Quest High-Q
By Manny Trotta
2012-10-23

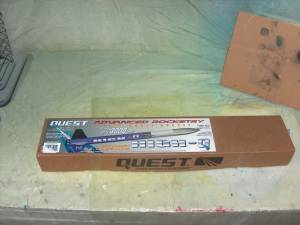
This project is a build of the Quest High-Q kit. The High-Q can fly on D, E and F motors. It has a 29mm diameter motor mount but includes a 24mm motor mount adaptor kit. With an Aerotech F32-6, the High-Q will go to almost 3,000 feet. For that motor you need the 24mm mount.
The Kit came packaged in a box as opposed a bag and cost about $42

The Kit also includes diecut fins, heavy duty airframe body tube, parachute and a sheet of colorful self adhesive decals.

The Fins are attached and I have made fin fillets using 60 minute Loctite epoxy. I then went over the fins and tube spirals with Elmers Carpenter's Wood Filler (the Natural color). In the past I had used Elmers Fill'N Finish for this but I couldn't find it in the local Walmart anymore. I mixed some of the Carpenter's Wood Filler with water in a small cup and just brushed it on. It works great. No fumes, water cleanup and easy to sand when dry. I also went over the fillets with the filler as well. Once dry, I lightly sanded the whole rocket and repeated this process 2 more times.

I then primed the rocket with duplicolor filler primer. Once dry I lightly sanded the entire rocket. When sanding I try to use a sweeping motion from the body tube up onto the fins. This helps make the fins look like they are part of the body tube and not a seperate part just glued on. I typically sand long ways parallel to the length of the rockets. I over sanded the trailing edge of the fins where meet the bodu tube which left them concave in that spot. I wasn't too happy with this and am considering using some putty or filler to build them back up. For the plastic nose cone, after it was sanded I used Testors contour Putty on each seam. I just squezed it on and then smoothed it in with my finger. The contour putty dries quickly and will crumble so to help smooth it in I wet my finger continuously with rubbing alcohol. When the putty was dry I sanded the seams and then primed nose cone with duplicolor filler primer. The nose cone was then lightly sanded once dry.

Here the nose cone is painted with Aluminum although the plans called for silver and the body has a base coat of white.

I used the airbrush and sprayed the body tube with Createx Opaque Purple paint. The top six inches of the body tube and one fin have been masked off and will remain white.

Paint is all done and the rocket is ready for the decals.

The decals are on, the "HIGH - Q" decal is not perfectly straight but it still looks nice.

This rocket is ready to fly.

Sponsored Ads


")

 |
 |