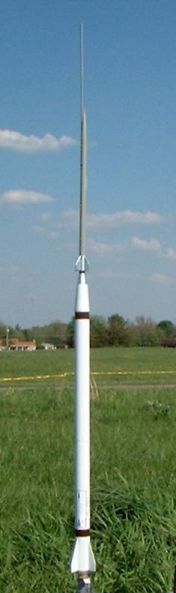
Aerospace Speciality Products Super Loki Dart
Aerospace Specialty Products - Super Loki Dart {Kit} (KSLD-24)
Contributed by Chan Stevens
| Construction Rating: | starstarstarstarstar_border |
| Flight Rating: | starstarstarstar_borderstar_border |
| Overall Rating: | starstarstarstarstar_border |
| Diameter: | 1.33 inches |
| Length: | 42.50 inches |
| Manufacturer: | Aerospace Specialty Products  |
| Skill Level: | 2 |
| Style: | Scale |
Brief:
Very nice scale of a NASA workhorse, this kit can easily be a competition-level
entry in either sport scale or giant sport scale. I decided to enter it in a
local giant sport scale competition, and while flight results are still pending
(see below), the static score placed this well ahead of the other competitors.
Construction:
All parts are very good quality. The kit contains:
- 24mm motor tube/assembly
- BT-55 24" body tube
- BT-5 12" upper body tube
- Basswood fin stock
- Balsa nose cone
- Balsa transition
- Balsa bulkhead
- Heavy duty mylar chute
- Decals, weights, and trim tape
Construction starts off with the motor mount assembly, a basic tube with pair of centering rings approach. A nice plus is that this kit includes a Kevlar® cord anchored to the motor mount for recovery. The motor mount assembly is glued into the BT-55 body tube.
Fins are cut from basswood using a template. The basswood was very easy to cut and is much easier to work with than balsa when it comes to grain filling. A couple quick applications of Elmer's Fill 'n' Finish and they're ready to go. Before gluing on the fins though, you must mark the tube and cut out cardstock fin supports, which are then bonded to the BT-55, giving this more of an authentic look. The 4 fins are then glued to the fin supports. The 4 smaller upper stage fins are attached directly to the BT-5 without supports.
Construction of the transition is one of the more challenging aspects of this project. You start with a paper transition pattern, which is rolled into a truncated cone shape. In order to avoid a seam, I wound up cutting off the overlap tab, and glued this to the inside edges of the ends, ("overlapping" inside the transition). The result was a flawless/seamless joint. While this is setting, a short length of tubing is glued to the top of the balsa bulkhead. The tube acts as a container for a couple of lead sinkers used for nose weight, as well as serving as an alignment guide for the transition shroud. After epoxying in the weights (use a generous amount of epoxy here), a centering ring is attached to the short tubing, and then the transition shroud slides over the top. A smaller balsa transition section is then epoxied to the top of the tube/shroud, completing the assembly.
After attaching the upper body tube to the balsa transition, construction is virtually complete. All that's left is filleting joints, paint prep, and basic launch lugs and recovery system installation.
Overall, the construction was fairly straightforward. As long as you pay careful attention to the well-written instructions and the illustrations, you should be fine. I'd rate this a skill level 3 kit though, due to the complexity of the shroud & transition.
Finishing:
This has a fairly challenging paint scheme compared to basic modrocs, though
for a scale competition kit, it was relatively easy. The BT-55 and transition
get a flat white finish, while the upper tube gets light gray, with silver
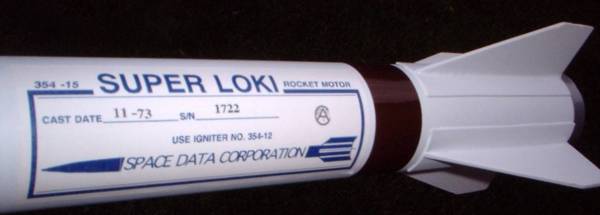
trim. After painting, there are some colored vinyl decals for stripes that go
on and several highly detailed decals showing manufacturer's information and
other markings. Considering the great quality of the components of this kit and
the highly detailed marking on the decals, I was a little disappointed that
they were peel-n-stick rather than water-slide. My competition score was dinged
significantly for this.
Construction Rating: 4 out of 5
Flight:
For the qualified flight attempt, I chose a D12-5. Winds had been a steady
12-15 mph throughout the day, though around 5:00 we got a break and they dipped
down below 10, so I decided to put this beauty up. In addition to the basic
flight, I picked up some gold glitter at a party supply store and went for
mission points, calling it radar chaff.
The flight was perfectly straight without a trace of spin and the delay was just right, popping right at apogee. At an estimated altitude of 800 feet or so, I wasn't sure we'd be able to see the glitter, but it sparkled in the sun and was a pretty cool sight. Unfortunately, the heavy ejection charge in the D12, combined with the very heavy weights in the transition proved to be more than the recovery system could handle, as the screw eye was ripped completely out of the balsa bulkhead despite the fact that it was epoxied in (it actually pulled out a small plug). The result was the lower section drifting a LONG way (cleared our half mile wide park), and the upper section came down dangerously fast with all that lead and very little drag. The upper section planted itself a good 4-6" into the soft ground. DQ/sep, though I'll probably have an opportunity to repair and fly it again it at "bonus day"/continuation.
The damage was fairly minor and once I complete the contest flight, I'm looking at a torn/crimped body tube to replace plus a replacement screw eye for the bulkhead.
Recovery:
Flight was excellent though the recovery is poor. This really needs to be a
two-piece recovery. Given the weight of the upper section, I'd be inclined to
go with a nylon chute and heavy-duty Kevlar®
shroud lines. I just don't think the single mylar chute is going to be able to
hold up on this.
Flight Rating: 3 out of 5
Summary:
I was quite pleased with this kit. It was fairly easy to build, resulted in a
very competitive scale rocket, and just plain looks nice. The recovery system
is obviously a weakness, though very easily correctable. The decals are another
weakness and Andy at ASP mentioned that he might go water-slide in the future
on this (even offering me a set of water-slides when I finish my repairs).
Overall Rating: 4 out of 5
Sponsored Ads


 |
 |