Mini Max
By
2016-12-11

Rocketry is something I never really even knew was a thing until my fiance introduced me to it. I never would have thought I would enjoy it as much as I do but it is something I have grown to really enjoy. I am always learning something new and learning new ways to improve the rockets when building them. Rocketry has also been away for my fiance and I to spend quailty time together which I absolutley love :) My first solo build is the mini max and I have enjoyed every step of building it.
Starting my build
2016-12-11
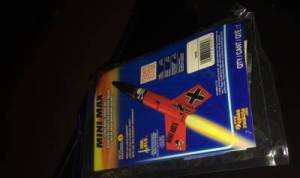
Mini Max
- Skill Level 1 – 300 ft.
- Length : 8.8 in
- Diameter: .98 in
- Estimated Weight: 1 oz.
- Recovery: Streamer
- Recommended Engines: ½ A3-2T, A3-4T & A10-3T
Parts
- Motor Mount Tube (MMT)
- Engine Hook
- Engine Hook Retainer Ring
- Engine Block
- Centering Ring (2)
- Body Tube
- Fins (3)
- Launch Lug
- Nose Cone Pin
- Nose Cone
- Shock Cord
- Streamer
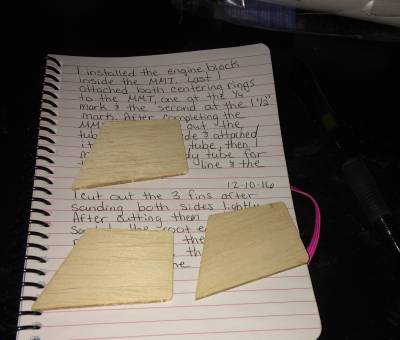
To start my build I began by assembling the motor mount. First, I made 3 marks on the MMT, ¼ “1” and 1 ½ “. At the 1 ½ “mark I cut a 1/8” slit in the tube to insert the engine hoot, after that I installed the engine hook retainer at the 1” mark using wood glue. Next, I installed the engine block inside the MMT. Last I attached both centering rings to the MMT, one at the ¼ “mark and the second at the 1 ½ “mark. After completing the MMT I then cut out the tube marking guide and attached it to the body tube, then I marked the body tube for the launch lug line and the 3 fin lines.


Fins and Launch Lug
2016-12-11
I cut out the 3 fins after sanding both sides lightly. After cutting those out I sanded the root edges to make them all the same. I then rounded the edges opposite of the root edge. Before gluing the fins on the body tube I put glue on a piece of cardboard and let it dry until it became tacky making it so I won’t have to hold the fins in place as long. After attaching the fins I took a toothpick and ran a line of glue along each side of each fin where the fin meets the body tube to allow the fins to have a better bond to the body tube. After attaching the fins I attached the launch lug, first I lightly sanded one side of the launch lug then applied glue and attached it to the body tube.


MMT Install, Nose cone pin and Shock Cord Assembly
2016-12-11
My next step was to install the MMT, which is the scary part because of previous experience. My first step was to test fit the MMT, which was successful. After test fitting then it’s time to apply the glue and insert the MMT into the body tube. I made a 1” mark on a tooth pick and used this as my guide to insert the glue. I put a ring of glue 1” inside the body tube all the way around the body tube and then inserted the MMT until the end of the tube was eye level with the fins. After letting this dry for a few mins I ran a bead of glue around the rear centering ring where the centering ring meets the body tube to allow for a stronger bond. After installing the MMT inside the body tube I assembled the shock cord. First I cut out the templet that is used to glue the shock cord on, then I apply glue to the #2 spot on the paper and lay the shock cord in the glue, I then fold the end that has the # 1 on it over the #2 spot, last I apply more glue and fold the spot marked with the #3 over the #1 and #2 spot and hold until dry. After this is done its time to install the shock cord in the body tube. This step was almost disastrous. I didn’t glue the cord far enough down which made it so the nose cone would not go all the way on. The instructions say to glue 1” down from the top of the body tube and I didn’t go quite far enough. I let the glue dry and then my wonderful fiancé (who got me into building rocketsJ) saved the day. He tore the cord out and used epoxy clay to re attach it. Now we let it dry for 24 hours.


Sponsored Ads


")


")


 |
 |