Descon Project Orion Test Vehicle
Scratch - Project Orion Test Vehicle {Scratch}
Contributed by Dick Stafford
| Manufacturer: | Scratch |
Hot Rod II
A Project Orion Test Vehicle
by Dick Stafford
Project Orion Background
Before I get started, I want to mention that I don't intend to repeat much of detailed history that is available on-line and in print. If you want to learn more about this interesting project, I suggest reading Project Orion: The True Story of the Atomic Spaceship, by George Dyson. George's father, the renowned physicist Freeman Dyson, served as a consultant on the project. There is also a nice web site with more information about the project at ProjectOrion.com
Project Orion was a conceptual space vehicle whose main propulsion was to be realized through the detonation of atomic bombs. Small bombs, on the order of 0.1 kiloton, would be ejected and detonated behind the ship. Water would be ejected and would in essence be the propellant. The force of the explosions would push against a pusher plate and would yield an ISP of between 10k and 1M seconds. Although the concept was proposed in 1955, the project was started in 1958 at General Atomics in San Diego. The project only lasted into the early 60's. By then the Saturn project was underway. Although the Orion was to be initally launched with chemical propulsion, using nukes was a hard sell and the nuclear test ban treaty hammered the nails in Orion's coffin.
Design Concept
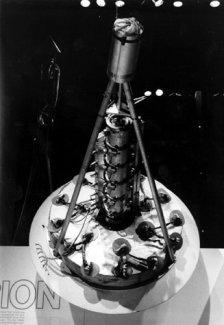
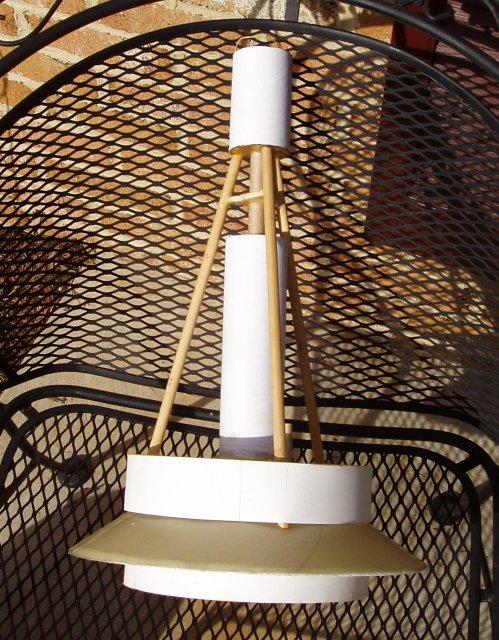
This photo shows an early test vehicle, known as Hot Rod. The Hot Rod was 'flown' in 1959 at a test facility at Point Loma, CA. It was boosted by a large BP charge followed by five rear-ejected high explosive charges. It was stable, reaching an altitude of 105 meters and recovering via parachute. The vehicle itself is held by the Smithsonian Air and Space Museum. I don't know if it is currently on display. If you want to see a video of the flight, visit the Nuclear Space Multimedia Gallery.
I am a saucer fanatic and am always thinking of new saucer ideas. So, the Project Orion Hot Rod was a natural. Since I am not much of a scale modeller, I decided that a stand-off version was in order (hence the 'II' in its name). I took some rough measurements from the photo and found that using 2" mailing tube for the central body would yield a 12" base. Since the real thing used parachute recovery I also thought mine should, which is a deviation from most of my saucers.
Construction
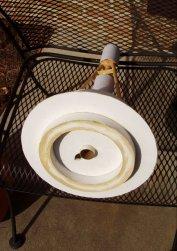
The central body consists of 9" and 3.5" sections of 2" tubing separated by a LOC 1/2" launch lug (3" exposed). The short section will hold the 'chute and the longer section is the motor mount. The 1/2" lug extends through home-made ply centering rings mounted in the ends of the body tubes. Inside, I filled the space between the 2" tube and the 1/2" lug with Gorilla polyurethane glue to help lock the lug in place. The motor tube is 29mm LOC tubing which runs the length of the lower body tube. It is centered with foamboard rings. The bottom ring was also backfilled with Gorilla glue.

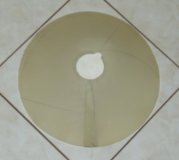
The main shroud was constructed with 1/64" fiberglass using the template calculator on EMRR. I chose the fiberglass as I thought it would hold up better if I were to add details later. The bottom of the saucer section is a foamboard ring with the top rim beveled - an idea borrowed from Art Applewhite's line of saucers. The plate was first epoxied to the shroud, and then this assembly was attached to the lower tube.

The flat structures above and below the main shroud are foamboard rings framed with strips of cardstock. I had considered several materials for the struts, including arrow shafts and BT-20 tubing, but decided on 3/8" dowel. I first installed the top plate and shroud. When the glue set, small holes were made to accomodate the struts, which were attached with 5-minute epoxy.
The last structural member was the small triangle which interconnects the struts just above the longer body tube. I should have planned this earlier and installed it prior to assembling the body, since the connecting lug has to pass through the center of the triangle. This wasn't a big problem, but I did have to cut the triangle support in order to install it.
In the photo of the Hot Rod, it looked like the parachute may have been exposed at the top of the tube so that's what I did. This worked fine on my 38mm spool rocket, so I didn't see this being a problem. The recovery harness consists of several feet of thick Kevlar twine mouted through the centering ring at the base of the parachute tube. A 24" piece of elastic is next, followed by a large snap swivel.
Stability
The dimensions of bottom saucer section is pretty close to my Aeroshell, which was a modified Art Applewhite 12" saucer. This gave me a warm feeling that it will be stable with the extra weight forward of the saucer section.
Trim and Finishing

I painted the top portion using Rustoleum Hammered Gold and the bottom silver. Trim was installed after painting and
included a piece of BT-20 tubing, some sockets from a dead chain of Christmas lights, some wire, and some circular
stickers. The latter were painted flat black. The small photo on the side is off the web and the one below is mine.

Flight and Recovery

Flight #1 - It was a windy day at Coverdale Crossroads, DE and I was a little concerned that the Hot Rod II would
weathercock and thus not attain enough altitude to eject before returning to Mother Earth. Since there wasn't much
volume to pressurize, I used about half the ejection charge provided with the G64-4 motor. I added a small 'chute
protector and tightly rolled a 12" RocketChutes 'chute. The boost was arrow straight despite the brisk winds. I
don't have an altitude estimate but the flight was respectable for its size. The 4-second delay was too long and it was
well on its way back down before the charge went off. But all's well that ends well, the 'chute opened and it recovered
without damage.
Flight #2 - The second flight was at Price, MD, and again it was windy. I used another G64-4, but this time I
substituted an 18" 'chute. This 'chute, despite being larger than the one on the previous flight, fit more loosely
in the tube. This had an interesting effect. At apogee, the 'chute drag-ejected (similar to a drag separation), which
was perfect! Sorry, no pic - drained battery.
Conclusion
Project Orion was an interesting piece of space history, and my Hot Rod model was an interesting piece of my rocket history. I think I'll have to make a trip to the library and re-read the Dyson book.
Sponsored Ads


")

")
 |
 |