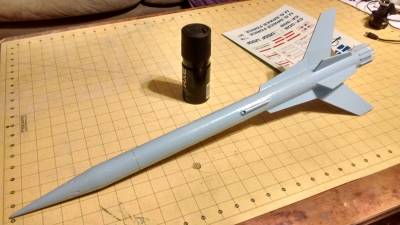
Vindicator Clone
By Lester Anderson
2015-09-08
| Manufacturer: | Estes  |
I am starting a new build. I am going to be cloning the old Estes Vindicator of the mid-1980s. A few of my parts are pre existing, like the nose cone, body tube, engine mount tube and thrust block. I needed to cut out my own fins, centering rings for the engine mount, and I will be making my own parachute. I will be using decals that came from Excelsior rocketry before they went out of business.


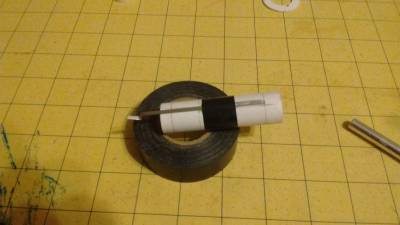
Motor mount
2015-09-10
Actual start of construction. Step number one is too attach the engine hook to the motor mount - you do this with a little bit of glue and the line of tape.
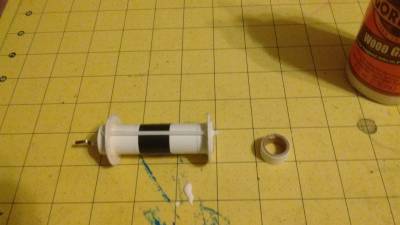
Step 2 is the installation of the centering rings. Like most motor mounts, there are two of them.
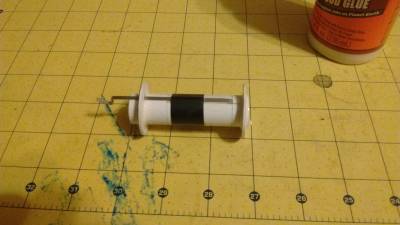
And here we are adding a slight modification. When Estes originally built this kit, they were in the habit of not including a thrust block in the engine mount. So I am going to include one. I am also going to include Chris Michelson's shock cord anchor modification. That little mod is nothing more than a hollow q-tip stick running alongside your motor mount so that a Kevlar thread can loop around the engine at the base.

Vindicator fins
2015-09-11
step number 3 has you sand the fins on the outside and to final shape. Step number four has the fins assembled from their separate pieces. I didn't do any before pictures for those who were interested.
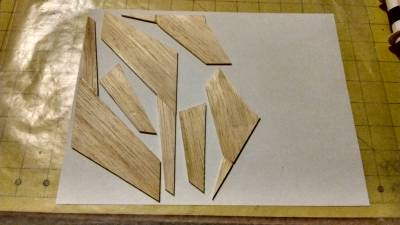
Again with a couple modifications, call this step 4.1. I'm going to be using a glue stick and paper covering my fins to give them a little bit more strength and make finishing them easier.
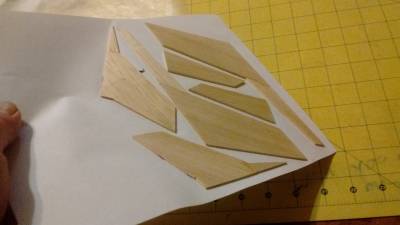
Here is one side of all the fins glued to a piece of paper.

And both sides covered in paper. Then you simply burnish the paper down to help the glue adhered. I simply use an empty an engine casing.

After allowing the glue to dry overnight, simply separate the fins and trim the excess paper away from them. These fins should now be ready for mounting.

Vindicator body tube
2015-09-13
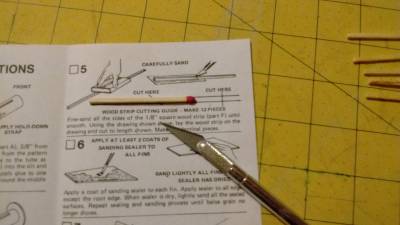
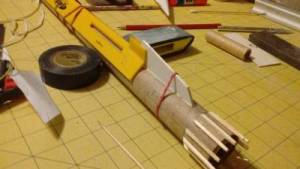
Skipping a couple steps. Step number 5 what have you cut out the tail veins from a piece of 1/8 by 1/8 balsa strip. Save yourself some time and effort by substituting some common kitchen matches the end cut at a 45 degree angle. Step number six is sealing all of your fins with sanding sealer. The paper covering I did earlier eliminates the need for that. Step number 7 is to install the motor mount. I'll get back to that soon.
That brings us to step 8 & 9. Both of which deal with marking the body tube for the wings, horizontal stabilizers, lower strands, and tail vanes.

Now that the main body tube is all marked up, I'm ready to install the engine mount. First we smear some glue around the inside, then we will slide our motor mount in till the end of the motor mount tube and the end of the body tube are even.


Vindicator tail vanes
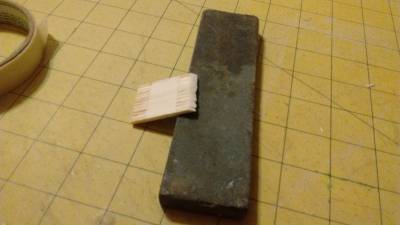
2015-09-15
Backing up to step number 5, we are prepping the tail vanes. As I mentioned earlier, I am substituting balsa with standard kitchen matches. First they'll get cut to size.

Followed buy a little bit of shaping to make them all have the same leading edge and length.
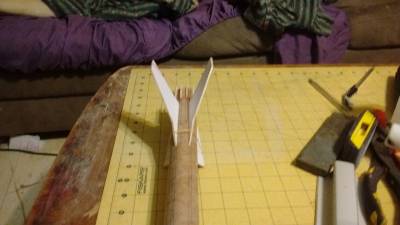
Now we just glue them to the end of the body tube. I'll be using a rubber band to hold them in place while the glue dries.


Now that the tail vanes are glued on, step 10 is complete.

Vindicator main fins
2015-09-16
first of six fins to go on this rocket.

Little more progress, 4 fins are on now.
Now the last two fins are on. Setting up to dry for glue fillets to dry.

Vindicator parachute
2015-09-20
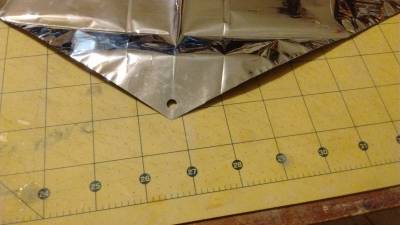
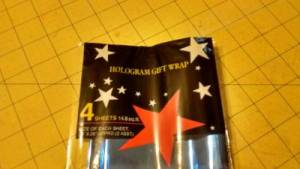
Now it comes time to build our parachute. Because I scored a deal on mylar wrapping paper a couple years ago, I have been making my own parachute from this.

Take a sheet of it, do a simple triangle fold, cut off the excess. Then you end up with the big hexagon.

This visual maybe poor but there has been some tape applied to each corner.

Now we just need to punch some holes in the corners.
And finally tie on some string.

Vindicator launch lug
2015-09-22
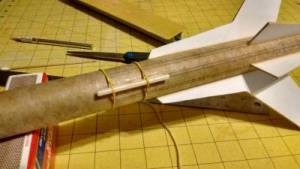
And here it is, the actual last step of assembly. The instructions tell you to put on a 2 inch long launch lug. What I actually had on hand was a 2.25 inch lug. Not too terribly different.

Next we will be moving on to priming, painting and decals.
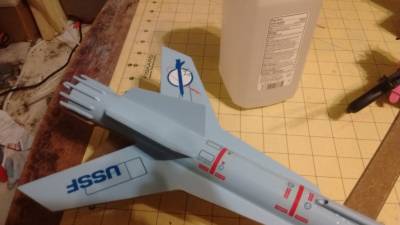
Vindicator Paint
2015-09-27
I was bad. I did no entry for applying the primer, fixing errors from it, or applying the blue. I didn't even take any pictures of masking off the blue before shooting the brown. The Brown is shot and is drying right now, and I will be working on decals after I buy some more micro set.


And here she is, with all the masking removed. I did a little better on the smaller one, the brown blue line matches up on the canopy and body tube better than it did on my big one.


Tomorrow, if everything goes to plan, I will be putting the decals on her.

Vindicator decals
2015-10-07
This little beauty is finally done. A note on decals. Always use some form of decal setting solution. I had quite a few try to curl up backwards on me, and ended up having to use a little bit of CA glue to hold them down.


I hope everybody enjoyed the build.


Sponsored Ads


")

")
 |
 |