Scratch Mark II (Upscale) Original Design / Scratch Built
Scratch - Mark II (Upscale) {Scratch}
Contributed by Dennis McClain-Furmanski
Brief:
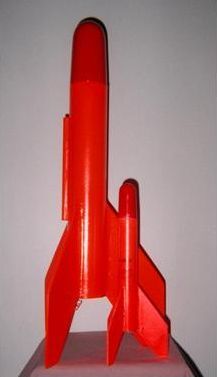
Upscale of Orville Carlisle's original model rocket kit, the Rock-A-Chute Mk II
with appropriate mods for mid-power flight.
Construction:
The parts list:
- 12.25" of BT-70 body tube
- "E" size 24mm motor mount (two 50/70 centering rings, 4" of 24mm/BT50 tube, 3.75" engine hook, and 20/50 centering ring for engine block)
- Balsa nose cone custom turned by "Sandman" of TRF and Roachwerks
- 6" of 3/8" OD tube for launch lug
- 2' of 150 lbs test Kevlar® thread for shock cord anchor
- 4' of 1/4" elastic shock cord with snap swivel on end
- 3 fins cut from 1/8" basswood stock
This upscale was made from measurements taken from the instructions for the Semroc Retro-Repro Rock-A-Chute Mk II. Use of BT-70 made this a 2.13:1 upscale and the remaining dimensions were calculated from this. All construction was with normal LPR/low MPR materials and tools. Wood glue was used throughout.
The BT-50-BT-70 motor mount was constructed mostly as per normal kit instructions with the "E" engine hook taped in place and then anchored by the upper centering ring. The engine block was glued into place by inserting it on top the engine hook through the top end of the motor tube. The centering rings were reinforced with 1" by 1/4" sections of 1/8" basswood on the ring surfaces facing each other. The Kevlar® shock cord anchor was made into a loop, the doubled loop glued to the motor tube below the top centering ring, and run between the motor tube and the upper centering ring. This later became a problem. The elastic shock cord was likewise doubled into a loop, tied to the anchor with a loop-through slip knot, and a snap swivel tied to the end also with a loop-through slip knot. Once fully constructed, the motor/recovery mount was inserted into the aft of the body and glued into place.
Fins were cut from 1/8" basswood and sanded to rounded edges and then glued into place with heavy fillets added in 3 layers.
The custom turned cone came with screw eye glued in place. The shock cord was clipped to this.
A scale launch lug would have been approximately a BT-20 (18mm). Instead, a semi-scale lug was made from 6" of 3/8" OD cardboard tube.
Finishing:
Finishing was two coats of Deft spray lacquer sanding sealer on everything,
sanded after each (with 400 grit then 600 grit) followed by white primer. For
spiral filling and a smooth finish, two coats of white satin finish were
applied. Finally, the body was painted fluorescent orange and the nose cone
red, all matching the original.
[Note: White satin finish, at least Rustoleum's version makes a good filler but takes a long time to dry. The first top coat of orange paint was put on 24 hours after the satin. This was not enough. The satin sagged or shifted, causing the orange to crack in sharp curves such as fillets. A second coat of top coat, 2 days later, fixed it.
Flight:
A 12" nylon X-form chute was permanently assigned to this bird. Cellulose
"dog barf" wadding is used.
Test flight was on a C11-3 with 1" engine spacer in the motor tube. Boost was immediate, fast, and straight with no early wobble, arching, or weathercocking. Ejection was at apogee and recovery was good and within 100 feet of pad.
Second flight was on an E9-4. Boost was again vertical and very impressive. Ejection was just before apogee, deployment and recovery good, within 100 feet again.
Third flight was on an E9-6. Boost was great as before, ejection was just past apogee. At deployment, the nose and chute separated from the body. The nose came down slowly on the chute and the body tumbled in. It landed on the tall hay field and suffered no damage.
Inspection showed that the Kevlar® had burned through both strands, right at the top of the engine tube. After consulting with others and conducting some testing of various heat exposures to various weights of Kevlar® thread, I concluded that close proximity to ejection gasses is hazardous to Kevlar®'s health. Although this was a scratch build, I followed instructions I've used in some kits that used this configuration. It would probably be a better practice to run MMT anchored Kevlar® cord between the centering ring and body wall. Since there was ample unburned cord left on the shock cord, this rocket was repaired by using the LOC/Precision shock cord anchor method, of tying knots in the cord and gluing it inside the body just below the forward end. This repair was the only instance of epoxy used.
This rocket has flown many times since, exclusively on E9-4 and E9-6 motors. No further burning of the recovery equipment has occurred. The bottom surface of the aft centering ring is starting to char and bubble from base drag vacuum pulling the exhaust gasses up, but the damage is limited to the paint. Repairs are planned using a cosmetic/protective ring doped with boric acid and painted with high heat stove paint.
Summary:
Carlisle's original design has proven itself as successful even when scaled up.
This rocket flies at least as well as the Semroc clone of the Mk II it was
scaled from. The only problems were the burned Kevlar®
and the cracked paint, both fixed and or worked around easily, and neither
having anything to do with the design itself. Next step: a 3" diameter,
38mm MMT upscale, the Rock-A-Chute Mk IV "Carlisle Express", intended
for level 1 HPR flying.
Sponsored Ads


")

")


 |
 |