Scratch D-Fusion Bomb Original Design / Scratch Built
Scratch - D-Fusion Bomb {Scratch}
Contributed by Dick Stafford
| Manufacturer: | Scratch |
(Contributed - by Dick Stafford - 09/07/09)

Brief:
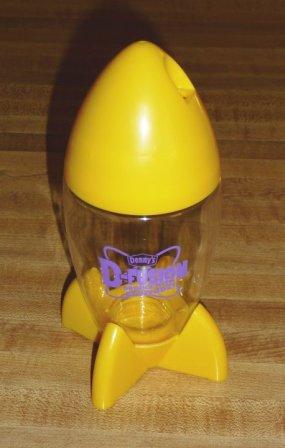
Denny's serves(-ed) kid's drinks in this cool retro-styled rocket cup. I whined until our waitress gave me one.
I originally wanted to make this fly on 29mm motors without added fins. The dimensions of the base made me change to 24mm. I then designed a RockSim model without added fins and it looked like it would be stable. It wasn't. So, I back-pedaled again and added a set of fins. This review will only describe the successful, finned version.
Construction:
Parts used were:
- One Denny's D-Fusion drink cup
- One Firstfire igniter tube
- 2.125" mailing tube x 4.5"
- One 24mm to 2" fiber centering ring
- 24mm motor tube - one 3" piece and one 3.25" piece
- Spent 24mm case to connect the motor tubes (you could use one piece of 24mm tube and skip this item).
- 3/32" plywood
- Steel fishing leader
- Elastic strap
- 4" of tubular Kevlar®
- Lead shot
- 2 small sheet metal screws
 I
prepared the drink cup by grinding the base to fit a 24mm motor tube. I also ground the threads off the cap and bottle
neck so that the cap would slip on and off easily.
I
prepared the drink cup by grinding the base to fit a 24mm motor tube. I also ground the threads off the cap and bottle
neck so that the cap would slip on and off easily.
I found that 2.125" OD mailing tube fit nicely in the top of the bottle. Furthermore, this tube also fit in the inner neck of the cap. I cut a 4.25" piece of tubing to serve as a parachute tube and to keep the clear body from getting ugly from ejection gasses. It extends above the neck on the body and mates with the cap/cone.
I installed the short piece of 24mm tubing in the base using a single fiber ring. A steel fishing leader was screwed to the wall of the tube just above the ring. I wrapped the tube with a layer of blue laser contact paper and installed it in the body.
The nose weight was determined from the RockSim model. The weight is a slurry of lead shot and Gorilla polyurethane glue. A Kevlar® loop is embedded in the slurry and a screw through the tip of the cone ensures the weight stays in place. The weight proved inadequate for the fin-less version and was retained as is when the fin unit was added.
The fin unit is another piece of 24mm tubing with a 2" piece of a spent casing glued in. The fins are 3/32" ply with a 4" root, tip and span. They are swept slightly backwards and appear over sized. They were designed iteratively in RockSim.
I ground a trough in the wall of the body to accommodate a piece of a Firstfire tube. I wanted to fly this away from the crowd so a 1/4" lug seemed appropriate. This lug was attached with CA. It is aligned with one fin and a corresponding hole was bored in that fin.
The cone is attached to the steel leader with a foot long piece of elastic.
Finishing:
One good think about converting plastic things to rockets is that they often don't need much finishing. I painted the
fin can with Testor's yellow spray paint and added squares of the laser contact paper to match the body. The lug was
painted dark blue.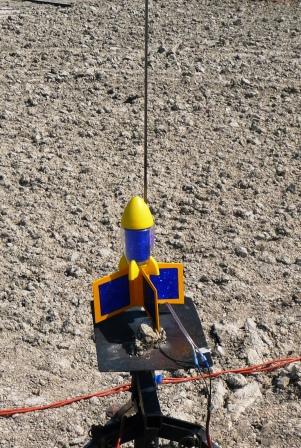
Flight:
Although the flight of the fin less version appears in the flight logs below, I'll only describe the successful
flight of the finned version.
I decided to use an E15-4 SU motor since there is no positive motor retention. I stuffed the body with a ton of dog barf and attached an 18" nylon 'chute. The nose was a bit loose so I wrapped the neck of the body with masking tape until it was snug. The motor was given a tape thrust ring and was friction-fit. It weather cocked a bit but had a nice flight anyway. It landed near the pads, which usually is a good thing!
Summary:
Even with the fin unit, the rocket looks pretty cool and flies nicely. This is one of the 2-3 rockets I've built
where RockSim was wrong. It may have been stable with a higher impulse motor and less wind but I elected not to test
this theory. If you got one to fly without added fins, PLEASE write a review!
Sponsored Ads


 |
 |