Scratch Hefty? Serve 'n Store? Flying Saucer Original Design / Scratch Built
Scratch - Hefty? Serve 'n Store? Flying Saucer {Scratch}
Contributed by Art Applewhite
| Manufacturer: | Scratch |
Brief:
A well known trash bag and paper plate maker has taken model rocket
construction to a whole new level of simplicity and low cost. This may not be
what the folks at Pactiv Corporation had in mind when they designed their
Hefty® Serve 'n Store® Everyday plates
with interlocking rims but once a "true" rocketeer sees them in the
proper light, it becomes obvious what they are really made for and it ain't
leftovers.
Construction:
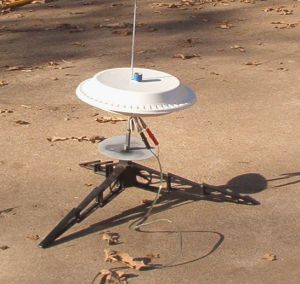
There are only 2 parts to this flying saucer shaped rocket: a Top and a Bottom.
Both parts are made from Serve 'n Store® Everyday 9 inch
(actually they are 8.875") plates. These are available at most grocery
stores in packs of 24 for around $2.00. This works out to less than 17 cents
per rocket. Only the Serve 'n
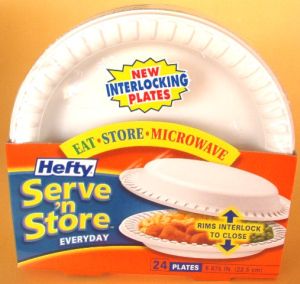 Store® Everyday
type of plates, as pictured above, should be used. These are the white ones and
come in two sizes, 9 inch and 10 inch. The 9 inch plates fit over the 24 ounce
bowls of the Everyday brand. The Everyday brand plates and bowls
are thicker, stronger and more impact-resistant than the red Party
brand. They interlock so well that no glue is required to hold the rocket
together. The photos in this article are for the 24mm motor version of the
flying saucer, but the 18mm version is identical except for the size of the
Motor Holes.
Store® Everyday
type of plates, as pictured above, should be used. These are the white ones and
come in two sizes, 9 inch and 10 inch. The 9 inch plates fit over the 24 ounce
bowls of the Everyday brand. The Everyday brand plates and bowls
are thicker, stronger and more impact-resistant than the red Party
brand. They interlock so well that no glue is required to hold the rocket
together. The photos in this article are for the 24mm motor version of the
flying saucer, but the 18mm version is identical except for the size of the
Motor Holes.
Start by trimming off the rim, where it starts to turn down, on one (and only one) of the plates with a pair of scissors. This plate will become the Top. Trimming the rim off creates a more aerodynamic shape in the finished rocket.
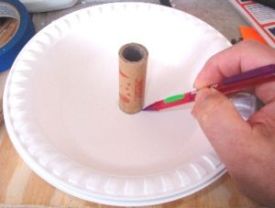
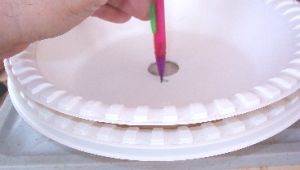
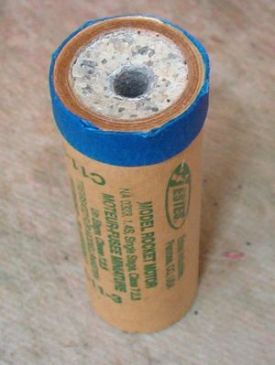
 Next mark the hole for the motor in the
center of the plate using a spent 24mm motor and a pencil. The
Hefty® logo is in the center of the plate and the letter
"f" is in the center of the logo. You should be able to use the logo
as a guide and "eyeball" it close enough. Draw around the base of the
motor with the pencil. Make sure the base of the motor is not flared out from
use. Cut out the Motor Hole in the Top with a sharp, craft knife. An
X-Acto® knife with a new #11 blade works best here. Stay inside
the line so that the motor will fit tightly in the Motor Hole. After you cut
the Motor Hole, test fit a motor into it. If the Motor Hole is too large for
the motor to fit tightly then the rocket will not be safe to fly. For safety's
sake, discard the plate and start over.
Next mark the hole for the motor in the
center of the plate using a spent 24mm motor and a pencil. The
Hefty® logo is in the center of the plate and the letter
"f" is in the center of the logo. You should be able to use the logo
as a guide and "eyeball" it close enough. Draw around the base of the
motor with the pencil. Make sure the base of the motor is not flared out from
use. Cut out the Motor Hole in the Top with a sharp, craft knife. An
X-Acto® knife with a new #11 blade works best here. Stay inside
the line so that the motor will fit tightly in the Motor Hole. After you cut
the Motor Hole, test fit a motor into it. If the Motor Hole is too large for
the motor to fit tightly then the rocket will not be safe to fly. For safety's
sake, discard the plate and start over.
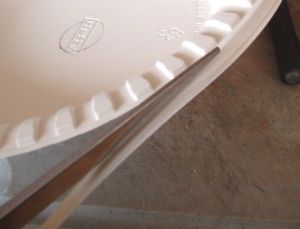
Place the Top inside the other plate and mark the Motor Hole and Launch Rod Hole with a pencil. Make sure the "teeth" of the interlocking rims of the two plates are offset from each other. This will ensure that when the Top is flipped over and interlocked with the Bottom the launch rod holes will line up straight. Cut out the Motor Hole and punch out Launch Rod Hole in the Bottom. Interlock the Top to the Bottom with the Launch Rod Holes lined up. When fully interlocked, the two parts should hold together well enough that no glue is required. This is a good thing because most glues, including super glue, do not form a good bond to the Polypropylene plastic the plates are made of.
A more details about this rocket and variations on the theme are available at http://www.artapplewhite.com/sns.html
Finishing:
You may wish to paint the completed flying saucer. The solvents used in most
paints will not harm the plates but there are many paints that will not stick
very well to it either. It is always a good idea to do a spot test first,
perhaps on the inside surface of one of the plates. Sharpie®
pens will work reasonably well if you allow extra drying time for the ink.
Krylon makes a paint called "Fusion" specifically for plastics. This
may be the best paint for these rockets.
Flight:
Recommended motors:
24mm version: C11-0, C11-3, D11-P, D12-0, D12-3, E9-P, and E9-4.
These rockets may fly well on Aerotech Single Use and Reloadable motors but due to burn bans in Texas, I haven't had the opportunity to try them yet.
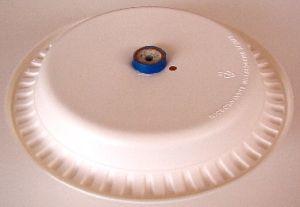
Make a thrust ring around the base of the motor with masking tape. It should be 1/4" wide and at least 4 complete wraps of tape thick. Insert the motor into the Motor Hole in the Bottom. If the fit is very tight, then use a twisting motion to get the motor into the hole. Be careful not to rip the plastic around the Motor Hole. If the fit is not tight, don't fly the rocket because the motor will not be properly held in place and may separate from the rocket at a bad time.
Support the rocket at least 6 inches above the blast deflector to prevent the bottom from being melted by the hot rocket motor exhaust.
Test flights of this rocket have been flawless so far. An 18mm version was flown twice with C6-3 motors. The boost was straight and low. A 24mm version was flown once on a C11-0 motor with same results as the previous flights. Future flights using more powerful (D, E and F) motors are planned once the burn ban is lifted in Kerr County, Texas.
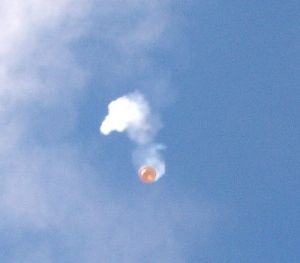
Recovery:
The descent was very gentle. Each time, the rocket was recovered with no
damage.
Summary:
PROs: Low cost. Quick and easy to construct from readily available materials
and tools. Very easy to prepare for flight. Flys straight and lands close to
the launch pad. Difficult to lose or get stuck in trees or power lines. Ultra
reliable, nearly foolproof aerobrake recovery.
CONs: Low and slow flights (this could be a pro for folk with small flying fields). Requires some skill with a sharp knife.
Don't "overbuild" this rocket. It is safe "as is" and will provide many enjoyable flights at very little cost and effort.
Sponsored Ads


 |
 |