| Construction Rating: | starstarstarstarstar |
| Flight Rating: | starstarstarstarstar_border |
| Overall Rating: | starstarstarstarstar |
| Manufacturer: | QuickBurst  |
Brief:
A single stage 3FNC kit that has top quality components and includes absolutely everything needed to build a sturdy
high power capable rocket.
Construction:
I was looking for a kit for my Level 1 qualification attempt. Naturally, I used the many great reports on EMRR in my
research. Many builders described substituting various components of available kits for stronger and more durable
materials. Many of these modifications were strictly the builders preference and not necessary for a successful L1 but
I was noticing a trend anyway. During my search I was surfing by the Quickburst site and saw this parts list:
- 1 LOC 75mm Plastic Nosecone
- 1 LOC 75mm x 18" Airframe with three 7" slots (slotted aft airframe tube)
- 1 LOC 75mm x 16" Airframe (forward airframe tube)
- 1 LOC 75mm Coupler
- 1 LOC 75mm Stiffy Coupler
- 1 17” LOC 38mm Motor Mount Tube
Structural Parts:
- All wood parts are Birch Plywood.
- 1 ½” Nosecone bulkhead.
- 1 ½” Zipperless bulkhead w/four drilled recovery gas vents.
- 2 ½” x 38 x 75mm Centering Rings.
- 1 ¼” x 38 x 75mm Centering Ring.
- 3 ¼” thick Baltic birch fin set
Recovery System:
- 1 Sewn Loop tubular Kevlar® Harness x 3’ long
- 1 Sewn Loop tubular Kevlar® Harness x 9’ long
- 2 3/16” U-Bolt with required hardware
- 3 3/16” Quick Connects
- 1 500lb Rosco Swivel
- 1 X-Form Parachute, Top Flight XTPAR 42
- 1 Nomex® Parachute Protector 12 x 12
- 1 1/4" x 6" Parachute retaining cord
Launch Guide System:
- 2 Delrin Series 1000 Rail buttons
Motor Retention:
- 1 Motor retention clip, supplied with needed hardware

Well I was sold and placed the order for my 2007 Christmas present. The package arrived in good order and parts where every bit as good as described.
The instructions are outstanding. Not only do they take you from start to finish, but along the way they include tips, techniques, and insights into the selection and design of the components. The diagrams are clear and accurate and include the CP calculations that I verified using the VCP program. As an added bonus, the instructions are available for download and study on the Quickburst web site. Construction was straightforward using the manufacturer's recommended adhesives: 30 minute hobby shop epoxy for motor mount, bulkhead, and fin attachment, yellow carpenters glue for the stiffy coupler doubler, thin CA to reinforce the upper airframe tube ends, and expanding polyurethane foam to fill the fin can.
Finishing:
Quickburst provides a blank canvas as far as finishing choices are concerned which is a plus in my opinion. The
plastic nose does require some prep to allow a good paint bond. It's standard practice to wash plastic cones thoroughly
with soap and water and that's probably obvious to most of you. I gave mine a light pass with some sandpaper before
proceeding to primer and paint and some places started lifting in chunks right down to the plastic after a dive from
the prep table before the first flight. I don't consider this a vendor deficiency. Airframe spirals are minimal and
easily filled in the priming process with 3 coats of the auto gray sandable Rustoleum. The fins surfaces were
exceptionally smooth. I used some acrylic wood sealer after they were installed and fillets applied to provide a
moisture barrier.
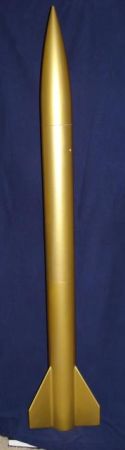
I finished mine with three coats of Rustoleum metallic gold and two coats of Future and named it the "Sunburst".
Construction Rating: 5 out of 5
Flight:
I flew the Sunburst with a Cesaroni H153 with about a 10 second delay. The WRASP32 program said 3300 feet at apogee.
Flight prep is very easy with the provided Nomex®
chute protector. The Cesaroni is the easiest reloadable system to prep and was secured in the airframe with the include
Kaplow clip. Most of the day we had wind gusting from 13 to 15 miles and blowing to the short end (about 200 yard
recovery area) of the field with most flights drifting into the trees and grazing land south of the recovery area. At
about 3:00pm we had a good 20 minutes of sub-10 mph winds so I got her loaded on the rail and started the countdown. As
luck would have it, the wind picked up right around zero and she weathercocked towards the trees along the northwest
border of the field, reaching a height of maybe 1500 feet.
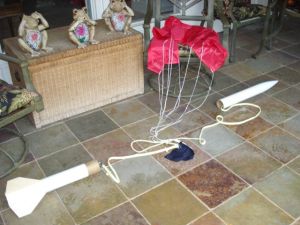
Recovery:
The strength of the airframe and the recovery harness really paid dividends here. The reduced altitude (due to the
weathercocking) resulted in what appeared to a rather high-speed, nose down deployment. The anti-zipper design,
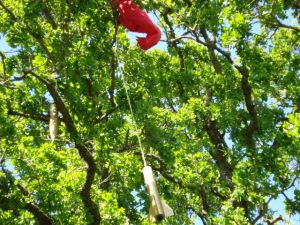
featuring a mid-airframe break worked as advertised. The rocket landed about 20 feet up in a tree and needed quite a
bit of coaxing before it was finally pulled down. Other than surface scrapes, there was no damage and the L1 flight was
declared a success by acclamation. Dave and several other fliers who have experience with the prototype said that it
does not have any weathercocking tendencies in calmer conditions, but I took off half a point until I can confirm that
with my model.

Flight Rating: 4 out of 5
Summary:
PRO: The complete package. All components are first rate. Outstanding instuctions.
CON: If you need color scheme suggestions or decals, you're on your own
Overall Rating: 5 out of 5
 |
 |
Flights
Sponsored Ads


")

")


|
|