| Construction Rating: | starstarstarstarstar_border |
| Flight Rating: | starstarstarstarstar |
| Overall Rating: | starstarstarstarstar_border |
| Diameter: | 1.33 inches |
| Length: | 12.80 inches |
| Manufacturer: | Estes  |
| Skill Level: | 1 |
| Style: | Sport |
Brief: Construction: I can't comment on the instructions because I didn't even bother to open them. I had the motor mount together and the fins punched out and sanded to shape before I realized that I had no idea what I'd done with the instruction sheet. Unless this is your first kit, you can easily do the same. I cut a slice in the forward centering ring, tied a double knot in the end of the piece of Kevlar, and slid the Kevlar into the slice. I pulled the knot tight against the ring and secured things with a generous blob of Elmers Wood Glue. When this had dried, I slid the completed engine mount into the bottom of the body tube and secured it with more wood glue. The fins needed some slight attention with sandpaper to allow them to slide into the pre-cut slots. I also wound up removing about 1/16" from the top of the tab for each fin. This allowed the fin to fit flush against the body tube and made it easier for the tab itself to be glued to the side of the engine mount. The fins themselves stayed properly aligned because I only took a little off the top. Words to live by. I then applied double glue fillets with Elmer's Wood Glue. If these fins fail, there's no hope for the rest of the rocket. Finishing: Construction Rating: 4 out of 5 Flight: I managed two flights with the Big Dawg at B6-4 Field. The first was as expected, decent height and fairly straight into the calm skies. A group of my kid's friends had stopped to watch and as the ejection charge fired, one of them took off across the field after the rocket. Despite starting off at a distinct disadvantage, he closed the gap quickly and plucked the rocket from the sky just before it touched down. (Ah, to have knees capable of doing that again.) The kids had never seen a launch before and quickly took over the button pushing and rocket choosing duties. As I launched, I noticed that the breeze was picking up some. This should have been a warning. The next flight was on another B6-4, and I could see that it was in trouble as soon as it left the rod. It arched to the west as it left the rod and I immediately wrote it off. Ejection took it rapidly over the trees and into the neighborhood where I'd move a few weeks later. The kids took off through the yards after it and came back a few minutes later to report that it had hung up high in a tree. Several weeks later one of them stopped by our new house to inform me that "the tube part" had dropped, but the nose cone and parachute were still high in the tree. Summary: CONs: Sticker decal. Short shock cord. Overall Rating: 4 out of 5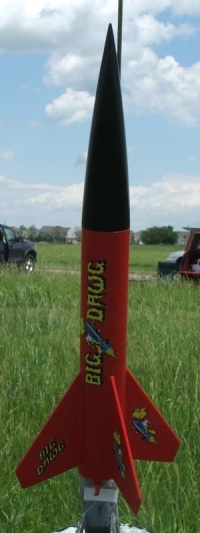
The Big Dawg was one of those rare kits from Estes that actually turned out to be quite a bit more than the sum of its parts. While it looks like a typical late 90's 4FNC rocket at first glance, it's interesting in that it's one of the earliest Estes kits that utilized through the wall (TTW) fin attachment. The Big Dawg builds quickly and results in a sharp looking, sturdy little 18mm screamer with minimal effort. I picked up a box full of Big Dawgs at a closeout price with the intention of using the PNC-55AO nose cones as cloning parts, but something about the Big Dawg intrigued me. I felt an immediate kinship with the rocket--being somewhat short, stubby and sturdy myself--and started building one of them while watching a ball game one night after dinner. Except for paint, it was flyable by the time I left for work.
The parts list:
There isn't much tube on a Big Dawg, which means that there aren't many tube spirals to fill, something that I can appreciate. I coated the fins with two coats of Elmers Fill 'n' Finish and ran a thick coating along the tube spiral while I was in the area, then cleaned everything up in one marathon sanding session that lasted all of ten minutes. I followed this up with a coat of Kilz Primer and another sanding. I painted the body with two coats of Valspar Cherry Red Gloss and the nose cone with two of Valspar Gloss Black. From here it was a simple matter of applying the stick-on decals and the Big Dawg was catalog perfect. From a distance.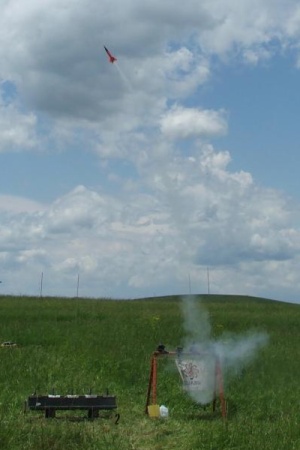
The first flight of the Big Dawg came at a Quark section launch on the same field where I'd watched our club presidents Big Dawg CATO and burn by the pad several years earlier. (I was closest to the inferno, but I don't stomp another mans Big Dawg.) Since the VOA is fairly expansive and the Big Dawg was inexpensive, I loaded a C6-5 for the initial flight. The flight itself was impressive, arching somewhat into the wind before an early ejection charge brought things to a premature end. The breeze brought it back toward the pads and it recovered just off the access road (but perilously close to recovering on the access road, which is something that I've had more than my share of lately. Since this was a busy day, I didn't get to fly it again, but it seemed like the perfect rocket for some B6-4 flying at one of my favorite local fields a few months later.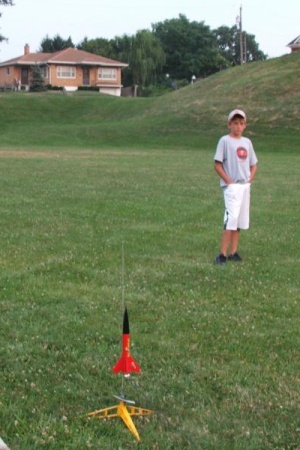
PROs: Performance. TTW fins. Good looks and solid appearance.
Other Reviews
- Estes Big Dawg By Mike Olson
I built a Big Dawg recently, and flew it when my son's Cub Scout pack was invited to Tripoli Nebraska's October launch. Construction was straight-forward for a through-the-tube rocket. Estes' instructions were very good, however, it appears that the motor tube has been shortened since the illustrations were drawn. They show a three inch tube. The included tube measured 2 3/4 inches, and as a ...
- Estes Big Dawg By Doyle Tatum
I like this kit. It is extremely easy to construct, yet is very attractive and sturdy. The through-the-wall fins reached to the motor mount per the instructions, which are precise. I added a Kevlar cord, tied to the motor mount, in lieu of the Estes shock mount. I did decide to build this one stock and maybe another one in the future with a 24mm mount. I used 5 minute epoxy throughout. The only ...
 |
 |
Flights
Sponsored Ads

")


 - 47776017535")

, 12.3 in. (31.1 cm)")

|
|