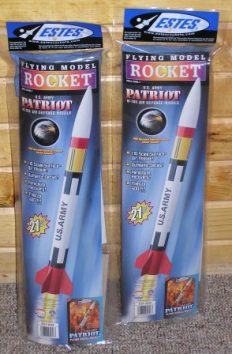
Modification U.S. Army Patriot M-104 Cluster Modification
Modification - U.S. Army Patriot M-104 Cluster
Contributed by Ray King
| Published: | 2010-08-01 |
| Manufacturer: | Modification |
| Style: | Cluster, Scale |
 Brief:
This is part 2 of the EMRR Challenge #7 as outlined I built this rocket as I wanted, making my own modifications. I like the look of the rocket so I didn’t modify that at all – I focused on adding more power. “Tim the Tool Man Taylor would be proud” – if you don’t understand this comment go watch some reruns for Tool Time. This rocket is a Semi-Scale version of the US Army Patriot Air Defense Missile. The rocket is designed to use an 18mm engine and 12” parachute recovery. I modified it so it now uses 2 -18mm engines and a 12-18” parachute.
Modifications:
I followed the instructions with a few exceptions. First I made the engine mount a 2 engine (18mm) cluster with no engine hooks. The centering rings few made from balsa hardened with epoxy. I also changed the shock cord attachment, rather than using the standard Estes I ran Kevlar to the engine mount (drilled a small hole in the top centering ring and tied the cord around the engine tube assembly). I also, added about .8 ounces of nose weight to ensure the rocket was stable. The rest of the assembly was per the instructions.
Construction:
- 2 – BT-60 White Body Tube (6.625” Long)
- 1 - Yellow Body Tube (3.25” Long)
- 2 – Blue 18mm Engine Tube
- 1 - Nose Cone (#72057)
- 2 - Body Tube Couplers
- 1 - Launch Lug – 2.375” Long
- 1 - Std Engine Hook
- 1 - Green Engine Block
- 2 - 2 Engine Cluster Centering Rings (Made from .060” Hard Balsa)
- Balsa Fins (3/32” Pre-cut Sheet)
- 36” of Kevlar Shock Cord
- 18” – 1/8” Shock Cord
- 12” Plastic Parachute
- Decal Sheet
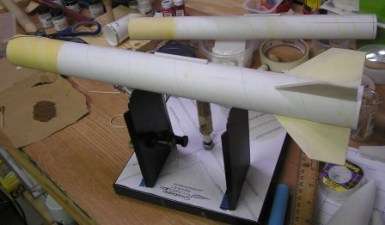 In this case I didn’t finish this because I ran out of time to get my review complete so I chose to fly this naked. I did apply a couple of coats of Emery’s Wood Putty thinned with water to the tube and fins prior to assembly to the rocket. I found sanding these as components is a lot easier. My plan is to paint both rockets as the instructions outline – I will add some pictures of the painted versions to the flight log pictures.
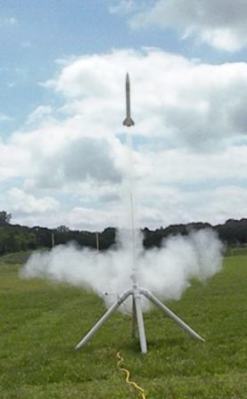 Flight:
I flew this rocket only once because the filed was a little small for the altitude predicted. The maiden flight was done on 2 C6-5’s and did this rocket fly. Thankfully, I flew the single engine version first and was surprised by the altitude of the C6-5 so I changed from the 18” parachute to the 12” parachute. On 2 C6-5’s this rocket screamed to very high altitude – it took roughly 2.5 minutes until the rocket landed. I was going to fly 2 B6’4’s but after the first flight they would only be a disappointment. I will fly this rocket again on a bigger field once I paint it.
Recovery:
The recovery was prefect; it just took awhile for the rocket to land. Thankfully the wind was very light and the rocket landed in the field. 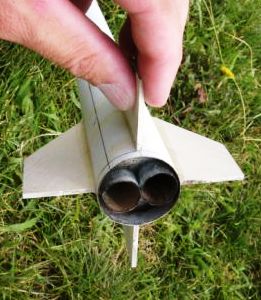
Summary:
If 1 engine = a Great Rocket; than 2 engine results in an even better rocket. For anyone who likes high flying I would definitely recommend this modification and the 12” parachute is fine.
 |
 |
Flights
Sponsored Ads


![Vintage Estes Russian Vostok #1272 Model Rocket [4*A-22]](https://i.ebayimg.com/thumbs/images/g/rkIAAOSw3X9l1kK8/s-l225.jpg "Vintage Estes Russian Vostok #1272 Model Rocket [4*A-22]")

|
|