Scratch Billy Bob Joe Original Design / Scratch Built
Scratch - Billy Bob Joe {Scratch}
Contributed by Dave Brunsting
| Manufacturer: | Scratch |
Brief:
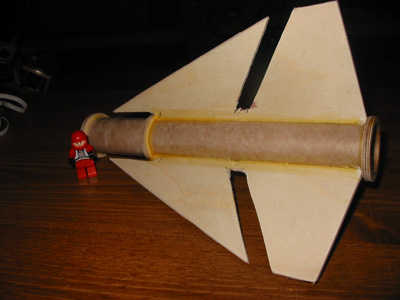
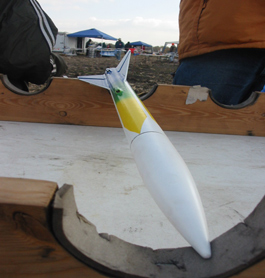
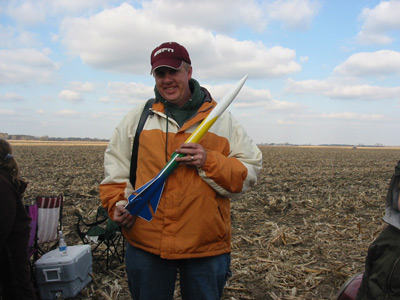 I wanted to create a split-fin design rocket on a mid-power scale with out actual split
fins. While there may appear to be 6 separate fins there are actually only 3 separate fins with a notch cut out. I also
wanted to try to get the fins to whistle like bigger rockets sometimes do. It is a simple design similar in size and
weight to a Aerotech Mustang or Cheetah.
I wanted to create a split-fin design rocket on a mid-power scale with out actual split
fins. While there may appear to be 6 separate fins there are actually only 3 separate fins with a notch cut out. I also
wanted to try to get the fins to whistle like bigger rockets sometimes do. It is a simple design similar in size and
weight to a Aerotech Mustang or Cheetah.
Construction:
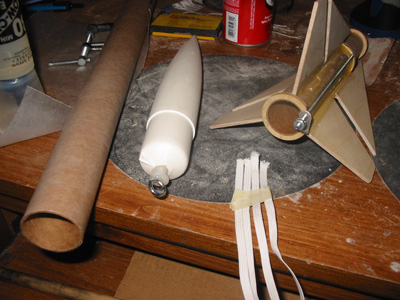
Here is the parts list:
- 22" long 1.65" Dia. body tube.
Basically a left over 38mm motor mount. - Lots of 1/4" elastic shock cord.
- 3 ea. 1/8" plywood fins.
- 3 ea. 29mm-38mm centering rings
- LOC Aura nose cone
- 6/32" threaded rod
Anyone with any mid power rocketry experience will find this build a snap to repeat. First was the construction of the motor mount / fin can. This is a little over built but I have built other scratch rockets before and I really don't mind the extra time it takes.
 I used 3 centering rings because I slotted the airframe. The front 2 rings make it a sure
thing that the motor tube is pointed directly in the middle of the airframe. Before gluing the rings, I marked the 29mm
tube for the fin alignment and for the all-thread. I used standard Tite-bond wood glue for this step.
I used 3 centering rings because I slotted the airframe. The front 2 rings make it a sure
thing that the motor tube is pointed directly in the middle of the airframe. Before gluing the rings, I marked the 29mm
tube for the fin alignment and for the all-thread. I used standard Tite-bond wood glue for this step.
Then came the fins. These were a bear to cut out. I used RockSim to create the templates to trace and then went from there. I don't have a band saw or a scroll saw of any sort so this was a real challenge to do by hand. I used a Dremel with a tiny sanding drum to get all 3 fins to the same shape. It is strongly recommended to use a table saw with a really good blade on it or a band saw if attempting a fin pattern like this.
Once the fins were cut with the leading and trailing edges slightly rounded over it was time to glue them to the MMT tube. I used a medium CA glue to tack them into place on the lines and then Tite-Bond wood glue for the interior fillets.
Then it was time to slot the airframe. Since fins never seem to be perfectly aligned, I cut the fin slots based on the exact location of the fins. It is a simple process. Number the fins, slide the MMT in as far as it goes and then make marks that line up with the fins and mark matching numbers on the body tube so that this dictates the slot location. Make the slots slightly larger (about 1/32" - 1/16") than the width of the fins. I used a standard hobby knife with a fresh blade to cut the slots.
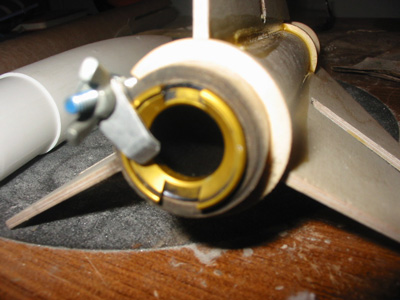 After the glue set on all the centering rings I notched out the after ring and glued
into place the all-thread up to the middle centering ring. This is my motor retention. It is as simple as it get and I
could not figure out another way to do retention without resorting to retention rings.
After the glue set on all the centering rings I notched out the after ring and glued
into place the all-thread up to the middle centering ring. This is my motor retention. It is as simple as it get and I
could not figure out another way to do retention without resorting to retention rings.
Since wood glue sometimes has a real strong initial tack I used Elmers white glue on the centering rings when I slid the MMT into the slotted airframe. I have done this before with wood glue and had a hair-raising experience when I couldn't slide the MMT all the way in because the wood glue was beginning to take hold. This process can take a few minutes to slide everything into place so a quick setting glue is not a good idea.
 Next was the shock cord. I used 2 4" pieces of 1/4" elastic cord and epoxied
them to the inside of the body tube ala LOC/Precision style. The loop created by this is where I tied the cord to the
nose cone. I then epoxied a drywall mount screw hole in the base of the nose cone. Then epoxied a wood screw-eye in the
hole. This became my nose cone attachment for the cord and the parachute.
Next was the shock cord. I used 2 4" pieces of 1/4" elastic cord and epoxied
them to the inside of the body tube ala LOC/Precision style. The loop created by this is where I tied the cord to the
nose cone. I then epoxied a drywall mount screw hole in the base of the nose cone. Then epoxied a wood screw-eye in the
hole. This became my nose cone attachment for the cord and the parachute.
I used 30 minute epoxy for the fillets on the fins. This was used simply because I have found it much easier to get good looking fillets using epoxy than wood glue.
Finishing:
 I don't spend a lot of time finishing my rockets just because it's not my thing. I
did use 30 minute epoxy for the fillets just because I have had better luck getting those to look good rather than
using wood glue.
I don't spend a lot of time finishing my rockets just because it's not my thing. I
did use 30 minute epoxy for the fillets just because I have had better luck getting those to look good rather than
using wood glue.
Figuring out a simple but different looking painting scheme was difficult. I have no idea what inspired what I did but I used 1/8" blue painters tape down the length of the bird after I painted it white. Then came the yellow, green and blue. I used all Krylon paints and Kilz spray-on primer.
Flight:
I plan on flying this mostly on E's and F's and if the weather is perfect with ZERO wind maybe a G.
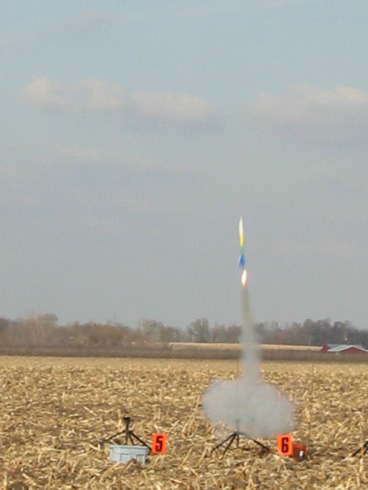 Flight one: F24-4w It flies straight with a little whistle in the fins just as planned. It
weather-cocked a bit in the higher winds which is not surprising with the proportionally large fins. Rocksim seems to
think that the 7 second delay is what I ought to use but I went with the 4 because of the winds. The delay was a tad
short as expected but not even a hint of damage.
Flight one: F24-4w It flies straight with a little whistle in the fins just as planned. It
weather-cocked a bit in the higher winds which is not surprising with the proportionally large fins. Rocksim seems to
think that the 7 second delay is what I ought to use but I went with the 4 because of the winds. The delay was a tad
short as expected but not even a hint of damage.
Flight two: F24-4w Almost identical to flight one. I did notice that the 12" thin mil parachute I used seem a touch small as it came down pretty fast. No damage though with the super soft corn field we use.
Unfortunately, both sets of launch pictures came out extremely blurry...
Summary:
Pro: This is an awesome little E and F burning rocket. It should last a long time.
Con: The fins. Whatta pain. If you take on a project off like this be sure you have the right tools lined up rather than try to cut it out with hand tools like I did. With the right tools this is an awesome way to do a spilt-fin design.
Sponsored Ads


")

")


 |
 |