| Construction Rating: | starstarstarstarstar |
| Flight Rating: | starstarstarstarstar |
| Overall Rating: | starstarstarstarstar_border |
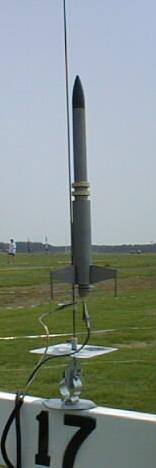
| Diameter: | 1.33 inches |
| Length: | 17.00 inches |
| Manufacturer: | Custom Rockets  |
| Skill Level: | 1 |
| Style: | Futuristic/Exotic |
Brief:
The Ion Pulsar, by Custom, is a fairly easy model to build. The model specs. are; length 17", Dia. 1.325", Weight 1.4 oz. with recommended engines B4-4, B6-4, C6-5.
Construction:
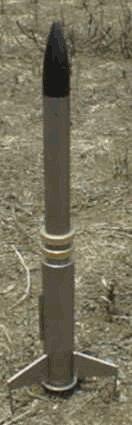
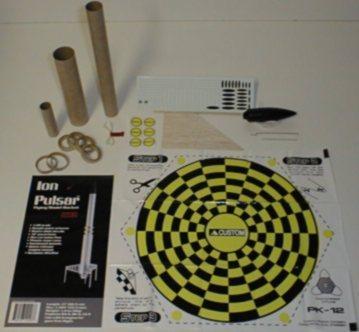
The kit comes in a bag that contains two kraft paper body tubes, cardboard paper centering rings, plastic nose cone, die cut balsa fins, plastic 12" chute with elastic shock cord, decals, and the basic motor mount with a metal engine hook.
The instructions are very easy to follow and each step has a corresponding illustration. I followed the directions exactly as they were written with the exception of using Titebond wood glue instead of white glue as the instructions recommend. Titebond is an excellent general-purpose adhesive and gets tacky in just a few minutes. Assembly consisted of building the motor mount, marking the bottom body tube for fin placement, gluing the two body tubes together, attaching the fins and dowels to the tube, and adding the launch lug. Anticipating a rough landing on the fins and dowels I made sure to use ample glue on these joints.
 Finishing:
The finishing instructions have you mask off the two body tube rings located in the middle of the model and spray paint the rocket silver. I just happened to have a can of, Plaski-kote brand, pewter spray paint on the shelf and decided to use it, thinking pewter would be appropriate. This paint is actually a metallic looking silver with small metal flakes. The paint was perfect for this model! Since the nose cone is black plastic I choose not to paint it. This kit comes with 84 decals! Way too many decals for a skill level 2 project. Most of the decals are clear plastic with small black dots to look like rivets, which should look great on a silver model. Unfortunately, there are only four rivets per decal. A better solution would have been a single body wrap decal.
Construction Rating: 5
Flight:
The recommended engines are B4-4, B6-4, C6-5. I flew the model for the first time on a B6-4 and the flight was straight with ejection at apogee.
Recovery:
Recovery was as predicted with a good 'chute deployment and gentle decent, but a 1 to 5 mph wind gust made this rocket drift at a fast rate. When the model contacted the ground one fin came off and two of the dowels separated from the fins. Upon inspection it appears I did not have a great glue joint on the damaged fin.
Flight Rating: 5
Summary:
I like this model. Although it is nothing more than three fins and a nose cone, the different size body tubes with the gold center rings make it unusual looking. I would suggest to builders to use epoxy on the fins and dowels or they won't last long. I would have rated this model an overall five, but the number of decals knocked it down.
Overall Rating: 4
Other Reviews
- Custom Rockets Ion Pulsar By Kevin Timmins
Brief: The Custom Rockets Ion Pulsar is a 1:48 scale model designed for B & C engines. The Kit Included:- 2 x Body Tubes Engine mount & hook Motor mount centering rings Elastic Shock cord 2 sets of Card centering Rings 6 Centering rings (2 for centering tubes - 4 for detail) 12" Plastic Chute & lines Die Cut Balsa Fins & Dowel Plastic Nose cone ...
 |
 |
Flights
|
|
M.R. (January 1, 2001)
D.G. (February 1, 2001)
unknown (June 1, 2001)
G.M. (September 1, 2001)
B.I. (September 1, 2001)
T.A.P. (December 31, 2001)
K.T. (April 4, 2004)
K.A.C. (June 7, 2005)
Sponsored Ads


|
|
C.R. (November 1, 2000)