Scratch Little Joe I Original Design / Scratch Built
Scratch - Little Joe I {Scratch}
Contributed by Dick Stafford
| Manufacturer: | Scratch |
Brief:
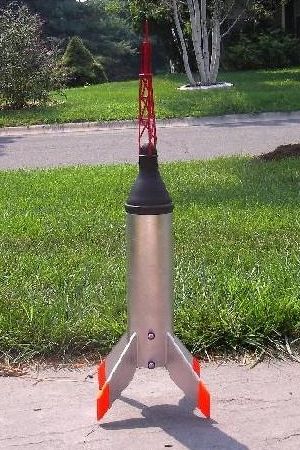
This is a very stand-off scale model of the Little Joe I. It is 2.6" in
diameter, has a 29mm mount, and is based on a custom-turned Mercury capsule
that was donated by an anonymous guest for the
Nekkid Rocket
Photo Contest. On the real Little Joe I, the body is larger in diameter
than the capsule. In mine, the capsule fits the body tube.
Construction:
The following are the major components used:
- 2.6" phenolic tube, 8.75 long (Giant Leap)
- 29mm phenolic motor mount (Giant Leap)
- Two centering rings (Giant Leap)
- 1/8" tubular Kevlar®, 10' long (Giant Leap)
- Swivel (Giant Leap)
- Scrap bungee for NC shock cord attachment
- 3/16" plywood fins (Michael's Crafts)
- Rail buttons (railbuttons.com)
- Two T-nuts (Home Depot)
- Lead shot
This was a straightforward build: 4FNC with through-the-wall fins. I got the measurements for the body tube and fins from Rockets of the World (RotW).
The fins are thick. Not that they had to be, but I had the 3/16" ply and delusions of beveling them heavily. I slotted the fin slots using a Dremel. To make sure I didn't chip the end of the phenolic tube at the slots, I inserted the rear centering ring. Next, I attached the front ring to the motor tube, with the end of the Kevlar® shock cord going through the ring. I used 5-minute epoxy throughout. The motor tube was then installed with the rear ring being dry-fit. The latter was then removed and the fins were glued in. Here I ran into a problem that I seem to keep making: I didn't check the alignment of the shock cord which was epoxied to the motor tube. Of course, it ended up perfectly aligned with a fin slot! The fix was easy, as I notched the tab on one of the fins so that it cleared the shock cord.
 I made
small external fillets and thick internal ones with Superfil. I also
filled the spirals at this point. Finally, I attached the rear ring and the
rail buttons. In order for the rail to clear the lip on the cone, I used
oversized screws and an extra center spacer between the button and the tube.
I made
small external fillets and thick internal ones with Superfil. I also
filled the spirals at this point. Finally, I attached the rear ring and the
rail buttons. In order for the rail to clear the lip on the cone, I used
oversized screws and an extra center spacer between the button and the tube.
For the nose cone recovery connection, I epoxied a small section of scrap bungee into the deep core that the builder drilled for me. I also added enough lead shot to make RockSim happy. With the heavy wooden cone, I wouldn't have thought any would be needed, but the thick fins and motor mount worked against its stability.
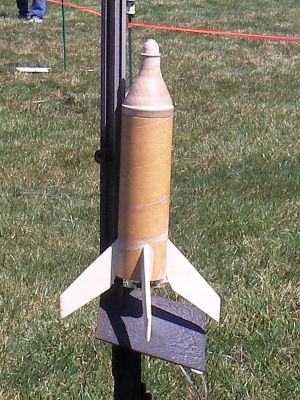
For the first flight, I did not build an escape tower. However, I since built one out of bamboo skewers, thin dowel, and a spent 13mm motor. A true scale purist may see the next mistake I made--I scaled the tower based on a 3" body vs. the actual 2.6" tube! I also have painted it per RotW, but haven't added decals.
Flight and Recovery:
I flew the Little Joe on a 24mm F39-6 in my virgin Rouse Tech casing. I used a
little dog barf, a chute protector, and a nylon chute. The flight was fairly
fast, and ejection was just a little late. Recovery was fine. I am
contemplating a G64 next.
Summary:
This is a sturdy but heavy rocket. As long as the phenolic stays away from
thing like irrigation pipes, it should survive even hard landings. It is barely
scale-like, which is good enough for me.
Sponsored Ads
 (2pk) SEM-KM-10")
 SEM-KM-11")
 SEM-KM-11")
 SEM-KM-10")


 Blue Bird Zero™ KMX-06")


 |
 |