Scratch Rectangulator Original Design / Scratch Built
Scratch - Rectangulator {Scratch}
Contributed by Clive Davis
| Manufacturer: | Scratch |
Brief:
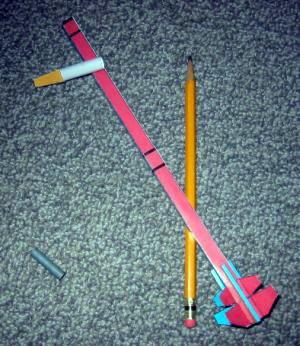
This is another paper rocket design of mine for exploring different shapes.
This rocket consists of rectangular boxes for the body tube, nose cone, and
launch lugs. Standard shapes are used for the fins.
Construction:
The entire rocket is made out of paper except for the shock cord. All necessary
parts of the rocket fit on to an 8.5 x 11" sheet of paper.
Instructions can be downloaded here and are easy:
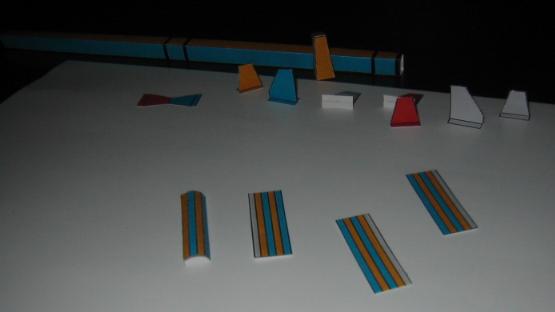
- Cut out all parts from the parts sheet.
- Shape and glue the body tube, nose cone, fins, and launch lugs according to directions, using white or yellow glue.
- Create a motor mount and motor block, which is actually part of the motor mount folded inwards at the top.
- Glue the motor mount in the body tube.
- Glue fins on to the corners of the body tube.
- Glue the four launch lugs between the fin tabs.
- Create a paper shoulder for the nose cone to fit inside the body tube.
- Attach shock cord to body tube and nose cone using the tri-fold method.
- Add support structures with the extra paper around the middle and top of the rocket to support the fragile paper area by the nose cone.

Finishing:
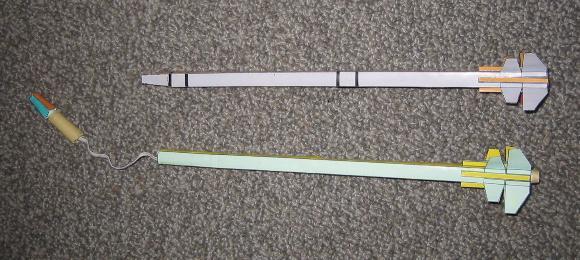
I used a glossy business paper for my final rockets but have also built the
Rectangulator with cardstock in previous prototype models. Since the rocket is
constructed with printed paper, there is no need to finish the rocket. If
desired, the rocket could be sprayed with an acrylic clear coat to protect
paper. (This is particularly a good idea if the patterns were printed on an ink
jet printer.)
Flight:
The motor is friction fit into place. There is no need for a streamer although
on my first flight I tried one. The rocket has four launch lugs, so as I
prepped my rocket, I did not have to align the rocket any specific way on the
launch pad.
All three flights were stable with a quick, straight boost. The rocket flew really high for being an odd design and rather large for a MicroMaxx model. I removed the streamer after the first flight as it was found to be unnecessary. On the third flight, the ejection charge either did not go off or was too weak to eject the nose cone. The previous two flights had perfect nose cone ejection. The first flight was on an MMX I motor while the next two flights featured MMX II motors. Due to the ejection charge not functioning on the final flight, the rocket plummeted to the ground nose first. The rocket was only slightly crimped in its mid-section. With the addition of a supprt structure at this midpoint, the rocket should be ready to go again.
Summary:
PROs: Cheap rocket with distinct looks. Another addition to the MMX fleet
CONs: The rocket can be very delicate in construction and flying if you use thin paper.
Sponsored Ads
 (2pk) SEM-KM-10")
 SEM-KM-11")
 SEM-KM-11")
 SEM-KM-10")


 Blue Bird Zero™ KMX-06")


 |
 |