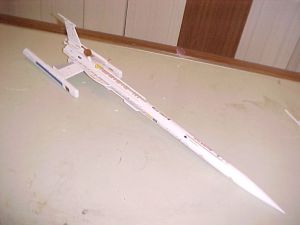
Sirius Rocketry Refit USS Atlantis
Sirius Rocketry - Refit USS Atlantis {Kit} (S-0010)
Contributed by Drake "Doc" Damerau
| Diameter: | 1.33 inches |
| Manufacturer: | Sirius Rocketry  |
| Style: | Futuristic/Exotic, Upscale |
Brief:
I saw that Chan Stevens, a top-notch builder and reviewer, already reviewed this kit but I wanted to add to it by
going a little further into the construction and offer more construction details. It’s not a “second
opinion” review, rather one to complement Chan’s review.
Construction:
Engine Mount: Right of the bat I chose to make a modification to my build. Since this was a larger model, I
chose to install an Estes motor hook capable of accepting an Estes E engine. If you do this, it also means that
you’ll need to do three things: add a slight bit of nose weight, build it strong, and use a spacer to use the
recommended D engines. To use an E engine clip, make the engine mount exactly as shown except move the cut for the hook
from 2.50” to 3.25” from the rear.
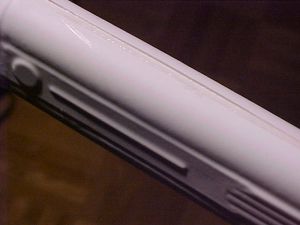
Belly Fin Assembly: I sanded the inside edges of the fins to make them fit to the body tube better and give it a cleaner look. The downside to doing this is that the two side pieces sit slightly lower causing you to sand some of the surfaces so that they align up again. I used a small drum sander on a Dremel to sand the assembly after it was glued to the body tube.
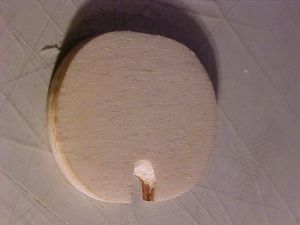
The other modification I made here was to the antenna dish. Since the antenna is mounted on an angle and the notch for the antenna is cut straight, it doesn’t fit well to the antenna dowel. To solve this, I sanded the notch in the antenna dish on an angle. I then chose to sand an angle in the antenna dish for a neater, more antenna-like appearance. If you chose to do this, only sand the backside. You need to leave the front flat because a decal is placed here later.
Once the belly fin assembly was mounted to the body tube, I sanded the antenna sides to fit in the hole. The antenna is slightly wider than the hole in the fin assembly.
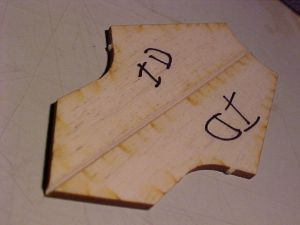
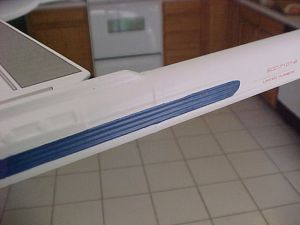
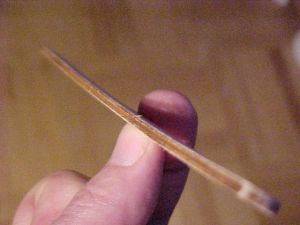
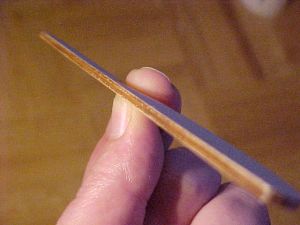
Top and Side Decks: The plywood used in this kit is made from basswood. This strong yet light material is prone to warping. Mine was fine when it came out of the kit, but over the few days it sat on my bench, it warped. The side decks were a particular problem because the warp in the wood would not have allowed me to keep them straight along the centerline. Luckily there is a quick and easy fix for this. The property of bass wood that makes it warp, is the same property that makes it easy to straighten it out. Slightly moisten the inward side of the warped piece. Don’t wet it, you just need a slight amount of moisture. This causes the wood to swell on the moistened side. This swelling will cause that side of the wood to expand and force the wood back. If you use too much moisture, you’ll warp it too far or cause it to twist. The before and after pictures show the results. Once it is straight, glue it to the rocket.
I had the same problems with the top deck, but I chose not to try to fix it. This piece is so long that I didn’t want to chance it. Instead, I used the slight warp to my advantage. I chose to mount the side up that would cause the two ends to be in contact with the tube. I then only needed to hold down the center until the glue set.
Pods: The most important thing here is to take your time. This is a difficult part of the build and is the coolest part of the kit. Make them look nice! I started mine much sooner in the build than the directions told me to. This allowed me to work on them for a while and then continue to go back to them rather than spend the whole build waiting on this step. Since nothing in the build actually needs to be done before you do these, doing it this way works well. You’ll want to get them just right before you cut the slots for the fin.
The instructions give you some options when building the pods. Chan took the harder, more time-consuming approach. It looks like his efforts were well rewarded. I was not able to get such a nice fit.
I chose to make each pod, start to finish, separate from the other hoping I would learn from doing the first pod and make it easier for the second pod. It’s very difficult to know where to cut the pods when removing them from the sheet. I ended up cutting a bit too much on my first pod.
Once you have the pods to your liking, you need to glue the inner tube assembly to the inner side of the pods. I chose to use an epoxy paste for this. Make sure you get some glue around the area for the fins or the plastic will be loose after you cut them. Since you want the tubes in full contact with the inside surface of the pod, I chose to lay a thin hardcover book on them while drying.
Once the pods are dry, you’ll need to start sanding them. Sanding the seam down flat worked pretty well at this point. Next I wicked some thing CA into the seam. This ensured a good bond along the seam and started filling in the gaps. While drying, there’s a point where the CA sands the same as the styrene. If you wait too long the CA will become harder than the styrene and will be difficult to sand. I used the styrene sheet provided to finish off the seam.
One of the tools I use for detail sanding is emery boards. I buy packs of them at the dollar store. The grit is about right for detail work and their straight flat shape works well in many instances. Sanding the seam on the pods is a perfect application for them.
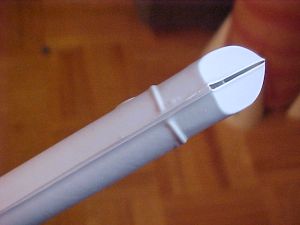
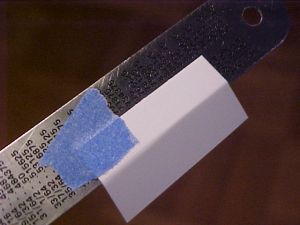
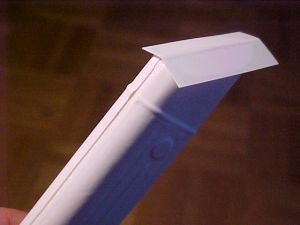
I covered the end of the pods with a piece of the styrene sheet. Cut a piece from the supplied styrene sheet and bend a crease as shown. Using model glue, glue the piece to the end of the pods. Once the glue is set, trim and sand for a seamless fit.
Finishing:
The kit comes with a balsa nose cone. The one that came with the kit is as nice as they come, but I don’t like
balsa nose cones. My problem with them (especially the larger ones) is that you seal, sand, prime, sand, fill, sand to
get a good finish. After all that work, a slight bump dents it. The other thing is that you can never get the shoulder
as nice as a plastic one. I replaced it with an exact replica made from polystyrene. This also gave me some space to
add the nose weight need for E engines.
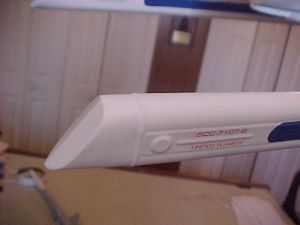
I was in the same boat as Chan when it came to finding the gray paint, so I did go with white. This turned out to be a mistake. Some of the decals are very slightly gray in color themselves. This causes the clear areas to be noticeably different than the paint. Be sure to trim the decals as close as possible. Some of the decals just barely fit on the surface where they are to be placed.


Other Reviews
- Sirius Rocketry Refit USS Atlantis By John R, Brandon III (September 29, 2011)
The Refit USS Atlantis is a classy update-upscale of Estes' old USS Atlantis exotic starship. The old one flew on 19mm motors, this one is set up for 21mm. It's mostly a plywood and cardboard-tube kit with some vacuum-formed plastic parts as decor. I have to brag on Sirius' customer support. I ordered the Atlantis kit on the first of September and their website reported it shipped ...
- Sirius Rocketry Refit USS Atlantis By John Lee (October 22, 2008)
Brief: According to my records, my Refit USS Atlantis has been sitting in my build pile for about a year. That jives with my memory. It was one of the first kits I ordered and it has been intimidating me ever since. I really wanted to build it but I wanted it to look good too. Finally, I decided to give it a try, not because I think I can do it justice but because I want it so bad. ...
- Sirius Rocketry Refit USS Atlantis By Chan Stevens
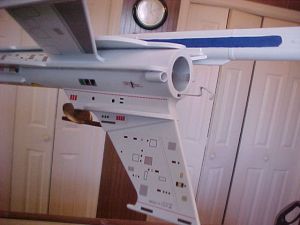
Brief: Inspired by Star Trek, this futuristic spaceship design will draw a crowd at the pad and flies surprisingly well. At $60, it's a bit on the pricey side, but it is made with quality components and design and is challenging and enjoyable to build. Construction: I ordered my kit via the Sirius Rocketry website with their flagship Saturn V kit. There was a delay of a couple ...
 |
 |
Flights
Sponsored Ads


|
|