CLICK PICTURE TO GET FULL SIZE
 |
 |
 |
 |
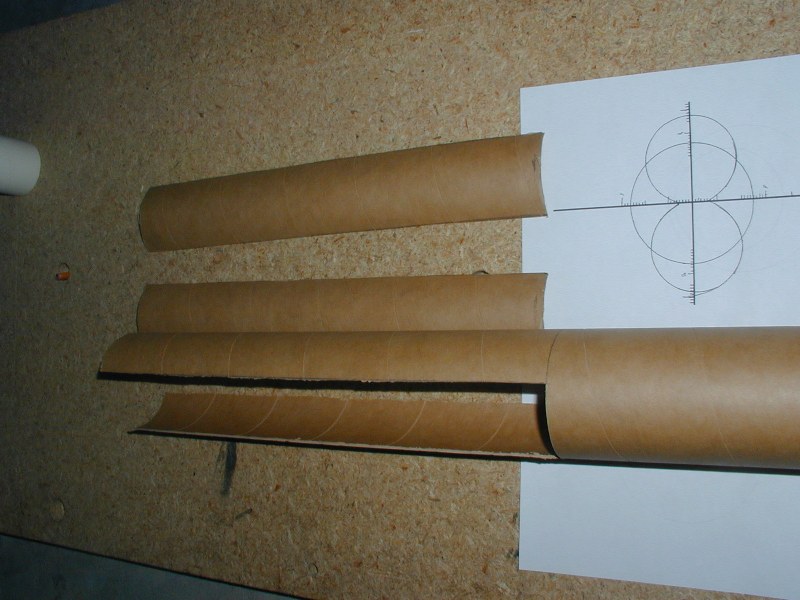 |
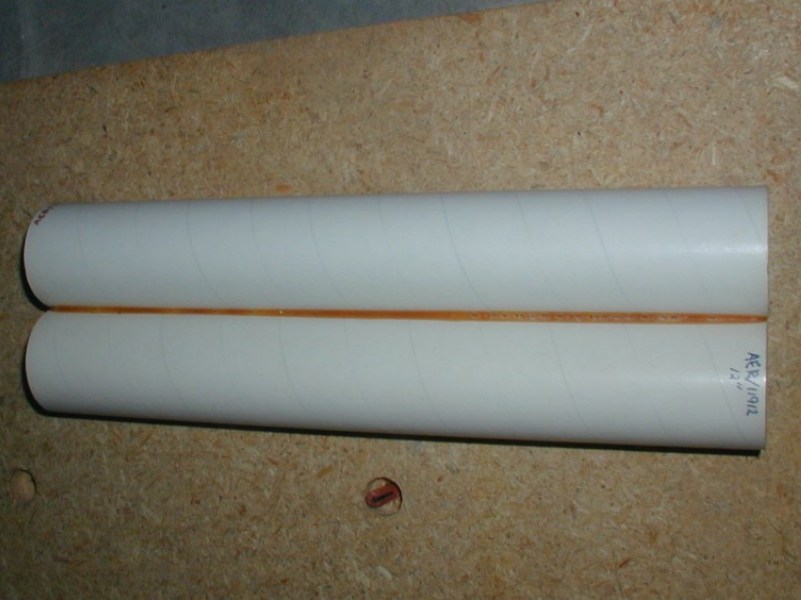
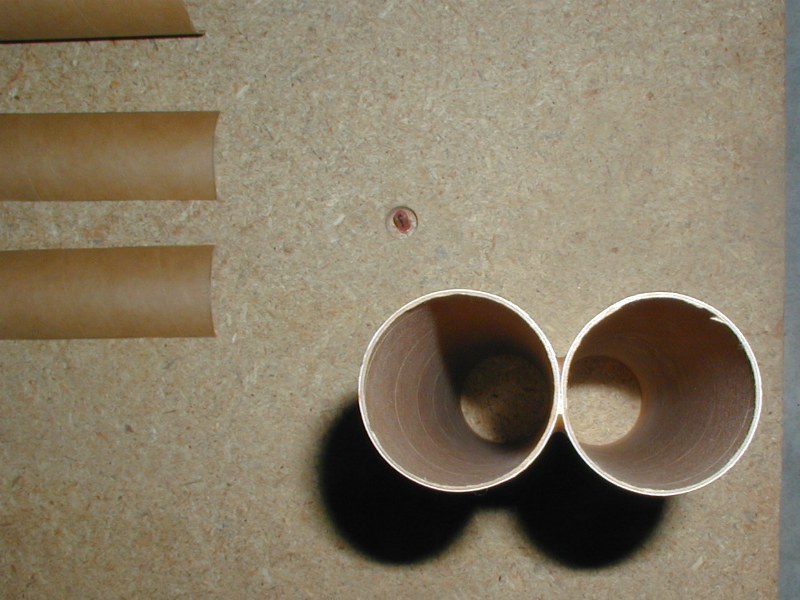
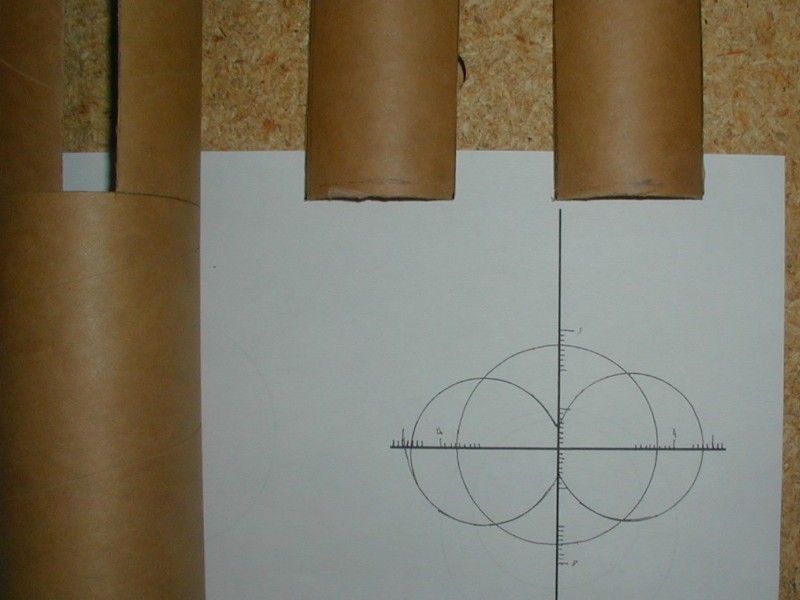
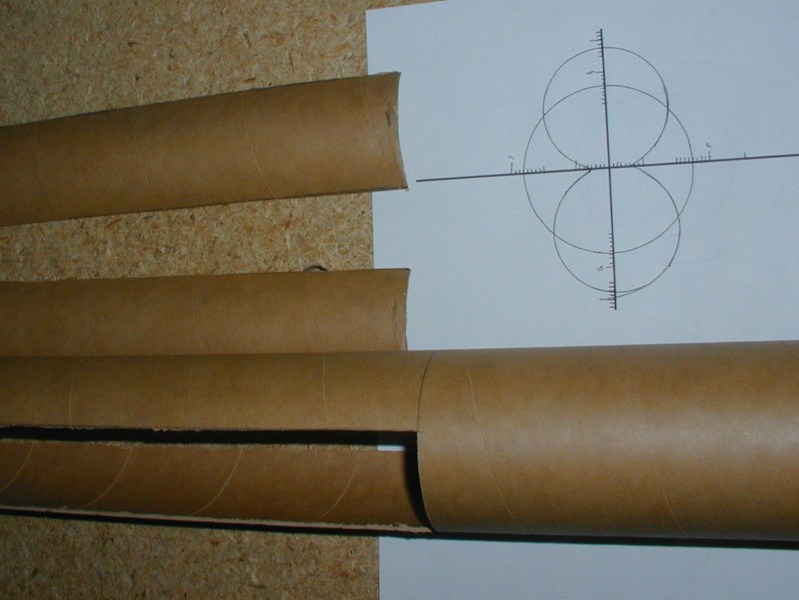
| Step 1: Glue the two 1.9" tubes together using a flat surface to keep them aligned. (I used ProBond Wood Glue) | Step 2: Fillet the two 1.9" tubes | Step 3: Create your template by first drawing two intersecting lines that are perfectly perpendicular to each other. Next put 1 mm hash marks on the lines to allow equal alignment (using graph paper would have been a good idea). Next place the two 1.9" tubes on the paper so that they are left to right, center them, then carefully trace them. Next place a 2.6" tube on the paper, center it, then carefully trace it. Check your template and make sure everything is centered. If good, then put your 2.6" tube back on and mark on the tube where the 1.9" tubes intersect the 2.6" tube. Also make a mark in-between the intersect lines at the left and right intersection of the crisscross. Put an "X" next to these marks. | Step 4: Extend the (6) marks the entire length of the 2.6" tube using a door jam or straight edge. Mark each line exactly 12" from the bottom. Place a sturdy piece of printing paper around the tube and align it to itself so that it forms a straight edge at the 12" mark. Using the paper as a guide draw a line all the way around the body tube (this will be 12" up from the bottom) (see Technique 1 on page 3) |
Step 5: Using a very sharp hobby knife, slowly (light and multiple passes) cut along each of the four lines from the bottom up to the 12" mark. Once each of these four lines are through the body tube, then cut along the 12" line between the two. WARNING: be sure to cut between the correct lines. Look for your "X" from step 3 |
 |
 |
 |
 |
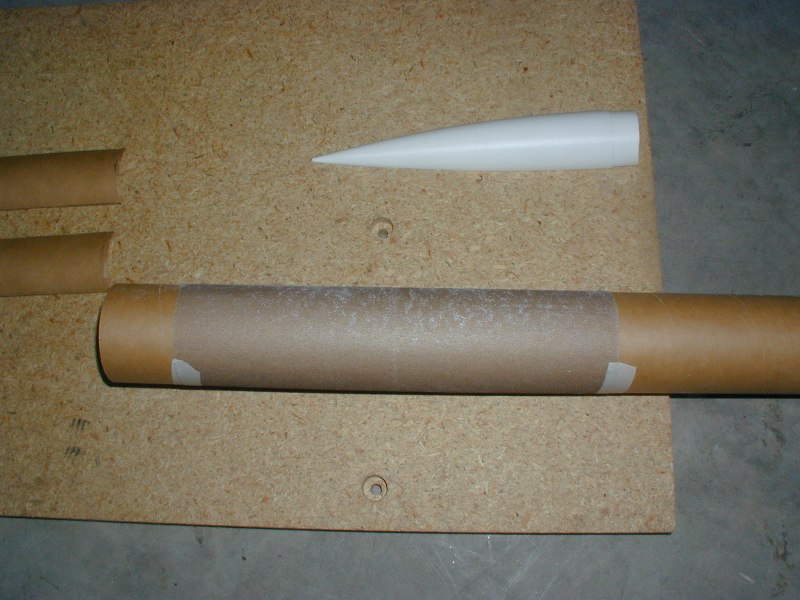 |
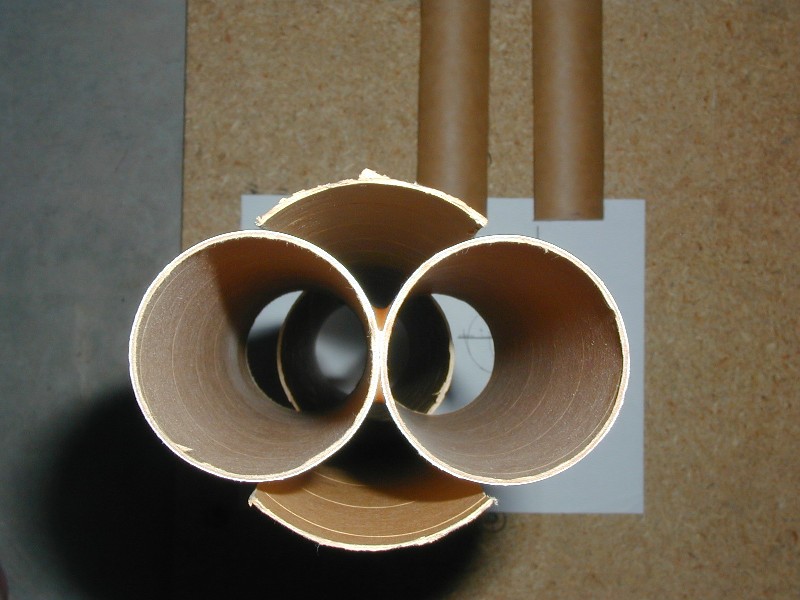
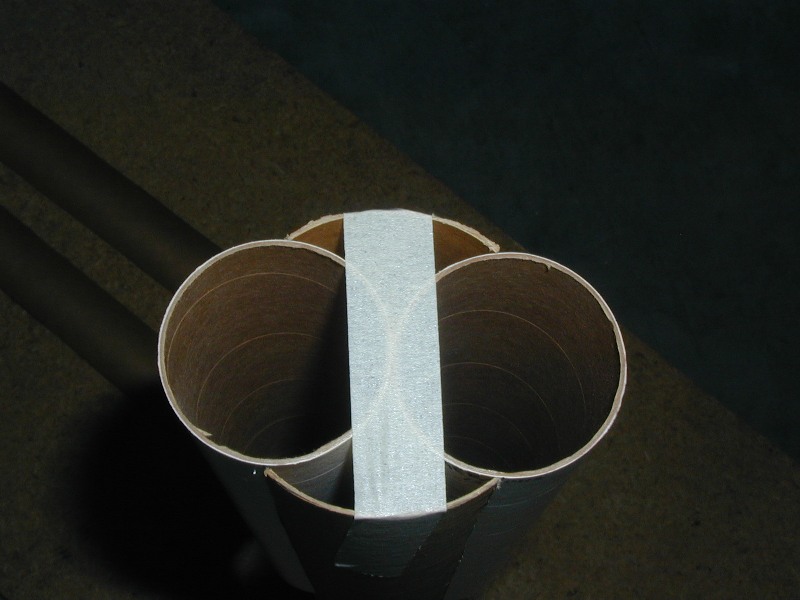
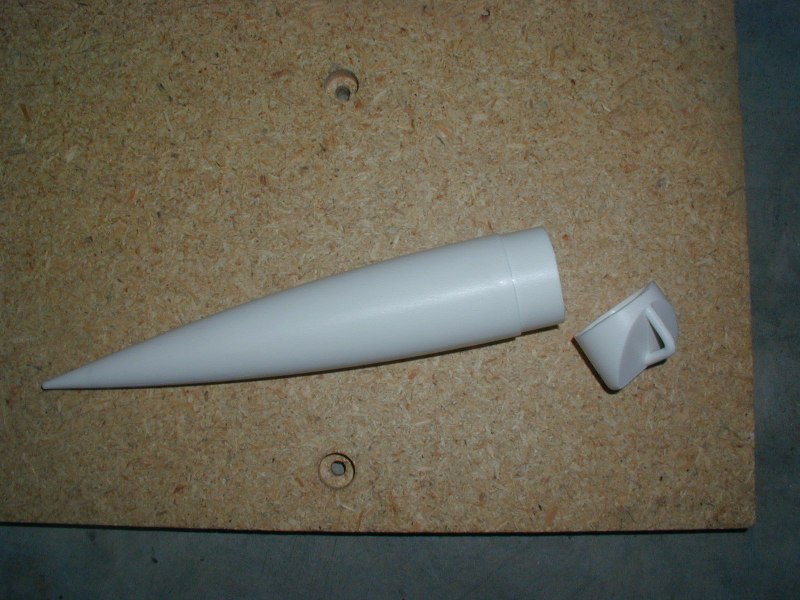
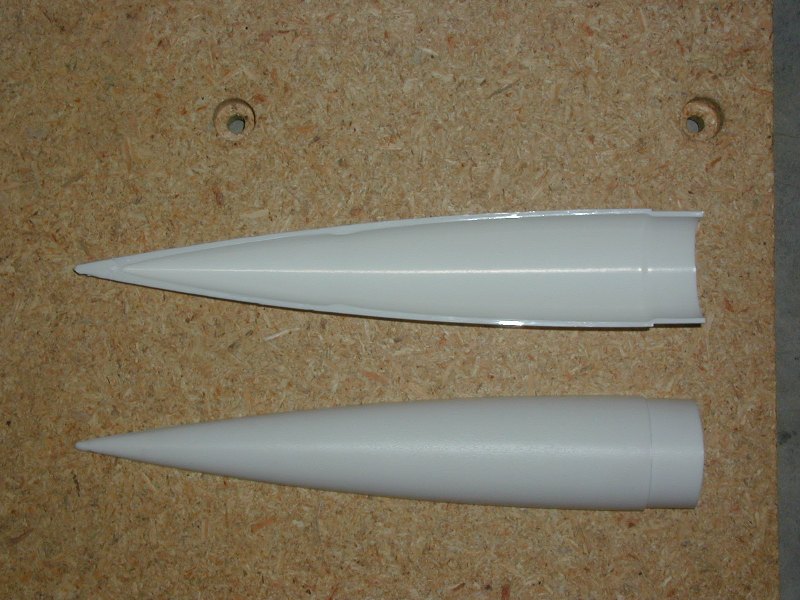
| Step 6: Test fit your two 1.9" tube assembly into the 2.6" tube with the cut outs. The left over 2.6" tubing should lay flat and straight along the 1.9" tube assembly without looking distorted. You can hold this whole assembly on the paper template from step 3 to compare the fit too. Trim as needed. | Step 7: Once the fit is correct, put the 1.9" tube assembly in place and tape the 2.6" tubing flat at the bottom. This tape should go across the 1.9" tubes to hold them in place. Check to ensure the 1.9" tubes are centered at the 12" (up) mark by measuring each side and aligning until equal. Place some tape there to hold the 1.9" assembly in place. Now using epoxy, glue the 2.6" flaps to the 1.9" tubes. If you have tape in the way, just skip that/those spot(s) initially. Once glued on both sides, remove the tape and glue the remaining spots. Then applied as may layers of epoxy as necessary to smooth out these seams. | Step 8: Stick the shoulder of the 1.9" nose cone into one of the 1.9" tubes until the shock cord hook just disappears. Mark the shoulder all the way around the nose cone. Then using a very sharp hobby knife, cut off the shock cord hook section. WARNING: do NOT cut off the entire shoulder. |
Step 9: By placing the nose cone on the template and using the crisscrossed lines, mark the left and right side of the nose cone. Using a flexible (metal or plastic) ruler, mark a straight line from the left mark to the tip of the nose cone. Do the same from the right mark. Then using a very sharp hobby knife, making light cuts (multiple passes), cut the nose cone in half lengthwise. | Step 10: Take a full sheet on 150 grit sandpaper and tape it to one of the 2.6" body tubes. Then being careful to have the 1.9" nose cone half aligned lengthwise with the 2.6" tube, sand the nose cone to conform the edges to match the body tube. Do both halves. Test fit the nose cones into each side of the 1.9" assembly. If the should does not slide in without angling the tip of the nose cone away from the 2.6" body tube, return to sanding until it fits. Once they fit then put epoxy on the nose cone shoulders and slide into place. WARNING: see note in step 11 for motor ejection and technique 5 before installing the pod-cones. Use tape to hold the tip so that it aligns with the left (or right) mark that you extended on the 2.6" tube. Epoxy where there isn't tape, remove tape, epoxy and then go back to smooth out the seams. |