| Construction Rating: | starstarstarstarstar_border |
| Flight Rating: | starstarstarstar_borderstar_border |
| Overall Rating: | starstarstarstar_borderstar_border |
| Published: | 2010-04-14 |
| Manufacturer: | Estes  |
 Brief:
This is a father/son dual build. Up to this point, I've been helping him build his rockets. We started with me doing most of the building, and him as an extra pair of hands. Over the course of 3-4 builds, he's been doing more and more, and the roles are reversing where I'm becoming the extra hands. I found a couple of Firebirds for relatively cheap, and so we're building these in parallel. This will be his first purely solo build, and we'll be comparing the results of our two builds. After this, he'll be moving on to building his L1 cert rocket... if I think he's ready.
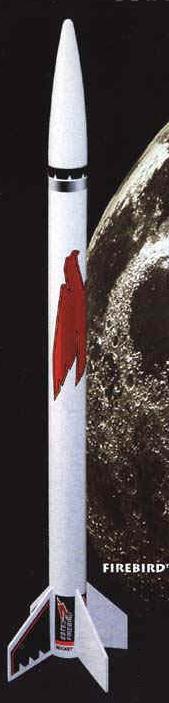
The Firebird is a fairly basic single stage Estes offering. Nothing dramatic or fancy, here, just a solid design with classic lines.
Construction:
Dad: This is a basic 4FNC rocket. Plastic nose cone, pre-cut fins, some flimsy paper centering rings and the usual too short shock cord and plastic chute. The body tube is a good length of BT-55 1.325" tubing, while the motor tube is the cheap blue 18mm tube. For standard 18mm motors, everything is sufficiently strong. For the 18mm Aerotech D reloads, there could be some extra stress that could test some of these parts.
Son: Yeah, yeah...what he said. What's with the wimpy 18mm motor mount? That's got to go. I'm going to raid the parts closet. Let's see. 24mm motor mount, some BT50-55 centering rings to replace the cheapy paper stuff. OK. I'm good to go. Let's get building.
Dad: Once again, this is pretty basic Estes fare. Anyone who's build a typical Estes rocket in the last couple decades won't have an issue here. There are a couple minor changes that I make to all Estes kits.
Namely the recovery section.
I always toss the 3-fold concept. I notched the upper centering ring, and slipped a length of Kevlar through. I knotted the end to prevent it coming back through the notch, and put a dab of epoxy to hold it in. Normally, I would tie the Kevlar® in a loop around the motor tube, but since these fins are through the wall, the loop would interfere with the fin tangs.
Speaking of which, I wonder why Estes went with through the wall fins for this kit and only an 18mm mount. For all the Estes 18mm motors, TTW fins is way overkill. Of course, it does make fin alignment much easier.
Son: Well, he taught me, so, yeah, I'm tossing the 3-fold as well. Since I'm doing the 24mm thing, I get to choose my engine tube size, so I went with a longer tube, and a third centering ring. The first 2 rings sandwich the fin tangs as normal. I tied the Kevlar® around the motor tube, and put the third ring on top. Hah! Mines stronger.
While I was at it, I cut the top of the engine hook off so it doesn't go into the motor tube. I also left off the motor block. The down side is I'll need to use tape to make "thrust rings" on the bottom of Estes engines to keep them from going through the rocket. The up side is that I can use any 24mm motor including the upcoming Aerotech 24/120 and the CTI Pro 24 cases. Bigger, faster, higher! I can't wait to put a 24mm G motor and watch it rip! Dad's shaking his head while I'm typing this. Says I'll never get it back. Maybe, but it's fun. Besides, I don't pay for the motors. (Dad: He may start buying them if he loses them like this)
Finishing:
Dad: Decals are typical of Estes in this era. That means peel and stick. I really don't like them. I much prefer water slide. That said, as per my usual superstitious approach, I won't actually paint and decal the rocket until after the first few flights. Why? Because I've found that the odds of my losing a rocket increase exponentially with the amount of time I spend on it prior to it's first flight. If I build a rocket in 2 hours the night before a launch, it's coming back. Every time I've spent 2-3 months doing a painstaking job of building and finishing, something bad has happened.
As for the pre-paint finish work, it's all typical. Sand and seal the fins. Sand the flashing off the nose cone. Fill the spirals in the tube. The spirals actually aren't too bad, and the tube is white. If you go with the factory color scheme (white) you could probably get away without filling.
Son: I'm done building, let's go fly. Seriously. Yeah, I could take some time to make it look good, but this isn't one of those rockets. Let's fly. I want to get started on my cert rocket. I'll take more time on that one.
Construction Rating: 4 out of 5
Flight:
Dad: For all our rockets larger than 1" diameter, we keep a supply of Nomex to avoid using wadding. Wadding can be easier in the smaller rockets, but the larger ones just take too much. Besides, reuseable Nomex is more eco friendly.
Other prep is standard. Yes, there's a lot of this review that just says "it's standard issue." That's because this is a pretty standard rocket. Stepping into high power, many of the rockets are pretty "standard" as well. Just stronger materials. At a certain point, you can't do anything too fancy with high power motors, because the motors will just shred the rocket from the high thrust.
Son: What he said. I'm getting tired of typing. I haven't flown mine yet. Weather hasn't been good enough.
Recovery:
Dad: My turn to say it. What he said. We haven't flown either rocket yet as the weather hasn't cooperated. My expectation is that, like everything about this kit, it will be typical Estes. The chute is too big, and it will float, so we'll probably fly with a streamer or smaller chute. As we get a chance to fly these, I'll be posting the flight logs, and updating the review through the flight log comments. Actual flight is just the last validation of the build in this case. The primary goal was to give him a solo build to validate he has the skills necessary to attempt his cert build.
Son: So, do I pass? When can I start on the Matrix?
Flight Rating: 3 out of 5
Overall Rating: 3 out of 5
Other Reviews
- Estes Firebird By Ken Tsai
- by Mike Goss The Estes Firebird is your basic four-fins-and-a-nose-cone sport rocket. It stands almost two feet tall and uses a BT-55 (about 1.3") diameter body tube. Construction Rating: 5 out of 5(Simple and straightforward) The Firebird came in the usual plastic bag with the colorful graphics on the front. (Note to Estes: Why do you print on the back of the bag ...
 |
 |
Flights
Sponsored Ads


")


|
|