| Construction Rating: | starstar_borderstar_borderstar_borderstar_border |
| Overall Rating: | starstarstar_borderstar_borderstar_border |
| Published: | 2011-01-26 |
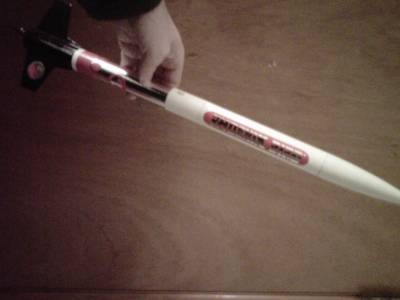
| Diameter: | 1.33 inches |
| Length: | 24.00 inches |
| Manufacturer: | Estes  |
| Skill Level: | 1 |
| Style: | Sport |
 Brief
Brief
This is a remake of the old Centauri classic. I was a bit disspointed by Estes' choice not to use the original kit's plastic fin can, nose cone, and body coupler.
The instructions for building the kit have a fatal flaw. The kit uses through-the-body-tube fin mounting, and, if the directions are followed, the builder will NOT be able to insert the engine mount as the fin tabs stick well inside the body tube. Fortunately, I saw the problem before glue was applied.
My solution was to glue the engine mount in place first, then cut a notch in the fin tabs so they would slide over the lower centering ring when inserted through the body tube. This probably makes for a better-built kit, but someone who just follows the instructions will have "issues."
The fin stock was very smooth, the laser cuts were nice and crisp, the separate "tips" of the fins, however, gave me some trouble as they had a tendency to snap off.
First flight is coming up as soon as the snow melts.
Components
- Two white body tubes
- Laser-cut balsa fin stock
- Balsa nose cone
- Balsa body tube connecter
- Rubber shock cord
- Plastic parachute (preassembled)
- Engine mount
- Two launch lugs
- Self-stick decals
- Instruction sheet
Construction
Pros:
-
Laser-cut fin stock made short work of prepping the fins for sealer
-
"Sticker" type of decals are crisply printed, and very flashy
Cons:
-
The instructions for building the kit have a fatal flaw (described above).
Overall, with the fin issue, I can't give the kit a better grade than "poor" because an inexperienced modeler will very likely run into big problems. Estes needs to revise the instructions.
Finishing
Sanding and painting the balsa wood fins and nose cone was pretty much standard practice - a few coats of sanding sealer, sanding between coats, final sanding, two coats of gloss enamel paint. Painting the fins was done after they had been sealed and attached to the model. The directions are not very clear as to where the color separation line should be, but looking at the photo of the competed model, it's pretty easy to "guesstimate."
The "sticker" type decals were very nice, true to the original.
Flight
Has not been flown yet.
Recovery
Has not been flown yet.
Summary
The fin vs. engine mount issue is a big problem that needs to be addressed by the manufacturer. Estes does own the rights to the plastic fin can. It should be used for the kit.
Other Reviews
- Estes Phoenix Bird By Mark H (February 28, 2011)
The Phoenix Bird is an Estes remake of the early 80s Centuri Phoenix Bird. Although close in appearance, this version uses BT-55 based parts compared to BT-56 used in the original. The biggest difference though is the Estes version uses through-the-tube balsa fins, and a balsa nose cone. The Centuri version used a plastic fin can and plastic nose cone ...
 |
 |
Flights

|
|
Sponsored Ads


 Decals")

")
")


")
")


|
|
Kristian Holvoet (September 2, 2011)
"The instructions for building the kit have a fatal flaw. The kit uses through-the-body-tube fin mounting, and, if the directions are followed, the builder will NOT be able to insert the engine mount as the fin tabs stick well inside the body tube. Fortunately, I saw the problem before glue was applied."
Same thing with Estes Cosmic Explorer. At least the Cosmic Explorer had a red errata sheet, but still. It is disappointing that Estes has had these quality control issues (really, errononeous instructions?).