

Making a Hemispheric Nylon ParachuteI will attempt to document the steps and consolidate the information I gathered to make a nylon hemi parachute. Don't let your wife's or mother's sewing machine intimidate you...you can do it! Let me preface by saying, I have never attempted to sew anything in my life until a couple days ago. Previously, I cut and pinned fabric while the wife sewed, but I got brave and finally tried it myself. For some of you this is old hat and you maybe have variations on the method I am about to decribe, any input is welcomed. This just works for me. Practice on a few scraps of fabric first and get to know the machine. It might help if someone is around who actually has some experience with sewing just in case you need some pointers starting out; threading the machine, reversing direction, changing stitch settings, etc. It's not hard, promise. I was sewing my own chutes the first day with the machine. Just take your time starting out, stitch slowly at first and don't let the machine get away from you, you're not working in a sweat shop!
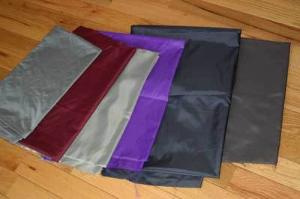
First step is deciding the size chute you want and how many gores(panels). I discovered a link in another thread that helps with sizing the gores and printing a gore pattern, it can be found here. Start with a six or eight gore pattern just starting out. I'm not entirely sure how hemi sizes work, but can tell you that an 8" hemi comes out looking and performing(probably better) more like a 12" hex parasheet. Your gore pattern will be limited to 12" on this program, mostly due to standard paper size, but I was able to stretch the 12" gore pattern to 125% with my printer settings. This took me to about a 14" gore, I'm guessing. I use a 50% sphere so I have enough fabric to make the hems. Don't get carried away with spillhole size. I went with .5 on the smaller chutes and 1 inch on the larger chutes. Those sizes will actually increase by a 1/2 inch or more once you hem the fabric, just keep that in mind when you size your spill hole.
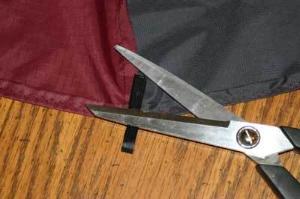
Cut out your paper pattern and transfer the outline to the fabric...I used a Sharpie for this. This is a familiar step for most of us who have cut out fin patterns in the past. Use a good pair of fabric scissors to cut out the gores from the fabric, this will limit the amount of fraying and give you a nice clean edge. You should wind up with 8 panels all the same size like this... gore pattern
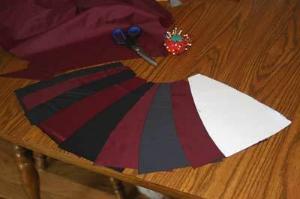
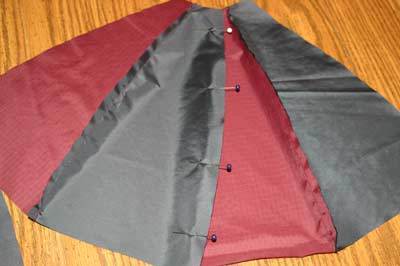
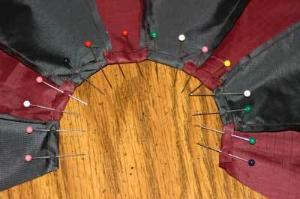
Note that the gores are all pinned on the same side and that the colors are stacked the same. This is important when it comes time to assemble all the gores together, this keeps a uniform A B A B A B...pattern, assuming you are using two colors. Same rules apply using three or more colors.
Sew the pinned side of the paired gores together, about a 1/4 inch from the edge. Start at the top and work your way down. The machine should have a reverse feature which should reverse direction and let you backup. "Lock" the first few forward stitches by reversing direction for a few stitches then allow it to move forward again. This "locking" technique should be used at the beginning and end of EVERY seam to keep the thread from pulling out. Your paired gores should look like this (BELOW-LEFT) after they have been stitched together. Join two pairs together following the same technique as before (BELOW-RIGHT).
Join the two completed 4 gore sections together for one last seam, again using the same method as before. Sorry, no picture here, but I think you get the drift. You should wind up with a semicircle and something that is starting to resemble a parachute. Hem the bottom edges of your semicircle. Fold and pin the edge about a 1/4 inch. I like to fold it over twice on the larger chutes to make a neater, more finished edge, but once will suffice. Reverse side showing the entire edge pinned up.
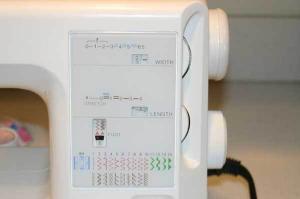
Now it's time to stitch the bottom hem. I use a zigzag pattern for the hem. Machine settings look like this (BELOW-RIGHT).
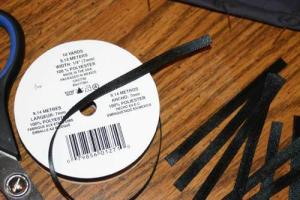
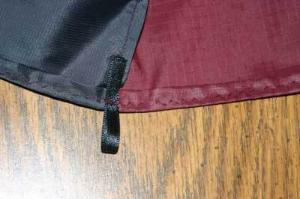
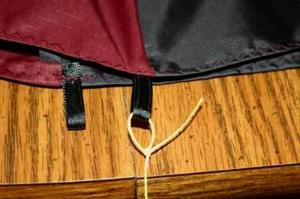
Again, remember to "lock" the thread at the beginning and end. Go slowly and remove the pins as you go. However keep the ribbon loops pinned until you make a pass over them. Remember the reverse feature? Reverse direction over each ribbon loop you come to, adds more stitches over that area and secures the loops better. Then, continue zigzagging to the next loop, reverse zigzag over loop, and so on. Remember to lock your stitch at the very end of the hem. Should look like this when your done (BELOW-LEFT). Trim the excess ribbon (BELOW-RIGHT).
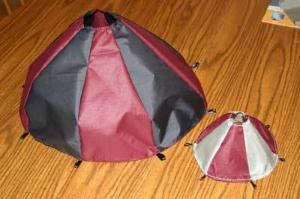
Use the same zigzag stitch as the bottom to hem the spillhole. Sewing the spillhole is the trickiest part because of the tight radius, just take your time and go slow. Removing pins as you go should help. It's time to join the edges of your semicircle together and actually form the chute. This is your last bit of sewing. Pin and attach the gores just like you did the previous ones. Don't forget to change the stitch setting back to the straight pattern you used before. Remember, we have been working on the inside of the chute. Once the final stitch has been made, you can turn the outside-in, or inside-in, or the outside-out, however you want to say it. Here is what it should look like now. All that is left to do is attach the shroud lines. I prefer Kevlar® for the lines, but upolstery thread and curtain cord can be used as well. Each line coming down from the chute to the apex should be about 1.5 times the length of the chute diameter. I hope Micro doesn't mind me using his pic, but here is the shroud line attachment for a six line arrangement. shroud line attachment (6 lines)
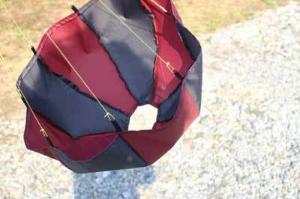
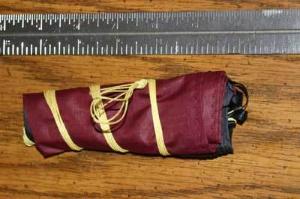
Good idea to use an overhand knot to attach all the lines together at the bottom to keep all the lengths even. I use a bowline knot to attach the shroud line ends to the ribbon loops. This is where your Boy Scout training skills come in handy. You were a Boy Scout weren't you? Bowline knot Here is the finished chute catchin' wind. Rolled and ready to go.
Much of this may be elementary to some, but I hope this helps. Contributed by Craig Zicafoose
What You Can Do |
|||
|
|
 For this demo, I chose to make an 8 gore hemi chute with the upscaled 12" pattern. I think I chose 1.5 for the spillhole size.
  Next step is to start pinning the gores together. Start by pinning the gores in pairs like this...
 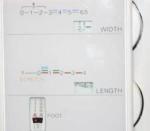 Use a straight stitch to sew the paired gores together. My machine settings look like this...
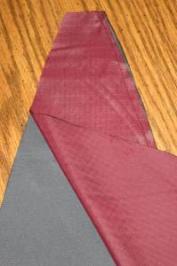


Anne Fleischmann (January 25, 2015)