| Construction Rating: | starstarstarstarstar_border |
| Flight Rating: | starstarstarstarstar_border |
| Overall Rating: | starstarstarstarstar_border |
| Published: | 2011-08-17 |
| Diameter: | 1.33 inches |
| Length: | 28.25 inches |
| Manufacturer: | Estes  |
| Skill Level: | 1 |
| Style: | Sport |
 Brief
Brief
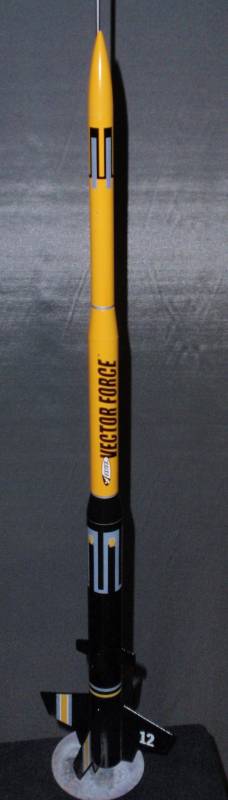
The design of the Vector Force appears to have been inspired by military air-defense missles, but it is not a scale or pseudo-scale model by any means. It's just (to me) a good-looking kit. It is fairly large and uses standard 18mm motors (B & C power). The unique design features are it's two transition/reducer sections and a second set of small "finlets" a few inches ahead of the main fins. Fortunately, the two reducer sections are made of solid balsa and not paper, so there isn't any real chalenge building this model. As a result, this model has the capability to have two seperate payload sections. The kit I bought was top-quality. The tubes were well finished and smooth, and the balsa fin stock was thick, stiff and sturdy. The decals were OK at best though.
Components
This kit includes three main body tubes of varying sizes: BT-55, BT-50, and BT-
20. The model is designed to seperate at the largest tube, and the "nosecone" consists of both smaller tube sections and the two reducer sections as well as the nosecone itself. Upon landing, the cosiderable length of the two smaller sections and the nosecone usually hang down so low that the nosecone sticks into the ground, but only lightly. My nosecone finish has not been damaged (yet). All the usual required solid parts are included, although you will want to throw out the paper shock cord mount and get some kevlar thread.
Construction
This kit was fairly easy to build, as there was nothing unusual about the design. This was my first kit using through-the-tube fin mounts that glue to the engine mount tube, and I like that method a lot. Estes does pre-slot the tubes so that part of construction is a breeze. It is a bit more difficult to make sure you have the glue where it's needed though. These fins are going to stay on the model hopefully forever! The instructions and illustrations were correct and clear to me. As you probably read elsewhere though, throw away the paper shock cord mount and use a bit of kevlar attached to the motor mount and rubber. I didn't do that to this model and I have since regretted it. Come on Estes, when are you going to get with the Kevlar program? I did like the parachute material though, it was a translucent orange, very easy to see and not full of that printed checkerboard design. When really, really high, the small checkerboard patterns just look more gray than orange. Solid colors with no design is best I believe. Also, the instructions tell you to glue the two transition sections together - that's a good idea if you want to ensure that it doesn't seperate in flight, but I much preferred to have a payload, so I just friction-fit the sections together using masking tape to provide a tight fit. This method could also make it easier to repair a damaged tube by simply replacing it.

Finishing
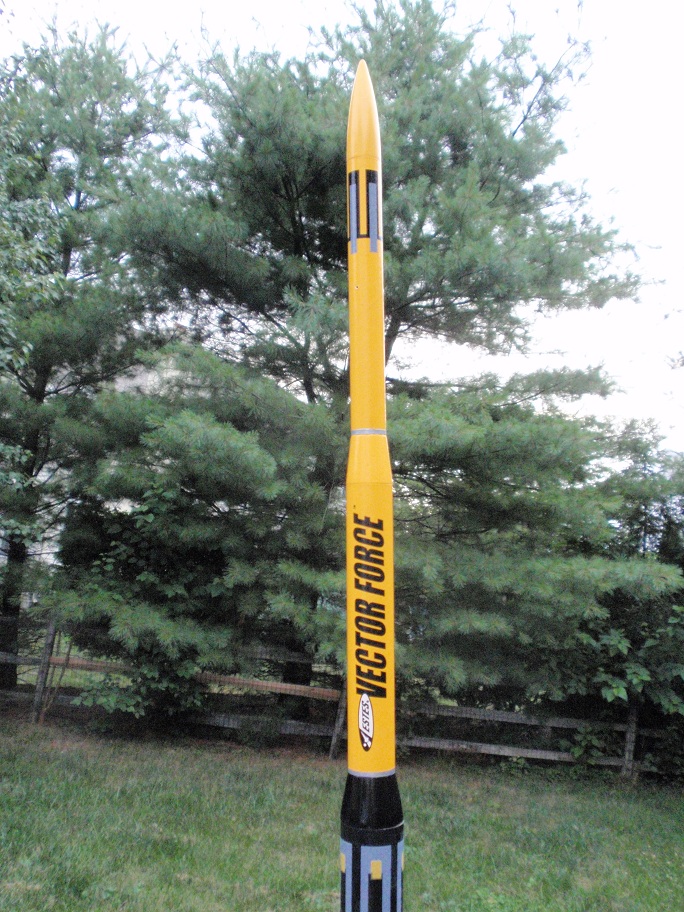
Just like construction, there are no suprises with this kit. Finishing is no different than most other models. The catalog and instructions recommend that this model be painted orange on top and black on the bottom, but the decals included are white, grey and yellow. Because of that I decided to paint the top yellow instead to match the decal color. I believe too many colors on a rocket just looks like you are trying too hard! But that's just me, obviously you can paint it whatever color you like - or not at all. The decal sheet was fairly nice, but my sheet did not have very good alignment of the different colors, so you can see the overlap between the yellow and grey colors. Another small issue is the cool yellow/gray stripes for the fins. As there are 4 fins with two sides each, I expected to find 8 stripes - but there were only 4 of them! To compensate, I placed all four stripes on the fin sides facing the "camera" side - in the same view as the large "Vector Force" decal, oposite the launch lug side. As for the tube quality, I decided to not use a primer and the finish came out wonderfully glossy, no tube spirals at all. I did use many coats of balsa fillercoat on the balsa nose cones and transitions. I added about 4 coats of clear gloss finish over the decals also. I also painted the engine clip and the rear-end of the motor mount silver, it's just my silly thing I do, either silver, gold, or red.
Flight
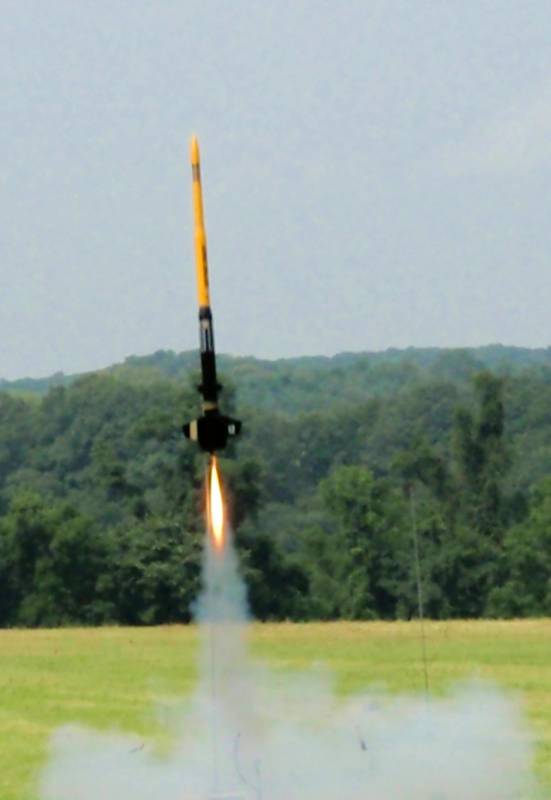
This model flies pretty well. I've never had it weather cock a great deal. I had to add a lot of noseweight to get it to pass a string-stability test though, about 20 grams! (It seems I have to do that to most models - am I doing something wrong here?) Altitude is OK with a B6 (apx. 150'), and much better with a C6 (apx. 400-450'), but not so high that it will disappear. The thick balsa fins and the shape of them pretty much ensure they won't get destroyed on landing. It could survive a smaller parachute if you are worried about drift, but the parachute that came with the model is fine. Since this model flew so well (about half a dozen flights), and seems fairly rugged, I though I'd try it on a Apogee composite motor: the D10-7. That thing took off like a rocket (no pun intended), a few didn't believe it was even a D motor - I wouldn't be sure myself except that I saw the label on the motor. I assume it was a D motor because it reached the predicted altitude - just over 1100 feet. And this is why I regret not using a kevlar shock cord mount: Unfortunately the ejection charge was probably as powerful as the motor and when it went off, it shot the upper sections out with enough force to rip the shock cord clean out of the lower body tube glue joint. The booster side tumbled down OK in soft grass, and the upper sections, with it's reduced weight on the parachute, drifted fairly far - fortunately it wasn't very windy and it landed somewhat close to the edge of the field with a forrest just beyond. Good thing as I had a $50 altimeter in the payload. So if you get tired of a B or C, try the Apogee D motor - but only if you installed a kevlar shock cord mount and use a much longer rubber! I still want to try it with an Aerotech D21 once it's repaired.
Recovery
As stated earlier, the solid orange parachute is fine for this model, even if you are going to add some payload weight. I'm glad the parachute used holes and thread loops instead of just taping the shrouds to the parachute like Estes did in the "old days". The hole and loop method is much more secure. The shock cord mount should be replaced with Kevlar - no question.
Summary
Pros: I like the aestetic design. The quality of the kit and it's components was very good. The price was good also. The through-the-tube fin mounting is very good. Overall I really like this model.
Cons: The shock cord mount is not very good - that's a major issue for an otherwise fine kit. The decals were not so well printed and didn't have enough fin stripes - but that's a minor issue.
Other Reviews
- Estes Vector Force By Bill Eichelberger (January 24, 2015)
The Vector Force reminds me of another recent Estes offering, the Stratocruiser, in that they're both rockets that Estes got right from start to finish. I've built them both and painted them as close as possible to the face card, and the results have been two of the better looking recent rockets in my fleet by far. Both are fairly easy to build 4fnc birds, but sometimes that's ...

 |
 |
Flights


|
|


|
|
Rich DeAngelis (November 27, 2011)
If there is any wind at all, I would fly this on a B6-2 and not a B6-4. If you have a decent size field, a C motor should still remain below 500 feet. Use a -3 if there is any wind, because it can weather-cock a bit much. On a calm day, a C6-5 would be OK to use.