Notice the white Redstone tanks at the bottom, this is the Skylab Saturn 1B. The earlier Saturn 1Bs had the alternating black/white tanks. The paint pattern on the center corrugated wraps are also a bit different.
All the parts are in the above picture. The capsule and tower are the same parts found in the newest Saturn V kits. The LEM shroud is slightly different.
Far left: Two new vacu-form corrugated wraps
Center: A new scalloped tank shroud molded in styrene plastic.
The Asteroid Hunter was available from 2012 through the 2016 catalog.
I remember seeing it in the Sport Rocketry magazine when it was being developed by John Boren. The magazine picture showed a prototype. This was one of the new Level 5 builder's kits.
I was interested in building it, but was concerned there was only one recommended engine, the C6-3. Now with the new Estes C5-3 and 18mm Quest Q-Jets I started to track one down.
I found and ordered an Asteroid Hunter kit online from a School Supply Company. I never got a confirmation email. I waited for the package to arrive - nothing. My account was charged!
I called the bank, they followed up and got me a refund.
I kept an eye on some Ebay listings and bought the kit for a reasonable price.
I made a blog post about the failed mail order and heard from three different hobbyists offering to donate a kit to the blog. I was surprised and thanked them for their generosity.
Get ready for one of the more interesting blog builds!
In the past I've built the full size Estes and Semroc Mars Lander (Sorry, not on this blog) and the Estes Mini Mars Lander: CLICK HERE. Now things are going to get even smaller - This looked like a challenge and I have plenty of MicroMaxx motors to fly it with.
Here's the front and back of the package.
The largest square white pieces are the Leg Alignment Tools, at the bottom of that piece is the engine mount depth gauge and the three nozzle laminate rings.
The parts of interest, clockwise from the upper left: Printed card stock trim pieces. Strut support pieces (laser cut thin card stock) 3D printed nose cone Nozzle base disk (1/8" thick balsa) Lander Legs (1/32" thick basswood) Center - Antenna disks (basswood)
"The first flying kit of a flying saucer ever produced!"
A well engineered design. Stable (but labored) boost. At apogee, the model flips over and descends landing on three wire antenna legs. Glow in the dark accents were included, "Perfect for display in your room!"
Above is the first catalog page showing off the Centuri Alien Scoutship Flying Saucer. This catalog was the second printed in a large newspaper style. I remember being disappointed by the new catalog format. This page is from Ninfinger's: CLICK HERE
The model I'll be building was posted on YORF.
'The Mole" took the time to do a 75% size downscale. Here's his first post from November, 2015:
"This is a cardstock / downscale combined model. The Centuri Alien Scoutship Flying Saucer has always been one of my favorite kits. I had a couple when they came out years ago. The design to me was so well thought-out. Centuri gave us the basic flying saucer that most flying saucers have been designed on since. So I set out to clone the Centuri UFO. I know, others have done this. I decided to take a different approach to my clone.
"First, I decided to draw the elements that had originally been embossed. Second, I down-sized the scale to fit on a 8.50 X 11.00 sheet of card stock for printing. Third, I wanted to share this design with anyone who would like to build their own. At the end of this build thread I will send the PDFs to Scott so he can post them for sharing. It's all right with me if anyone wants to recolor or add their own touch to the drawing. All I ask is share it here. The size of the craft is around 75% the size of the original Centuri UFO. (7 inch in diameter) I used the BT-20 engine tube. If you want to fly on a smaller engine use an adapter. Some parts are printed on 110 cardstock, and some parts are printed on adhesive-backed shipping label paper as noted in the thread.
This smaller version can be printed on standard 8 1/2" X 11" 110 lb.card stock. Two of the four sheets are printed on self adhesive paper.
I've downsized the antenna landing legs and drawn 75% reduced "wire form retainers" if you'd like to add them to your build. This printout PDF is available to Patreon members.
Email me at oddlrockets@bellsouth.net and ask for the Centuri Flying Saucer PDF.
NOTE: If you want to add the antenna/legs you will have to trim the outside edges of the "C" and "L" internal fins to clear the extra width of the wire and card stock retainers. The re-fit of the internal brace fins took some extra time.
The original kit diameter was a little over 9". This version is about 7" round.
On Frank's build, the 2 3/4" long engine mount tube was even with the fin tops and extended out the back. Mine will be even with the rear of the fins with the mount over the top by 3/8".
This is 3F/NC rocket a little like the old Estes Scrambler Egg Lofter.
The original Scrambler was BT-60 based with a three engine cluster. Now with 24mm D engines, a cluster isn't necessary to give an egg a good ride.
This rocket has an overall BT-65, 1.8" diameter body. There is no reducer from the main body to the clear payload like the Scrambler. The Scrambler had a BT-60 lower body, a balsa adapter joined up the BT-65 sized (1.796") clear payload tube.
This nose cone and coupler are also used in the Olympus model sold through Hobby Lobby.
The parts of interest: The new plastic nose cone and attached coupler. The light green clear payload section The "Green Eggs" sticker Three fins laser cut on 3/32" balsa. These are close in shape to the old Scrambler fins.
I'm not a big fan of stickers. New decals will be drawn up. Hey older modelers - In this build, paint colors and home print decals will be in the original Scrambler decor! To see the first Estes Scrambler egg lofter: CLICK HERE
This will be fun! A New Way square tube Micro Maxx kit with a clear payload section. This is a downscale of the regular sized New Way C-Thru rocket.
The square tubes, clear "payload" section, nose cone and fins are 3D printed. 3D printing has come a long way, these are some of the smoothest parts I have seen.
Here we go - now on sale on the Estes website, One of the more anticipated new kits, the very detailed Destination Mars - MARS LONGSHIP.
The kit parts are packaged in a tall box.
Two bags of parts and one long BT-55 tube.
The bag on the left contains: The plastic details that glue onto the tube The large, thick walled tail ring Laser cut card stock details Engine mount tube Laser cut balsa Two sheets of decals.
The bag pictured in the middle: The big plastic nozzle The one big ring again (repeated) Separate instruction sheet showing decal placement Long molded nose cone
The shock cord is already installed! This is a different attachment - the low end goes through a slit in the body tube, then folded up along the outside. The launch lug strip is glued over the shock cord holding it down against the tube.
The nose weight is already in place. Under a bright light you can see the clay weight inside the nose cone.
The nose cone weighs just over one ounce.
The engine mount doesn't have a traditional motor mount tube. On the left is 1/2 of the fin can/motor mount assembly. Notice the two central vertical ribs. There are two more ribsi n the opposite half of the fin can. When the engine is slid in from the bottom - the wedge shaped ribs direct the top of the engine to fit and "lock" into that circular groove in the upper centering ring.
The stocky body, orange and white roll pattern set this one off! The parts were all of good quality. 3" diameter heavy slotted tubing and 18" parachute.
Parts of interest: That BIG nose cone Peel and stick metallic trim bands 29mm engine retainer rings
There is also a "sport" decor. Buy the kit, email Estes and request the sport decal. The black stripe wrap decals are included on the kit decal.
You could use the Viking fins, but it turned out they were a little short. I'm building two different Vector Vs with different fin positions on each. One model will have the longest fin side glued to the lower BT-55 tube. The BT-55 tube on the Vector V is 2.3" long, the Viking fin root length is closer to 2".
I drew up the fin tracing and enlarged it to the correct 2.3" root edge length. The interior dashed line is the Viking fin. I'll use this larger fin template on both builds.
I was curious if the Viking fin shapes were consistent. Older die-cut style fins weren't usually uniform, the blades in the die block could shift over time.
On the right is the back side of the fin sheet. the blades were probably old, they cut didn't go all the way through.
After some careful stacking - You can see how off the cuts are. You could clean them up with a sanding block. I'll cut new fins using the slightly larger Vector V size.
The back side of the face card tells the story. I would assume more "Designer Signature Series" kits are in the works.
Parts are good quality. Parts re few, typical of a small featherweight recovery model.
This was a pre-production kit, the nose cone was not yet supplied. I understand the balsa nose cones were turned by BMS.
Parts of interest: At the top, the fin "weights". On this version, the weights are laser-cut card stock, not cut from lead sheet.
The original plan called for BFS-20 or 1/16" stock. The fins in the new kit are 3/32" thick, the fairings are 1/16". The center lines are lightly laser cut.
The Orbital Transport Laboratory was the June 1971 Design of the Month winner. Designed by Ted Nomura, and featured as Plan #73 in the Model Rocket News - Volume 11, Number 2. Ted Nomura still lives in Las Vegas and is a professional artist. He has drawn many comic book covers. From JimZs, here are the instructions: CLICK HERE
This design was a game changer. It was probably the first design to incorporate a "solar panel" look on the fin sides. The Centuri Skylab used the solar panel fin idea a few years later. The root edges of the fins were not glued directly to the body tube but were held in place with dowels. The dowels were slid into drilled holes and glued to the engine mount. This might be the first design to use a TTW (through the wall) fin attachment.
And . . . probably the only D.O.M. winner to be featured in a catalog. Look above the number 3 on the cover of the 1972 Estes catalog. The M.R.N. instructions were printed in black and white. The catalog showed the model in color! This is going to be a fun build.
I remember getting this 1970 catalog in the mail! The slick, new Orbital Transport was featured on the cover. This was Estes kit number K-42 and sold for $3.25. The design was by Wayne Kellner. The kit was sold from 1969 through 1985.
No die-cut or laser cut balsa on this one! All 36 (Yes, I said 36) pieces of balsa were traced from patterns and cut by hand. Launch lugs and stand-off dowels were also cut to size.
The O.T. is still a fun launch. At ejection the orbiter usually glides well, circling around the booster descending under a parachute.
Estes re-released the kit in 2002. Surprisingly you still had to trace and cut out all the balsa! Semroc has also released their version of the full size O.T. All the balsa stock is laser cut, the parts are notched for better alignment and easier assembly. This next blog build will be their recent Micro Maxx version. Semroc claims it reaches 220' with a MMX engine. I don't think it'll get that high - I have yet to launch this finished MMX Orbital Transport. About ten years ago I built a downscale carded version of the O.T. Boost was straight with a A10-3t engine. At ejection, that heavy card stock glider didn't glide!
It's BT-55 based and uses the interceptor nose cone. It's a builder's kit, some extra time will be spent on the jet engine assemblies.
All the parts - That's a pre-assembled 15"parachute.
The balsa sheets hold the wing and jet intake pieces. One of the new screw on engine retainers is included. The BT-20 internal engine mount tube doesn't have a glassine clear coat. This tube is enclosed and won't be seen. The great Interceptor nose cone.
Phantom Express won't get off the ground after all. Boeing has withdrawn from Experimental Spaceplane (XSP), a U.S. Defense Advanced Research Projects Agency (DARPA) program designed to increase the nation's access to space.
The tube wraps are rolled up, inside the large 40mm diameter Quest tube.
Parts of interest: Some of these will be switched out.
On the left are the center core sheet for the 3 ply laminate fins - 110 lb. card stock, very thin. The engine hook isn't spring steel. The thin yellow motor mount tube was cut short, by about 3/16". Three small SRB nose cones are there, but I only got one nose cone shoulder coupler! The centering ring outside diameter is small, a loose fit in the main air frame tube.
According to the Semroc website - The first version of the Excalibur was introduced in the 1972 Centuri catalog -
The Semroc website says it had streamer recovery, but it did use a 12" parachute. In 1973, a booster was added, this kit variation was renamed the Excalibur 2. The Excalibur single stage was on sale up to 1980. The two-stage version was sold until 1981. The blue and black paint scheme above was never that interesting to me, except for the chrome wrap that Centuri included in some kits at that time.
There's a second paint scheme that is difficult to figure out. It's in the Centuri Rocket Times newspaper print catalogs that started in 1975: CLICK HERE There was still another catalog model that was white, green and black - not my favorite.
Here's the decor I'll try to duplicate. It first showed up in the BIG SHOT starter set in the 1980 Centuri catalog.
TRIVIA: The Excalibur used fiber fins or as Centuri called them - "Fibre", the British spelling of "Fiber". These were die-cut from the same thick card material used for centering rings. Die-cutting left you with rounded off edges on one side, the other side had squared edges. The Semroc Retro Repo kit I'll be assembling has laser cut fiber fins.
Estes hasn't produced a cluster kit in a while. This one is different, two parallel tubes and two streamers for recovery.
Estes does recommend using their Pro Series II Launch Controller for reliable cluster ignition. The fins on this one have a large surface area. This might help with a vertical launch if only one engine ignites.
Parts look good! It's a little like two 2 fin nose cone models side by side.
Pictured above is a pre-production kit. Everything was fine, except the orange in the decals was a bit light. The decal register was also a little off. Estes has improved decals coming for the kit release.
Lots of figure eight centering rings. Note the small holes near the center of the "8". These are used in place of launch lugs, sliding right down the launch rod.
Two of the new screw-on engine retaining rings Two shiny chrome streamers.
The Semroc V2 is a clone of the old BT-55 Based Estes V2 kit. It looks like the Semroc V2 kit has been discontinued. ASP now offers a BT-55 V2 kit along with 13mm and 24mm engine kits.
I first saw the Estes V2 in a "temporary" Estes catalog around 1969. TRIVIA: Estes had run out of their standard sized catalogs and produced something to get them through a very busy sales period. The catalog was made up of black and white prints, four reduced kit descriptions per page.
I was immediately attracted to the V2 and ordered the kit a short time later. I noticed how much stronger the BT-55 tube was compared to other BT-20 models I had seen up close.
This version was from the Semroc X-Series. A full color face card and parts list is included in the Semroc kit. The instructions are to be downloaded from online sources like Jim Z's. To see the Estes V2 instructions, CLICK HERE I had started this kit and for some reason set it aside. The engine mount is glued in the tail cone with a Kevlar leader. The smaller "scale" fins were cut out and shaped. The washer weight and screw eye are glued into the nose cone. The parachute is missing. We'll take it farther forward from here -
I won't be bidding on this one, I can pretty much clone it from spare parts. The instructions and full size templates are available at oldrocketplans.com: CLICK HERE
I searched some other websites and found a build by Nick Esselman on rocketreviews.com: CLICK HERE
I'm not very familiar with Seattle Rocket Works. Apparently the design rights were transferred to Lawn Dart Rocketry.
This is an interesting design, like a Jayhawk and Bomarc had a child. The back end has built up fairings around the fins. On the underside is a ramjet intake. Along the top is a half round conduit tunnel.
There is lots of pieces to form, the details are out of the ordinary. The upcoming build won't be a direct clone, I'm making a few changes while keeping the feel of the original kit.
I always thought it was a matter of time before Estes produced a Mercury Little Joe kit. Here's the face card and parts in the bag from the back.
Here's the parts for the booster. All seem to be of high quality.
The red plastic parts are the capsule and tower. The white parts are the new scale nozzles.
Some interesting parts, clockwise from the left: All the centering rings. Notice the wheel spoke cutouts to keep the weight down. The decals with the stenciled "UNITED STATES". Multi-pieced balsa fin parts. Card stock fin covers. Laser cut card stock shroud.
I was at the Dollar Tree store picking up some cheap snacks. I found the spider web candy dish that George Gassaway turned into a successful saucer rocket. I almost picked one up, but saw this instead.
It's a small cardboard casket. Strong, hollow and fairly light. The graphics were good. The rocket "wheels" starting turning in my head.
When I got it home I started looking for line drawings of skeletons.
Here's a clean skull I found online.
Now . . . how do you combine a coffin with the skeleton?
I want to call this one "Gry-fon" but it is pronounced "Griffin". From Wikipedia: The griffin, griffon, or gryphon is a legendary creature with the body, tail, and back legs of a lion; the head and wings of an eagle; and sometimes an eagle's talons as its front feet."
Here's the kit parts in the bag -
Some have posted they see a resemblance to the OOP Edmonds Aerospace kits. The new Gryphon is a rear wing, canard design but that's where the similarities end.
Also included in the kit is the Launch Controller Wire Standoff. This standoff helps hold the controller wires and clips away from the lower wings of the glider. A smart addition. On the right are the black and white decals.
The Sasha was one of the first models built for Estes. I waited until the kit was released before starting a blog build. It's a two stage, BT-60 based model with a Soviet Military decor.
Parts are of good quality. The tumble recovery booster has through the wall fin slots.
Recovery is by 18" parachute.
The long plastic nose cone / tail cone has been seen in a few other kits.
The parts of interest: The booster centering rings are punched for venting and more reliable staging. The kit includes a 24mm engine retainer. On the lower right is a "staging cone" that helps direct the booster flame into the upper stage engine nozzle.
There's a pretty good sized water slide decal sheet printed in red, black and white.
As I mentioned before - The two main, smaller diameter body tubes are the thicker walled ST-7 tubing. The other BT-50 style tubes look to be thicker walled ST-9 tubes. When I got the parts last year, the decals weren't included - yet. The new production kits do have decals and embossed metallic trim.
Parts of interest: A Midget style BNC-50J style nose cone What do ya' know - An Odd'l Rockets Parachute! In the center are some laser cut thick cardboard rings and trim pieces. BIG Balsa wing fins. Two round end tapered toothpicks. The original Estes kit had dowels. In the middle bottom is an old style black fish paper coupler. There is a hole for the Kevlar tie. On the far right is a clever system of fin and body tube alignment tools.
"The Centuri Russian SAM-3 was first advertised in the Centuri 1878 catalog with an availability date of May 15, 1978. It was one of the four models in the new Strike Force line. It was loosely based on the actual Russian SA-3 surface-to-air missile of the Cold War era. Photos of early prototypes were closer to scale than the final released version. It was released as Catalog No. 5332 and retailed for $3.75."
To see the Centuri Strike Force catalog page: CLICK HERE To see the original Centuri instructions: CLICK HERE
"The Semroc Retro-Repro™ SAM-3™ is very faithful to the released version. It is a semi-scale model that preserves the flavor of the Strike Force series. We released it as a special kit for our SAM members. The decals do not reflect either the original Russian or Centuri version, but feature the SAM mascot. Added nose weight is provided for better stability."
The Semroc SAM-3 was released to SAM (Semroc Aerospace Modelers) members only. I'm finally getting around to building it.
The only other Strike Force kit I built was the Centuri Israeli Gabriel and Cruise Missile. The Gabriel was one of the few models that survived in my old bedroom until 39 years later.
The Estes Black Brant II kit was available from 1986 - 1998. This model was the second design from the Canadian sounding rocket program. I always thought it was a clean, classic look with a very interesting roll pattern. BT-55 based and D engine powered. Recovery was an 18" parachute.
Estes brought back their BT-50 based Black Brant III kit last year.
Somewhere along the way I picked up two Estes Black Brant II kits. These were obviously from different batches and different years. The earlier kit on the left had water slide decals and a parachute you had to assemble. The kit on the right had stick-on decals and a assembled parachute. The instructions were different in both kits. All other parts were the same.
Interesting to note the Skill Level was "3" was on the older kit with the water slide decals. The Skill Level 4 was the rating on the sticker version.
I actually started this build last year and set it aside. There were some concerns with the tail cone, fin fit and antennas. I doubt the toothpick antennas would stay on the after the first launch. There was some trouble shooting on this build.
Here's almost all the parts I'll need for the build.
I didn't know how I was going to make the intakes. I should have included a short length of BT-5 tubing. Making the intakes fit will be the difficult part of the build.
The model will use 12" diameter from the Odd'l Rockets multi-size parachute.
The vacu-formed canopy is the same used in the Odd'l Fighter Fleet kits. This fantasy model will be around the same size as the other two jets, the F-16 and F-104.
This simple drawing is all I really need to proceed. Much of the work is already done using the Estes instructions. There might be a single additional fin at the bottom.
The wing root edges will meet over the top of the body tube. In the Estes Stealth kit, the root edges of the wings glue into a recess "slot" in the blow molded body.
This was the first real catalog I received from Estes. This 1970 catalog cover had a great impression on me. I had to have that cover rocket!
By the time I requested one, Estes had ran out of their 1969 color cover catalogs. They ended up printing some "get-by" pages in black and white. Four catalog pages were reduced and crammed onto 8 1/2 X 11" pages. The illustrations and copy were small and hard to read. This 1970 catalog was he first time I could make out detail on the models. The Orbital Transport was probably my fourth or fifth rocket.
Here's the page from the kit introduction in the 1969 catalog. The original retail price was only $2.50. The price jumped to $3.25 in 1970. Wayne Kellner did the amazing design work. The kit was in production until 1985. It was released again for a short while in 2002.
A mail order to Estes took 10 days to arrive back to our home in Watsonville, CA. I remember being home when the white Estes box came, it must have been a Saturday. At that time this was a difficult build for me. I've wanted to tackle it again for some time. Semroc has brought back the kit. I'll refer to this one as the Estes version, I'll be building it from the original instructions printed from the JimZ website.
The Semroc Snake Jumper was a Goony based on the old Centuri Evel Knievel Sky Cycle rocket. The instructions are interesting - CLICK HERE Check out the rear "positioning disk" and shock cord mount that attached to the engine mount. The model also had die-cut card stock fins, cut from the same material as the centering rings.
The Centuri kit was available from 1975-78. It probably would have had better sales if the Snake River jump was successful.
The Centuri kit was 1.3" diameter, the Semroc Groonie is 1.8". Semroc called them a Groonie as they were grown up Goonys. Centuri used 13mm engines, the Semroc version uses 18mm.
Carl McLawhorn at Semroc based his designs on the original Estes Goony drawings that were changed into flying brooms and rabbits before production. The original Goony drawings remind you of the old CarToons magazine art.
The Semroc Snake Jumper is 1" shorter and stubbier compared to the Centuri Sky Cycle. The decals reflect the original kit except the face of the "pilot" decal is angrier.
I'm basing my C engine Egg Lofter design on the old Competition Model Rockets Robin design. To see the CMR catalog: CLICK HERE
I'm really doing a lot of guessing with my competition designs. I know you have to keep them light and aerodynamic. The only NAR competition I did was in 1975 and 1976. Over the years some things have changed, other elements haven't really changed at all.
I'll base my model height and body tube diameter on the Robin design. Note the CMR tube walls were a little thinner than the equivalent Estes sized tubing. I'll be using Estes tubes in these builds.
The model itself is very simple except for the Egg Capsule. Years ago, CMR was the main source for lightweight, vacu-form nose cones. CMR also made the larger egg carrying capsules.
Apogee now sells vacu-form capsules. This parts pack has shoulders for both 18mm and 25mm models.
This build is one I put together for the recent NARAM. After a two hour tour of Estes, I got back to the launch field too late to fly it!
The FlatCat Boost Glider was designed by G. Harry Stine back in the earlier days of model rocketry.It is arguably the quintessential example of a standard front engine pop-pod boost glider, designed to be easily built and flown by model rocketeers who had no previous experience with gliding models.
The design was originally published in the August 1969 issue of Model Rocketry Magazine in the ‘Old Rocketeer’ column.In 1970, the glider was produced in kit form by Model Products Corp.The FlatCat was also featured in the 4thedition of The Handbook of Model Rocketry.
Though the basic design appears rather clunky by today’s competition-grade standards, the FlatCat proved to be quite popular for use in NAR sanctioned contests in the late 60s through the early 70’s.Mr. Stine himself flew one to take top Senior Division honors in the Sparrow (A-engine) Boost/Glide event at NARAM-11 in 1969.
Stine made the comment in the Old Rocketeer article that the FlatCat was a good solid design which could be used as a ‘test-bed’ for experimenting with boost/glider modifications.
As for me, I built two of these birds back in 1973, and remember how much fun they were to fly.One of them was modified to fly as a variable geometry rocket/glider by utilizing a sliding engine pod.I’ll describe these models in greater detail in a future post.
Anyhow, for a little more insight on the history of the FlatCat, here are a couple of interesting links:
According to the BMS website, the BMS/Alway Saturn V kit has been out of production for eight years. The picture above is from a build I did a few years back.
This is a very well engineered kit. The stage 1 and stage 2 tubing is a Centuri ST-20 at just over 2" in diameter. The finished model stands 22" tall. It's larger than the BT-60 based Dr. Zooch Saturn V and about half the height of the Estes Saturn V. This version is a more manageable size and uses 18mm B and C engines. It is launched with the four F-1 outside nozzles in place. It's interesting to note this is not the moon landing Apollo 11 rocket but the Saturn V from the Apollo 15, 16 and 17 missions.
Here's another build for contest flying at the August NARAM. There aren't many competition boost glider kits available. This one fits the bill for a 13mm A engine model.
This Apogee produced kit is a downscale version of the Chinese Sky Condor boost glider. I have built and launched the larger Sky Condor with good success. The larger Sky Condor B/G kit has tung wood parts instead of the traditional balsa we know.
This picture from the Apogee website.
All the parts: The instructions are very well drawn and the steps well explained. The BT-5 pop pod tube seems long. An engine block is included but not really needed for a competition model
Parts of interest: The boom (glider body) is laser cut from spruce. The white parts are cast at Apogee from urethane resin. They are well molded with no bubbles. 3 feet of 100 lb. braided Kevlar shock cord. 2" X 18" Mylar streamer 1/32" thick (actually thin) balsa horizontal and vertical tail pieces
This model build was a request. It's been a while, I get around to them sooner or later!
There's not much background information on this rocket. I had left the hobby in the late 1970s, on the road as an entertainer since 1978. These two were introduced in 1980 and featured on the catalog cover. Both kits were in production for only two years. These were introduced as "The Good Guy" and The Bad Guy". I remember thinking the Dragon Ship 7 looked like a bulldog. At first I didn't like the design, it grew on me over the years. Both designs were remind you of Buck Rogers, especially the trailing fins and engine tubes on the Excalibur.
After checking the Semroc Classics page I saw Keith Niskern did the design. Mr. Niskern worked for Centuri and did the development of their Saturn V kit. CLICK HERE to go to the Semroc Classics page. If you are not familiar with the Classics page, on the left side are blue boxes with small illustrations of rocket parts. Click on it and another page will list the kit parts.
Big and Burly. The parts are standard and of good quality.
Parts of interest: The big PNC-60AH black plastic nose cone. Two very short launch lugs Gold and black decal sheet (more of this in the next post) Red and blue stars and bars decals (the red bars are the original kit length. They were shortened in later kit runs)
There is some minor differences between the original and re-issue kit construction: FIN SHAPING OLD: Leading and Trailing edges are rounded, root and outside edges are left square NEW: Just the leading edge is rounded
LAUNCH LUGS OLD: Small rear lug is even with the end of the body tube. NEW: Small rear lug is 3/8" above low end of the body tube. Front lugs are 4" from the top of the body tube in both kits.
CENTERING RINGS OLD: Rear Centering Ring is 3/4" from the end of motor mount tube. NEW: Rear Centering Ring is 3/8" from the end of motor mount tube.
OLD: Front Centering Ring is 1/8" from the end of motor mount tube. NEW: Rear Centering Ring almost even with the end of motor mount tube.
ENGINE MOUNT STUFFER TUBE OLD: BT-20B is 8.65" long - NEW: Engine Mount Tube, #030323 is 7 3/4" long
Back in 1976, I received a letter in the mail from Silver Spring, MD, dated October 16th and signed by a gentleman by the name of Herb Desind. In the letter Mr. Desind stated that he was a member of the Starlords International Association of Rocketry (This was a correspondence-based club run by Dennis Bishop out of Hawaii), and had found my name on the membership roster, noting that I lived in Colorado, the perceived heart of model rocket country. Herb stated that he was an avid flier of the Cineroc movie camera, and that he sought contact with model rocketeers all over the U.S. and the world. He went on to say that he often sent Cinerocs and booster rockets to folks at many locations with the idea that they could take some interesting Cineroc film sequences for him at various scenic locales. This letter was the beginning of a correspondence friendship that lasted well over two years. I never had the opportunity to meet Herb in person, but we had several phone conversations, not to mention the dozens of letter communications that passed between us. During this time period, Herb sent me a booster rocket - an Estes Omega upper stage which he re-named 'Mountaineer', along with one of his own specially modified Cineroc cameras. I flew the camera for him several times, after which I would send him the film cartridges. He would process them and always sent me back a copy. Also, at Herb's request, I scoured the local hobby shop scene to find new Cinerocs for him. He was definitely a voracious buyer and user of the product! All told, I remember locating and purchasing a total of seven in the Colorado Springs area, which I sent to him, and for which he always re-imbursed me. A short time later, Herb sold me two of the cameras, equipped with his own special modifications. Unfortunately, I lost touch with Herb in the early 80s. A short time later, in 1985, I exited the model rocket hobby. Establishing a home, career, and family took precedence over model rocketry. Sometime in the mid-1990s, I toyed with the idea of picking the hobby back up (BAR-ing in today's parlance). I began perusing the internet to see what the state of model rocketry was, since I hadn't kept up with it in over a decade. It was then that I learned that Herb had passed away. I was greatly saddened by that. What made me even sadder was the fact that, when I had sold off all of my model rocketry stuff in 1985, one of my Herb-modified Cinerocs was in the lot. I still kick myself in the butt for that one. If I could only get my hands on a time machine.... Anyway, that's all water under the bridge. Spilled milk. Etc., etc. I still posses a notebook containing all of the correspondence and photographs that Herb sent along. I still have the memories of my friendship with that remarkable individual. I will now share all of that with the modern model rocketry community through this new blog series. I hope some of you readers who knew Herb will enjoy this latest offering. Stay tuned.
Anyone who has been into hobby rocketry for a length of time has heard of Douglas Shrox - "The Master of the Dark Art of Rocketry". Shrox is legendary for his exotic designs, many of which have been turned into kits offered by Apogee, e.g., the Orion, the LexJet, the Sea Sting, the Stonebreaker, etc, etc. There is also some of his work published in the Apogee Peak of Flight newsletter, free for download; however, you need RockSim or Open Rocket (which can import RockSim files) in order to open the designs, extract the parts lists, and print out the fin patterns. I particularly liked the Bolaero, an Earth defense missile, and built it several years ago - it flies great! The downside to all this is that some of the plans (like the Tarmon) are missing, having fallen into Internet voids over the years. Hopefully they can be recovered by some enterprising sleuth.
The orange Rustoleum paint I applied to the Marauder yesterday did not turn out so well - I have some bubbles and a "cottage cheese" problem on the lower body and a couple of fins, which means sanding and more paint later on in the week when the current paint is fully dry. Feeling a bit frustrated, I sat down at the computer and started looking for something else to build. Nothing on my kit list appealed to me (though I should have considered the Trident or Starlight, which are on the 2018 build list). However, I did run across a Shrox design - the Sniple - stashed away on my hard drive, which caught my imagination with its Asian missile looks.
The Shrox Sniple (Click to enlarge).
I noticed that the Sniple had rather small fins, with one set being located fairly far from the rear of the rocket - not very stable. Sure enough, the RockSim file showed almost 30 grams of nose weight to insure stability, which means it's gonna fly like a pig - only about 180 feet on an A8-3. I also noticed that all that weight gave about 5 calibers of stability, so I kept reducing it until Open Rocket showed about 2 calibers with a C6-5 loaded - which occurred with 10 grams added to the nose. Much more reasonable, and a nice improvement in altitude. Still, I didn't quite trust the results - the rear fins look very tiny - so I loaded the modified file into RockSim, which produced a near match to the Open Rocket results. I feel better with both programs saying the model is stable, but the proof will be in the flying.
The Sniple in Open Rocket (Click to enlarge).
It's raining all day today, so I am gathering the parts to start building this little beauty. It appears to be the perfect project to occupy my time over the next couple of rainy evenings. If anyone else out there is looking to build something from scratch, I heartily recommend one of the Shrox designs (see post 65 in this thread) - they are very cool fliers!
Open Rocket visualization of the Sniple (Click to enlarge).
Here's yet another kit version of the Little Joe II. I first saw a "Littler" 1/100th scale Little Joe II in the 1971 catalog. The page to the left was from the 1972 Centuri catalog. Many agree this was the best catalog ever produced. To see it: CLICK HERE
At that time I couldn't afford the BIG 1/45 scale Centuri Little Joe, priced then at $17.95. This smaller Little Joe II kit was a mere $3.25.
It seemed attractive - No Painting Required! Corrugated metallic and pre-printed roll pattern wrappers. Even the fins were covered with self-adhesive silver.
Here's the face card picture from the Estes reissue kit. It uses the same size capsule, decals and upper body wrap from the Centuri kit. It does not include the chrome body wrap or fin covering material. The Centuri kit had an 18mm engine mount, the Estes has a 13mm mount. The Estes kit was only available from 1991 - 1992. It sold for $11.99! To see the Estes catalog listing: CLICK HERE
I finished up an Estes Saturn V build for a client. If you have a kit, look close at box picture. It is a picture of an actual build and not a C.G. image! Here's two things that could see improvement.
On the upper transition there are four raised "nubs". I assume those are some sort of release mechanism for the transition to open up. On the box picture they are painted black, they should be white. Whoever built this for Estes took the easy way out, but the mask can be done. The inset picture shows the recent build with the raised areas in white.
The rounded top of the fin fairings end up being raised above the low wrap. Look to the left of the "A" in USA. It looks like there is a black line around the top. The instructions don't mention it, but use some of the scrap plastic from the wraps to fill the gap. Trim and sand, then fillet - Done!
I've always like the D Region Tomahawk, a clean looking sounding rocket. The first on I put together was the old Competition Model Rocket version. I remember (unsuccessfully) trying to emboss rivets on the upper bands.
This Aerospace Specialty Products kit should be much easier. Smaller with less detail, still capturing the feel of the real thing.
Parts are of great quality. My past experience with ASP kits have been very good. The ASP 18mm Corporal was a favorite build. That craft stick is used to apply glue inside the tube for the engine block.
Parts of interest: The yellow engine block spacing tube. Inside the tube is the rolled Kevlar and elastic shock cords. 1/16" thick laser cut basswood fins. Fin attachment plate decals printed on white water slide paper. WIDE, plastic streamer recovery.
Here's the Little Joe I remembered wanting. The BIG 1/45 Scale Little Joe II from the 1969 Centuri catalog. To see the catalog, CLICK HERE But $12.95? All I could afford was the smaller 1/100th scale Little Joe II.
The fin fairings and some trim was vacuum formed. They were lightweight but fragile, much like the Centuri Saturn V fins and fairings incorporated into the Estes re-issue Saturn V kits.
The "metalized" wrap was pre-installed at the factory. To see the original Centuri instructions: CLICK HERE
The body and capsule came down separately on two 24" parachutes. A three engine cluster. The recommended engines included three A8-3s! The Estes reissue capsule and tower used the molds from the original Centuri kit.
According to the Vol. 3, #1 issue of the Centuri American Rocketeer, Centuri used some scale data from Al Kirchner's 1/30 scale model. To see that issue, CLICK HERE
I'll be using a lot of construction tips from from the TRF builds of James Duffy and George Gassaway: CLICK HERE
Well, I thought it might work! I bought two Estes STM-012 kits on Ebay with the hopes of kit-bashing one of them into an AMRAAM. It never even occurred to me that the STM-012 model would have three through-the-wall fins. The AMRAAM has two sets of four fins. I would have to buy a couple new lengths of BT-60 to do the conversion. That, and the STM-012 nose cone was long!
So the kits sat for a few months with me wondering what to do with them. Then I remembered this design from Madcow: The AGM-33 Pike. I've always like the looks of this one, I did the instructions for their 1.6" diameter kit. This won't be exact copy of the Madcow kit, just a look alike with different paint and decals. The Madcow design isn't based on an actual missile so you've got some creative leeway. I'll be calling mine the B32-M SPIKE. Yep, I just made up the name. This should be fun! This kitbash is certainly not meant to draw attention away from the Madcow AGM-33 kit. These are heavier duty, made for larger engines. Madcow produces great kits with well fitting components.
Well, we've all been there - the balsa grain runs in such a way that the trailing edge tip can break off. If the tip break is small you can fill it.
Sand off some balsa dust from some scrap balsa. Don't sneeze.
Apply some yellow wood glue to the broken corner. Use wood glue for this, yellow glue can be easily sanded.
Press the glued corner into the balsa dust pile from all sides. Let the balsa dust and glue dry. Note in the inset picture that the dust and glue is a little larger than the chip area.
Here's the same filled corner after filling and sanding to surface. Not perfect, but after the fillets are applied it won't be noticeable.
I dug into the build at the very best place to start - at the very beginning, which in this case is the motor mount.
This is not so different than any other LPR mount. It includes rings (squares in this case), a motor clip, motor block, etc. The mount also has two normal round rings to hold the clip securely in place. The Kevlar leader is attached behind the forward square centering ring. Unlike any kit I've had, it also includes a section of shrink tube to protect the lower several inches of the Kevlar. I pretty much built this stock. If I want to put a bigger motor in one, I will have to buy another one. The only deviation is that I attached the leader with 5-min epoxy.
Next up are the fins. The ply and square fins are both notched to mate with one another. This took some wiggling but they fit great. You have to love laser cutting. I tacked them square with a few drops of Bondic UV-sensitive glue and then started adding fillets using Titebond Wood and Molding Glue (now has a different name). The kit includes several Q-tips to swab glue on.
I've seen a few pictures of "Rocket Families" on the forums. The Red Max is a favorite with the Estes Mini Max (BT-50 based), standard Red Max (BT-60 based) and Mega Red Max. Well, how about a smaller BT-5 version for 13mm engines? This one is tiny at just 5 1/4" tall! It performs like a BT-5 Mosquito.
At one time I had a little carded Red Max model. It was a BT-5 diameter with a Micro Max engine mount. I lost it somewhere along the way and wanted to make another one. After a few searches I couldn't find it. I thought it might be at Wayne Hill's Rocketry Blog - CLICK HERE There are many carded rockets there including my designs.
The carded Red Max I had before had three piece laminated fins. The redraw I did has two piece "butterflied" fins where the center fold becomes a rounded leading edge. The center core is cereal box cardboard.
The decal art was taken from the online instructions at Jim Z's, cleaned up a bit and reduced.
Don't use the illustration at the right to make the rocket. Email me at: oddlrockets@bellsouth.net and I'll send the full size PDF.
Two prints are made, on on 20 lb. paper a second on 110 lb. cardstock. This print gives you enough to make two rockets or have some extra parts.
PARTS: You'll also need some BT-5, a plastic Quark style nose cone, 1/8" diameter launch lug, 65 lb. Kevlar and a 13mm engine block. TOOLS: A sharp knife, a dull butter knife for scoring the fin leading edges, clear acrylic spray, white glue and a glue stick.
The original Estes Photon Probe was only around for two years, from 1991-1993.
I have two kits, one original from the 1990s and the second from 2009 when Estes started their "Classic Series. The older kit was #2043, the reissue kit is #3026. Both kits will be built at the same time, I'll be making comparisons between the two. There are some differences.
I always thought this was a sister kit to the Photon Disruptor that came out in 1976. Maybe it's the black and white decor with the that orange (or pink or purple) center section. Both designs are BT-55 based and about the same height.
Why another MPC branded model? I needed some ST-7 tubing and ERockets.biz are the only vendor left that carries it. The MPC kits are on clearance at $5.00.
The box still proclaims: "Flys up to 260 feet!" Every different model design in the MPC lineup says the same thing. My MPC Red Giant (another Sky rocket re-brand) did get to 427' with an Estes C6-5.
Besides that, Warner Brothers characters are a favorite of mine, even thought this model looks nothing like the Duck Dodgers cartoon rocket seen at the right. Sometimes it's a nice change to put together an easy one.
I find these kits interesting to see how things are done in China. I don't think I'd launch this one with the Quest A6-4. At 2.2 ozs it might be on the ground when the parachute deploys.
This rocket is the same kit at the Sky Long March 3, a semi-scale model of the Chinese launch vehicle, with a very different decor.
This picture is from the Apogee Components website.
The new Odd'l Rockets F-16 kit is almost ready! The fins have been laser cut and almost all the parts are here.
After the instructions are drawn up you should build a model using them to be sure everything works and check the fit of the water slide decals on the laser cut fins. To be honest, I've made too many prototypes and wasn't excited about building another normal F-16. I decided to make a BT-60 Goony version using spare parts with the same fins and decals used in the Odd'l Rockets F-16 kit.
The parts picture is different, this wasn't going to be a blog build. But the model turned out very well and I decided to start taking pictures. I didn't take this parts picture until after some of the prep work had been done. The nose cone is a black plastic Alpha shape. The main airframe is a Goony sized BT-60 at 7 1/2" long. The intake tube is a 4 1/2" long BT-55. Here the motor mount is glued together, the fins pieces have been glued and the grain filled with CWF. The dowel missiles are carved and smooth. The vacu-form canopy (don't know why I didn't include it in the picture) will be shown later in the build.
For anybody interested in the new F-16 kit, much of this build will be the same as the Odd'l kit. The Odd'l kit uses a heavy wall BT-50, very close to the original Centuri size.
From what little I know about mid-power the parts seem to be very good quality. The gray tubing (I should call it an airframe, this is mid power and all) is Quantum Tubing. A polymer tube, it looks like gray plastic. The fins are G-10 fiberglass are .062" or about 1/16" thick. To the far right are the molded urethane landing pads. The launch lugs are 1/4" diameter brass. The 38mm motor mount (brown tube) is thick phenolic. On the low right is the ejection piston package. To check out the instructions, CLICK HERE
The nose cone and tail cone are plastic. The nose cone has a well formed resin tip. The strap shock cord is already attached to the tip, set in the resin glue. The tail cone looks to be made from the same nose cone mold. Fin slots are cleanly cut.
The Falcon Rocketeers get ready to weigh their rocket before a flight (Click to enlarge).
We are now in "crunch time" - those last couple of weeks before the TARC deadline, ones in which the teams make every effort to get some practice in before setting up their qualification flights. Pegasus field hosted the Falcon Rocketeers and Hope Rising on Thursday, which tuned out to be a good day for both teams. Falcon had no catos and achieved a couple of decent flights, so they decided to make a qualification attempt. Unfortunately the rocket traveled a bit too high, yielding a not-so-good 51 as their first score. Disappointing, but at least they have a qual flight in the books - quite a few teams don't turn in a single qualification score. Hope Rising shook off the infamous Estes E cato curse that had been plaguing the team, rallying after an initial cato to produce two good practice flights with altitudes just over 800 feet. They were back at Pegasus on Saturday, when the Z-95 Headhunter demonstrated the "Right Stuff" by soaring to altitudes of 773 and 778 feet, just 2 and 3 feet off the mark! They were having a bit of a problem with thermals towards the end of the day, so they wisely decided to waive off a qualification attempt. This was smart, as their last flight was way long on duration.
Hope Rising prepping Headhunter for its first flight of the day (Click to enlarge).
Which brings us to today...
I stopped by the field on my way home from work to find the Hope Rising team setting up for their first practice flight. The rocket weather cocked a bit in the 8 mph wind, reaching a low peak altitude of 730 feet. Drifting about 100 yards to the northeast, the payload section decided to plop itself in the branches of a tree, about 20 feet or so off the ground. Fortunately, it was recovered without damage. The sustainer... well, that's a different story.
Headhunter on the pad (Click to enlarge).
And in the air (Click to enlarge).
The sustainer drifted about as far as the payload section; however, it made for the east side of Pegasus, landing in the road, near the edge of the asphalt. The kids on recovery were almost to the road when it touched down, but had to wait to retrieve the rocket because of an oncoming car. The driver of this vehicle, on seeing the rocket hit the pavement, deliberately swerved his car and ran over the sustainer, crushing it. We were dumbfounded - NEVER, in all the years I have been involved with TARC, have I seen such a display of downright meanness. I have to give Hope Rising credit - they took it in stride, returning the remains of their rocket to the prep table and immediately setting to work to get another sustainer ready for flight. In an ironic twist, these teens served as role models to the parents on the field, who were pretty pissed off, if I may be so blunt. Hope Rising made one more flight, in which their rocket overshot altitude and duration, before packing it in for the day. As I left the field, I found myself admiring their quiet resolve - I really hope they make it to Nationals.
The sustainer after being run over by the car (Click to enlarge).
And I hope karma catches up to that jerk in the car.
Way back in 1974, during the fledgling days of my model rocket career, I placed an order with Model Products Corporation for some rocket kits and engines. The order included the Flatcat, a Flare Patriot, a Theta-Cajun, and a Lunar Patrol. The latter intrigued me because of the pair of delta-wing gliders that served double purpose as the model's fins. I built the model and took it to one of the club meets to launch it. When the launch button was pressed, I didn't get the expected soaring flight. Instead, the model blew up on the pad! A seriously defective MPC 'A' engine ripped the booster rocket completely apart, and the gliders fluttered to the ground.
Aftermath of the original Lunar Patrol maiden 'flight.'
Undaunted, I soon built a replacement booster out of some Estes parts I had hanging around, with a few deviations from the original design.
With the two original gliders, the new 'Lunar Patrol II' turned in many successful flights over the next several years. The bird was a joy to fly, and quickly took its place as one of my fleet favorites. It was quite a sight to see the model shoot straight up and separate into three parts that all descended gracefully. The Lunar Patrol was a real crowd pleaser at club demo launches as well.
The Lunar Patrol II ready for launch sometime in 1975 at
a ROMAR club meet.
Sadly, when I exited the hobby in 1985, the Lunar Patrol was sold along with the bulk of my model rocket collection to another local rocket enthusiast. To this day I wonder if that individual continued flying some of my models. How many more flights were logged on the Lunar Patrol unbeknownst to me. Anyway......
Now, as a full fledged, active BAR, one of the top priorities on the build list is another Lunar Patrol.
A Black Brant V sounding rocket, from Wallops Flight Facility, parked all weekend outside NARCON
I'm finally back from NARCON, and what a weekend it was! Three days of presentations on all aspects of rocketry, plus museum tours, dinner, and a speech by one of model rocketry's beloved company founders, all took place at the Crown Plaza Dulles Airport hotel in Herndon, Virginia, just outside Washington, D.C. The hotel was conveniently located a short shuttle ride from the airport, and not far from the National Air and Space Museum's Udvar-Hazy Center.
Plus, there was a real NASA sounding rocket - the Canadian-built Black Brant V, seen above - on display in the parking lot outside all weekend. This in fact caused a bit of a stir, when an F.B.I. agent driving by noticed the hulking rocket sitting in a hotel parking lot, got a little suspicious about this, and called the police. NAR officials quickly cleared this up, and the police apparently had a bit of a laugh about the whole thing.
This year's convention was hosted by NOVAAR - the Northern Virginia Association of Rocketry - and they put together a great event.
Orange and black are the official colors of NOVAAR.
The event director was Trip Barber, a longtime rocketeer who did some important early research in model rocket staging, and the founder of TARC - the Team America Rocketry Challenge contest for student teams.
I arrived at the hotel around 11:30 in the morning on Friday, and met CG, co-host and creator of The Rocketry Show podcast, for the first time. Despite the fact that we're on the same show, we'd never met in person before.
He gave me my official Rocketry Show shirt to wear at the weekend's events. It's pretty nice!
We went to the Udvar-Hazy Center to look around and record some video and audio for the podcast, including the teaser video I posted yesterday.
Friday night began with a town hall meeting where NAR president John Hochheimer discussed the state of the NAR and the board's pre-NARCON decisions about the organization. Membership continues to reach record highs, and the organization is in good financial shape.
This was followed by Research and Development presentations. This is a competition event for those wishing to present projects on technical development in the hobby, and presenters were vying for $1,000 in cash prizes.
International competitor Stoil Avramov showed techniques he uses for building incredibly light, perfectly airfoiled wings for competition rocket gliders. Building up wings from multiple materials - a foam core and various materials for skins and hinges, he has perfected wing building.
My camera had a hard time with some of the lighting this weekend, so some of these photos are a little blurry.
Stoil Avramov shows off one of his competition rocket gliders.
Matt Steele, of North Coast Rocketry, presented an analysis of S1 performance in the 2016 World Championships for Spacemodeling. The S1 competition is a two-stage altitude competition, where juniors fly 1/2A to 1/2A staged motors, while seniors fly A to A stages.
These are very lightweight rockets. Matt made a couple of interesting points. For best altitude, it is best to have the booster (first stage) as light as possible. If it were possible to have a massless booster, that would be best.
But a sustainer (upper stage) performs best between about 9 and 11 grams. That is the optimal mass.
Another interesting result of the analysis has to do with the timing of the staging. Multistage model rockets typically use direct staging, in which the lower, booster stage rocket motor ignites the upper stage motor, when the propellant burns its way through the top of the motor. There is no delay grain or ejection charge - just a propellant grain which is exposed at the top of the motor.
As such, there is only about 0.001 second between burnout of the lower motor and ignition of the upper motor (this 0.001-second delay was actually described by Trip Barber during his college days - the work I mentioned above - and is thus known as the "Barber delay"). In other words, staging is nearly instantaneous.
By doing this, the upper stage model is "launched" in midair, but already traveling upward very fast. Therefore, the velocity of the boosted rocket is added to the sustainer or main stage, giving the model a much higher performance than if it were launched standing still.
High power rockets and those that use composite propellants, however, often have a delay between the lower stage burnout and upper stage ignition. The booster will burn out, the stages will separate due to the drag on the lower stage, and the upper stage is then ignited by an electronic system carried on the rocket itself.
What Steele said is that, according to his analysis, there would actually be an altitude advantage on an FAI competition model if there were such a delay between booster burnout and sustainer ignition. This surprising is in contrast to what most people assume, because of the way staging is described in The Handbook of Model Rocketry. The reason is that most people forget that when describing the altitude gains in direct staging, G. Harry Stine was assuming that there was no aerodynamic drag. By increasing velocity of the rocket, you increase drag dramatically. Therefore, there is an advantage gained by allowing the rocket to coast a bit between booster burnout and sustainer ignition - provided the rocket doesn't begin to arc into the wind, of course!
In reality, delayed staging like that is impractical in a contest rocket, because there is a weight penalty. The electronics needed to ignite the upper stage would add mass to the rocket.
Tim Van Milligan of Apogee Components presented a computer analysis of drag on launch lugs, launch rail buttons, and launch rail guides. I was really interested in this one. I have seen in online forums that a lot of people assume that rail buttons create less drag than launch lugs. A lot is made of the drag of launch lugs, including in The Handbook of Model Rocketry. But to my knowledge, the drag of lugs and rail buttons had never been put to the test, and it seemed that everyone was assuming that buttons are of lower drag.
I won't go into too much detail here, because this subject will almost certainly be the topic of an upcoming Apogee Components newsletter. But I'll just say that, according to the airflow computer simulation software he used, Van Milligan found that launch lugs have the lowest drag, while rail buttons have the highest. Launch rail guides are in the middle.
Some other interesting findings - airfoiled rail buttons (such as the one seen above) actually do have lower drag than standard buttons, and the drag can theoretically be lowered further by rounding the sharp edges on the tops of them, and launch lug drag can be lowered further by shaping as well. Also surprising, long launch lugs appear to create less drag than short lugs.
Don't be fooled by these numbers. Simulations were run on an extra large simulated model to get more clear information.
It is important to note that this is just a computer analysis using an airflow simulator. To get the real story, wind tunnel testing would need to be conducted, and flight testing would confirm whether the effects seen in this study would be significant enough to affect model rocket flight in a noticeable way.
Dan Wolf presented his project, creating a digital pressure sensor emulator, which he hopes to use in altimeter testing. This is to verify the accuracy - and consistency - of various commercially-available altimeters.
And Chris Flanigan, another contest flyer, presented comparisons of predicted and flight data for rockets flying from an 18mm piston launcher (a piston launcher is used in contest rocketry instead of a traditional launch pad and rod. It uses the motor's gasses to impart more velocity to the rocket at liftoff in an attempt to reach higher altitudes).
First prize went to Chris Flanigan, second to Stoil Avramov, third to Matt Steele, and honorable mention to both Tim Van Milligan and Dan Wolf.
The Breakout Sessions
On Saturday, the breakout sessions took place. There were four "tracks" you could choose from: TARC Rocketry, Professional Rocketry & Spaceflight, Model Rocketry, and High Power Rocketry.
Honestly, it was sometimes hard to choose what to see. There were seven scheduled hour-long sessions with one session in each track, so you could see up to seven presentations. I made it to five in total. I wish I had seen others, but CG and I needed to record some stuff for the podcast.
We chatted with the vendors in the Vendors Display Room. Those conversations will be on the forthcoming podcast. I saw presentations on NASA's sounding rocket operations, Tim Van Milligan's demo of doing a lightweight fiberglass layup for FAI contest rockets, and a presentation on painting and finishing which was really aimed at TARC rocketeers (this year's contest rules include the requirement that all rockets must be colored somehow or another - be it paint, marker, colored tape, Monokote covering, etc).
Carl Curling describes how this TARC rocket was finished and painted.
Later in the afternoon, I went to hear Jim Barrowman speak in a TARC Rocketry session. Barrowman created simplified mathematical equations for finding the center of pressure on a model rocket, which enabled rocketeers to create designs and know they would be stable in flight. His work is used in all rocket simulation software today, such as RockSim and OpenRocket. He based these equations - what became known as "the Barrowman equations" - on his work with sounding rockets.
The room was packed. He said at the outset that the session would cover the basics in Centuri TIR-30, and would not be about the Barrowman equations, and that he would understand if anybody felt bored or left. Of course, nobody did!
After the session, Jim came to the Vendor's Room where CG and I had set up a table to record, and he was gracious enough to grant us an interview. I turned to him as we were setting up and said "I have to admit that I'm pretty nervous."
But he was so easy to talk to. Jim Barrowman is a really approachable person, and we ended up having a great conversation. Once we ended the interview, we continued chatting, and had a conversation that I can only describe as delightful. CG said "I should have been recording this!"
Me, Jim Barrowman, and CG. Meeting this man was worth the whole trip.
But the interview was terrific, and I really think you'll enjoy it.
The Manufacturer's Forum
Some of the most exciting news came from the Manufacturer's Forum at 5p.m. There were nine vendors there to discuss new products, and each had a limit of five minutes to present. Here are the ones I think readers of this blog will find most interesting.
Jolly Logic
Jolly Logic has a number of exciting things in the works. First, the next iteration of the Chute Release will include more ergonomic, easier-to-use buttons. New bands and chute deployment bags for larger chutes for high power are being developed.
Second, a smaller version of the Chute Release is in the works! This was hinted at on Twitter a while back, and John Beans is currently working on it. He has to build a whole new servo in order to do it. The current Chute Release uses the smallest servo he can find. But the good news is that the new Chute Release should fit into a much smaller tube, and due to being smaller, should be less expensive than the current Chute Release. Both of these are great selling points, especially for model rocketeers with a fleetfull of smaller sized rockets. The new Chute Release will probably not be out this year, but likely in 2018.
What should be released sooner, however, is the Altimeter Four. Before Chute Release, Jolly Logic was primarily known as a maker of versatile, easy-to-use altimeters. Here is a photo of my Altimeter Two, which weighs about 10 grams.
It's a great altimeter which gives a lot of interesting flight information. But at 10 grams, it can be a little heavy for smaller low power birds.
Well, here is a 3D printed "size model" of what Altimeter Four will look like.
Altimeter Four's projected weight - one gram! Not only that, it will connect to a computer or phone and give all the flight analysis information you'd expect from a Jolly Logic altimeter, including a flight profile in graphic form like the Altimeter Three.
[EDIT] I nearly forgot to mention that John is working on a GPS location solution for rockets. Knowing how easy Jolly Logic stuff is to use, I can't wait for this to come out! It may take some time, but I'll definitely put it in the shopping cart.
AeroTech
AeroTech has a number of exciting things coming out - both new kits and new motors.
The four-inch diameter Monstra will be able to fly Level 1 and Level 2 HPR flights with its 38mm diameter motor tube, and four-inch airframe. It features a recovery harness from One Bad Hawk.
And the beautiful "fantasy scale" Arreauxbee-Hi is a cross between the AeroTech Arreaux and an Aerobee-Hi scale model. It flies on 29mm motors, and I wanted to take it home with me.
The new kits include screw-on motor retainers instead of motor hooks, and also have both launch lugs and rail guides, so the rocketeer has the option of either one without having to purchase additional hardware separately.
A new single-use F motor is debuting soon, the F67 Economax. Why an F? Gary Rosenfield, the owner of AeroTech, explained it was their attempt to get the most power they could from 30 grams of propellant. 30 grams is the most that can be legally shipped via the US Postal Service, rather than via UPS with a HAZMAT fee.
The 14-second delay won't be featured. Delays will be 4, 6, and 9 seconds.
Speaking of US Mail shippable motors, another exciting development by AeroTech for HPR fliers is a non-HAZMAT J motor! This is pretty unusual, and it's accomplished by dividing the motor into 13 individual 30 gram propellant grains.
This, says owner Gary Rosenfield, will be about as far as they'll go with that, so don't expect a mailable M motor any time soon!
As for the Quest Q-Jet composite model rocket motors, they only had on display the A3 motors, which have passed certification, but the others are still waiting to finish the process. They'll all be released at the same time, once all motors have been certified. According to Gary, this is one of the hardest motors AeroTech has made, but it will be exciting for us when they are finally available.
Apogee Components
Tim Van Milligan announce Apogee's intent to release ten new kits this year. Apogee is hiring a marketing person and a web developer.
Aerospace Specialty Products
ASP showed off some of their new 29mm powered mid powered scale kits. These weren't new at NARCON, but it was nice to see them in person, particularly the Sandia Sandhawk, the D Region Tomahawk, and the WAC Corporal models. These are pretty simple kits that a relative beginner can assemble without much trouble, but with accurately-sized parts so that an experienced builder can add details and have a very faithful scale model.
Due out mid to late summer are three more scale kits, details of which will be announced later.
eRockets (including Semroc)
There are now 125 Semroc kits through eRockets, and the number continues to grow.
The Blue Jay is a new delta-wing glider with an extra wide keel and a beefed-up front end.
The Maple Seed is a sort of odd-rock with maple seed-shaped fins. At apogee, the seed-shaped fins detach and helicopter down, just like the real thing.
Also coming out later this year, provided Estes doesn't change their mind and re-release it, will be a Semroc version of the Scissor Wing Transport, a boost glider which always had a bit of trouble flying just right. Randy Boadway of eRockets says he's solved the problems with the Scissor Wing, and it should be flyable more than once or twice.
Chad had an Estes Scissor Wing Transport, and I can tell you that it was tough to get it to fly right.
North Coast Rocketry
Matt Steele presented a new kit, an upscale of the Estes Goblin, called the Hobgoblin. It will fly on 29mm motors. It's actually a much smaller version of a North Coast Hobgoblin from years ago, which was 8 inches in diameter. This one is pretty fun and still nice and fat at 2.6 inches in diameter.
Also coming soon from NCR are 29mm screw-on motor retainers similar to those sold by Estes, but with rocket nozzle details attached, so your mid power model rocket can look more like a space launch vehicle.
Dr. Zooch
Wes Oleszewski of Dr. Zooch presented at the Manufacturer's Forum. While they won't have any new kits, Wes does have a series of books on the history of spaceflight, Growing Up with Space Flight (click here for an example).
You'll hear more from Wes on the upcoming podcast.
* * *
At the banquet, Lee Piester of Centuri Engineering, told the story of his time running a much-loved model rocket company. It was an inspiring story with some surprising details, and even made me nostalgic for Centuri rockets, even though I was far too young for rocketry when Centuri did most of its business, being nine years old when the Centuri line was finally discontinued.
We hope to have Lee Piester on the podcast soon.
Door prizes were handed out. John Beans had donated ten Jolly Logic Chute Releases, and while I didn't win one to replace my lost one, as I'd been hoping, I did in fact get a pretty great prize for me - a copy of Tim Van Milligan's book Model Rocket Design and Construction, something to add to the library.
* * *
After the proceedings on Saturday, I sat in the hotel restaurant with Bill Cooke of The Rocketeer's Corner blog and had a great chat. Bill's a really nice guy with a fun blog (check out his stuff about "Geezer TARC"), and we shared modeling tips - well, mostly I asked him how he builds such nice looking rockets.
Sunday I returned to the museum with those who stuck around, and stayed there for five hours, looking at planes, models and space ships. It was a perfect weekend, and I managed to only spend slightly too much money.
Thanks to NOVAAR and the NAR for such a fun conference!
This will be a fun build - The Astron Skydart II. It first appeared in the 1973 Estes catalog as K-57. Larry Renger was the designer. He also developed the classic Falcon Boost Glider. Pop Pod boost gliders were pretty new then. The first Citation Bomarc and was a pop pod glider. With a "pop-pod" glider the internal engine tube ejects and descends by parachute. The eject pod raises the elevator and the model glides in.
The online instructions are a different format for Estes and worth a look. To see them, CLICK HERE. There are differences between the original and re-issued kit.
The original kit hard cardstock formed nacelles on the underside of the wing. The new kit uses a split BT-50 tube.
The original kit included a pre-bent elevator retainer wire. The current kit uses three glued together pieces of balsa.
Goony conversions are somewhat based on the Estes Goonybirds from 1973. They were short, goofy BT-60 based models that flew on 13mm "T" engines. Excelsior Rockets brought out new 18mm plan kits that included instructions and decals. These new Goonys weren't flying brooms and fish but were based on Estes kit designs. A Baby Bertha kit is used for parts. On some of the designs you just cut out new fins.
Excelsior has cut back on decal production, the Alps printers are old and beyond repair. This kitbash is based on one of their Goony models, The Nike Goon. Sandmandecals.com might still have the plan pack and decal sets still available.
Here's all the Big Bertha parts, This picture came from the Estes website.
Look at all the extra balsa outside the laser cut fin borders. I'm going to try to cut the Nike Goon fins using just this kit balsa.
With everybody excited about the reissued Estes Nike X, it seemed like a good candidate to "Goon".
The upcoming build posts will show the process I used to shorten and fatten up the Nike X.
The first K-49, BT-50 based Estes Sprint was introduced in 1970. It was advertised as "The First True Competition Model". To see the catalog page, CLICK HERE Very few models had boat tails back then. The Sprint sported a low drag parabolic nose cone and fin shape. It used 18mm engines, streamer recovery and came with two different decal motifs. On the original the boat tail was formed from card stock. There was no engine hook, the engine was friction fitted with masking tape. The old Sprint stood 13.8" tall.
The newer Sprint XL is an upscale model built around a BT-60 and uses 24mm engines. "In memory of Mike Dorffler (1946-2010), longtime Estes Model Rocket Designer." Mike Dorffler designed other models including the Estes Cineroc. The Sprint XL is 22.8" tall.
Here's a rare one produced from 1983 - 84. I thought it would be different because of the card stock fin fairings. That rear canopy is another feature. For a while Estes had a few models with card stock flared ends like the Delta Wedge, #1931.
After looking over the instructions on oldrocketplans.com, I came up with these parts and measurements. To see the instructions, CLICK HERE
PARTS LIST: 1 Engine Mount Tube (type BT-20J) 2 3/4" long 1 Engine Hook (type EH-2) 2 3/4" long 2 Centering Rings (type AR-2050) thick style 1 Body Tube (type BT-50B, heavy) 10.25" long 1 Set Balsa Fins3/32" thick 1 Launch Lug (type LL-2A) 3 Flat Tapered Toothpicks 1 Cardstock Details 110 lb. Cardstock 1 Nose Cone (type PNC-50KA) 2.75"? Long 1 Shock Cord 1 12" Parachute, Shroud Lines, Set Tape Disks 1 Decal
The card stock fairings and canopy were roughly hand drawn. I used these to test their size, there was no reference measurement. This is a picture of the printed stock, I set a ruler beside it.
The formed pieces seemed to be the right size. I did redraw them, The online pattern shown at the right had a very rough, thick line. The online decals looked pretty clean and could probably be printed as is.
This is a spare parts odd-roc based on Steve Lindeman's Little Me-Me. Steve's design was a left over engine mount from the Estes Jetliner kit. He upgraded the Jetliner to 18mm engines. The leftover 13mm engine mount was assembled and launched as a spool.
To build it you'll need: 2 5/60 Centering Rings 1 2" Length of BT-5 1 1 3/4" long Engine Hook 1 13mm Engine Block Electrical Tape
I couldn't tell the length of the BT-5 engine mount tube. Assuming the cross section drawing from the instructions was to scale, I enlarged the monitor picture until the engine mount tube wass about 1/2" diameter. That gave me the BT-5 at 2" long.
This is a spare parts build. I thought I had all the parts and started looking for the 5/60 centering rings. I have every centering ring except the 5/60 size. I'll have to cut them from .050" thick mat board. I did have 50/60 rings. First trace around the outside of the ring. Trace a few more than you'll need and use the two that best fit the BT-5 tube. After tracing the outside circle, set and circle a BT-5 in the center. Use a sharpened pencil so the line is close to the tube sides. It may take a few BT-5 tries to get the inner circle centered.
Using a new sharp knife, cut the inner circle first.
Cut a little inside the pencil line for a friction fit over the BT-5. Don't try to cut all the way through in a single pass. Make a few light passes to cut out the center.
The Estes Jetliner is one of the models currently on clearance for $4.59. I've read a few reviews. Some have found it under powered with the A10-3t engine. It reminds me of the old BT-60 based Goonybirds. The Goonys also needed more power than the 13mm engines provided.
Steve Lindeman did a build of the Jetliner on RocketReviews.com - CLICK HERE Steve built the Jetliner for 18mm engines but kept the 13mm engine mount and made a spool rocket out of it. "On a side note: Take the unused original motor mount and drill two holes in line on the opposite side from the clip large enough so that can slide it up and down a launch rod as a spool rocket. I call mine "Little Me-Me" and the kids love it. Have thought of building a few more of these from scratch to give away to kids at the park on the 4th of July. Just the sort of thing to spark their interest in the hobby. Always trying to play forward." Great idea Steve! This spool is simply a launchable engine mount not glued into a rocket body. No launch lug is needed, punch two holes in the centering rings for the launch rod. Use "0" delay (booster engines) or engines with a very short delay. These spools have tumble recovery, so heads up! I might take a look in the spare parts box and make one.
Yeah, I know what you are thinking - Why do a build on such a simple, small rocket? There is going to be some interesting decal treatments on one of the two Mini Max models I'll be building. There will be some tips for home printing from online decal scans. Stay tuned -
How could you pass up a Max kit on clearance for $3.29? I grabbed four!
The BT-50 main frame body tube seems a bit rough for Estes. The BT-5 engine mount tube is also rough, it doesn't seem to have a glassiene coating. Most rough tubes seem to smooth out when the primer / filler is sanded down.
Parts of interest: The injection molded nose cone and clear base. The decals! The white X882 nose cone decal isn't there.
Today, we're going to look at paint - how heavy it is, and how it may effect a rocket's flight.
When I begin building a rocket, I almost always either try to find or make my own simulation file for OpenRocket. I do this for a few reasons. I want to get an idea of how high the rocket will fly on certain motors. Estes rockets always have a list of appropriate motors on the package, but there are others available, and I want options.
Many rockets not sold by Estes don't come with a list of motors, and you have to figure out for yourself which ones will work.
My simulation of Sky Wolf - a limited edition rocket by Sky Pyrates. I have to choose motors myself for this rocket.
Sometimes I'll build the rocket with a larger motor tube than comes with the kit, and I want to make sure the rocket will be stable. A larger motor shifts the Center of Gravity (CG) toward the aft end, which affects the static margin - the distance between the CG and the Center of Pressure (CP). Those two points need to be a minimum distance apart - the diameter of the airframe or body tube - in order for the rocket to fly safely.
Estes Cosmic Explorer, upgraded from a C-sized motor mount to an E-sized mount. I had help with this one, by Rocketry Forum user K'Tesh.
I might decide to add a booster to a kit, transforming a single-stage rocket into a two-stager. And again, I need to see how this will affect the CG/CP relationship, and the altitude of the flight.
An Estes Hi Flier XL, with a booster I designed myself. The booster was left over from a rocket I lost a couple years ago.
And, of course, if I design my own, I'll start with OpenRocket. In that case, there are no instructions to follow, no list of motors, and no idea about how long a delay I'll need with a particular motor.
Titus - designed for my girlfriend, named for her nephew
When I build a simulation, I carefully weigh all the parts, and input them into the simulation. That way, I can see where the CG and CP should end up on the final rocket, and see how the rocket might be expected to perform.
However, once the rocket is built, everything changes.
* * *
Everything you add to a rocket when building it adds weight, and may also move the CG. This includes glue for attaching fins and launch lugs, glue or epoxy used for fin fillets, and - very significantly - paint. Added weight affects the performance of the rocket. Generally, a lighter rocket will fly higher than a heavier rocket - up to a point.
There is an optimal mass for a rocket, and it depends on a number of things, including the shape and size of the rocket and the motors used to fly it. High flying rockets tend to be pretty light. But there is such a thing as too light for maximum altitude.
There are two forces working against a rocket in flight. One, of course, is gravity. The other is drag, or wind resistance.
A heavy rocket will have a problem flying high, because the motor only has so much energy to work against gravity. A super light rocket, while it will be much less work for the motor, doesn't have as much inertia, and drag will slow it down more easily.
Imagine throwing a ball straight up into the air. You can throw a baseball much higher than a bowling ball, because the baseball is much lighter. But if you try to throw a really light foam rubber ball into the air, it won't go very high at all - it doesn't have much inertia, and the air has no trouble slowing it down. Ever try to throw a feather? It doesn't go far.
Nevertheless, most model rocket kits are probably heavier than they need to be for maximum altitude, so for performance, it's best to build light.
* * *
It may seem obvious that spray paint will add weight to a model rocket - but how much? This was a question I had recently.
I hadn't started a new rocket in a while, and I wanted to build something simple. From my build pile, I grabbed the Estes Monarch, a simple rocket I'd purchased during the holiday clearance sale from the Estes website a couple of years ago.
The Monarch is one of those rockets which are larger than they seem when you see images of them online. At 1.33 inches in diameter, it stands over 22 inches tall. It's a larger, but not enormous, low power model rocket, and I decided it was a good one to work on finishing techniques with. I also thought I'd try to find out how much weight I tend to add when I paint.
With an 18mm diameter motor tube, the Monarch is a B-C powered rocket. According to the face card, it should fly to an estimated 700 feet on a C6-5 motor.
With its large, swept back fins, I thought it would make an easy conversion to 24mm D motors. But whenever you upgrade a rocket like that, you want to make sure it will still be stable. I also wanted to know how much more altitude I could expect with a D12 motor. So I carefully built a simulation in OpenRocket.
After building the rocket, I weighed it. First, I weighed it with just the fins glued on, before adding any fillets or wood grain filler - which would make the fins smooth and prevent the wood grain from being seen through the paint.
The nearly finished rocket weighed in at 56 grams exactly.
Then I located the CG on the rocket.
I added fillets to the fin roots, using Titebond Molding and Trim Glue - a type of wood glue which dries quickly, is less prone to shrinkage, and resists sagging. This makes it an excellent glue for fillets.
Titebond Molding and Trim Glue, capped with an Elmer's Glue-All nozzle. I found this tip on Chris Michielssen's Model Rocket Building blog.
Titebond Molding and Trim Glue does shrink a little, so I usually do two or three layers of it, allowing it to dry between each layer.
After adding glue fillets, I weighed the rocket again. It had gained exactly one gram, coming in at 57 grams.
Adding 1 gram of weight should change the Center of Gravity slightly. I found the new CG. It had moved aftward by just over 1/8 inch.
Next, it was time to fill in the wood grain. I usually use Elmer's Carpenter's Wood Filler (CWF) to hide the wood grain on balsa fins.
But I'd had some frustration with it recently, and wanted to try out other methods to see what results I could get. A standby which model rocketeers used for decades is something called sanding sealer. It seals the pores of the wood, and allows you to sand the fins much smoother.
While CWF is best applied and sanded before attaching the fins to the rocket, sanding sealer can be applied with the fins already glued on.
Since sanding sealer is mostly sanded off, I wondered if it added any weight.
Even when it feels like it's all been sanded off, sanding sealer fills the pores in the wood. On this rocket, with sizeable fins, sanding sealer added 0.4 grams. The CG moved aftward only a little.
With glue fillets and sanding sealer, the CG has moved aftward less than 1/4 inch.
With glue fillets and sanding sealer on the fins, the rocket has gained only 1.4 grams, and the Center of Gravity has moved less than 1/4 inch toward the tail. The one thing I haven't learned from this build so far is how much weight is added by the glue attaching the fins to the rocket. Obviously, you need to glue the fins on, but if I'd been really diligent about weighing all the parts before building - something I normally do - I'd know how much the glue itself weighs.
Nonetheless, now we have a rocket which is built, but which is unpainted. It weighs 57.4 grams. Time to run a simulation to see what kind of altitude I can expect.
I'll override the mass of the rocket, so that my simulation matches the real thing - 57.4 grams. Then I'll run two simulations simultaneously - one with an Estes C6-5 motor, with which the rocket is designed to fly, and one with a D12-5 motor, since I've enlarged the motor mount.
I've also overridden the CG on the rocket, and here's something interesting, which we'll look at again below.
You see where it says "Stability:0.901 cal?" That's the static margin of stability when a heavier D12-5 motor is installed. "Cal" is short for caliber, and it refers to the diameter of the body tube. This rocket is 1.33 inches in diameter. 1 caliber stability would mean that the Center of Gravity (CG) is exactly 1.33 inches forward of the Center of Pressure (CP). 0.901 caliber means that the CG and CP are closer together than 1.33 inches - and the minimum safe margin of stability is 1 caliber. So far, with the rocket built this way, the D12 shifts the CG back far enough so that the rocket may be understable.
This is one reason I always make a simulation, especially when modifying a kit in any way.
But, we'll get back to this down below.
Let's run the simulations.
On a C6-5, the rocket hits 688 feet - very close to what the Estes face card tells us. With the D12-5, the Monarch soars to just under 1,100 feet, with a top speed of 255mph! Very nice!
But now, it's time to paint.
For primer, I went with my standby - Rust-Oleum Filler Primer - an automotive primer with a high "build," allowing it to fill in imperfections and scratches in the surface below. This was really helpful when using sanding sealer, as opposed to CWF, because while CWF actually fills in the wood grain, sanding sealer simply prevents primer and paint from soaking into the wood. In other words, you may need to apply a few coats of primer and sand carefully to hide all the grain. The filler primer helps fill in any deep troughs in the grain, making the fins nice and smooth.
I followed two or three well-sanded coats of primer with Rust-Oleum Painter's Touch 2X Ultra Cover Gloss Marigold, a beautiful golden yellow paint.
I allowed that to dry for several days, and finished with an accent color - Rust-Oleum 2x Colonial Red.
The rocket turned out simple but lovely. I decided it didn't need any decals.
Now it was time to find the answer to our main question - how much does the paint job weigh?
75.8 grams! That's quite an increase in weight. In painting the rocket, its mass increased 18.4 grams - an over 32% increase. Put another way, the paint is just over 24% of the final weight of the rocket. Nearly 1/4 of the weight of this rocket is just the paint job.
How is this going to affect the rocket's flight? Let's plug in the new numbers and look at our simulation.
First of all, the added weight has actually fixed one of our problems - stability.
With the added weight of the paint over the whole body of the rocket, the Monarch is now comfortably at 1.2 caliber stability with a D12-5 motor.
This might seem strange to you, unless you think about it this way:
Imagine balancing a chop stick horizontally on your finger. Now, if you add a 1 ounce blob of clay to one end, its center of gravity moves so much that to re-balance it, you have to hold the chop stick much closer to the end with the clay on it.
But if you balanced a 2X4, a 1 ounce blob of clay would make much less difference. In order to re-balance the 2X4, you'd only have to shift it over a very little bit. The more massive an object is, the less a small amount of weight on one end is going to affect its CG.
The added weight of our paint job has taken away the worry about stability on this rocket. If the Monarch had remained understable after painting, I would have fixed the problem by adding nose weight - most likely, by inserting a small amount of modeling clay into the nose cone and ramming into place with a dowel rod. Now, I don't have to do that.
Note: These simulations are pretty good, but when altering a kit like this, you always want to check stability on the real thing before you fly! Always measure the CG and CP on the finished rocket - with the motor installed - or simply do a swing test! , But how will the added weight of the paint affect our altitude?
On the C6-5 motors, we've lost nearly 100 feet in altitude. For lower flying low power rockets, that's pretty significant - for us, it's about a 13% loss in performance.
On the D12 motors, we've only lost 42 feet in altitude, down from 1,096 to 1,054 feet, a bit over 3% loss in altitude.
* * *
With the rather simple paint job I gave this model rocket, I added quite a bit of weight. So, could I have painted lighter? How can we add less weight when we paint? If paint adds weight, and weight lowers altitude, why bother painting rockets at all?
We'll go more into this and other stuff in the next post.
I'm building this one for a client. I've seen them on Ebay but never put in a bid. Like the Chinese made MPC rockets, I'm always curious how rocketry is done in other countries.
There's not much available online about the rocket, but I did find this: The Aggregate 9 (A-9) / Aggregate 10 (A-10) was the last in the Aggregate series of missile designed and developed by Dr.-Ing. Wernher von Braun in 1944 under the leadership of Dr. Walter Robert Dornberger, at Army Research Center Peenemünde.
The Aggregate 9 (A-9) / Aggregate 10 (A-10) was a two-stage intercontinental ballistic missile (ICBM) which design can be traced back to the early 1940s some of the people who assisted in the design were Ludwig Roth, Hermann Oberth, Walter Thiel. However work resumed in 1944, under the codename of Projekt Amerika. The Aggregate 9 (A-9) / Aggregate 10 (A-10) was 26 m long by 4.75 m in diameter and had a take off weight 100 tons and used the following engines first stage 1 × liquid fuel rocket engine producing up to to 30,500 kg of thrust. second stage 1 × liquid fuel rocket engine producing up to to 152,500 kg of thrust. Which gave a maximum thrust of 183,500 kg for 50 seconds of burn time.
There's not much to go on in the instructions and all the copy is in German. The two pages shown here are specifically for this build. The inside and cover pages are generic looking a little like a condensed Estes Yellow Pages.
Here's the engine mount directions.
Page two shows the fin placement, launch lugs and cockpit locations. That's about it!
I went to Google Translate and typed in most of the German copy. Many of the words didn't translate so I'll have to wing it!
The box copy exclaims: Lehrreich! = Instructive! Raketenfliegen Ganzjahrig Erlaubt = Allowed rockets fly year round! Sicher! = For Sure! Interessant! = Interesting! Immer Wieder Verwendbar! = Always Reusable!
Back in 2013 I bought a Semroc V-2 kit. This was one of their “X Kits”: a bag of parts intended to replicate as closely as possible a classic kit, in this case the Estes K-22 V-2, with no instructions. Instead they told you how to find the instructions for the original kit online. (I’m…
The Nike-G was the last of the pre-2016 build pile rockets, dating in fact to 2013 when I bought the decals and plans from Excelsior. I’ve finally started on it. Ready for all the gory build details? Tough. It’s a Baby Bertha with different fins and decals, big whoop. Well, okay, it’s a little different.…
I'm building this Gemini Titan for Rob, a client. I've never seen this kit before and was looking forward to the build.
Years back, Estes offered a larger, BT-70 based Gemini Titan with a two engine cluster. I built and flew one in the early 1970s. The first launch with two B6-4s was fine. In the second launch only one C6-5 ignited and the rocket arced over hitting the ground before ejection. This earlier G.T. had slightly canted engines. To see it, CLICK HERE
This version (available from 1987 through 1988) is BT-60 based with a single engine.
The parachute is 12" in diameter.
The parts of interest:
The blow molded capsule is detailed but the molding isn't very clean.
The plastic tunnel half rounds are still on the molding tree.
The decal is all black with large roll arounds.
The nozzle unit is used for display. The clear plastic fin unit twist-locks on and holds the engine. This fin unit looks like the same one used on the Estes Free Fall and Crayon rockets.
I built one of these when it was first released in 1976. Estes brought it back when they released the Classic Series of kits.
There is a lot of small fins on it, many areas I didn't get smooth the first time around. I remember how the simple yellow/black mask worked so well with the detailed upper body wrap decal.
In the two kits I'll build there was one bent BT-50 tube. The rest of the parts were of high quality. The 12" parachutes were a clear red.
The parts of interest: The wing/fin layout template. The nose cone with the side bumps. I understand a new mold was made for the reissue kit. The decal has some white print that is hard to see.
The Centuri Moonraker was introduced in the 1973 catalog. New kits and supplies were added as extra pages to the outside of the 1972 catalog format. To see this page, CLICK HERE A few of the new kits had "pre-cut fibre fins". The fin material was like mat board, approximately .050" thick. This material is similar to what fibre centering ring are cut from. The Hummingbird, Moonraker, Jayhawk, Nomad, Excalibur 2 and Arrow 300 had die-cut fibre fins.
"Two sections gyro-flutter safely back to earth. Features changeable shape, pre-cut fibre fins." I have a lot of experience with the Cyclone maple seed monocopter recovery model. With the Moonrakers shorter fins I have to wonder if it helicopters in or flutter tumbles.
I don't know where I picked this kit up. In the upper right corner is a handwritten price of $1.00, a second price says $.90. The original catalog price was $.85 so this was probably produced after 1973.
Not much in the bag. All you can see is a nose cone, two short body tubes and small launch lugs.
The metallic "Spec-Plate" was a new kit bonus feature in 1973. While a great idea on a larger model, this plate might be too much on this little rocket. (Note the pressure sensitive nose cone tab stuck under the Spec-Plate.)
Dean Black has written a paper discussing the true color of the X-15s, why it is that color and how to make your model's color true to scale. It's a .pdf and not hosted anywhere so I'll provide a teaser. He had given permission to distribute it so if you leave an email in the comment section, I will send it to ya'.
Is that X-15 Model Really the Right Color?
Is the X-15 really black? The short answer is “No”. For a variety of reasons X-15 appears black in most photographs, but outdoors in direct sunlight X-15 is an iridescent dark blue. That’s right, blue, or more specifically “gunmetal blue”. ....
This Enerjet Newsletter goes back to 1973. There was some news on Enerjet products but most of the issue dealt with semi-scale models. A Thor Delta and Mercury Little Joe models were featured. To see the issue, CLICK HERE
The semi scale Mercury Little Joe used the Mercury Redstone capsule now used in the current Estes Mercury Redstone kit. I've wanted to build this one since 1973. Estes sells the Mercury and Apollo capsules separately from the kits now. The Mercury Redstone capsule is: CLICK HERE Note: The white capsule decals are not included in the parts package.
The article says you could launch this with an E24-7. Thanks, I'll stay with a C6.
Another one to scratch off my rocket bucket list. The build starts in the next post. I'll be covering some capsule and tower details I may have missed before.
We first saw the Interceptor on the cover of the 1971 Estes Catalog. Graphically the cover was pretty exciting, placing the finished model over an eclipse. It showed us just enough to raise curiosity and start a page search for the cover model. That catalog page is: CLICK HERE
The original catalog number was K-50. I would think Estes wanted a showpiece kit to celebrate their fiftieth kit release. Wayne Kellner did the design.
One feature of the model was a two piece plastic nose cone, wing pods and tail cone. Estes was just starting to use plastic parts for some rocket details. The other major feature was two LARGE decal sheets. While the model was mostly white, the decals really set it off. The first issue kit price was $4.95.
The original K-50 Interceptor instructions are on JimZs: CLICK HERE In the K-50 kit instructions notice the two piece nose cone, dowel fin antennas and wing pods with balsa nose cones.
This build will be the re-issue Interceptor, kit #1250. While it looks like it has been discontinued, you can probably still find it from some distributors. Retail price is now $30.99. (Only six times the original kit price!)
In the 1990s, Quest came out with their own version, the Intruder. The fin layout is about the same but it lacks the conical, canopy nose cone and plastic fin details of the Interceptor. The decals were also a disappointment, they were peel and stick. CLICK HERE to see the catalog page. I've heard it called "the poor man's Interceptor". I had one of these in a bag but was never interested in building it. It was sold in a kit "lot" on Ebay.
I don't have the new Estes BT-60 based Nike Smoke kit yet, I don't even know if I'll get it or not. On oldrocketplans.com they have the old Centuri Nike Smoke instructions with a fin scan and ruler.
I dropped the picture into Corel Draw and messed with the sizing until the 1" ruler matched a 1" square box I drew. This got the fins size close to the Estes kit fins.
From the Centuri instructions the fin taper measurements are shown. The fin root edge is 1/8" thick and tapers to 1/16" at the outside edge. I had never looked that close before and didn't realize the "diamond" taper line doesn't go to the outside corners. It starts 1/8" in from the leading and trailing corners.
I traced the fin picture with the 1" square reference.
The balsa grain direction runs parallel to the leading edge in the older Centuri model. On the Estes kit the grain runs straight at a 90 degree angle to the root edge.
The Estes fin has two places where the corners could easily pop off when sanding the taper.
These are just observations. The fins are hard enough to sand to a scale taper. Most builders will probably just round the leading and trailing edges anyway.
Here's one of the weird cardstock shroud model from Centuri, the X-24 BUG. This one was introduced in the 1972 catalog. From the catalog description: "Now it's easy to assemble your own model of the manned re-entry vehicle that makes a weird sound and smoke trail as it climbs into the sky. It's unique shape actually makes the X-24 glide back!
I had the Centuri kit back then. I never got a decent "glide" from it. Check out the 1972 price - $1.00! To see the catalog page, CLICK HERE
In 1993, Quest brought out their own version, the HL-20. I bought one on Ebay and tried to fly it a few times. I never got an acceptable glide from it either. The Quest version had a streamer taped to the ejected engine. Two pennies inside some folded cardstock were used as rear trim weight. Here's the Quest catalog page - CLICK HERE The Quest HL-20 instructions - CLICK HERE
Here's a more recent kit version from Squirrel Works, the X-RV. To see the catalog page - CLICK HERE
I'll be making my Bug from the online plans from JimZs. To print it in the correct size, go with the available PDF CLICK HERE
The Centuri X-24 BUG build starts tomorrow! Printing it at home and using spare parts, it may only cost $1.00.
With an engine installed you might have to guess what was prepped a month earlier. Normally I mark the paper igniter retainer with the engine designation. If an engine was friction fitted it's hard to pull it out and check it. This engine is obviously a B6-4. The "E" stands for Estes made, the "X" tell me I have installed wadding. I learned this trick from Bill Gibson at NEFAR launch. For the whole story, CLICK HERE
Recently I was prepping a Flutterby with a pyrogen dipped MMX igniter. These igniters don't have the Estes style paper retainer. A simple solution was to write the engine designation on the 1/4" exposed nozzle end of the engine. I sent Estes a suggestion of printing the engine name on the last 1/4" end suggesting this might prevent launching an incorrect choice of engine. I never heard back from them.
I've always liked the OOP Thrustline Arapahoe E design. This picture is from Rocket Reviews: CLICK HERE John McClure did the build and review.
The original kit was made for D and E engines. The main body tube was a BT-60.
I picked up a few Estes Monarch kits in the recent clearance sales. I'm not too hot on the Monarch design, it reminds me of a three fin Big Bertha or the Quest Big Betty in a BT-55 body. This was one of those kits where the face card advertises: "Water Slide Decals!" The only decal included is the MONARCH name in a smaller size than shown on the face card. Masking and placement of all those silver pinstripes wouldn't be easy.
I bought the kits for parts or a possible kitbash. A down scaled Arapahoe C might put the Monarch parts to better use. This will end up with a BT-55 body tube and 18mm power.
I downloaded the original (BT-60)RockSim file: http://www.rocketreviews.com/unknown-arapahoe-e.html and loaded it into Open Rocket:
Some changes were made and component materials fixed. When you use online RockSim files you do have to double check the parts. This file was missing a launch lug, among other slight things.
This is the XL version of the original BT-20 Estes Hi Flier.
I understand the smaller Hi-Flier is a best seller for Estes. It makes great sense for Estes to produce the upscale. A standard three fin, nose cone design built around the strong BT-60 tube.
All parts are high quality including an 18" parachute, two 11.25" long BT-60 tubes and a thick walled BT-50 engine mount tube.
I'll be adding a homemade Centuri style baffle using the red coupler.
The 1/8" thick balsa fins are large. The wood is pieced together and laser cut.
There are enough decals for both sides of the three fins. Look closely between the grey bands and you can make out the the white ink areas.
This build was actually done back in 2012 but never posted on the blog. As it turned out, the finished model wasn't stable! I'll still post the build as a reference for those wanting to make carded models or great "shelf queens". There are many models suitable for flight conversion on the neilspapermodels.com website. Some cardstock models take time and patience. This one is moderately detailed.
I haven't done a cardstock conversion in a while. This is the Thor Able Launch Vehicle for the Pioneer 1 drawn up by Eric Truax and Jahn Knudsen. You can find the "one sheet" kit print and instructions at: http://www.nielspapermodels.com
According to Wikipedia: On October 11, 1958, Pioneer 1 became the first spacecraft launched by NASA, the newly formed space agency of the United States. The three-stage Thor-Able vehicle consisted of a modified Air Force Thor IRBM (liquid propellant, thrust about 153,000 pounds) as the first stage. A liquid-propellant rocket engine powered the second stage (modified Vanguard second stage, thrust about 7500 pounds). The third stage was a solid-propellant unit based on Vanguard design, rated at 116,500 lb/sec total impulse. The spacecraft was launched from LC-17A at 08:42:00 UTC on October 11, 1958 but it did not reach the Moon as planned due to a programming error in the upper stage causing a slight error in burnout velocity and angle (3.5 deg.). This resulted in a ballistic trajectory with a peak altitude of 113,800 km (70,712 mi) around 13:00 local time. A small quantity of useful scientific information was returned, showing the radiation surrounding Earth was in the form of bands and measuring the extent of the bands, mapping the total ionizing flux, making the first observations of hydromagnetic oscillations of the magnetic field, and taking the first measurements of the density of micrometeorites and the Interplanetary Magnetic Field.
Here's the parts, all printed on a single sheet of 8 1/2" X 11", 110 lb. card stock.
The model will (hopefully) fly on 13mm 1/2A3-2t and A10-3t engines. A BT-5 tube will run down the center. The finished model will be around 1" in diameter and just over 11" tall. I'll have to enlarge the fins and add some nose weight. There is a LOT of small detail work on this one. Get a new, sharp knife!
This should be fun! Here's another kit that shows what can be accomplished using laser cut balsa. "Quin" is for the five point star saucer. No nose cone on this one and it's much larger than the Blenders. The Blenders use 13mm engines, the Quinstar is made for 18mm engines, the B6-0 and C6-0. The C6-0 altitude is 150 feet. I just might convert it for 24mm engines. It should be strong enough, the 1/16" balsa is well supported with all the struts.
The face card is actually a picture of a finished model, not redrawn or smoothed out using photo editing. You can see balsa grain pores. The horizontal flat piece "M" has the hole for the launch lug. There is no lug in the face card picture.
There are five laser cut sheets of 1/16" thick balsa.
A small sheet of silver decals.
A standard 20/50 engine mount with Mylar retaining ring.
The BT-50 tube was flattened a bit. Not creased, but flattened. This was like some tubing found in the STM 012 kit. The kit bag isn't deep enough and compresses down on the tubes.
I'm taking a short break from the Estes Klingon Battle Cruiser. Believe me, I need a break from all the vacu-form parts! It'll start up again after this build is finished.
I've wanted to build one of the New Way kits for a while.
Many sub assemblies are in separate bags.
I'd like to see how the nose cones are shaped! The balsa is smooth and workmanship is clean.
Of course the basis for these kits is the square tubing. The "diameter" is like a BT-55. The Estes Demon was a BT-55 model so this rocket is the same height as the original. The tube walls are thicker than normal. Some have commented that the square tubes are heavy, but for sport flying its fine.
The tubes don't have a glossy surface and the seams are a bit deeper than on a regular round tube. It may take a little more work to fill and smooth but will be worth it.
This should be a fun build featuring everybody's favorite - vacu-form plastic!
This version came out around the year 2000, the twenty-fifth anniversary of the original Estes kit from 1975.
Back then I built both the Klingon Battle Cruiser and the Enterprise. I liked this one better, the Enterprise was dragged behind a long, parachute "probe" tube. The Klingon model flew by itself.
There wasn't many parts in the big box.
The parts of interest: Metallic foil trim Two BT-2 drive unit support tubes Two pats of clay nose weight, one is 1/2 oz., the other 1/4 oz. The vacu-form plastic sheet.
This kit had an added "Special Value! - Includes all the Testor's paint necessary to complete this kit." A $9.10 Retail Value!
This is an exciting new release from Estes, the 1/14th scale Honest John.
The main body is a BT-60 and it takes 24mm engines. Many were curious about the paint pattern. The only place I've seen it before was in the old Centuri catalogs.
Here's all the parts. Lots of 1/16" thick balsa here! The fins are three ply laminates.
The parts of interest: The wrap band is laser cut, the holes are purposely offset. The holes go to the top. The centering rings have what looks like a small hole for a engine mount Kevlar tie! No Kevlar is included in the kit, maybe Estes cut the hole so the builder could add Kevlar if desired. I wasn't expecting the motor retaining rings. The BIG nose cone is well molded with a slight seam.
Lonnie B. picked this one up at a raffle and gave it to me for some blog fodder. It's a good little piece of model rocket history.
Here's all the parts. The kit was in a big bag, almost too large for the parts. Notice the Mylar body tube wrap.
The plastic parts were very well molded. There were no visible seams in the nose cone or what MRC called the "bat" plastic fin unit. The down side are the body tubes. Too thin with a wide interior seam. The wall thickness reminds me of the old CMR tubes. These are not the quality of the CMR tubes. The main air frame tube is a standard BT-50 diameter. I'll swap it out for a real BT-50.
Here's the parachute after being cut to size. The width is 10 1/4", flat to flat. The three shroud lines were pre-cut from very strong rug and button thread. The lines were 24" long.
I have proceeded to cut things up and glue things together, so I guess there is no doubt that I'll build an ekranoplan. That doesn't mean I'll be able to convince the RSO to let it fly.
The photo below shows the start of the forward motor mount plate. If you click through to my Flickr album, there are a few more build photos. I am installing the 24mm Tres mount in the middle of the main wings. This was a trade between CG mitigation and room for the recovery components. I don't know what I don't know and that is a lot. I should probably look at stuff like the CP and NP at some point. I assume I need the CG roughly at the leading edge of the main wings but don't know how much nose weight will be required, if any. There will be eight C6-0s up front. I already have shortened the baffle to give as much room as possible for the laundry. I am a little worried about getting the baffle too close to the ejection. Before I glue it in, I'll guess at a 'chute size and see if I can stuff it in.
I've built a Zooch Ares before, but not this version.
The Ares 1 build was posted on rocketreviews.com CLICK HERE
This was back in 2010. The review had posted pictures of the completed model, but not much build information.
The parts are all good quality, typical of the Zooch kits.
Some parts of interest: The 1/4" wide elastic is 18" long. The Kevlar is a loose wrap, almost like a ribbon. I'll probably leave it off this one and substitute some longer elastic. Four small LAS nozzles cut from ends of fancy toothpicks. The screw eye seems too small.
Zooch nose cones are pre-weighted and have the hole plugged with wood filler. The screw eye goes in off center, to the side of the filler.
"Chute Release is designed to be extremely easy to use. As a first step, you attach the tether to one of the parachute shroud lines (so that you don’t lose your Chute Release). Then, you gather the bottom of your parachute together and wrap the (rubber) band around it and snap the pin into the other side of chute release. That holds your parachute closed until you want it to open. Then you use the buttons to set an altitude. You can pack your chute however you like after that, including rolling it up." So as I understand it - The parachute does eject as normal but the Chute Release holds your parachute closed, wrapped in a rubber band. The reefed chute acts as a closed drogue. When the Chute Release unit senses the preset altitude, the rubber band is released and the parachute fully opens. "A nice benefit of Chute Release is that you can use a larger chute than you normally would. You can choose your chute to give a soft landing without worrying as much about how far it will drift on winds aloft. It won’t fit in every rocket. Practically speaking, the smallest rocket tube that it will fit will be the 41mm (1.64″) BT-60 (Big Bertha) size tubes, and perhaps the international 40mm FAI size. Unless/until we can design a smaller Chute Release, we’ll market this as more of a medium-to-high power product, for motors F-K, since that’s a range that reaches higher altitudes and still usually relies on simple motor ejection." In a word - BRILLIANT! Less drift, and no need for a complicated second BP ejection charge. To see the product development, CLICK HERE
A few months ago, because of a recommendation from Chad, I read Homer Hickam's book Rocket Boys. This was adapted into the film October Sky, starring Jake Gyllenhaal.
In 1957, after the launch of Sputnik, Hickam became obsessed with building his own rockets. But model rocketry hadn't really been invented yet - in fact, the hobby got its start that same year - and a lot of kids tried building their own rockets at home, sometimes with tragic consequences. Cooking up propellant isn't something kids should do in the kitchen. Nobody should do it, unless they really know what they're doing, and most people don't.
If you've read the book, or seen the movie, you know Homer's first few rocket flights didn't go well. The first "flight" blew up his mother's fence. The second didn't blow up - but it flew out of control.
Since his rockets were made of metal, he was really lucky he didn't kill anybody. This is why we make model rockets out of paper, balsa and plastic. Their destructibility is a safety feature, in case something goes wrong in flight.
But what happened to Homer's rocket? Why did it fly all over the place, rather than straight up?
Reading the book was fascinating, and since I'd been studying rocketry for several months, it was fun to see how Hickam came up with a lot of innovations that we see in modern model rocketry today - electric ignition systems, tracking altitude from the ground, using a launch rod and launch lugs - all on his own. Model rocketry was invented in 1957, and it didn't get really popular until the 1960s, so a lot of young rocketeers did not have the benefit of its innovations or safety features, but many of them discovered better practices along the way.
I'd seen the movie years ago. But when I read the book, I thought, I bet I know why that happened. Actually, the reason why could have been one of several things.
There are a number of things to consider when designing, building and launching a rocket to ensure a stable flight. If you are merely building a kit, you probably don't have to worry about it that much. Most model rocket kits are well designed, and designed to be stable.
But if you'd like to design your own rockets - and it isn't that hard, as long as you understand a few simple concepts - it is very important to know something about stability. Also, sometimes we like to hack a rocket kit so it will take a larger, more powerful motor than the kit was designed for. I did this with the Estes Cosmic Explorer, because I love the way the rocket flies with standard motors so much, and I wanted to see it go higher.
My two Estes Cosmic Explorers - the stock kit build on the left, which accepts up to a C motor and flies to about 600 feet, and the upgrade on the right, which accepts a much more powerful E motor, and can top 1800 feet.
A larger motor is heavier, and so stability issues come into play - this is another time it's important to understand the basics of rocket stability. I was able to upgrade the Cosmic Explorer with confidence, knowing that it would have a stable flight, because I understood the basics of rocket stability.
Stability is covered in depth in G. Harry Stine's Handbook of Model Rocketry, which I highly recommend reading.
But I want to cover some of the basics here.
What keeps a rocket stable in flight? The answer might seem obvious: the fins. But simply slapping a set of fins on a rocket is not enough. You need to understand why the fins work, and what might prevent them from working.
The two most important concepts to understand with regard to rocket stability are the following: Center of gravity and center of pressure.
Center of Gravity
Every object has a center of gravity. This is also sometimes called the center of mass. It's a theoretical point somewhere on, inside, (or sometimes outside) the body of the object around which the mass is equal in any direction. This is also known as its balance point, because if you can balance an object - a stick, for example - on your finger or the back of a chair (or whatever), you've found its approximate center of gravity.
Any object in space, whether it's in the vacuum of outer space, or tumbling through the atmosphere, will rotate around its center of gravity. If you flip a stick in the air, it will rotate exactly around its balance point. A gymnast doing a somersault rotates around his or her center of gravity.
Remember how I said that sometimes the center of gravity is located outside the body of an object? That's how a boomerang operates. It rotates around its center of gravity, which is located somewhere in the air between its two arms.
A rocket will also rotate around its center of gravity. Keeping that rotation under control is what stability is all about. Although gravity is pulling equally on all parts of a rocket, from the tip of the nose cone to the end of the motor hook, it acts through the center of gravity.
In rocketry, the center of gravity is often abbreviated CG.
Center of Pressure
The center of pressure is the average location of pressure variation on an object. It's another theoretical point on a rocket - this time, the theoretical center of all the aerodynamic forces operating on the rocket. It is determined by the total surface area of the rocket, and in a way, it's similar to the center of gravity; it's the point where all the aerodynamic forces are in balance. The surface area in front of the center of pressure is equal to that of the surface area behind the center of pressure. Much like the center of gravity, air pressure acts on all parts of a rocket equally, but because the forces are balanced before and behind the center of pressure, we say that aerodynamic forces act through the center of pressure.
But the center of pressure is tricky, because while the center of gravity of an object mostly stays put*, the center of pressure can move around, as we'll see.
In rocketry, the center of pressure is often abbreviated CP. CG and CP are very important concepts, so keep them in your mind.
*(On a model rocket, the center of gravity does move forward slightly during flight. More below.)
The center of gravity is usually indicated with a blue and white checked circle, and the center of pressure is indicated with a red dot, often with a red circle around it, as in the picture below. Notice where the CG and CP are in relation to one another.
Yes, I'm calling it a Centuri ST-20 tube. I like the single long tube instead of two pieces with a coupler. The Centuri kit had an ejection baffle at the two piece tube joint.
This model is based on and uses the capsule and tower molds from the old Centuri kit. The capsule has great detail. The fins are laminated balsa like the Centuri version.
The engine mount is for 18mm engines with the only recommended engine a C6-3. I've seen one fly with a C6-3. With only a 200' altitude it seems under powered. I'll probably make it a 24mm mount and fly it with C11s and D12s. I can still go "low and slow" with a 20/50 adapter.
Pieces of interest: There is only a single 15" parachute. I'll use that for the body and the capsule will descend separately on an added 12" chute. A 1 1/2" long 1/8" diameter launch lug is included. This is cut into two 1/2" lengths. You'd think a model this big and heavy would use 3/16" lugs. Brought up earlier, the red on the decal sheet looks pink. There is the MR7 and too bold a font used on the UNITED STATES. Time for a redraw and home print decals.
I'll start with the fins first. Some have asked how to sand the tapers. There'll be a few posts covering it all.
This one turned out to be one of the weirdest builds yet! The way the model was engineered was interesting but required some extra primer and sealing steps. If you were to just punch out the pieces, glue it together and paint it, you would end up with a model with many rough edges.
I picked up two of these on Ebay for a very reasonable price. In the mid to late 1970s, many Centuri kits had die-cut card stock fins instead of balsa. These two had LOTS of layered card stock.
Centuri called the Marauder fins "baffled, multi-layer" wings. Making a model like this out of balsa would have been difficult. Thick card stock construction solved many problems.
Here's all the parts.
There are four sheets of die-cut card stock in three different thicknesses.
The parts of interest: The LONG blow molded nose cone. By 1979, Centuri was steering away from the two part molded nose cones. The shock cord mount is just a small piece of card stock, maybe too small. The clay nose weight is hard but still usable. One of the two ST-7 missile launcher tubes was a dark purple color. Held up to a light it was almost translucent. I've never seen a body tube like this before.
I've built one of these before, it is one of my favorite MMX models. A reliable, high flyer.
My first HoJo has over 20 flights and is showing it's age.
The kit parts are high quality. The body tube is supplied long and will be cut to size.
I was surprised, decals are not included. Not a deal breaker. I'll print my own decals like before. It'll look like the old Estes kit in black and white with the name "Honest John" down the side.
Why do it in the non-scale Estes style? Because it ticks certain people off and I find that funny.
I've always wanted to build the A.S.P or Atmospheric Sounding Projectile since the first time I saw the Estes Plan #37.
Check out the instructions at JimZs - CLICK HERE Estes did come out with an ASP kit years later but it didn't have this paint pattern.
I drew up a carded BT-5 based version. No painting, except for the silver tip of the nose cone. The body tube and fins get printed wraps.
This was a tough design to get correct! You couldn't simply draw a fin, copy and flip it over. From left to right, the first and third fins are the same. Fins two and four are opposites.
On the left is the first set I drew up. These were wrong. By the time I was ready to glue the fins on, I realized my mistake. The red and black sides didn't mtch up with the body tube patterns. Checking Peter Alway's book, Rockets Of The World, I noticed the spinnerons (spin tabs) were also on the wrong side. On the right are the corrected fins.
Textbook Rocket Launch - Space Center Houston Tomorrow
UpcyclingTextbooks.org threw out a design challenge for builders here to create launchable rockets made from old textbooks... in a week or less so that we could launch them at Space Center Houston's Earth Day Kick-Off on Saturday, April 18th... tomorrow.
Four builders here on TRF-- hcmbanjo, JumpJet, Babar, and Artapplewhite--accepted the challenge and delivered an incredible 13 textbook rockets of unique designs. Some of their builds can be seen on here in the Scratch Build forum. For those of you Houston locals, we'd love to see you for for the event and the launch 3:00pm and possibly a launch at 1:00pm also. Below is a bit of information abut what we're doing tomorrow and also a bit about Upcycling Textbooks.
A huge thanks to all our builders for their creative efforts and lightening speed turnaround to help us inspire change!
Rockets…Rockets…and more Rockets! Upcycling Textbooks @ Space Center Houston Earth Day Kick-Off Come see some though-provoking pieces crafted from… old college textbooks, including several textbook rocket ships, and a satellite! Then pick a favorite textbook piece, hop into our photo booth with your best pose and have your picture taken in front of some of NASA’s finest space images.
Check out a dozen experimental model rockets—built with discarded textbooks—including pinwheel rockets, a stealth rocket and a 1/100th scale Saturn 1B. And join us for a special launch as these one-of a kind “textbook rockets” spin and soar through the skies—some are predicted to blast several hundreds feet high.
Here's my submission -
It's called the "Speed Reader". I know - a little plain compared to John Boren's textbook Saturn 1B! The simpler design was a compromise. I only had a few days to put it together. The first package I received from Upcycling Textbooks contained a scarf and a letter thanking Grandma for taking care of the grand kids. I got my textbooks four days after that!
From Upcycling Textbooks: Upcycling Textbooks is a movement determined to advance education beyond textbooks, with more affordable, more environmentally friendly and more personalized learning tools.
If we can put a man on the moon, we can do better than textbooks. And we want something better. So, let’s use our creativity to spark innovation and fuel change. Let’s transform those old textbooks into something better and inspire people to see textbooks, learning tools and education in a new way.
What could you make from an old textbook to inspire change? A work of fine art? A top secret safe? A planter? A musical instrument? An iPad case? A solar oven? A rocket that actually blasts off? Textbooks probably never really wanted to be textbooks. So, let’s set them free and help create change. Share your piece on UpcyclingTextbooks.org. Tweet pics @UpcyclingTexbooks. Tag pictures #UpcyclingTextbooks or #UpcyclingTxtbks.
Check out other thought-provoking upcycled textbooks in the Gallery and Blog on UpcyclingTextbooks.org. Join our challenges and join a community of people who want change.
This model was from Peter Alway's Home Page. I can't seem to find it now! If anybody has a link, let me know. The website had plenty of sport and scale plans including a Vostok, Saturn I and a Flying Rabbit that looks better than the old Estes Cloud Hopper.
You can get Peter Alway's books: Rockets of the WorldHERE and Scale BashHERE Both highly recommended!
There's one model that has been on my "to-do" list for a while. The SATURN IV! This is Peter's "psuedo-scale" design of a Saturn that could have existed between the Saturn 1 and Saturn V, the Saturn IV.
Full resolution plans aren't available now, I'll build from the website pages.
Could this have been the missing Saturn IV? Dick Stafford posted this on his great Original Rocket Dungeon Website. HERE
From a February 24 post, TRF member luke skywalker has posted a summary of NASA's "Big G Final Report-Logistic Spacecraft System Evolving from Gemini." This includes drawing of more cool looking rocket configurations that never were and the layout of the capsule options". Here are da' rockets." I have most of the tubes already, the largest diameter is short lengths of BT-60. The nose cone is a PNC-55AC, or the same nose cone from the Bullpup and old Arcas kit. I pulled one from the PNC-55 assortment. I don't have the 55-60 adapter rings, an order is off to BMS.
For a while it was rare to find kits with clear payload section tubes. I'm glad to see they made a comeback.
Part of interest: The laser cut fins didn't get cut all the way through the wood. While you should never just punch fins off the sheet, these will take a few passes with a sharp knife to free them.
Here's the big one, the The Launch Pad PERSHING MGM-31A.
It's about the same size as the old Estes Maxi-Brute Pershing at 39.75" tall.
The Estes kit was 41" tall, BT-101 at 3.938" diameter.
Lots of parts, balsa strips and nine centering rings.
Below the nose cone are the two nose cone washer weights.
There is no engine block, the model uses Aerotech engines with the rear centering ring.
The body tubes from left to right: 12" BT-60 6" BT-80 12" BT-80 21.25" BT-101 The first picture shows the 2.75" long BT-50 engine mount tube.
The Estes kit used a blow molded nose cone. This long nose cone is formed with card stock shrouds. There are three shroud pieces topped by a conical balsa nose cone. The shrouds were rolled up in the large tube.
There are plenty of card stock templates. The upper square fins are card stock over built up balsa stringers. On the lower right is the tri-fold shock cord mount.
This is a Mylar parachute, a six sided oblong shape. Dimensions are 18" wide by 30" long.
An auspicious occasion, ladies and gentlemen. I have this evening opened up the last of the kits from 2013 still in the build pile: The Estes Xarconian Cruiser #3223. (And if you want one yourself, go buy it now! Estes is having another of its sales — no, this isn’t a holiday weekend, but apparently their ...
I launched the SPUDNIK twice yesterday morning, both times with a A10-3t engine. Both flights were stable to about 100 feet but there was corkscrewing.
The Odd'l Rockets Sputnik (with the 3" foam ball) flys vertical without any "coning" or corkscrewing.
The problem is trying to drill out a straight 1/2" hole for the engine mount tube. If the line of thrust is off by a degree or two the rocket won't fly perfectly vertical. Add the uneven surfaces along the top and it probably won't fly without some spiraling. Drag and weight are other considerations. On both flights the model was nose down and ejected the engine at half the altitude. I know - MORE POWER! A larger engine (B6-2 or C6-3) would get it higher in the air but still doesn't solve the mount hole reaming and deflection from the uneven top surfaces.
The inset picture shows the micro clips connected to the igniter. If you have a Sputnik rocket, be sure the clips have no chance of getting caught up on the legs!
The Spudnik won't become a kit. There just isn't a way to ream out a straight hole for the engine mount tube. This isn't a loss by any means. I'm only out a few dollars for the potato and two engines. You'd be surprised how many models are built, flown and not released. I might fly it at a club launch but wouldn't want to release it for sale with the stability concerns.
I've always liked the looks of the Canadian Black Brant series. This one was an Estes kit #1293, now OOP.
The Estes Crossfire ISX uses the same nose cone and tail cone nozzle as the Black Brant III kit. I bought two Crossfire kits. The engine mount, nose cone / tail cone section and parachute will be used.
This kitbash is inspired by a build by JeffyJeep on YORF: HERE The kit instructions are at oldrocketplans.com:HERE
Normally you could find the sizes of Estes body tubes at: Estes Custom Parts Catalog from 1974 HERE The BT-50N tube is not listed!
JeffyJeep gave all the information I needed in his first post: "I've collected all of the parts needed to do the build (except for the decals that should get here this week from Sandman) and I've blade cut three fin blanks from my best sheet of 1/16" Midwest basswood. Main BT is BT50 x 14" long. Launch lug is an LL-2B, .125" x 2.375". The Crossfire's engine mount tube, thrust ring, and AR-2050's are the same as what the original BBIII kit contained. I'll use an original-type "non-snelled" engine hook for the build, but I'll modernize the guts with a Kevlar shock cord leader and an extra long, elastic fabric shock cord."
I've never built an Estes Guardian. Somewhere in the Ebay buys I ended up with two.
Both kits had white tubes. You can see the bent tube on the right. I have some extra BT-55 and will cut a new one.
The 50/55 adapter is the same one used for the Bullpup kit tail cone. The shock cord is too short, only 18" long. One kit has balsa fins, the other laser cut Tung wood. All other parts are standard.
This bent tube had small spirals. The second kit had a very rough BT-55 with wide spirals, the worst I've ever seen in an Estes kit. The parachute is 12", yellow and black in the "spiderweb" pattern. The shock cord is too short, only 18" long. While the face card shows a very colorful model, you are only given a white nameplate decal that fades into blue.
The paint pattern is a very tough mask. I doubt few builders have tried to do it. I'll tackle it using a combination of paint and trim Monokote. The face card picture looks like Estes used trim Monokote on the blue fin centers.
I haven't built many of the ASP (Aerospace Specialty Products) kits except for two of their Micro Maxx models. I've always liked the looks of the Corporal. This is a BT-50 based, 18mm model.
ASP also makes a BT-55, 24mm version. I picked this one up at JonRocket.com.
Parts are standard and high quality.
Parts of interest, clockwise from the upper left: The clay nose weight, vinyl roll pattern, two longer 3/16" square balsa for tunnels, a metallic orange 12", 8 sided Mylar parachute, two smaller 1/8" square balsa tunnel pieces, red motor mount tube, large screw eye and snap swivel, black vinyl for fin area roll pattern, 1/16" basswood for fins, fin pattern.
The clay weighs in at .85 oz. I don't think I'll be using all of it.
Before starting on the build, check back to this older post about the Mini Mosquito instructions HERE This one will be quick! This is the Mini Mosquito packed as a bonus kit with the Mega Mosquito model. It's a repro of the original smallest rocket in the Estes 1972 catalog. There is really only six parts in the Mini Mosquito. Three fins, one nose cone, a BT-5 body tube and launch lug. This new version has a small Mosquito decal.
The parts of interest: The small decal sheet. The production copy is larger than the 'bug" and the very tiny Estes logo. The logo is unreadable. Again, the embossed production date stamp is too close to the decal image.
I'd been curious about the Chinese made MPC licensed kits. This one looks nothing like the Star Trek enterprise except for the parachute and logo. I made a Ebay bid of $.99 and won it! I feel like I only paid for shipping.
Opening the box I was surprised by the BT-60 size diameter of the body tubes.
The 18" parachute looks like the round body of the T.V Enterprise. The plastic is thick, maybe 2mm.
Stick on fin decor and a nose cone wrap that goes on right above the shoulder.
The plastic fins are very flexible and shouldn't crack.
Below the fins is the fin can and engine cap locking ring.
The tubes are convolutely wound. They look and feel like rolled thin sheet plastic! Not spiral wound but wrapped like you would roll a body tube on a card stock model.
The nose cone is blow-molded, 7 7/8" long! Directly below the nose cone is the tube connector.
The box copy describes it a a "two-tiered design". I think of two-tiered as a larger lower section and smaller upper section. Upper and lower section diameters are the same. The parts illustration on the back of the box looks like the old MPC line drawings.
The diameter is 1.58 or 40mm. When the fins are slid on and the tubes joined with the plastic connector, the model is almost 28.75" tall!
The recommended engine is a C6-5 - the package says the model weighs 3.67 oz. Maybe it'll only get 260 feet as advertised! Estes or Quest C6-5? I wouldn't use a Quest engine in this heavy model. It'll be interesting and require a lot of plastic cutting - it'll be converted for D12 engines. EDIT: I should have added - These models are not the old MPC designs from the 1970s. These models are based on the Chinese made SKY brand model rockets but in a trademarked wrapper. The MPC / Round 2 models use licensed images of the Warner Brothers cartoon characters, the rock band KISS and Star Trek. They also have some "generic" designs: Red Giant, Lunar Shuttle and G.T.S. 1. MPC / Round 2 have also brought back the old plastic MPC Vostok and Titan IIIC. Go HERE to see some of them.
Round 2 has brought back the MPC Vostok and Titan IIIC plastic models HERE. The re-release kit doesn't include any parts for flight. EDIT: The larger flight fins are included. The two piece molded launch lugs are still on the molded pieces. This build is the older version from the 1970s where you could "Build To Fly" or Build To Display". I'll try to include all information needed for the flying conversion. You should be able to fit a 20mm (or BT-20 tube with a shim) in the hollow middle plastic section. The AVI folks sent this one to me. I've had it in storage for over 35 years.
The plastic parts, many are broken off the trees . Most is molded in white, there are some chrome and clear parts.
Parts needed for the flying version: A large 20" Mylar parachute, 8 shroud lines and unusable tape strips. How you gonna' fit all that into a 20mm tube? A Stine "Shock Lock" shock cord attachment 9" long 20mm heavy walled tube Two lead weights One for the Vostok, one for the Sputnik capsule, your choice Thin yellow engine compartment tube The instructions said there was a brown tube, I couldn't find it and substituted a Quest yellow tube. Two engine hooks were provided, only one is needed Four larger for flight fins. Smaller display fins were included. In the middle are the two interior halves, the 20mm tube slides inside.
Here's a great Shrox design introduced in the 2010 Quest catalog. I understand Shrox likes conical pointy nose cones, the older MPC Nike Smoke nose cone is used here. This design also used a Shrox standard, the 50mm intake tube underneath.
Here's all the parts: The 18" 35mm main air frame tube Two piece Nike Smoke nose cone with tip Laser cut balsa wing fins Large decal sheet 1/8" launch lug 18mm engine mount 10" long 50mm intake tube not shown (I don't know why I didn't include it in the picture)
Some parts of interest: The 35mm body tube had a discolored spot on it. Oil? I'll have to double check it when the spray paint is applied. 14" parachute has thick off-white shroud lines (replace) Thin 18mm yellow engine mount tube (replace, more on this later) Engine hook (replace with spring steel engine hook)
I bought this one on sale from Uncle Mike's rocket shack. An interesting design with conical stability.
Parts were of high quality. The model is BT-50 based. This is another of the better BT-50s. They seem a bit thicker walled.
The parts of interest: 12" diameter red Mylar parachute. 3" long launch lug Three small laser cut fins, 3/32" thick stock 20/55 centering ring for shroud base Tri-fold shock cord mount. I'll replace with Kevlar from the engine mount. The conical shroud printed on 65 lb. stock. I'll scan it and reprint on 110 lb. card stock.
I haven't built a MMX rocket in a while. They are great first launch of the day models to test the controller, rod angle and winds. This one is almost a minimum diameter and should be fast with good altitude.
Parts quality is very good. The engine mount tube is a BT-2.5, just under 2" long. The crayon tube is a 6" long BT-3. The streamer is red plastic, 1/2" X 12" long.
Clockwise from the top: The Kevlar shock cord is thin, the line in my MMX Honest John has burned through. I'll replace this line with something slightly thicker. There is plenty of clear fin material, make extra fins. The body wrap is printed on red construction paper. The four centering rings and engine block are small but very well cut. The small nail holds the shock cord in the nose cone base. Finally, the crayon balsa nose cone.
While the FlisKit crayon wrap looks great I went and redrew a Crayola crayon logo wrap. I simply wanted it to look like a Crayola.
Oh boy - this should be a fun one! Skill Level 2? No, I don't think so. More like a Skill Level 4. It's interesting to look up the Centuri Blackbird instructions at Jim Z's - HERE
This BT-50 based model looks to be a downsize of the earlier Centuri kit. The larger BT-60 Centuri version was using Estes parts at the time.
The kit parts were actually good quality. The BT-50 tubes were the best I'd seen in quite a while. The biggest downfall, the decals are peel and stick! Many of them are white so I won't be able to redraw and print decals at home.
The embossing on the card stock is faint - almost not there! Some of the die cutting is off, more on that later. I can already see how hard these will be to glue and form over the central BT-50 tube.
Here's a build by request, the Estes Gyroc, # K-24 I received my first Gyroc as a Free Kit for placing a $5.00 Estes order.
Wayne Hill's Rocketry Blog gave some history: http://rocketry.wordpress.com/2006/06/06/rocket-of-the-week-662006/ "The Gyroc was originally released in 1965 and was offered as “Free with a $5.00 order” in the 1967 Estes MRN. The kit was listed asK-24and was offered through 1983." Years ago my first launch experience with the Gyroc wasn't successful. The moment it left the launcher the fin panels flipped. I didn't install the hold-down tabs correctly. The Gyroc did a tight loop and stuck itself into the dirt. I'm hoping for better luck this time.
On the upper left you see how it appeared in the 1969 Estes Catalog. As far as I know, this was one of the first helicopter kits available. I won't be attempting this paint job. It would be tough to get the spiral paint patter under the large wing fin. In later catalogs the Gyroc was painted yellow overall and used some of the black decals from the Beta kit.
The parts from left to right: The "Tape Hinge" material will be cut from the border pieces left from a stick on CD label. The "Flap Holders" will be carved from a larger craft stick. An LL-2A launch lug, 1 1/4" long BT-20D body tube, 6 1/2" long BNC-20B nose cone EB-20B engine block 1/16" thick balsa sheet (once known as BFS-20) Instructions printed from the JimZ website http://www.spacemodeling.org/JimZ/estes/k-24.pdf Elastic thread not shown
I recently released a new carded model PDF for a downsized Centuri BANDITO. The big Bandito design feature were the wedge fins. This build does require some extra care, especially when forming the wedge fins.
You'll find the PDF art for printing at home HERE Make two prints of the PDF, one on 20 or 24 lb. paper for the body wrap. 24 lb. paper will look better. You'll need a BT-5, just under 8.6” long. The printed body wrap goes over that. The second print is 110 lb. cardstock for the fins. There are plenty strong when made from 110 lb. stock. The Nose Cone is a Semroc BC-522P, 2.14” tall. This is the closest profile available for the downscale.
The fins are printed out on 110 lb. white cardstock. Don't cut them out yet! You'll need to score them first. BE SURE YOUR HANDS ARE CLEAN BEFORE ANY FOLDING!
I'm using the rounded metal back side of a single edge razor blade to score a line down the dashed centerline. Put a few layers of masking tape over the sharp edge (now facing up) so you won't cut yourself. I'm not cutting halfway through the cardstock to make the fold. The backside (not sharp side) of the blade is pressed into the cardstock, embossing a line for an smooth rounded fold. Carefully place your straitedge down the center before using the blade back. Score all three fin centers before cutting them out.
After scoring the centerline: Cut the fins out oversize, outside the border lines. It's easier to fold the fins with some extra card stock outside the sharp tips.
Don't fold a sharp crease yet. Using just your fingertips lightly fold down the scored line making sure your fold is centered. The sharp fold comes in the next post.
I’ll be in transit from Manila, Philippines to Orlando over the next day or so there may not be any blog posts. Thanks for your patience. While on the cruise I wrote an article for possible online publication about how to shape Nike style fin diamond tapers. When I get back I’ll be finishing up the Estes Xarconian Cruiser and building the new improved PIGASUS, soon to be a Odd’l Rockets kit. This model always turns heads and could be popular with rocketeer wives and girlfriends. Drawing up the instructions for the flying pig took a lot of time!
I won this one on a EBAY lot auction for a great price. I'd wanted to build it for a while. The parts are great quality, typical of FlisKits. There are two thicknesses of balsa sheeting, one 1/88" thick and one 3/32' thick. The model is BT-60 tube based.
The Kevlar seemed a little thin, it's probably fine but I'm going replace it with 150 lb. There is an addendum to the instructions to add clay weight. The clay is needed for stable flight with larger 18mm composite engines. Recommended engines are B6-4, C6-5, D10-5 and D13-7. The fin pattern sheet was folded in half though the fin marking guide. Only one copy of the shrouds is included. Fliskits usually includes a few shrouds. This is a complex shroud and I could use extras for a backup. I'll scan the sheets and print off more.
The original Centuri Hornet kit was BT-55 based. It came out at a time when Estes had pretty much absorbed the Centuri line. New Centuri branded kits were using BT tubes instead of the Centuri ST tubing.
The above picture is the Estes reissue. This downscale will display the Centuri logo. The Estes version has the fins glued flush with the bottom of the tube. Centuri's Hornet had the fins set above the rear. Semroc also has a Hornet kit but it doesn't have the Hornet (bug) drawing in the decal. This downscale will be from the original BT-55 to a BT-20 diameter.
To get the Scale Factor, the BT-55 diameter of 1.325" was divided by the BT-20 diameter of .736" The result was 1.8. Every measurement would be divided by the scale factor of 1.8 to get the smaller downscale sizes.
The online Hornet kit instructions told me the BT-55 tube was #30383. Not much help, I couldn't find the length in any catalog. The Centuri kit nose cone was #71070 which looked to be a 4 to 1 ogive shape.
Here my preliminary figures: Centuri HORNET Kit # 5341 Carded Downscale Information
Original Model is BT-55 based at 19.8” tall Allow ½” off low end for engine mount extension = 19.3” tall with NC
Original Height 19.8” divided / by 1.8 scale factor = 10.72” tall BT-20 based downscale with the nose cone in place. Semroc Nose Cone BNC-20G4 is closest profile at 3” tall 10.72” overall downscale length - 3.0” tall NC = Downscale BT-20 body tube length of 7.72” long
The other available measurements when divided by 1.8 - Down Scale Launch Lug is 2.22” from rear of BT-20 tube Down Scale 1/8” diam. Lug is approx. 1.15” long Down Scale Trailing edge of fin is .41” from rear of BT-20 tube. Down Scale Fin Root Edge is 1.25” long.
I recently got an Estes Xarconian Cruiser on EBAY. When Estes introduced it I thought it looked familiar.
The above picture is the Estes Xarconian Cruiser. The picture below it is my Starship entry from the 1972 Centuri Photo Contest.
I presented the model to Grant Boyd after he gave my family a tour of the Centuri facility. Later I found out it remained on a display shelf in the Centuri store for years.
The wing and rudder shapes do follow the same lines. On either side of the rudder are split tubes. On my design the split tubes are each capped with half a nose cone sanded to the body tube contour. My design has toothpicks on the outside edges of the wings and rudder. Back then many Centuri kits incorporated them.
Did this old contest entry influence the Xarconian Cruiser design 40 years later? Who knows.
I rode the mini-bike a few times and fell off a few times. It was sold to buy more rocket supplies.
Here's a rendering of the 1st cut at a RockSim model. I was scrounging around looking for something to build for the new Estes 29mm BP motors. I had an extra Quest MLAS kit and decided to convert it. There wouldn't be much room for a 'chute(s) and a fair amount of extra nose weight would be required. It already uses a heavy lag bolt for the nose weight and is not a particularly durable kit.
I found a slightly beefier tube of the same OD and somewhat arbitrarily decided to stretch it by 1.75". I also decided that I'd use the surviving fins from my high power upscale for the lower set of fins. I haven't assessed the nose weight situation but, between the larger lower fins and longer body, I hope the stock nose weight will suffice.
The original Estes S.P.E.V. was said to be a Spare Parts Elimination Vehicle. The facecard called it a SPace Exploration Vehicle.
You can see the profile of the (then discontinued) Thor Agena B kit. The BT-70H tube was the same length as the Little Joe II, also discontinued.
There is a LOT of balsa in this kit, notably the large TA-6070 reducer.
It is a large model with an interesting look. There's some Saturn V influence in the roll patterns.
The parts of interest:
BIG engine mount centering rings. That big balsa adapter, Relatively small fins, much like the Saturn V. There are also four slim "stick" fins that trail past the end of the body tube.
Here's a great small field flyer and a favorite Goony- The HONEST GOON!
You can get the decals and plan set from Excelsior Rocketry HERE The builder must supply a Baby Bertha kit, a BT70AJ, a TA6070, and a small ring of BT70. This was an early BAR build, it's been through the wringer. I liked the design but was never sold on the OIC-URGOONEY and OOPS decals. The new decal draw will more reflect the look of the old Estes Honest John. I don't know why I didn't paint the fin areas with the alternating black and white sides.
Old clear coats are yellowing up. The model was also used to test the application of Future acrylic coats. Still very strong and not to terribly banged up. It's worthy of a refinish.
These decals were tough to remove. They've been in place for years.
Scotch tape was pressed down and quickly pulled up. Some decals came off easily, others - not so much.
Most had to be sanded off with 400 grit sandpaper.
I'm doing a redraw of the decals and will print them off at home. The Excelsior decals are great quality - I just wanted to draw some changes from the originals.
You can see where the clear coats have "pooled" on the trailing edge of a fin. There isn't much grain but still could be better. Sanding down the white paint will fill in some of the shallow balsa grain pores.
Here's another one that can be made from parts from the Baby Bertha kit. This was the Estes kit #1391.
Check out the instructions at the JimZ plan site HERE
This will be a spare parts box build. The red nose cone did come from a Baby Bertha kit. It was painted red when it temporarily sat on my Ranger. A shot of primer and some white and it'll work on the Shuttle. All the patterns were copied and printed from Ninfinger's.
The instructions say the clay is 1/2" square. I'll have to check the weight.
The wings and rudder were cut from 3/32" scrap balsa. The wings are made from three pieces of balsa.
Here's a classic, the Estes Constellation. It was Kit #K-35
This is one of the Semroc X-kits. No instructions are included, they are printed off from the Jim Z website.
I had built this one years ago. I'm hoping to have better luck with the teardrop shaped landing pods this time.
The parts of interest: The decal sheet doesn't have any white ink, the face card picture shows three white fins. The old catalog pictures had one black fin with a white "1" decal on it. I don't know where the four black rectangles (next to the red USAs) would go.
Middle left is the tape strips used when gluing on the clear payload tube to the balsa coupler and nose cone. I was surprised the engine hook wasn't spring steel. It was easily bent and will be replaced. An 18" long old style rubber shock cord was included.
Not shown: A dowel was included for a launch lug standoff. This standoff wasn't really needed, the payload section wasn't a larger diameter than the lower end of the model. Back then, Estes had some kits designed for their C rail.
I found the MMX Saturn V the most interesting of the new releases from FlisKits.
Here's all the parts -
It's advertised as the "World's Smallest Flying Saturn V". I checked - the Quest MMX Saturn stands 5 3/4" tall. The FlisKit Saturn V is 4.65" tall.
Some parts of interest, clockwise from the left: Water slide decals that take care of most all of the trim. The card stock sheet with the fins and drag shroud Plastic streamer recovery Scalloped ring that forms the rear edge of the engine skirts Balsa nose cone forming the upper stages Small plastic rod for the launch escape tower.
On the back of the instruction sheet are the engine skirts. Jim Flis always gives extras on pieces that might be hard to make the first time around. Thanks Jim - a great idea for small parts.
I know, a level 1 kit? Why not! Sometimes you can take a simple model, change it up a bit. A few improvements and you can make it your own. At the last Tampa TTRA launch, Lonnie B gave me a Quest Viper kit to play with. Lonnie picked up a bunch of these on a recent purchase on Craig's List. Thanks Lonnie, lets see how we can "hop up" this one!
This would make a pretty good first rocket.
A molded one piece fin unit with integrated launch lug - in the picture the fin can is shown upside down.
Plastic nose cone
Kevlar and elastic shock cord
White body tube - No painting! (Unless you want to)
Parts of interest:
Tyvek tape disks for parachute edge reinforcement
14" Quest (stiff) parachute (a little large for this model)
I'm building a few of the discontinued Quest kits while they are still available from vendors. The Shrox kits and this great Raptor design are no longer being produced.
The parts were standard Quest fare.
The water slide decal sheet didn't have a protective backing sheet and some of the decal ink was left on the instruction sheet.
Part E (the tank tube under the main body) had some very deep spirals.
I need some "non-standard" centering rings for an upcoming build. A series of three interchangeable engine mounts will be made for a Semroc Centurion. I don't use BT-20 tubes for 18mm engines, they are too thin and weak. ST-7 tubes will be used. No BT-50 tubes for the 24mm mount, again too thin. I have some thick walled BT-50 tubing. The Semroc Centurion uses a Centuri style ST-16 mainframe. Sure, I could put in a custom order, but sometimes it's quicker and cheaper to just make your own from scrap framing mats.
I don't have a circle cutting compass. I know, I should have one. These rings will be cut with a new #11 X-Acto blade.
Trace around the larger diameter tube first. You won't be able to visually center the large tube if the smaller motor mount tube circle was drawn first. Use a sharp, thin mechanical pencil.
With the larger tube diameter drawn you can center the inside tube circle inside of it. Draw and check the center circle. If it's off, erase and redraw. It might take a few tries.
TIP: Cut the smaller inside circle first! You'll want to have plenty of border material to hang onto.
Here I'm cutting a little inside the pencil line. The traced line was drawn around the outside of the tube. You have to make allowances for the thickness of the pencil line next to the outside diameter of the motor mount tube. You can always sand to a perfect friction fit.
I picked this one up at the February Orlando R.O.C.K. launch. It's originally a Custom Rockets Zero Gravity kit. I saw it in a "bargain box" at the jonrocket trailer for $5.00.
But, something was wrong - Take a look at the nose cone - Somewhere down the line it was subjected to heat and warped! The bend starts about halfway down the nose cone.
I showed it to Roger and he said: "$2.00!" Heck, for the parts alone that's a great price. I bought it, warped nose cone and all.
The parts of interest: Of course, the warped nose cone. 1/4" elastic shock cord seemed thick for a BT-50 based model. The Die Cut balsa fins. (I thought all kits had laser cut fins these days.)
The other parts were of high quality, the BT-50 was better than many I've seen in recent Estes kits. I like the Custom line of kits. Good quality at a reasonable price. Now, what can I do with that nose cone?
A 4FNC rocket? I always need good models for soccer field launches and I have plenty of A6-4 engines to run through. There were "gotchas" on this build and some problem solving. Many have had trouble packing the wadding and streamer in such a short body tube.
I built a clone of the Quest Cobalt a while back.
I wasn't happy with the stability and wanted to try the actual Quest kit to see where I messed up!
All the parts -
That 40mm body tube is only 4" long!
The engine mount centering rings are a thicker, stronger stock. Older Quest kits had thin rings. This is a good improvement.
The laser cut fin stock is 3/32" thick.
Some pieces of interest -
The centering rings have no notches cut for the engine hook movement.
There is no hole for the Kevlar line. The engine hook will be replaced with a spring steel hook. Below the engine hook is the "Gripper Tab" to attach the streamer to the shock cord. Self-adhesive sticker decals - oh great!
Thanks go out to Ross Mozier, a member and flyer in the local R.O.C.K. section. Russ gave me this kit and 12 MicroMaxx engines! I told him I'd put everything to good use.
Ross also gave out kits to kids and spectators at the recent R.O.C.K. launch.
Ross mentioned that all the parts might not be there, he'll take parts from various kits when he scratch builds. I let him know I had plenty of spare parts, I should be able to put it together.
Originally, the Triple Threat kit had three saucers in one kit bag. These are made for 13mm engines. The A10-0t is the only recommended engine.
This kit was discontinued a few years ago, maybe because Estes didn't make the A10-0t for a while. These instructions were dated 2002, it was production kit #56. The face card says" "Altitudes of only 50 - 75 feet!" Hoo-Boy!
I had the printed body pieces for two of the three saucers, the most important for the build.
I bought .025" diameter music wire for the antennas. A length of 1 3/4" BT-5 was cut. Two 1" launch lugs were pulled from the spare parts box.
I don't like how far the finger tabs extend beyond the back end of the model. I first saw this tip on TRF, I believe Doug Sams posted about it.
TIP: Cut off the finger tab as shown. You might find it easier to use a Dremel and a cut off wheel. Flip the hook over - This rounded end goes to the top of the engine mount, the more square bent end goes to the bottom.
This makes for a cleaner looking model and the rear bend of the hook now has a sharper, square bend to lock over the rear of the engine.
While not mentioned in the instructions, The centering rings should be notched where they go over the engine hook.
Slide them in place over the hook and mark. Use a sharp knife or jeweler's diamond file to make the shallow notch.
The thin engine block is glued into the front end of the tube.
It sticks out a slight bit, raised beyond the tube by the thickness of the engine hook.
This is one I drew up on the last cruise. Not much to it,the chorme print decals are what set it apart: BT-5, 2 1/2" long BC-505 Nose Cone from Semroc equivalent to the Centuri plastic cone used in the kit 3 or 4 dowel fins, your choice, all 1/16" x 8" The picture shows 1/8" dowels,I used 1/16" carbon fiber dowels You can use wood dowels, a 1/16" diameter fits the fin notch best. NOTE: The antennas in the Centuri instruction drawings look to be longer. I found out too late the dowels were 8" long! I went by the parts picture and ruler and cut mine to the 4" length shown at www.oldrocketplans.com Two 1/8" X 3/8" fin Luglets 13mm engine block (not shown in picture) Thick Mat Board or Triple thickness cereal box cardboard (for antenna mount triangle fins)
The older 13mm Centuri Mini Engines were 2 1/4" long, this model will use the Estes 13mm engines at 1 3/4" long. The engine block is glued 1 1/2" inside the rear end of the BT-5 tube. This will allow the engine to extend 1/4" out the back.
You can use the "simulated chrome" body wrap, shown at the upper right of the instruction sheet. Or, use the black and white wrap below that and print on colored stock. 24 lb. paper is recommended for the the body wraps and overlay pieces.
The lower half of the available PDF is the decal art to be printed on a clear decal sheet. You can apply chrome Monokote Trim to the body, then apply the black water slide decals over the Monokote. This gives the printed chrome look of the original kit.
The PDF is available now - just send a request for the Satellite 62SL PDF to: oddlrockets@bellsouth.net
I don't think many of the kits in the catalog ever made it to the hobby stores. A few of the AVI engines have been shown on the forums.
This was a kit made up from two older MPC kits, the Tomahawk and the Nike Smoke. The Tomahawk was 20mm tube based, the Nike Smoke was a 35 mm tube. Quest sold both the plastic fin cans up until July of this year, I ordered three. The plastic transition doesn't exist - it'll have to be made from card stock shrouds.
The model is based on the Peter Alway drawings from Rockets of the World, 3rd edition. You can find it on page 161.
Before I show the parts, the adapter will have to be made.
The scale factor (based on the 35mm tube at 1.378" diameter) is 11.93.
To get the scale factor, the diameter of the Nike Booster body (16.44") was divided by the 35mm body tube (1.378") The result was a scale factor of 11.93.
All the dimensions in the Alway drawings were divided by the 11.93 to get the model dimensions.
On the left side are the real dimensions in inches. On the right are the model dimensions.
The 20mm tube is a bit off. 9.0" (real Tomahawk diameter) divided by 11.93 = .754" model diameter.
The 20mm tube is .787", close enough for sport scale.
The adapter will need two rings 1.5" wide. They are cut from mat board and two will be glued back to back for the wider center piece between the two shrouds.
Before showing all the parts, I'll need to clean up what I have and make the adapter. This adapter assembly will take up a few posts!
The original Estes Midget kit was one of the first rockets I ever built. In 1969 I thought $1.25 was a great price for a two stage rocket!
Before I start on this one - This build is not the recently released Retro Repro Midget kit from Semroc and not the original Estes kit. This is a clone kit I picked up off EBAY. I thought the price was good, under $10.00. The new Semroc kit is only $10.00!
I should have waited for the Semroc repro! There was too many things that needed fixing to get it close. Here's the parts I received. There are two 1 3/4" long 18mm casings I cut for 13mm engine adapters. I got this idea after reading over the Semroc Midget instructions online. When I received this kit, I thought - How ridiculous! This model can't be flown with current 13mm "T" engines. It was a clone of the old "S" (for short, 1 3/4" long) engine model. So it sat in the build pile until I saw how Semroc adapted 18mm engine casing adapters. A simple solution.
The strange thing is, these fins were laser cut by Semroc! I could assume most all the other parts were also from Semroc.
The clone kit didn't include a parachute or a proper shroud. I wrote a note to the producer of the kit and a new Estes 12" parachute was sent.
The 20/50 shroud transition was printed on 20 lb. copy paper. I felt it was unusable. A 110 lb. cardstock print of the shroud was sent with the parachute.
To the right is the LONG dowel for a lug standoff, the laser cut launch lug and
the two, 1 3/4" 18mm casings.
The short BT-20 tube is the engine mount tube for the upper stage, probably the shortest engine mount tube I've seen in a kit.
Above it all is the 20 lb. copy paper shroud. More on that later.
To the far right are the very short 1/8" long engine blocks. One goes above the upper stage engine as normal.
The other goes below the booster engine in the first stage.
This build is a classic, a Semroc reissue of the Estes Goblin kit #702-K-55. I remember getting one as a free kit about 1971. It was later added to the catalog line up in 1972. The price was $2.50.
It featured a long nose cone, square block fins and a goofy black decal sheet. I remember thinking how much thicker and stronger the BT-55 body was compared to my other BT-20 and BT-50 models. Back then I never flew mine with the new D engines. I used the EM-2050 engine adapter with 18mm engines. This Semroc kit comes with an 18mm adapter.
Semroc calls this one part of the Magnum Series. The word "Magnum" was used by Centuri to describe their D engines. I don't remember Estes ever calling the D engine birds with the Magnum moniker.
Parts are all first quality. The split 2050 centering ring is the cleanest straight cut I've ever seen in a model rocket kit. The launch lug is 3/16" diameter X 3" long. The original Estes kit used a 1/8" X 1 1/4" long or the LL-2A. Semroc has you glue the lug on in one piece. The Estes kit had the lug cut in two and was glued at the top and bottom of the BT-55.
The AR-5055 engine mount centering rings are a thick card stock in the Semroc kit. The older Estes rings were more like the 2050 wound rings in the enclosed 18mm engine adapter.
The decals look great! They are printed close together on the small sheet. This'll require some careful cutting.
This is another I wanted to build since first seeing it in the 1971 Centuri catalog. Definitely different, a combination of conical stability and card stock wedge fins.
PDF Prints and Centuri instructions available from JimZs at: http://www.spacemodeling.org/JimZ/ka-10.htm
For a great design variation, check out the "Black Vulcan" HERE Thanks go out to Chris Gonnerman
Parts: Body Tube - 9" ST-7 Semroc Nose Cone - Original was Centuri PNC-70 1 1/2" long Tip to Shoulder You could use: 1.75" Apogee PNC-18B fits ST-7 tube very well, hollow for clay nose weight or: 1.5" BC-715 Semroc Balsa Equivalent to Centuri PNC-70, needs washer weights added.
I went with the Starlight nose cone from the spare parts box. Those nose cones are available now from Apogee. This nose cone is a little longer than the 1 1/2" long original. Made for the BT-20, it fits the ST-7 tube very well. The picture shows an engine hook, I didn't use it, opting for a wrap of masking tape around the end of the engine for retention.
The original had a smaller launch lug glued underneath a wedge fin. This would put the lug at an angle, down the conical body side.
I tried for a central lug, down the 9" long motor mount tube.
Spray the printed cardstock sheets with clear acrylic to keep them clean when building and flying.
The rear plate is already glued to a piece of thick mat board.
I'm taking a day off from the Scavenger build until I find a better brand of spray paint that works! So for now, here's some prep for another build coming up.
After a few years I finally figured out what was wrong with my Red Max clone. The nose cone was too short. This is the first blog post: HERE
I had bought a Super Alpha on Ebay with the replacement plastic nose cone. I wanted the Alpha nose cone shape. The old Red Max clone would get the plastic cone from the Super Alpha kit. To save a few dollars the old balsa Red Max cone would be shaped to the Alpha profile.
I don't have a lathe. I've made nose cones on a drill before but it's tough to center a dowel in the nose cone shoulder. I figured I'd just wing it.
At the Semroc website a search was made for the BNC-60K nose cone. Scaled up from the BNC-50K this new cone is 4.6" tall.
I marked the Red Max cone with a pencil but it'd be hard to see in a photograph. White out was used to show the area to be removed.
The nose cone was scored just above the 4.6" line around the cone top. The cut line is less than 1/16" in. This is a "stop" for the chip cuts to follow.
Small chip cuts were made down to the scored line from picture 2.
After making chip cuts around the cone, score another horizontal circumference line and follow with more chip cuts working towards the center of the nose cone.
There was some questions raised the YORF forum about the Centuri / Semroc Astro 1 rocket. At the right is the Semroc Astron, a slight downsize of the Astro 1 and still uses 18mm engines.
Carl from Semroc answered many questions about it's design and history.
The Astro 1 fins were close to the shape of the Estes Alpha. But I had no idea how close they really were.
On the forums, some have wondered if the Centuri design team simply took an Estes Apha kit and turned the fins until they came up with the Astro 1 fin shape. (If you've ever built an Astro 1, Astron or Astro Jr. you might find yourself double checking the fin placement and it's root edge. You'll be tempted to glue it on like it is on the Estes Alpha.)
On a whim, I called up Lee Piester (Centuri President) and asked him about the Astro 1 fin design. He said it was never their intent to use an Estes Alpha fin design. He went on to explain that the Astro 1 fins were drawn up independently of the Estes Alpha. Mr. Piester is currently building some upscale Centuri designs for display in his Phoenix area hobby stores.
The Semroc Astron is fleet favorite and a great value at $10.00 retail.
Here's all the parts, right out of the bag. The Striker AGM looks to be a great design, perfect for demos and small fields with a B6-4. The 35mm tube is long, just a little over 18" long. The blue engine block isn't shown, it was found inside the yellow engine tube after the picture was taken.
The pieces of interest: The engine hook will be replaced with a spring steel hook made from the metal strip inside an old windshield wiper blade. This hook included with the kit bends easily. Looking ahead at the engine mount, the hook will need to be flexible.
The yellow engine mount tube is a little thin. It has a rough finish and would require a smooth surface where it's exposed out the back of the tail cone. I'll substitute a BT-20 tube.
The centering rings seem thin, but should be fine the way they are assembled in the mount.
The tail cone has ridges on it. There is four recessed lines used for fin alignment. The thickness of the ridge around the shoulder is inconsistent, thinner on one side. This might effect the fin root edges contacting the body tube.
The plans are from the Centuri American Rocketeer magazine, Volume 4, Number 1. The plans are on page 15. Go to: oldrocketplans.com HERE
Parts are available from Semroc:
1 ST-718 18" Long ST-7 Body Tube 1 TR-7 Engine Block 1 BTC-7 Balsa Nose Block or Coupler 1 BC-736 Nose Cone Conical, 3.6" long 1 CR-720 Centering Ring 2 LL-130 Launch Lugs 3" long 1 EC-136 1/8" X 36" long Shock Cord 1 SCK-24 Kevlar about 14" needed 1 CP-12BW 12" diameter Parachute 1 EL-28 Engine Hook 1 WC-5 Clay Weight .40 oz. needed 1 SE-2 Screw Eye 1 1/4" long scrap of BT-20 or ST-7 for retainer lock ring
Instead of slitting the tube for a shock cord, Kevlar will be tied to the TR-7 engine block.
Mylar lock rings aren't available in the ST-7 size, so I'll use a split piece of body tube. The split of the retaining ring will sit on either side of the lower launch lug location. For the paint pattern, I'll be using the Contact paper self-adhesive blackboard paper. Black electrical tape could also be used.
I only used one of the 3" launch lugs, under the rear shroud. The Centuri instructions showed both being used, glued in line with each other.
You can print up the tailcone adapter on 110 lb. cardstock from the Payload Bay website HERE Tube 1 size is an ST-7 at .759" Tube 2 size to fit the centering ring is 2.08" Length is 3" (The original adapter fits a ST-20 tube which was 2.04" diameter. I made mine slightly bigger for a longer lip on the bottom.)
Ray Lapanse has just started posting photos. He currently only has photos of Troj's Insane Project flying and CATOing on a 'P' motor. The album will be worth visiting again over the next few weeks. (While you're at it, check out his other albums. The LDRS-29 photos are really great!) More good news. He allows re-posting with attribution. Consider this attributed. Here are just a few low res copies to show how big the rocket was, and how big the ensuing boom was.
I had built and flown the original, big Centuri Orion years back. I was interested when Semroc brought back the full size Orion. I was more interested when I saw this downsized version.
This one flys with 13mm T engines. Here's the interesting parts: The "tanks" are BT-3s. There are three tanks and six little nose cones. The wrap decals are in the middle. The dowels and popsicle stick will be used to make up all the raised details not on the wraps.
From left to right: Clear fin (body wrap) substitute is a 4' clear fluorescent tube guard 7" BT-60 and Balsa Adapter #TA-5060 7 3/4" BT-50 and Nose Cone #TA-550 4 1/4" BT-20 Engine Mount Tube 12" Parachute, Shroud Lines and Tape Reinforcement rings Shock Cord and Kevlar Launch Lug Clear Fin Material (underneath Parachute) JT-60C Stage Coupler Three Adapter Rings #RA-2060 Instructions printed from web address in last post.
Some parts of interest:
I'm using the new all cotton shroud line string found HERE The nose cone will be formed from a #TA-550 balsa adapter The fluorescent tube guard diameter is just slightly larger than a standard BT-60 tube. A homemade parachute cut from a plastic tablecloth sheet.
Here's all the parts from another of the Semroc Deci-Scale kits, the IRIS. I hope to show an alternative way to paint the black/white separations down the body tube.
Some of the more interesting parts:
That is one long, beautiful nose cone, 8" in length! In the center of the the centering rings, are the square fin mounts. On the far right are the "stepped" body bands. The black decals will go over the long black areas down the body.
This is one of the three MicroMaxx kits I bought in a lot on EBAY. Here's all the parts:
Like the ASP Micro Jayhawk, there is no balsa in the kit. The nose cone is hardwood and all fin and details are white styrene plastic.
The top half is the Wac Corporal that most are familiar with. This model has a Tiny Tim booster. It is a single stage MMX powered kit. At ejection, the separation point is between the two stages. Note the clear plastic tube. That simulates the open area between the two stages and gives support to the thin half round supports. The mylar streamer is optional, the instructions state it'll aid in visibility.
Here's some kit pieces of interest: The lead shot nose weight is in the middle of a long piece of Kevlar. The bigger half round piece will be the tunnel. The very skinny half round piece will be the supports between the stages. You'll only use half of the brown coupler. It holds the weight high in the upper body, right beneath the nose cone shoulder. The double stripe in the decals help with the color separation and when placed give the correct spacing of the black bands.
I picked this kit up for $10.00 at the May TTRA Tampa launch. I'd seen a few on EBAY, but never closeup.
Stellar Dimensions is no longer in business, they had a half dozen kits in production in the late 1990s. Their claim to fame was their rocket bodies were square. Most all parts were laser cut from basswood and thin ply. The visible side of the body parts had faint laser cut lines in geometric patterns.
Here's all the parts laid out. If you count everything, there is 48 pieces to put together.
In the bag, the kit seems flat. There is no round body tube or nose cone to be seen. Some of the laser cut parts had broken free from the sheets. The loose pieces were taped together for the picture.
Along the bottom from left to right are the 4 engine mount sides, 4 fins, 6 engine block centering rings and 4 mid body pieces.
The four long tapered pieces above are the nose cone sides.
Here's some of the more interesting parts. One the left are the big shroud line tabs and plywood reinforcements. The tabs look like Breathe-Right nasal strips! The white circular piece is the Teflon motor lock ring. The black coil is the short shock cord. It's like a thin piece of licorice, too short for my liking. On the far right is the "centering rings / baffle" pieces. More on those later.
Here's all the parts from the latest version of the Estes Saturn V kit, # 2157.
The box is plenty big for what was inside. The length of the box accommodates the long BT-101 tube.
These are some of the more interesting pieces. The wrap shows the detailing of the vacuform process. There was an additional decal added with a letter explaining some white background was left off the fin number frames.
You can't see the opened parachutes yet. There is two 24" chutes for the lower body and a 18" parachute for the upper half. All three parachutes are printed in red and white like the original Centuri Apollo parachute pattern.
Time spent on build: 1:00 reading instructions and checking parts Total time on build so far: 1:00
Here's a fun, easy to build design by Bruce Levison.
The CORK SCREW won him first place in the FlisKits Design of the Month Contest in October, 2003.
Here's how Bruce described his entry:
October entry #3, the Cork Screw by Bruce Levison of Ohio.
Attached is my submission for the FlisKit's Design of the Month called the Cork Screw 2. It is a simple asymmetric ring finned design that is roll pitch coupled and flies stable! The model's unique coning flight path suggests a "cork screw "shape hence the name my son Ben gave it. The rocket has flown many times over the years, even at national events such as NARAM where Mark Bundick the president of the NAR and the acting sport range LCO indicated that the model lives up to its name. Sorry, I don't have any flight pictures.
Please link the attached Photo and RockSim version 7 file to the design article.
Links to the instructions and RockSim file can be found on this pageHERE
Here's the parts layout for the Semroc IQSY Tomahawk.
Of particular interest are the laser cut basswood fins. I can appreciate Semroc using the basswood. It'll be easier to sand the wedge taper on the leading edge and keep the line sharp.
The IQSY Tomahawk didn't have any lettering but there is a small decal included with the rocket name. I won't be using the decal, I'm going to try for "close to scale" using some G. Harry Stine drawings from the older Centuri instructions.
One thing I don't get is the two piece main body tube. The two tubes are joined by a coupler, but it still means another seam to be filled. I'm sure Semroc did it this way so it would fit into a smaller bag and be easier to hang on a hobby shop wall. The coupler also holds in the 24" long elastic shock cord. I'll add some Kevlar tied to the engine mount and attach the elastic to that..
The full size Tomahawk was 9.0" in diameter. This model is built around the ST-8 body tube which is .908" in diameter. This makes this model a very close 1/10th scale.
This may look like a standard build but we will be covering:
Making your own centering rings from card stock and cereal box cardboard
Making a "close" clone from a internet photograph
The Odd'l Rockets XLEH EXtended Length Engine Hooks
I know that most modelers would "clone" a favorite old rocket model that has been out of production (OOP) for many years.
The Cobalt is a new kit. It was first shown in last year's Quest catalog with a scheduled release date of July, 2010. It was released just a few months back. I have a few extras in this nose cones style (PNC-40) and plenty of the Quest 40mm body tube. Why not build a new Squatty for the A6-4 schoolyard launches?
Please note, this will be a close, not exact clone of the Cobalt.
Parts needed from Quest: PNC-40 Nose Cone T403000 40mm Body Tube 4" needed
I supplied other parts from my stash: 1/8" X 1 1/4" Launch Lug 3/32" Balsa 12" Kevlar 18" Round Elastic Shock Cord 2" Wide Crepe Paper Streamer
Specialized Engine Mount 3" Long ST-7 Engine Mount Tube (Semroc) TR-7 Thrust Ring (Semroc) One Odd'l Rockets XLEH Extended Length Engine Hook Two homemade Centering Rings (ST-7 / 40mm) The rings in the picture are not the ones used in this build.
I can't believe I didn't take a picture of the parts all layed out!
This downscaled PATRIOT will stand 11.7 " tall by .736" diameter. It flys with 1/2A3-2t, A3-4t and A10-3t engines.
Here's what you'll need to do the build it right along with the blog:
Main Body Construction Parts: 1 BT-20 8.1" long 1 BNC-20AH Nose Cone (available from Semroc) 1 SE-1 Screw Eye 1 ECR-124 Elastic shock Cord 24" long 1 SCK-12 Kevlar 8" needed 1 LL-110 Launch Lug 1/8" X 1" long 1 RS-236 Streamer 1 3/4" wide X 32" needed
Engine Mount Parts: 1 BT-5BJ Motor Mount Tube 1 3/4" needed 2 AR-520 Centering Rings 1 TB-5 Engine Block Or you can build the engine mount using old engine casings like I did.
Go to Wayne Hill's Rocketry Blog HERE Scroll down to the bottom and look for the Patriot. Print out the main body tube wrap (first page) on 24 lb. paper Print out the fins (page 2) on 110 lb. card stock. Cereal Box cardboard is used for the interior ply of the fins.
Tony (tbzep on YORF) couldn't find the downscaled nose cone on the Semroc website. He called Carl and asked him about it. Carl added it to the catalog! I don't know where I got the nose cone I used to make the first downsized Patriot. I had it marked as a BNC-20AH. On your next Semroc order, be sure to thank Carl for accomodating all space modelers.
You should be able to build this from spare parts like I did. You probably have most of this already. We'll start the build on the next post.
Here's all the parts laid out on the floor. This looks to be a fun, different build. The last helicopter rocket I built was the Estes Gyroc in the early 1970s.
Here's some parts of interest:
Three Du-Bro hinges .025" dia. music wire for the hooks Cast urethane nose cone Three rubber bands Red Kevlar thread In the picture above you can see the self adhesive decal sheets
Jim Flis' designs certainly don't need any tweaking. He's come up with some of the more innovative designs out there.
I recently won four MMX kits on Ebay, the Interloper was one of them.
This is a great design with plenty of detail. Sometimes I'll take a kit and play with the design.
I thought the "vanes" (the internal fins in the larger rear ring tube) could extend out the back of the rocket.
I wouldn't be able to extend them out by very much, they are already laser cut into heavy card stock.
I settled for a short extension out the back by raising the ring tube 3/16" or so. The rear of the internal fins will get a scalloped cut to match the scalloped top of the fin.
The top of the ring tube might get scalloped cuts between the internal fins.
I kept the fin shape but changed the angle of the toothpick tips.
The top end of the main tube is long. I will add some small details to visually even out the detail on the bottom. These look a little like the front guns on the Fliskits Stingray.
Right now it's just a drawing, One day I'll build it.
Here's a favorite and one of the best kits available today.
The Dr. Zooch Saturn V is a fun build and great flier.
This is close in size to the old Estes Semi Scale Saturn V kit, #1239.
I haven't seen the Dr. Zooch plans online, but you can check out the Estes plans at JimZ's site: HERE
There is plenty of detail throughout.
Add as much as you like.
In the Zooch version, the fins are not terribly over sized or made of clear plastic.
The engine bells stay on for flight.
Mine has flown with Estes B6-4s and C6-5s.
TIP: I can't recommend flying this one with the (Chinese made, long burn) Quest C6-5s.
The Quest C6-5 has the "oomph" to get it off the pad, but not enough power to keep it in the air.
Carl Campbell'sZooch Saturn V landed at our feet a few seconds before the ejection charge went off!
The Quest C6-5s are great engines for smaller diameter, lighter models.
After a high initial peak, the Quest C6 engines burn longer (with lower sustaining thrust) for 2.5 seconds compaired to the Estes C6-5 at a stronger 1.8 seconds of thrust.
The MPC Martian Patrol was part of the 1970 MPC kit lineup. Retail price was $3.00. The MPC kits came boxed and shrink wrapped.
This was the strangest of eight rocket kits in the Astro Line Series. The Astro Line kits had no balsa parts and advertised easy assembly, true flight performance and durability.
What set this model apart from anything else at the time were the dual Styrofoam saucers attached to the snap-together plastic fin unit. This style of fin can was still seen in the early Quest catalogs.
This catalog page courtesy of Sky High Hobbies. They still list some of the old MPC kits at: http://www.skyhighhobbies.com/
Dr. Zooch had already had the BT-60 based mercury Redstone kit. I'd built one before, it was a lot like the old version of the Estes Redstone. Not the plastic capsule and tower, but a tower you made out of dowels.
When finished, this model will be 13 3/4" tall.
The tower is a combination of vertical dowels and wire for the diagonal cross members. If you've built the Zooch Saturn 1B kits, you'll be familiar with the construction. The lower end is a lot like the Jupiter C kit.
I did my typical prep with the Dr. Zooch kits. I inventoried the parts and scanned the wrap sheet.
One of the first Zooch kits I built was was the Ares 1. I tried the method of applying white glue to the outside edges of the wrap and rolled it around the body tube. I had wrinkles and the wrap didn't quite match up on the other side. I tried to remove it and it ruined the wrap and body tube. Wes (Dr. Zooch) was nice enough to send out another wrap. So now I scan the wraps so if I need another, I can simply print on up.
Parts for the Enerjet 1340. The shorter body tube at the top with the Centuri Rockets sticker will be replaced with the body tube below the nose cone. Everything is here except for the Kevlar, shock cord and streamer.
I received one of the old Centuri M.A.R.S. Project parts bags from JonRocket.com a while back. The MARS Project was and abbreviation for "Merchandising Aid for Rocket Selling". These were sent out to hobby shops for display. They weren't necessarily made for flight, but I know many have been converted.
I'd always admired the old Enerjet 1340 design ever since I was sent the flyers back in the 1970s. That flyer talked about all the applications for the "Sounding" rocket. From pollution sampling, cloud seeding, avalanche control, line laying and signal flares, there wasn't anything this rocket couldn't do.
It was recovered by a 12" parachute or 10' drogue streamer. This version will fly with 24mm Ds, Es and Fs.
The Enerjet 1340 made it's debut back in 1972. It was not pictured in the Enerjet catalog.
I've always liked the Nike Smoke with it's clean, rakish lines. That long nose cone and fluorescent fins really set it off.
The parts available from Quest are very reasonable. The Nike nose cone is $1.25 and the fin can is $3.00. Their metric tubing is thicker than the Estes BT style. I already had some extra 35mm tubing.
I got a parts order from Quest today, only two days after ordering it online. (Oh boy - they sent another FLIC as a Freebie!)
A slight oversight on the Quest side, they sent me two "left side" nose cone halves - an easy mistake. While I could make due with it, the Nike Smoke nose cone had three cover plates. If I were to use these two left sides I would end up with only two plates. This picture doesn't show the Kevlar, parachute and shock cord. The Popsicle stick will be used to make a launch lug standoff. I emailed Nettie, a new nose cone is on the way!
I was surprised to find G. Harry Stine's drawings at: www.oldrocketplans.com/quest/que2007/que2007.htm Just scroll down to the bottom of the instructions for the plans and full size decal scan.
This looks to be a good, inexpensive build and a nearly indestructable flyer!


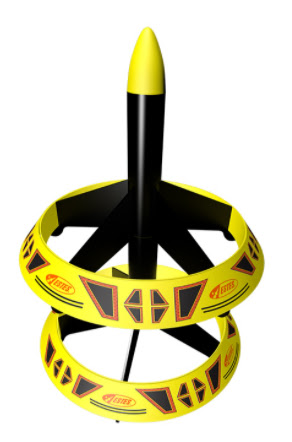
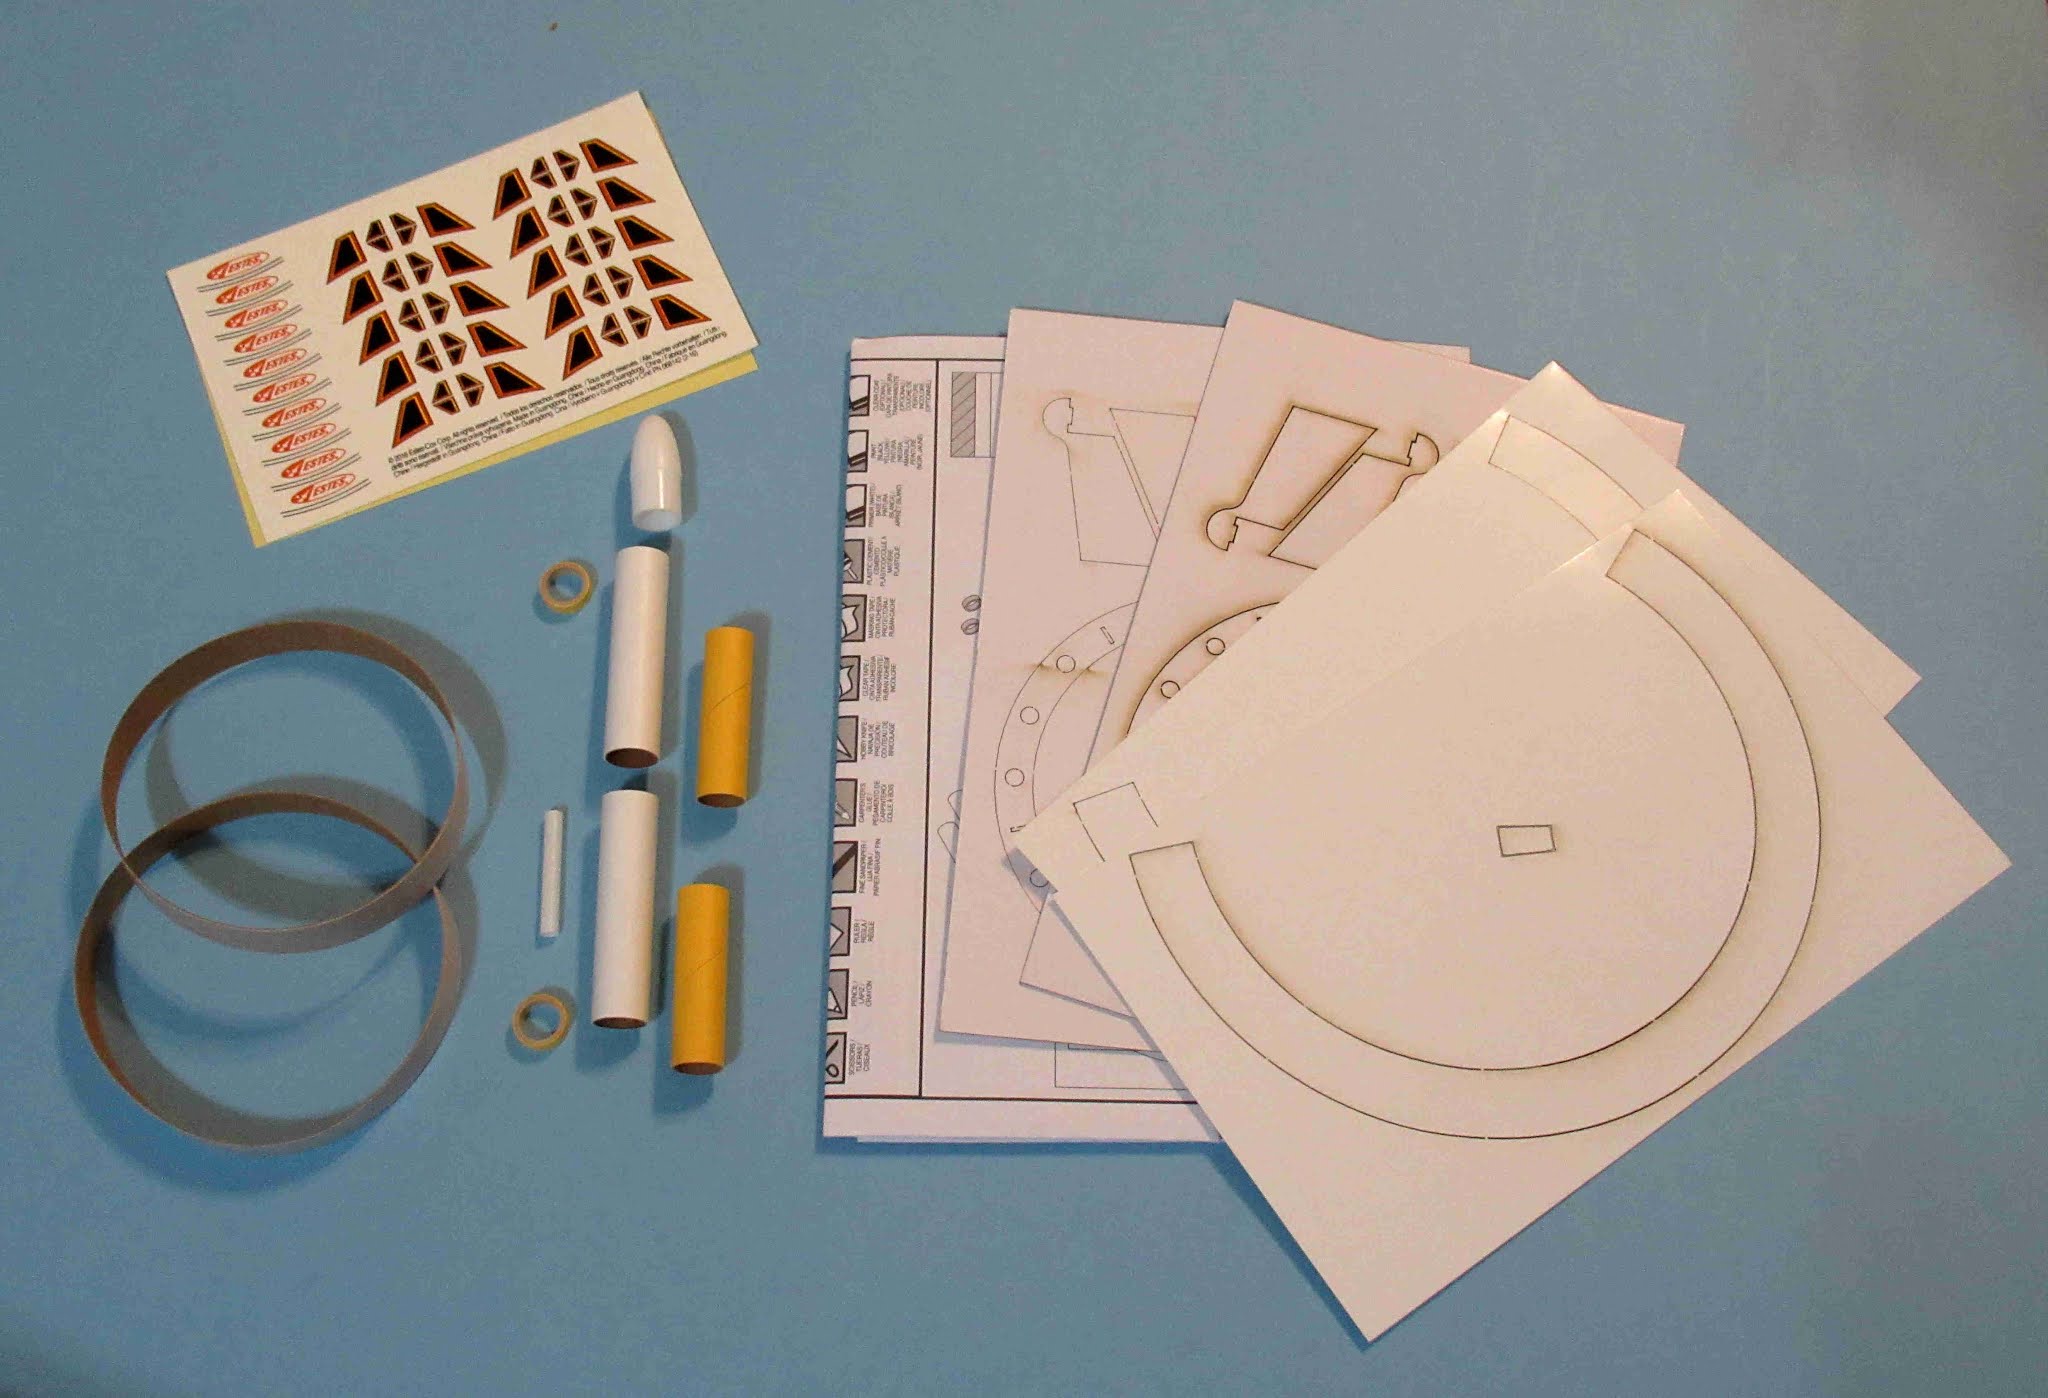

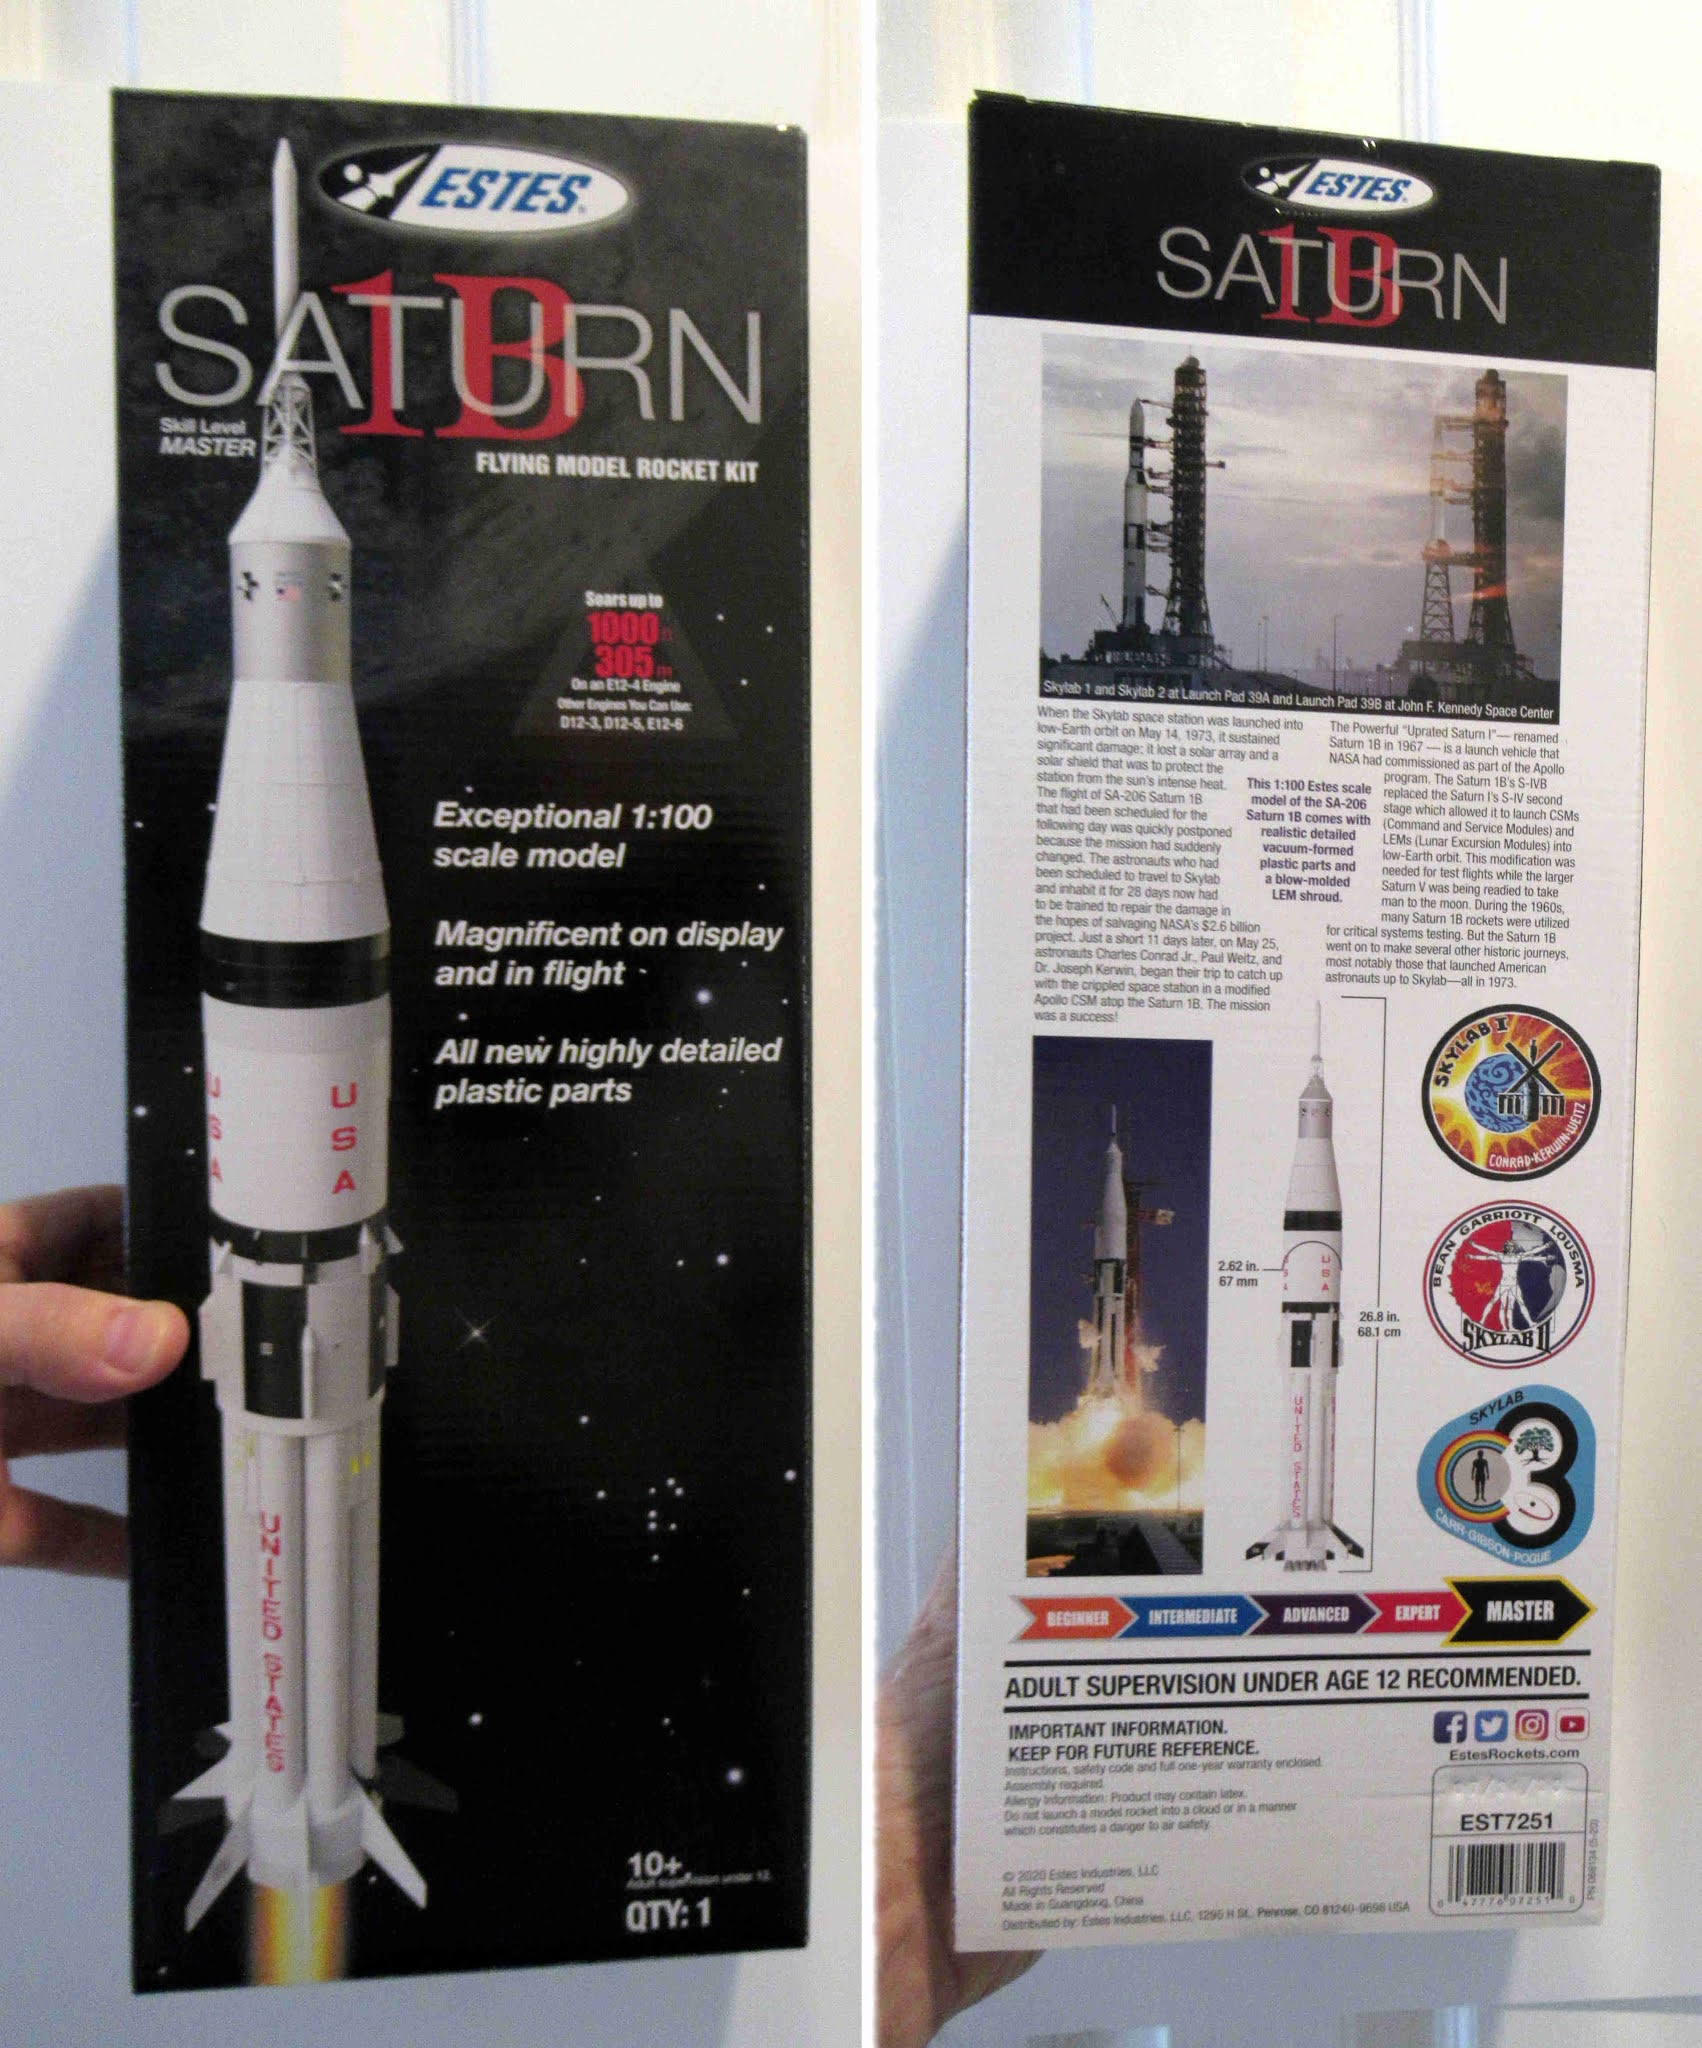
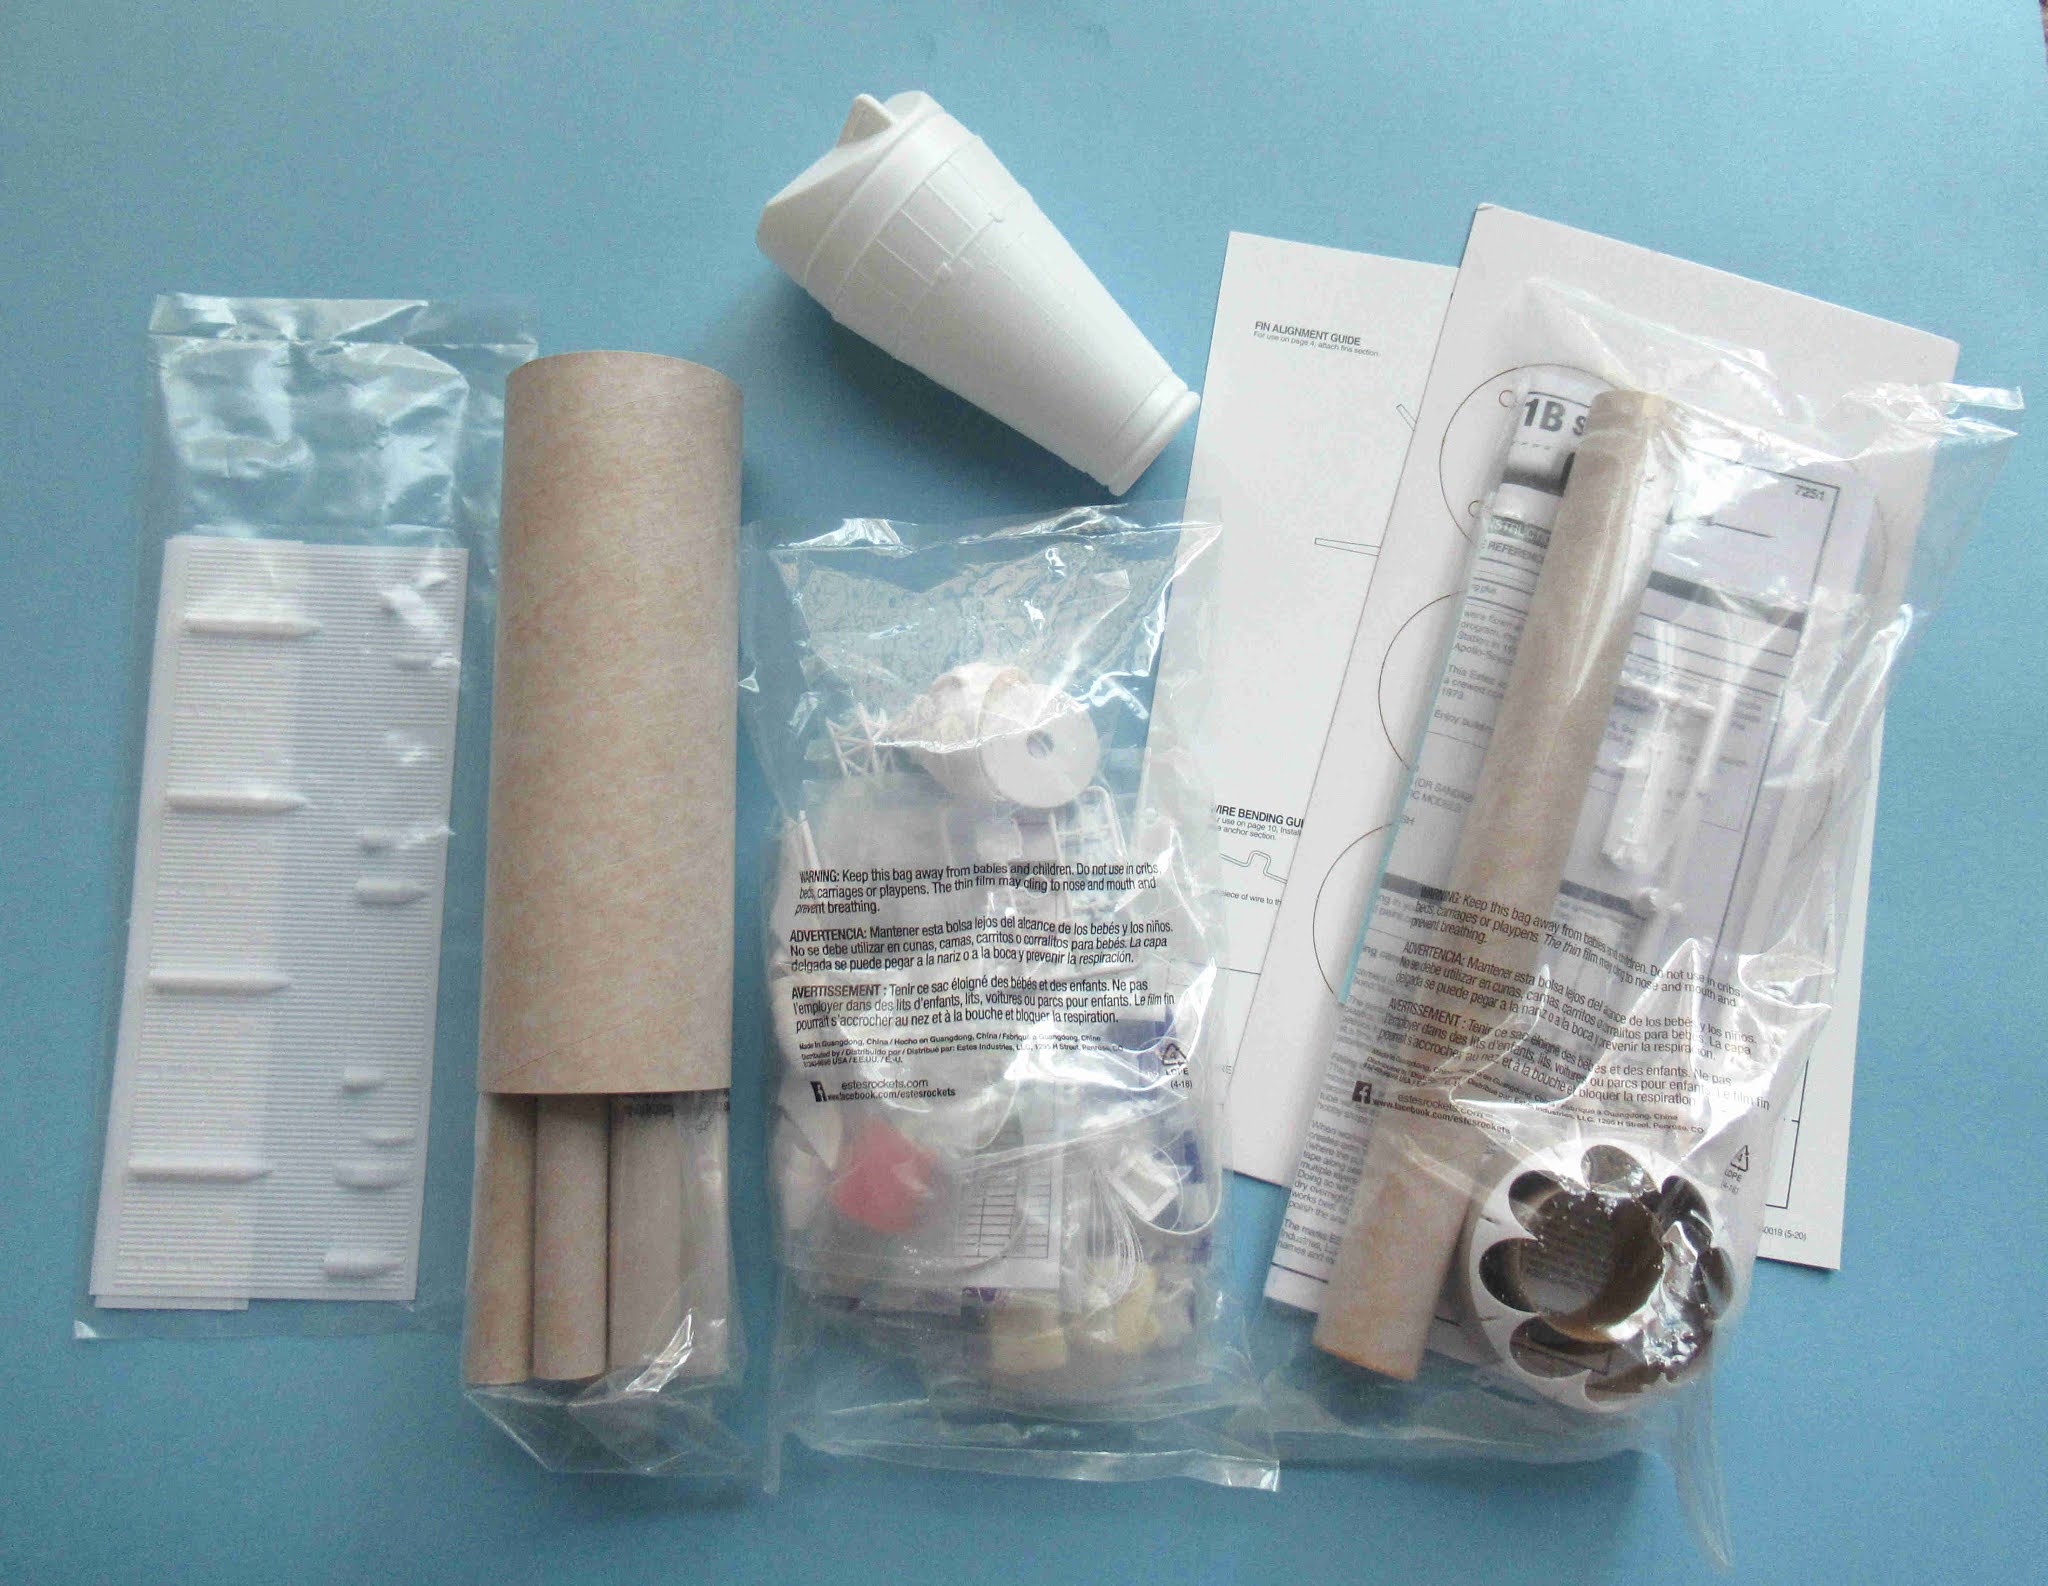
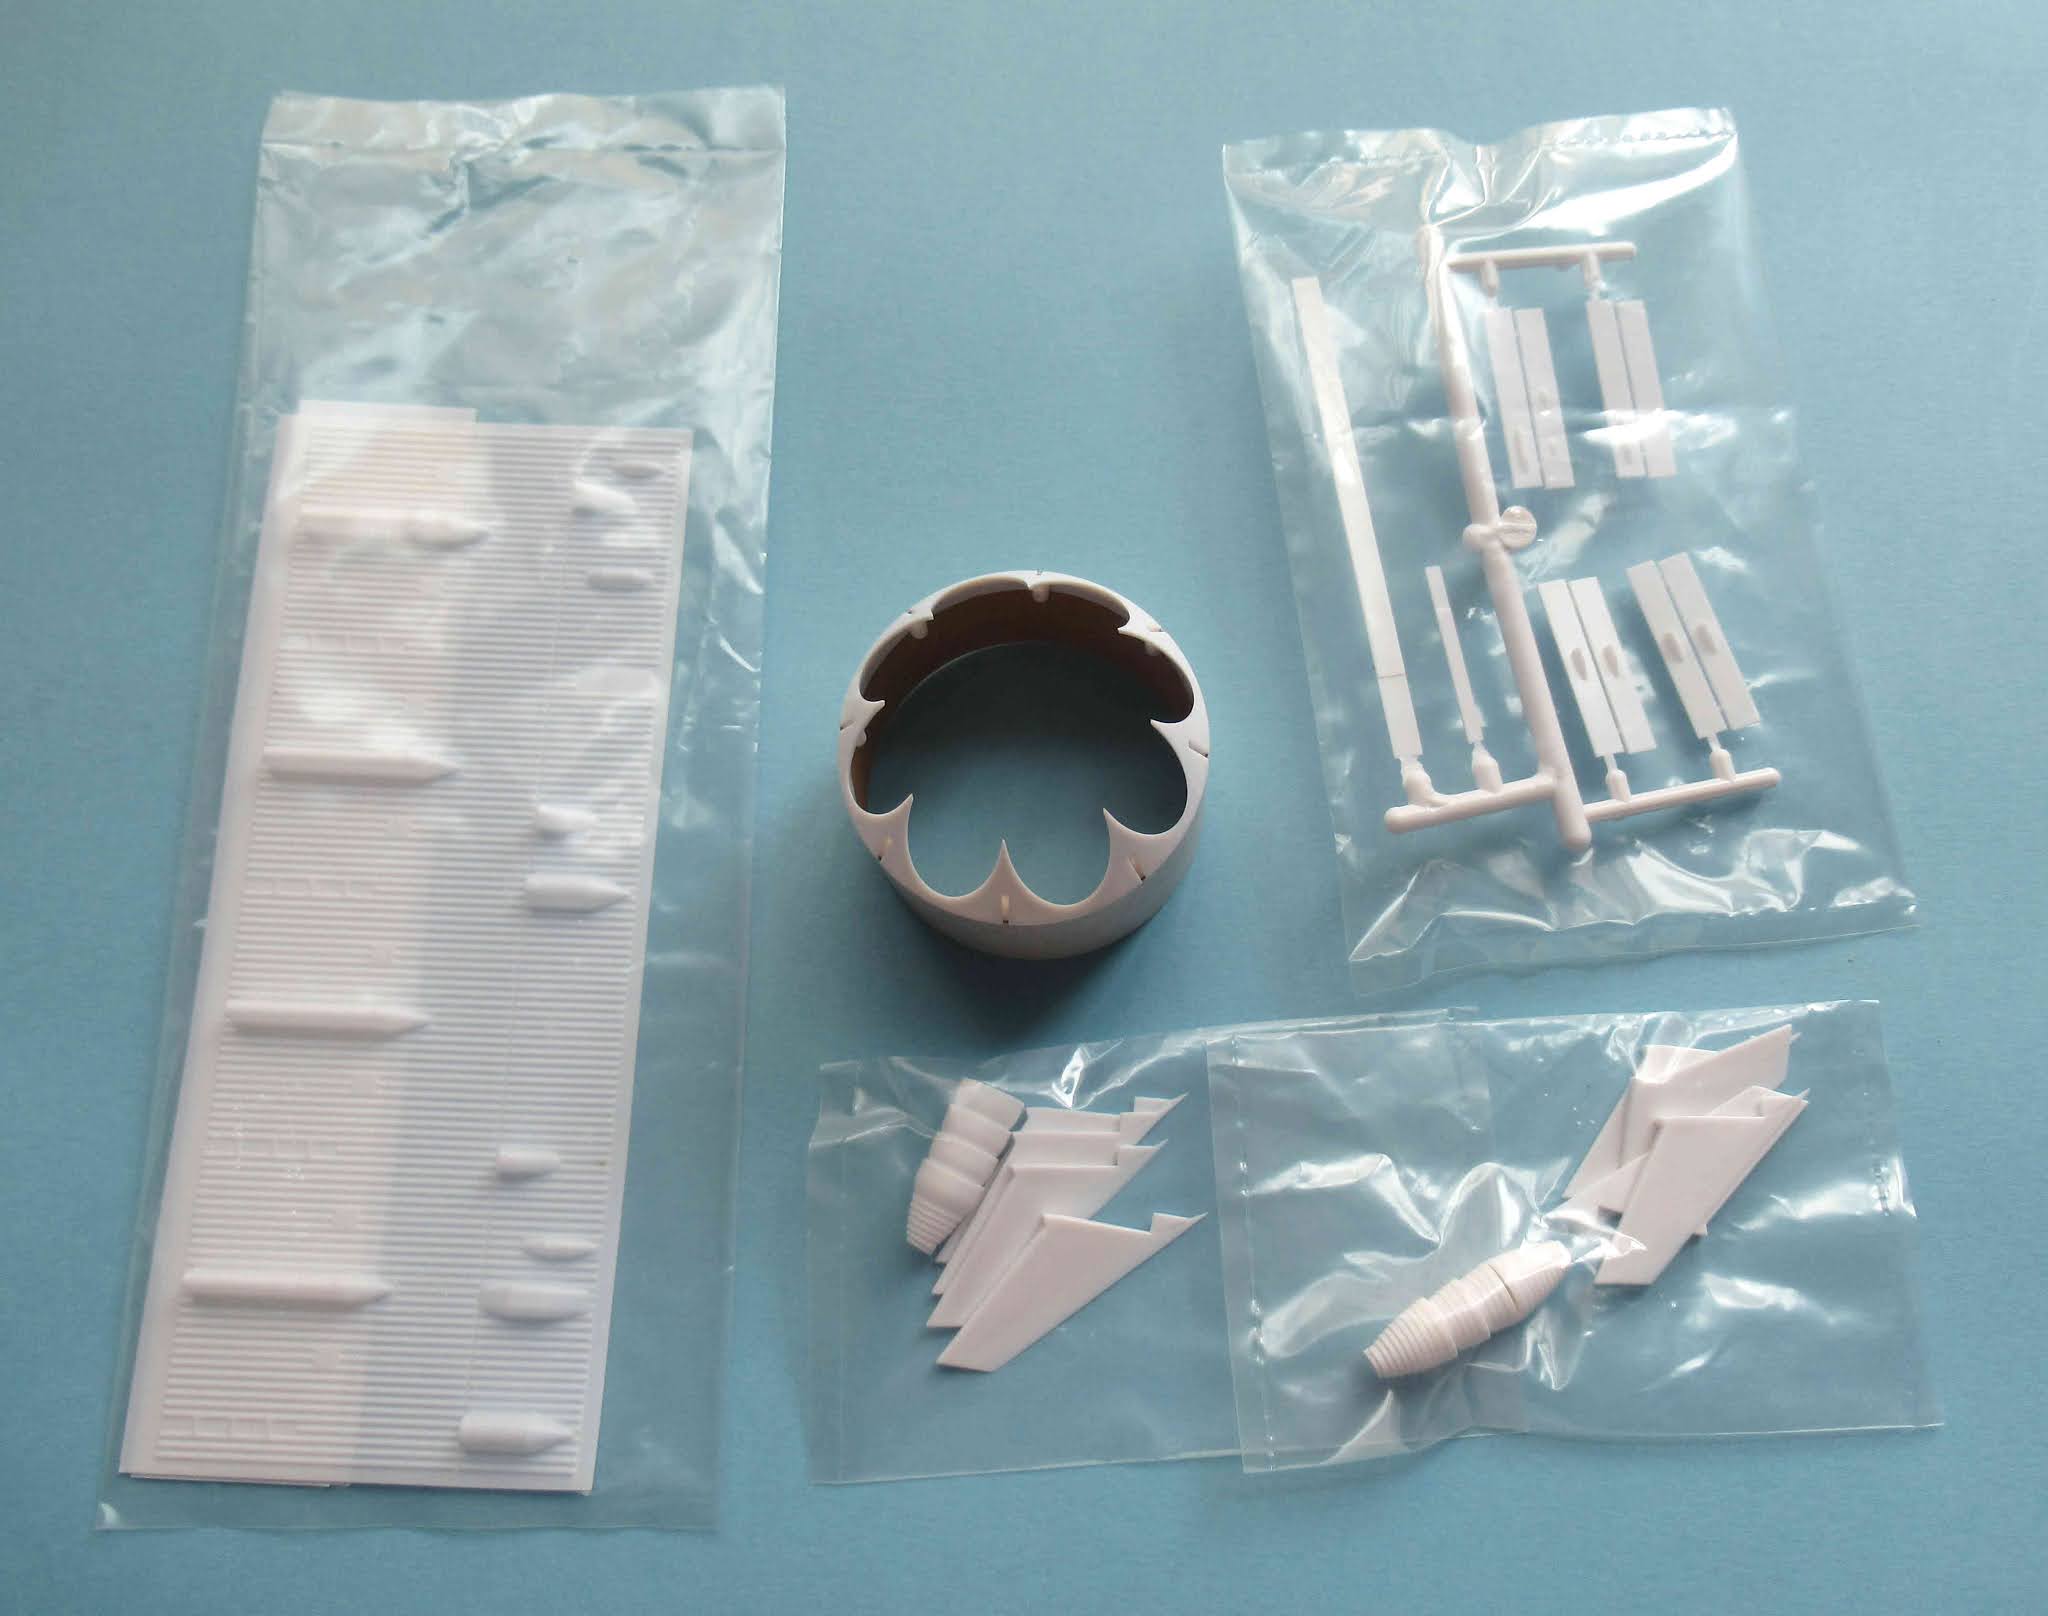
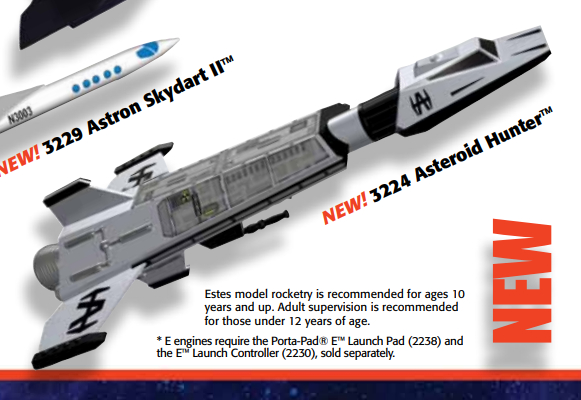
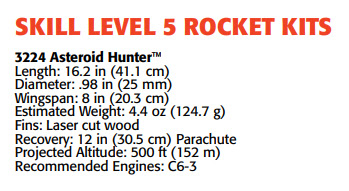
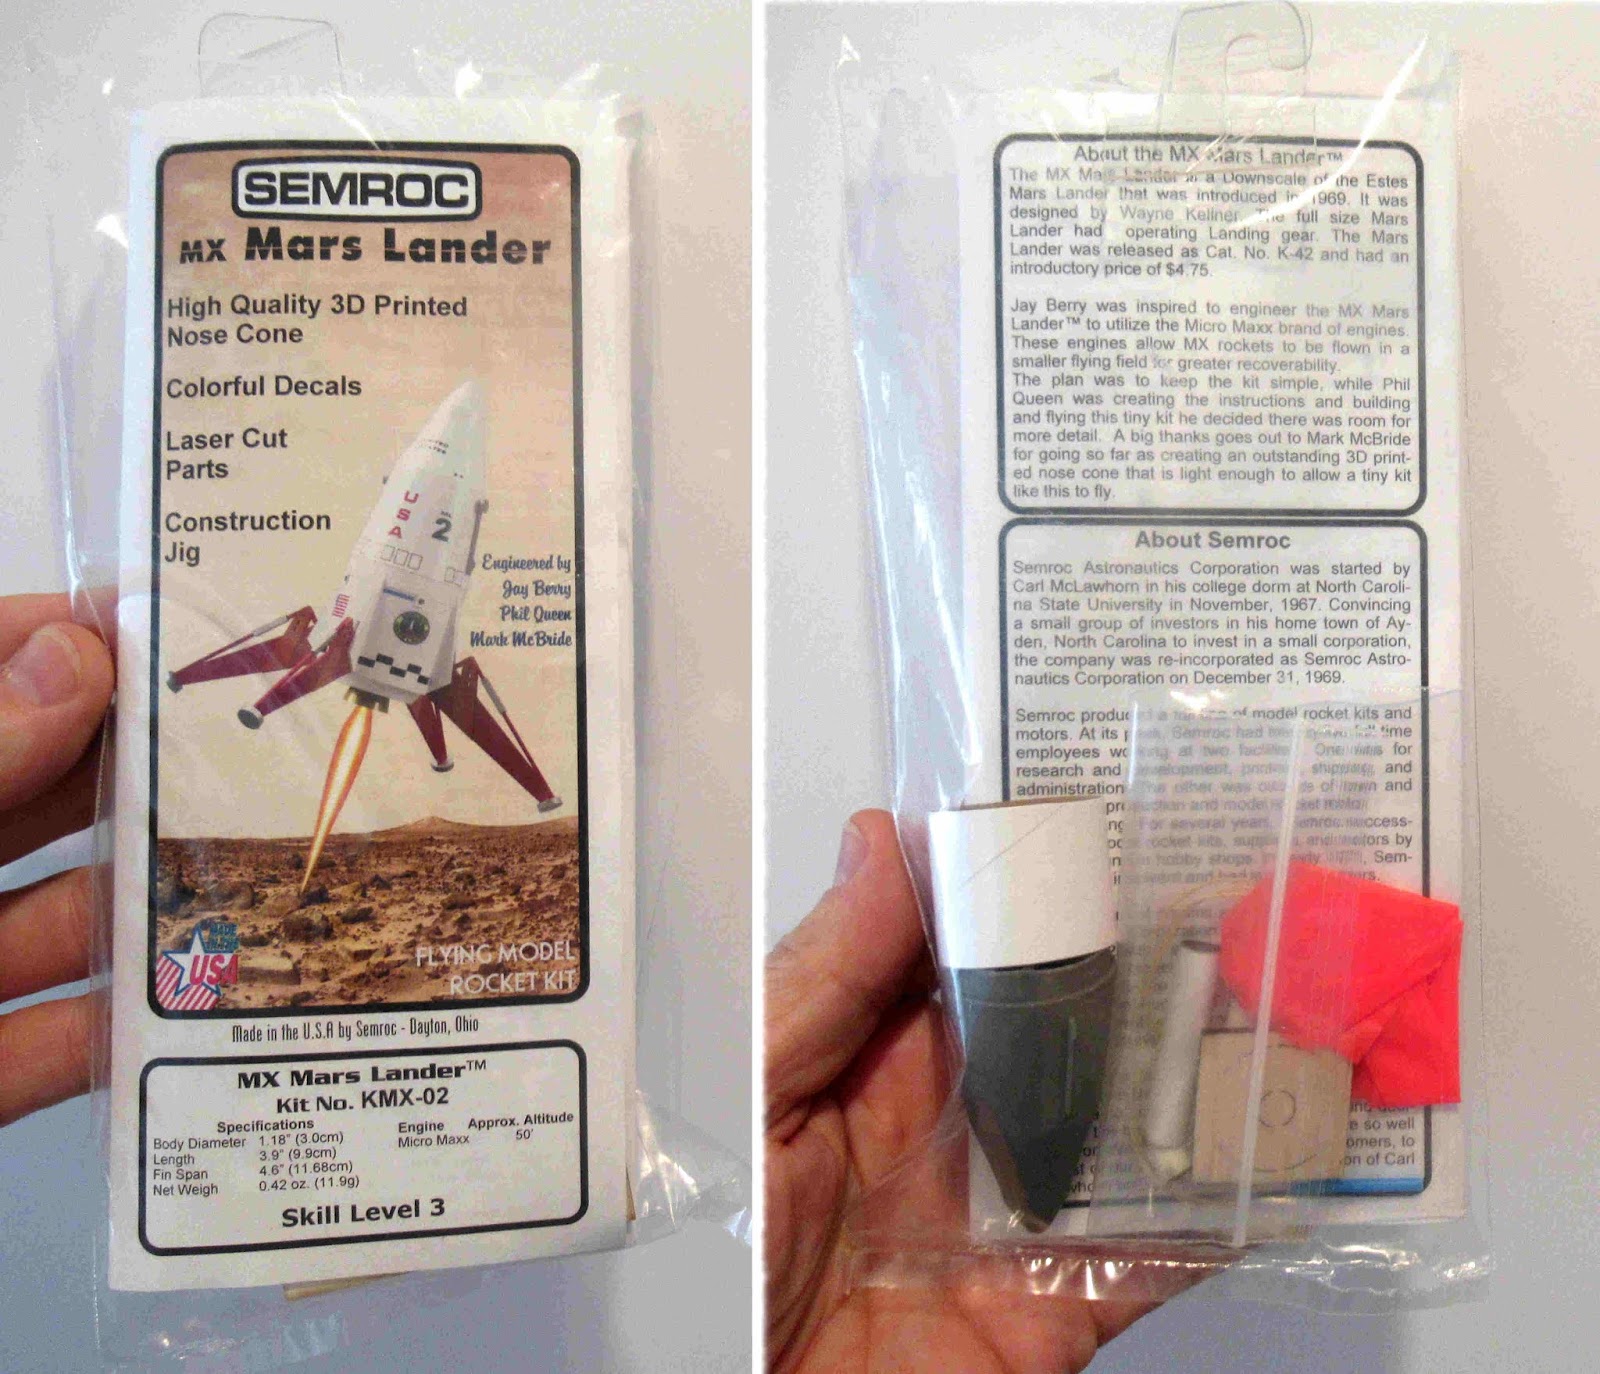
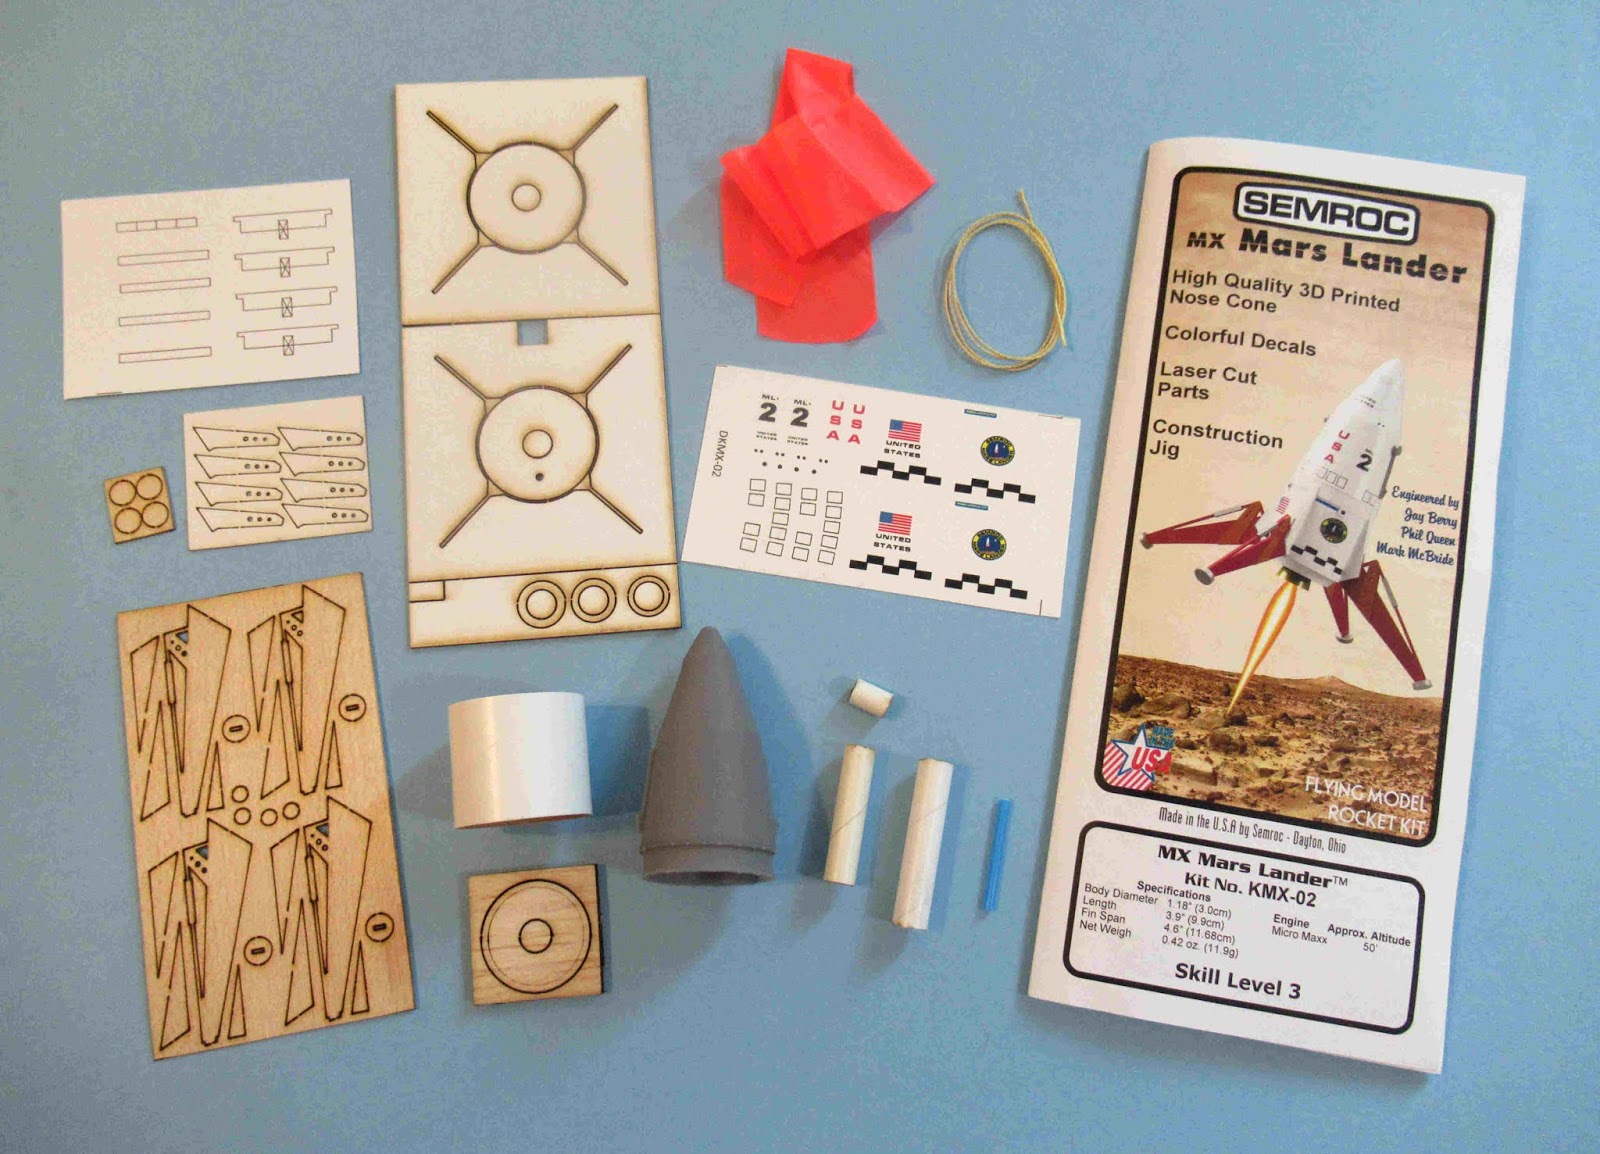
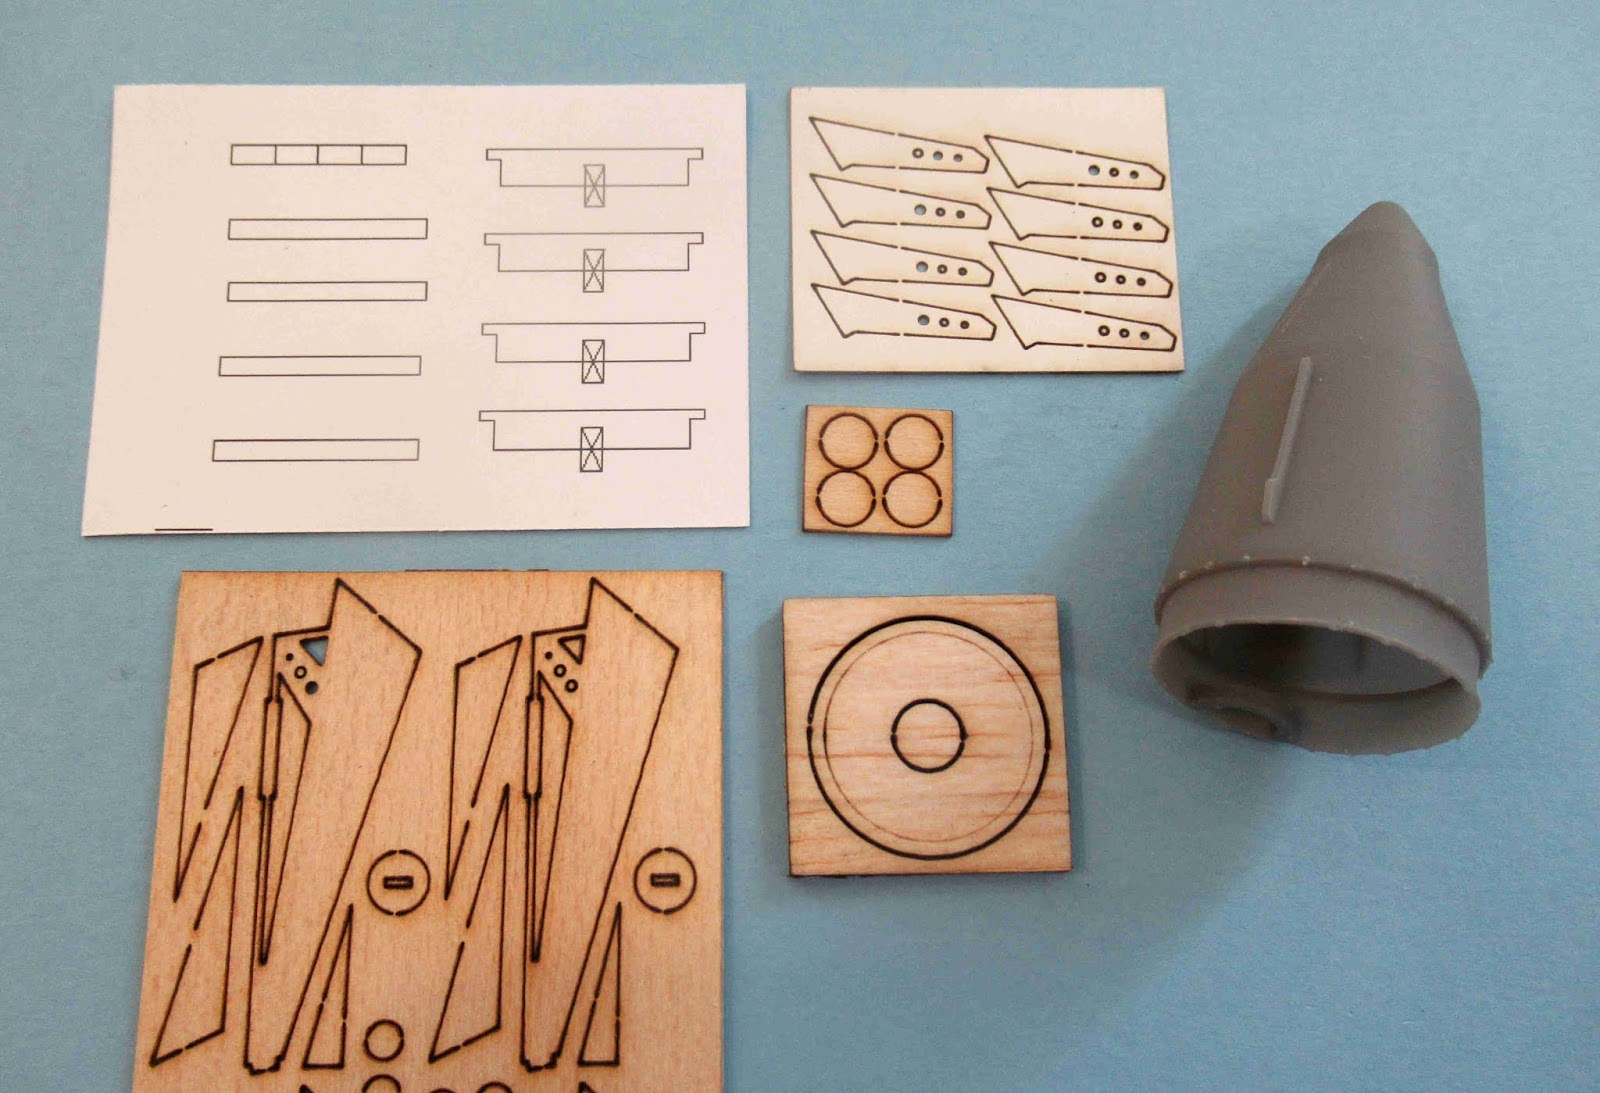
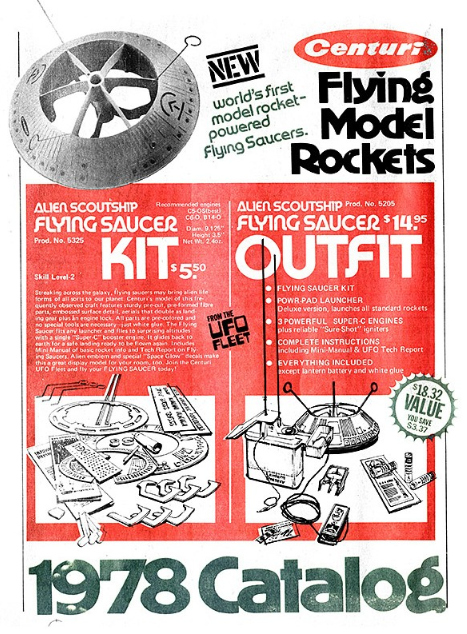
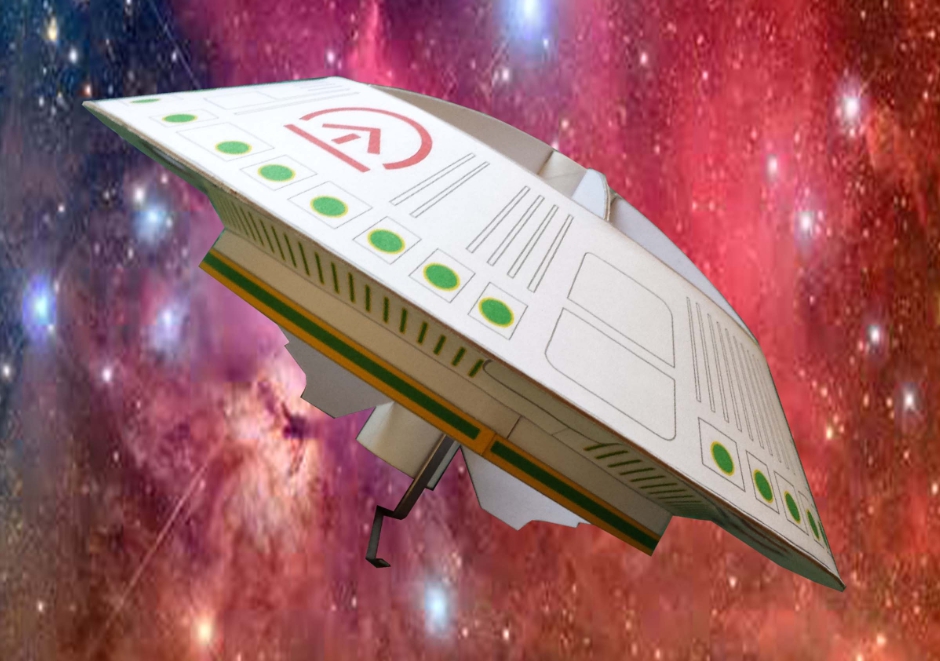
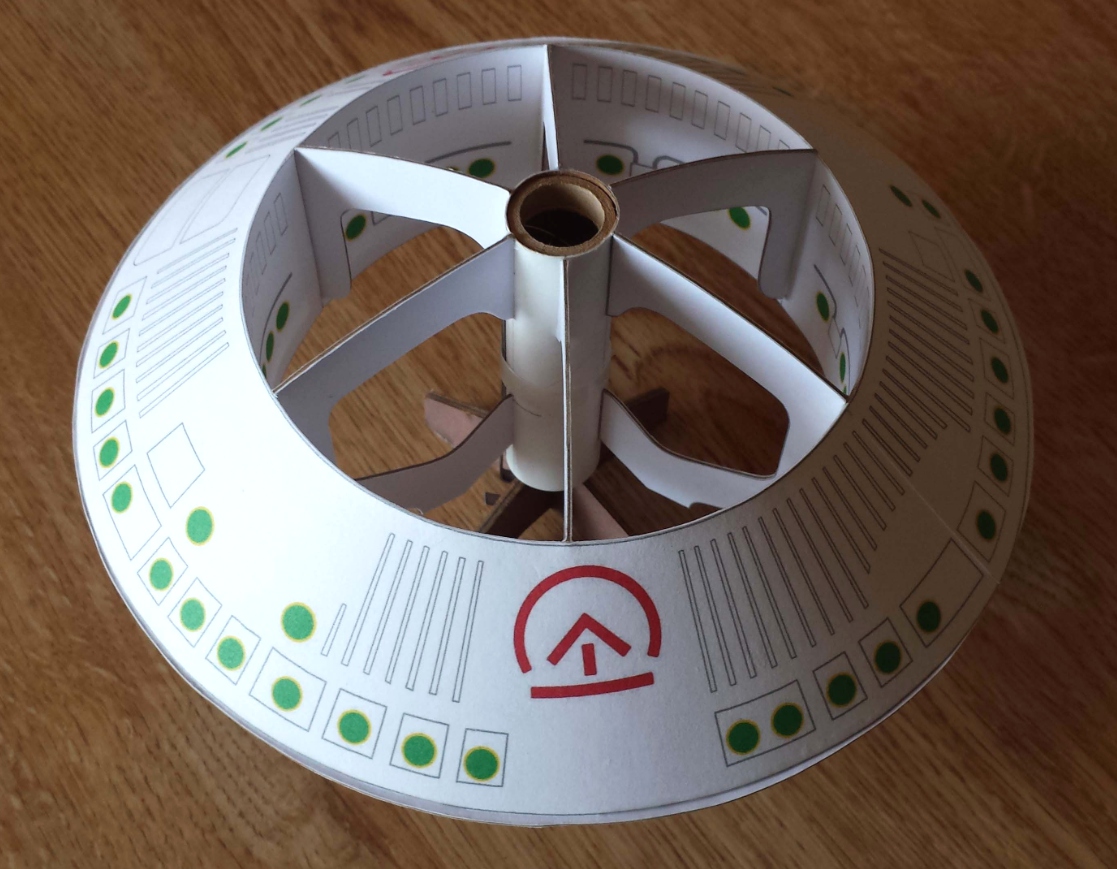
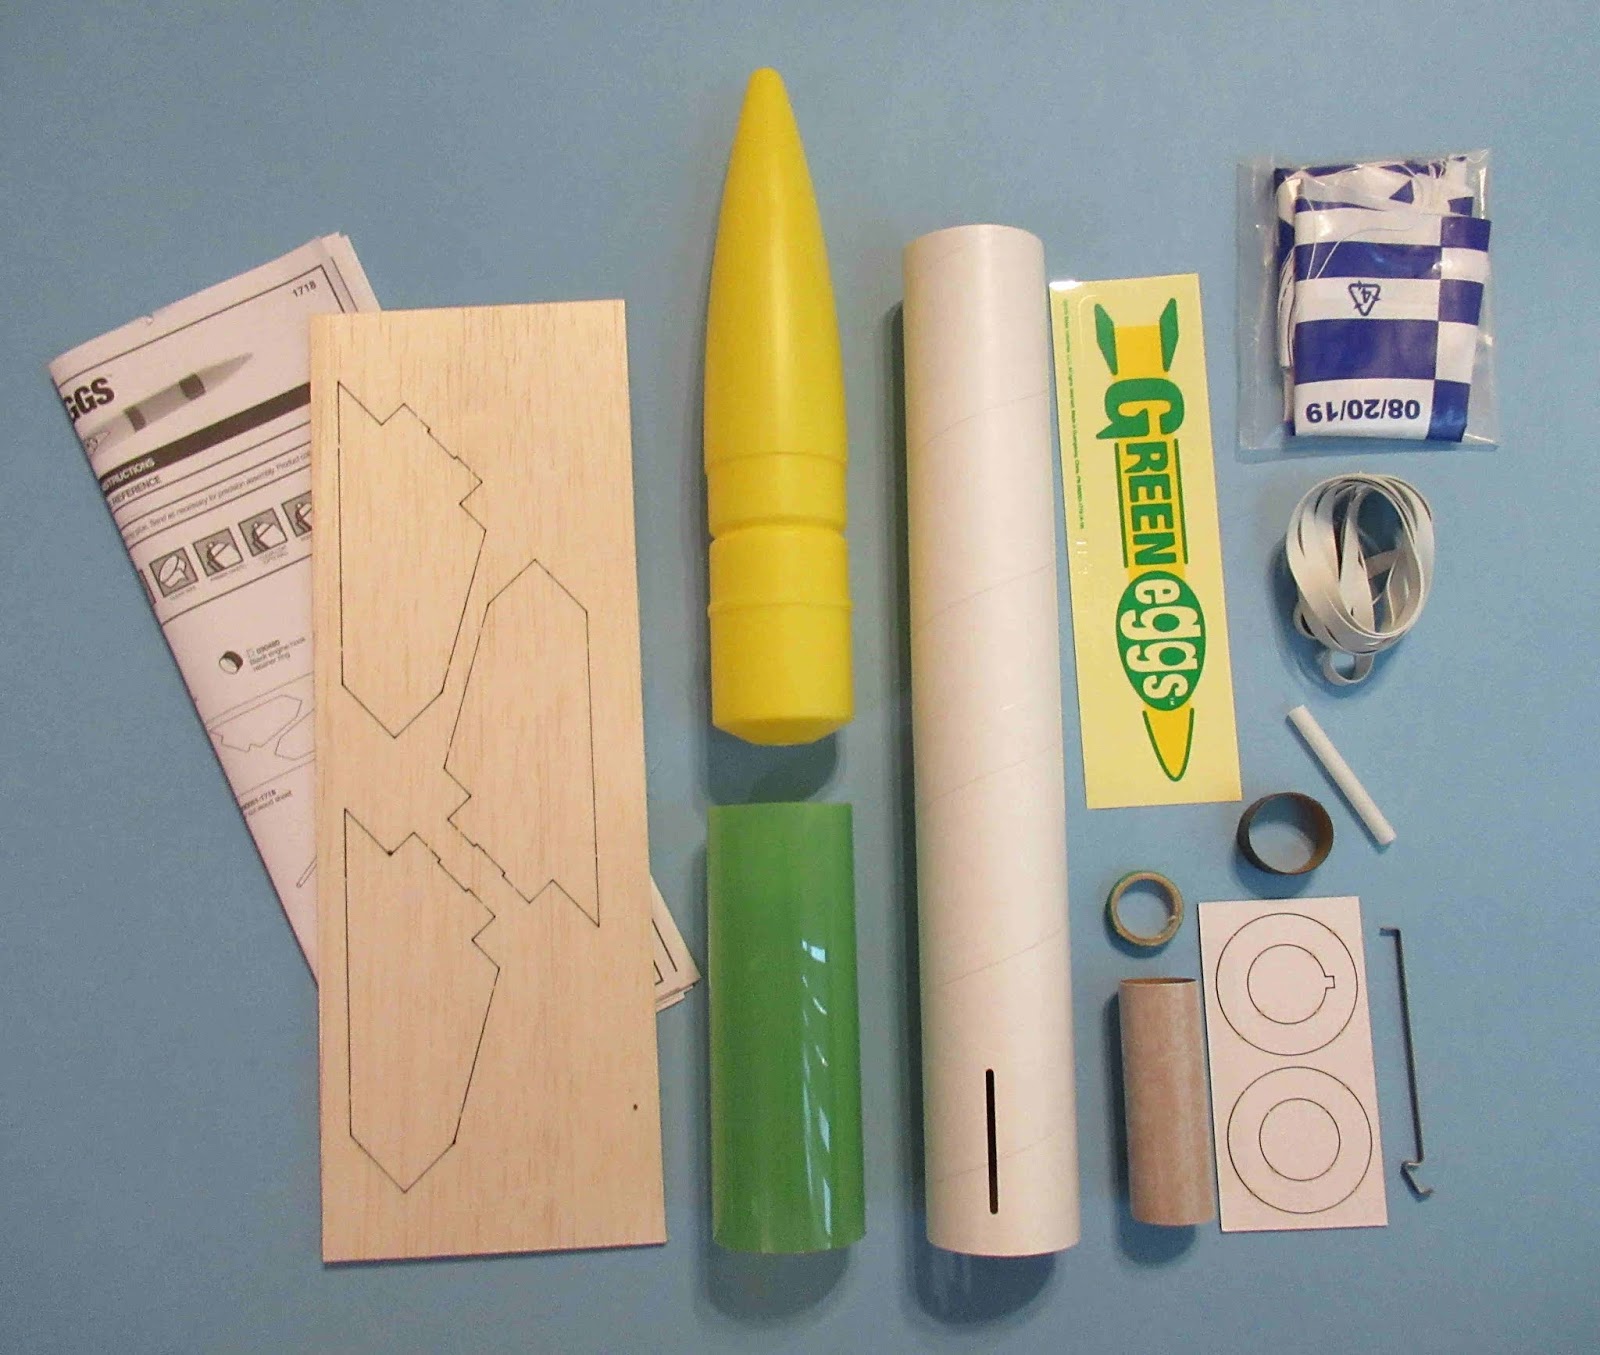
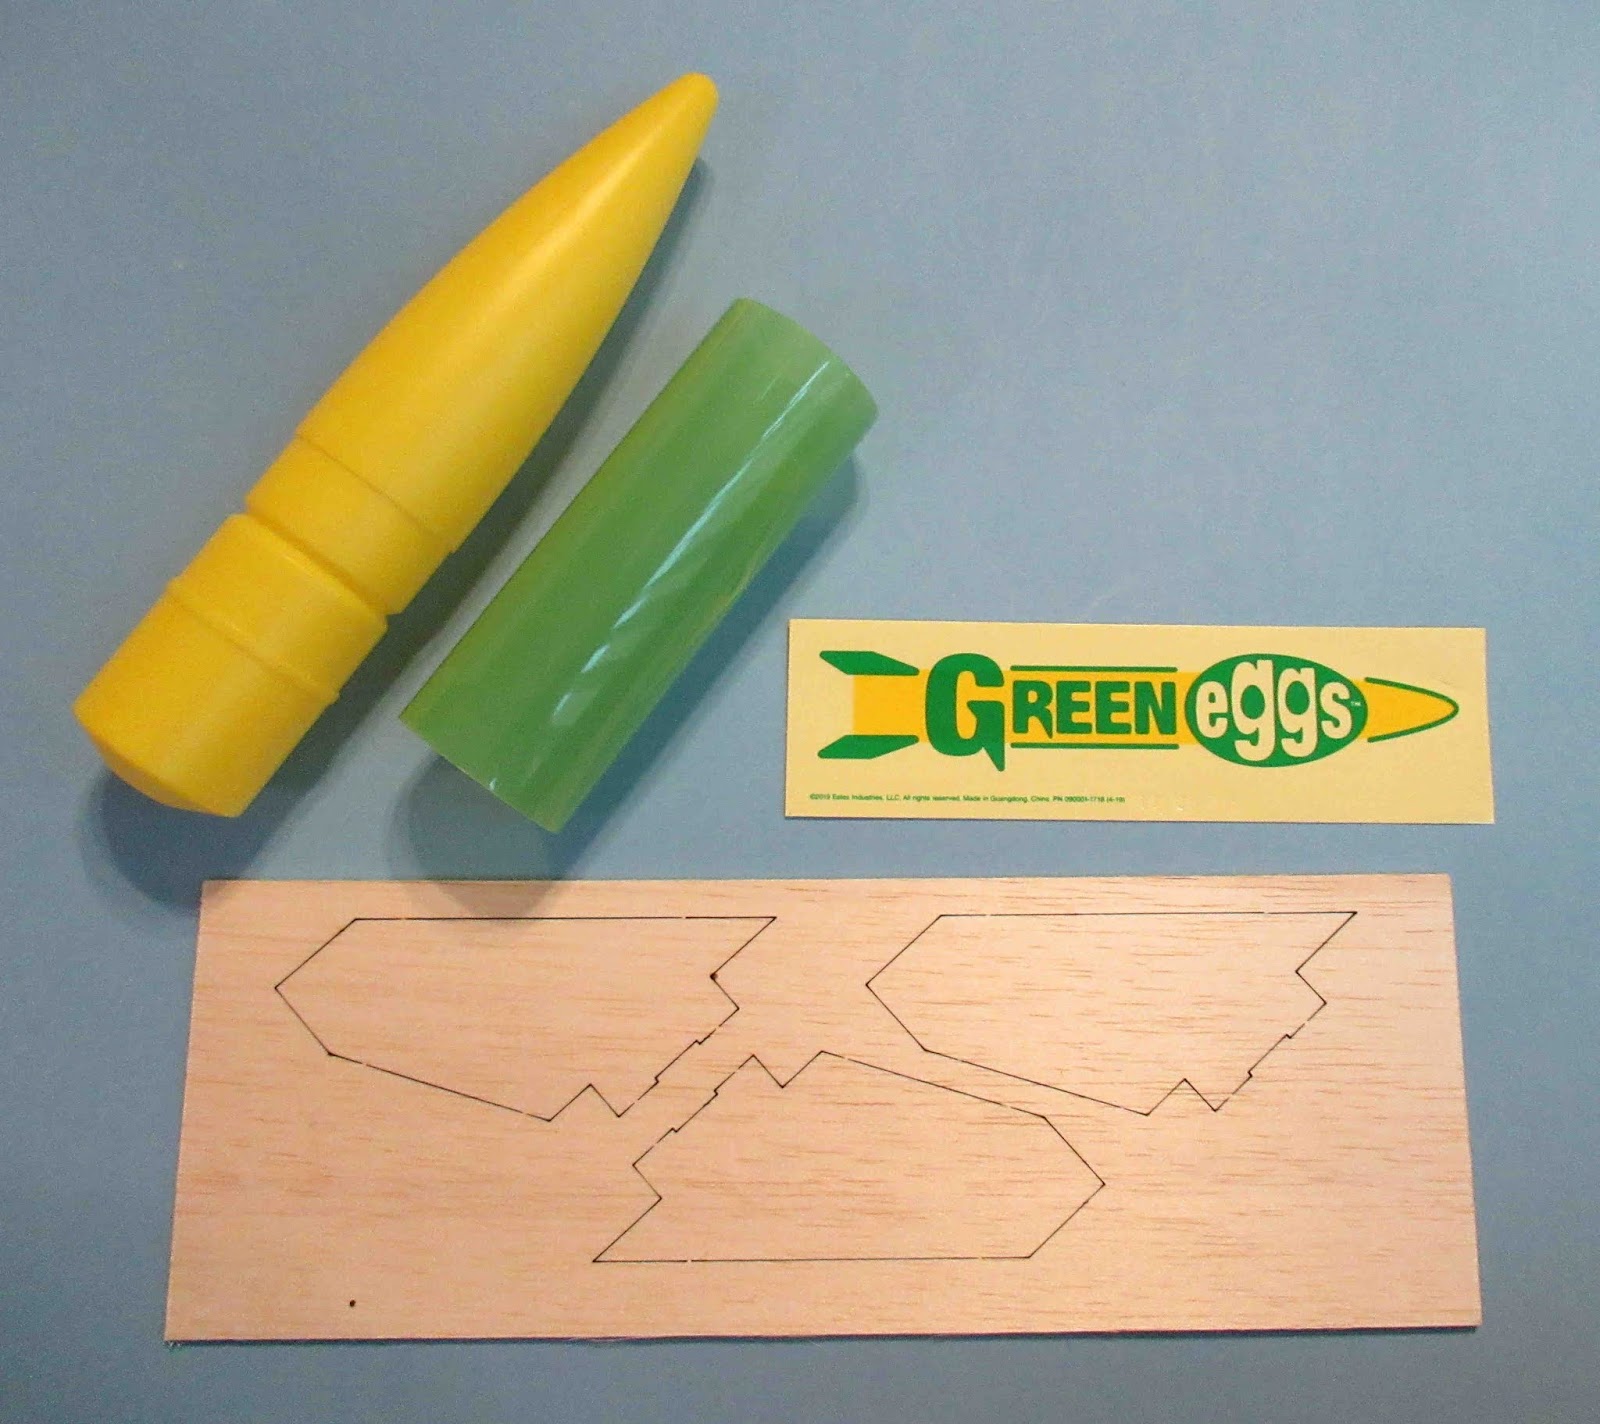
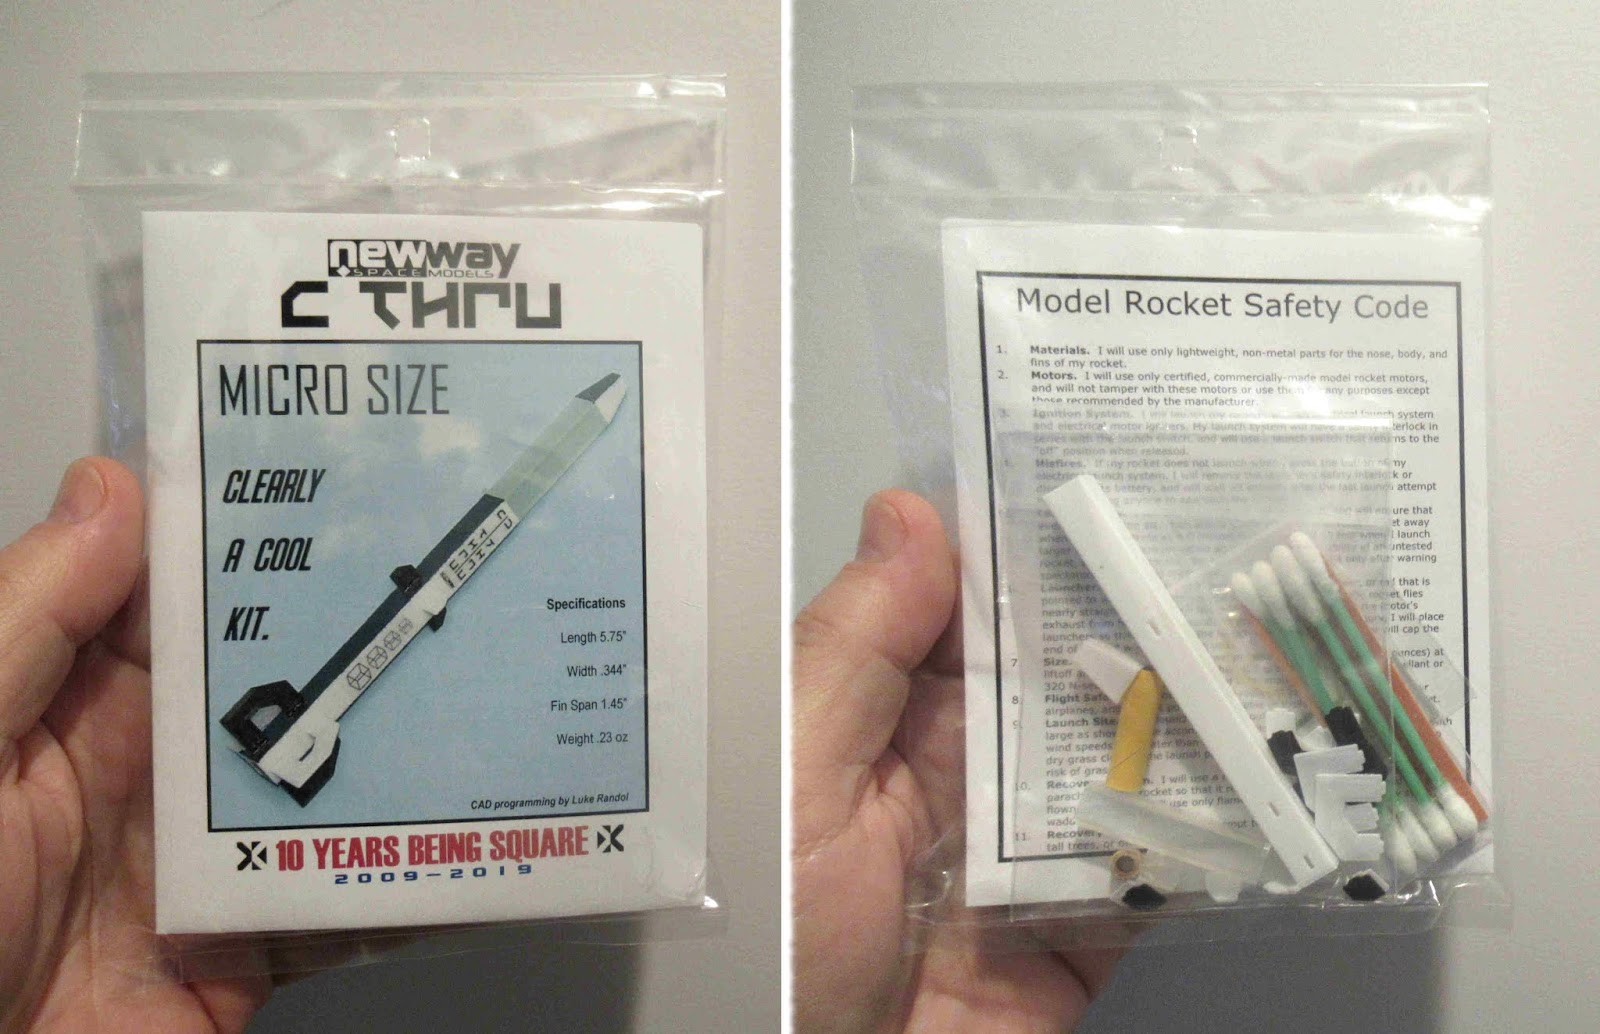
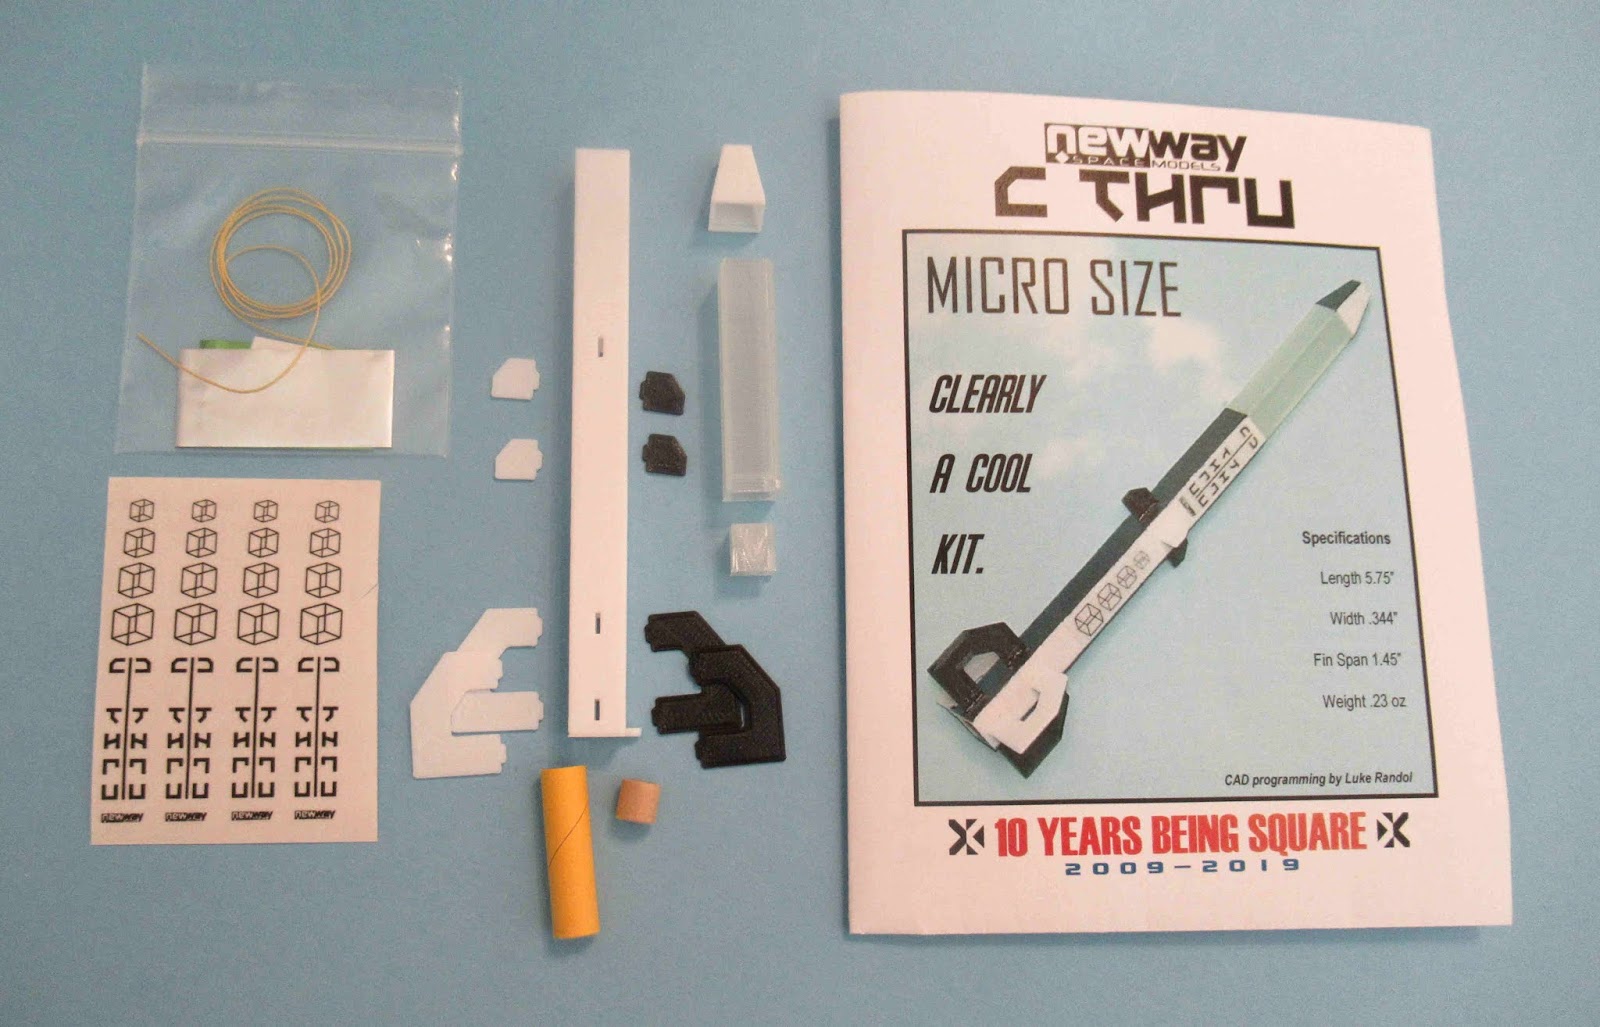

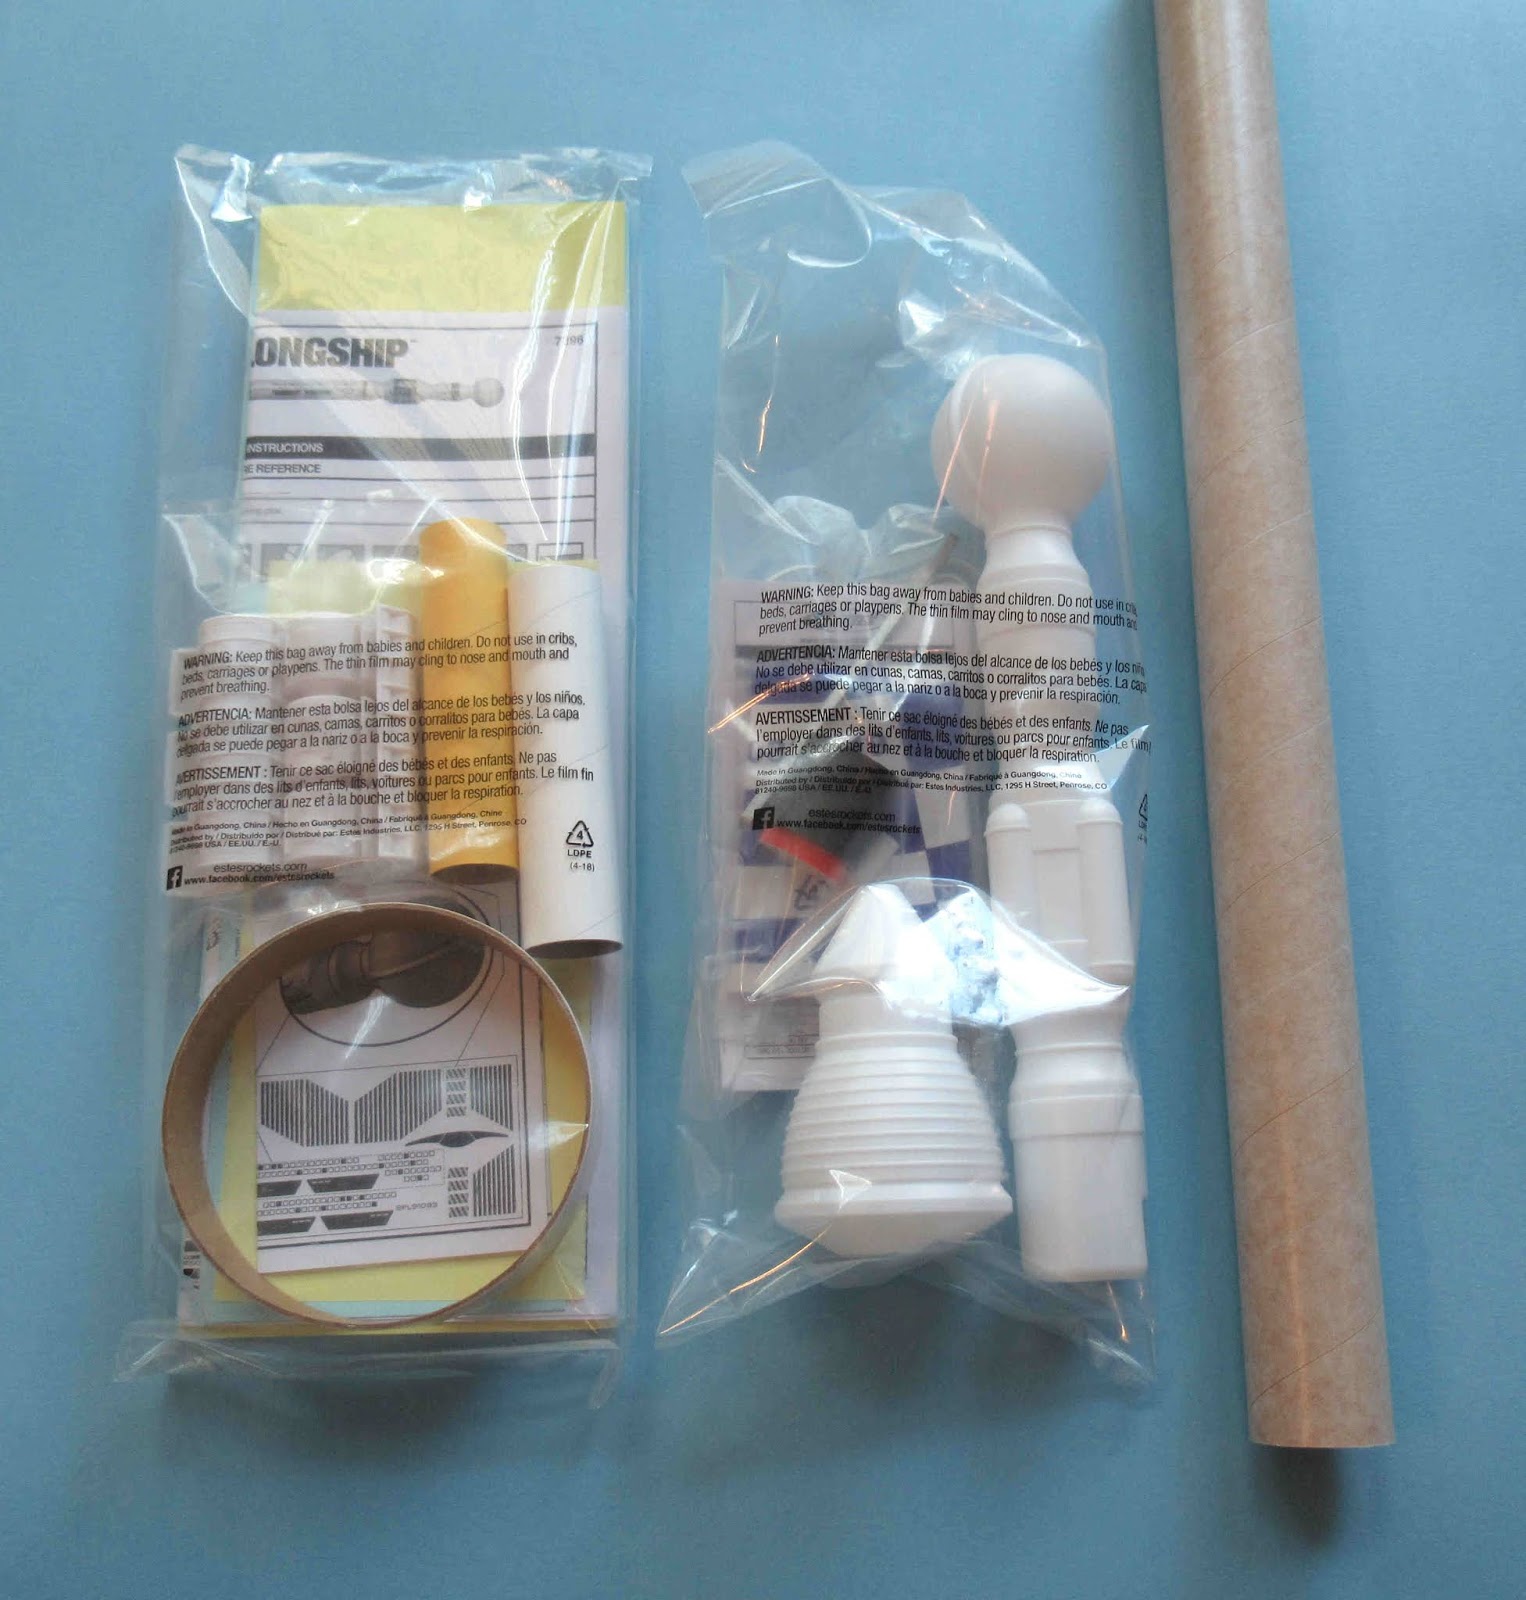
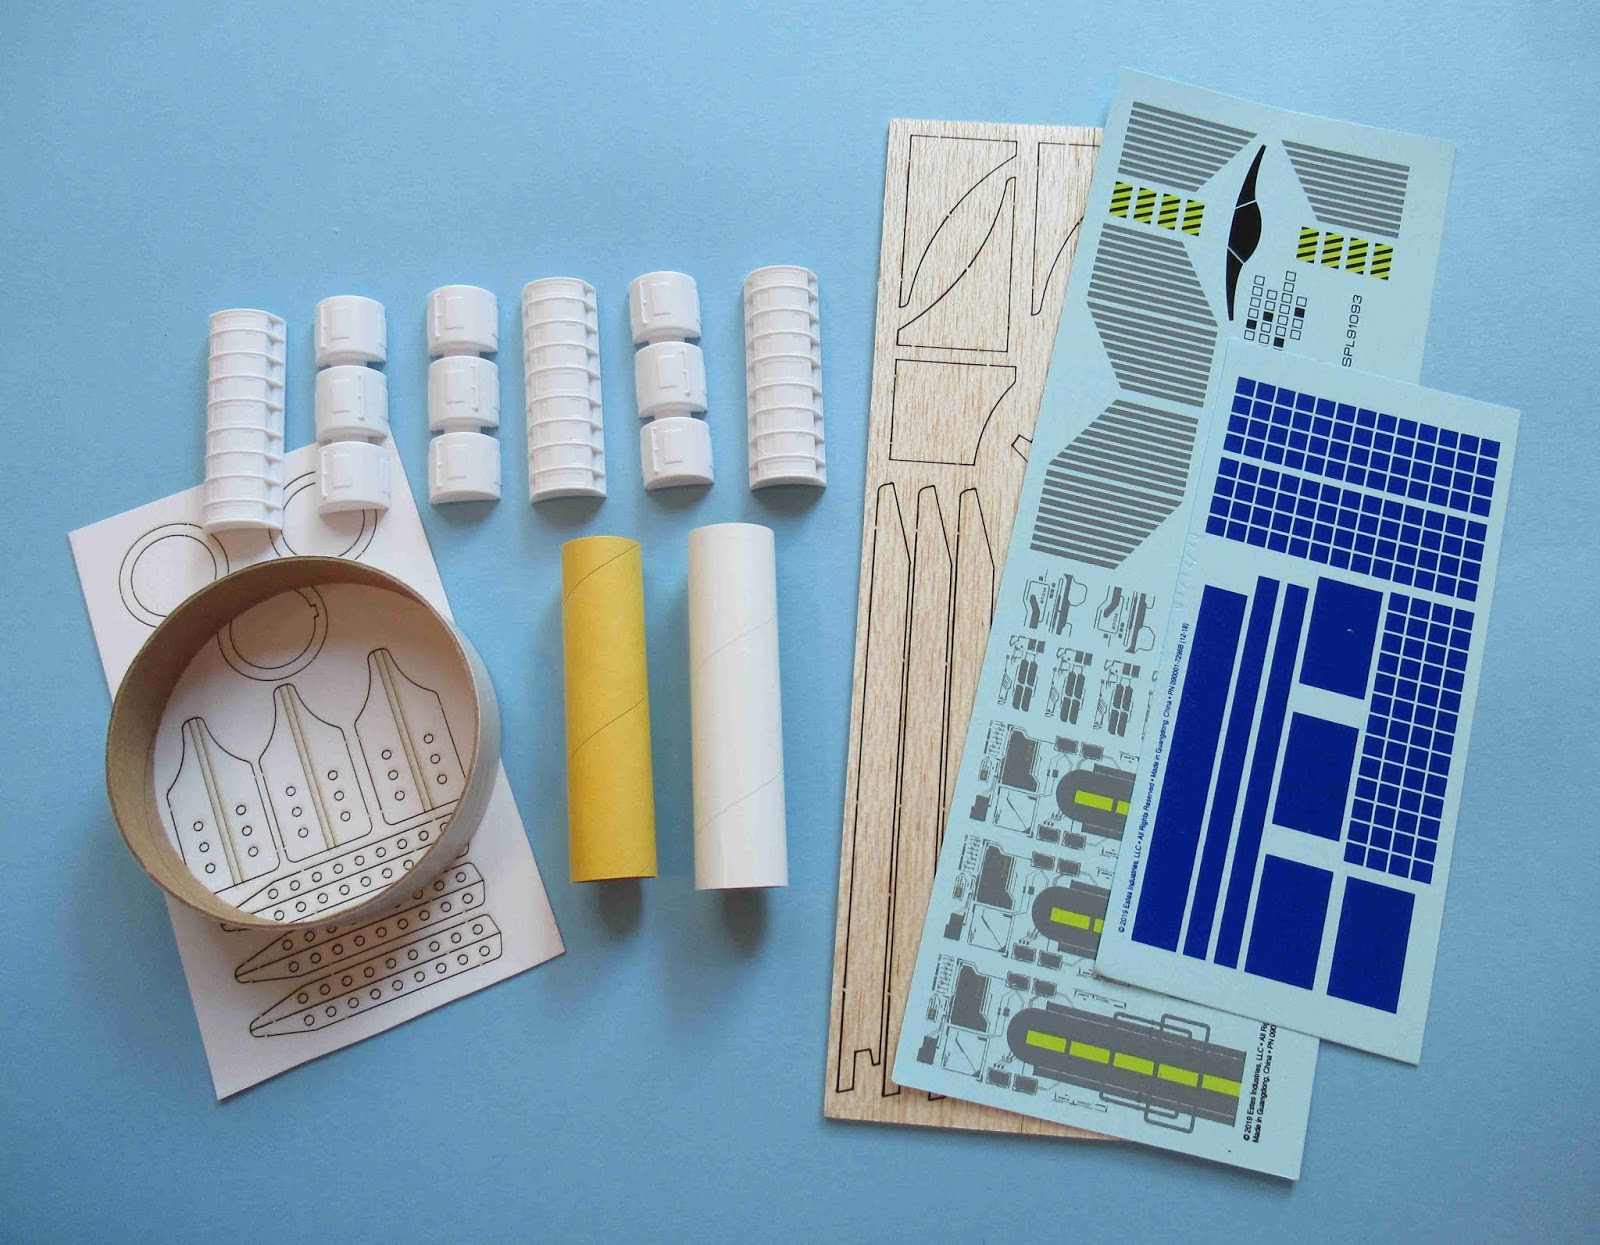
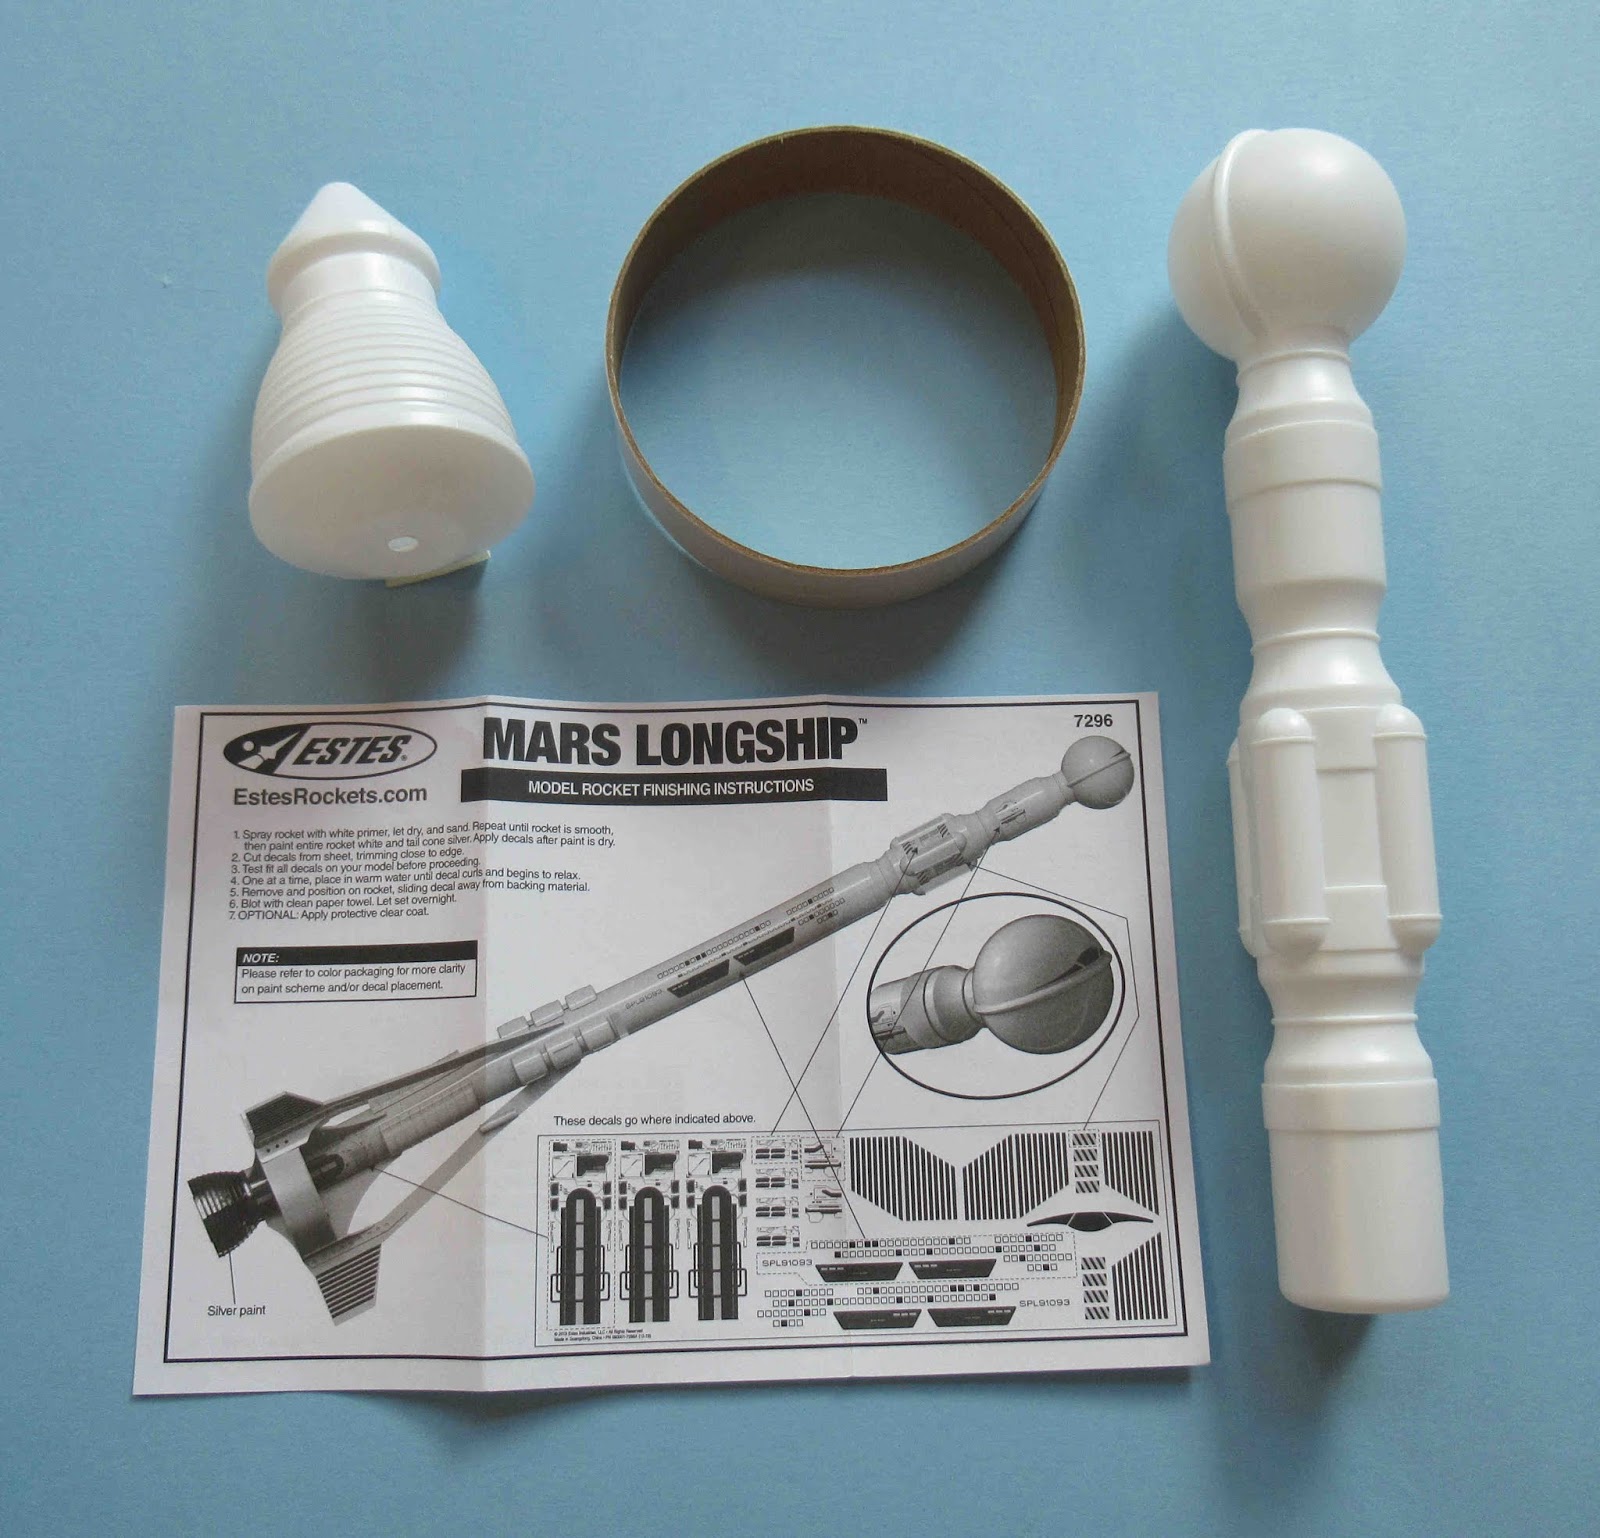


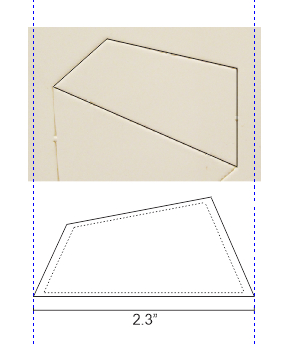
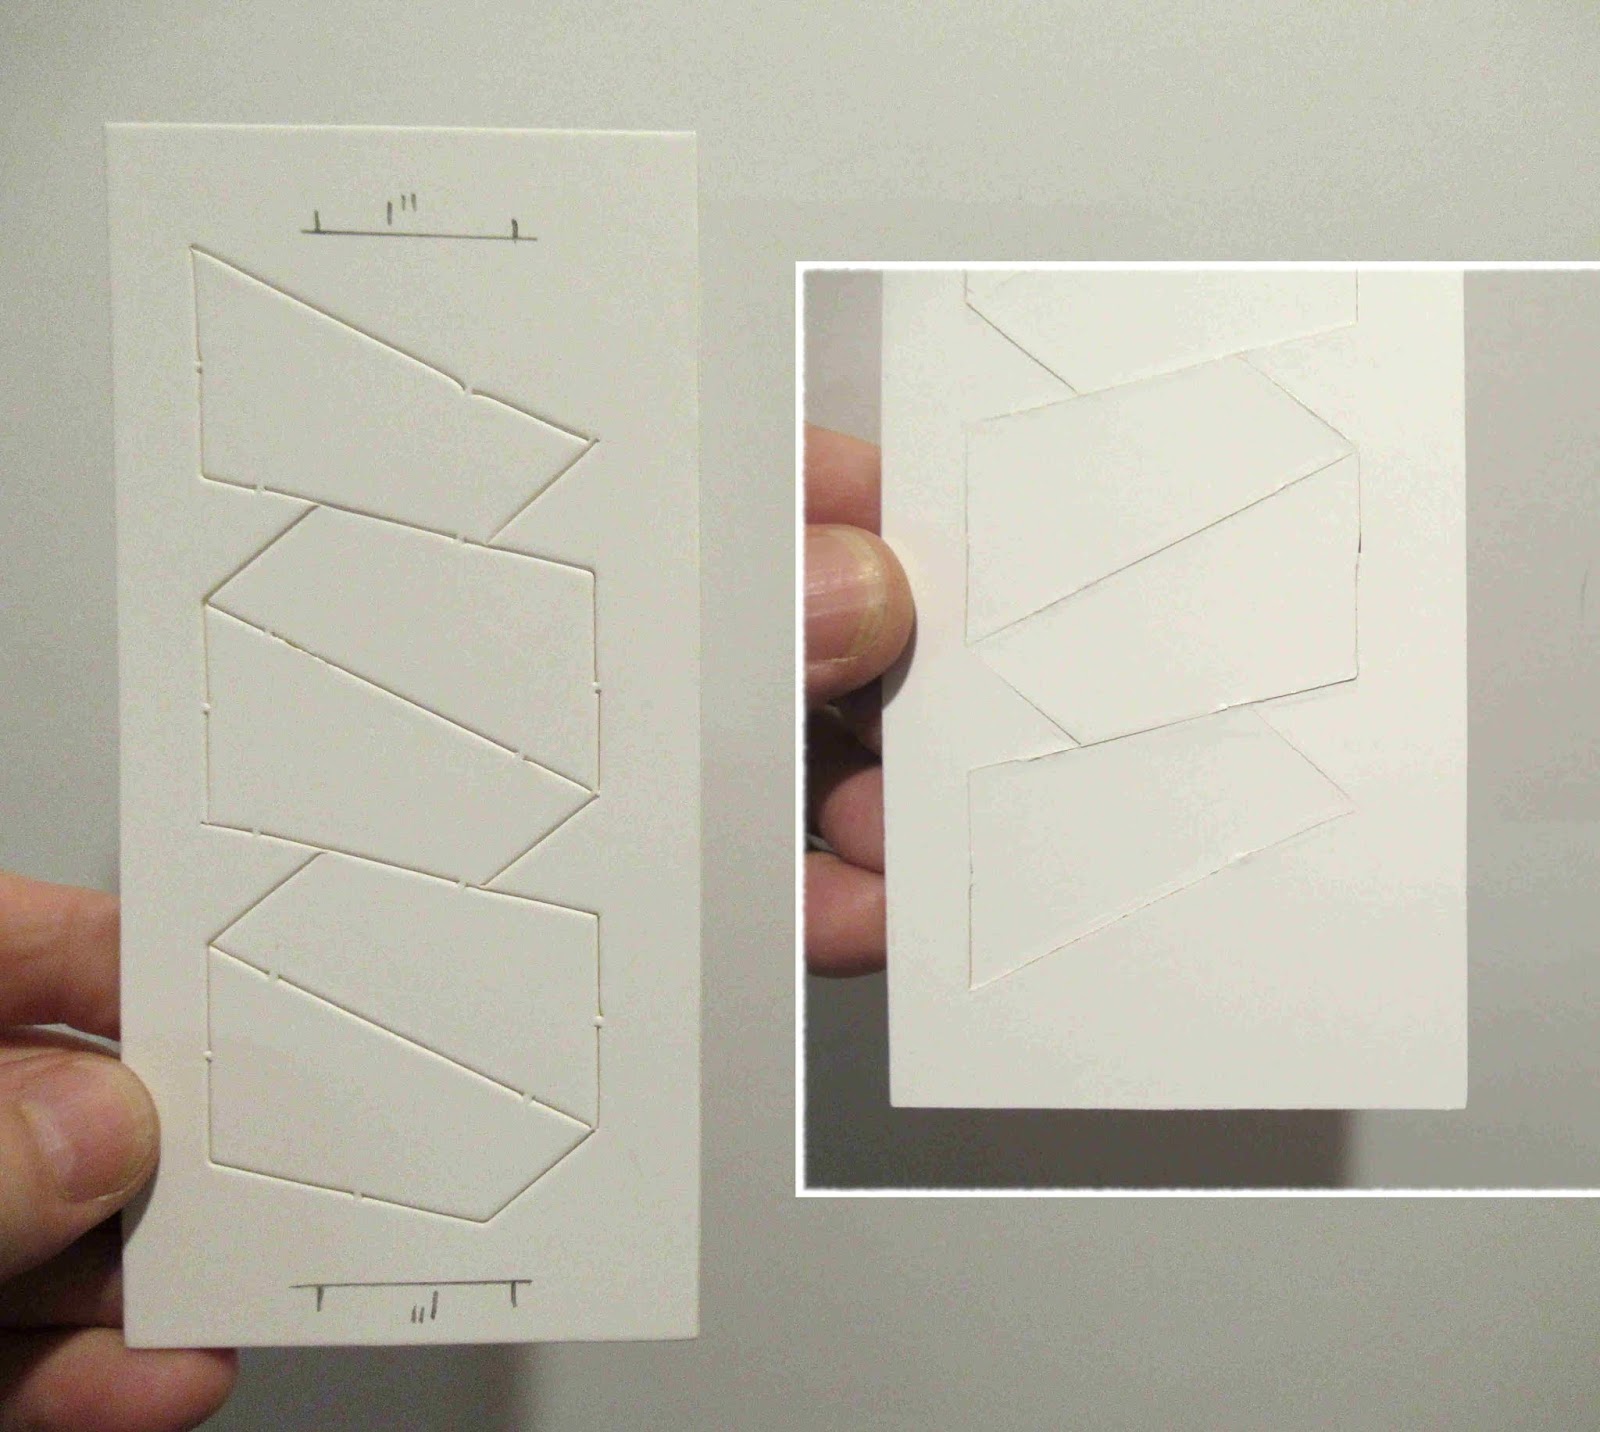
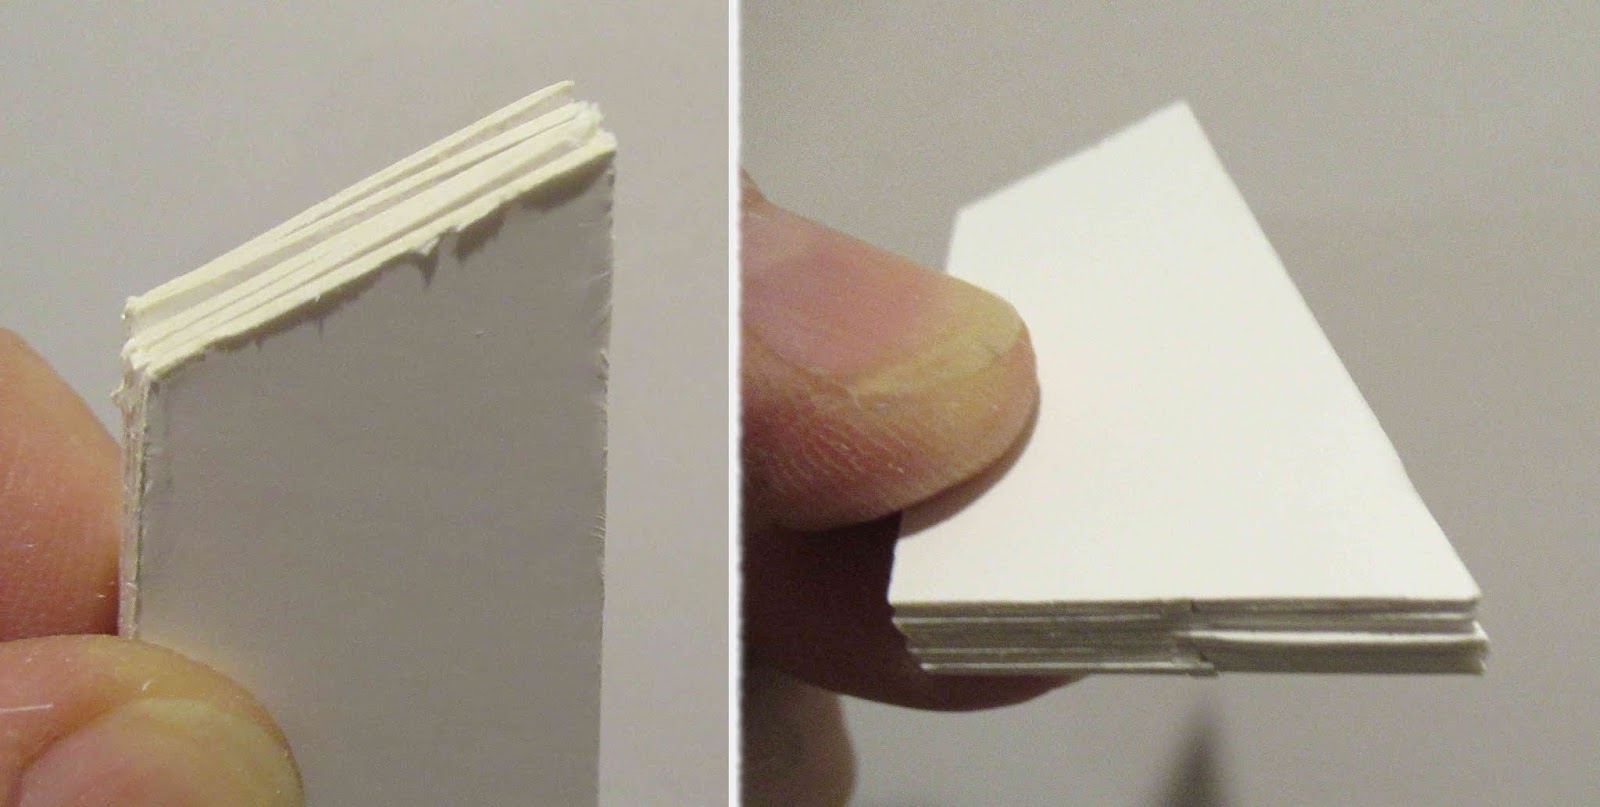
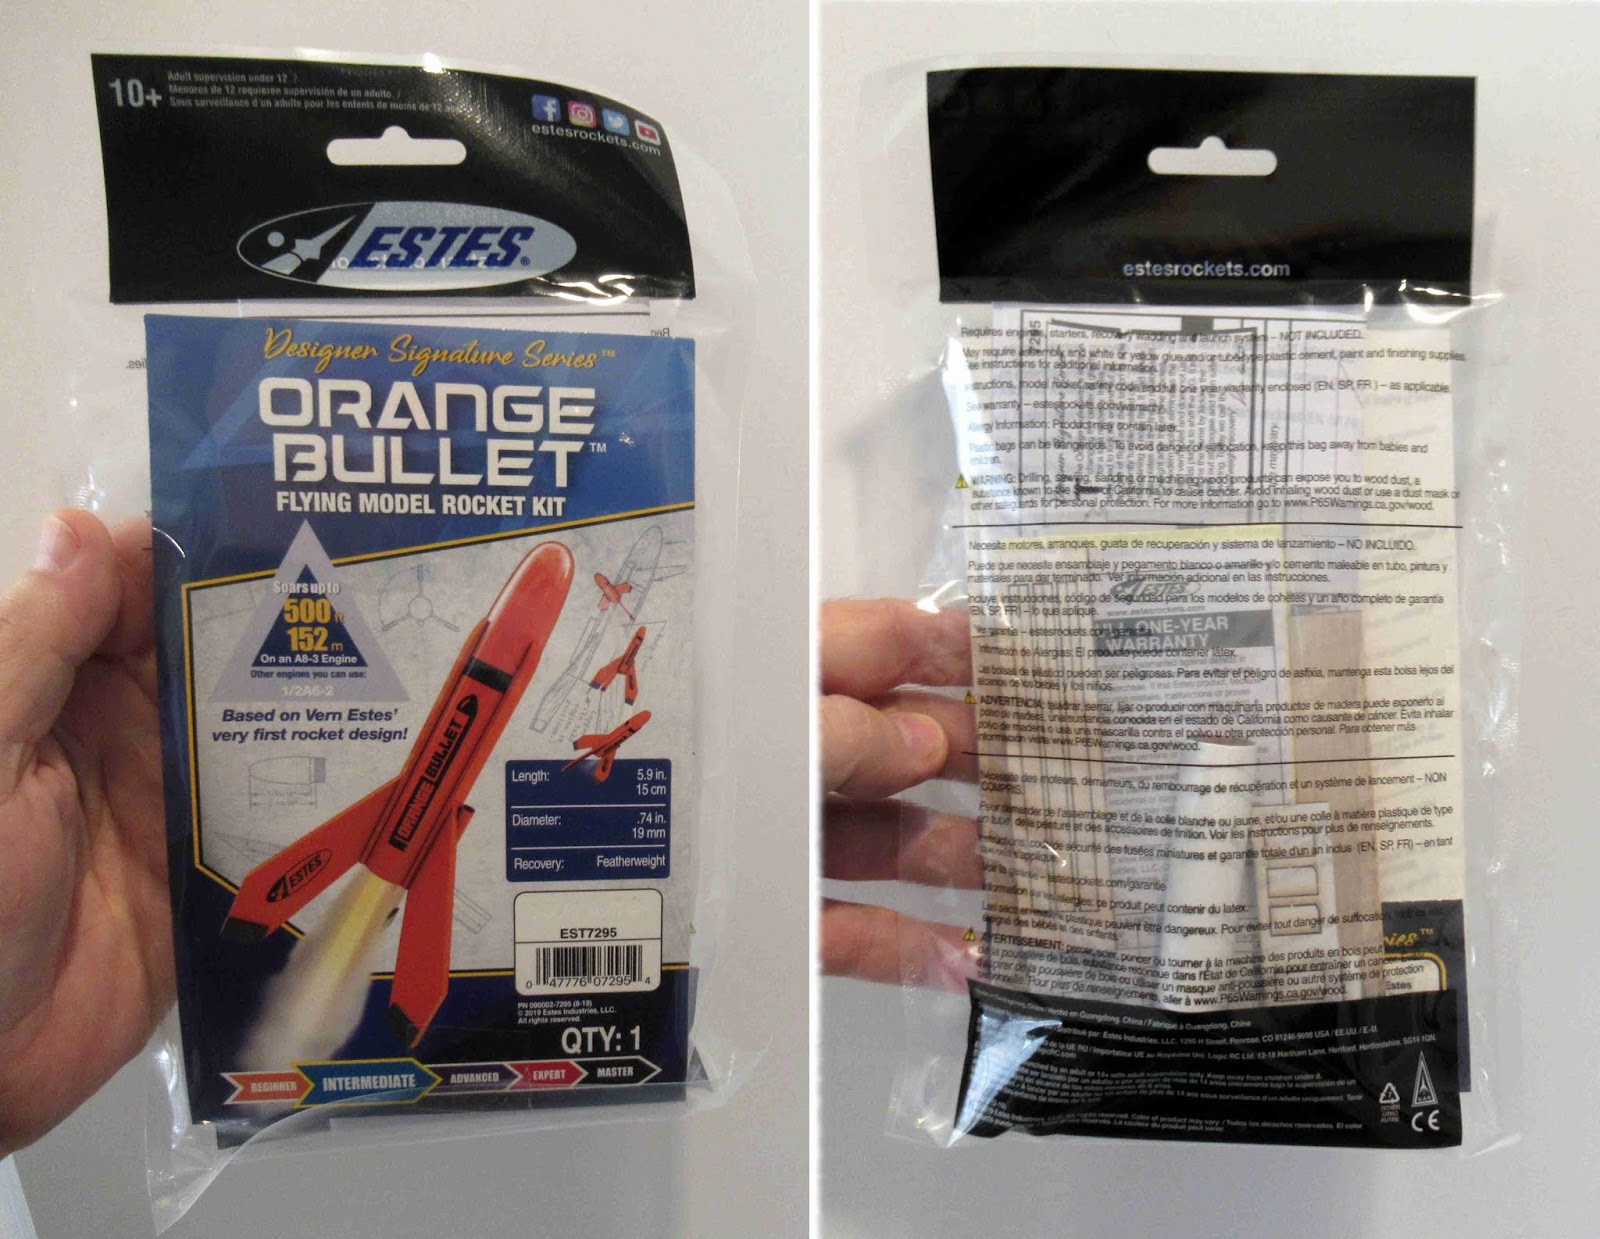
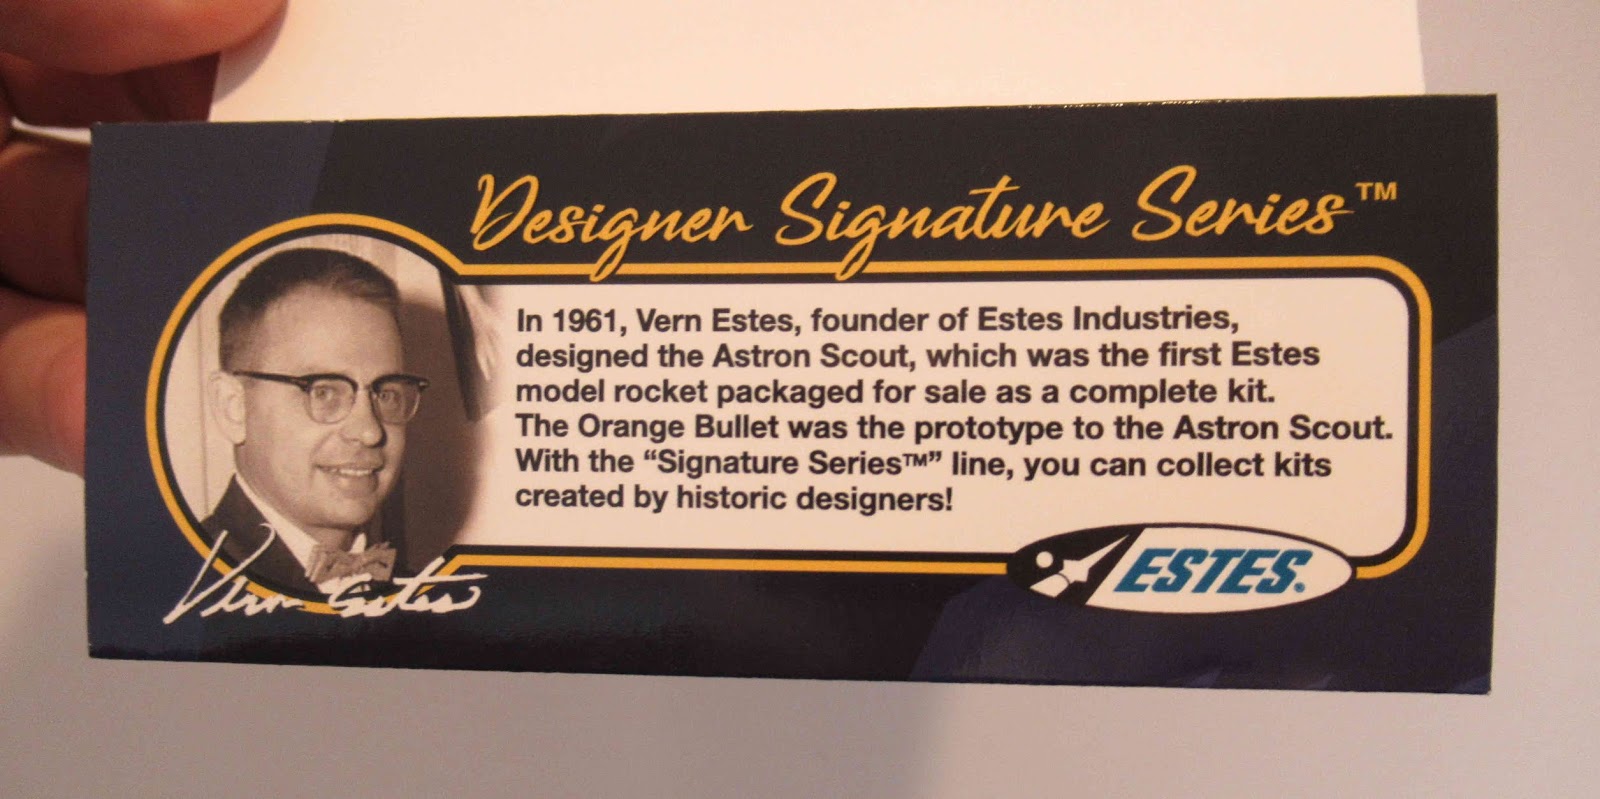
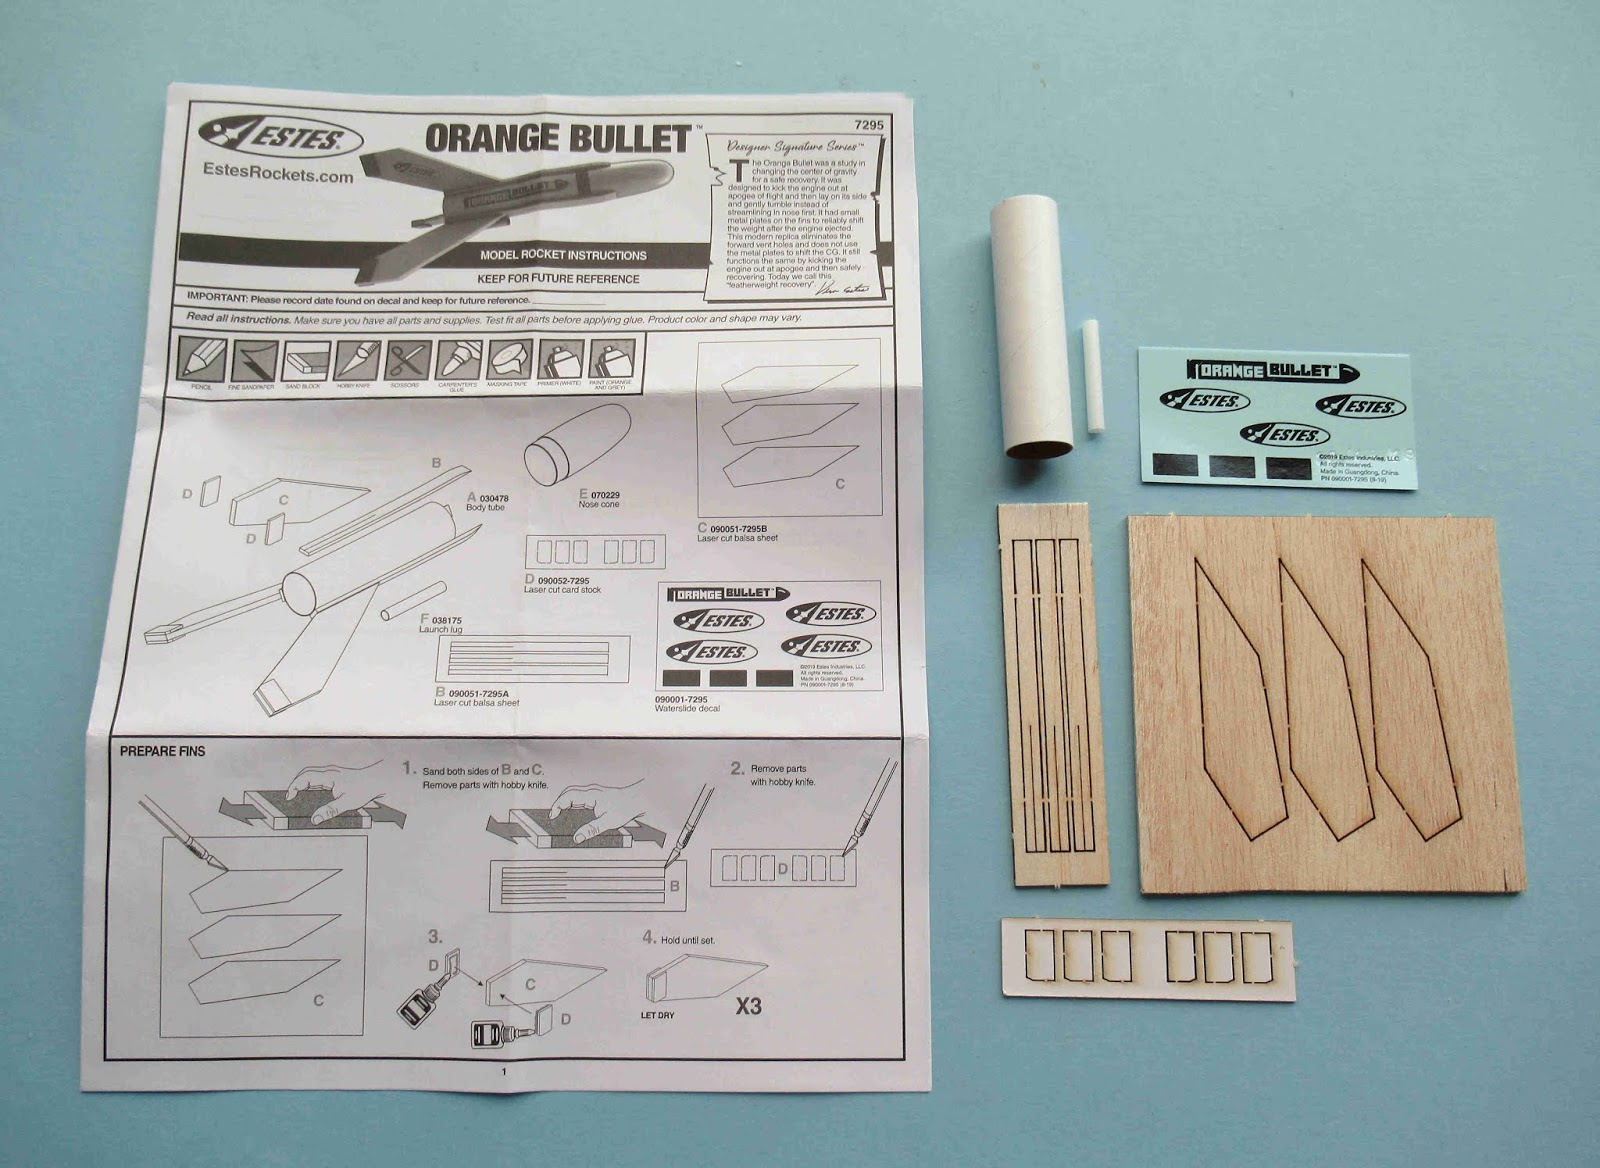
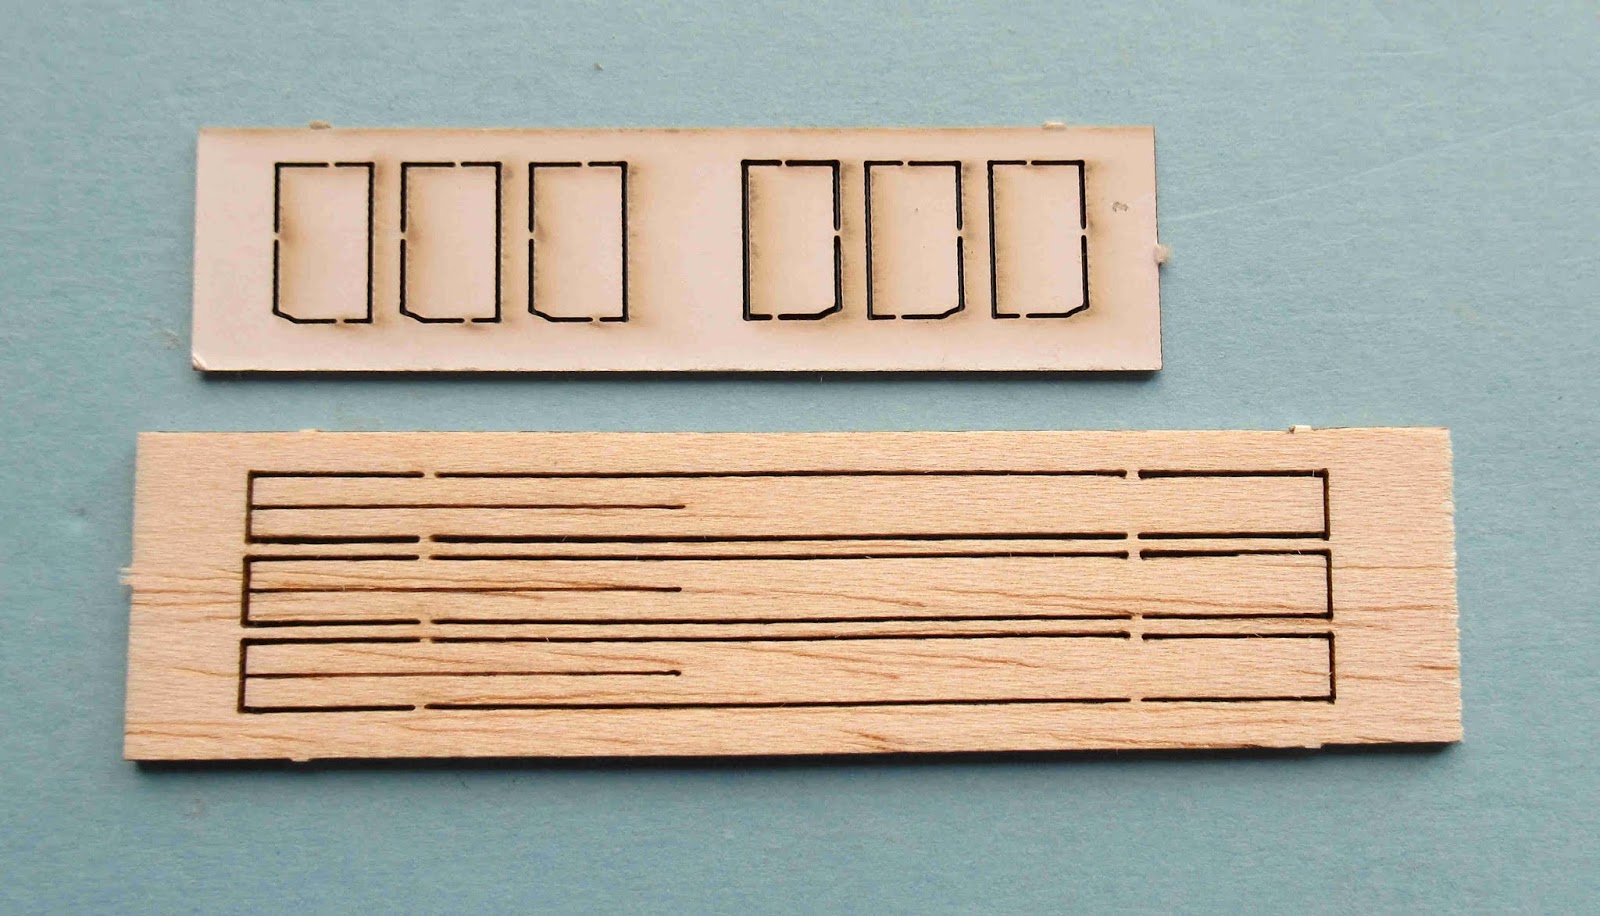

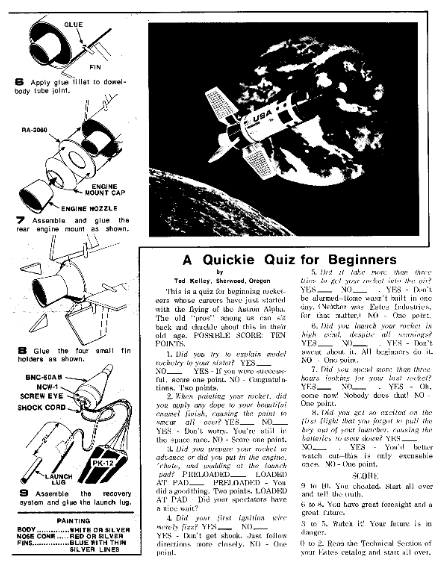
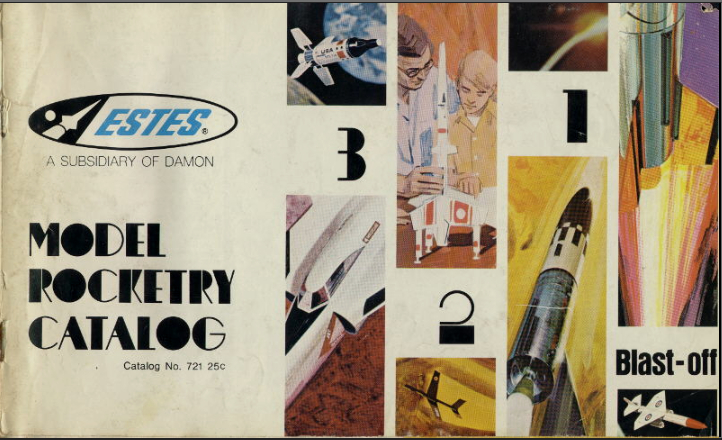
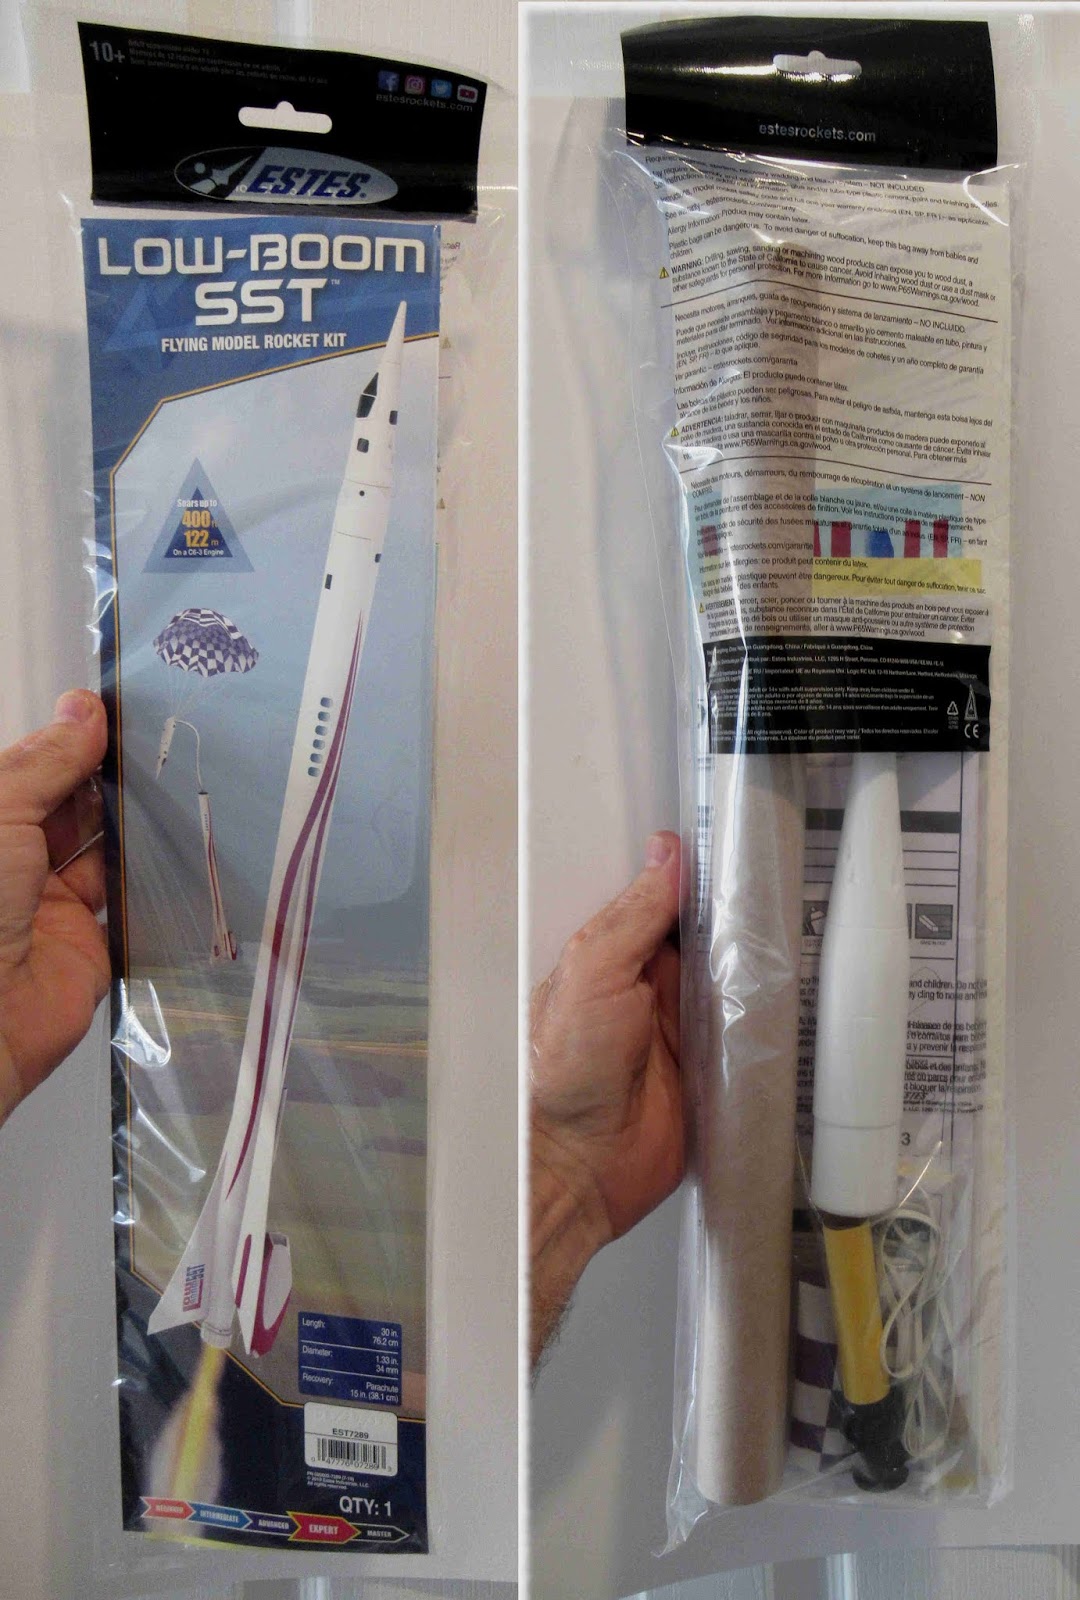
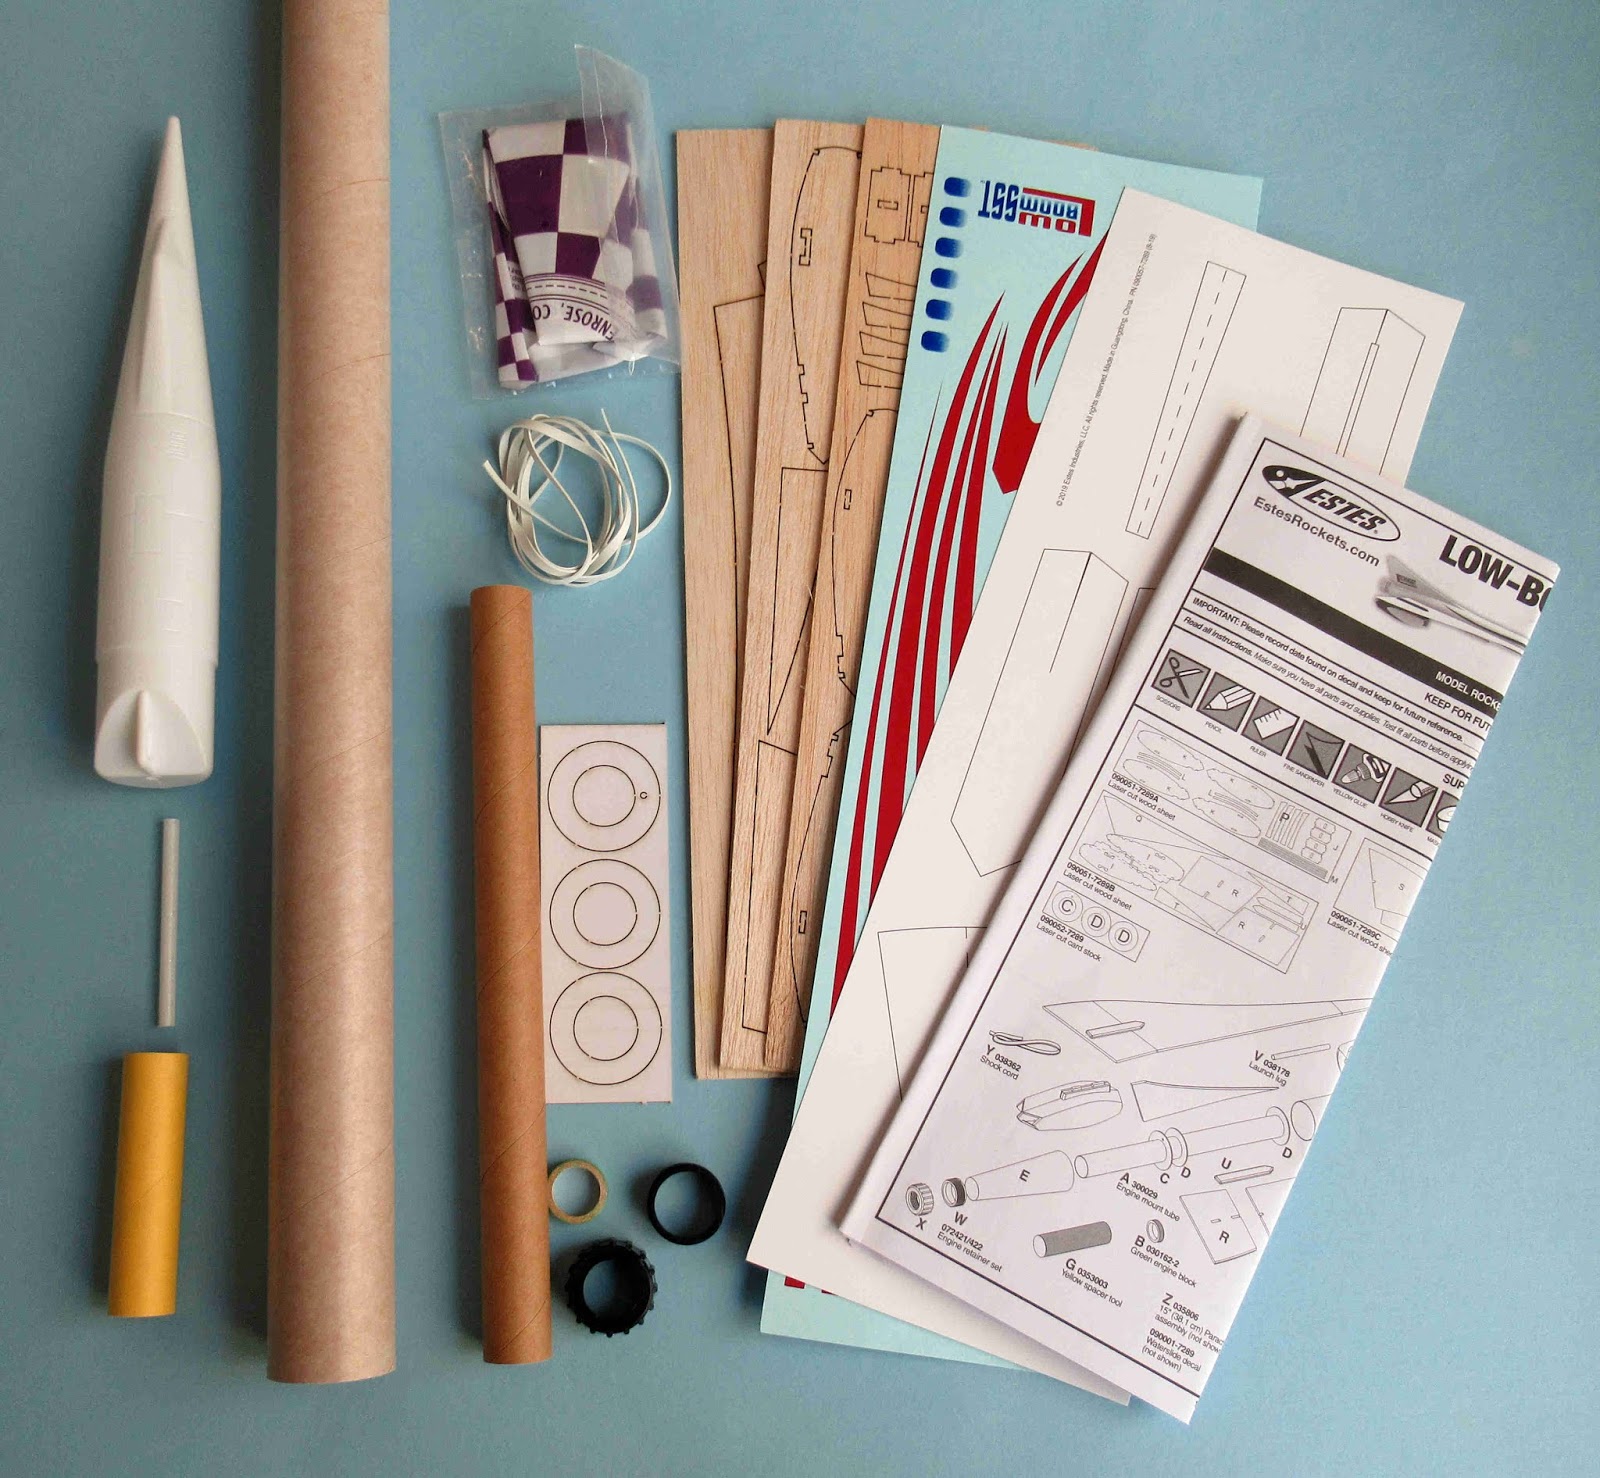
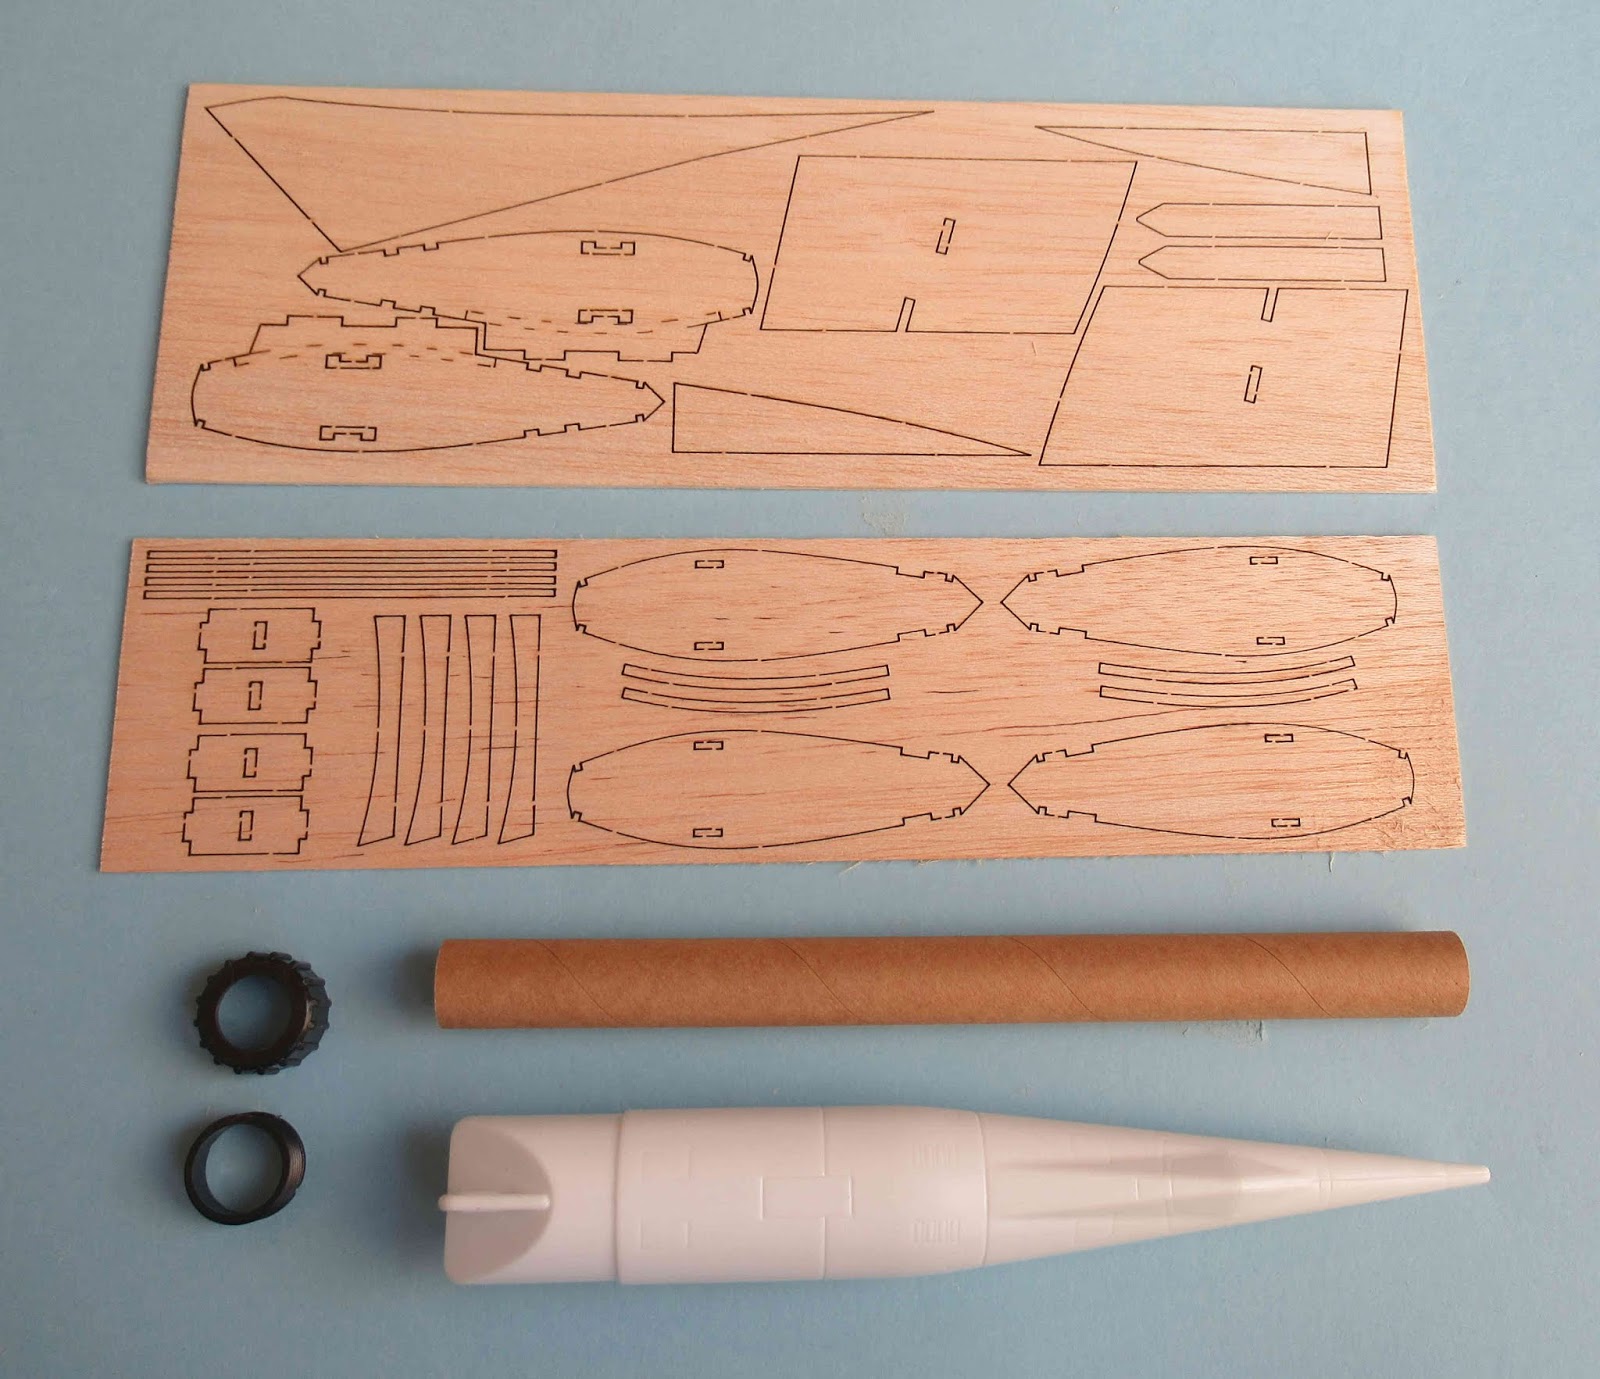
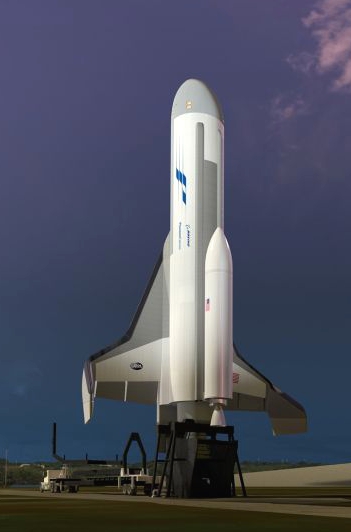
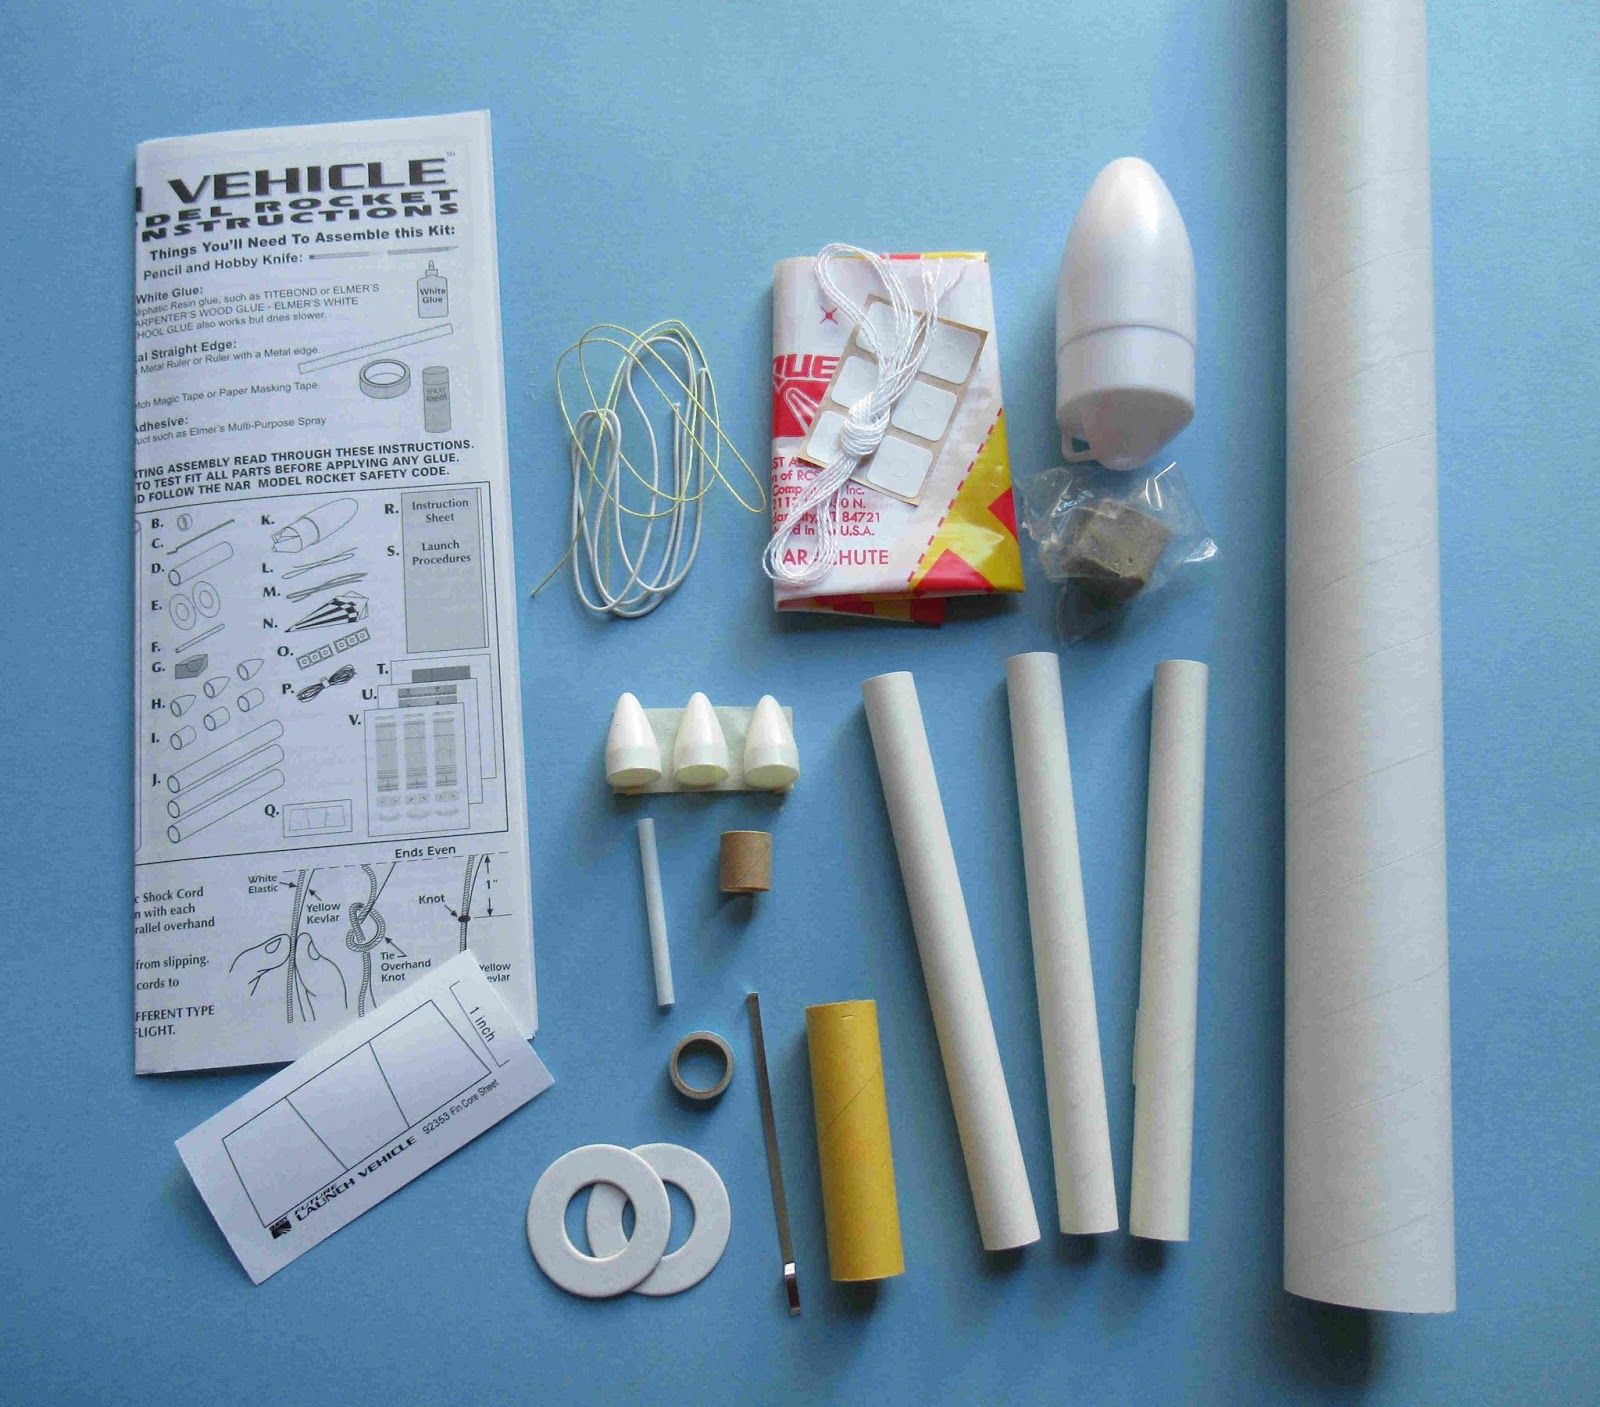
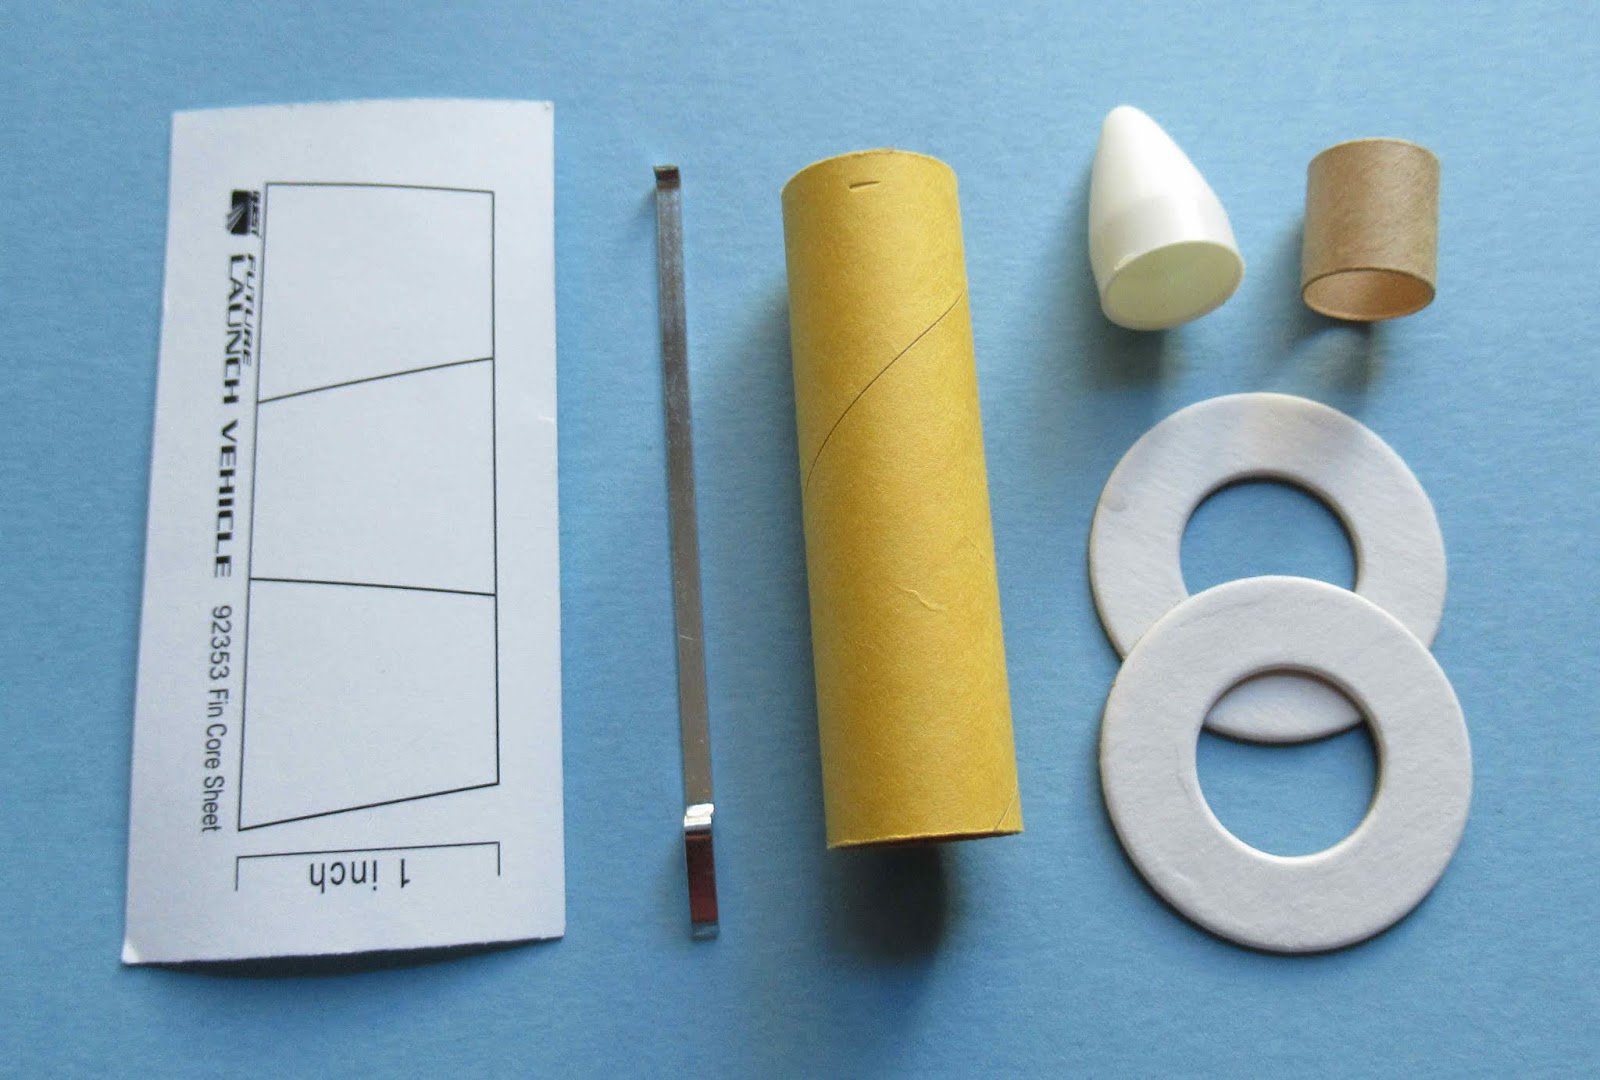
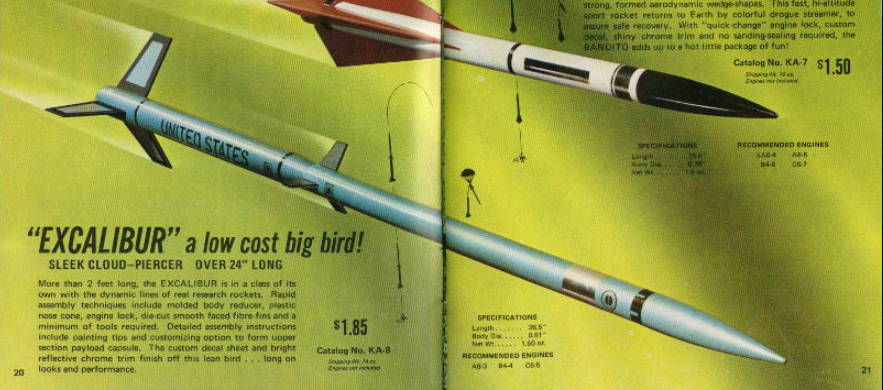
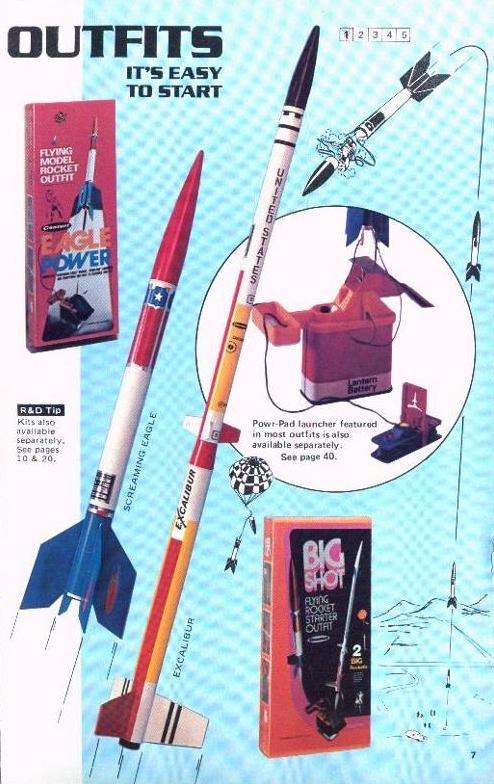
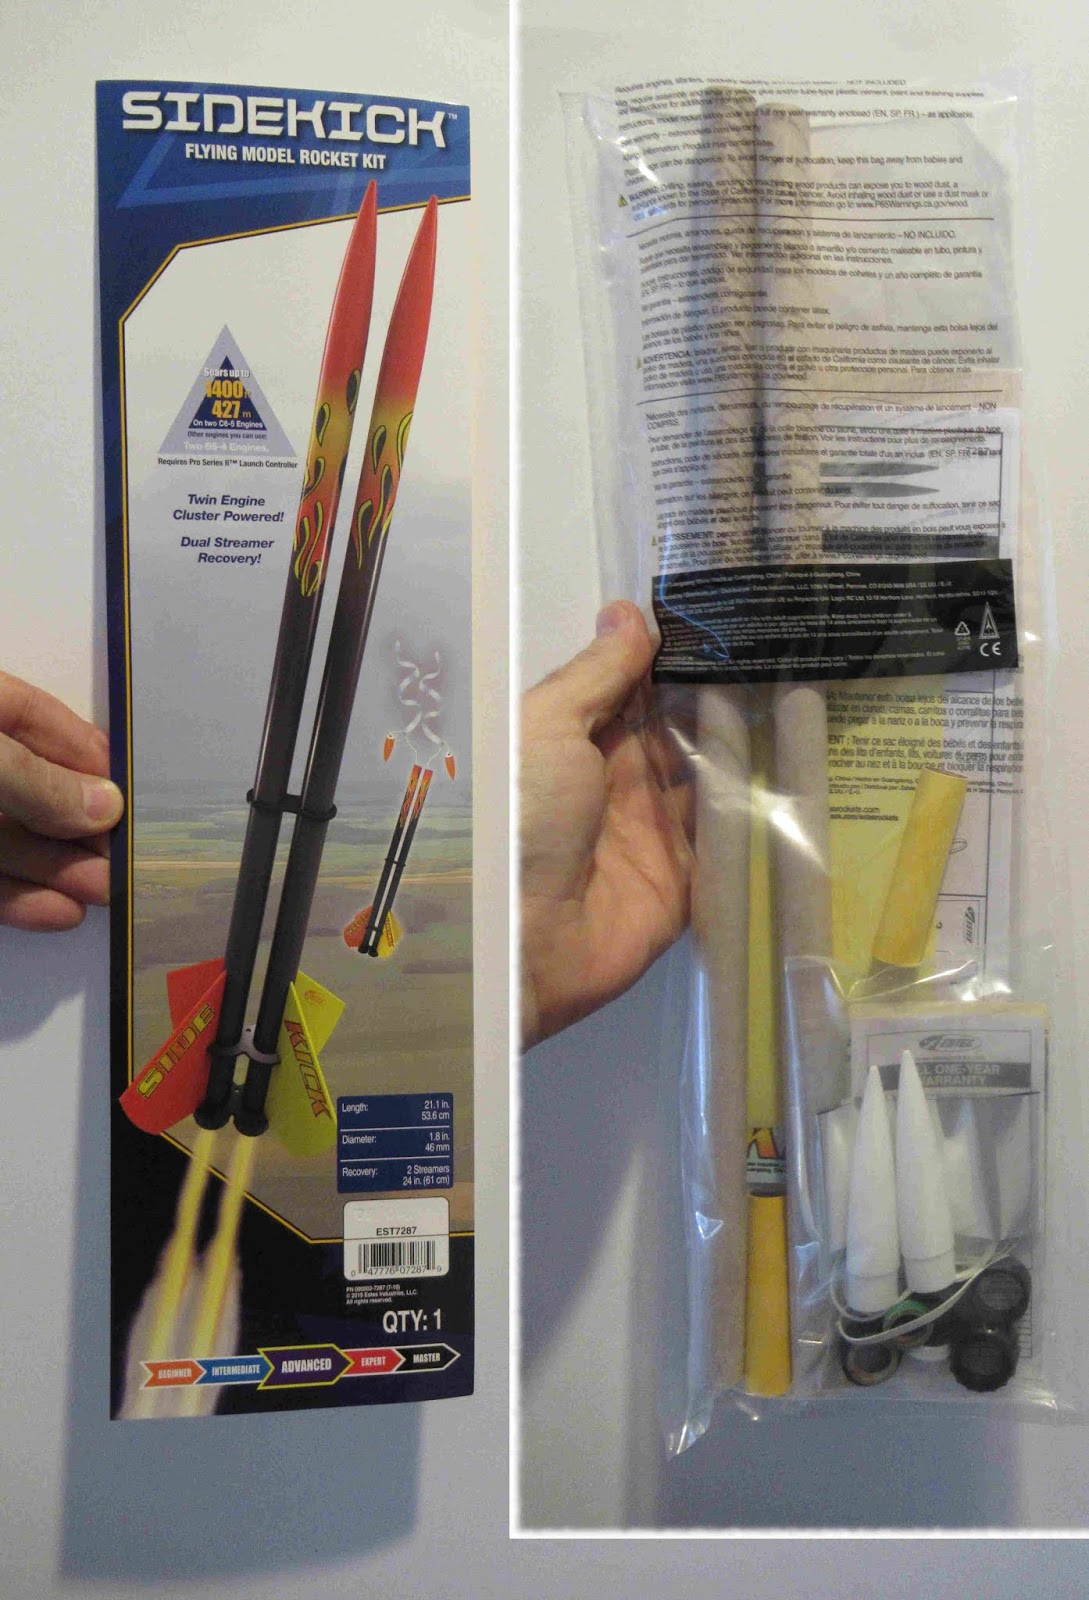
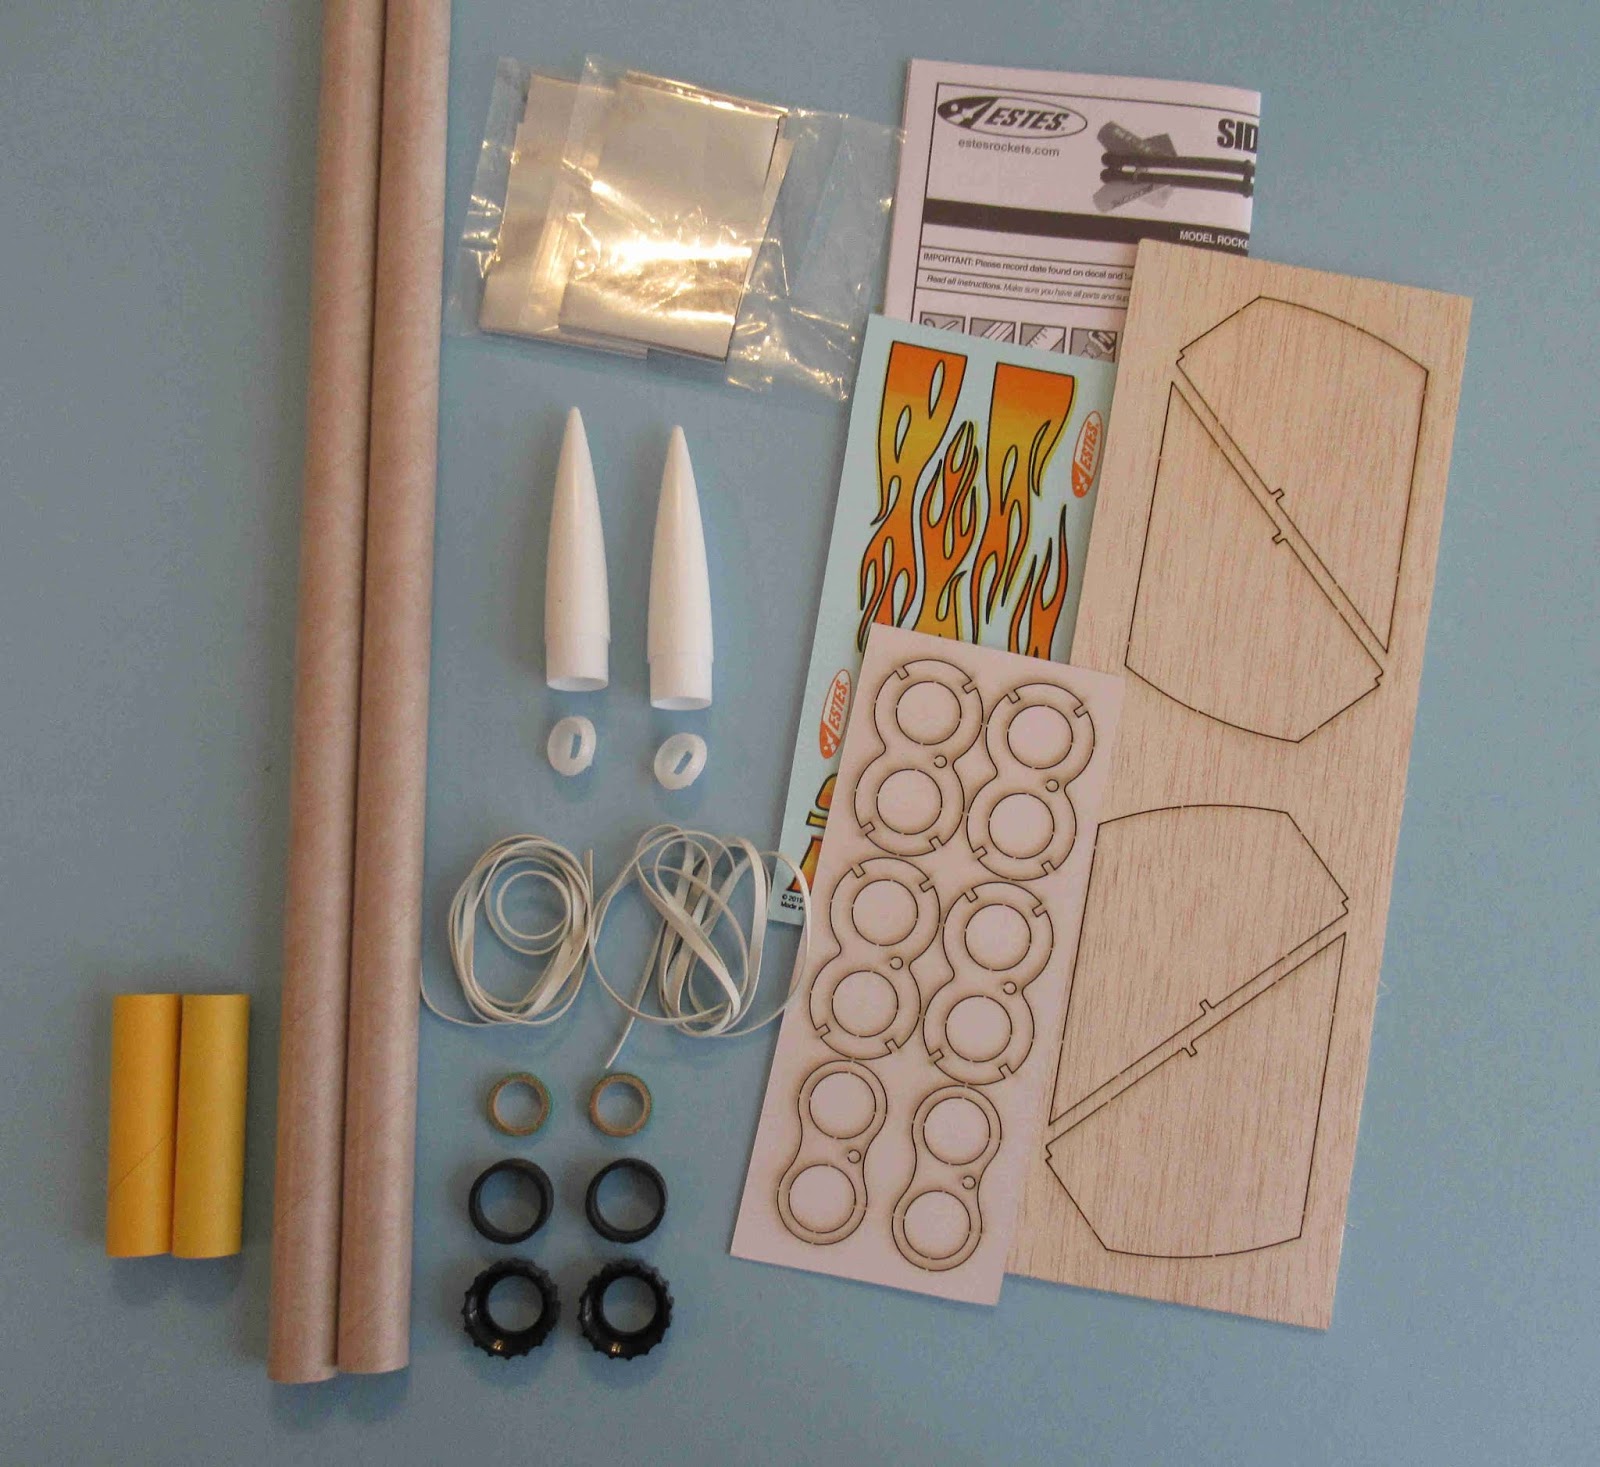
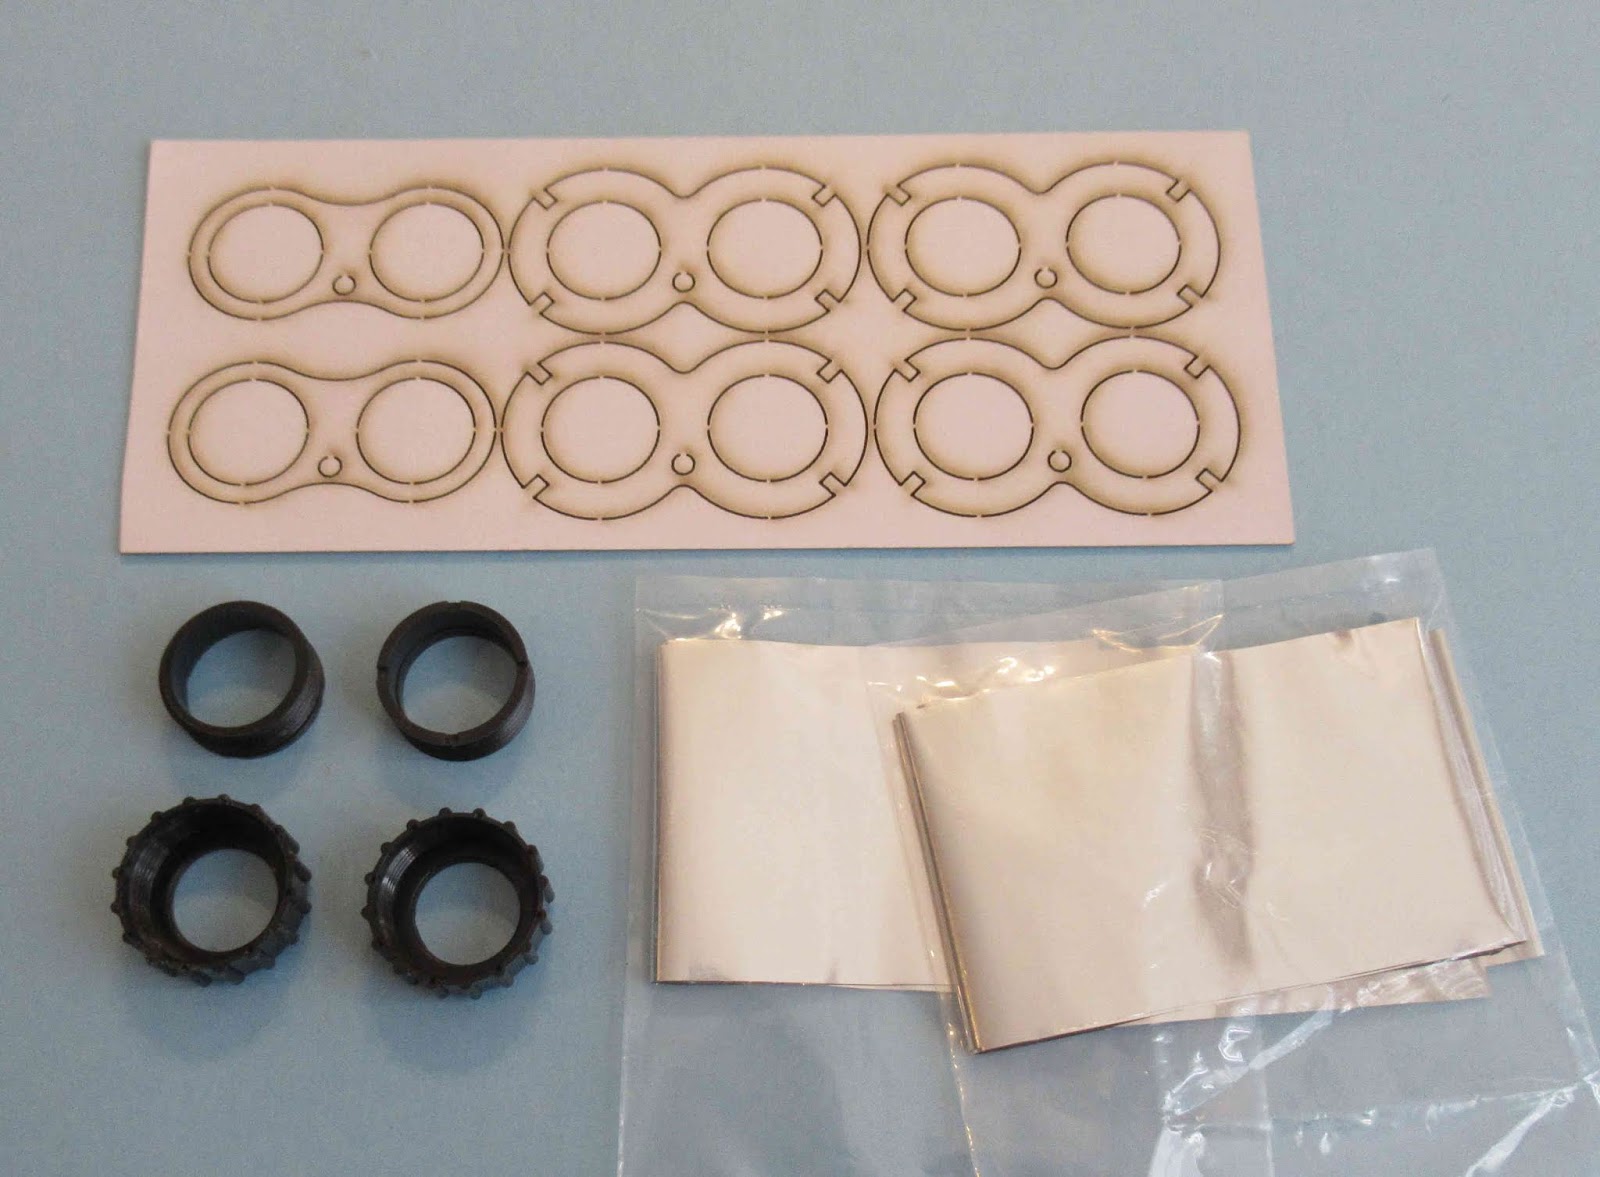
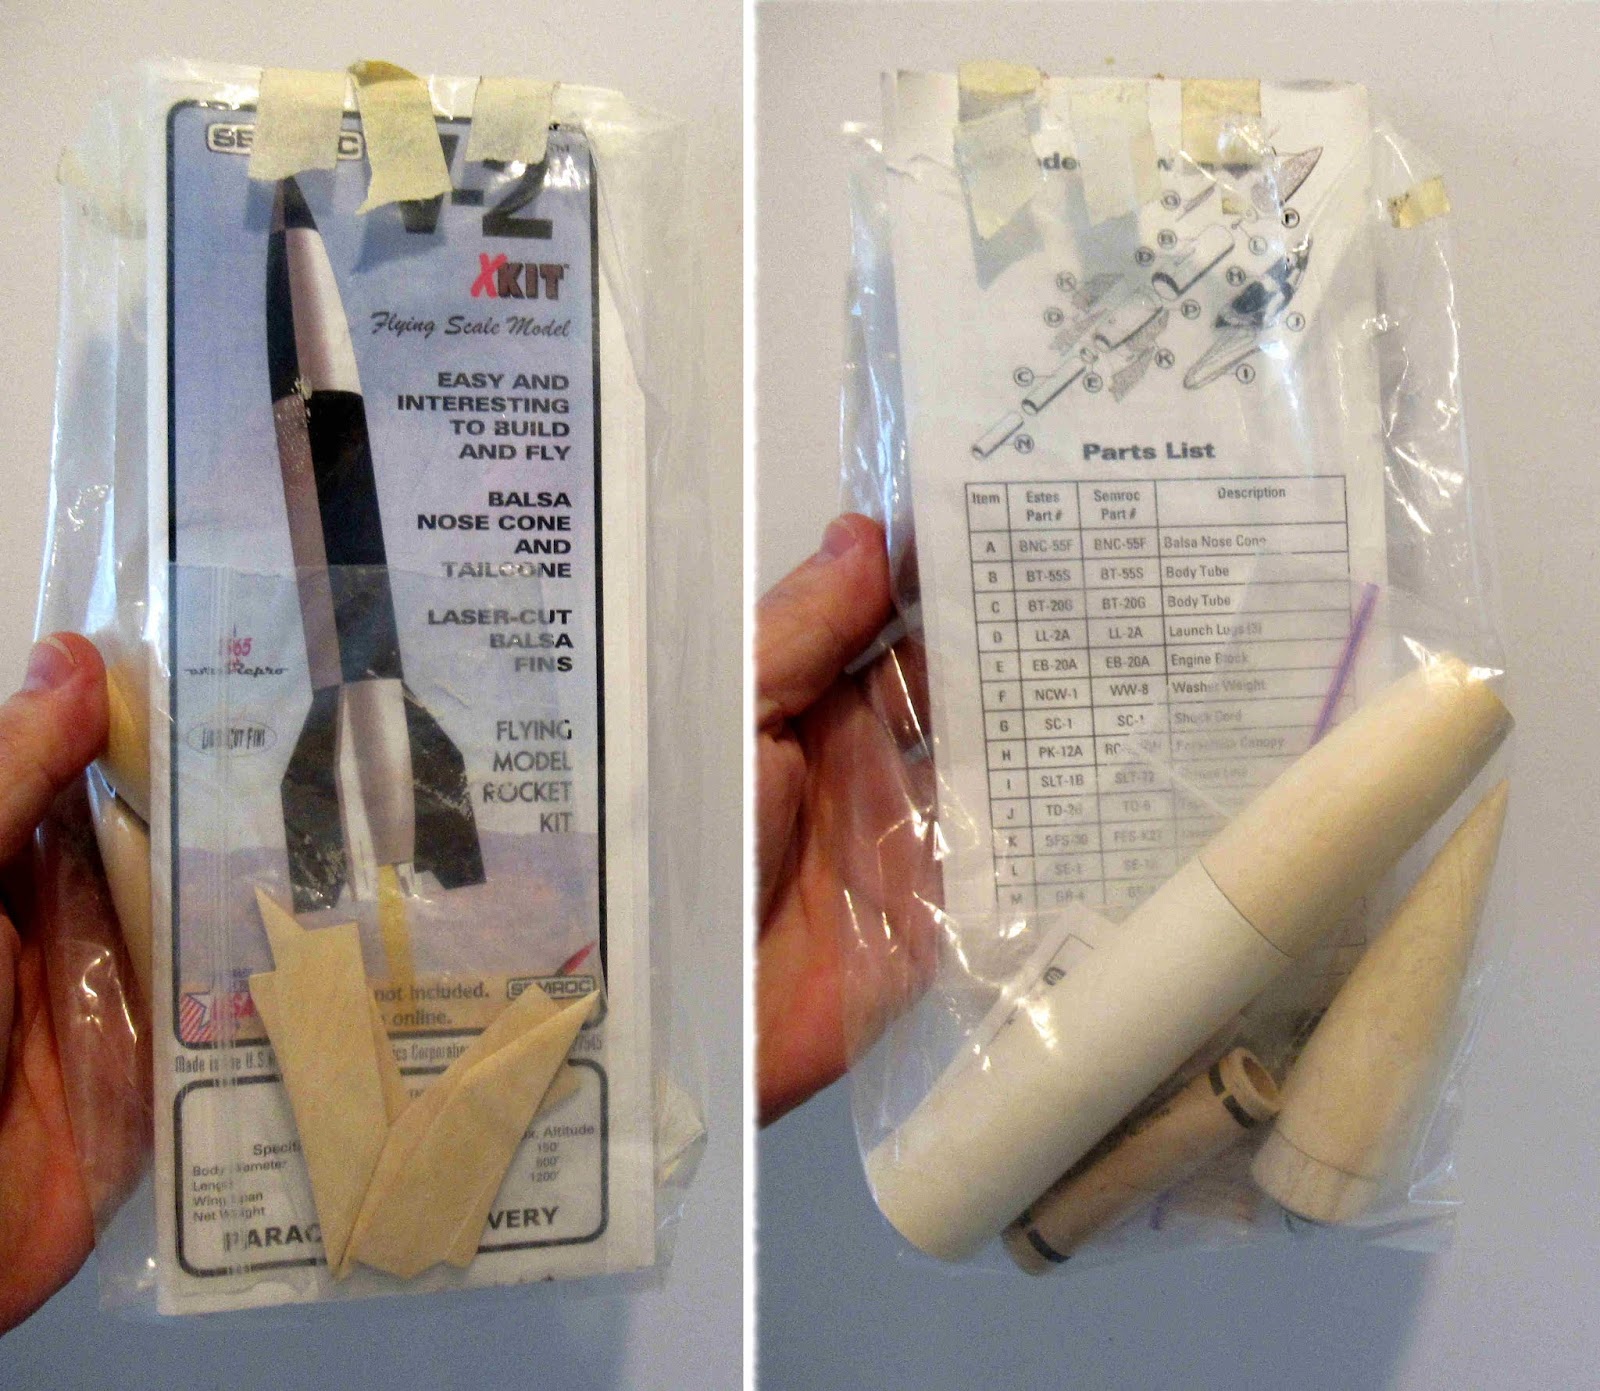
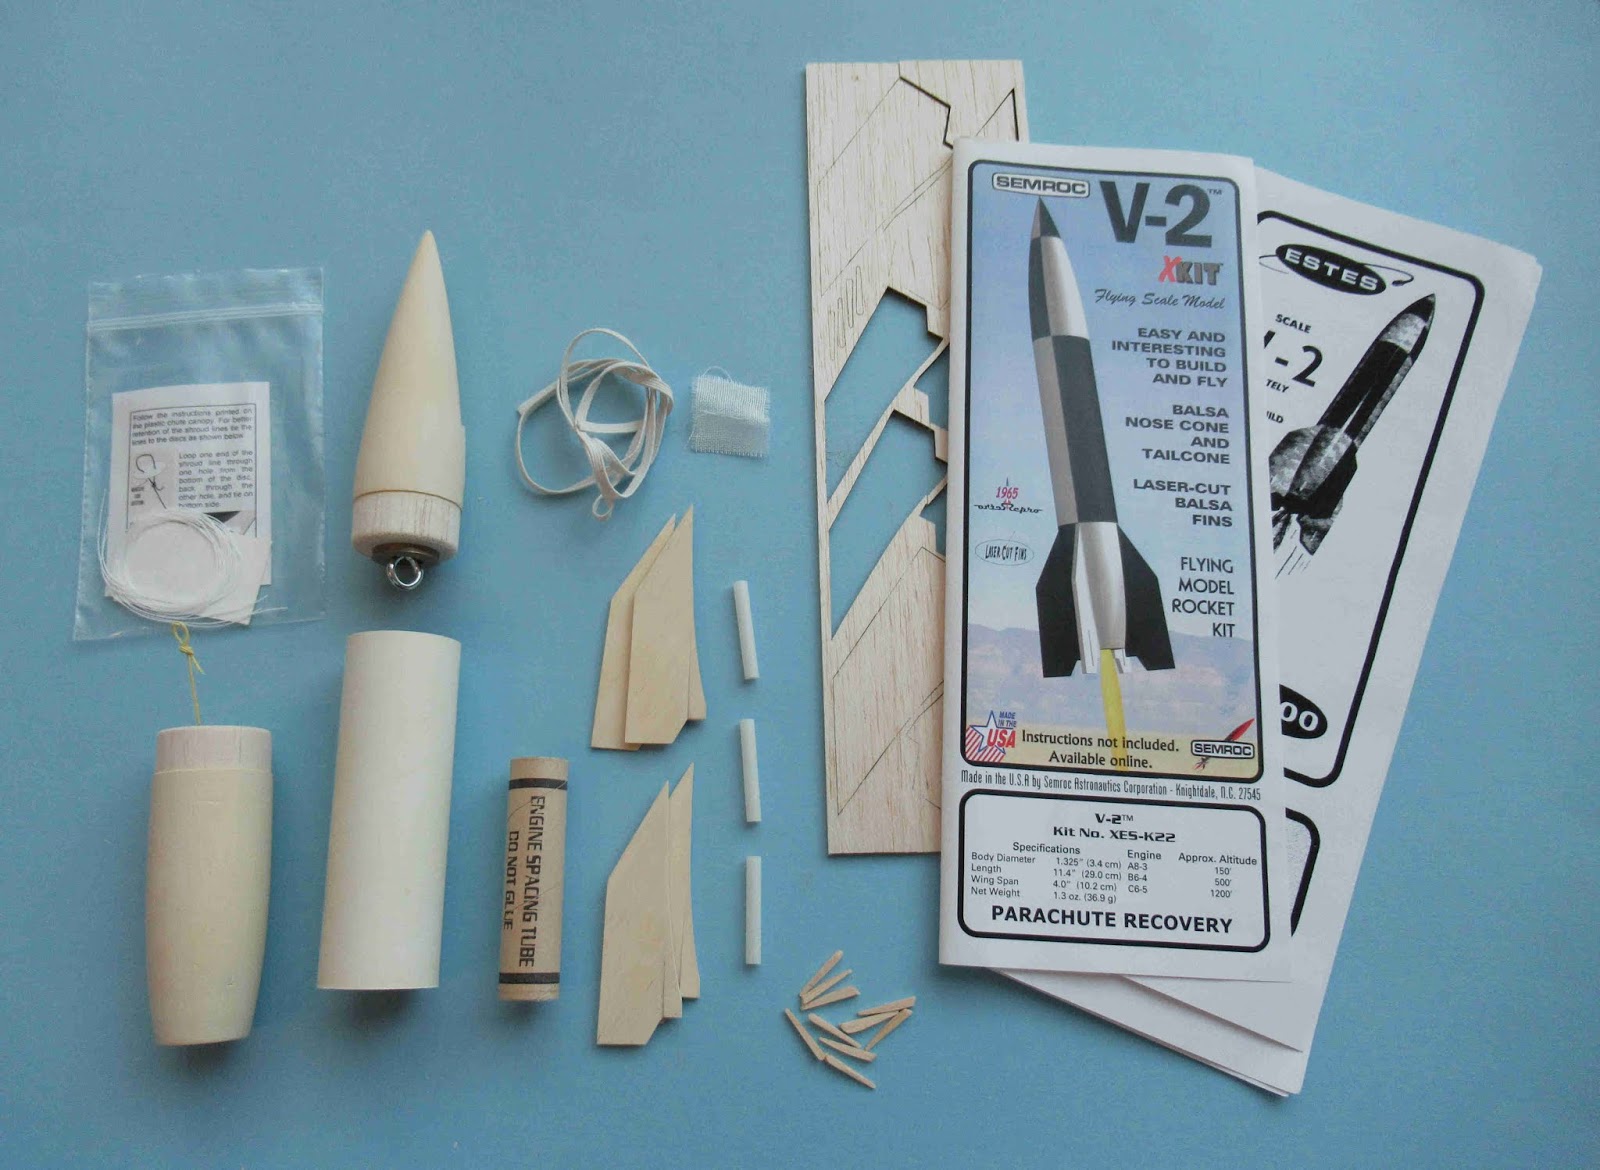
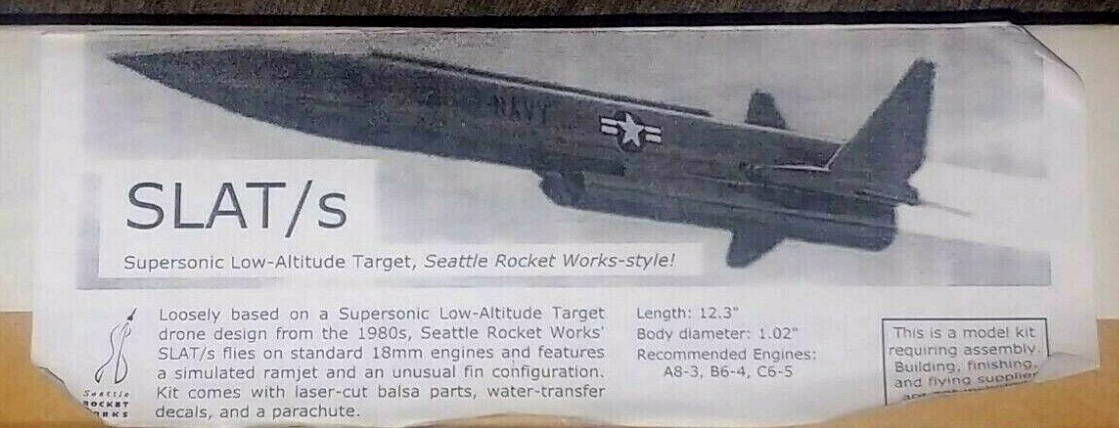
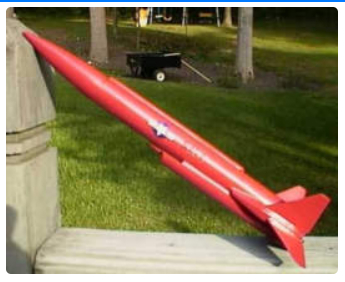

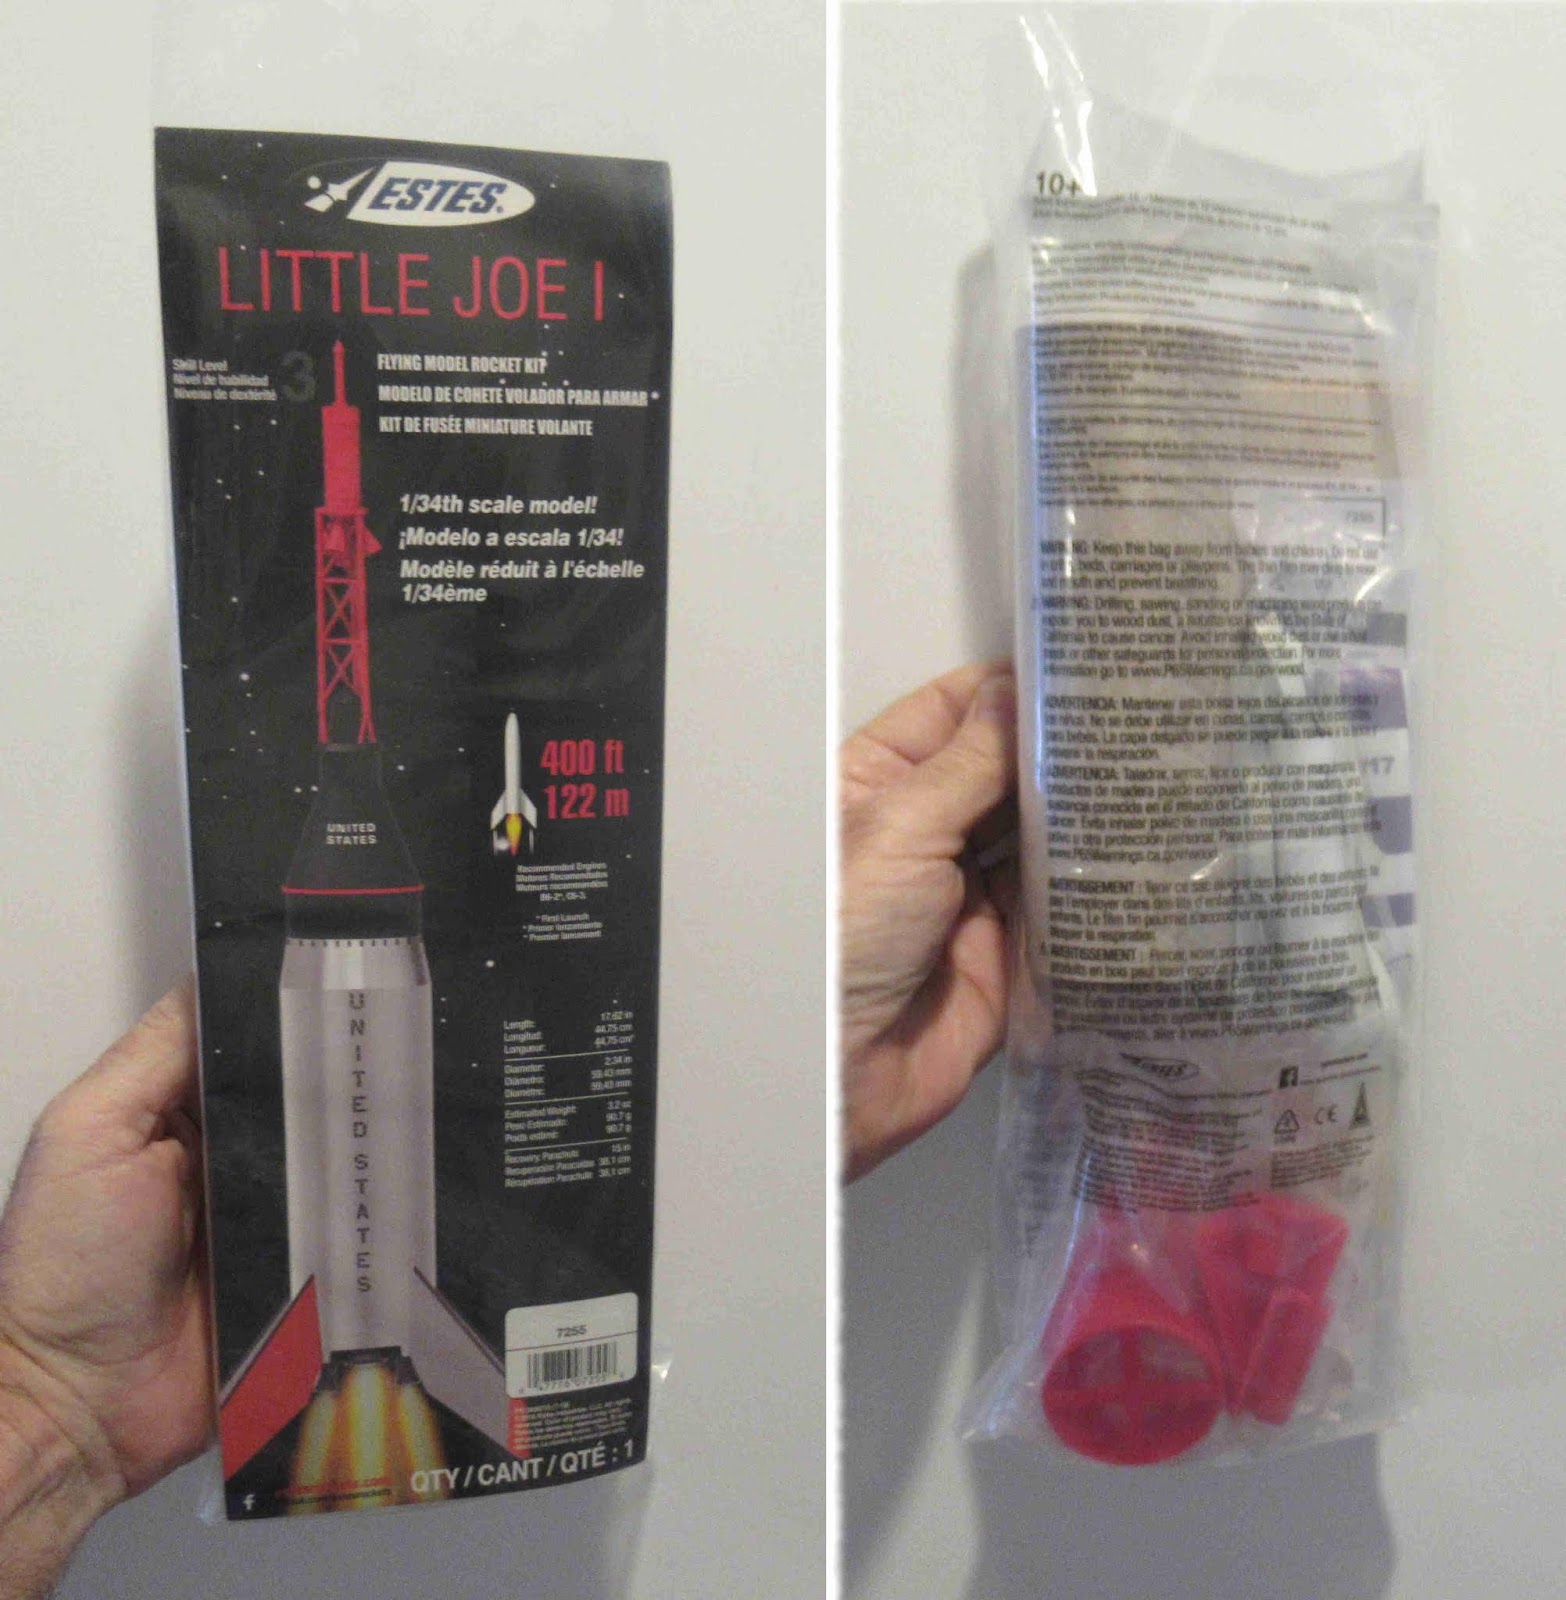
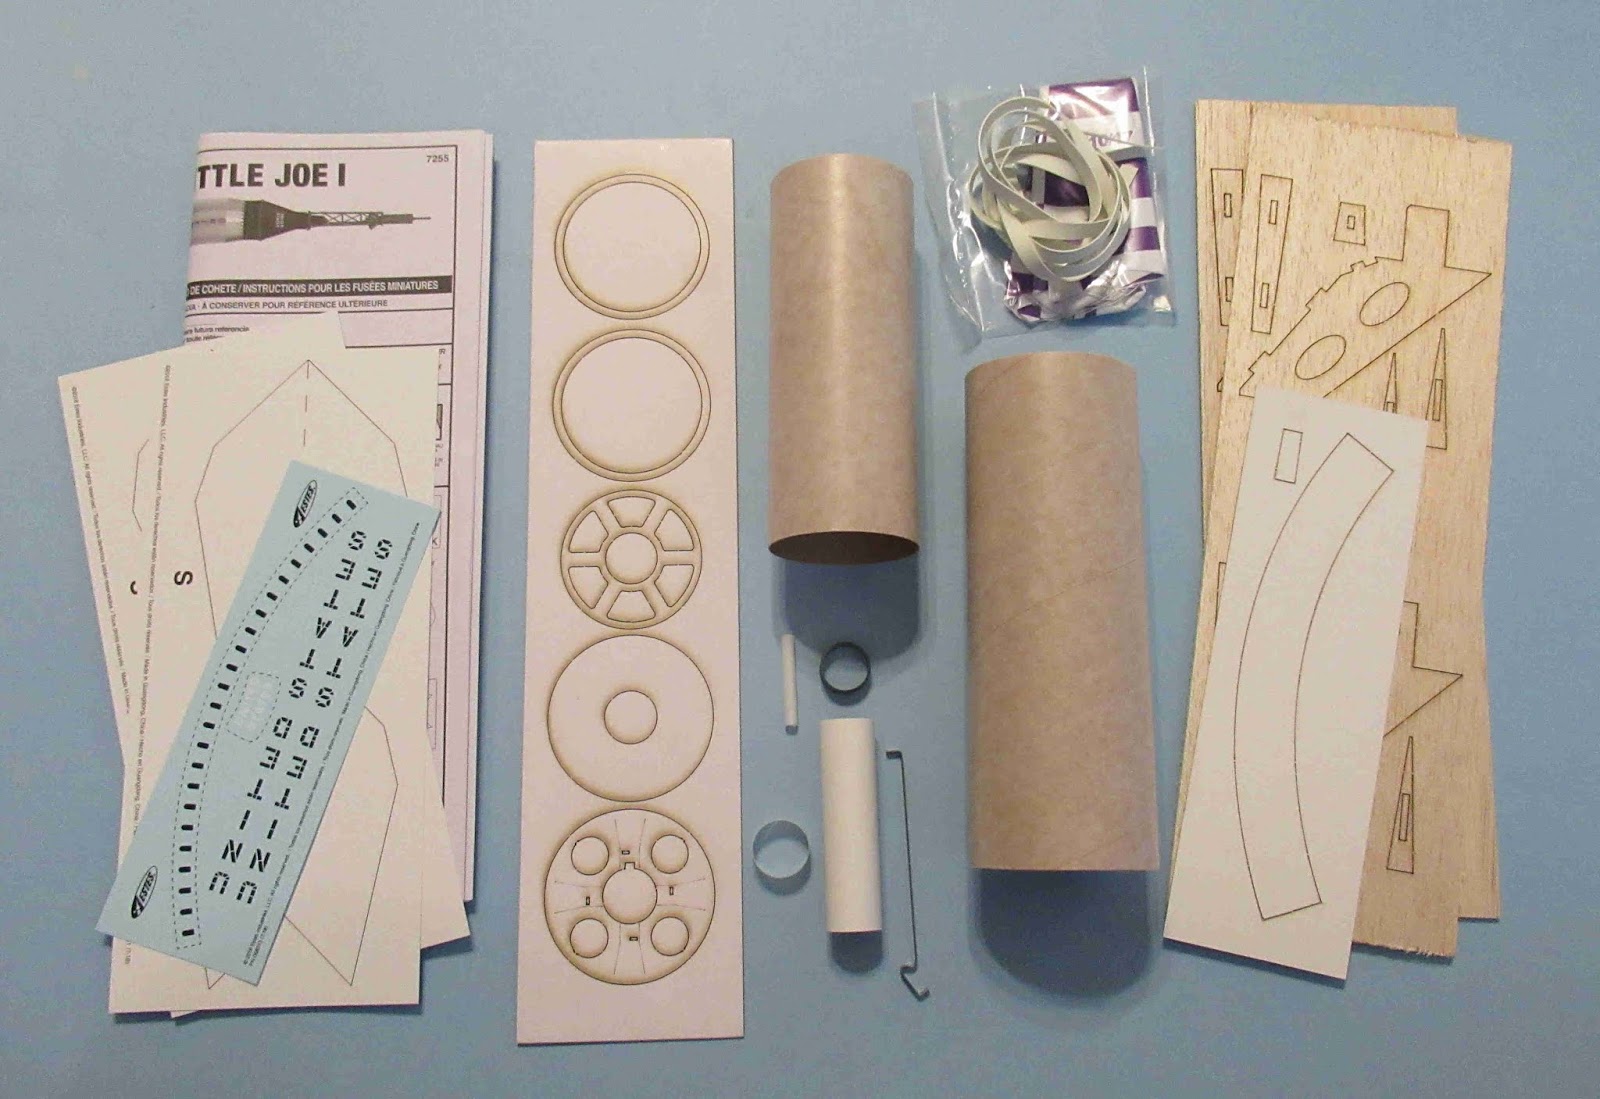
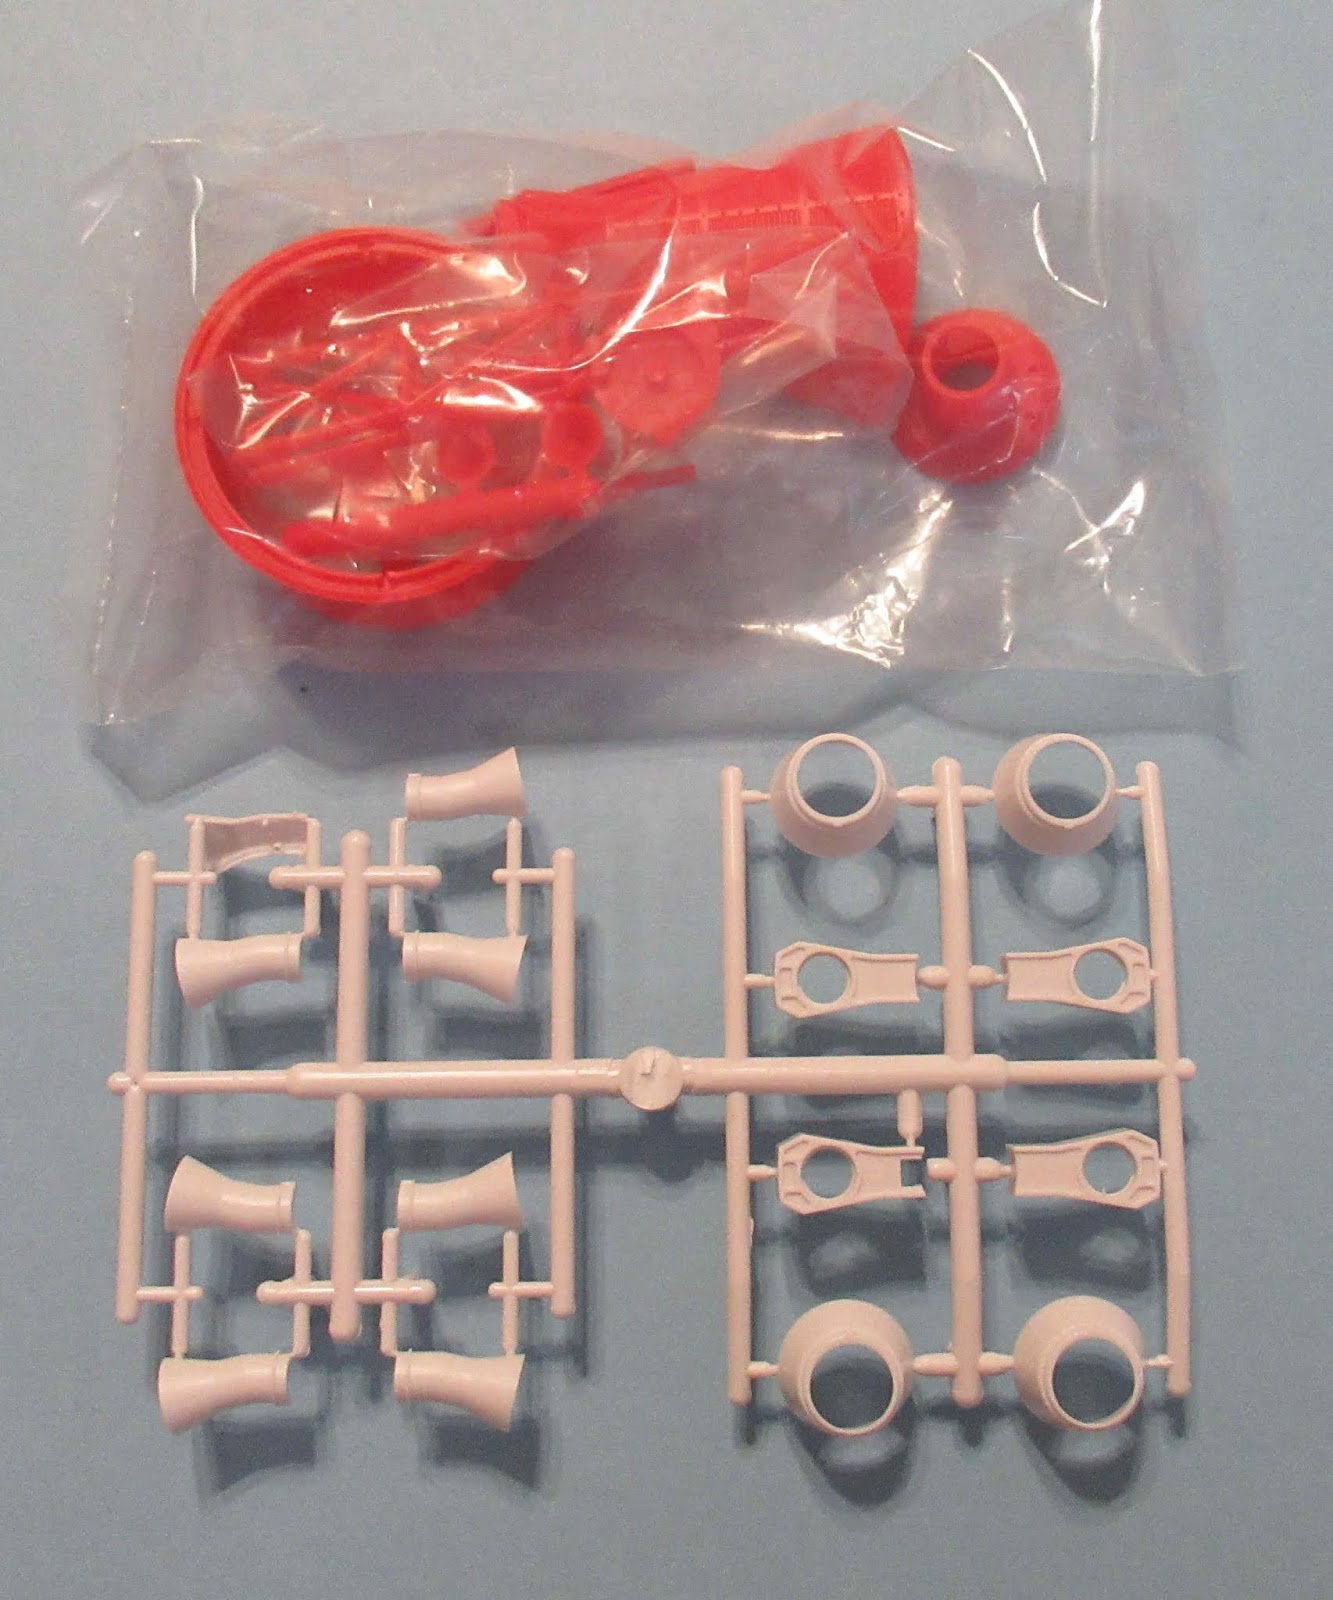
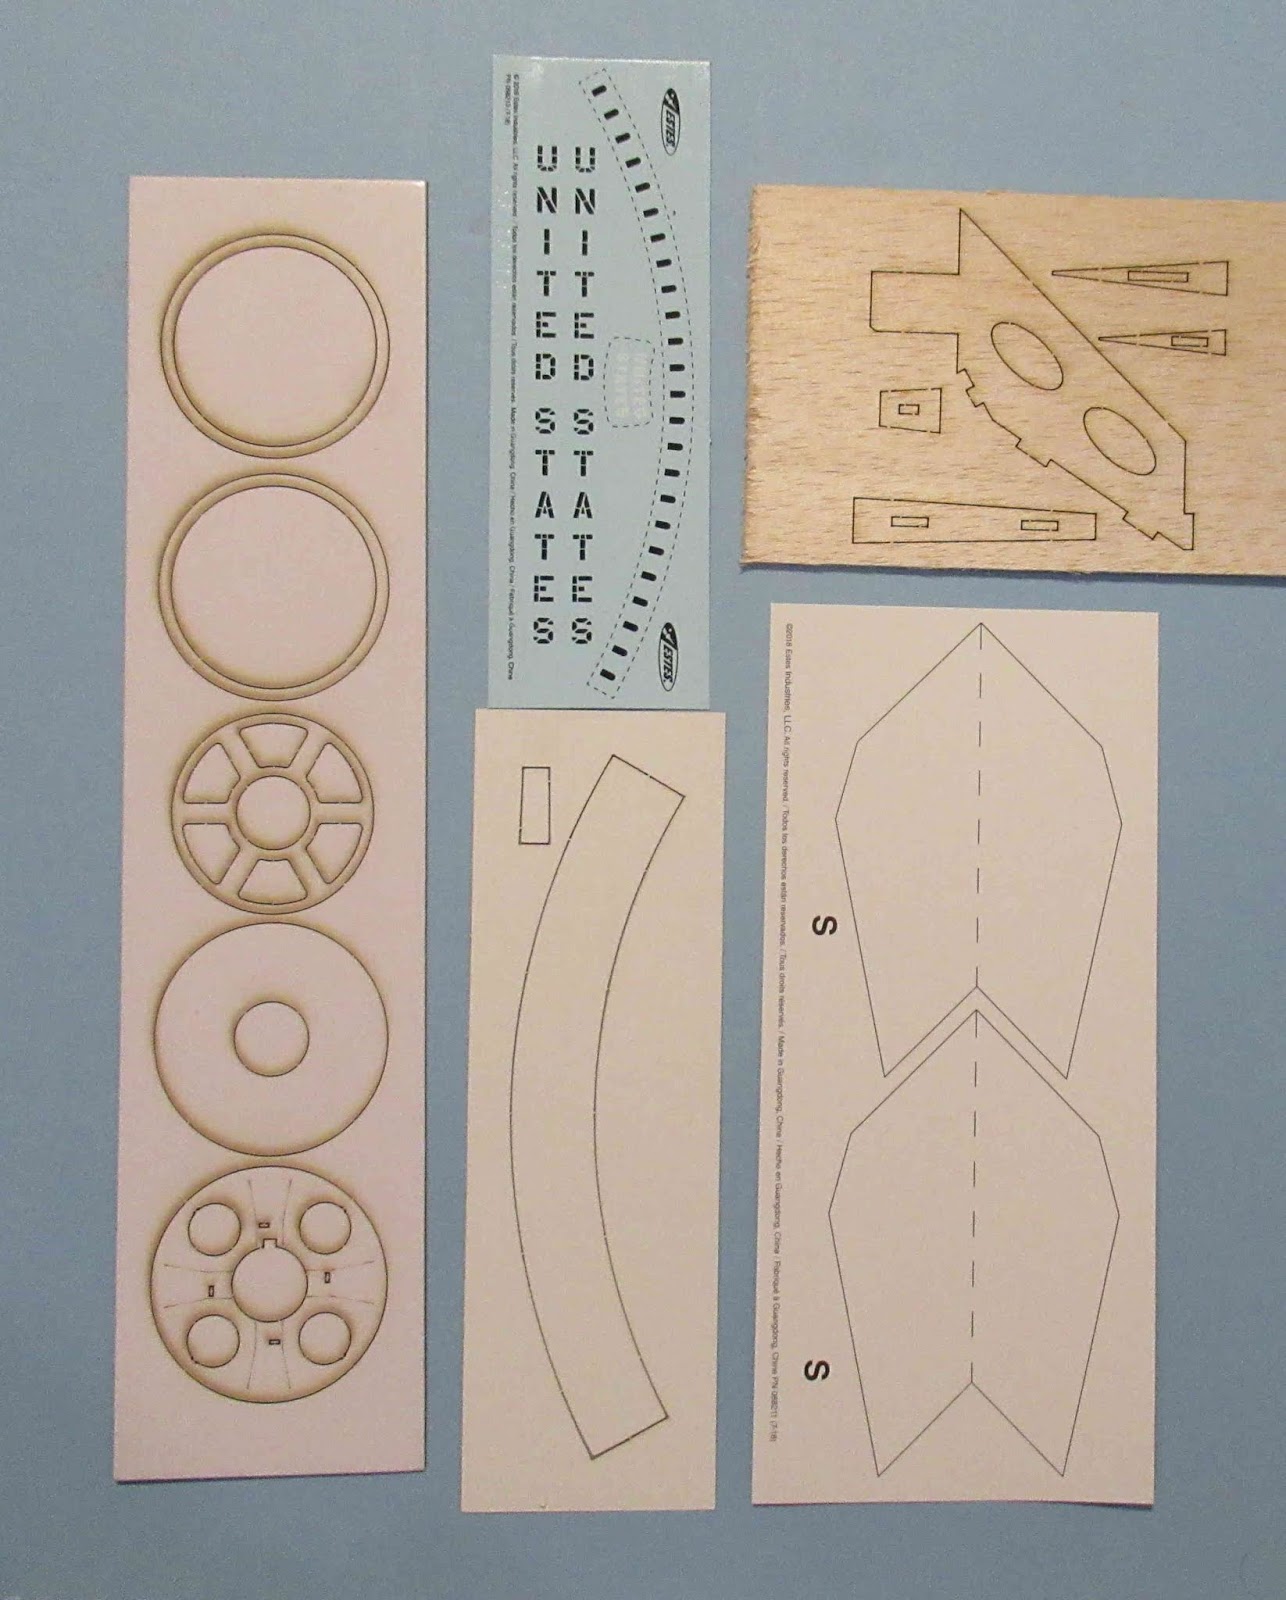
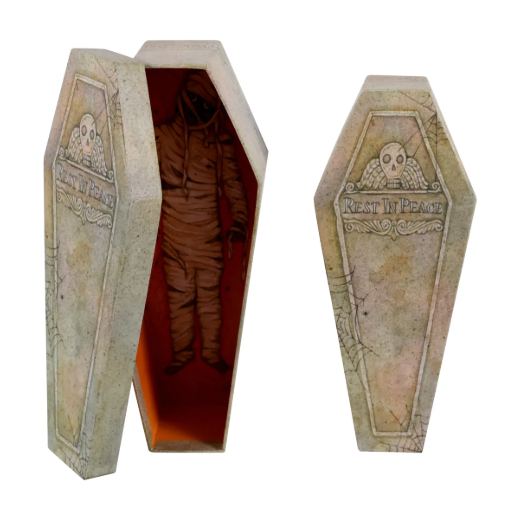

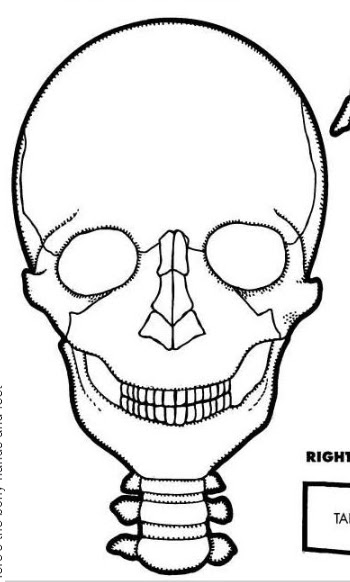
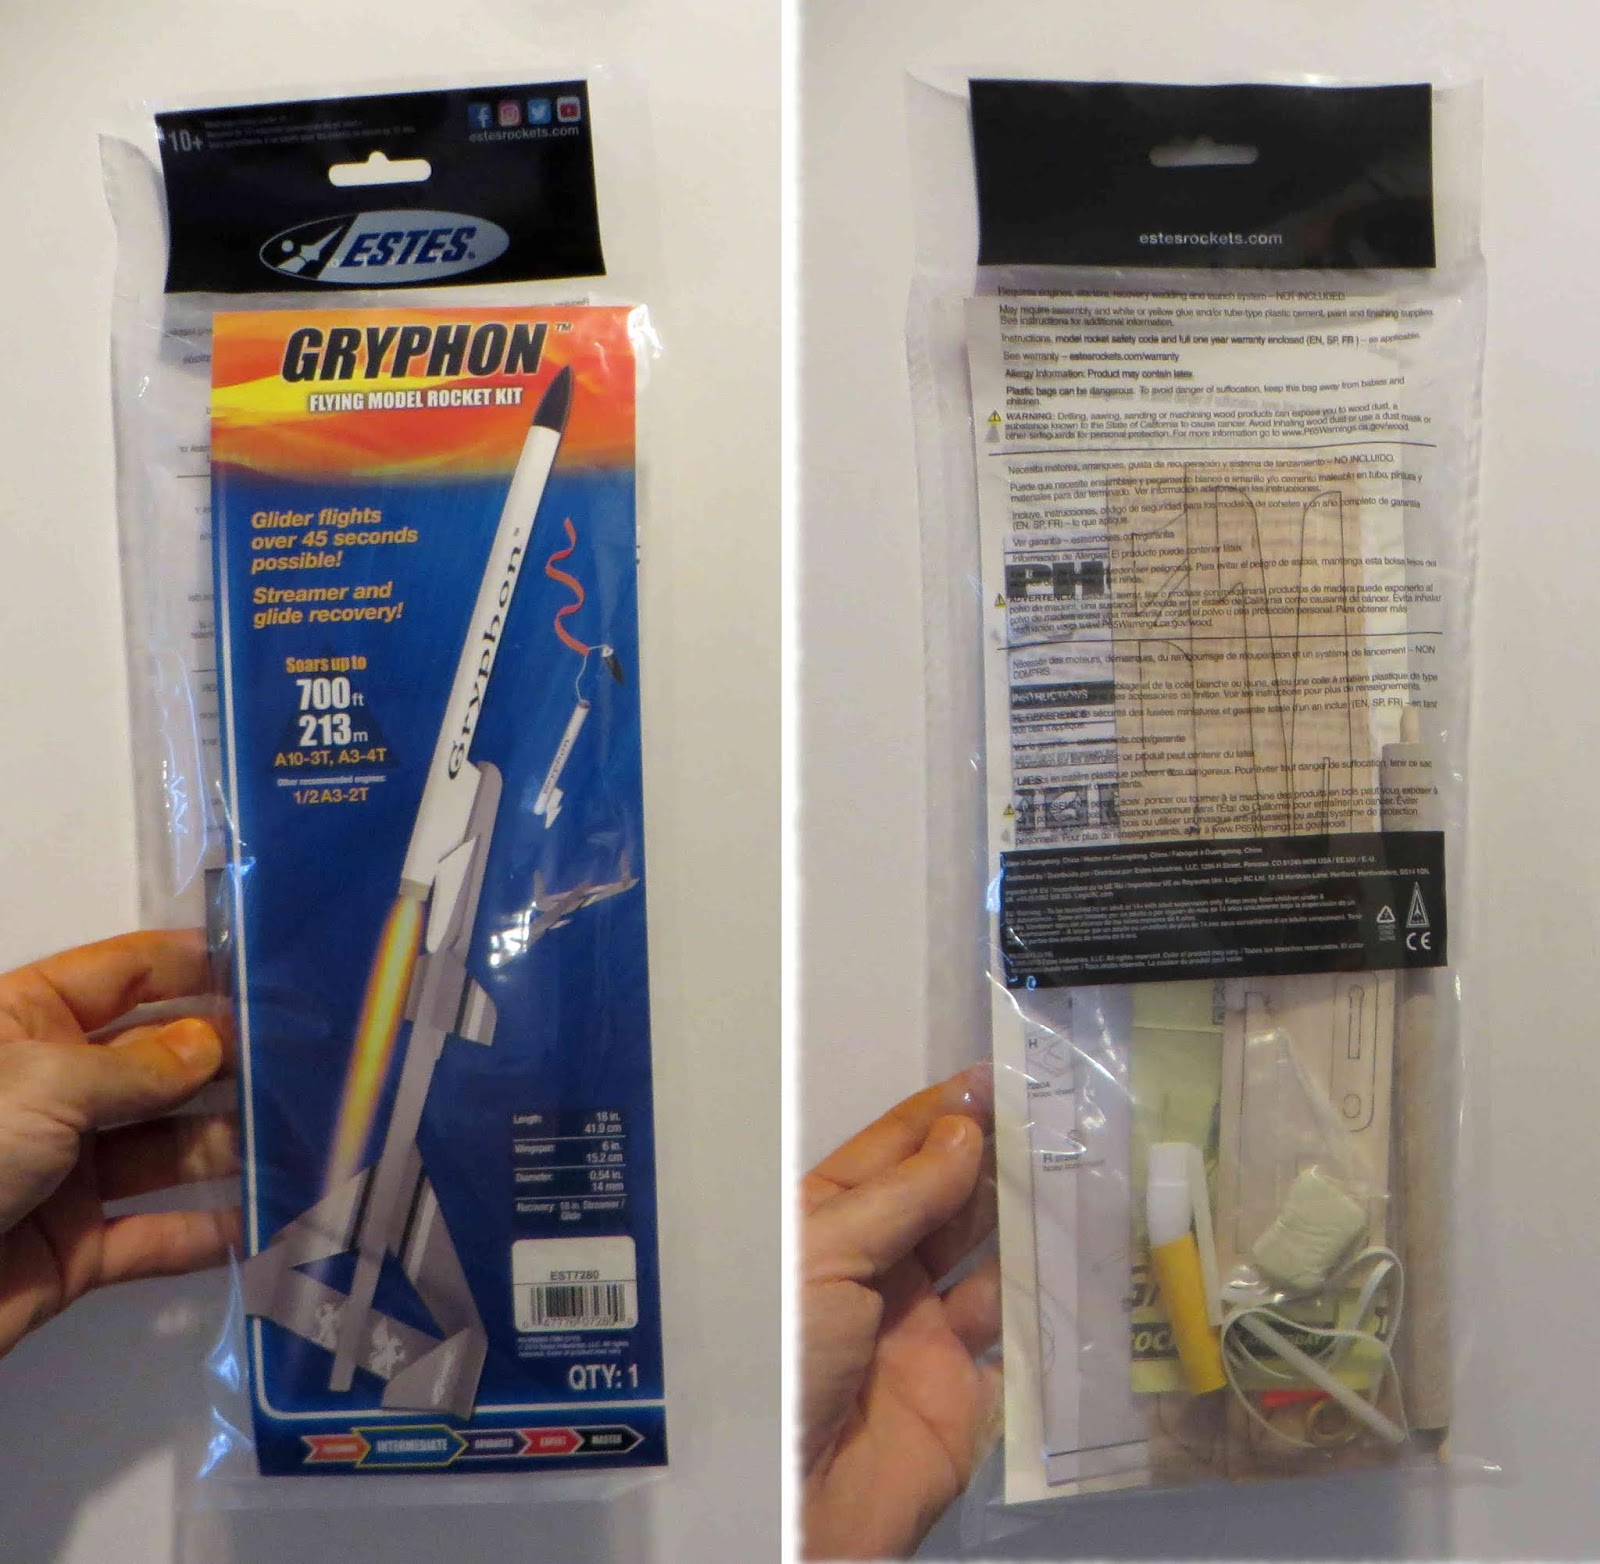
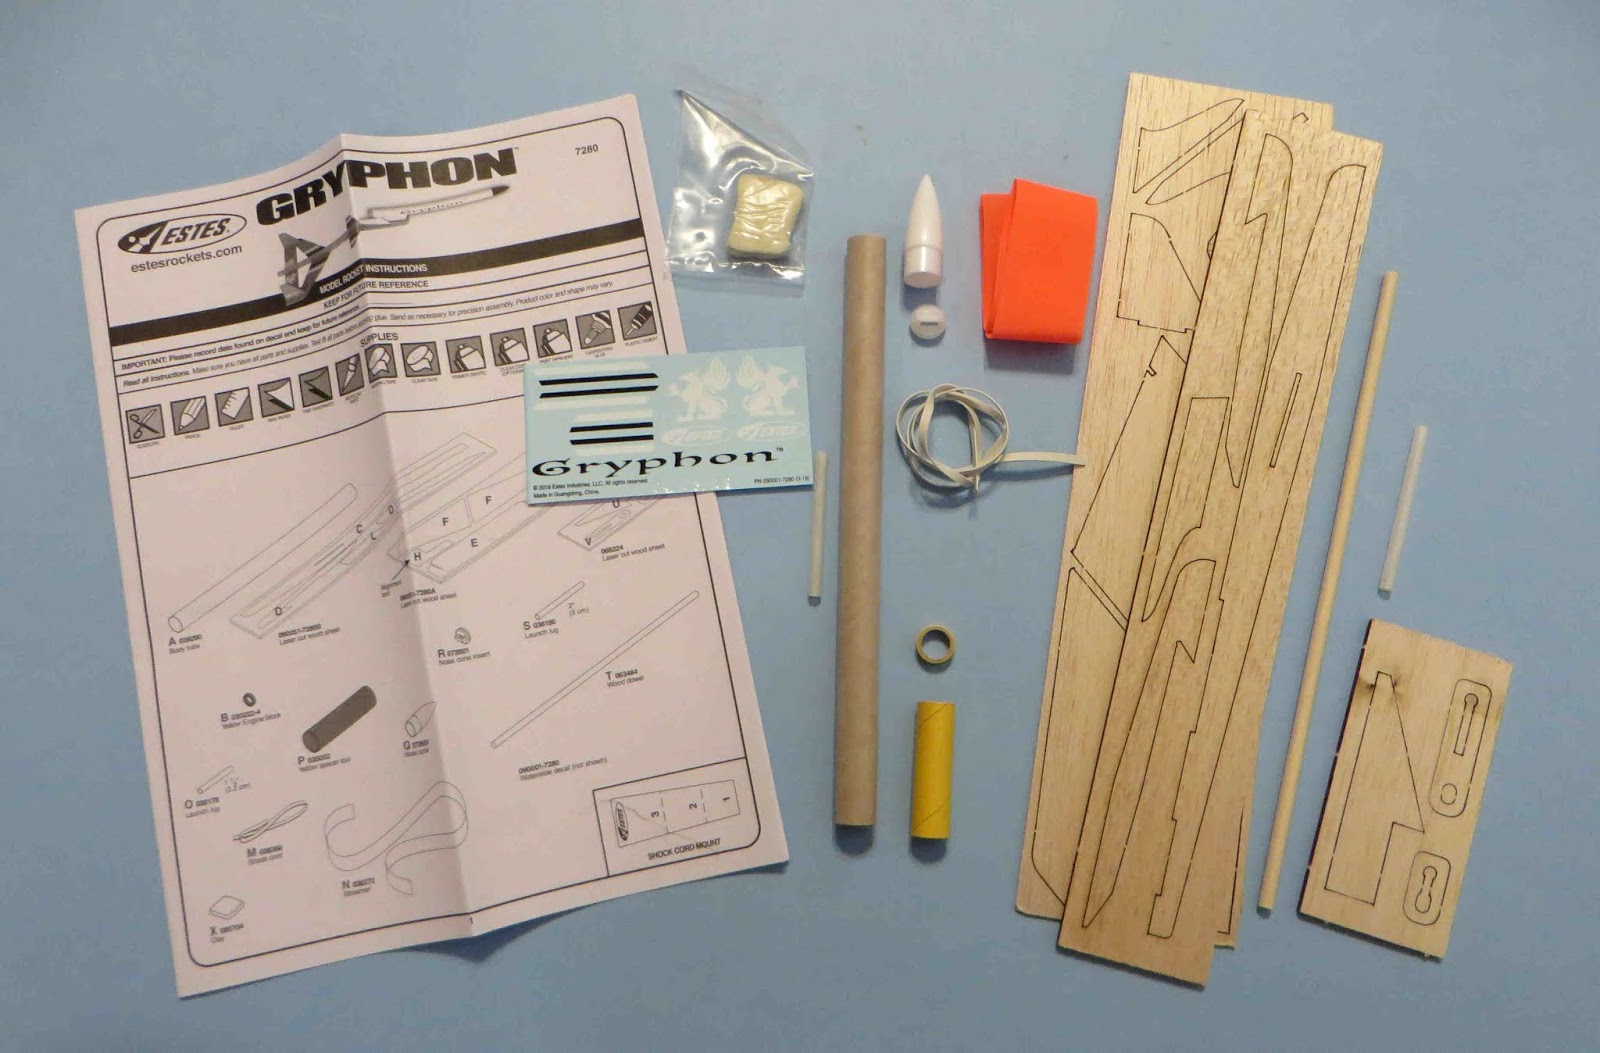
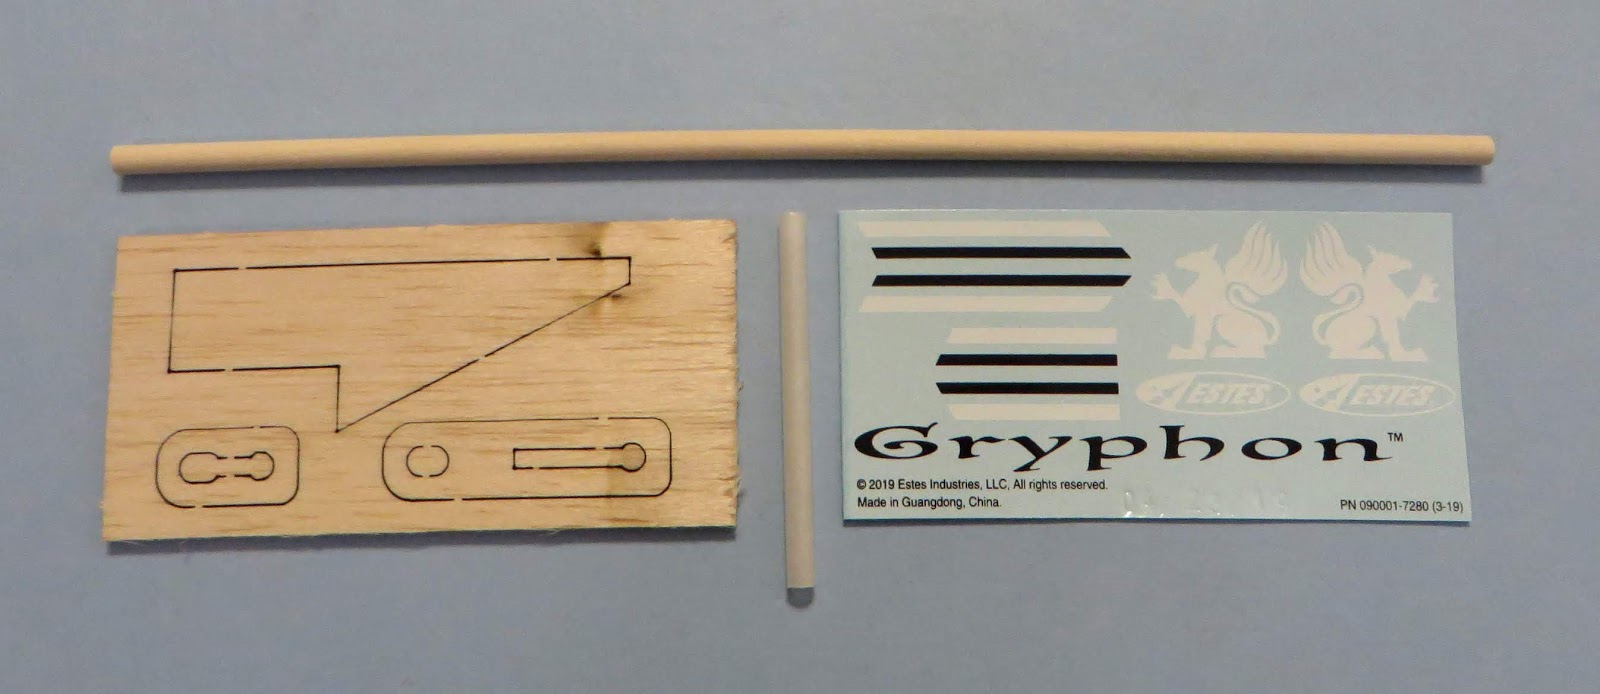

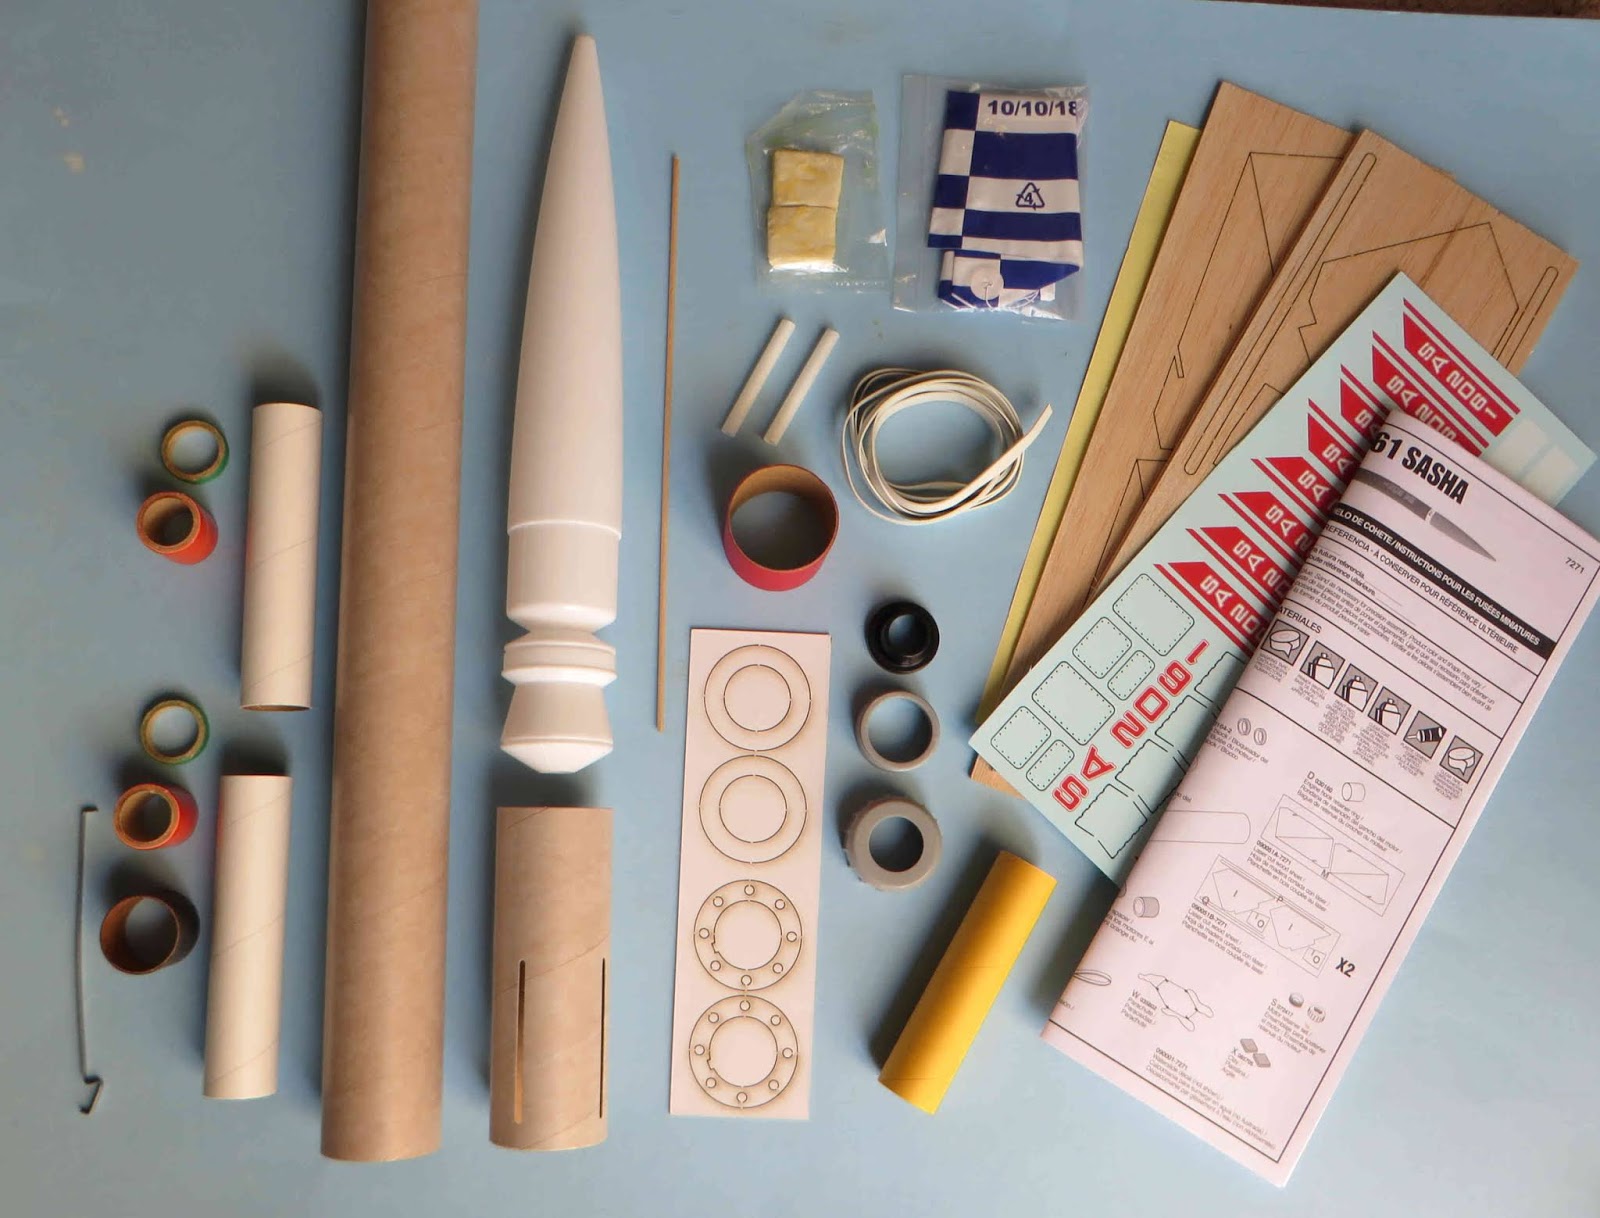
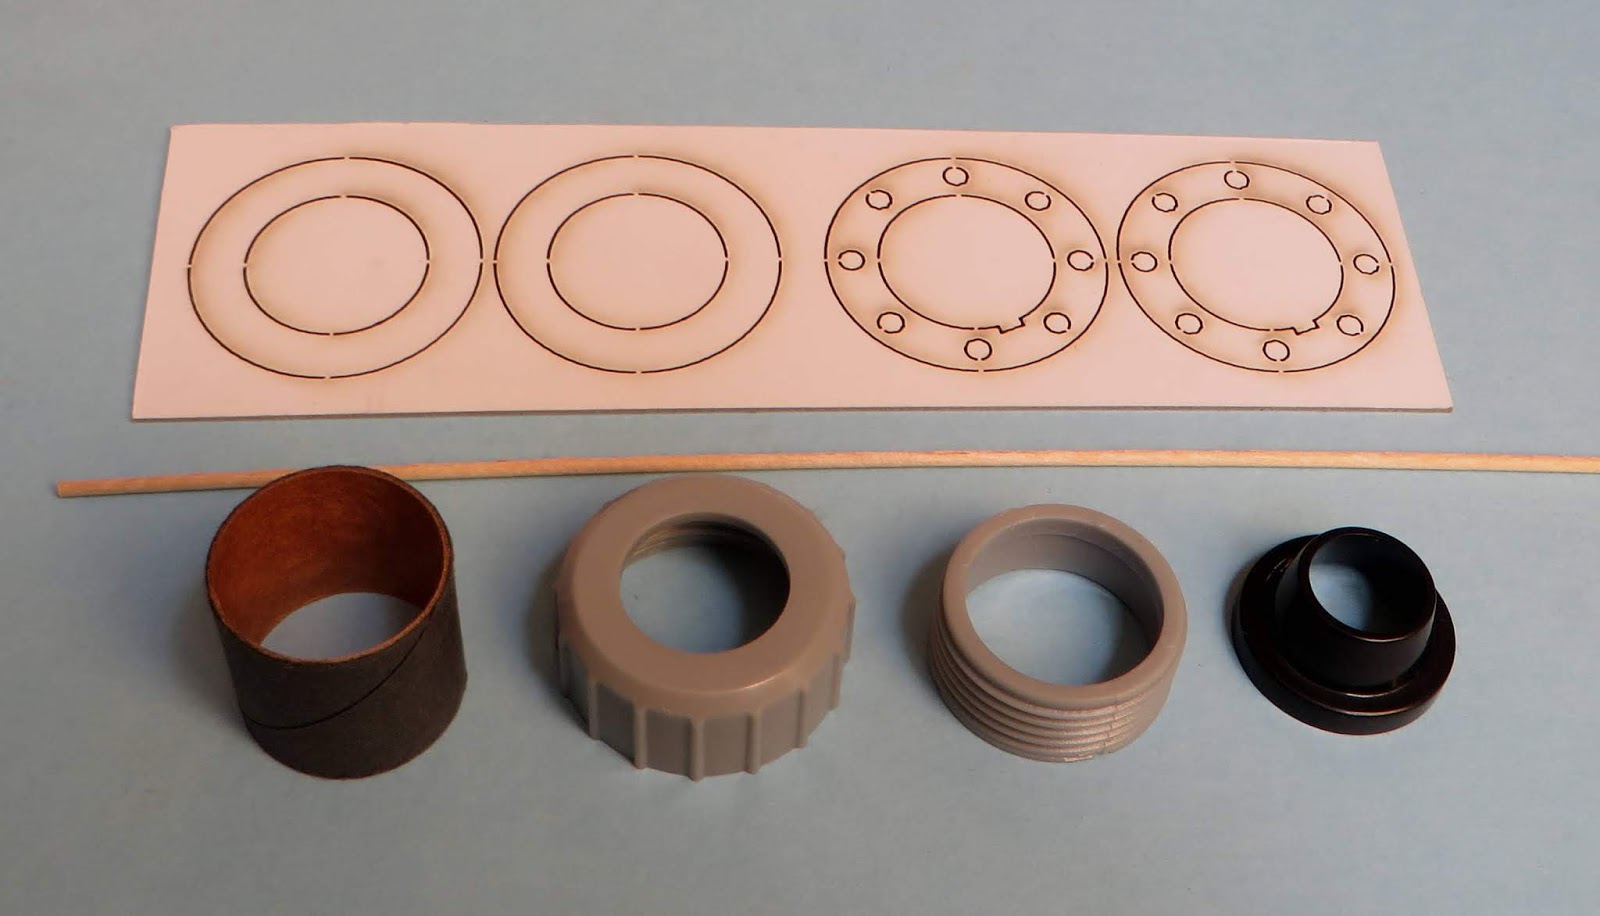
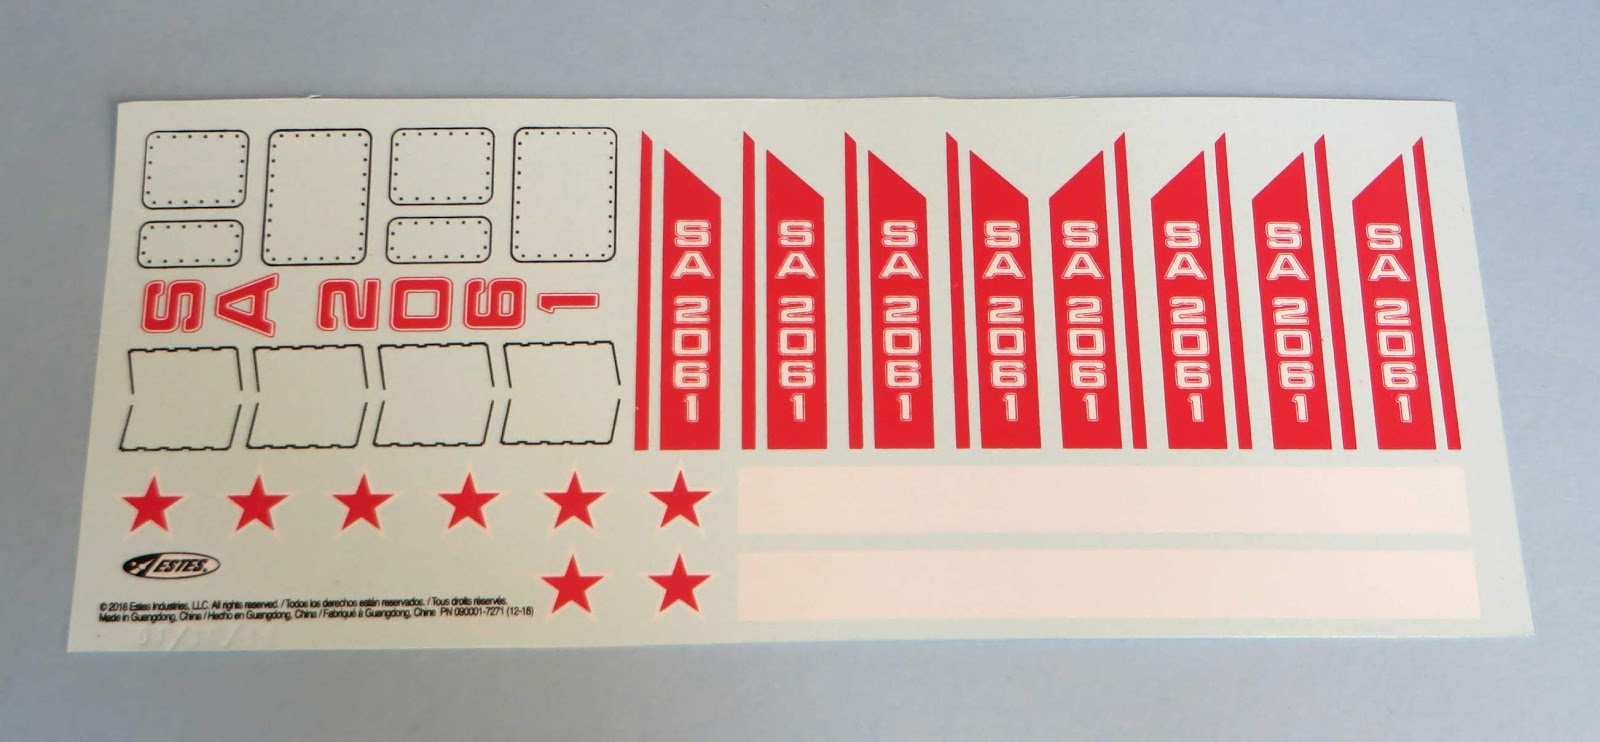

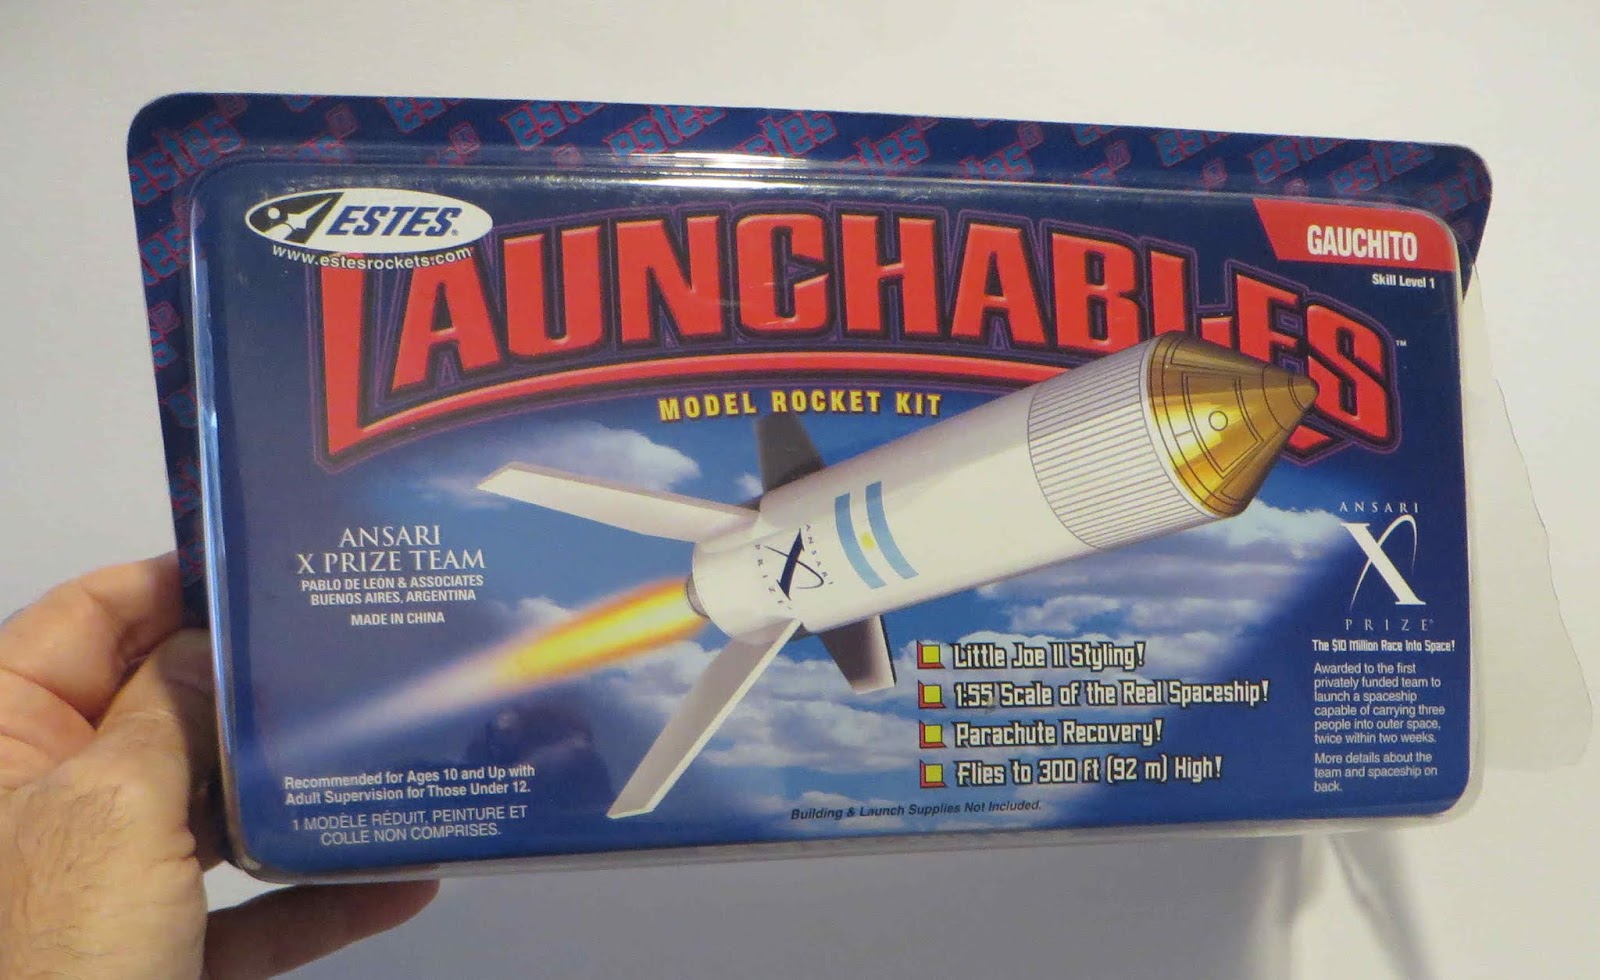
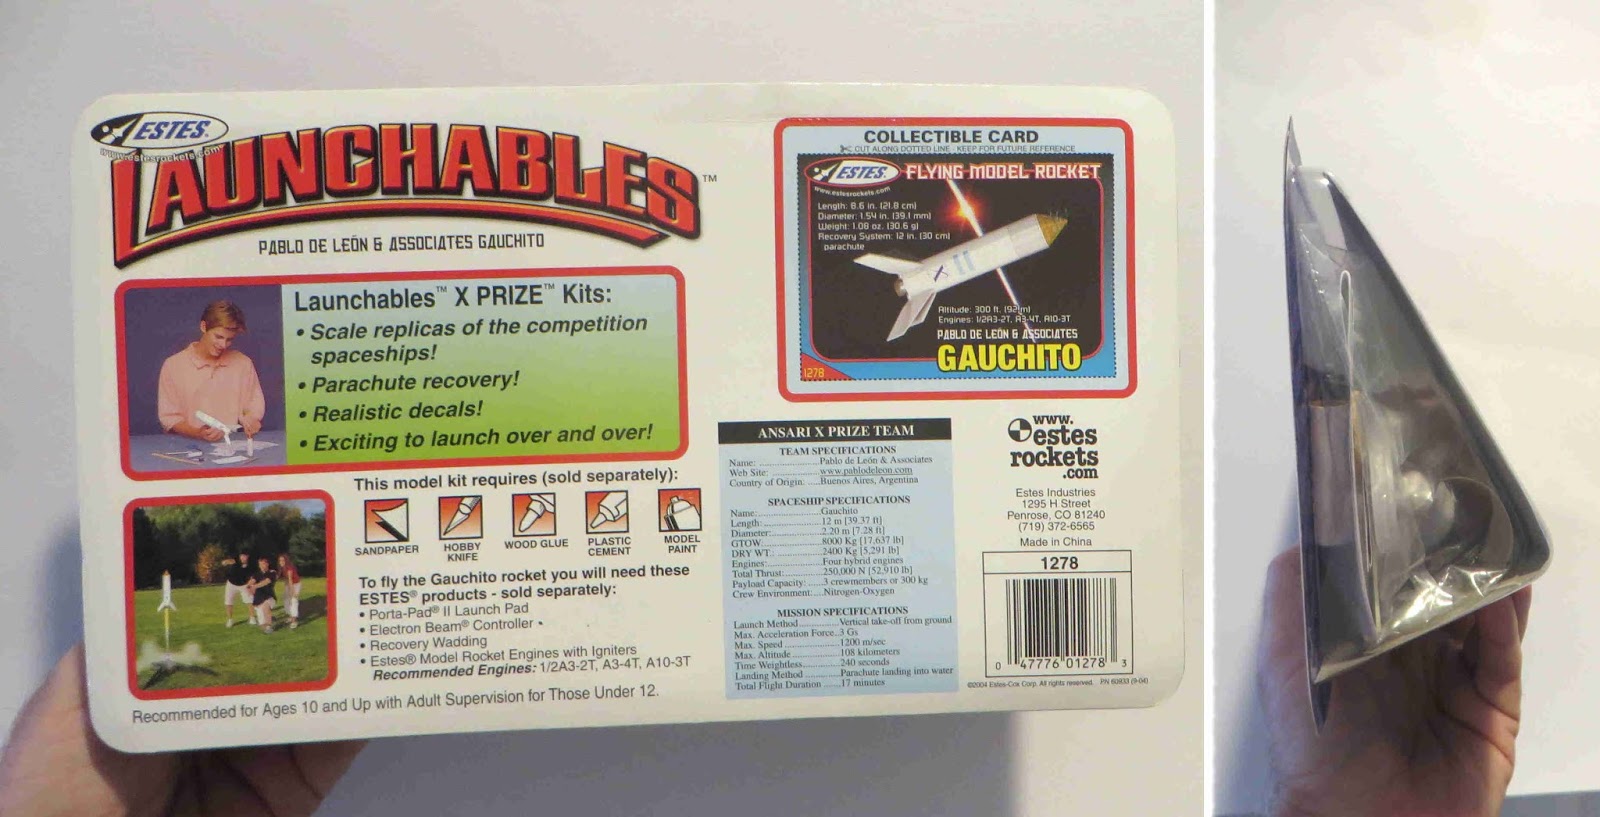

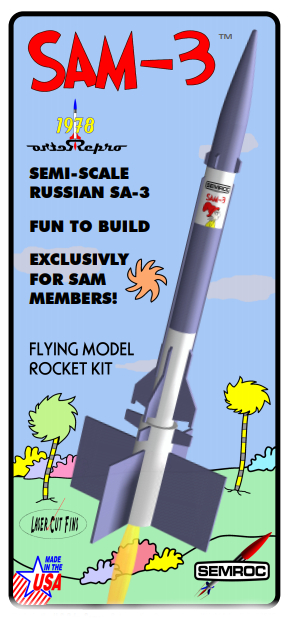


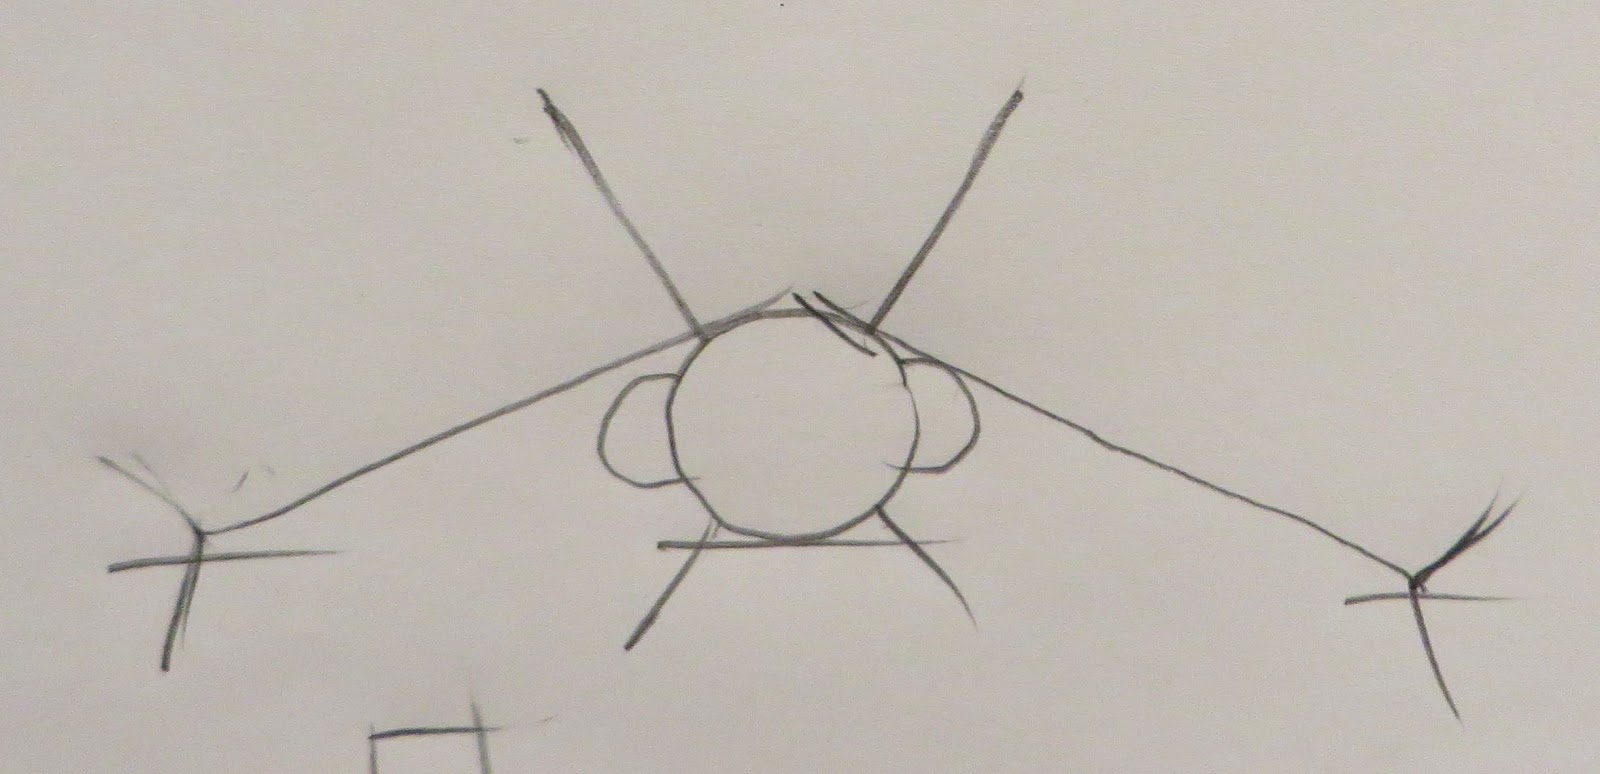
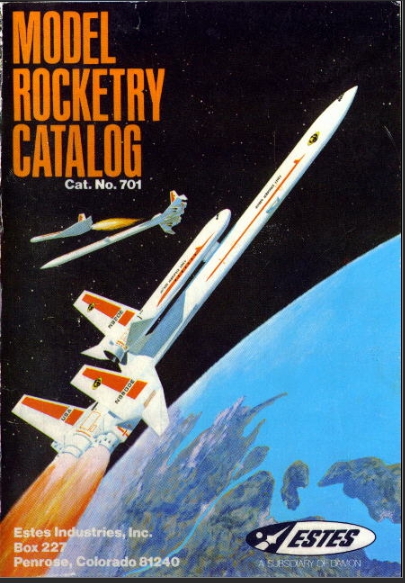

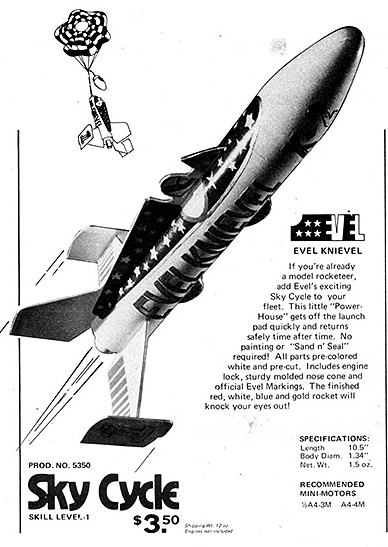

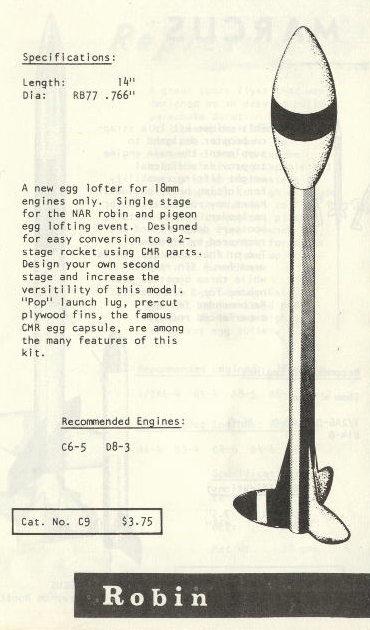
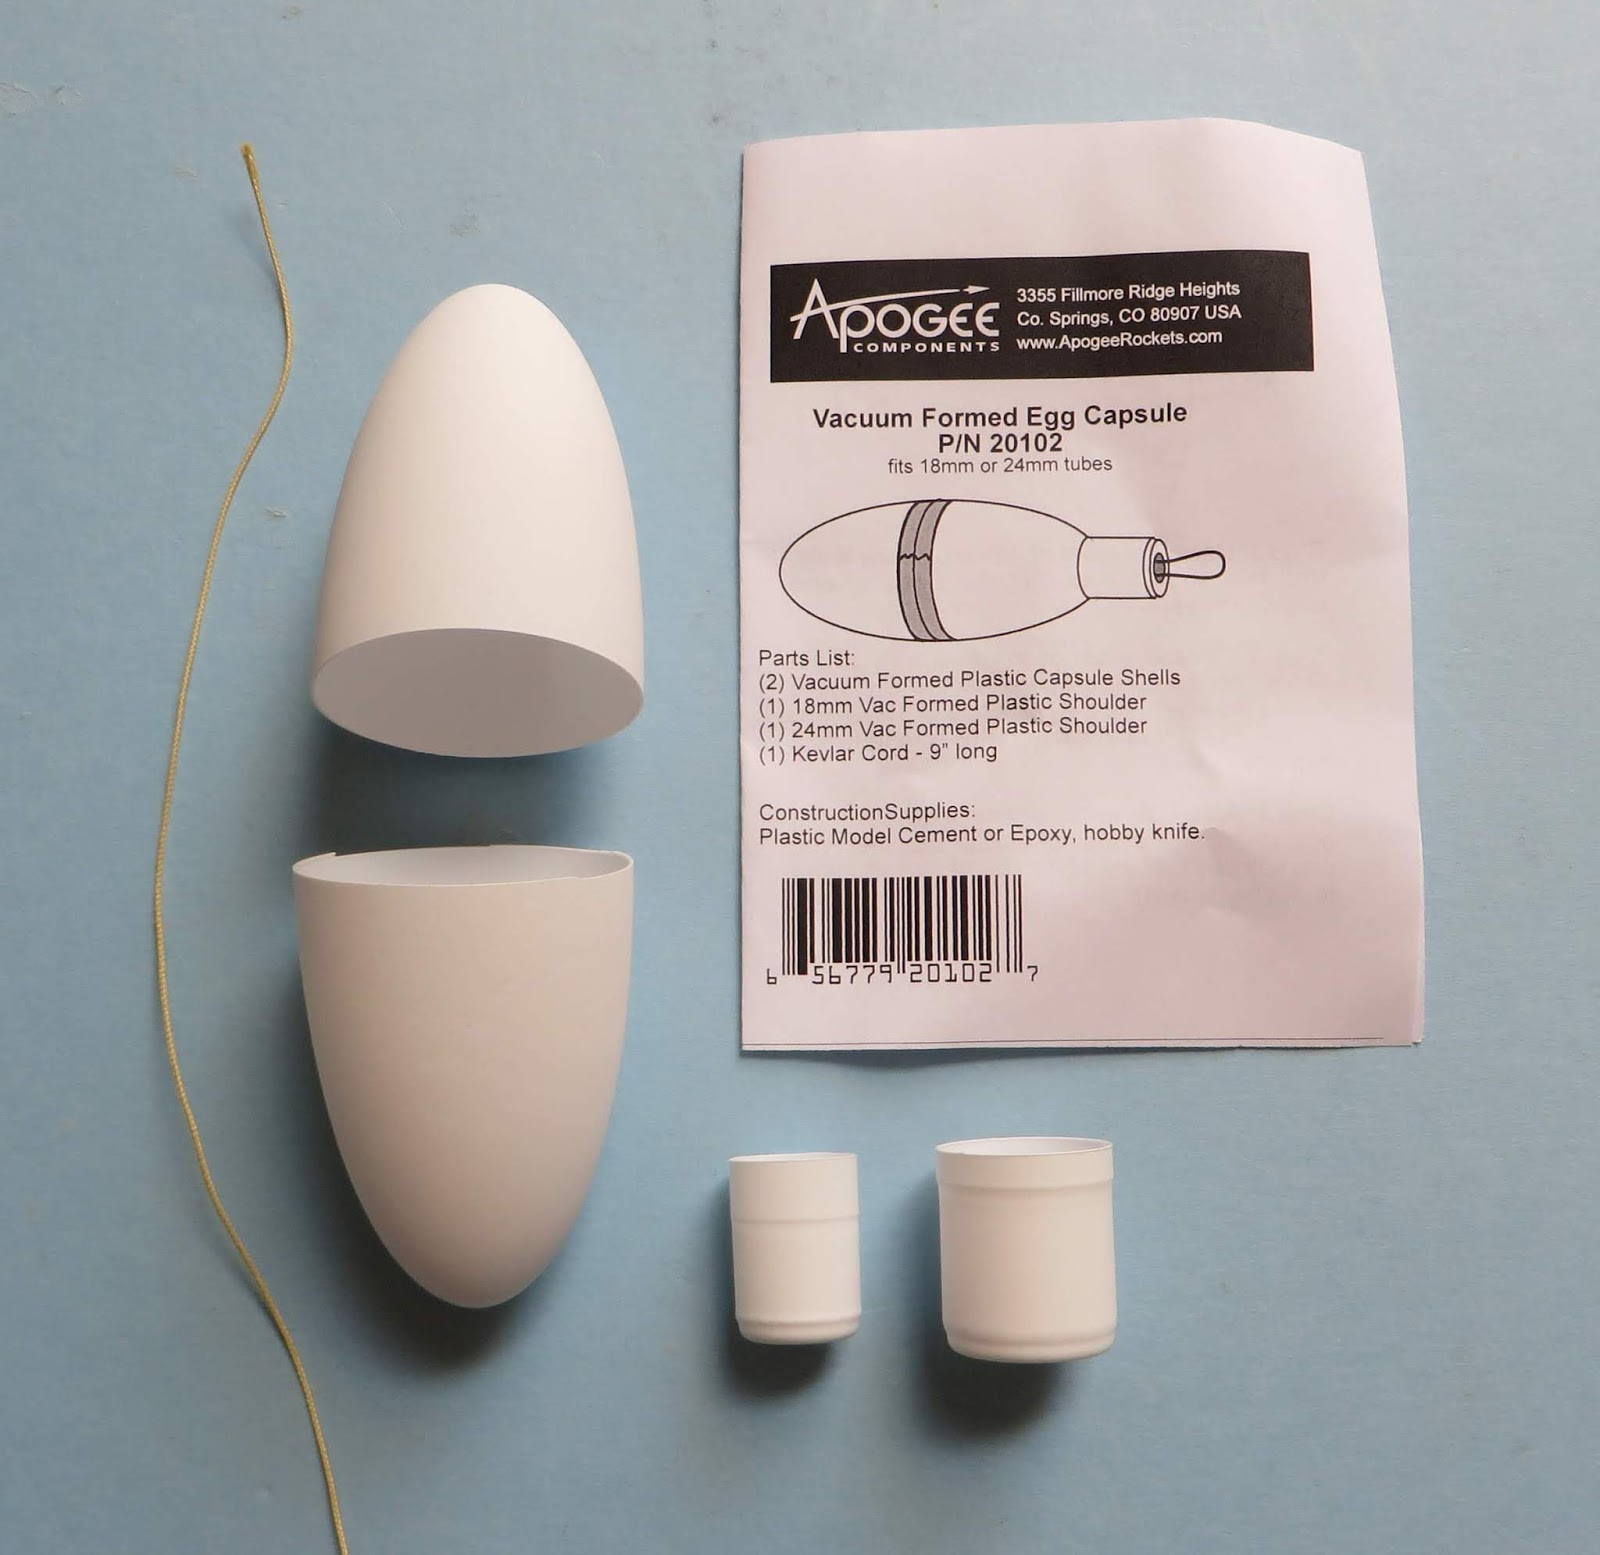

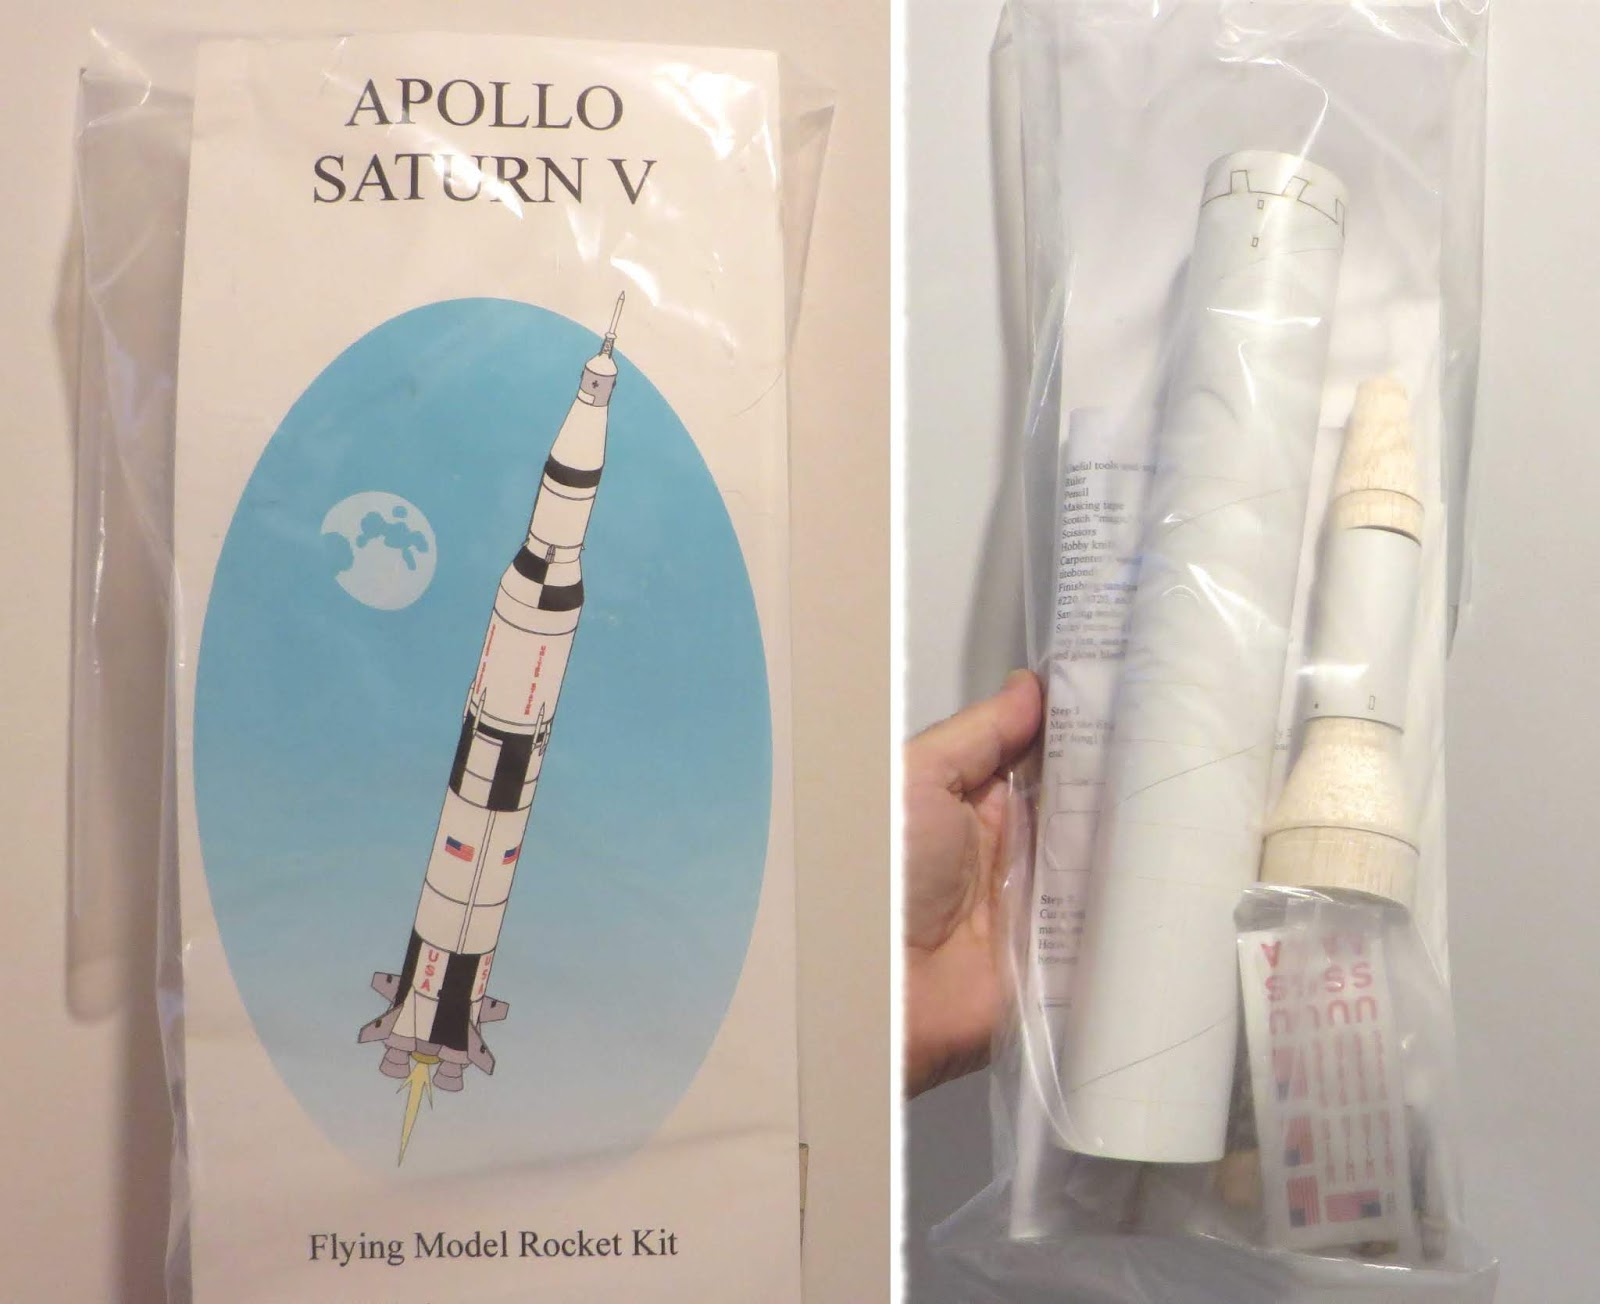
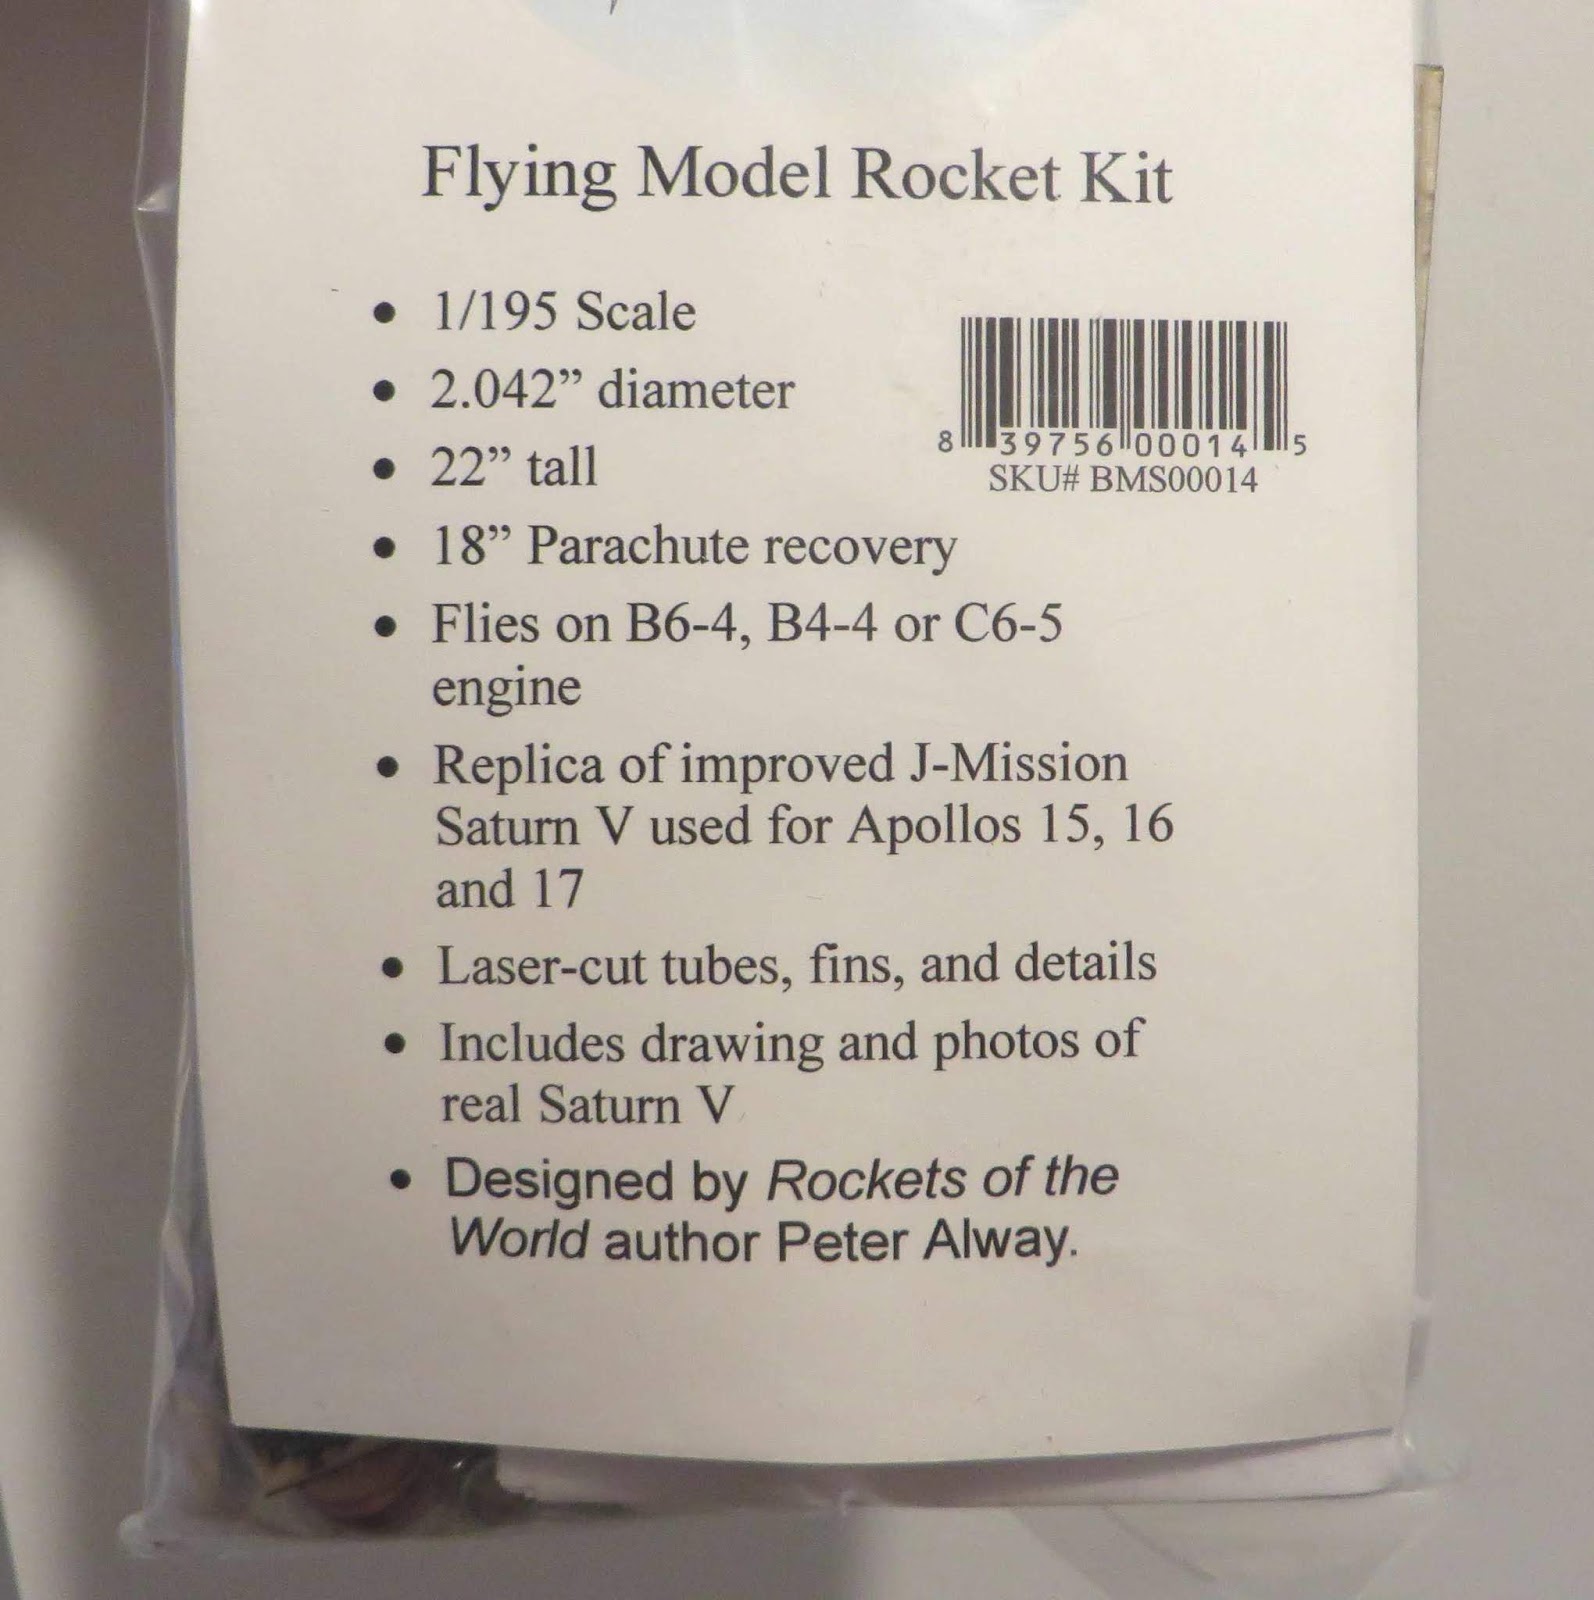
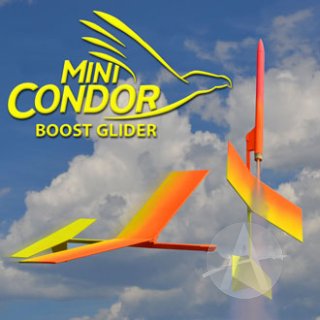

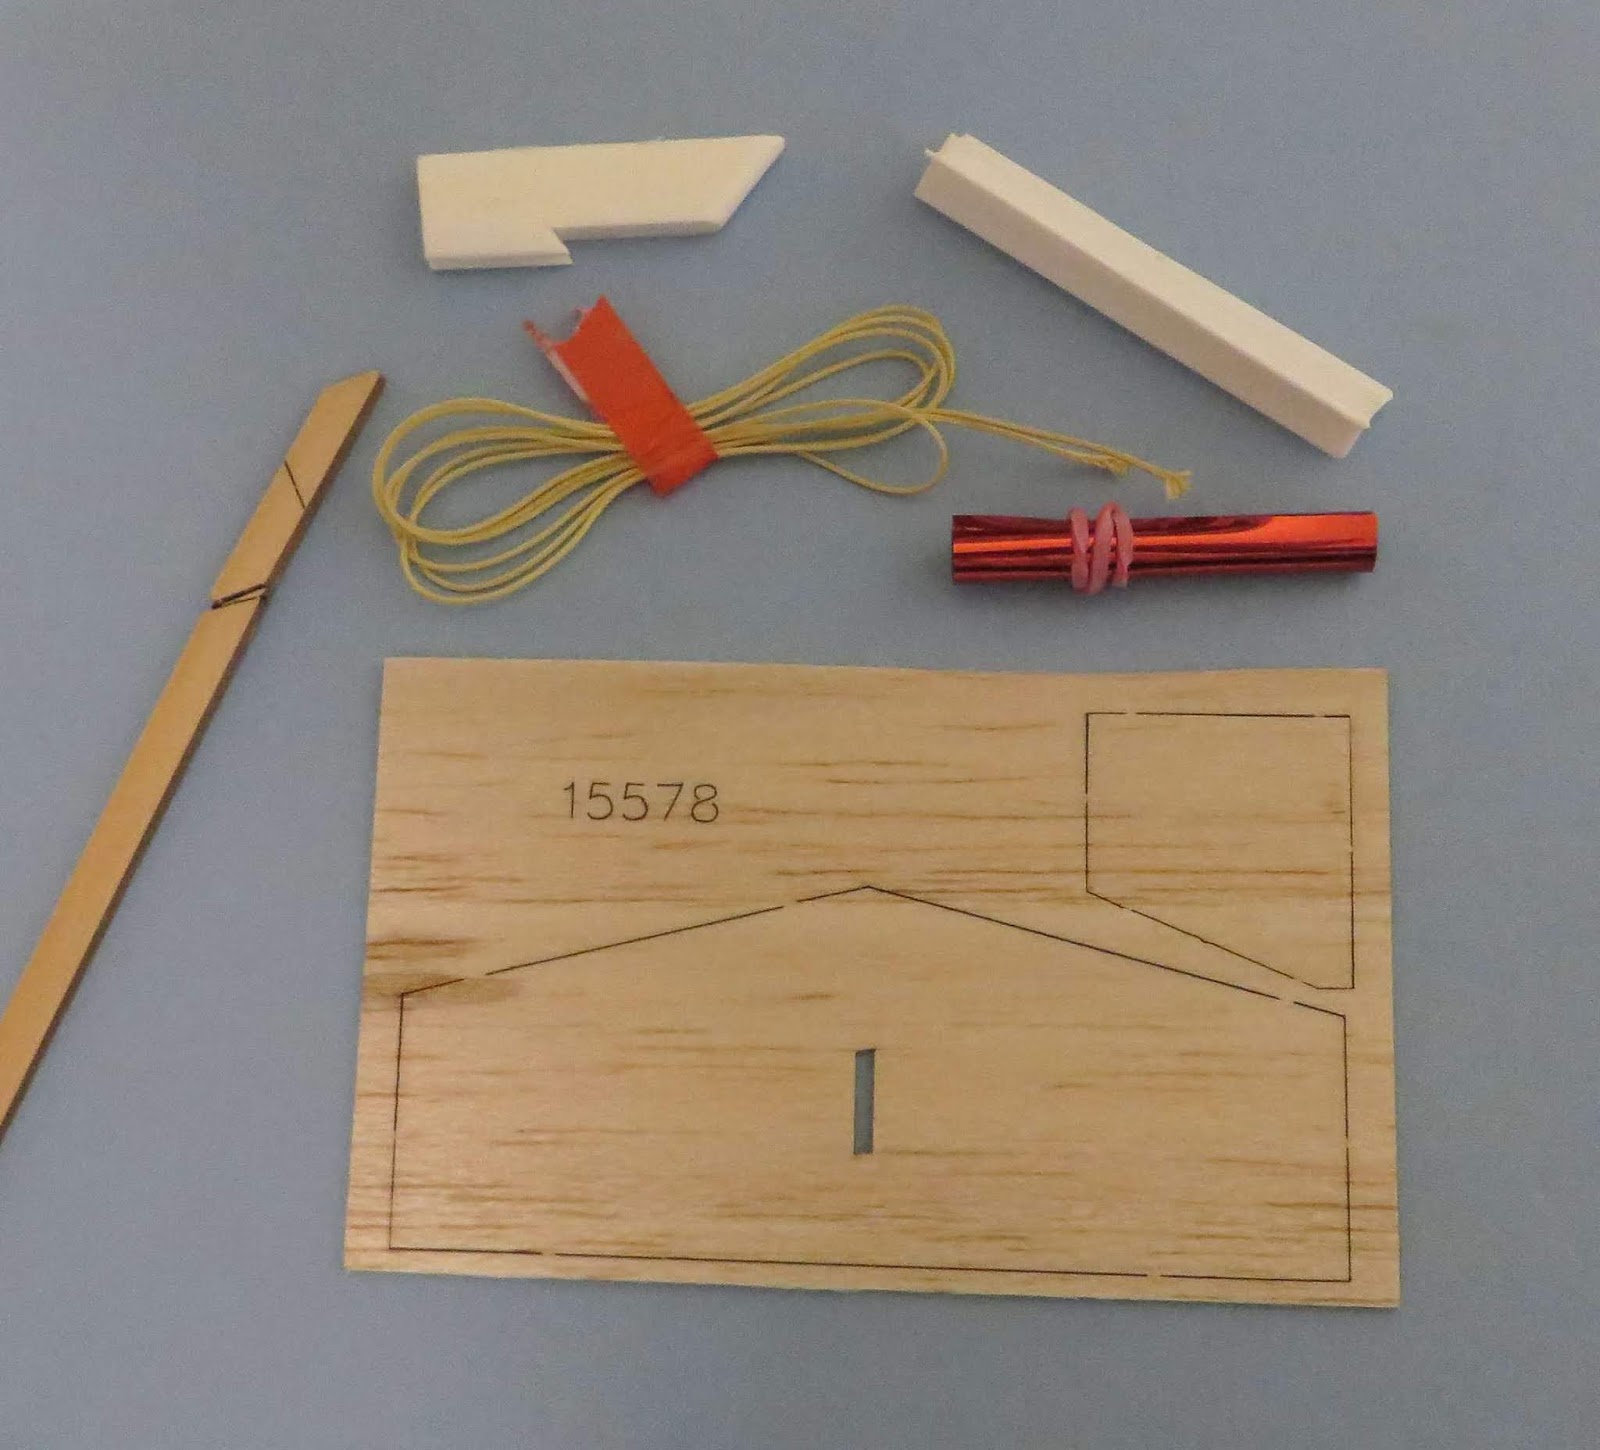

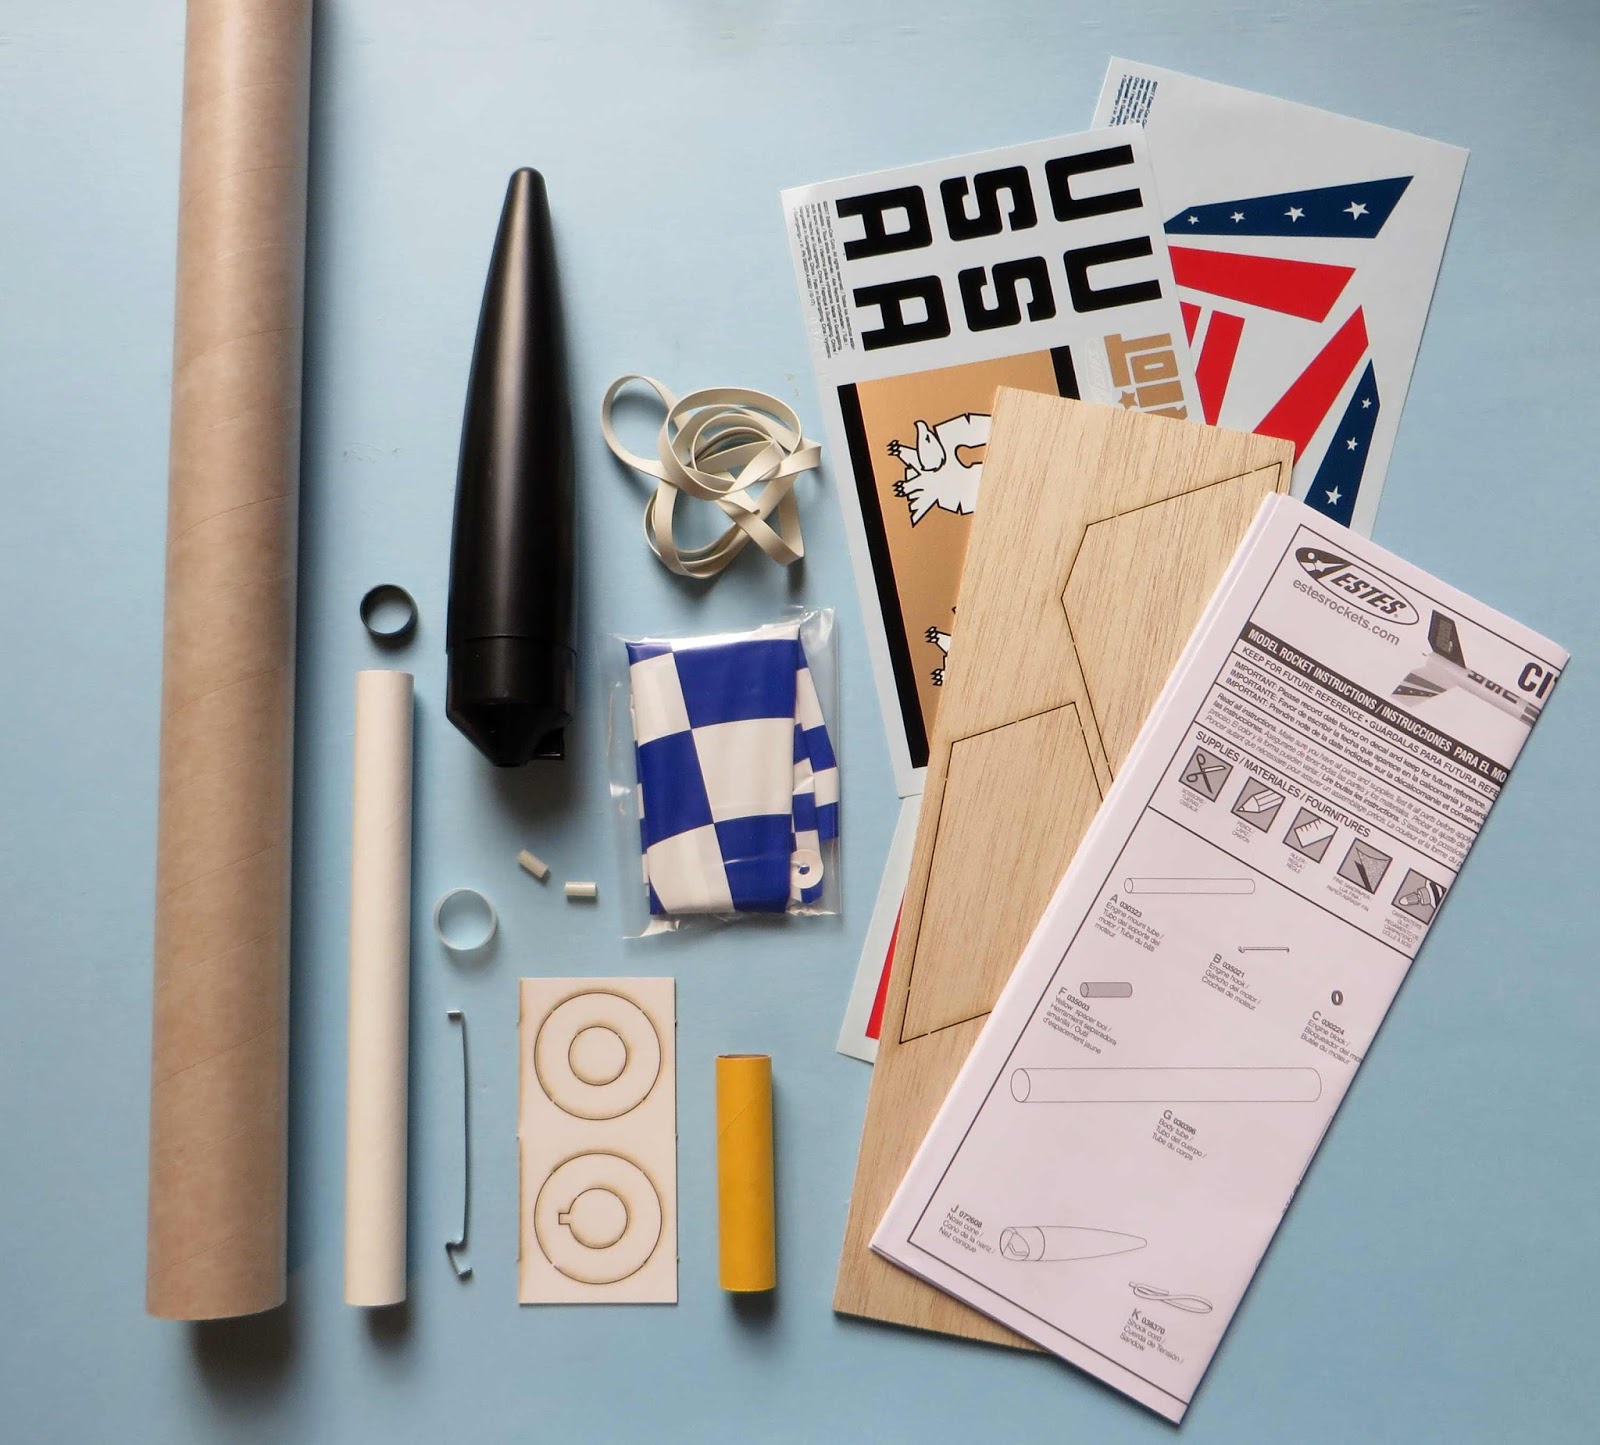
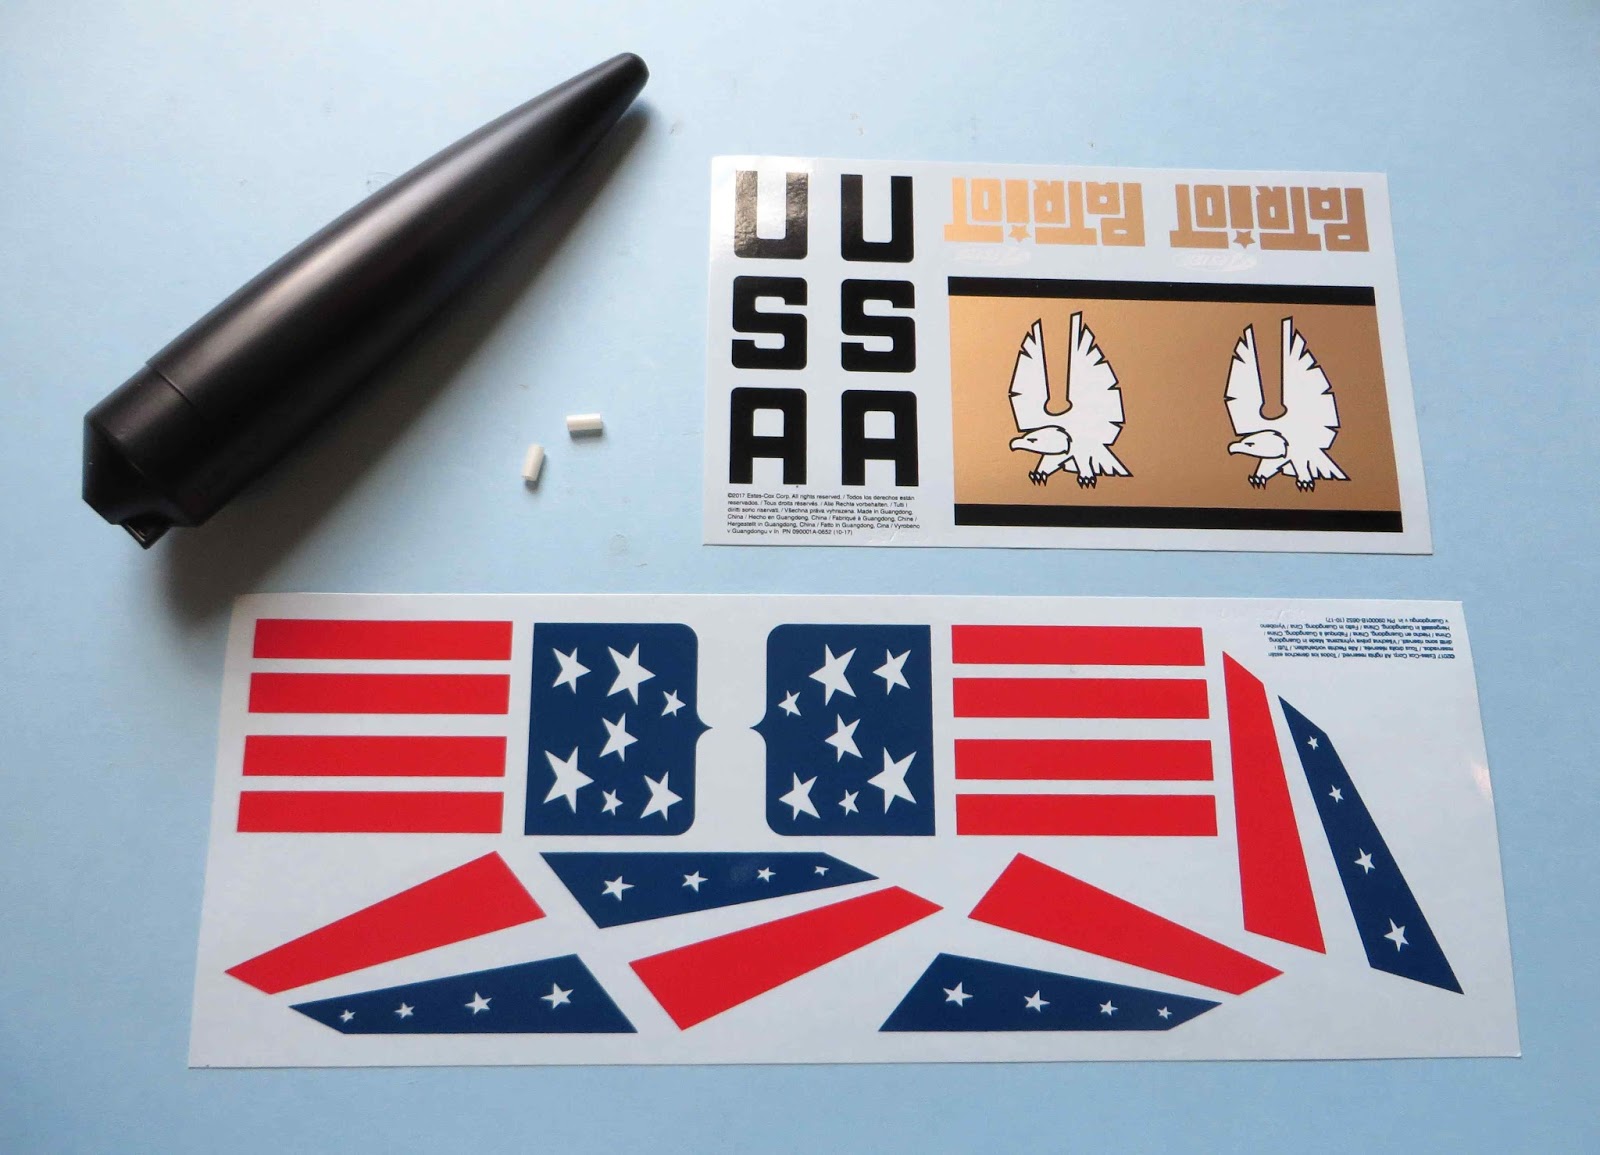
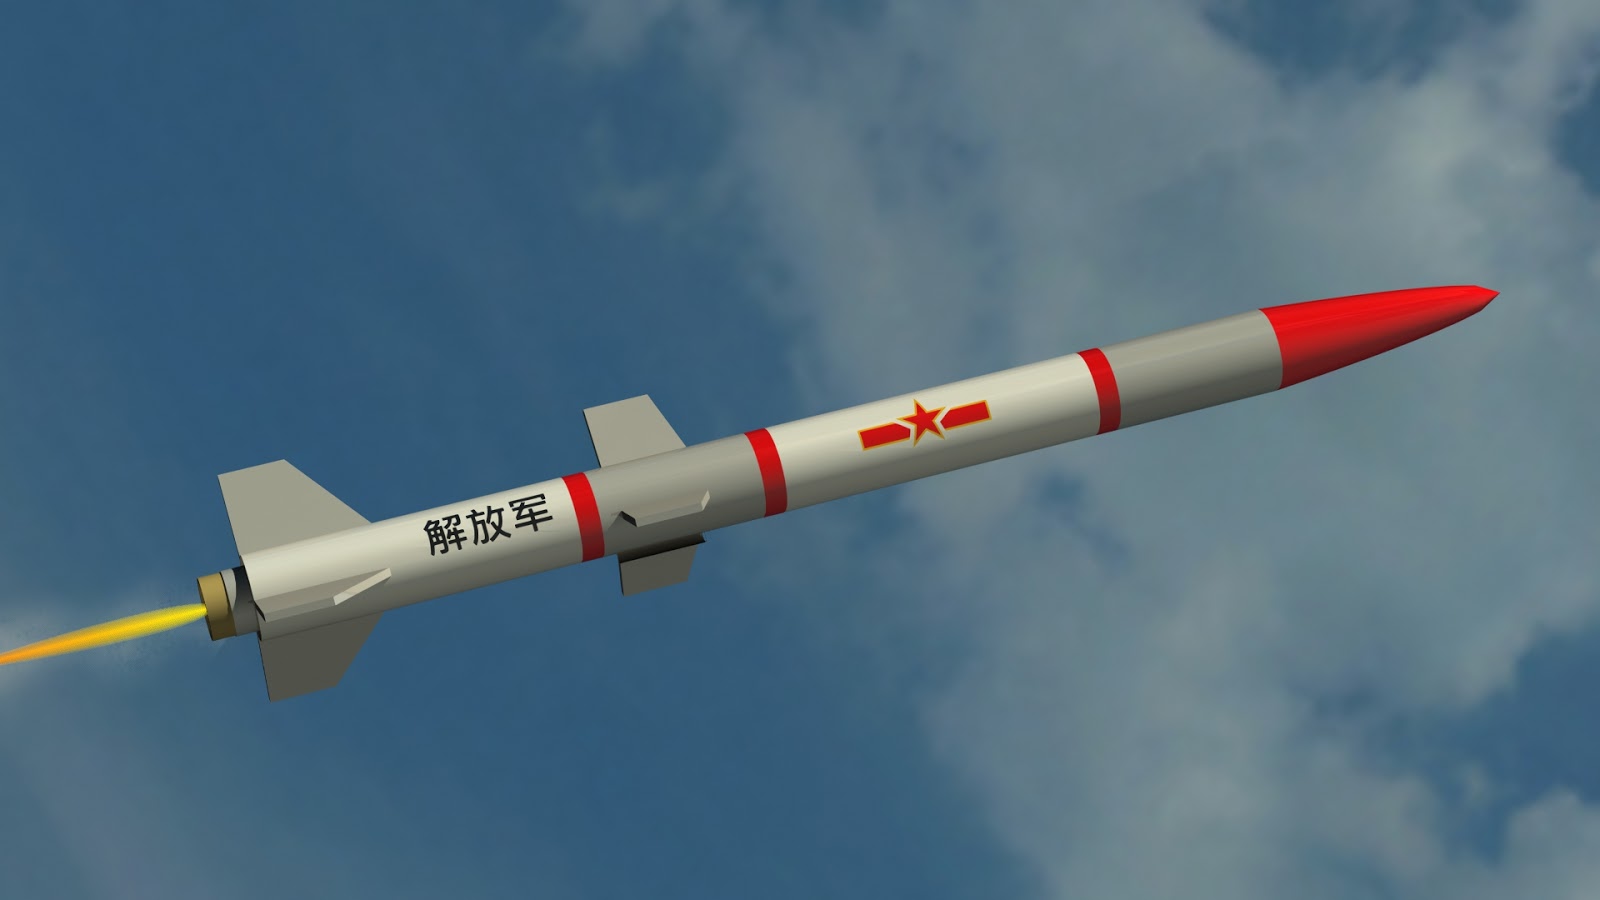

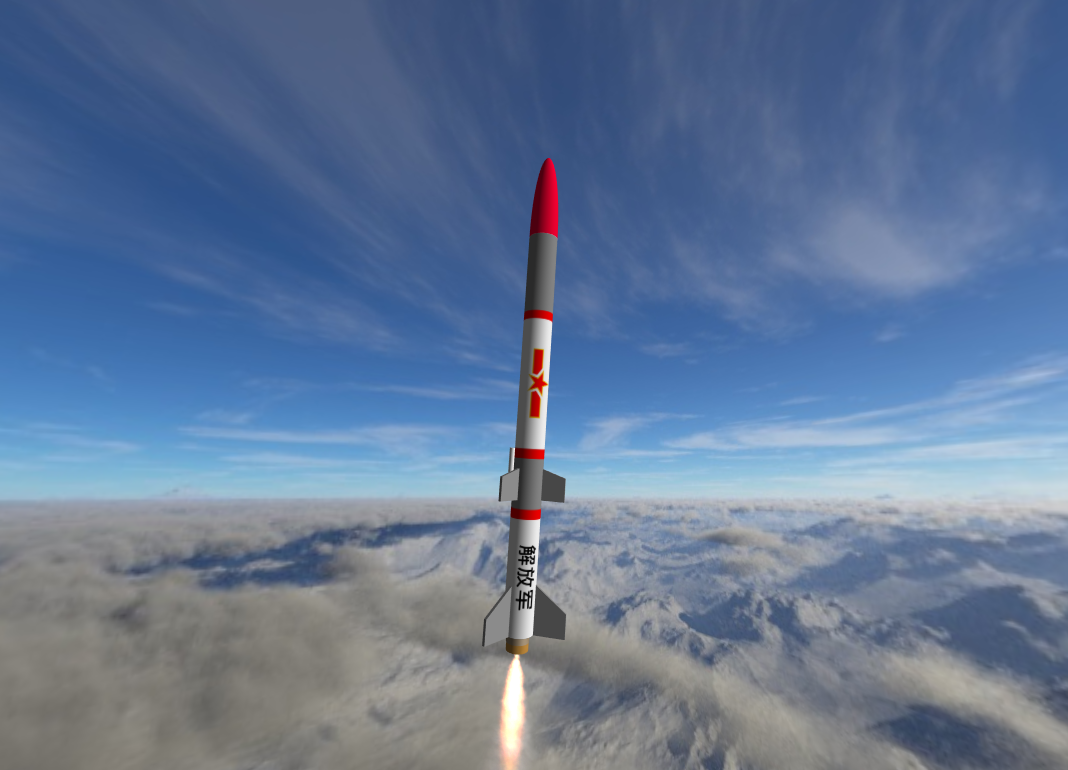
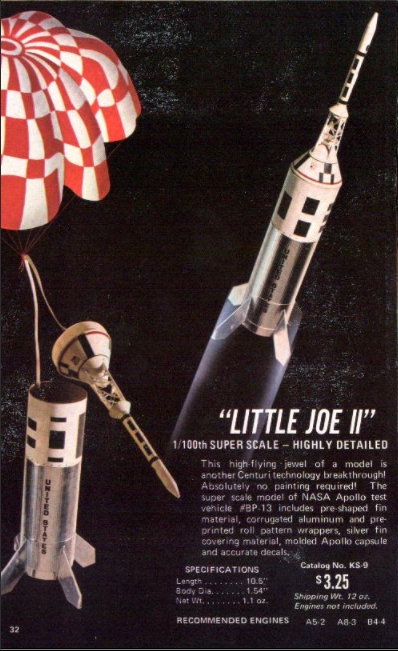

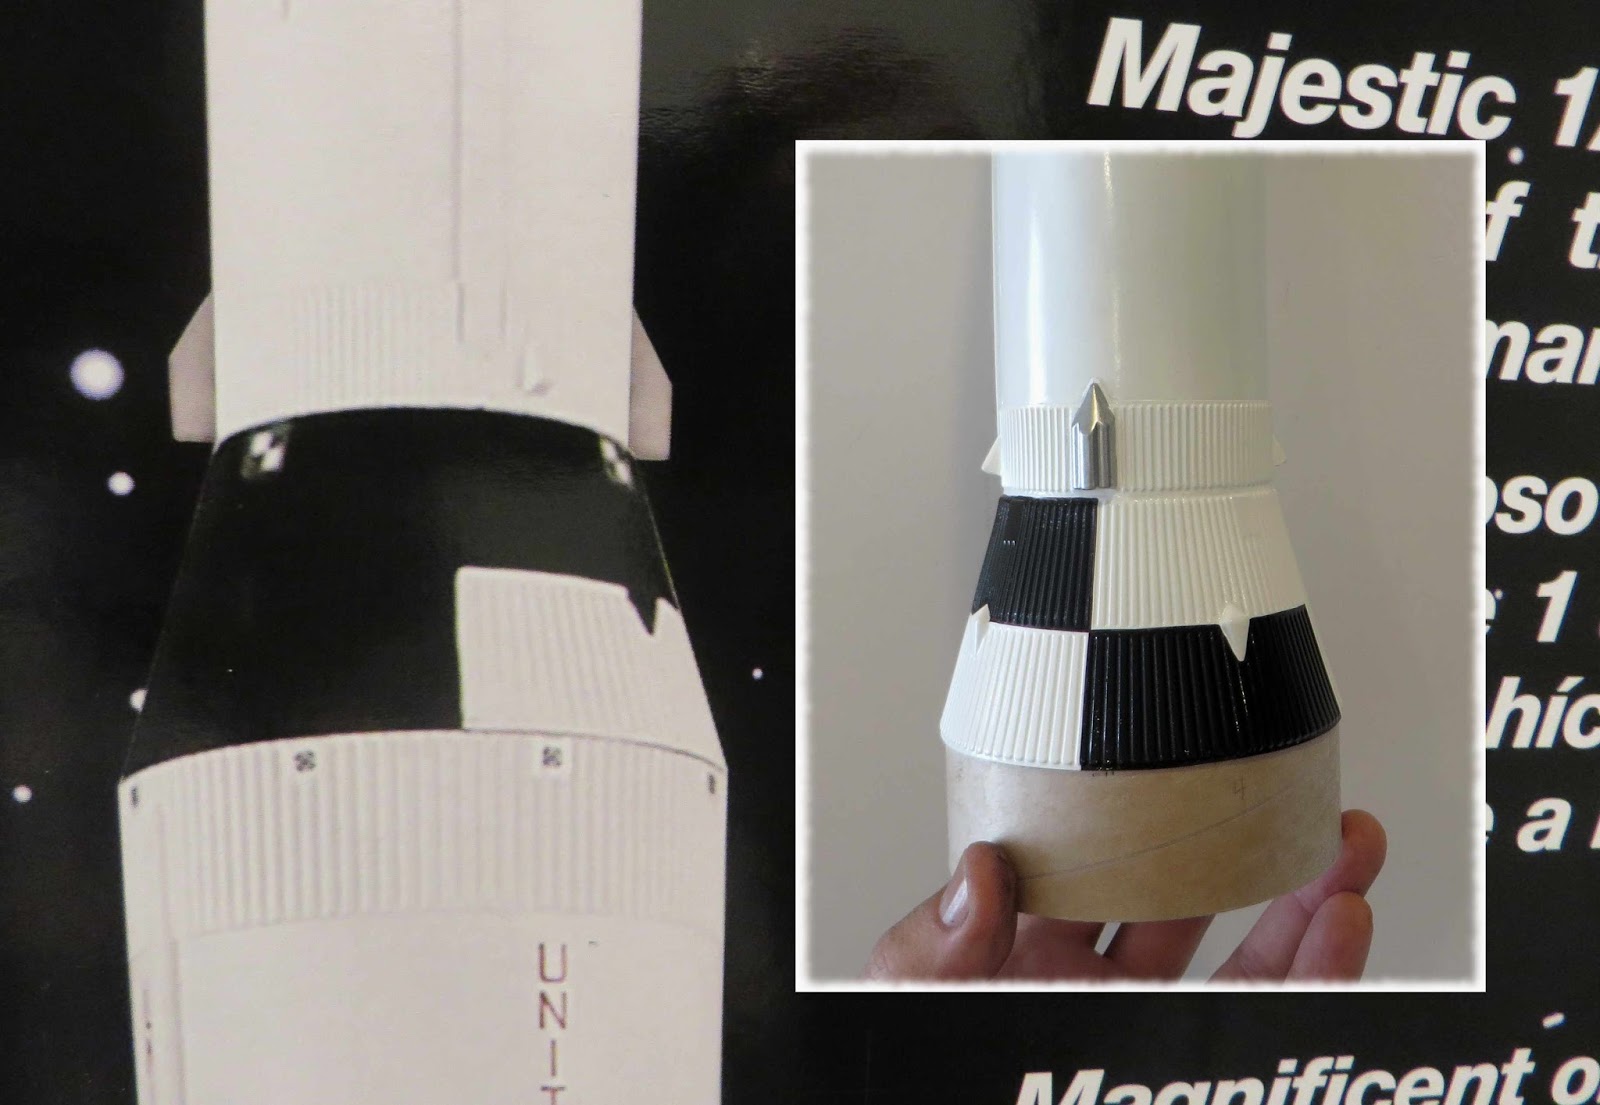
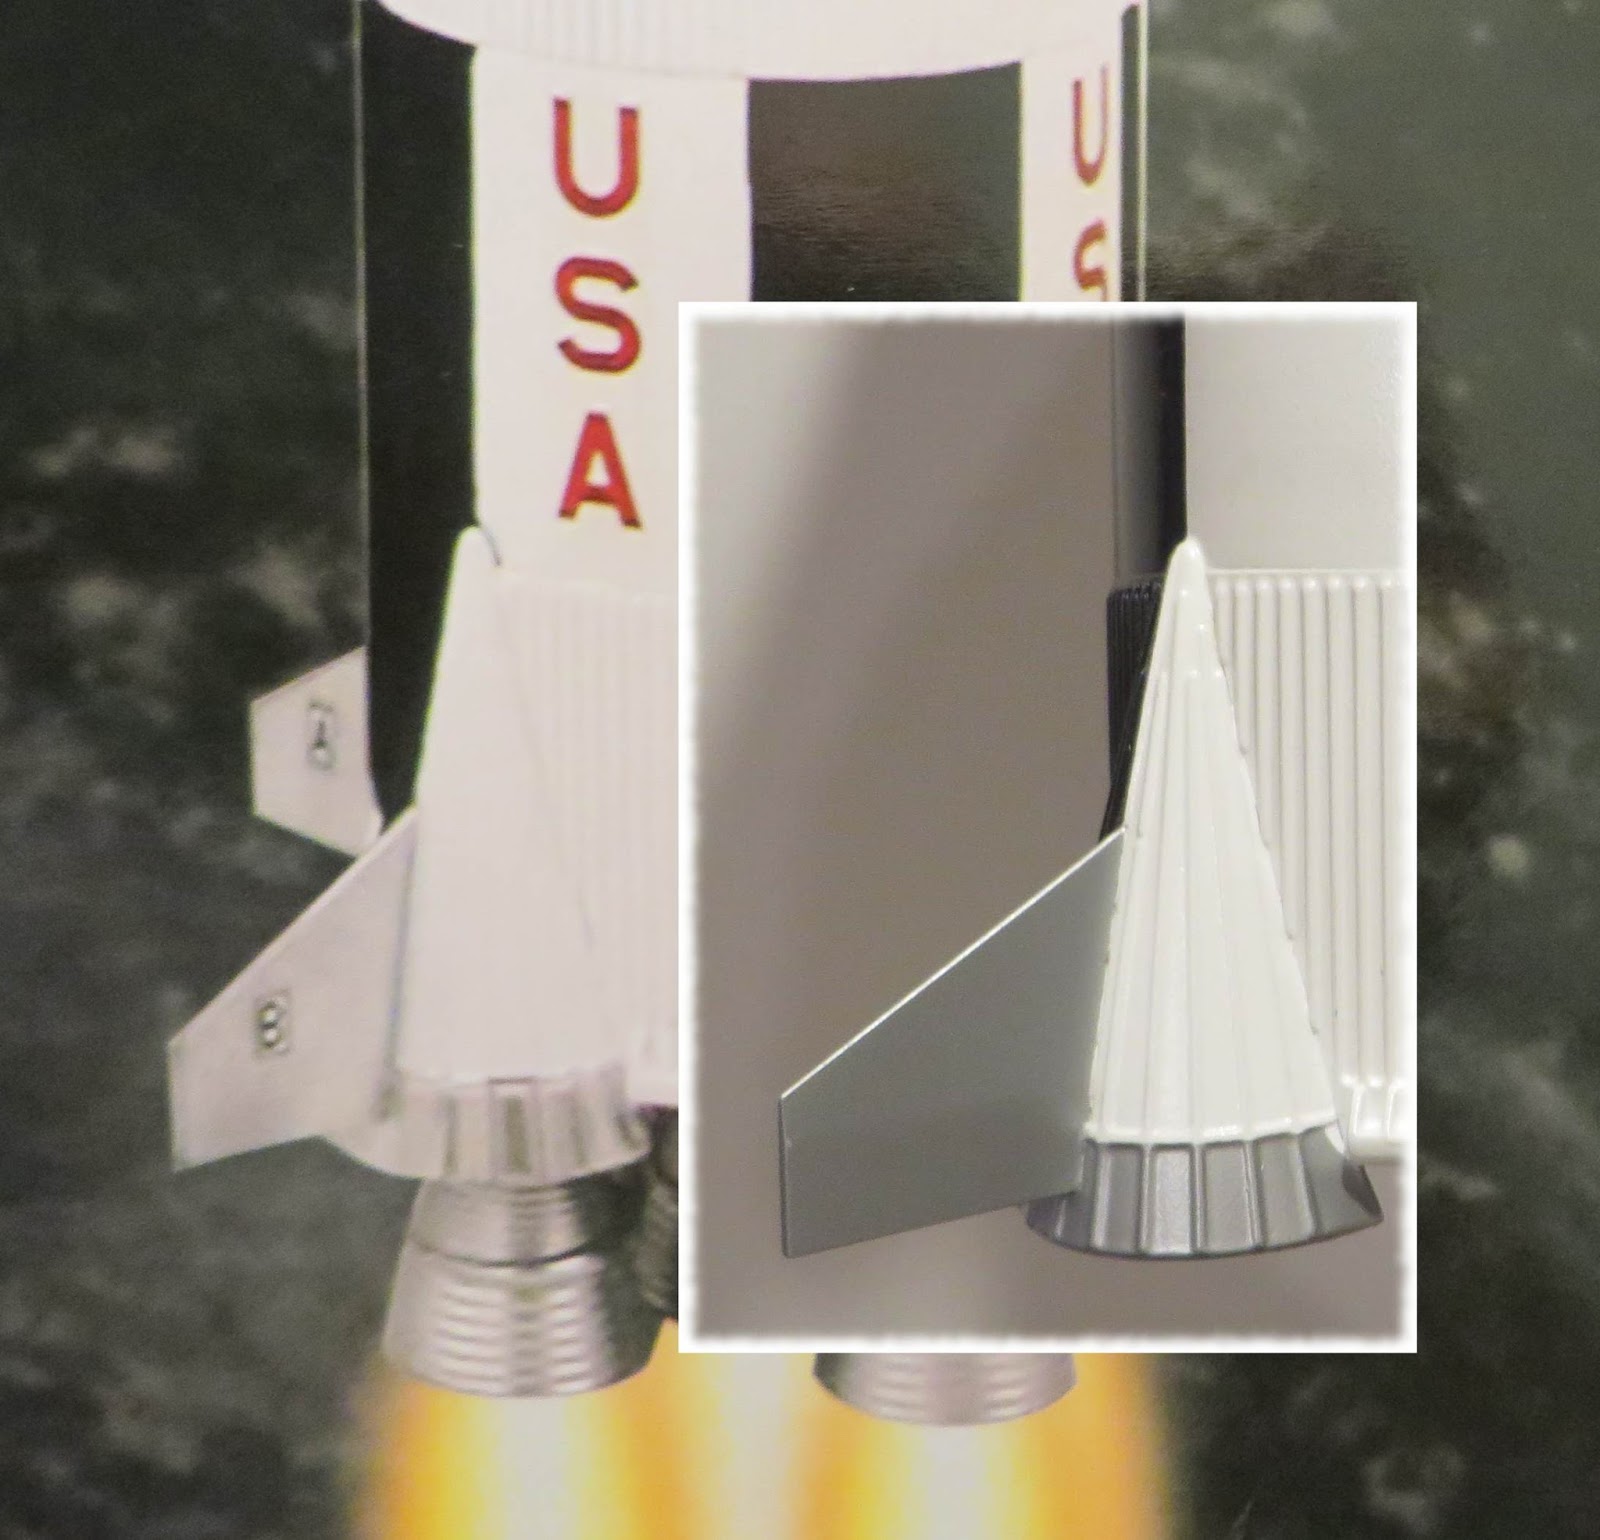

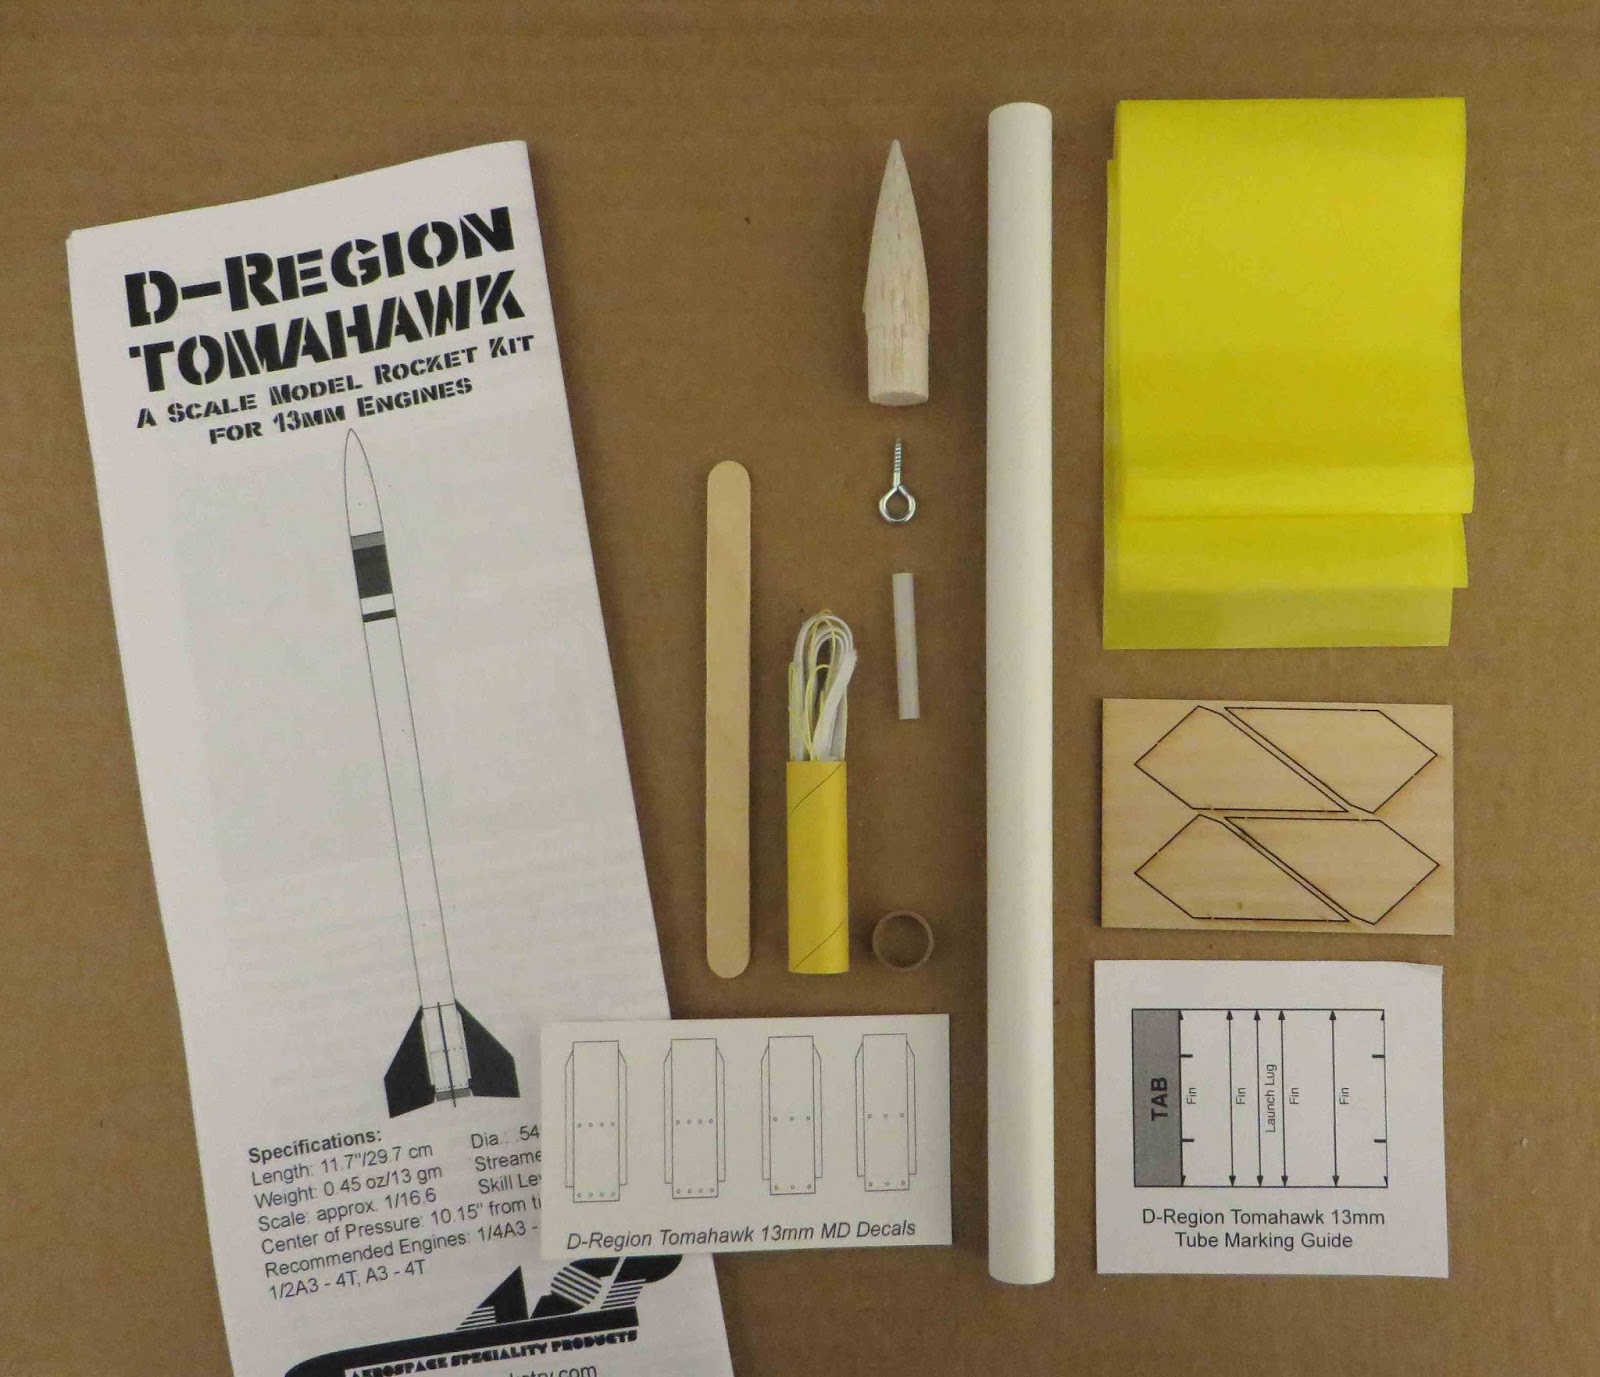


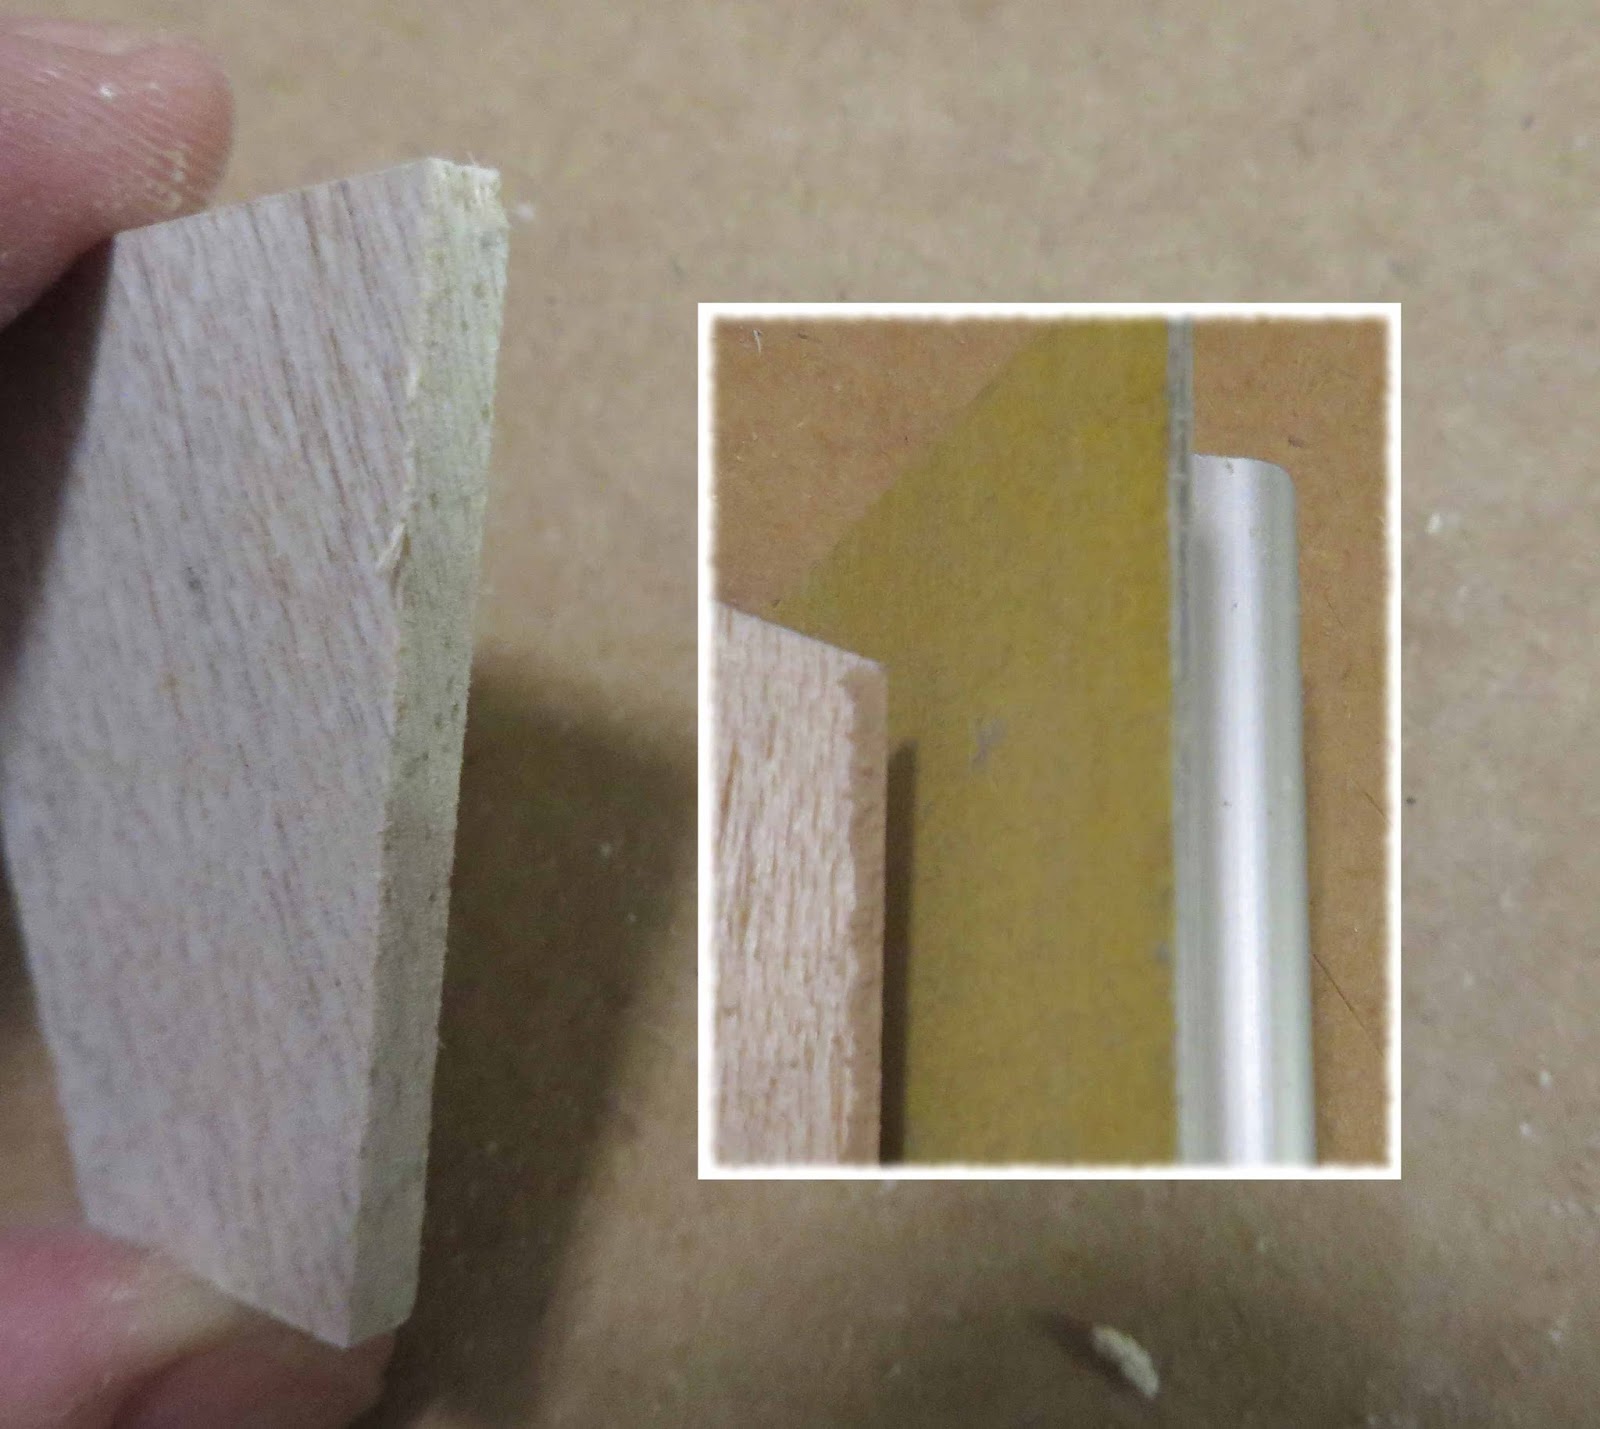
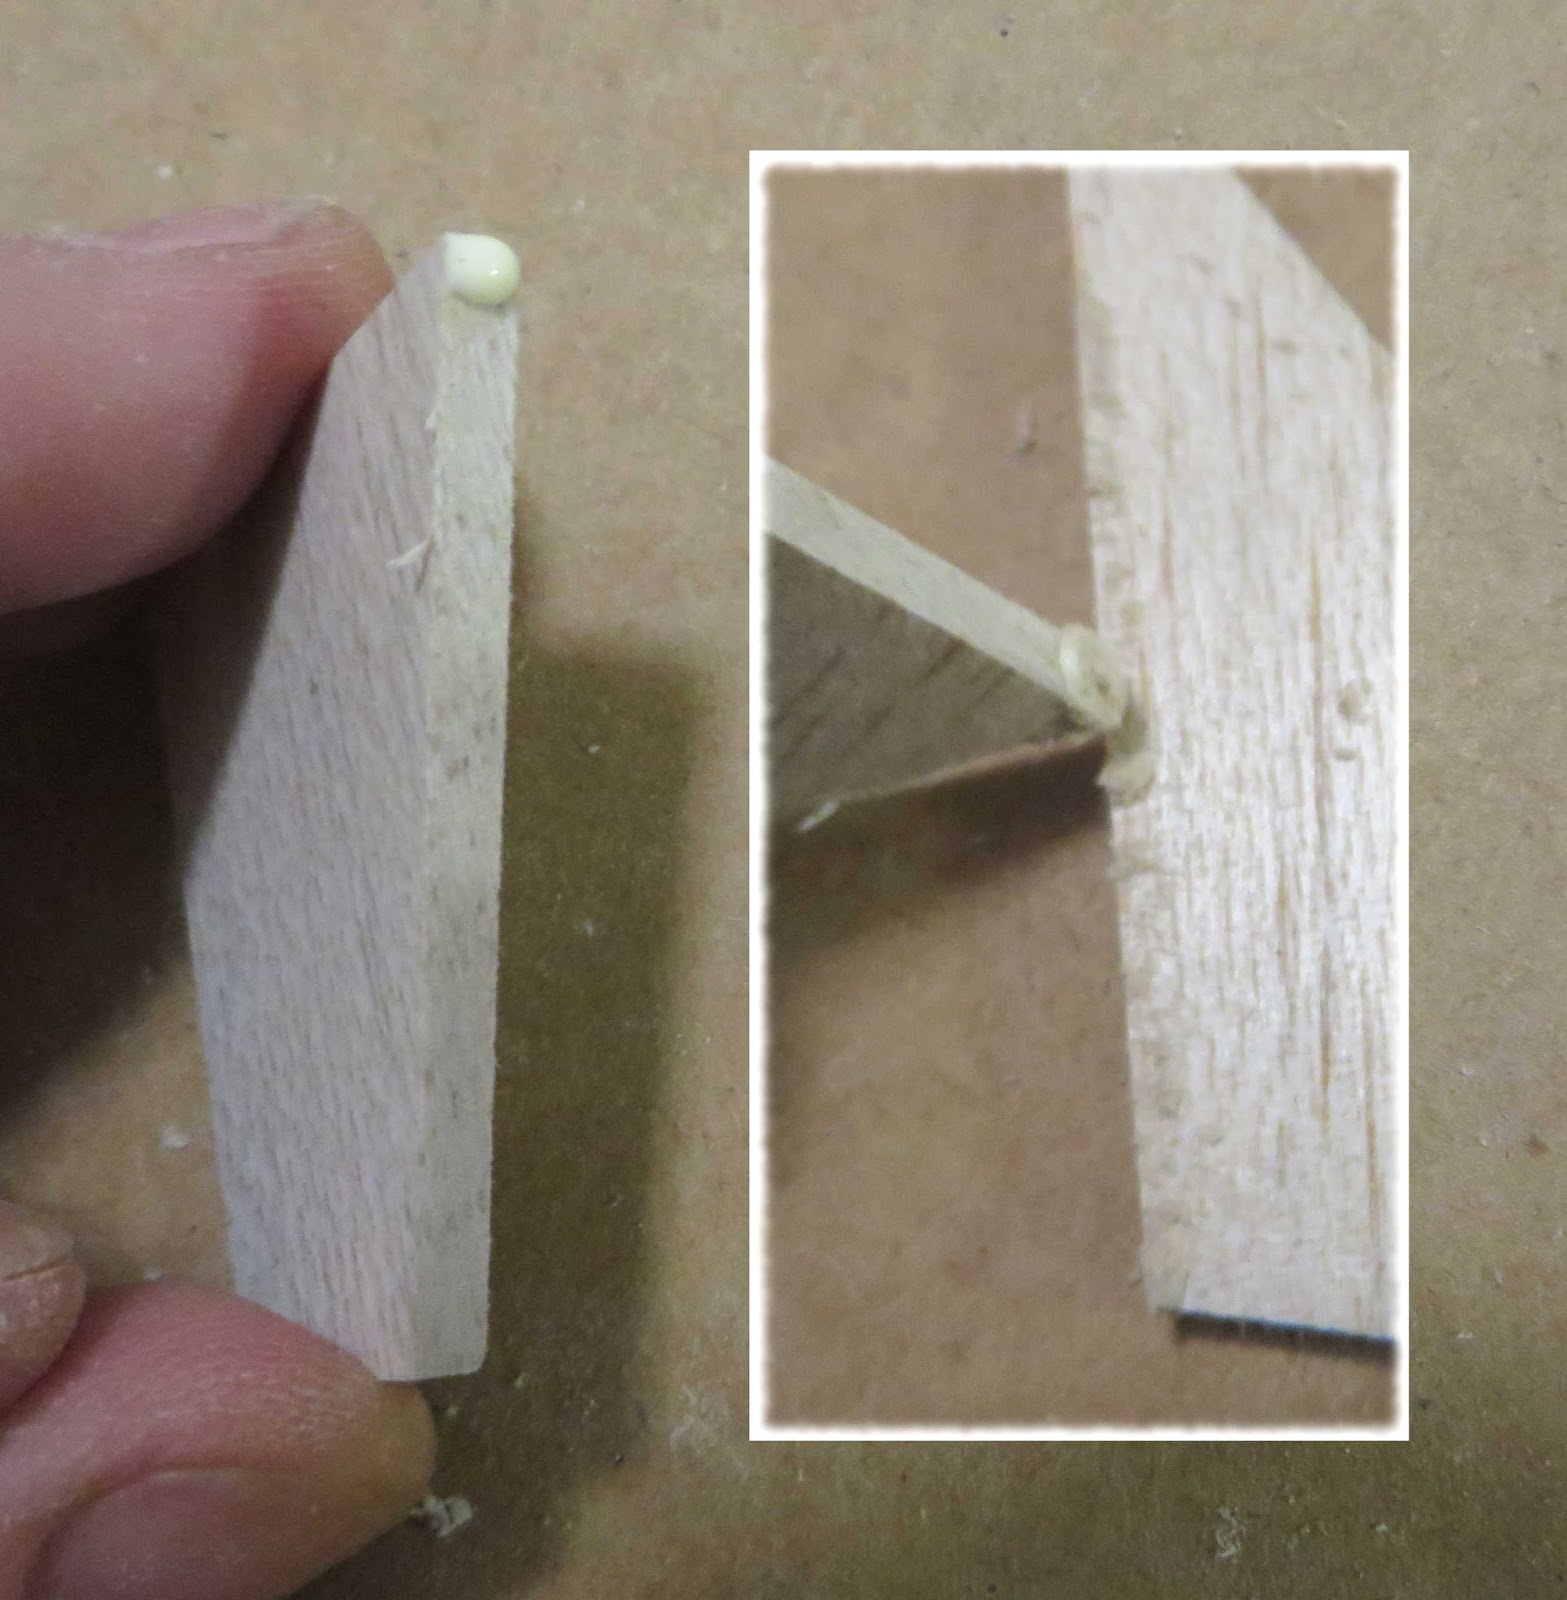
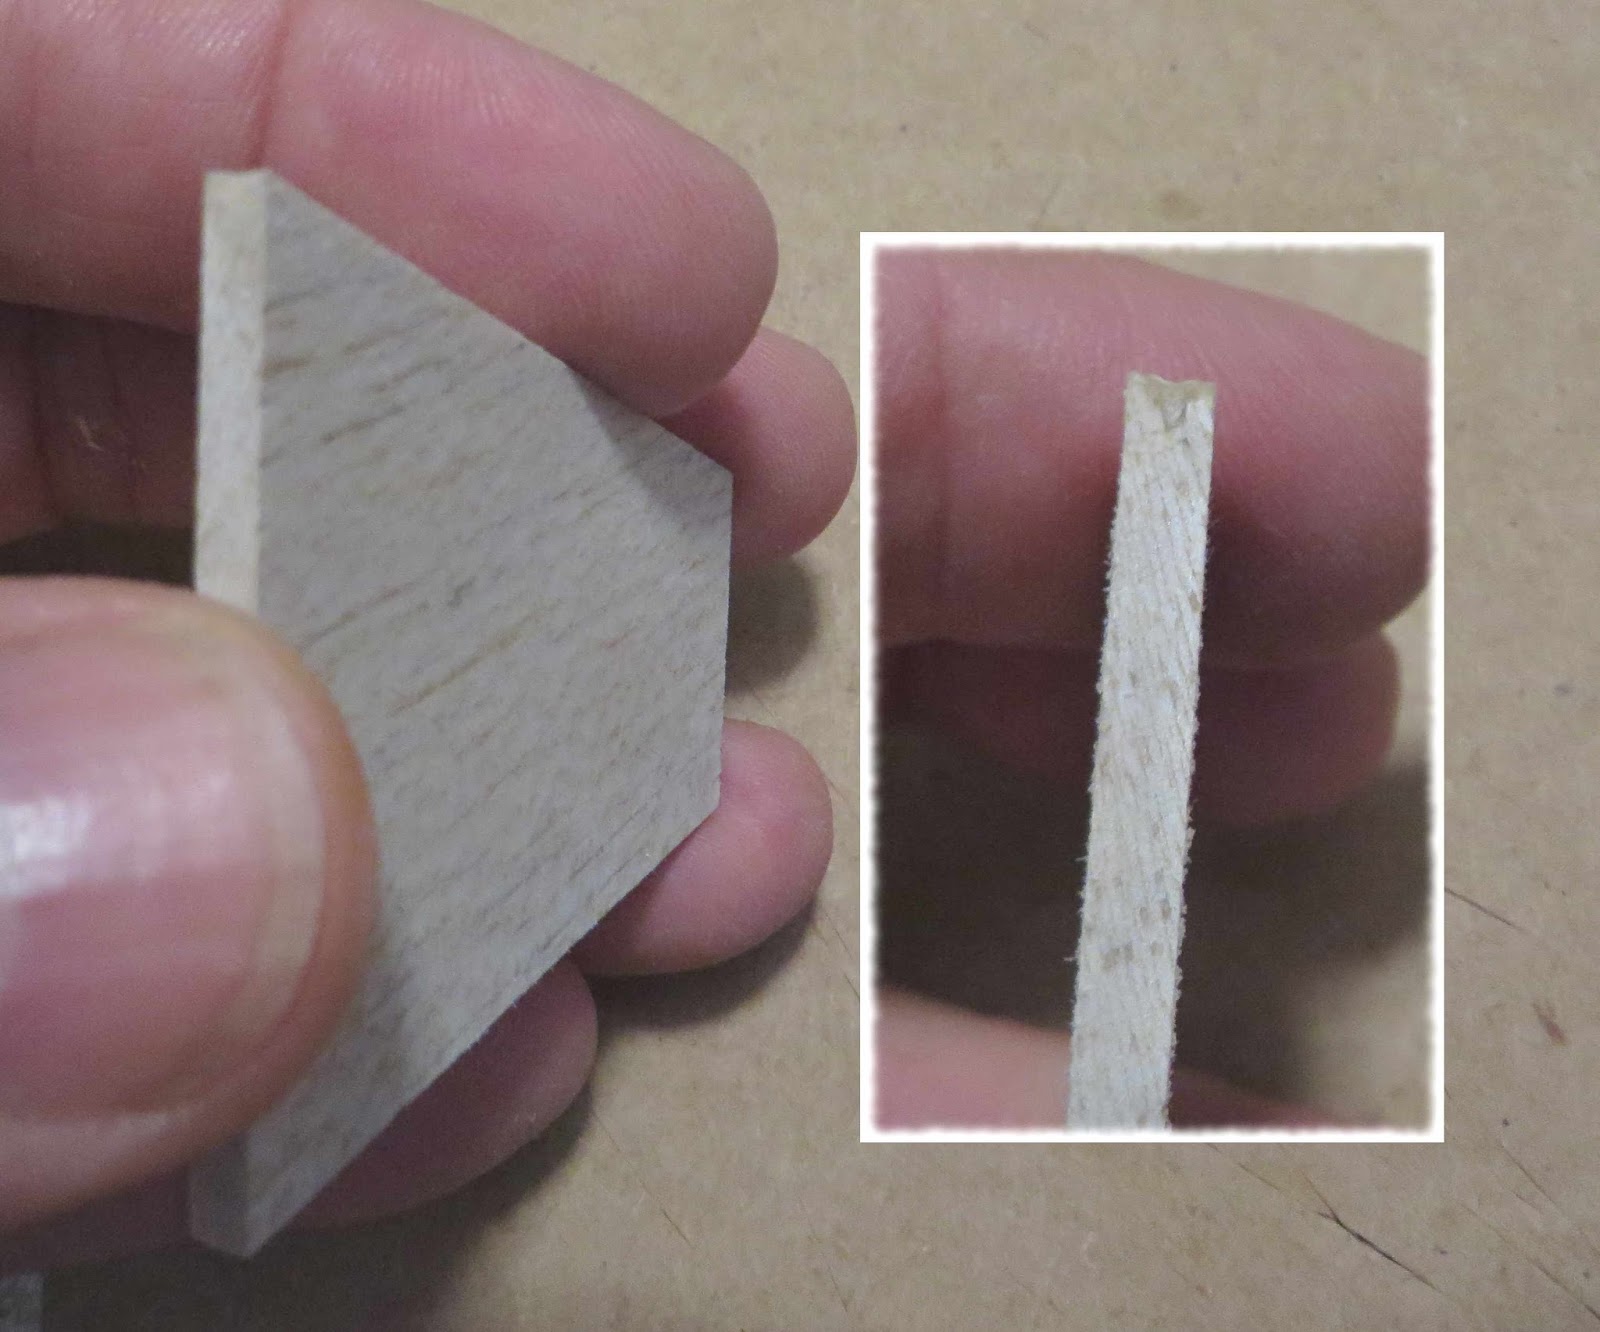
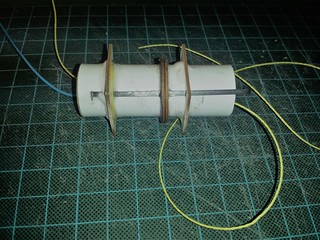
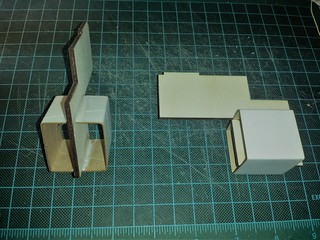
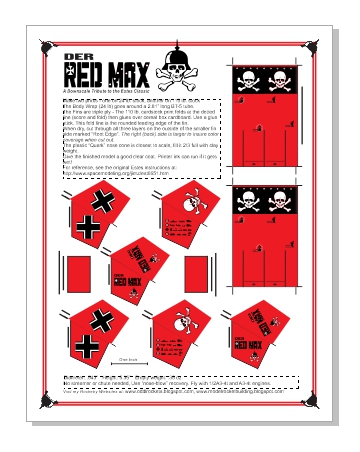
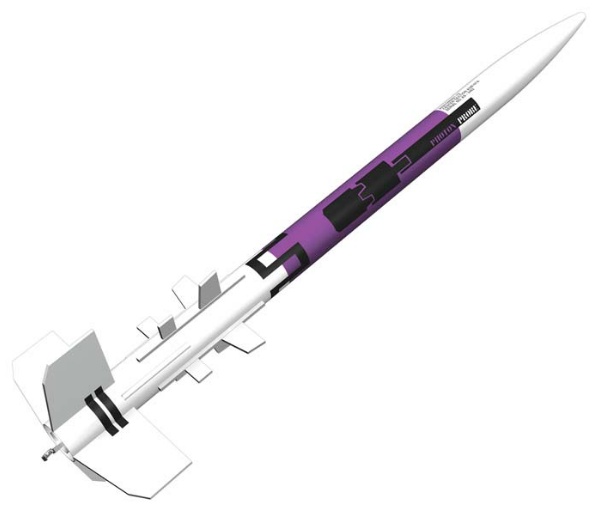
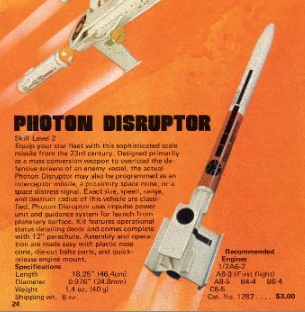
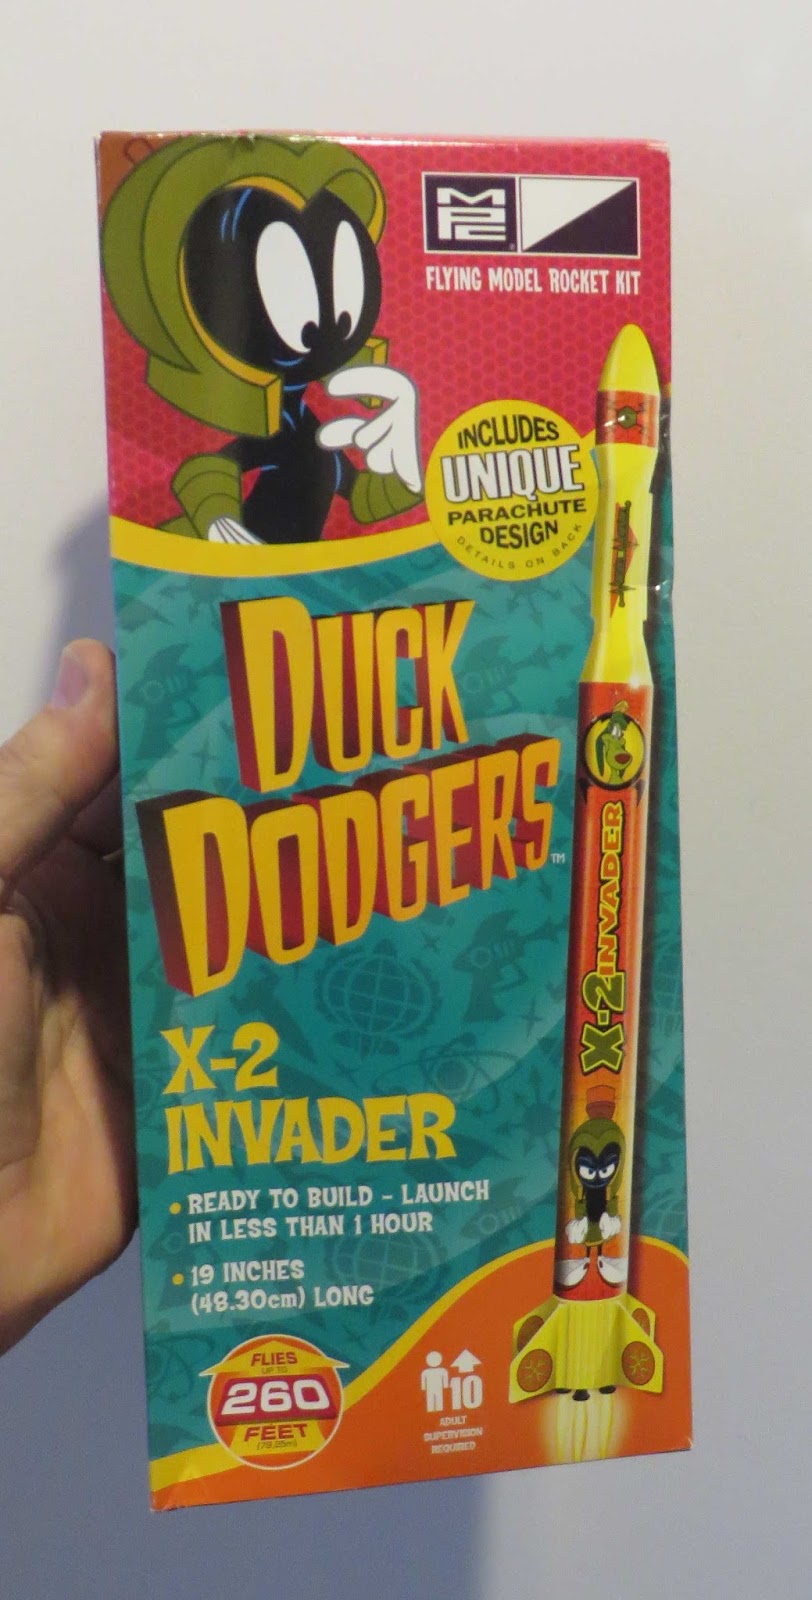
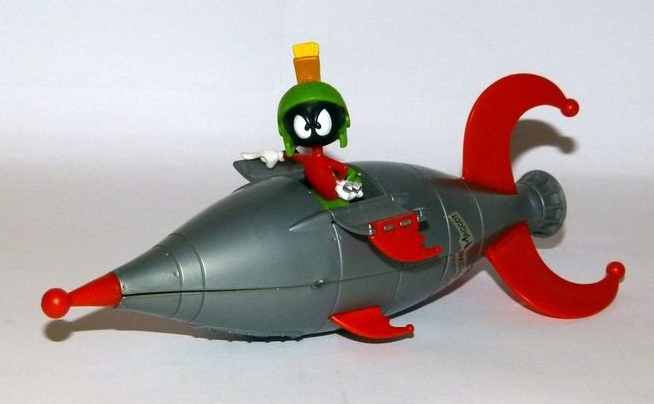
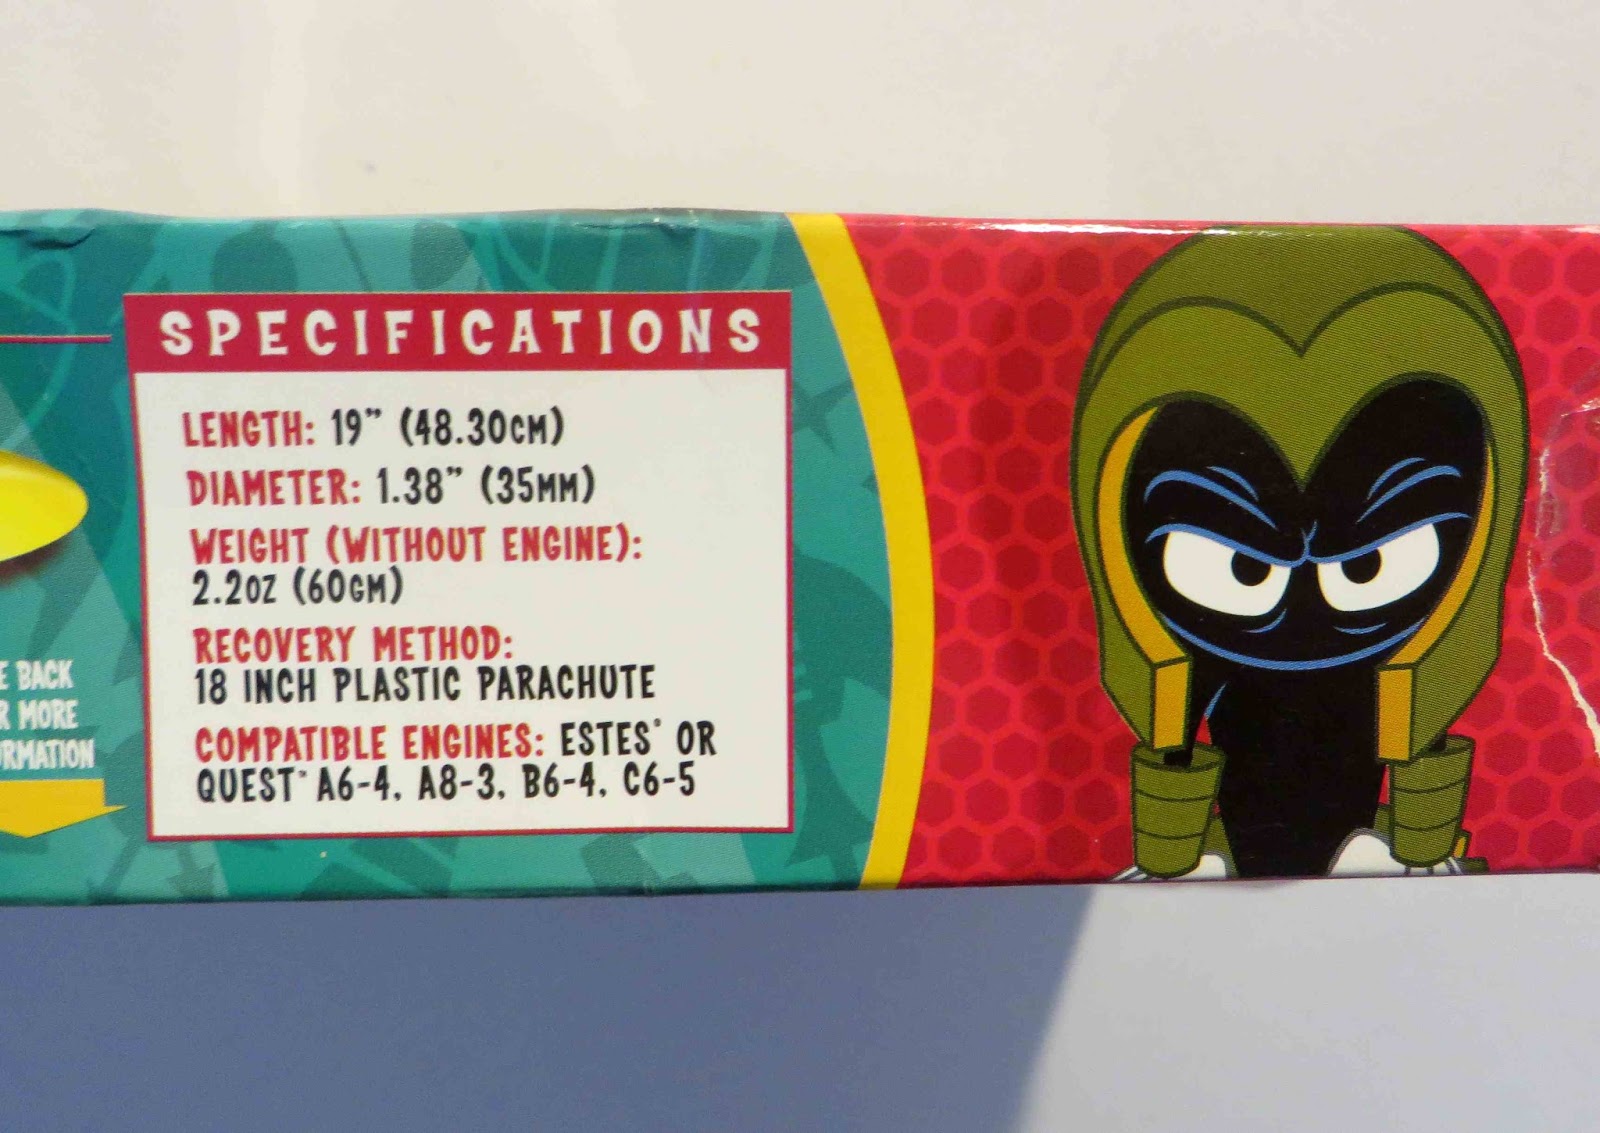
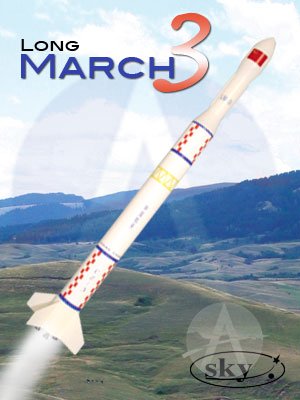


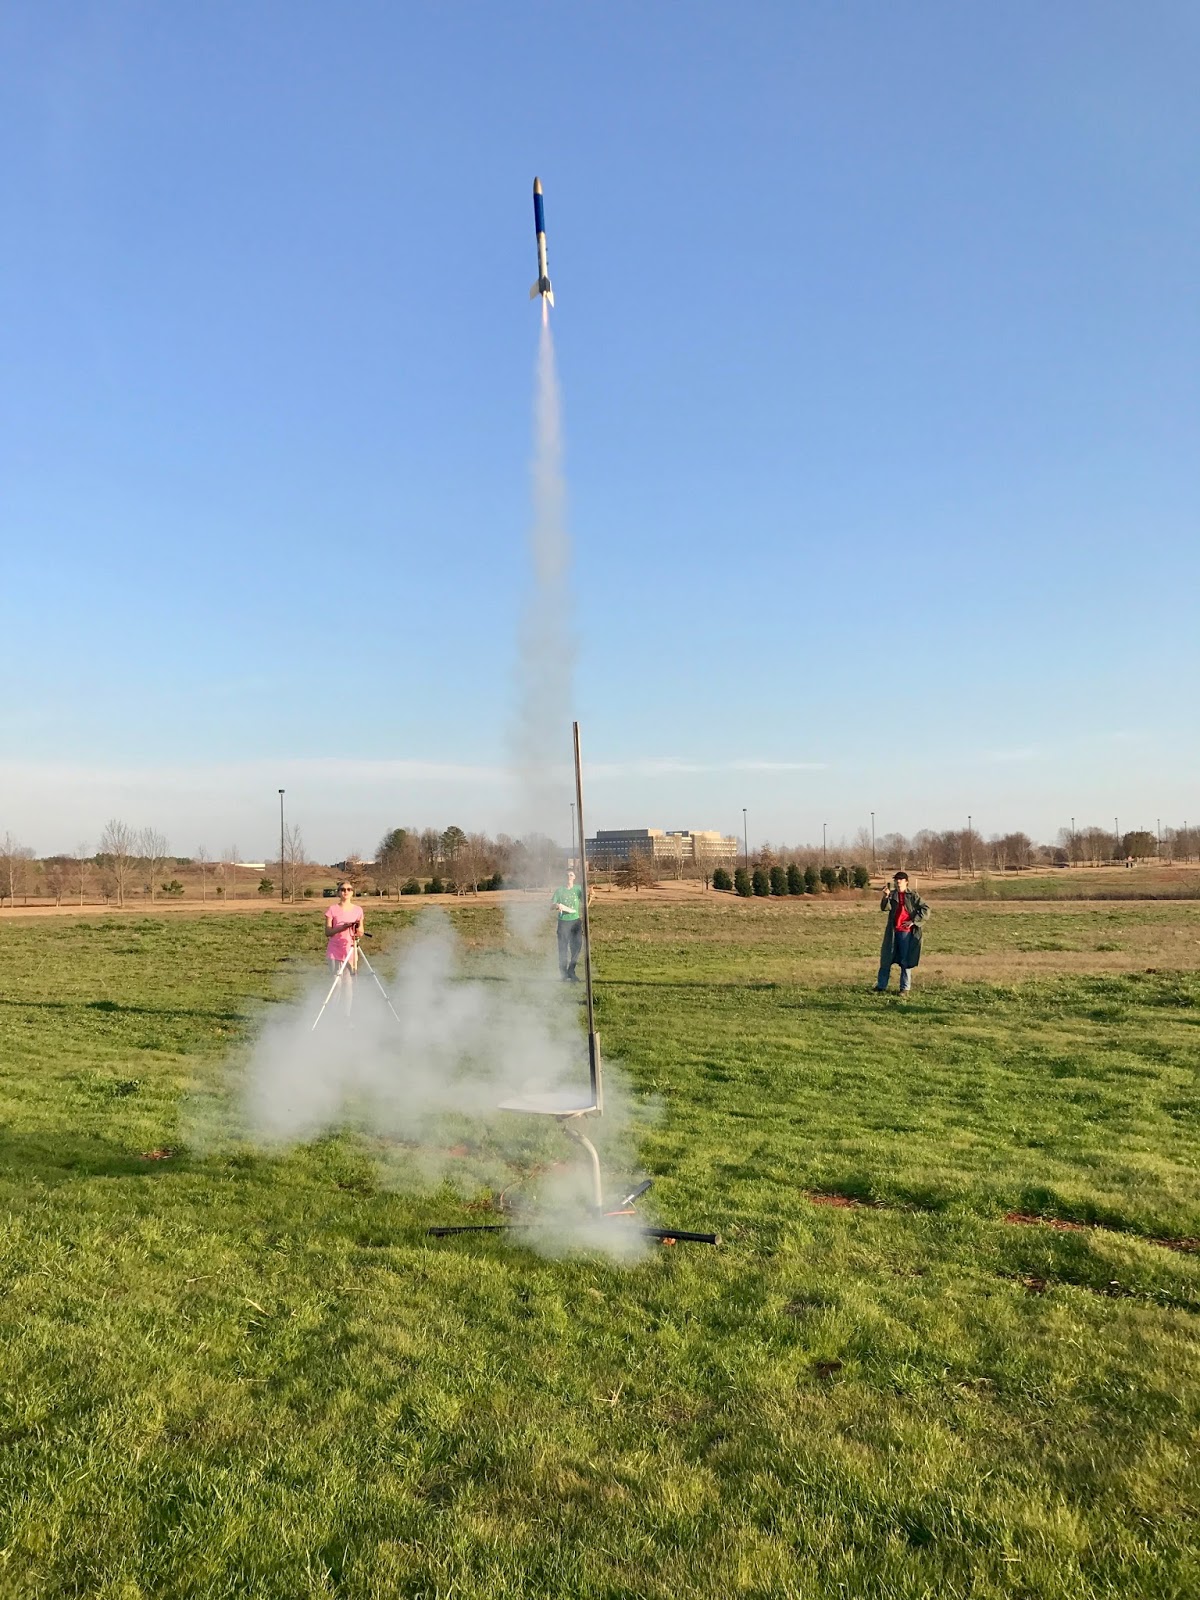
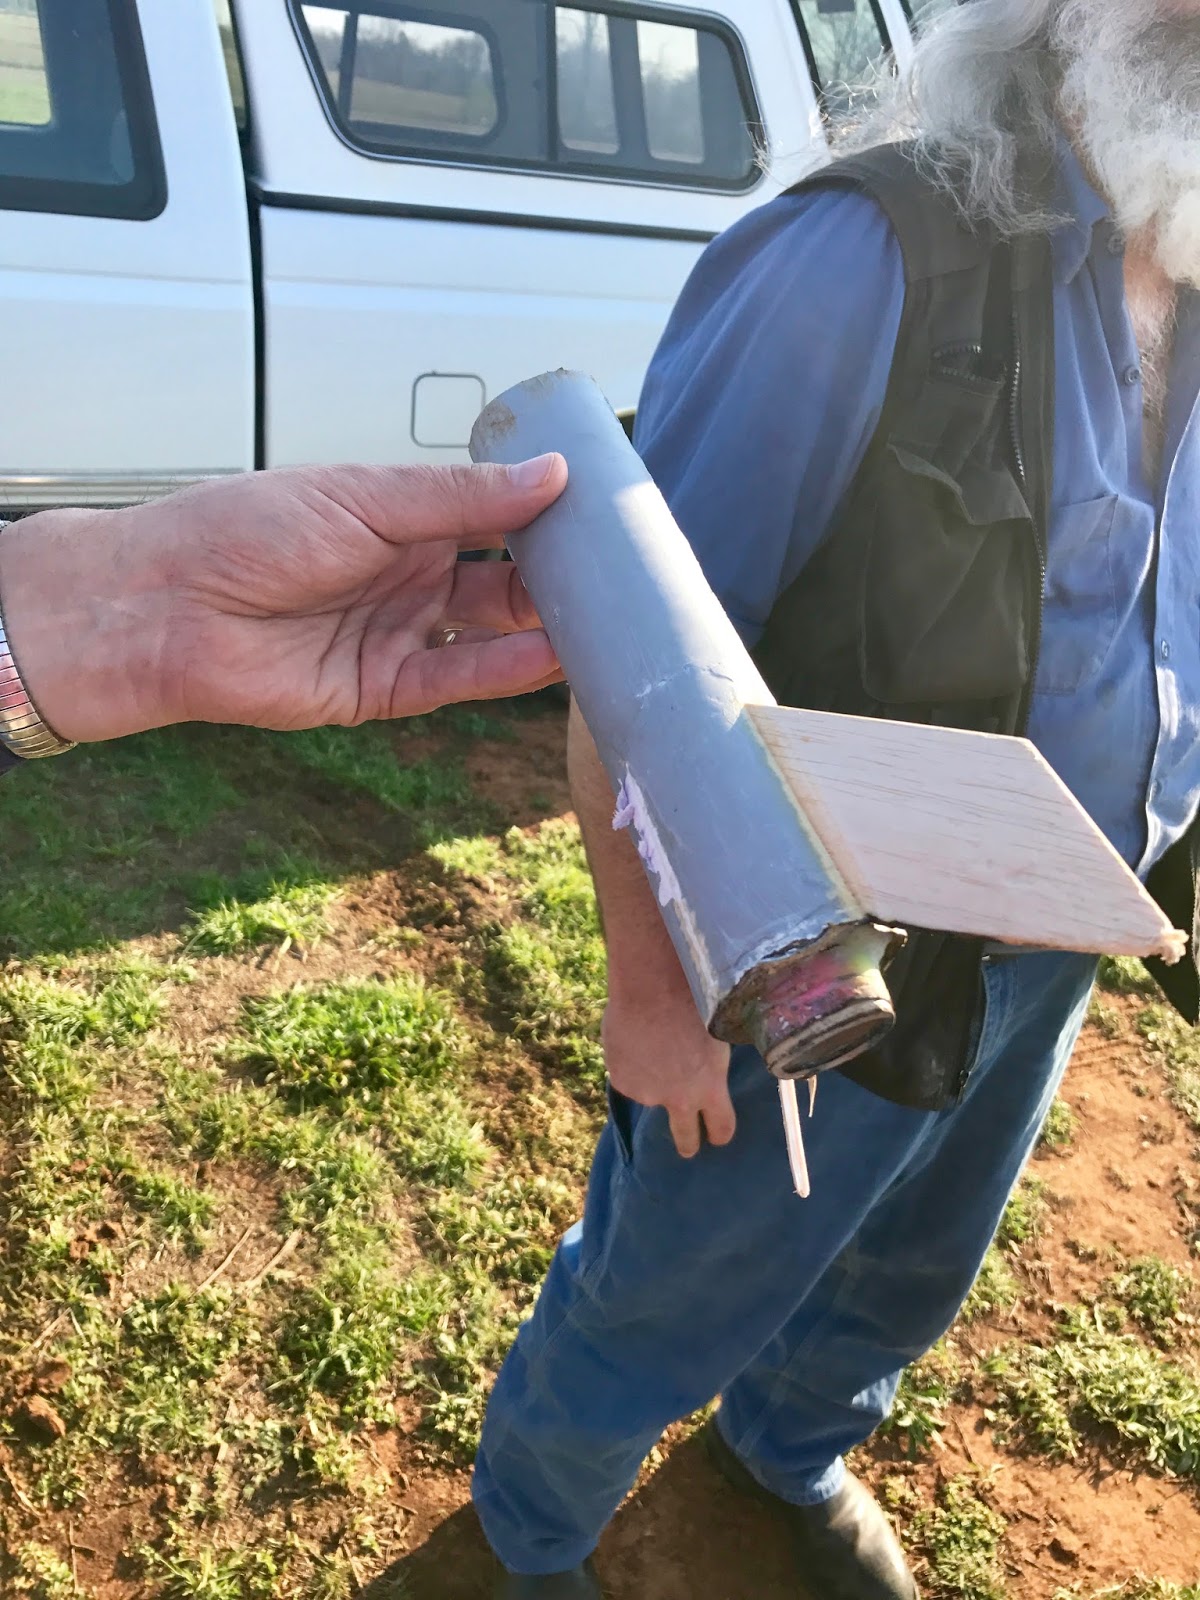
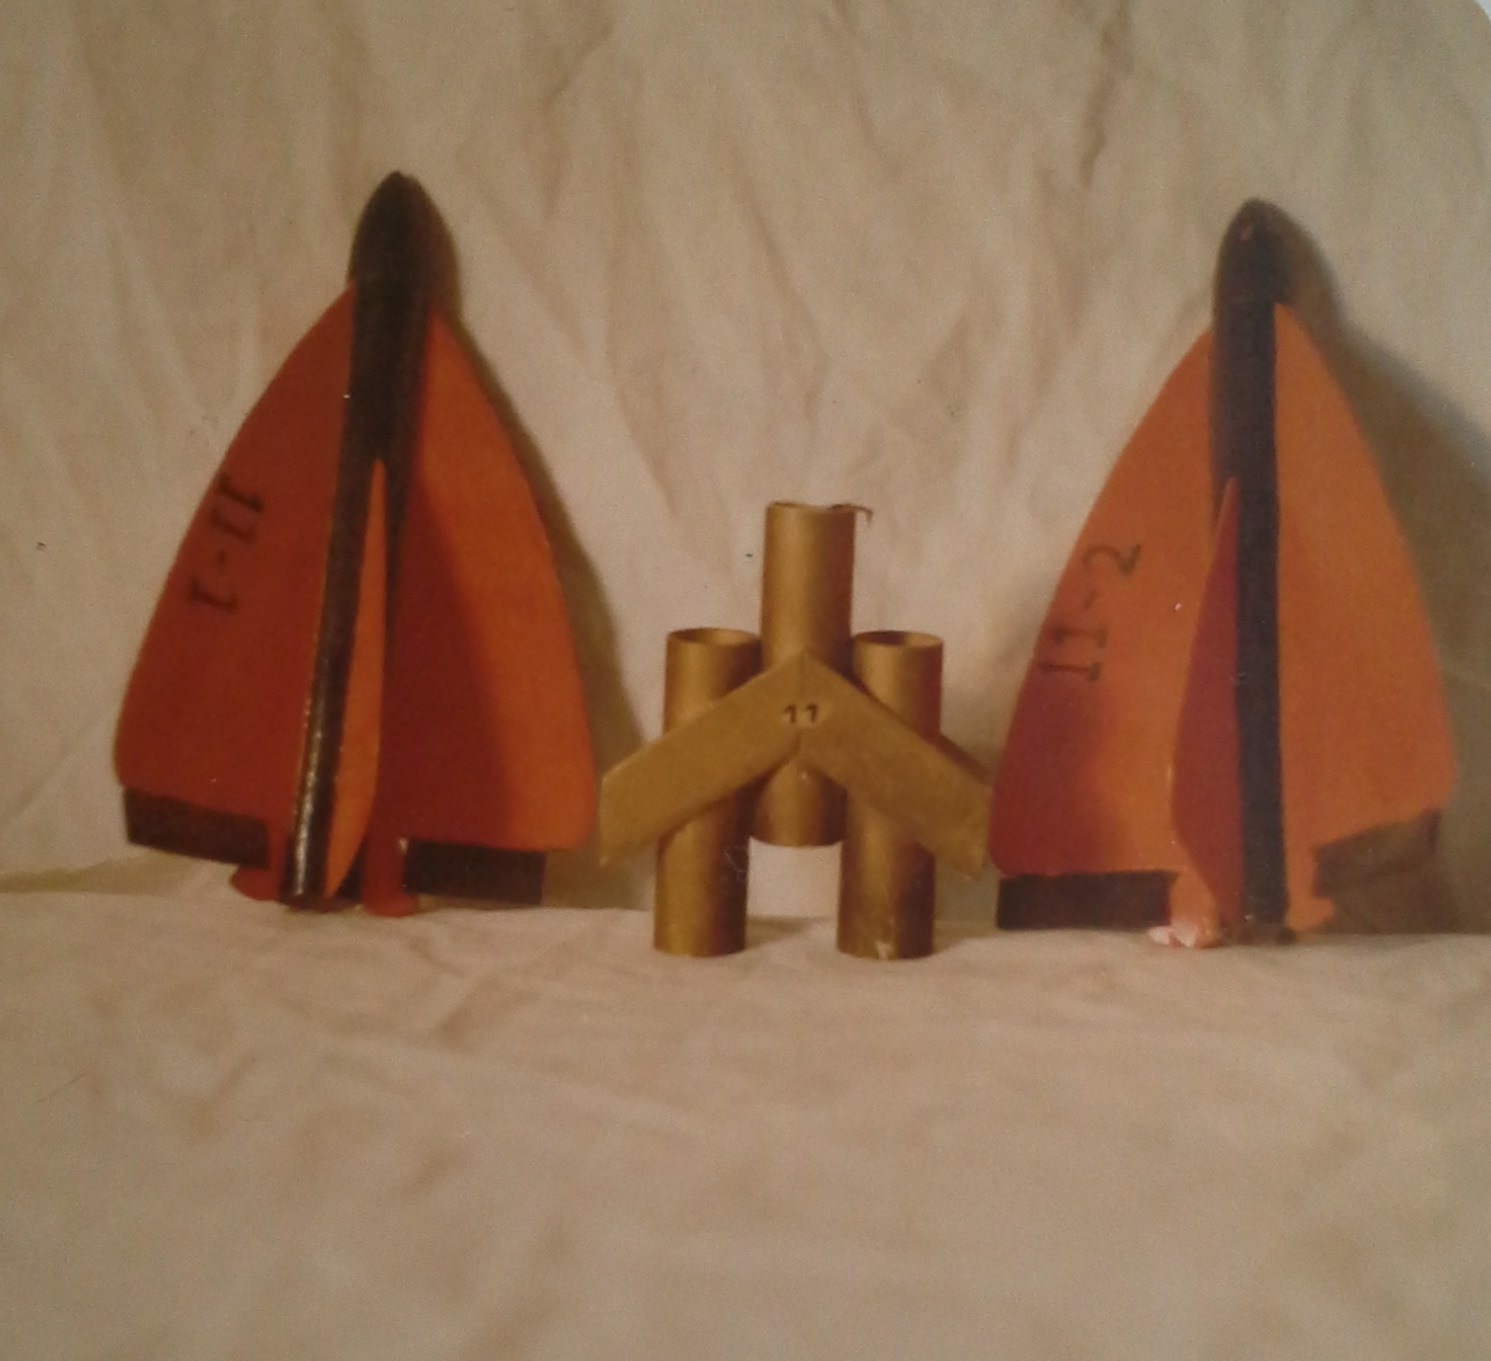

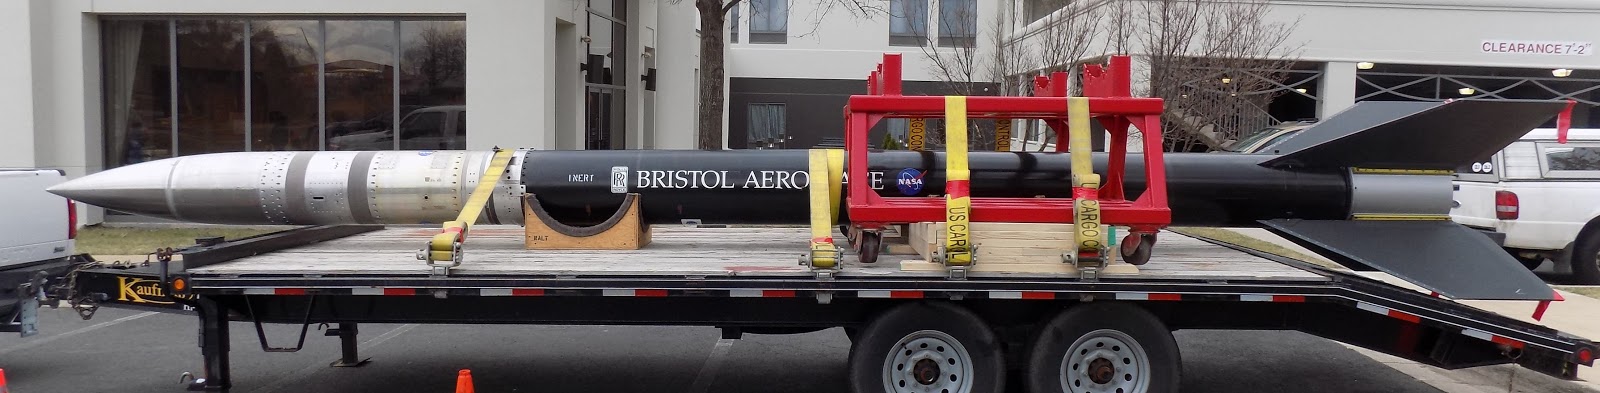
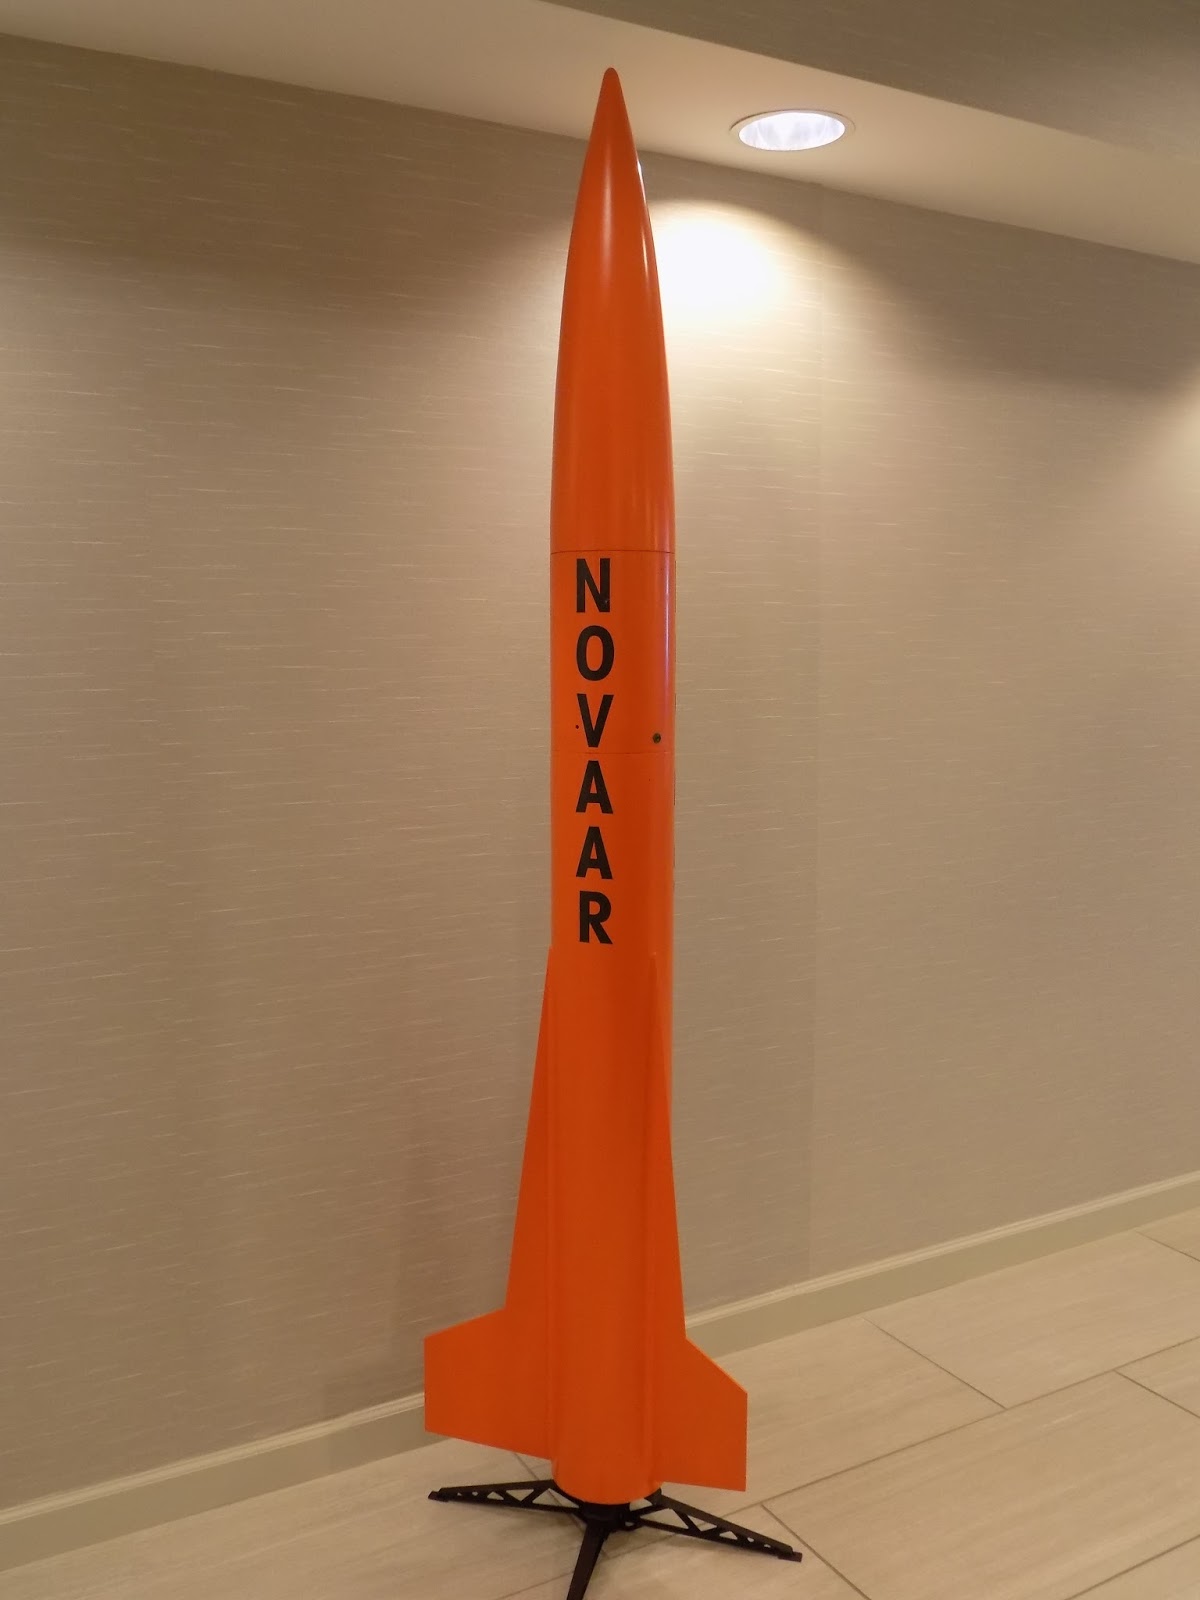

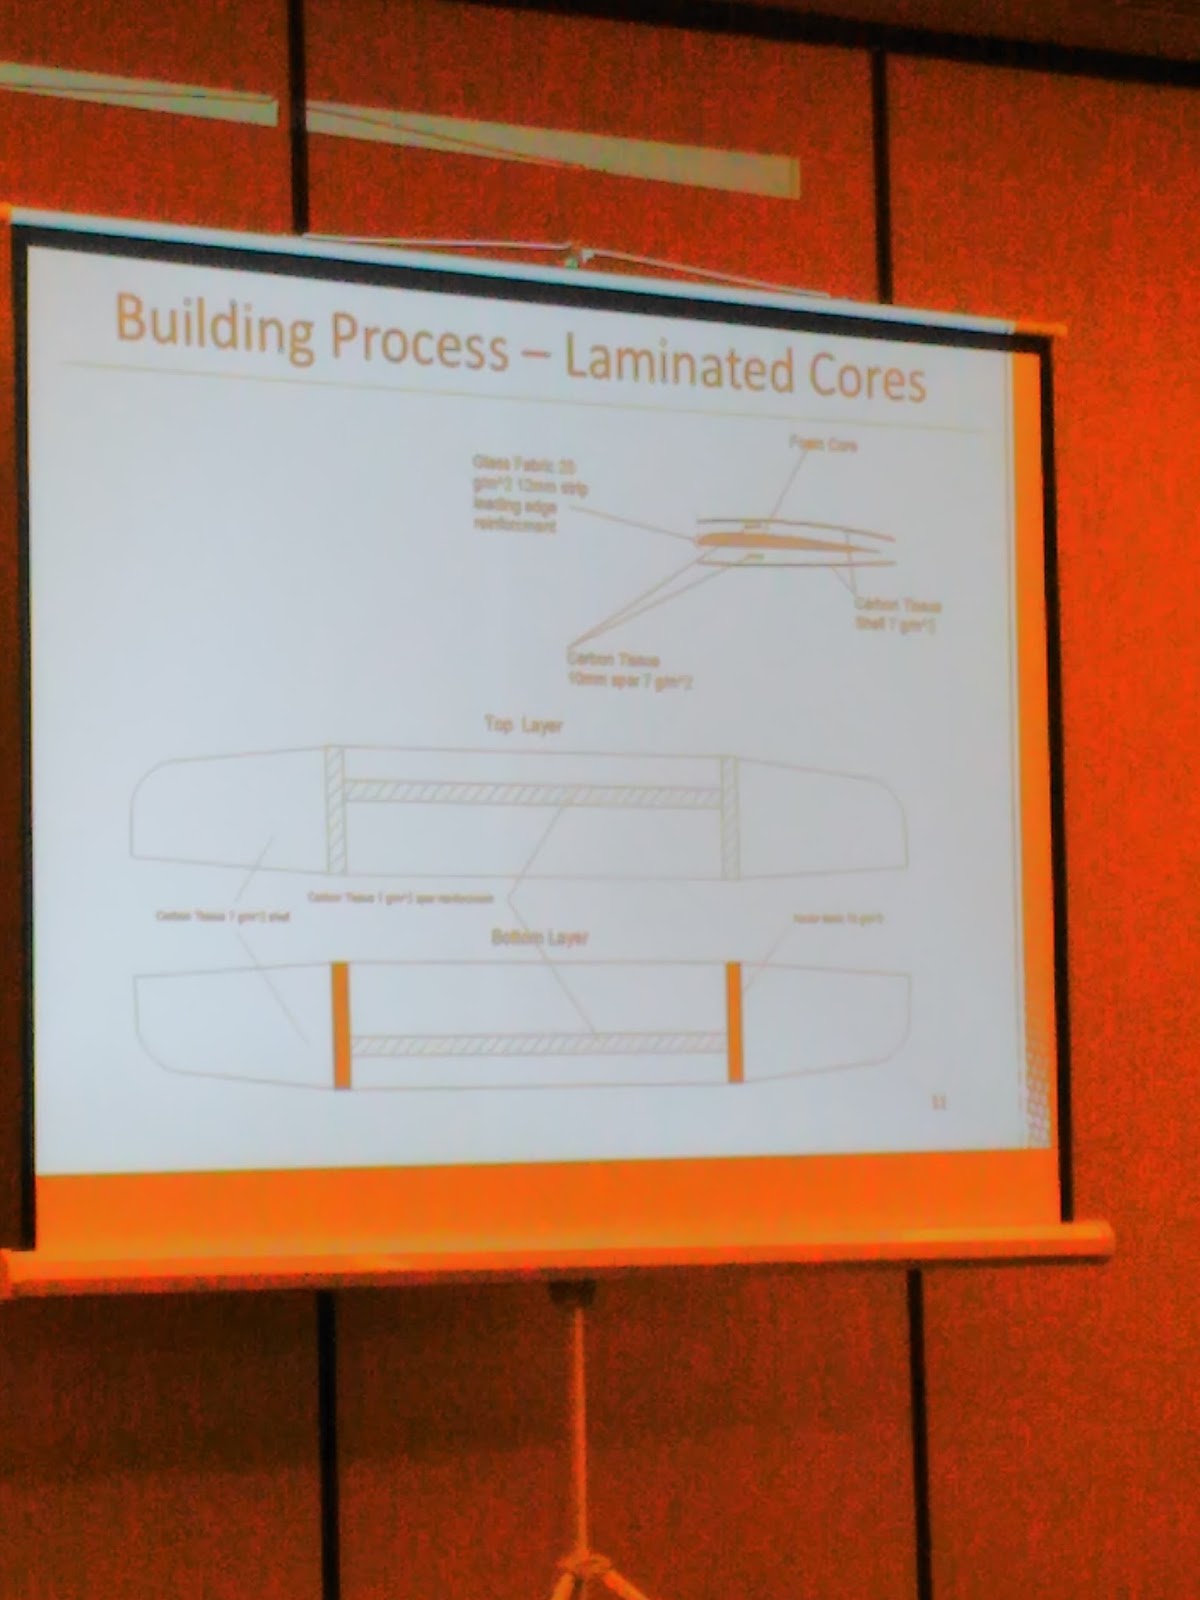

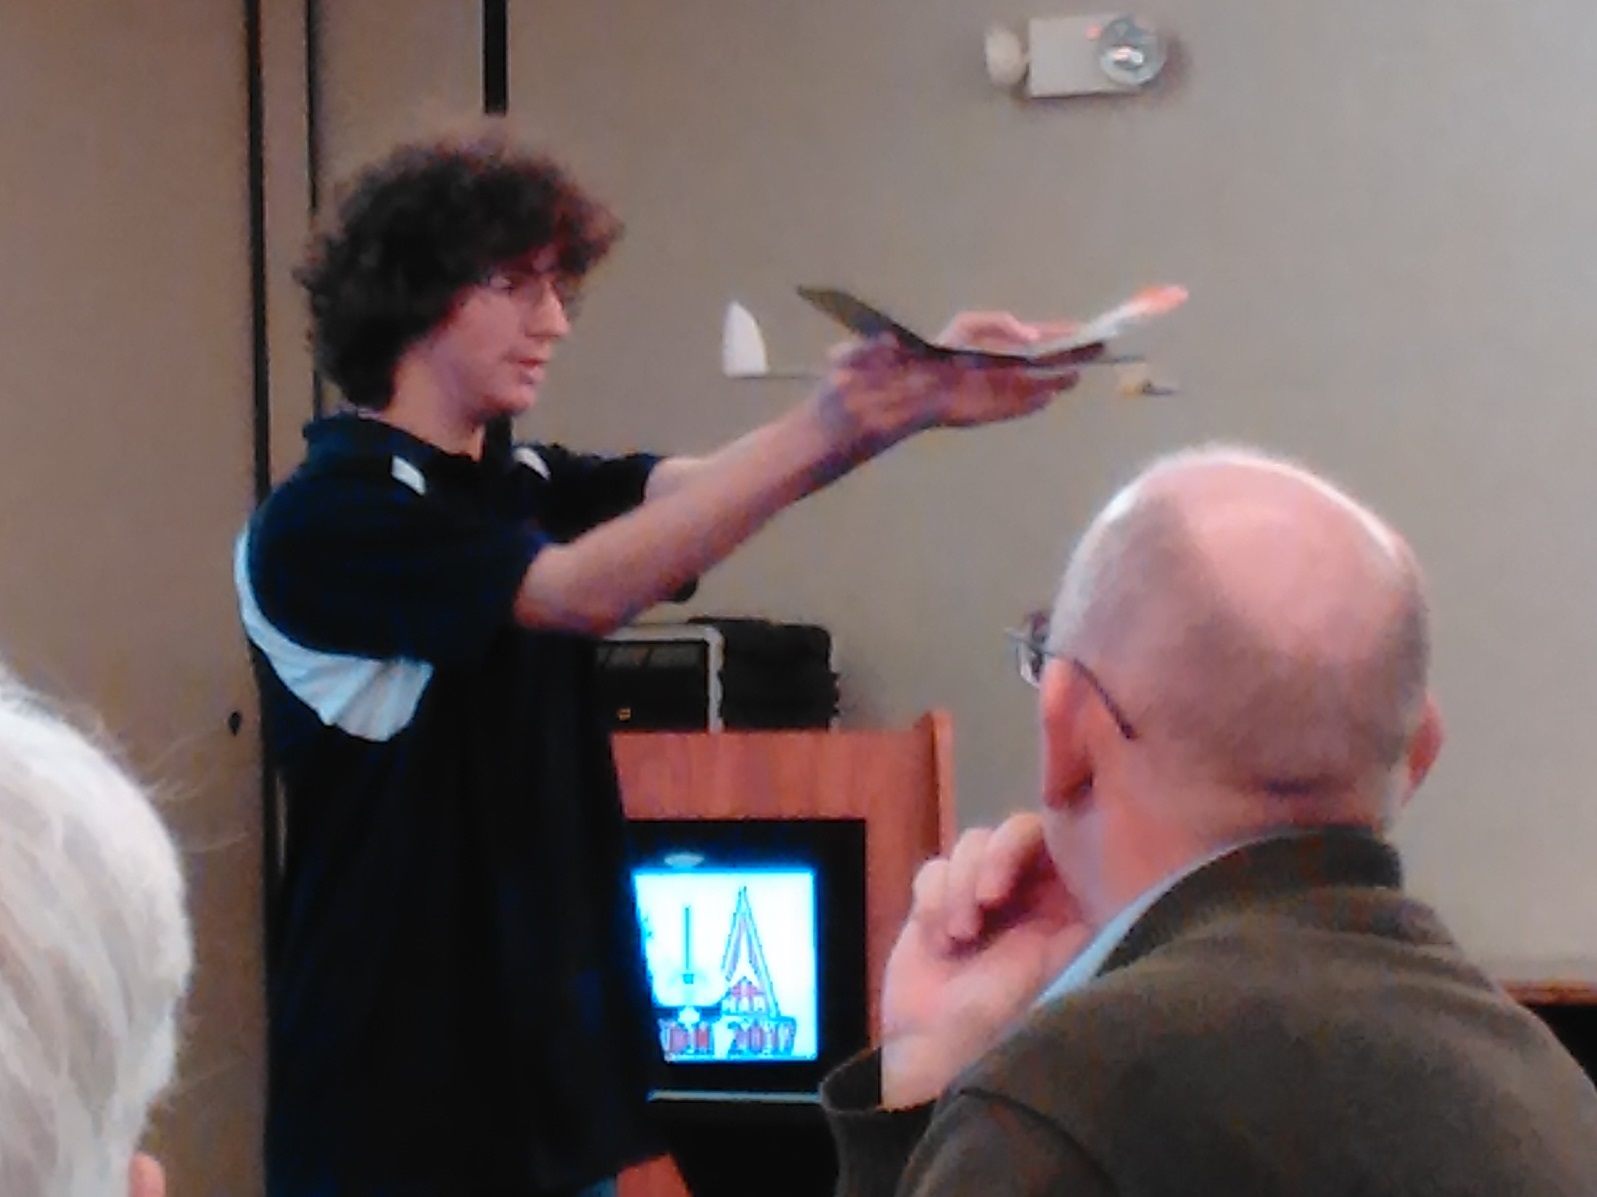


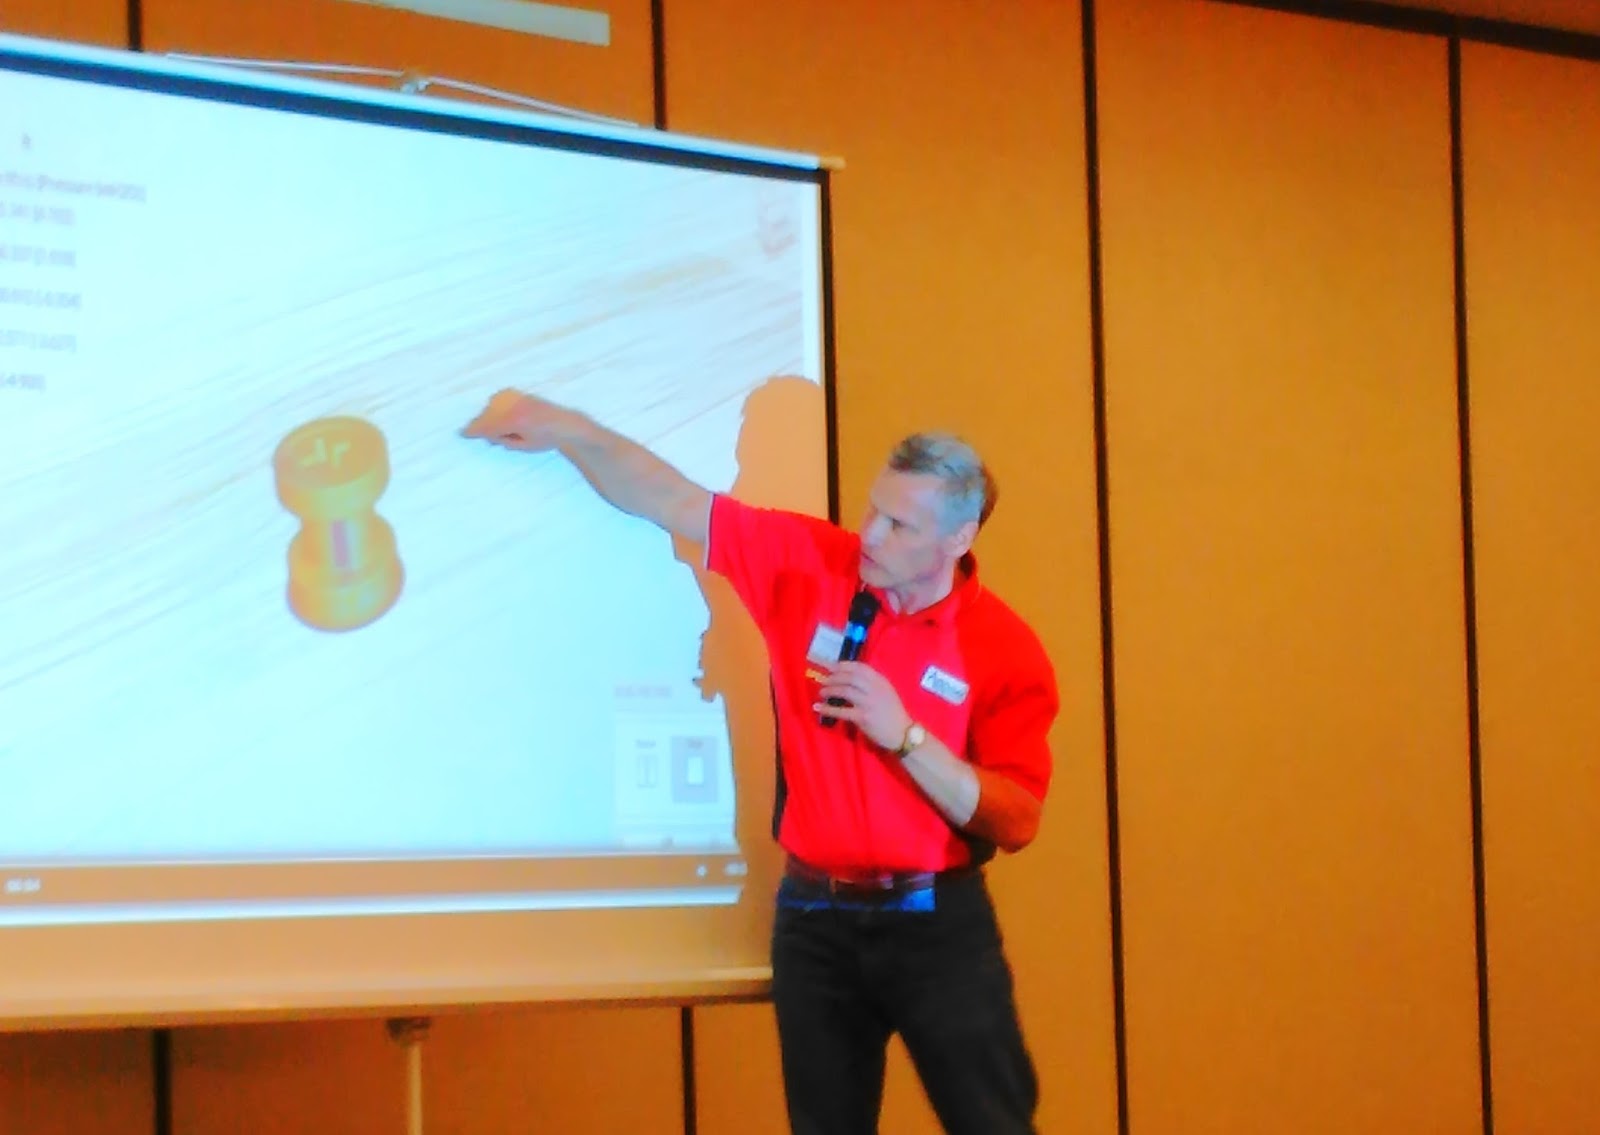
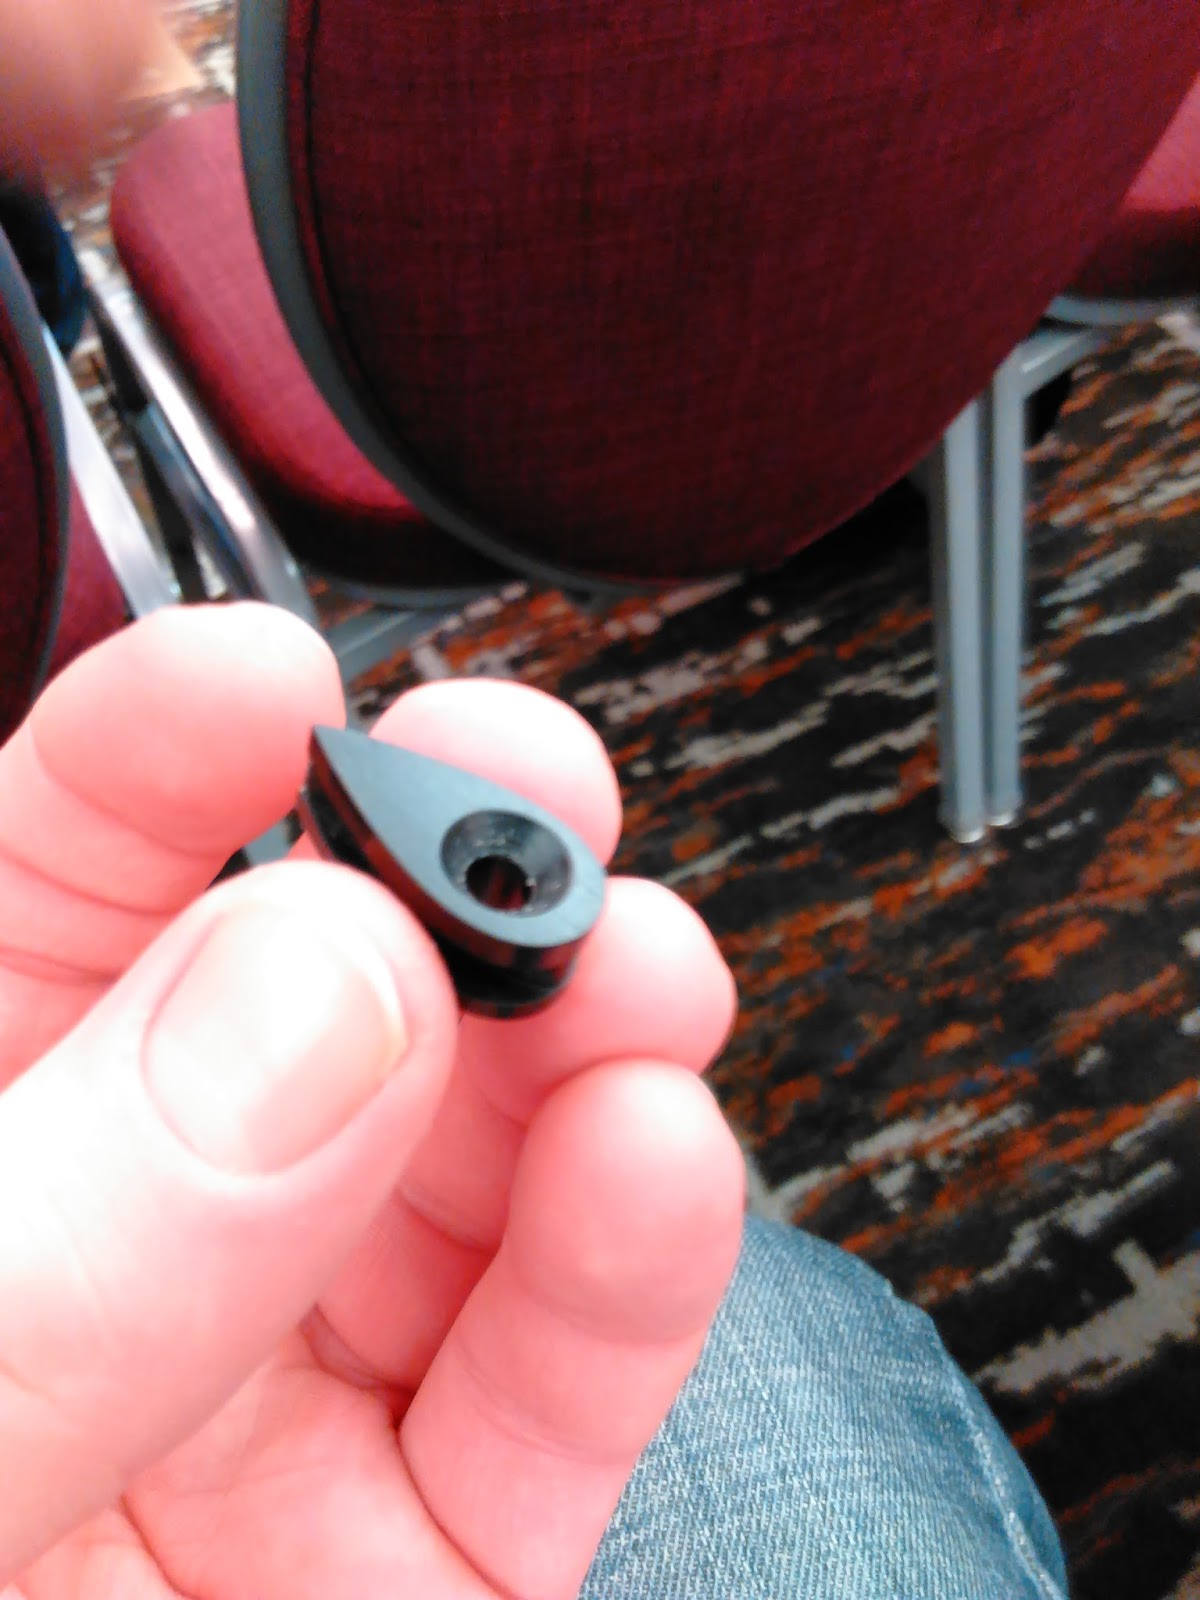


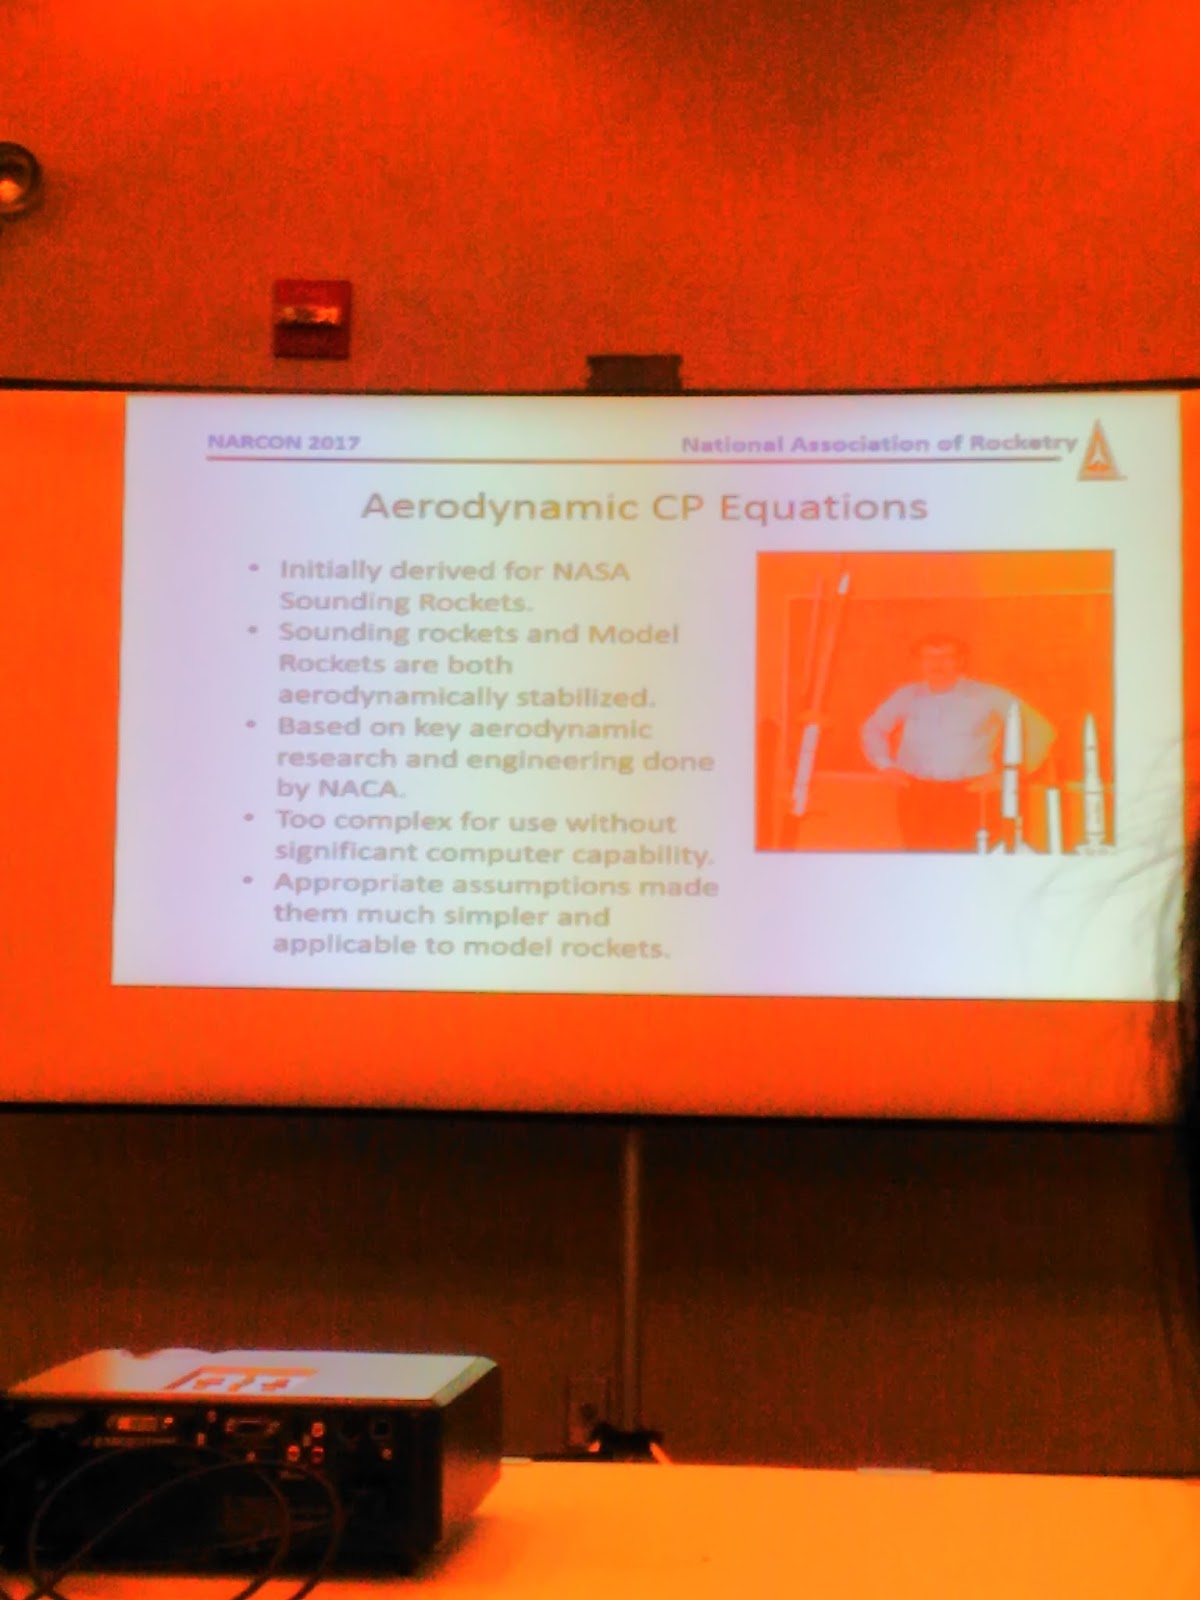
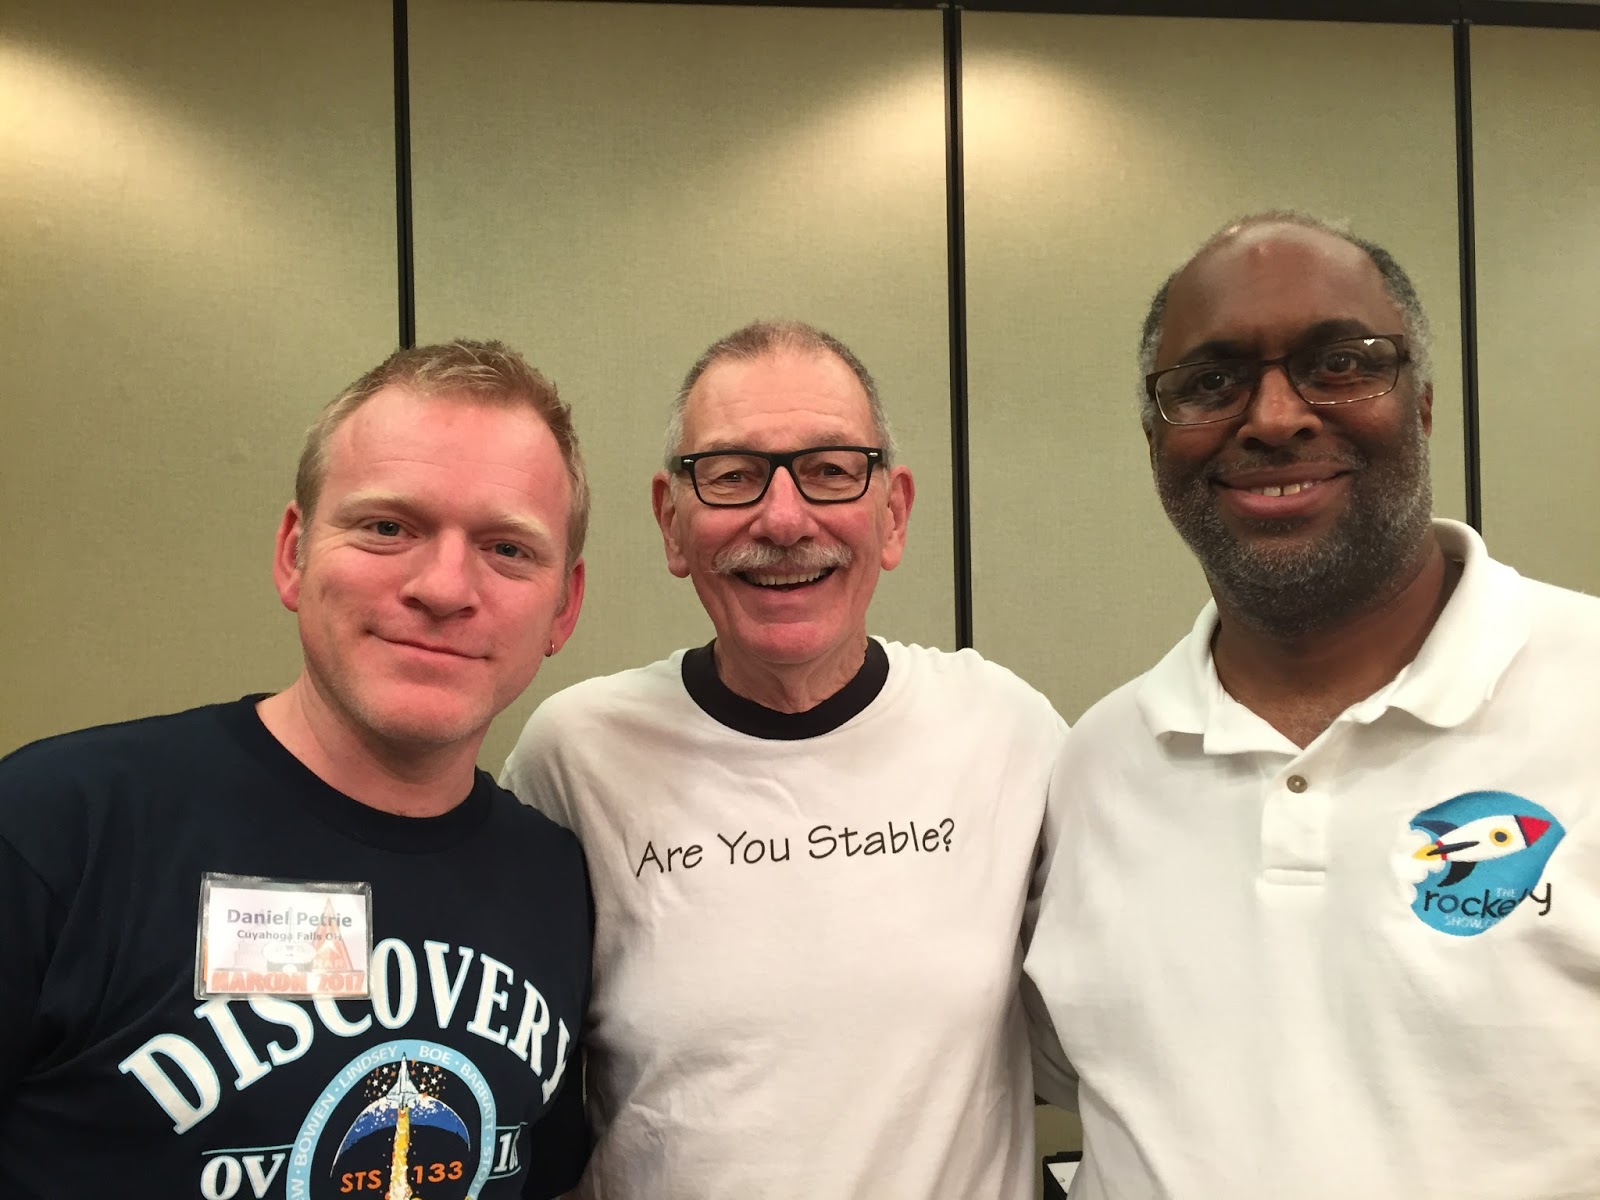
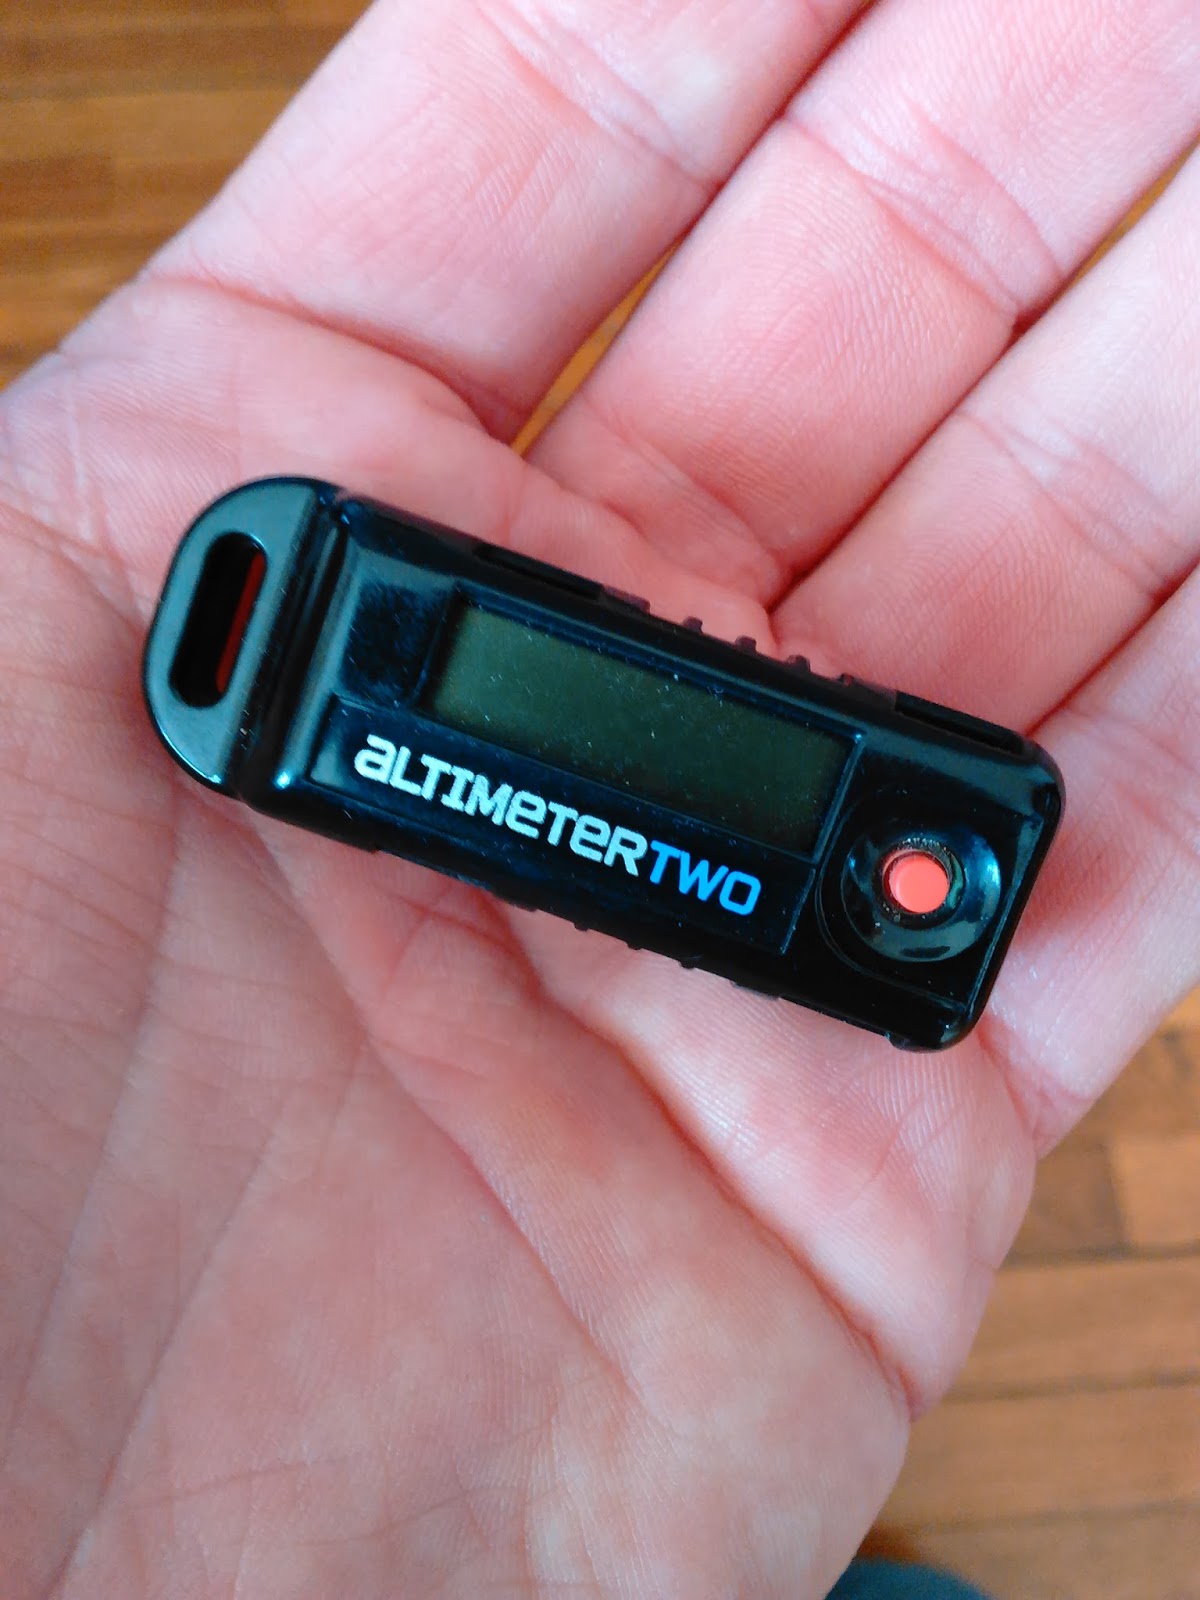

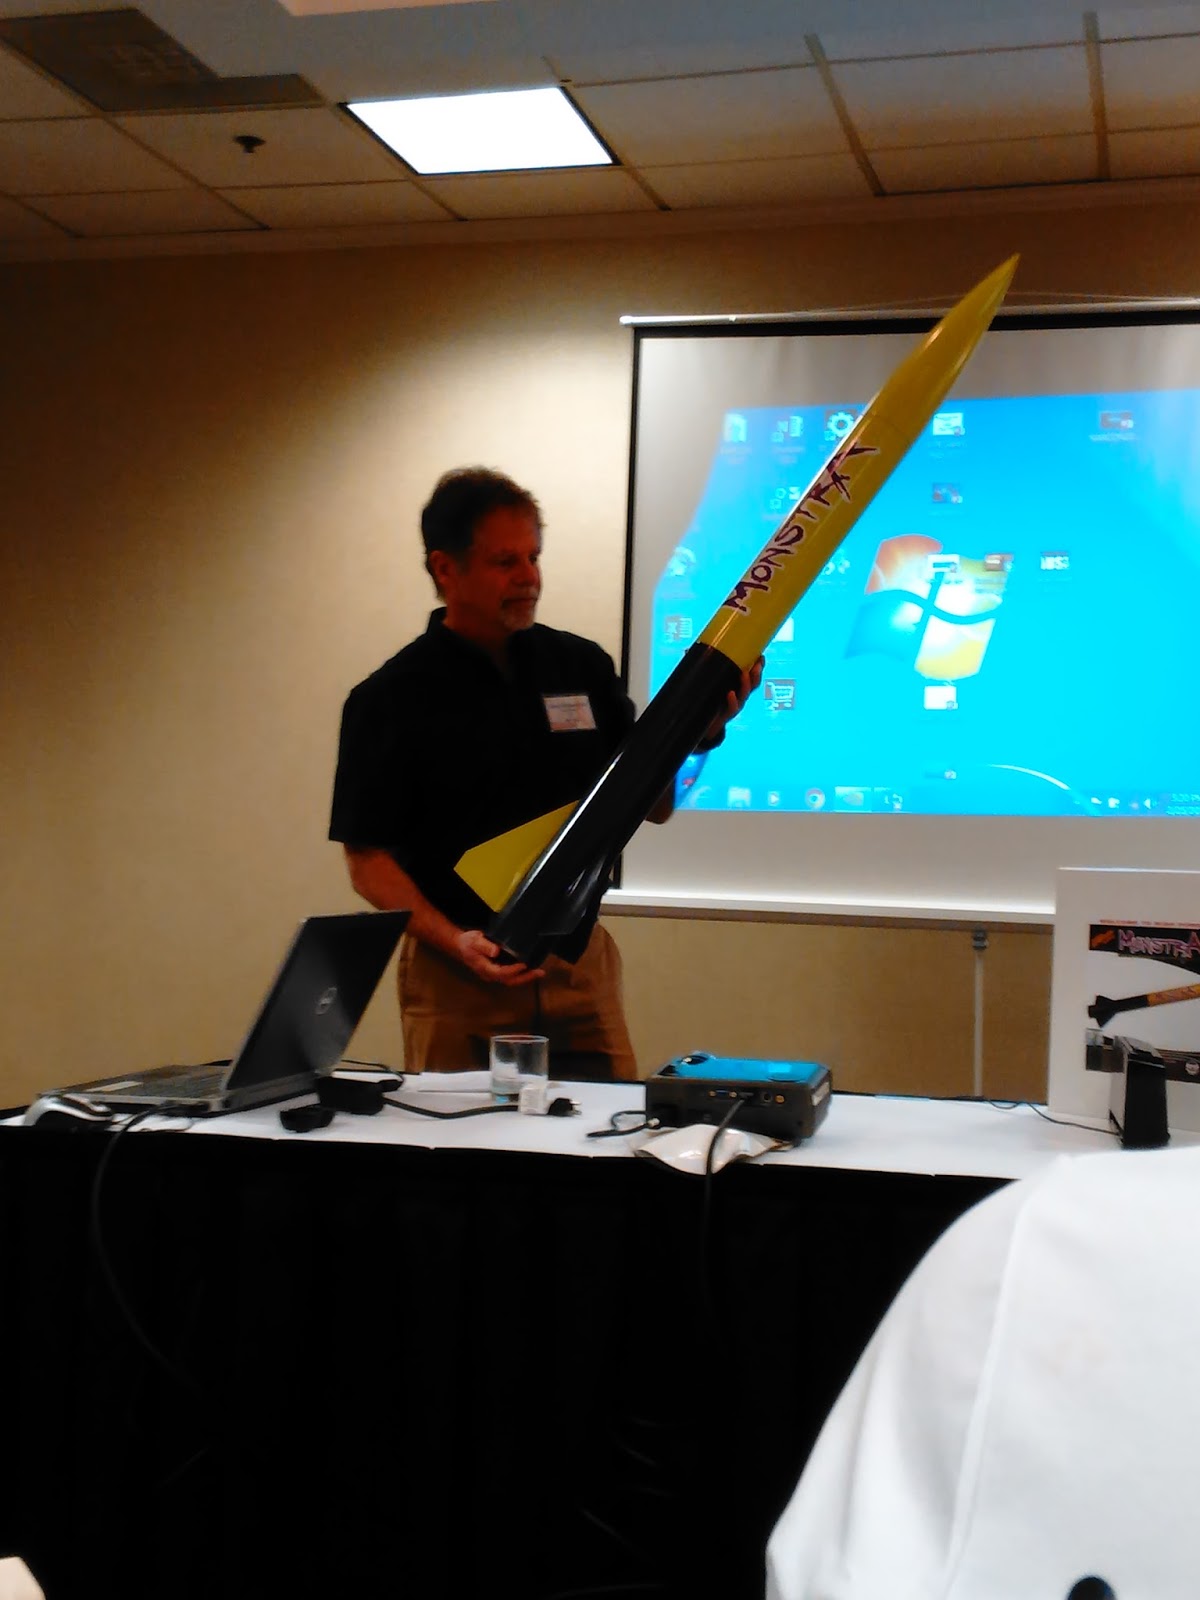

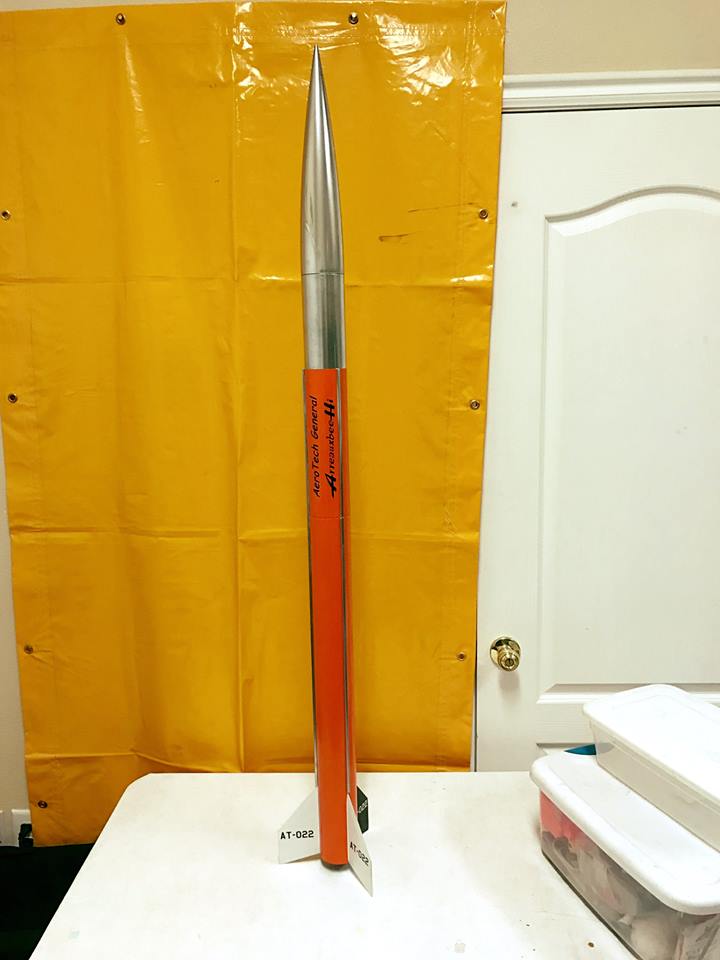


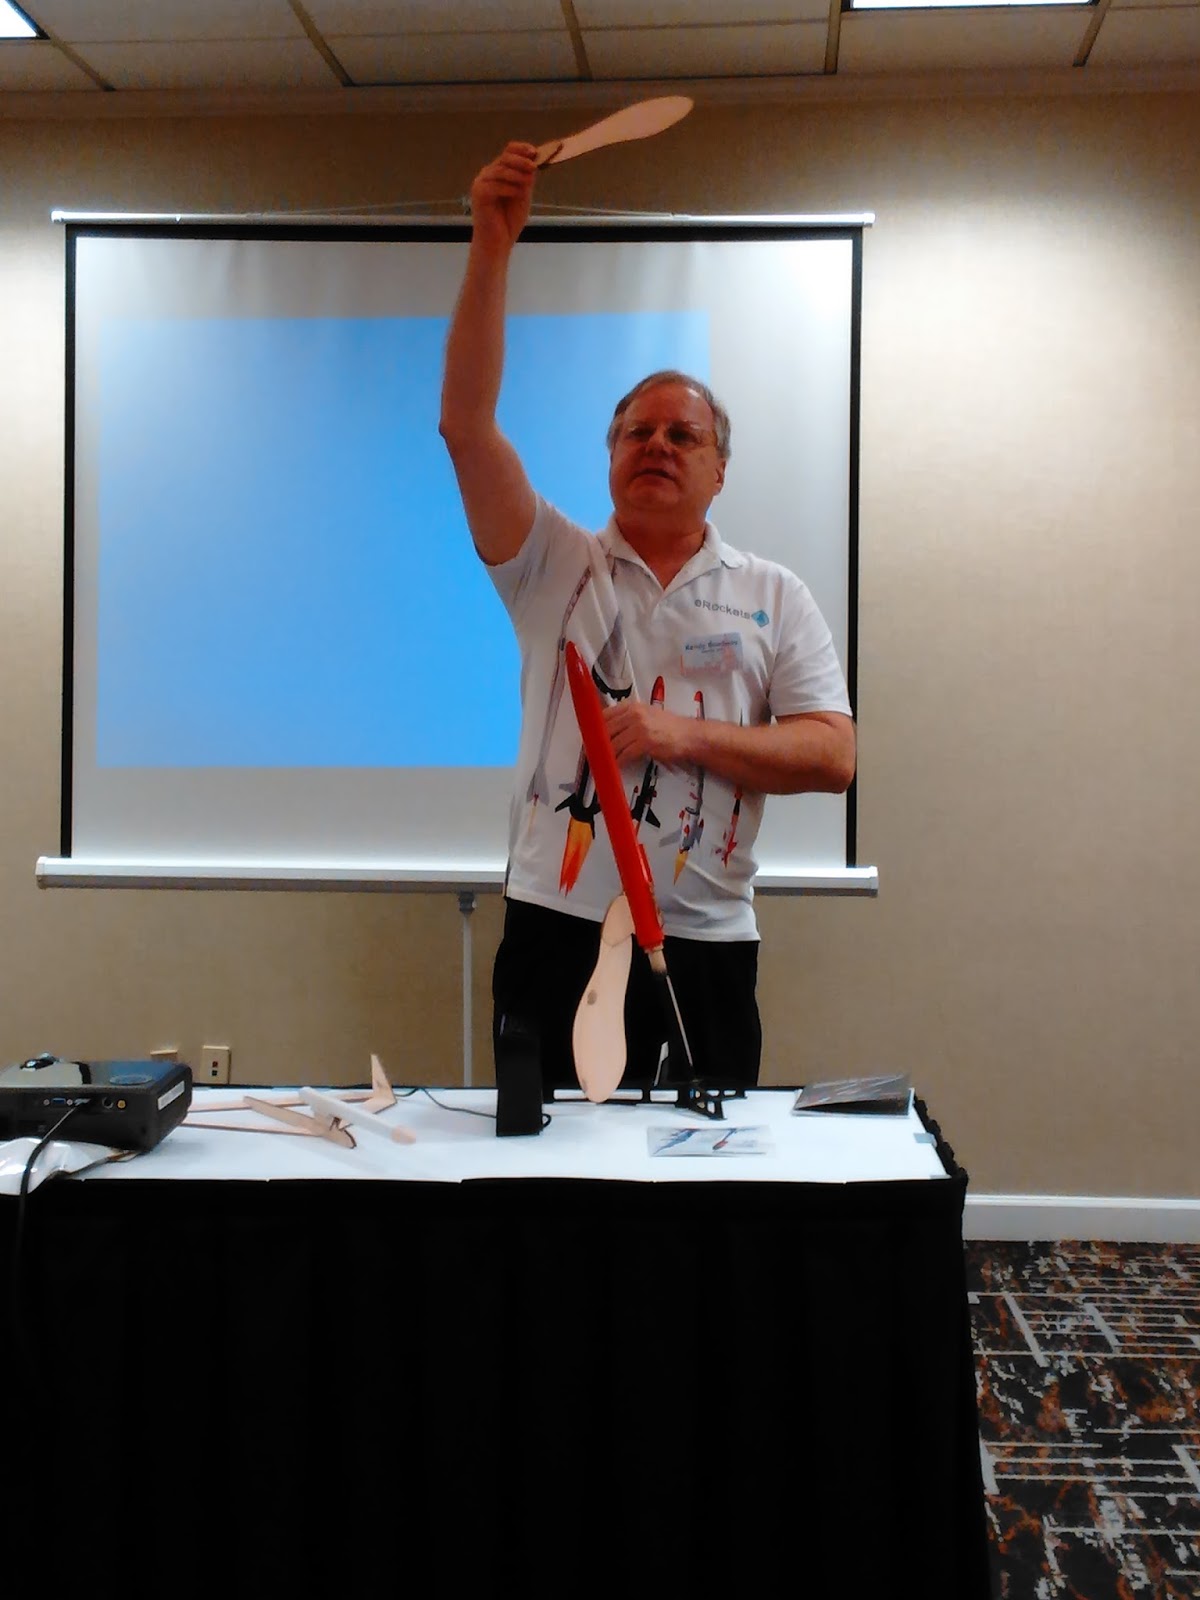


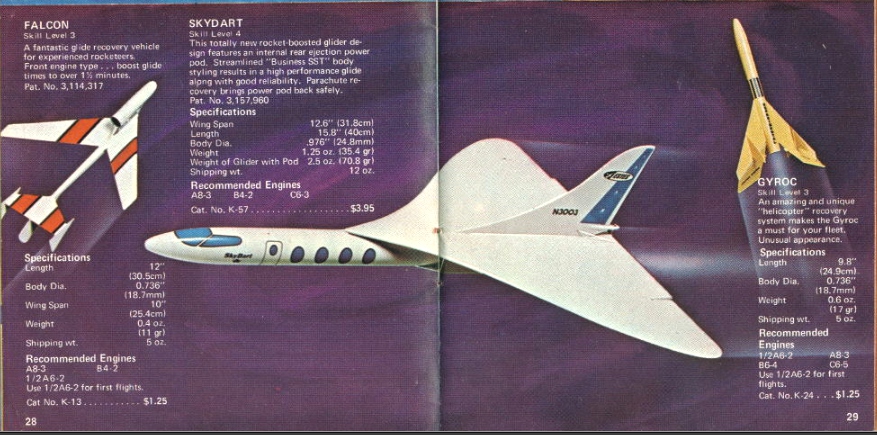
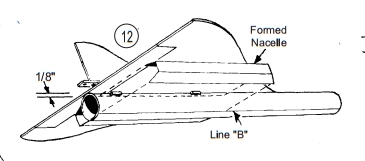


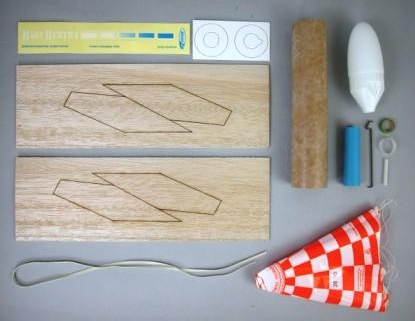
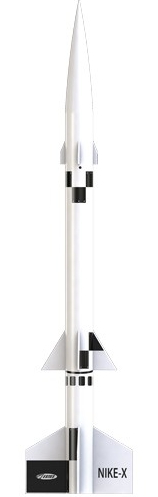
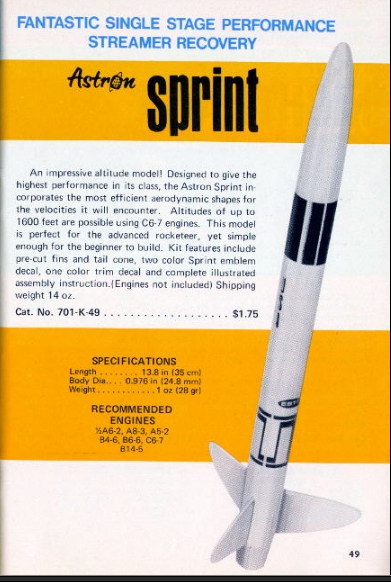
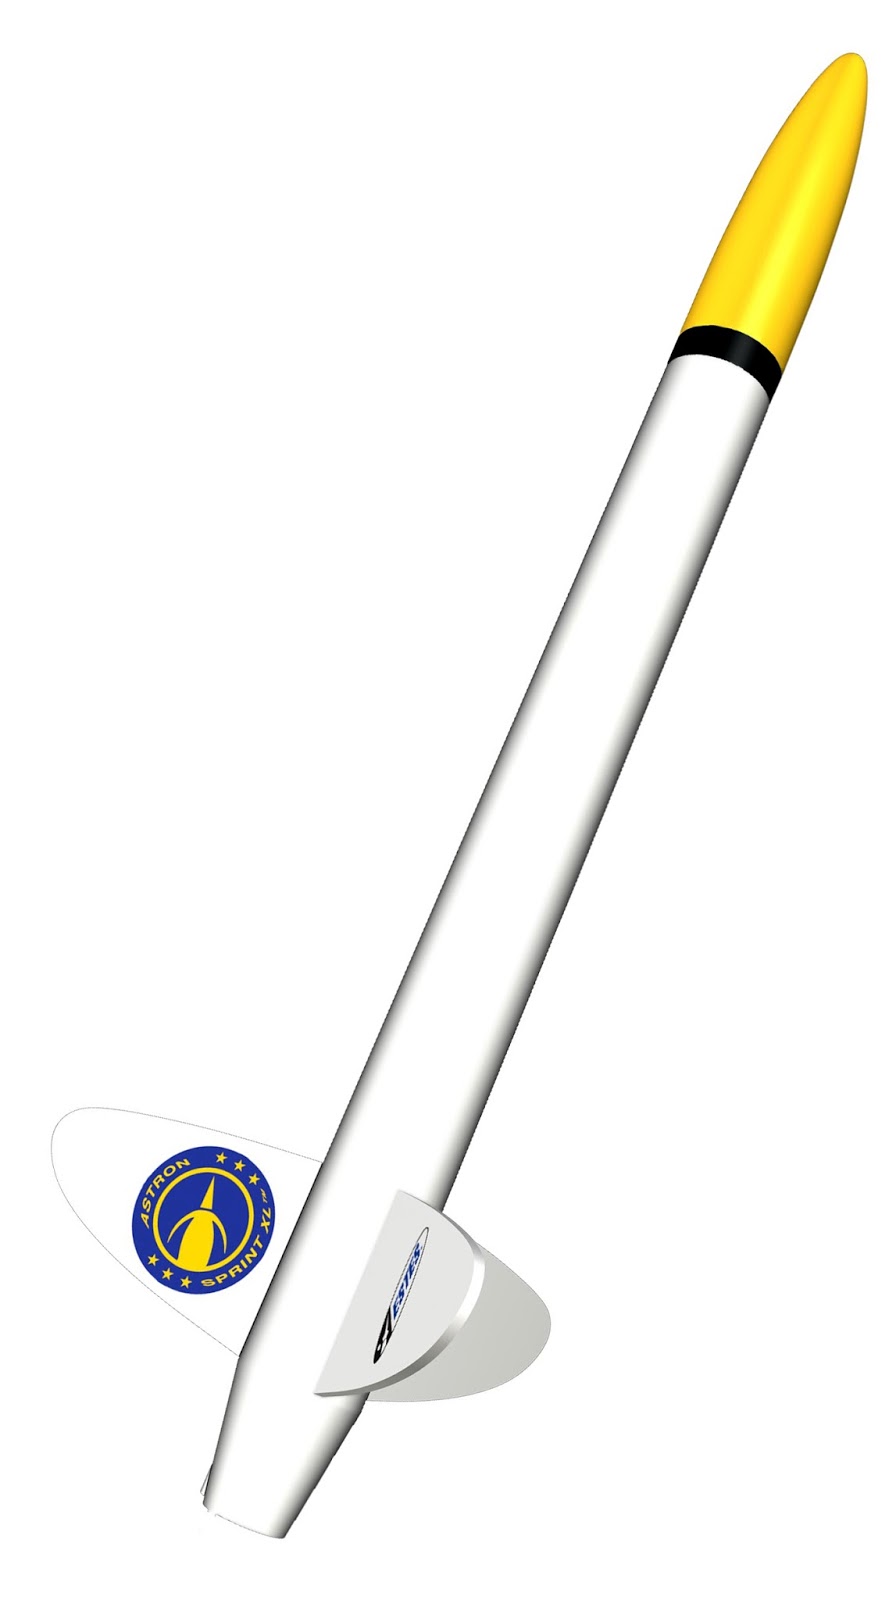
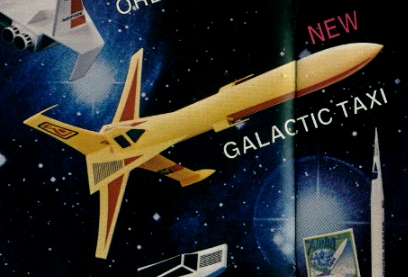
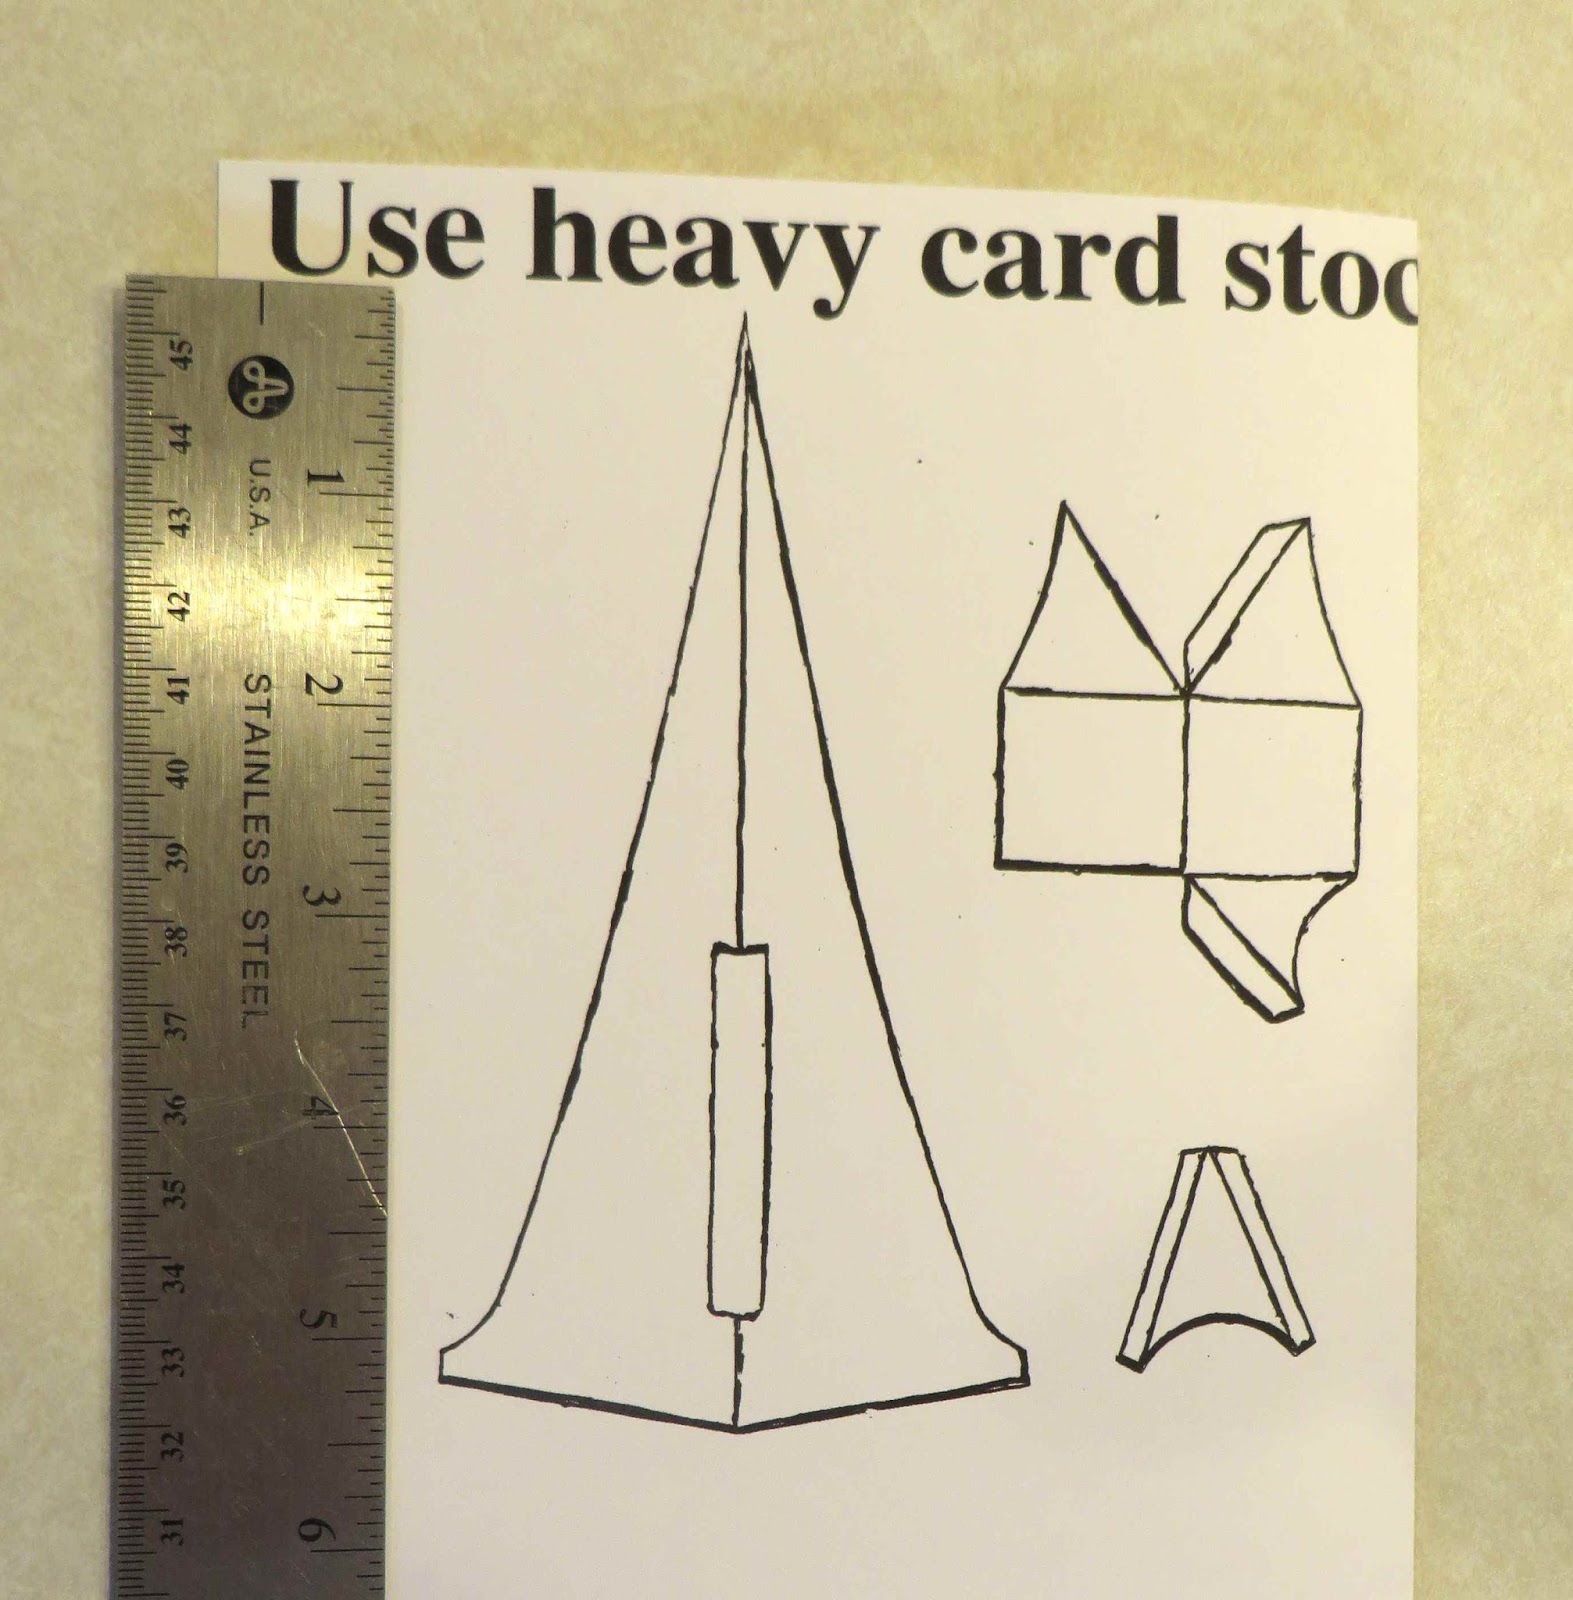
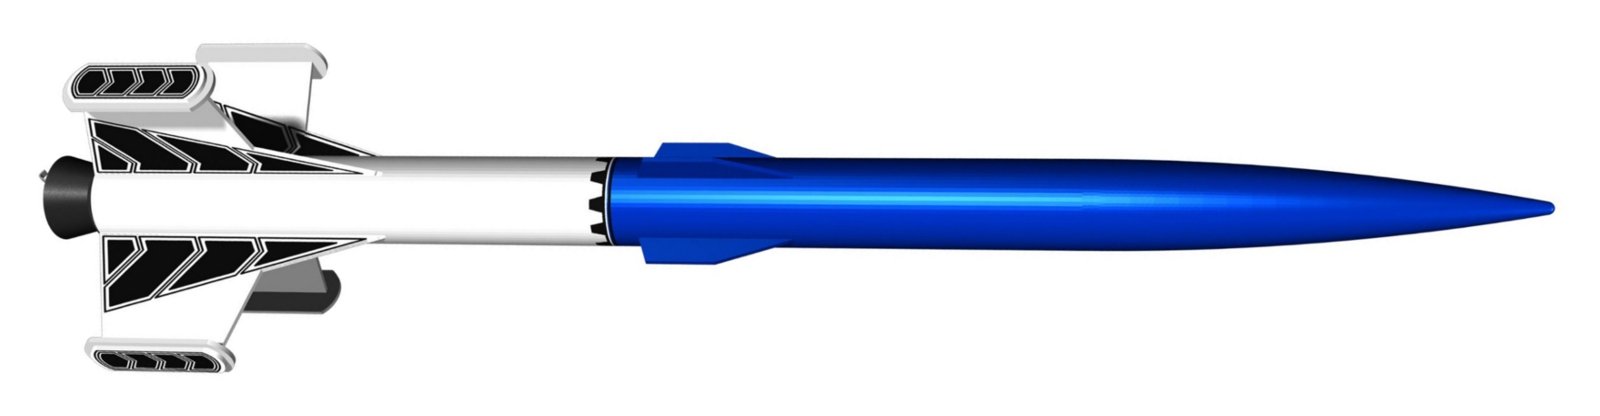
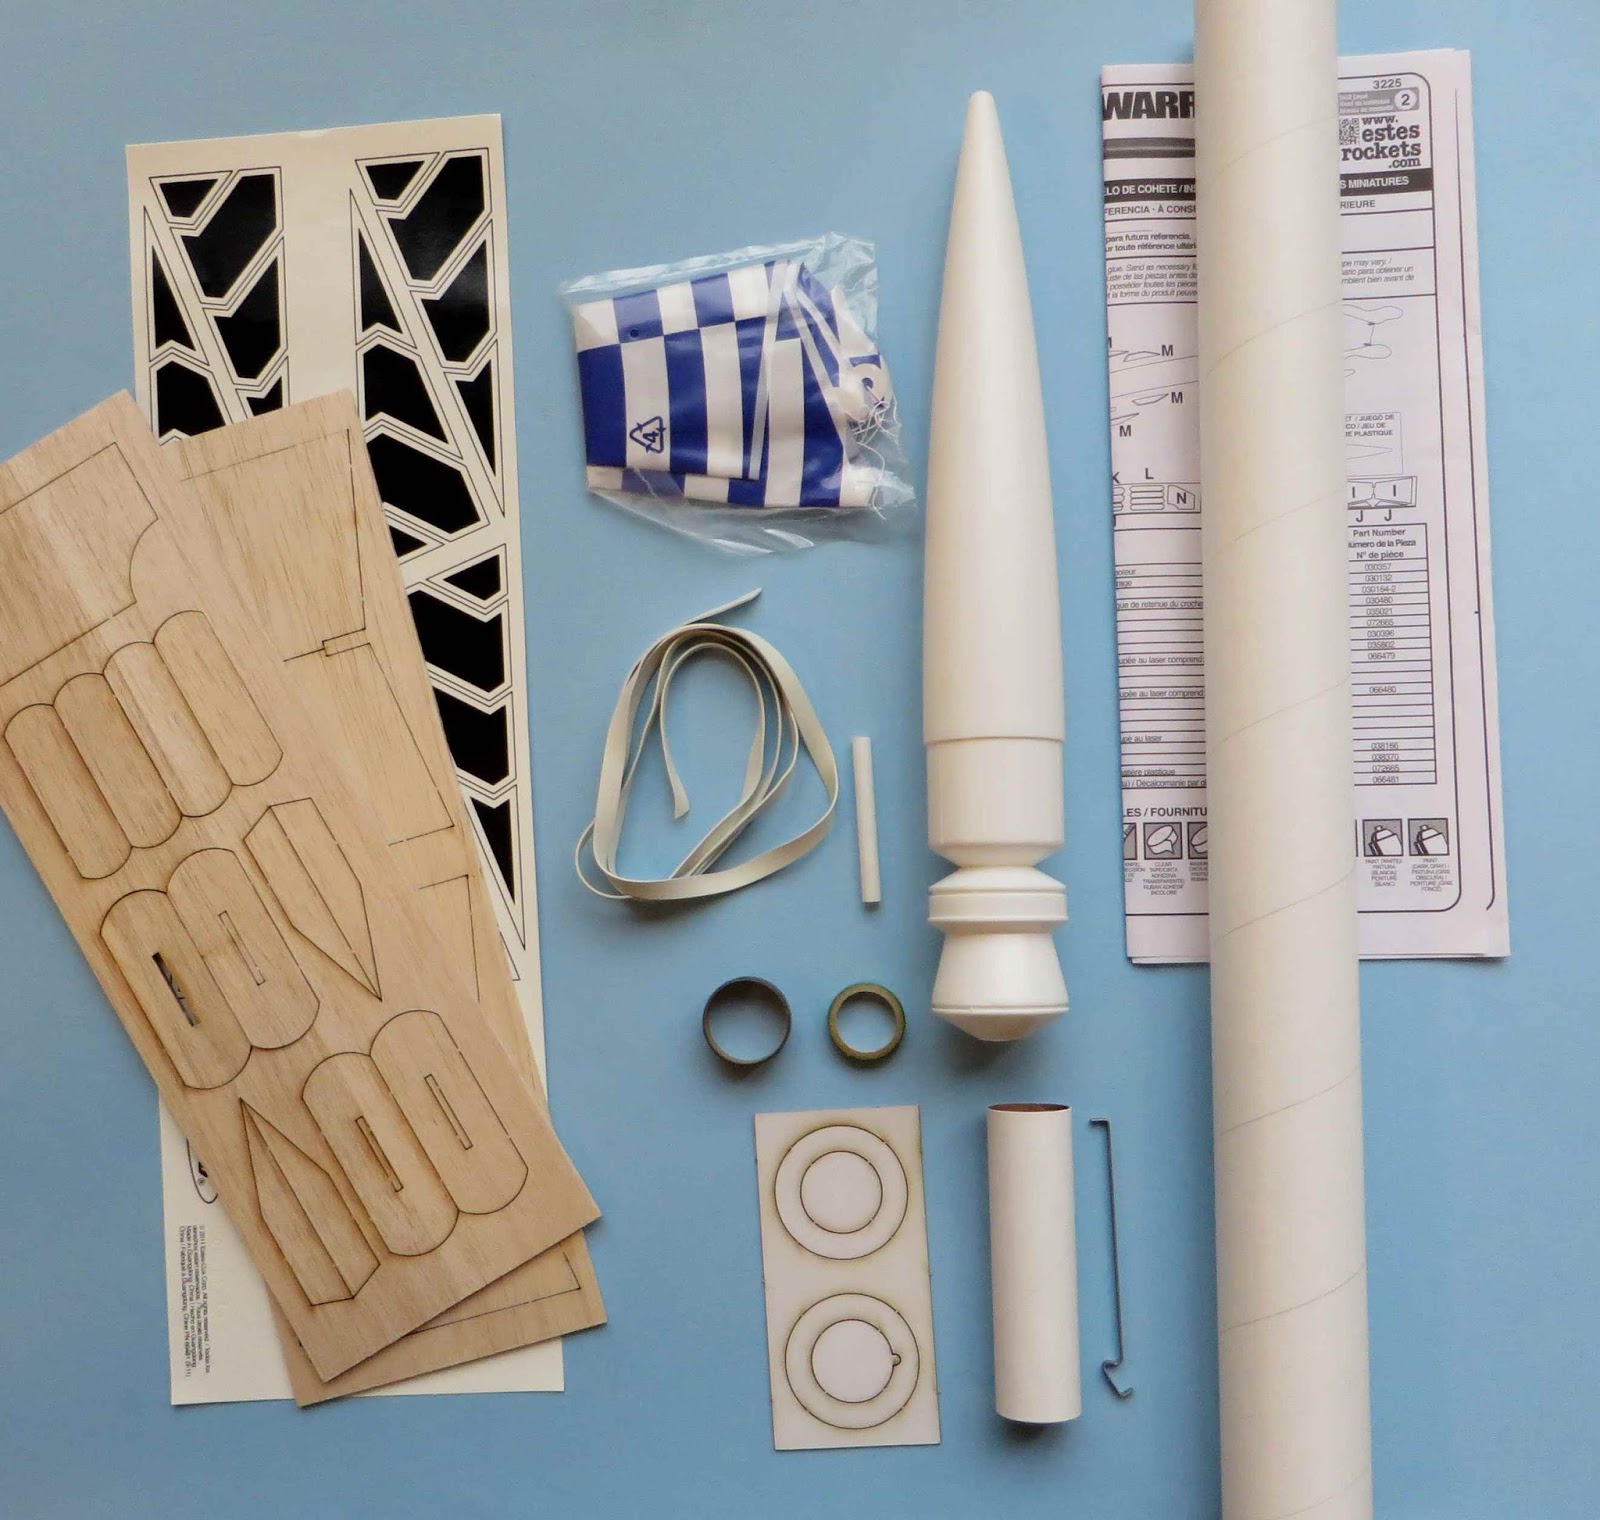

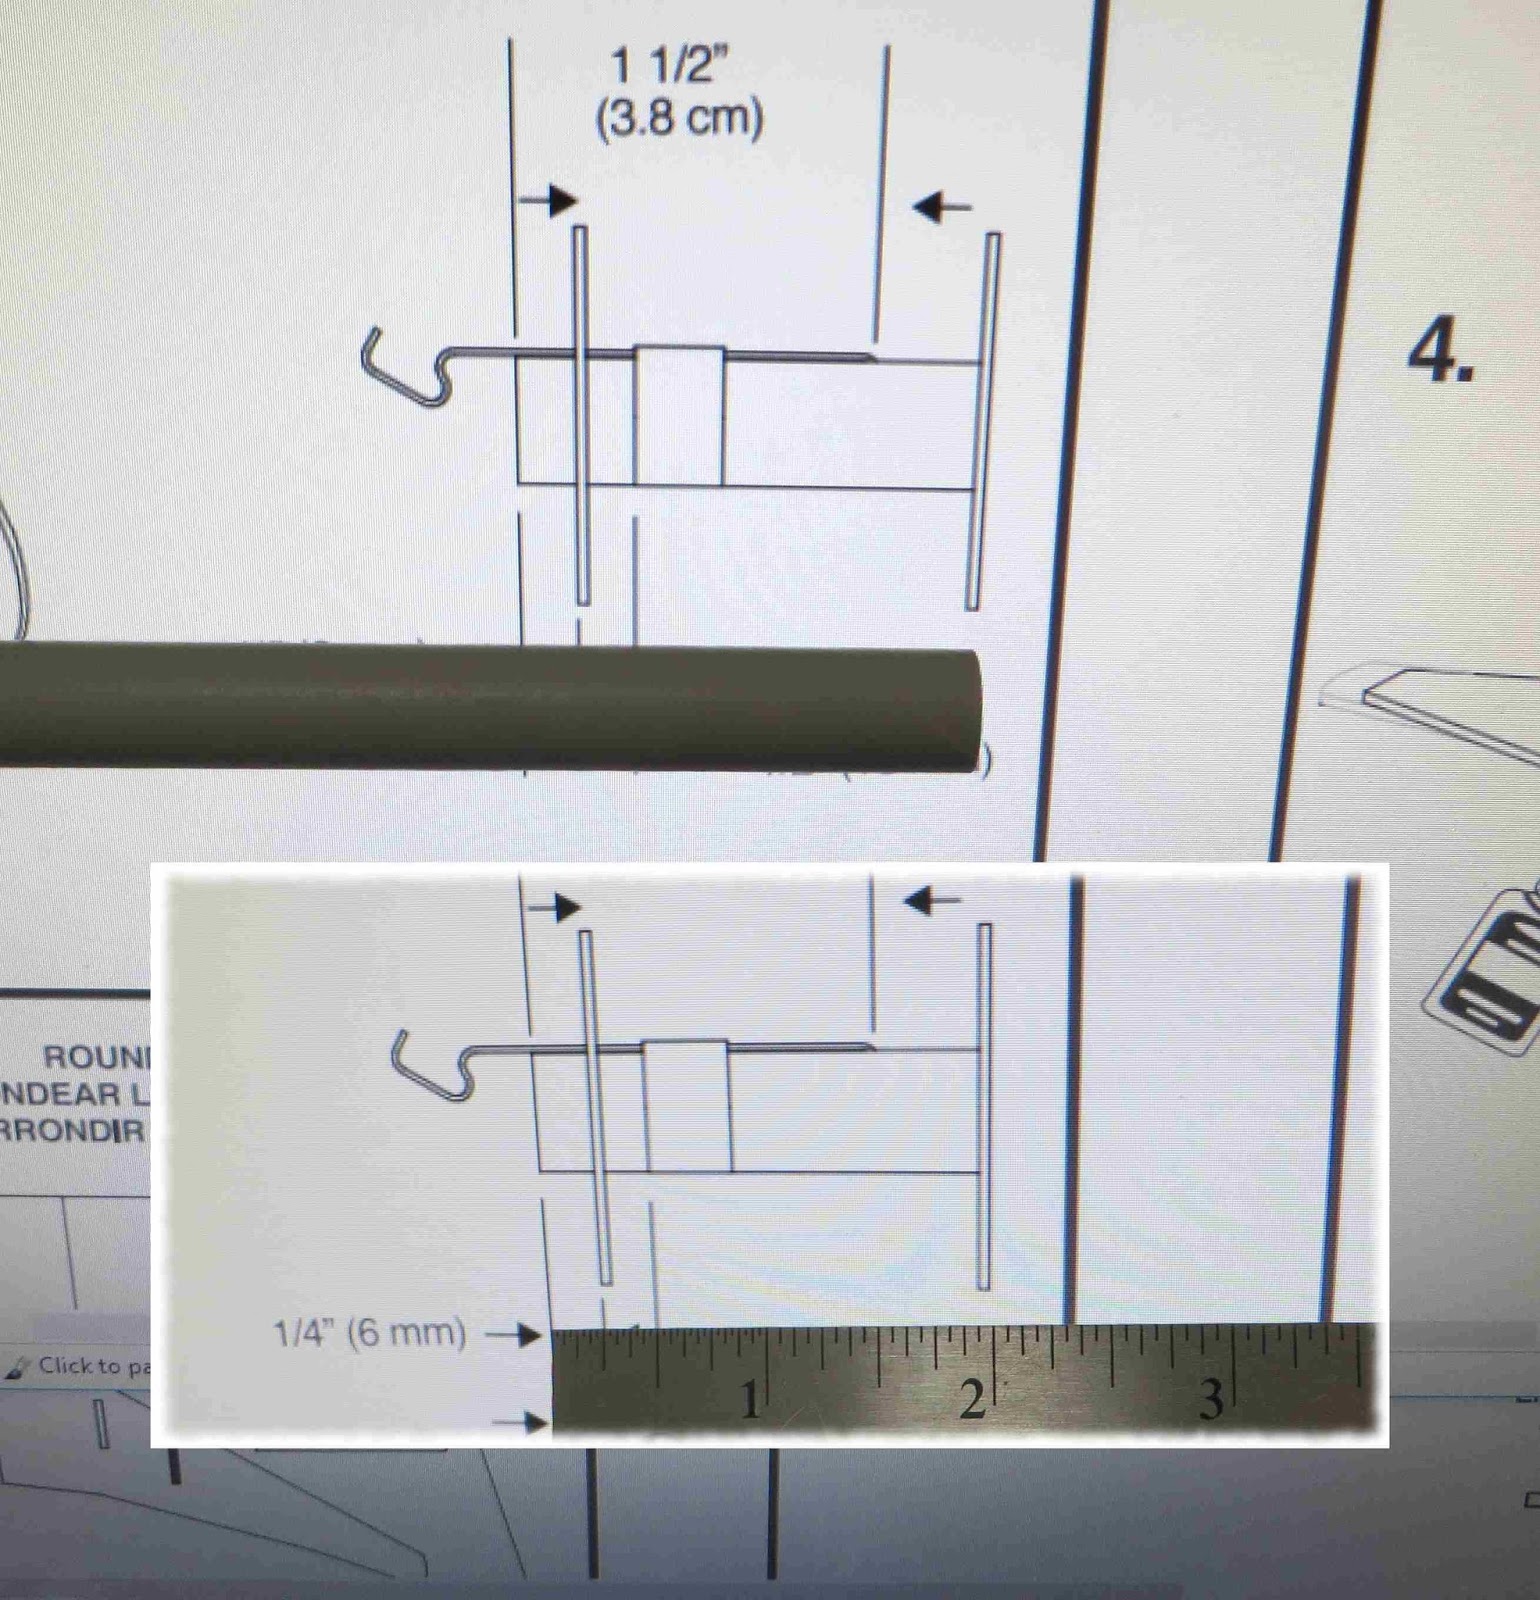


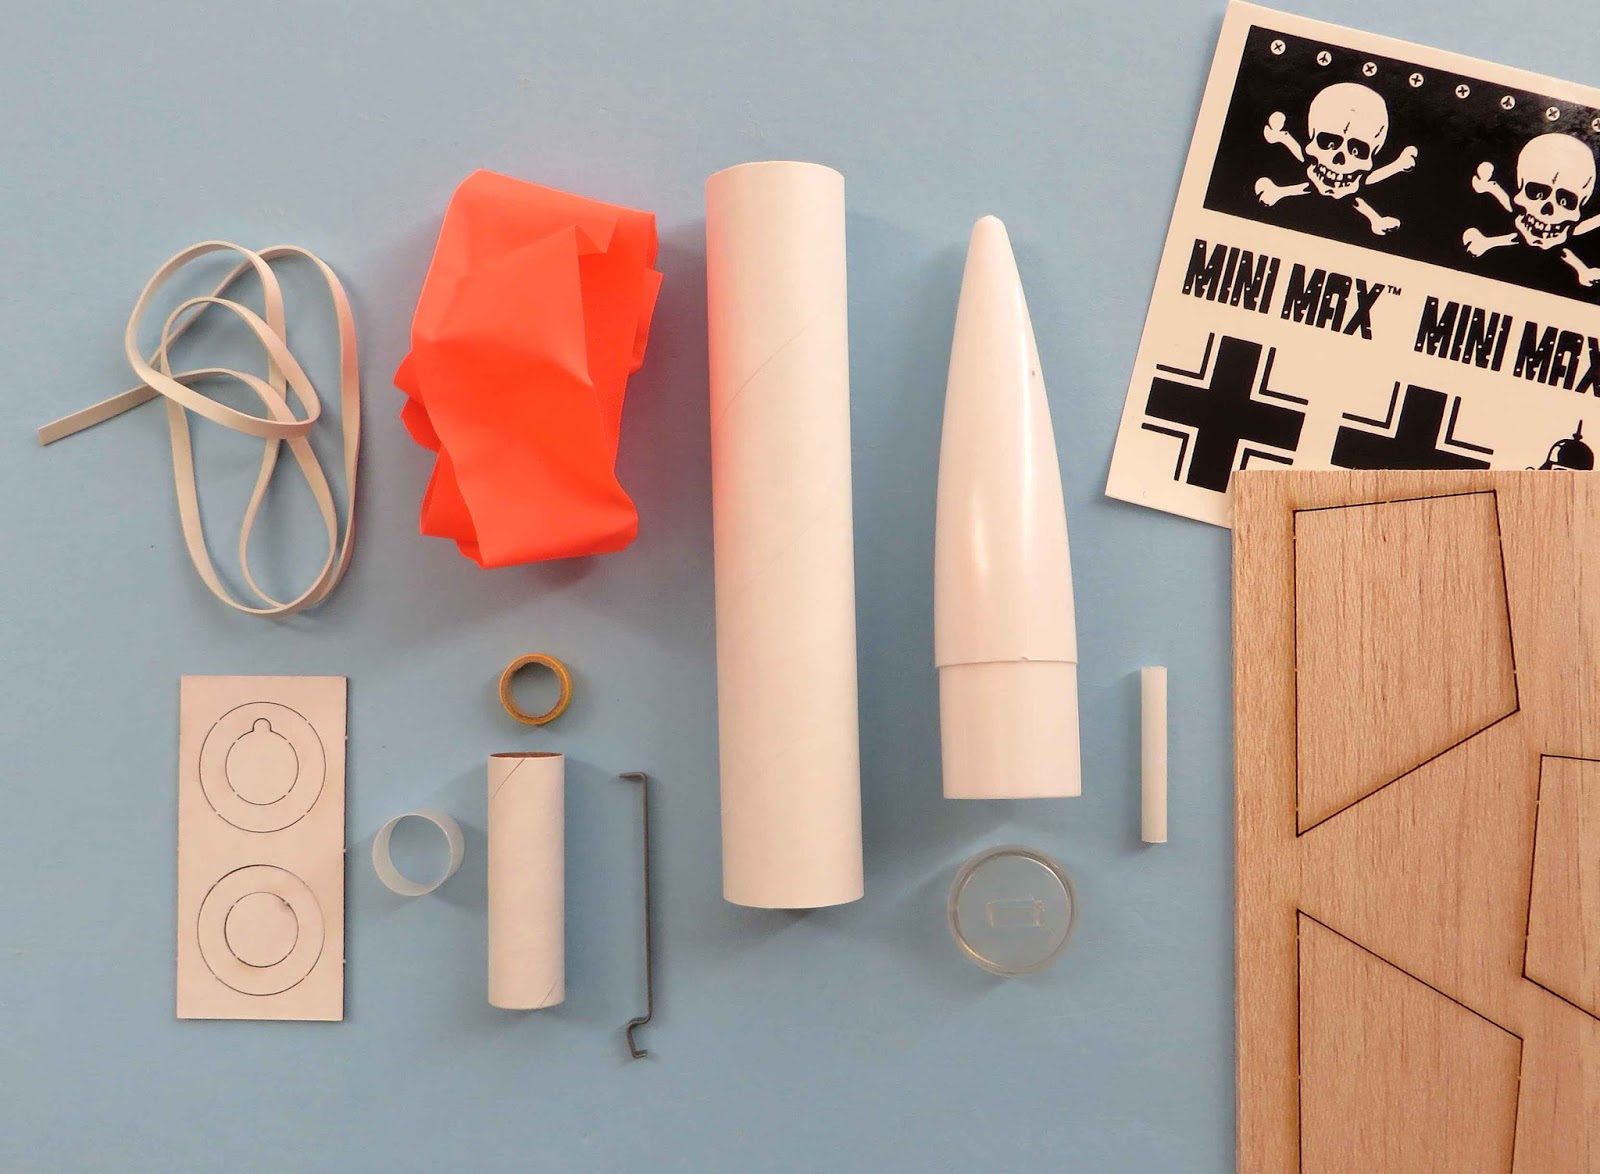
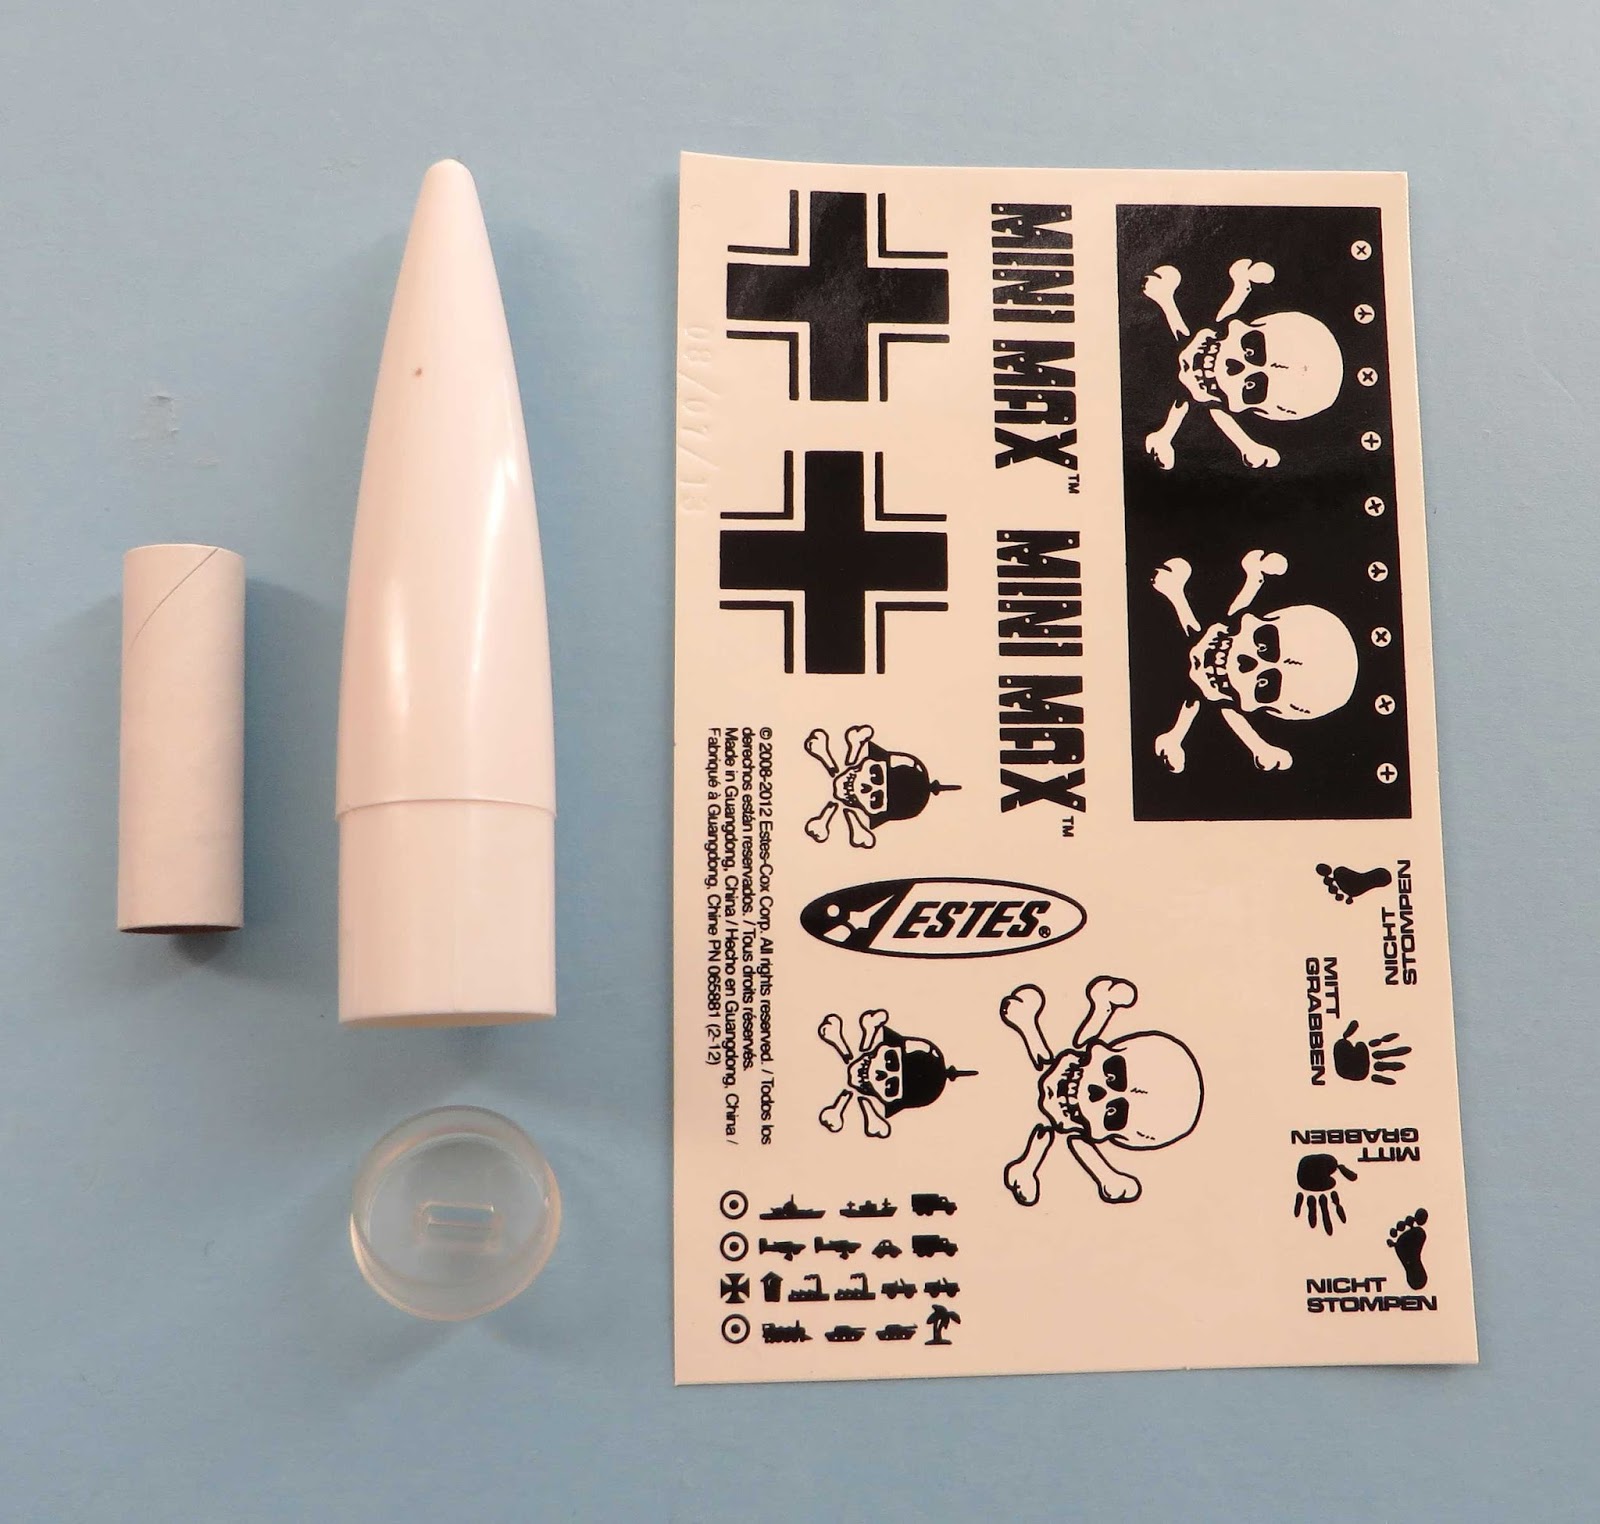


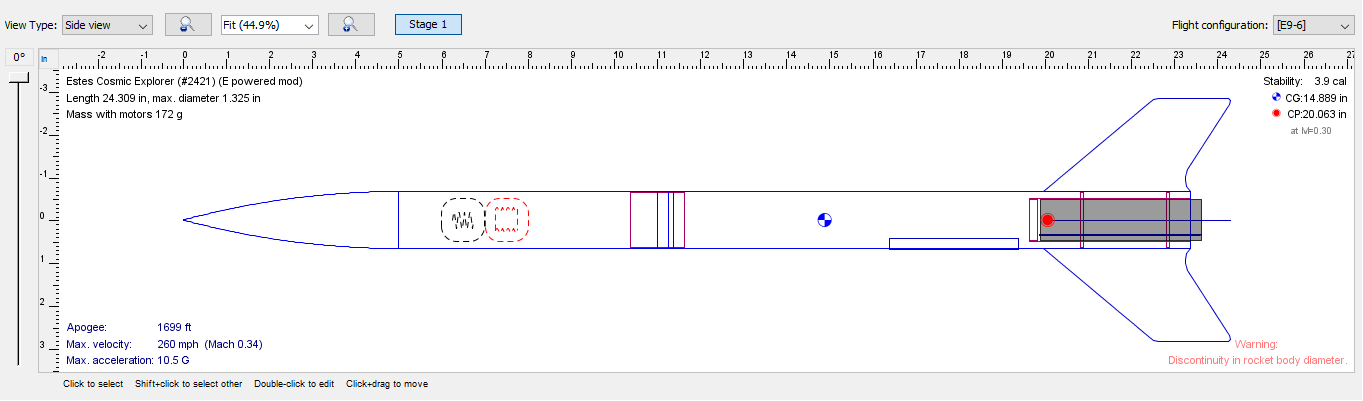
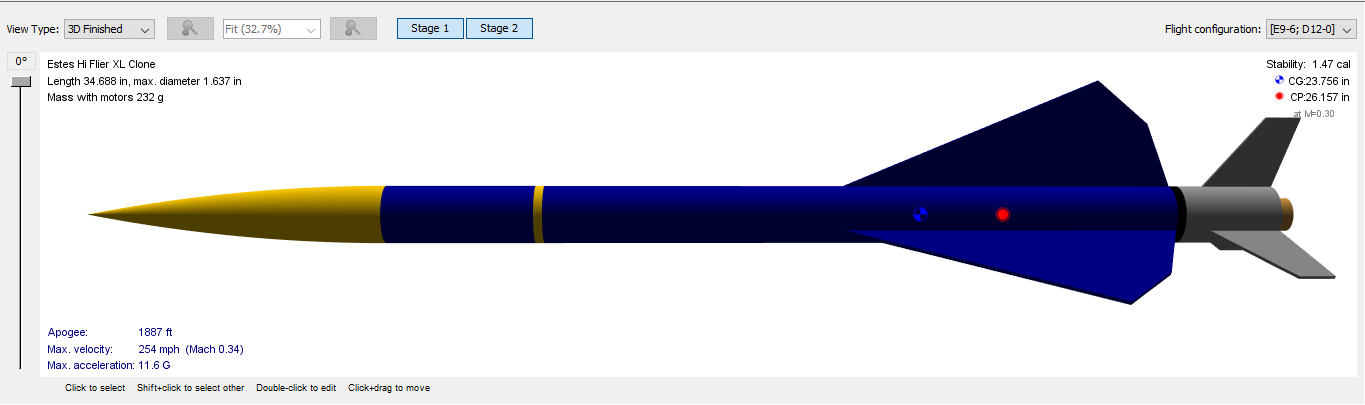
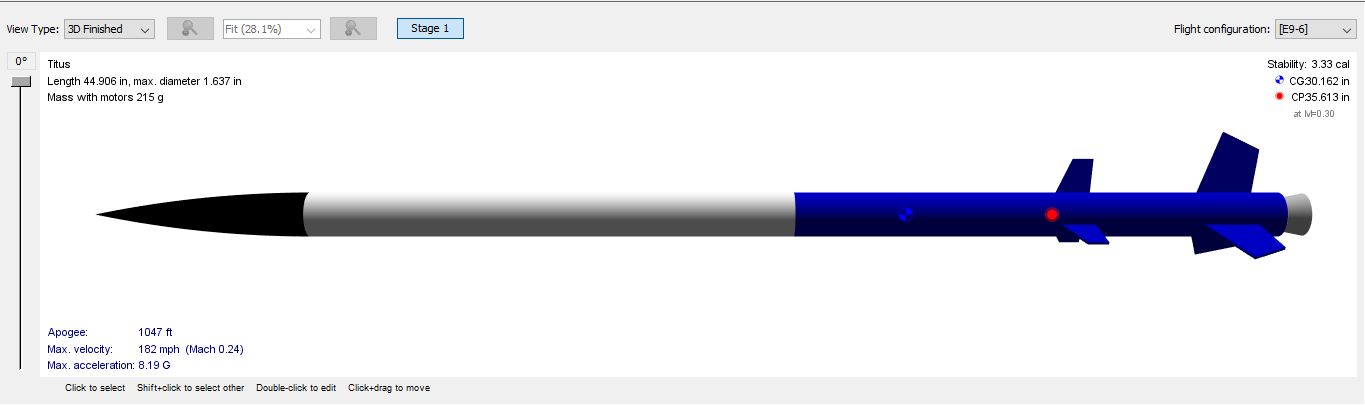


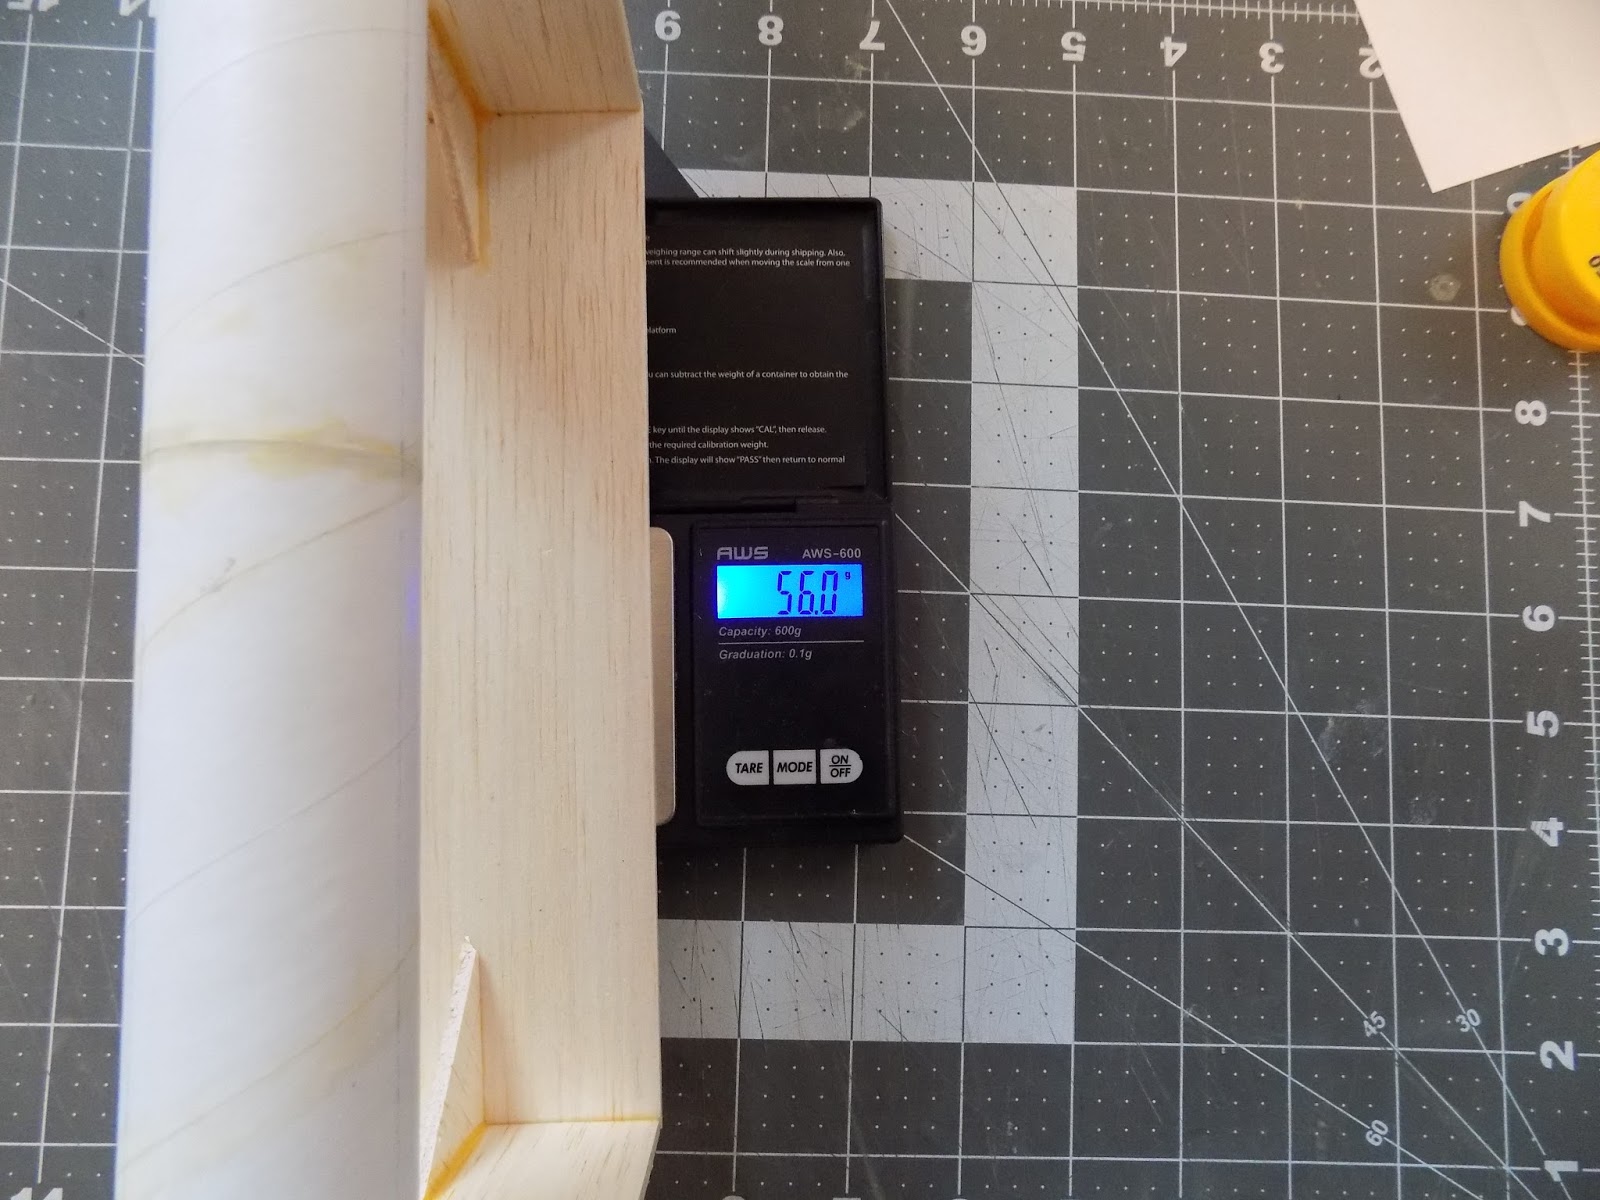
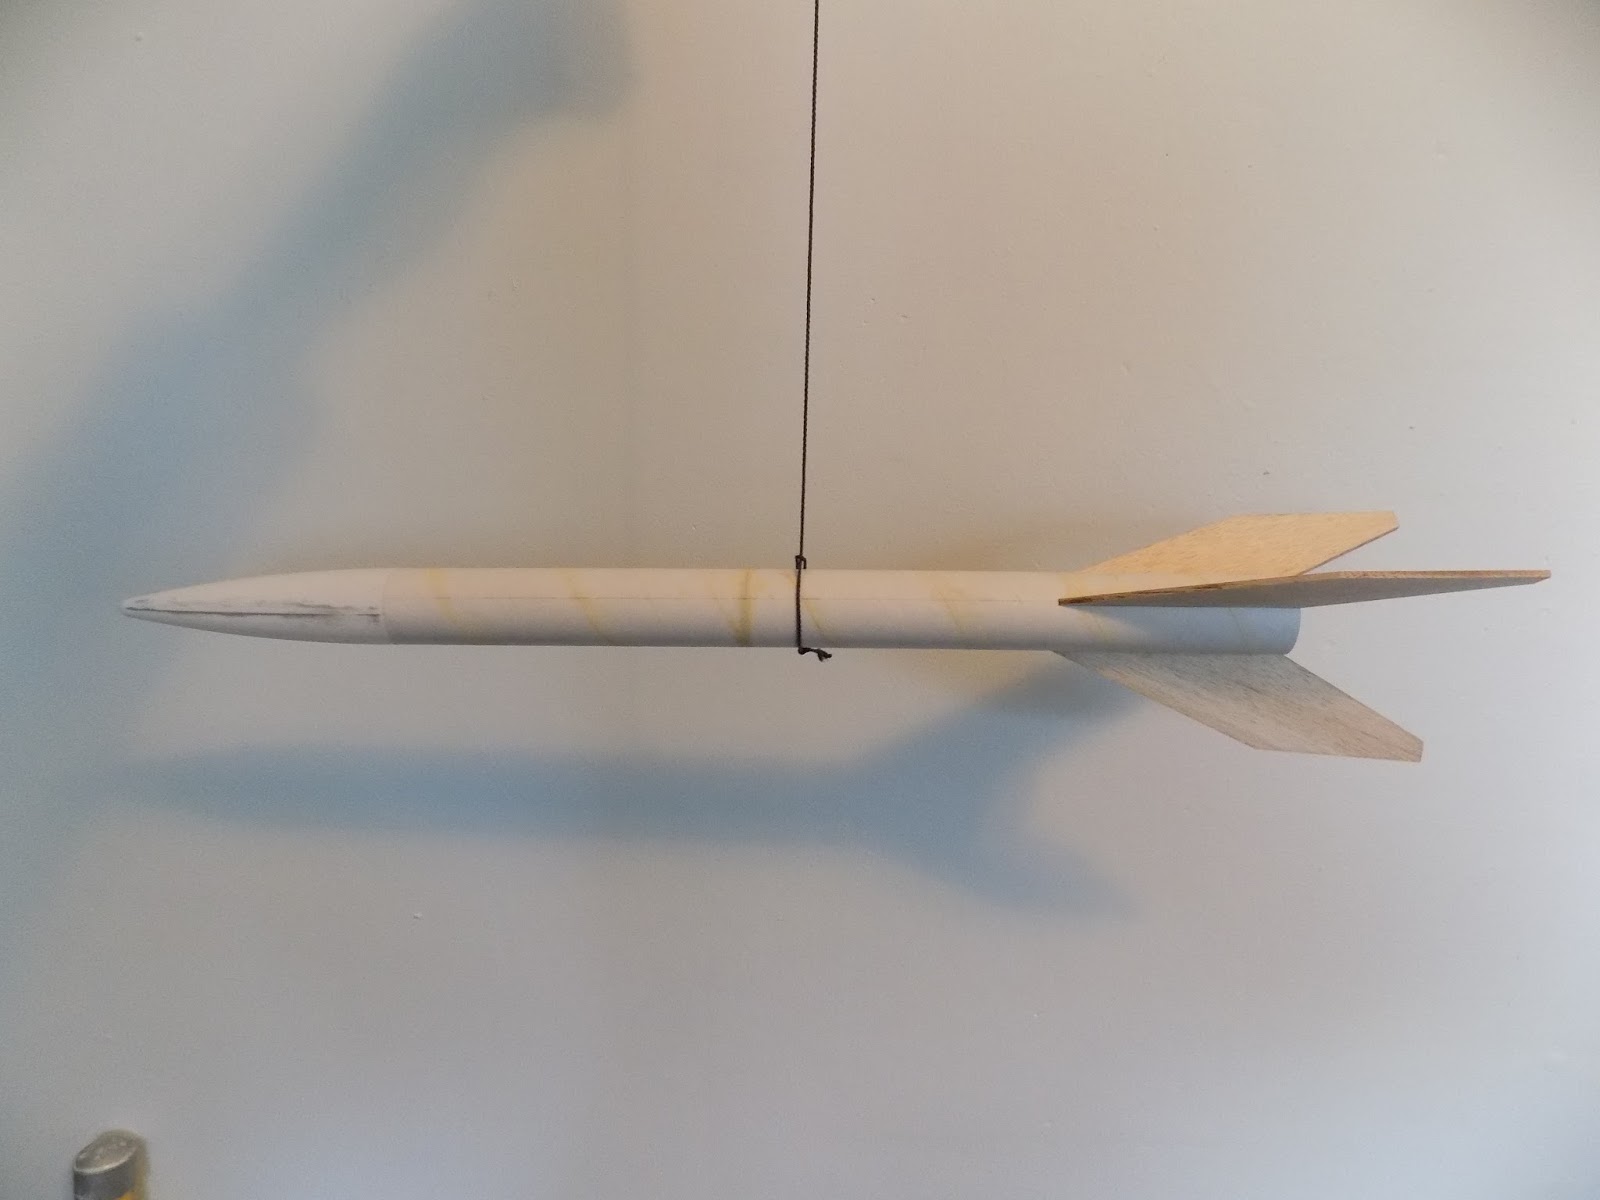

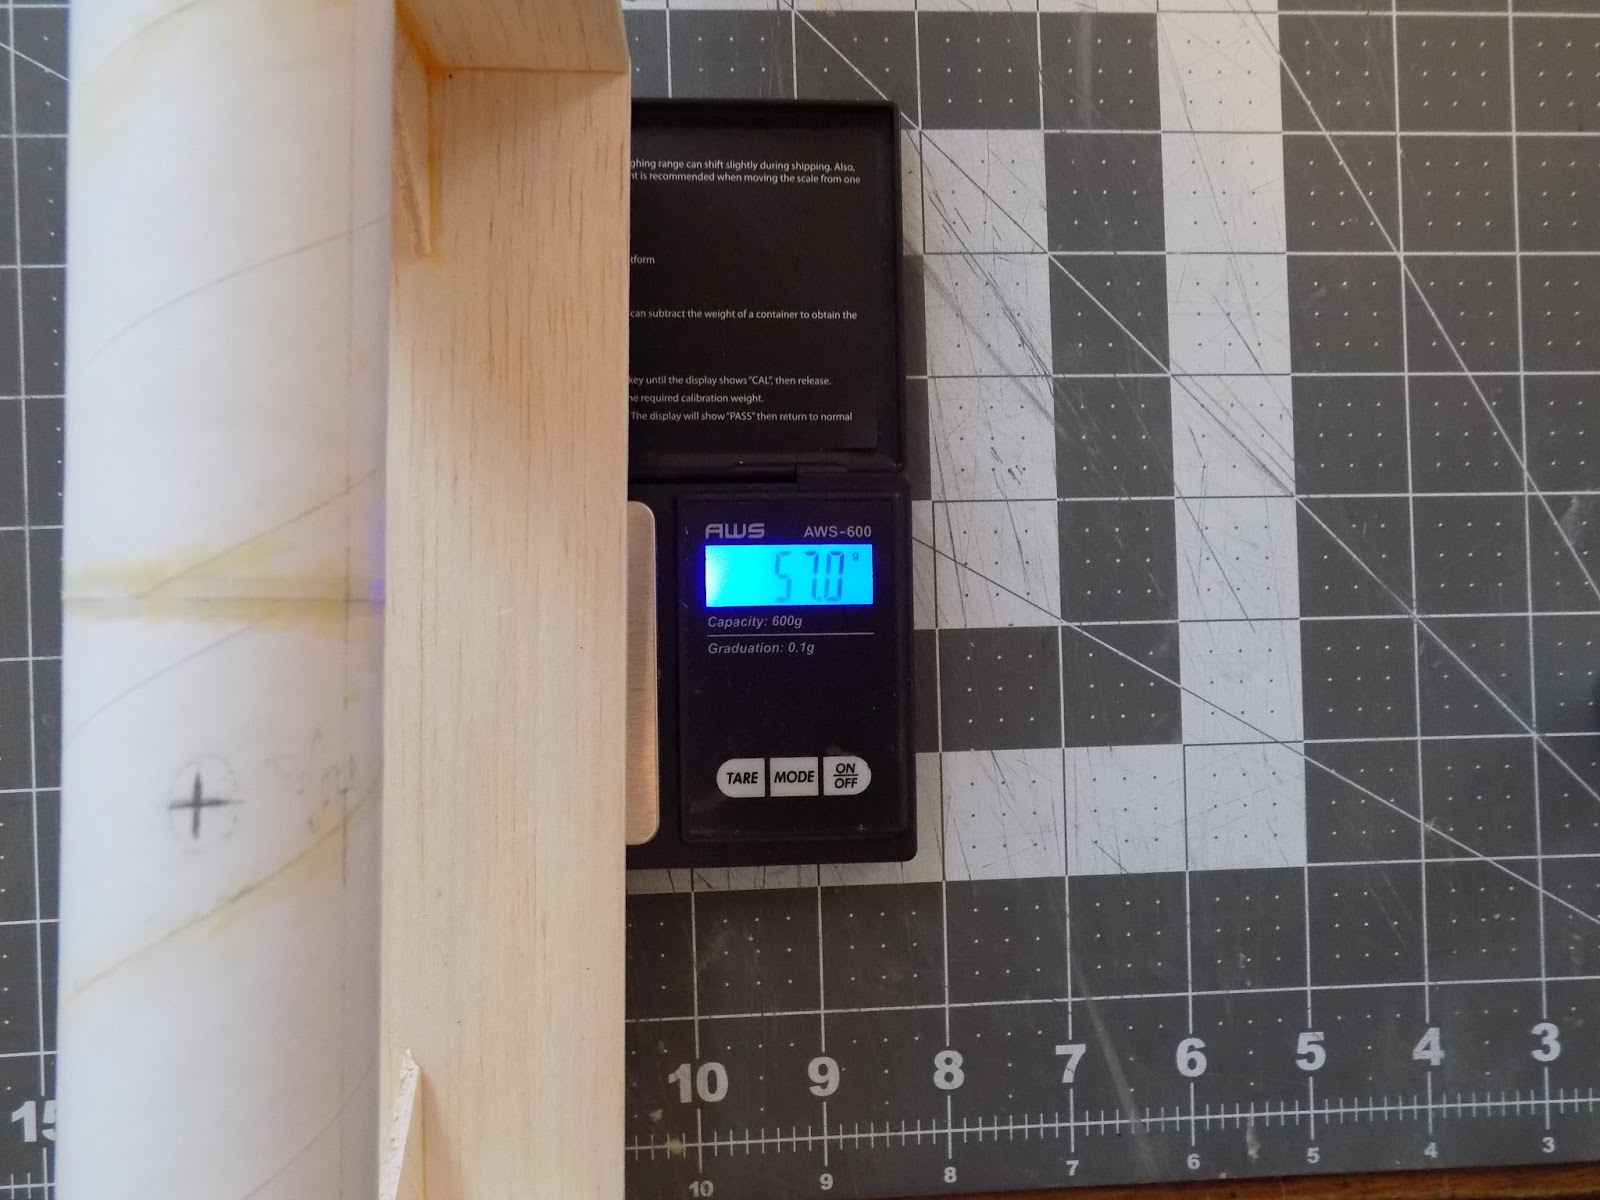
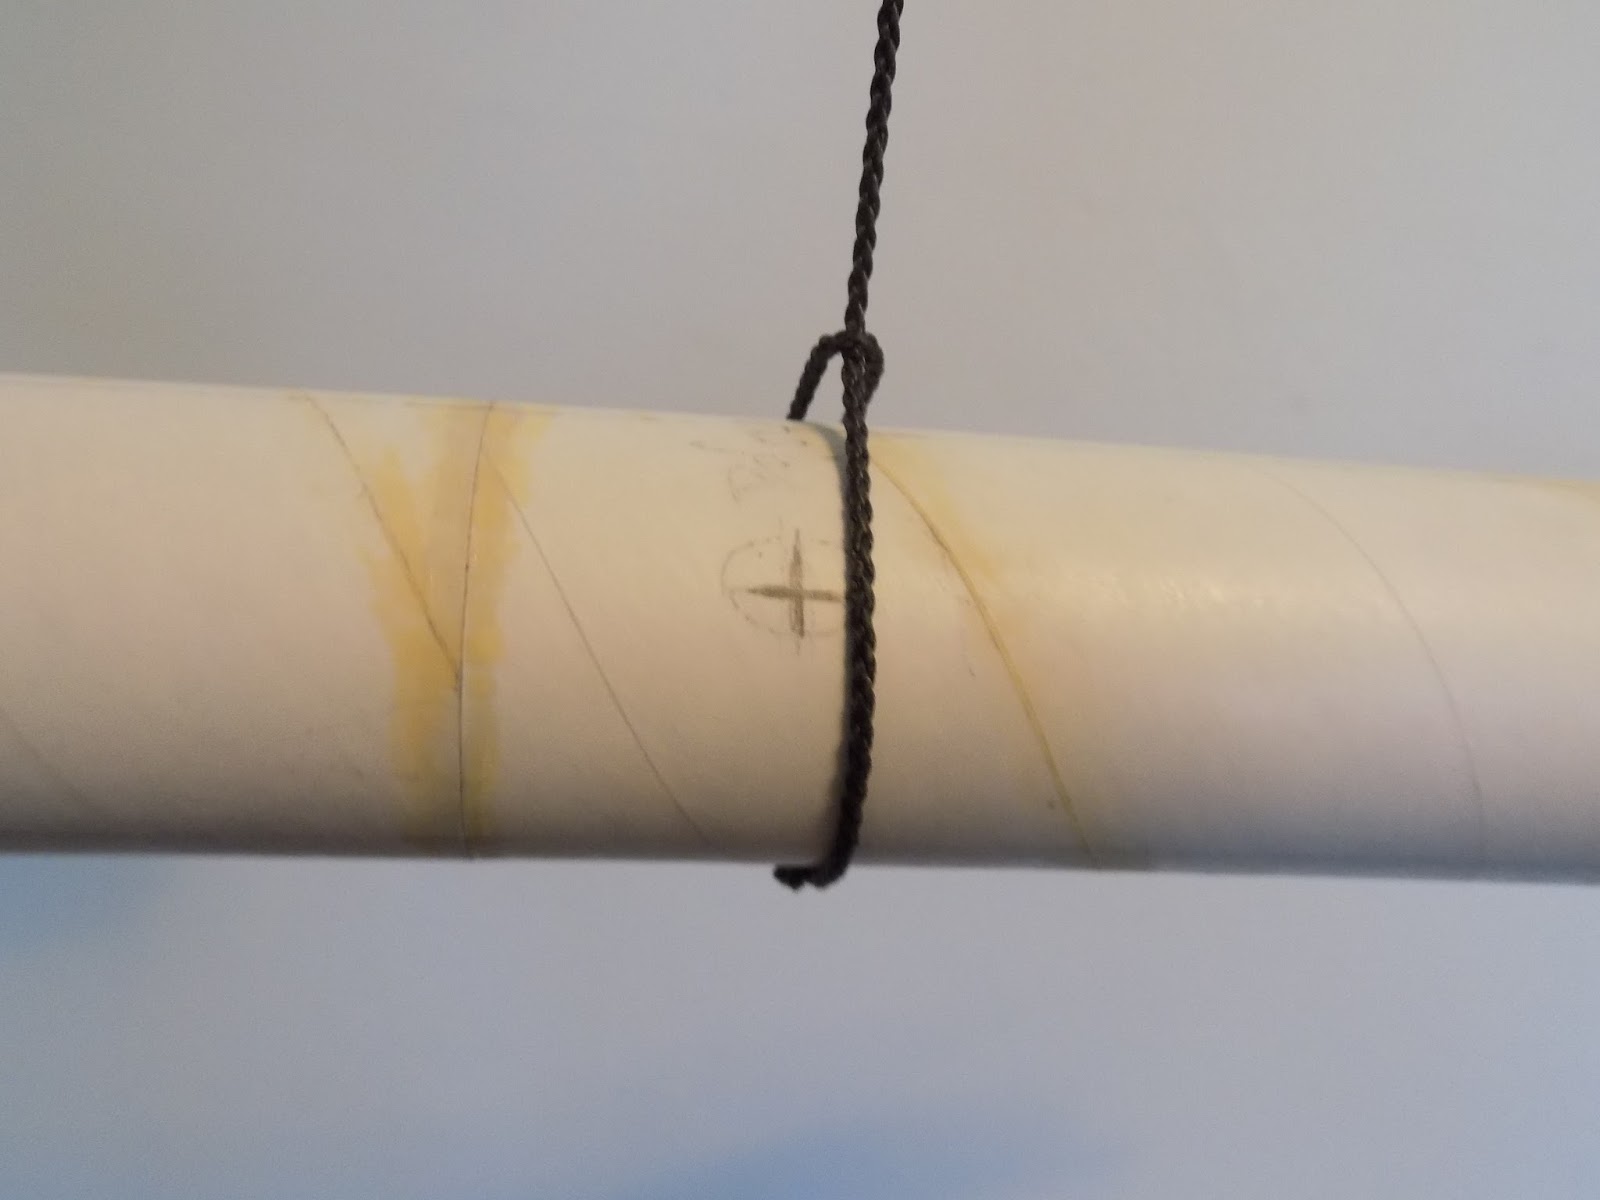
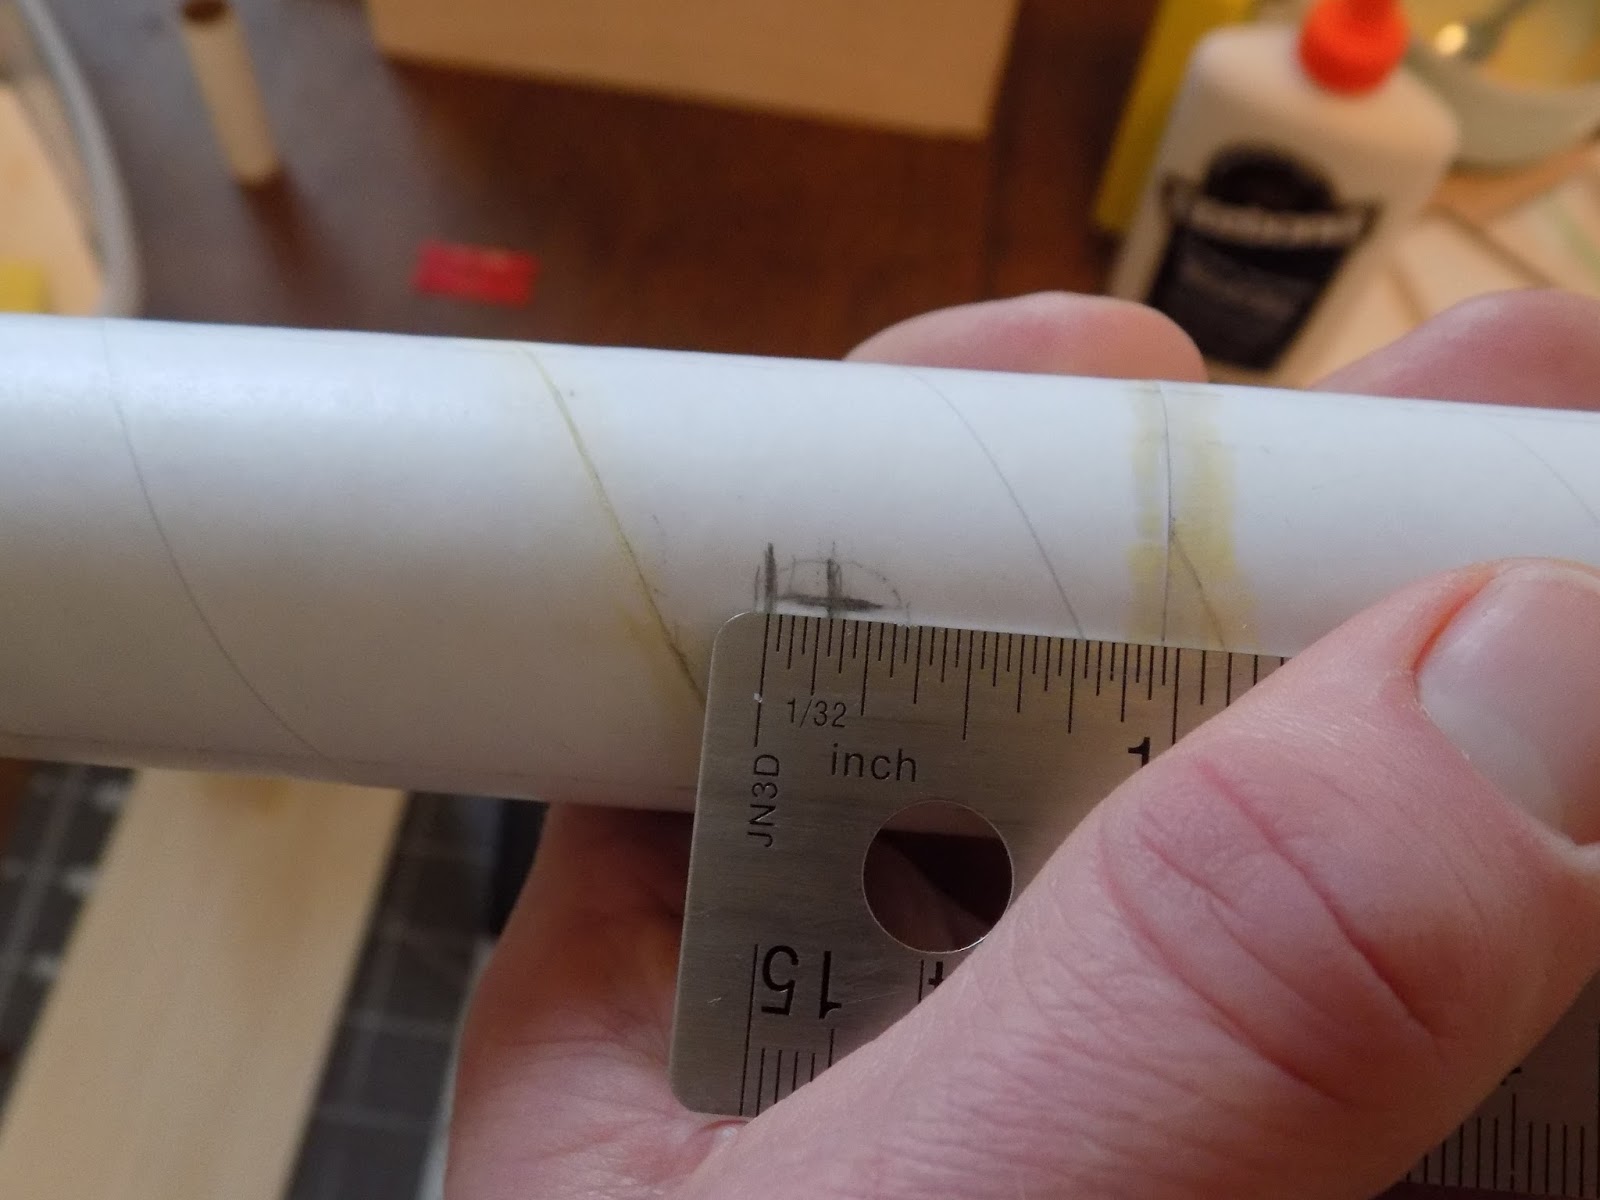

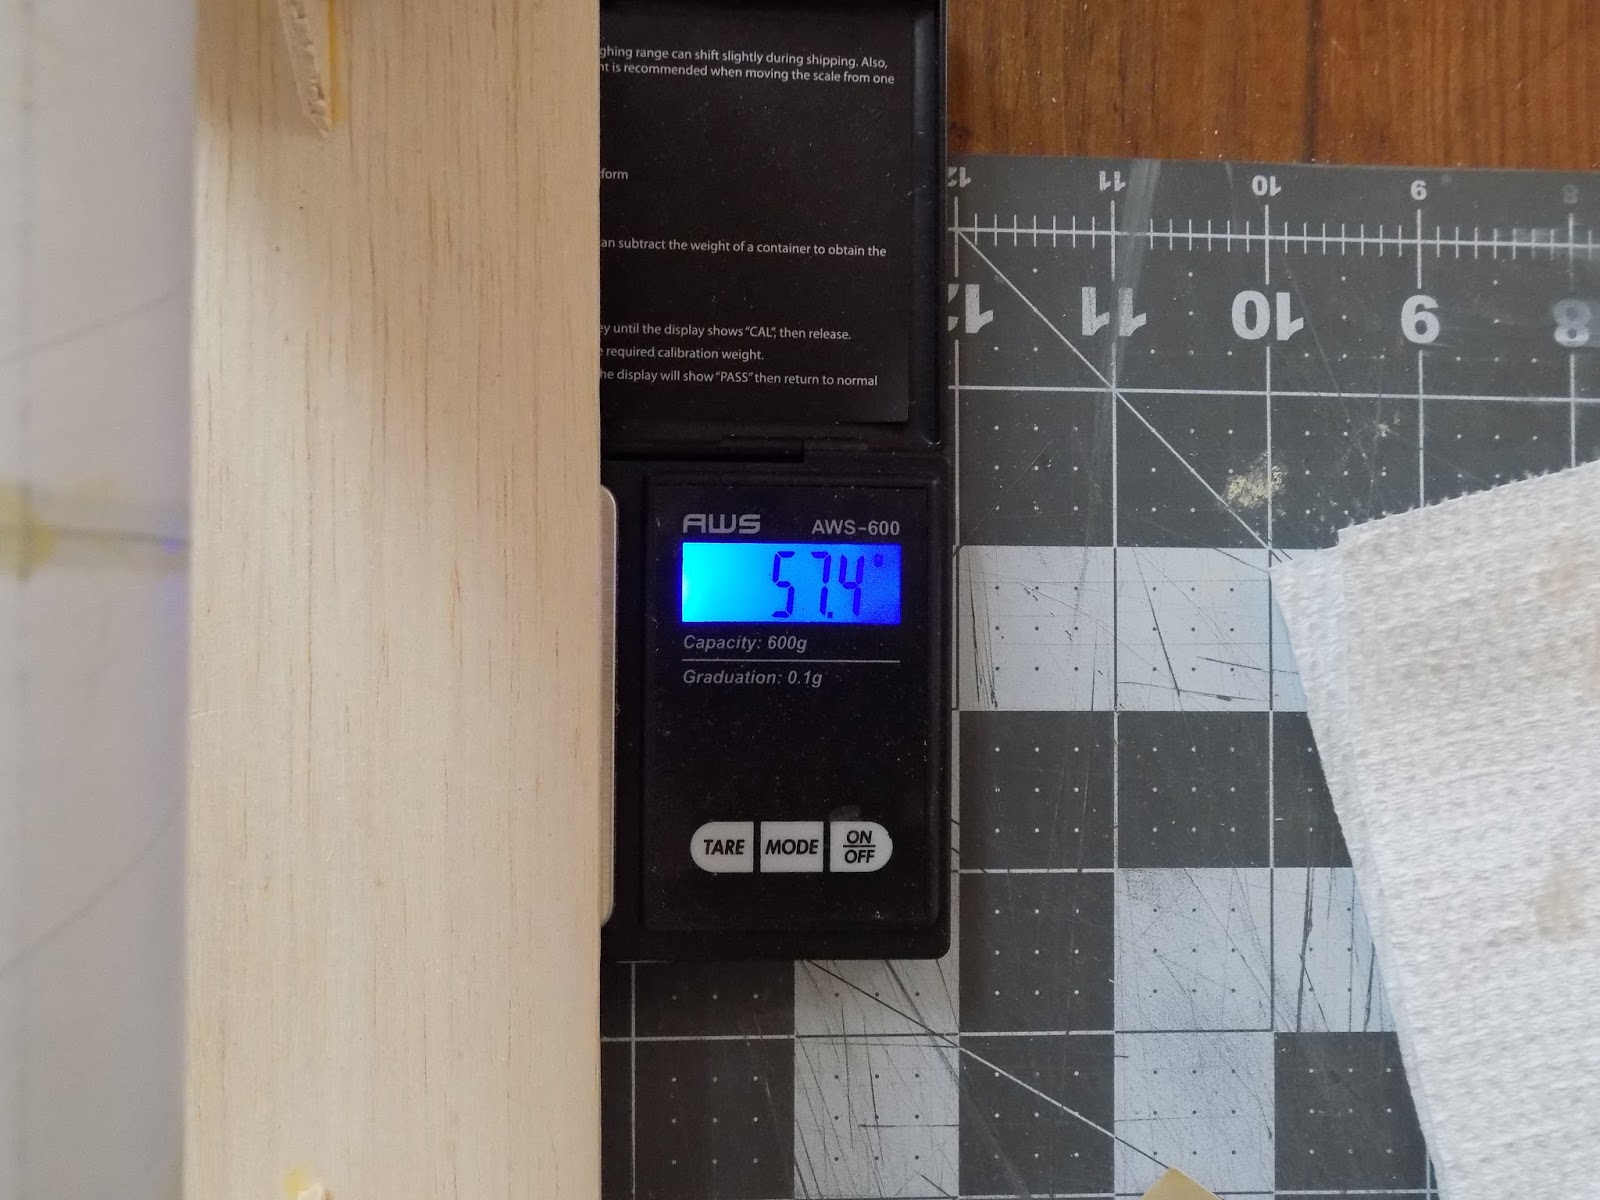
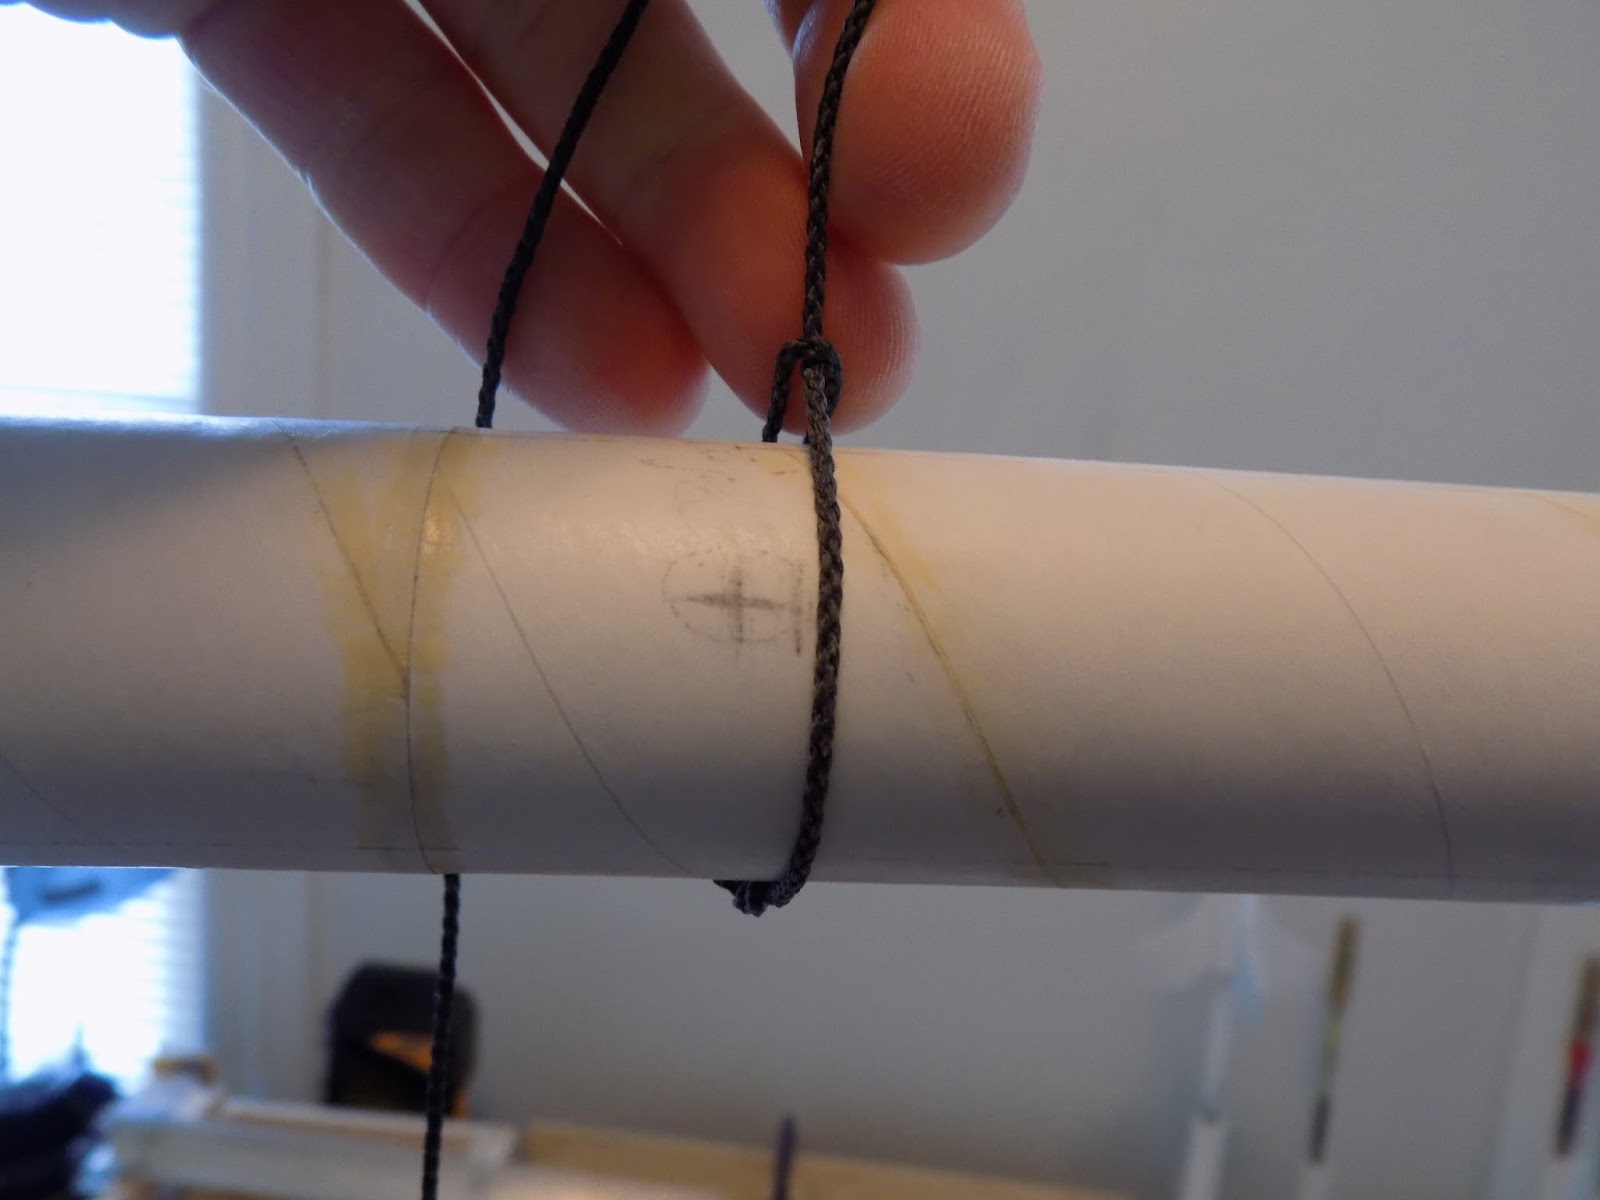
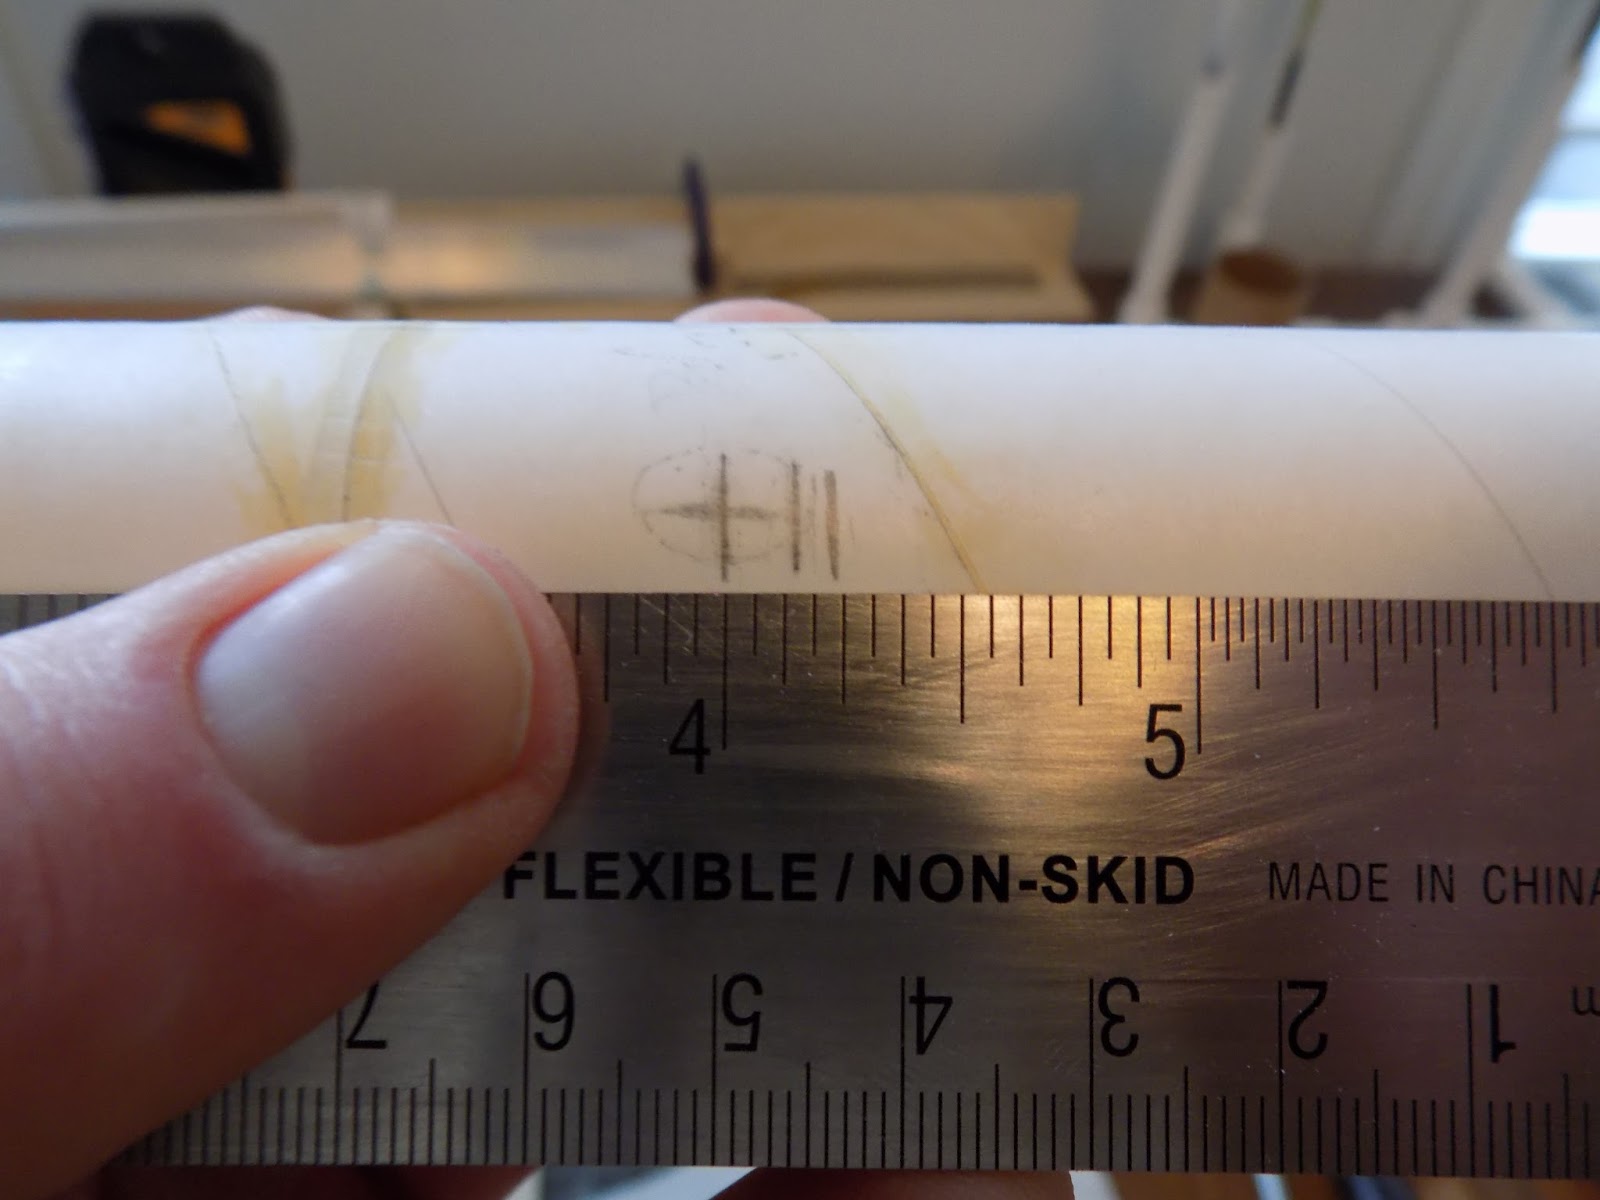


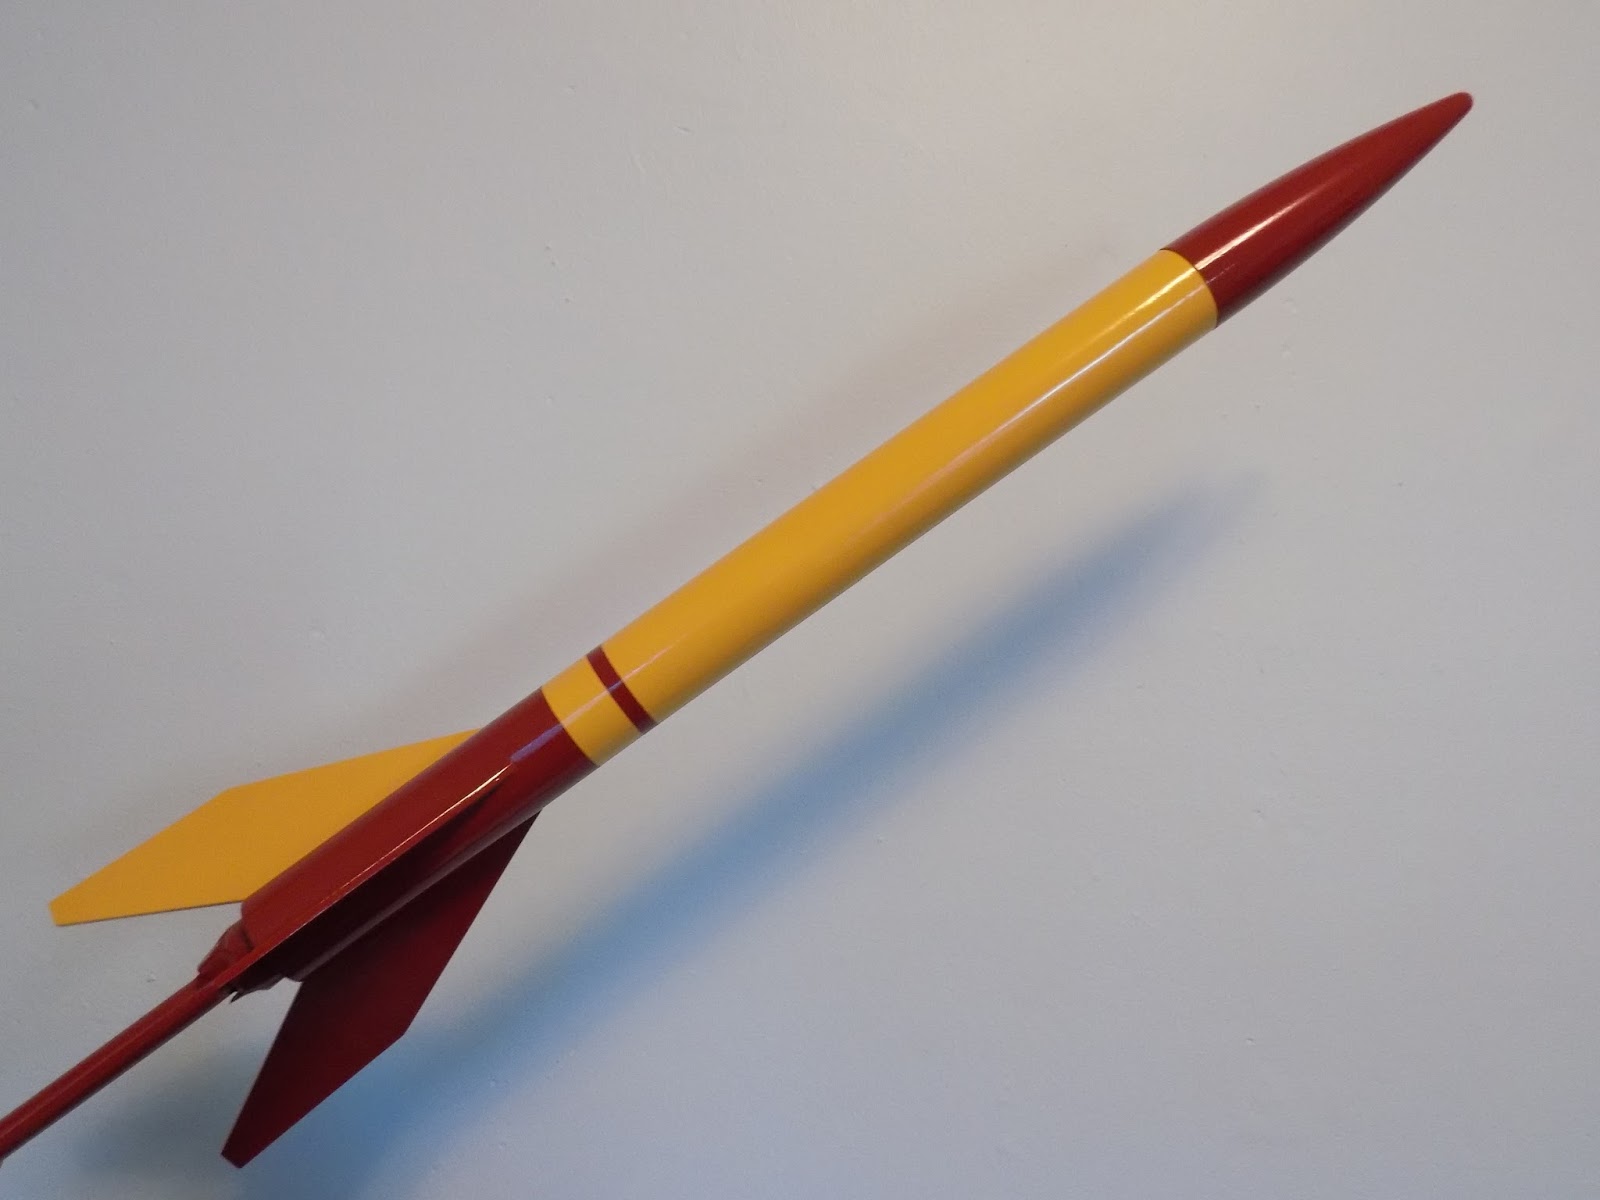
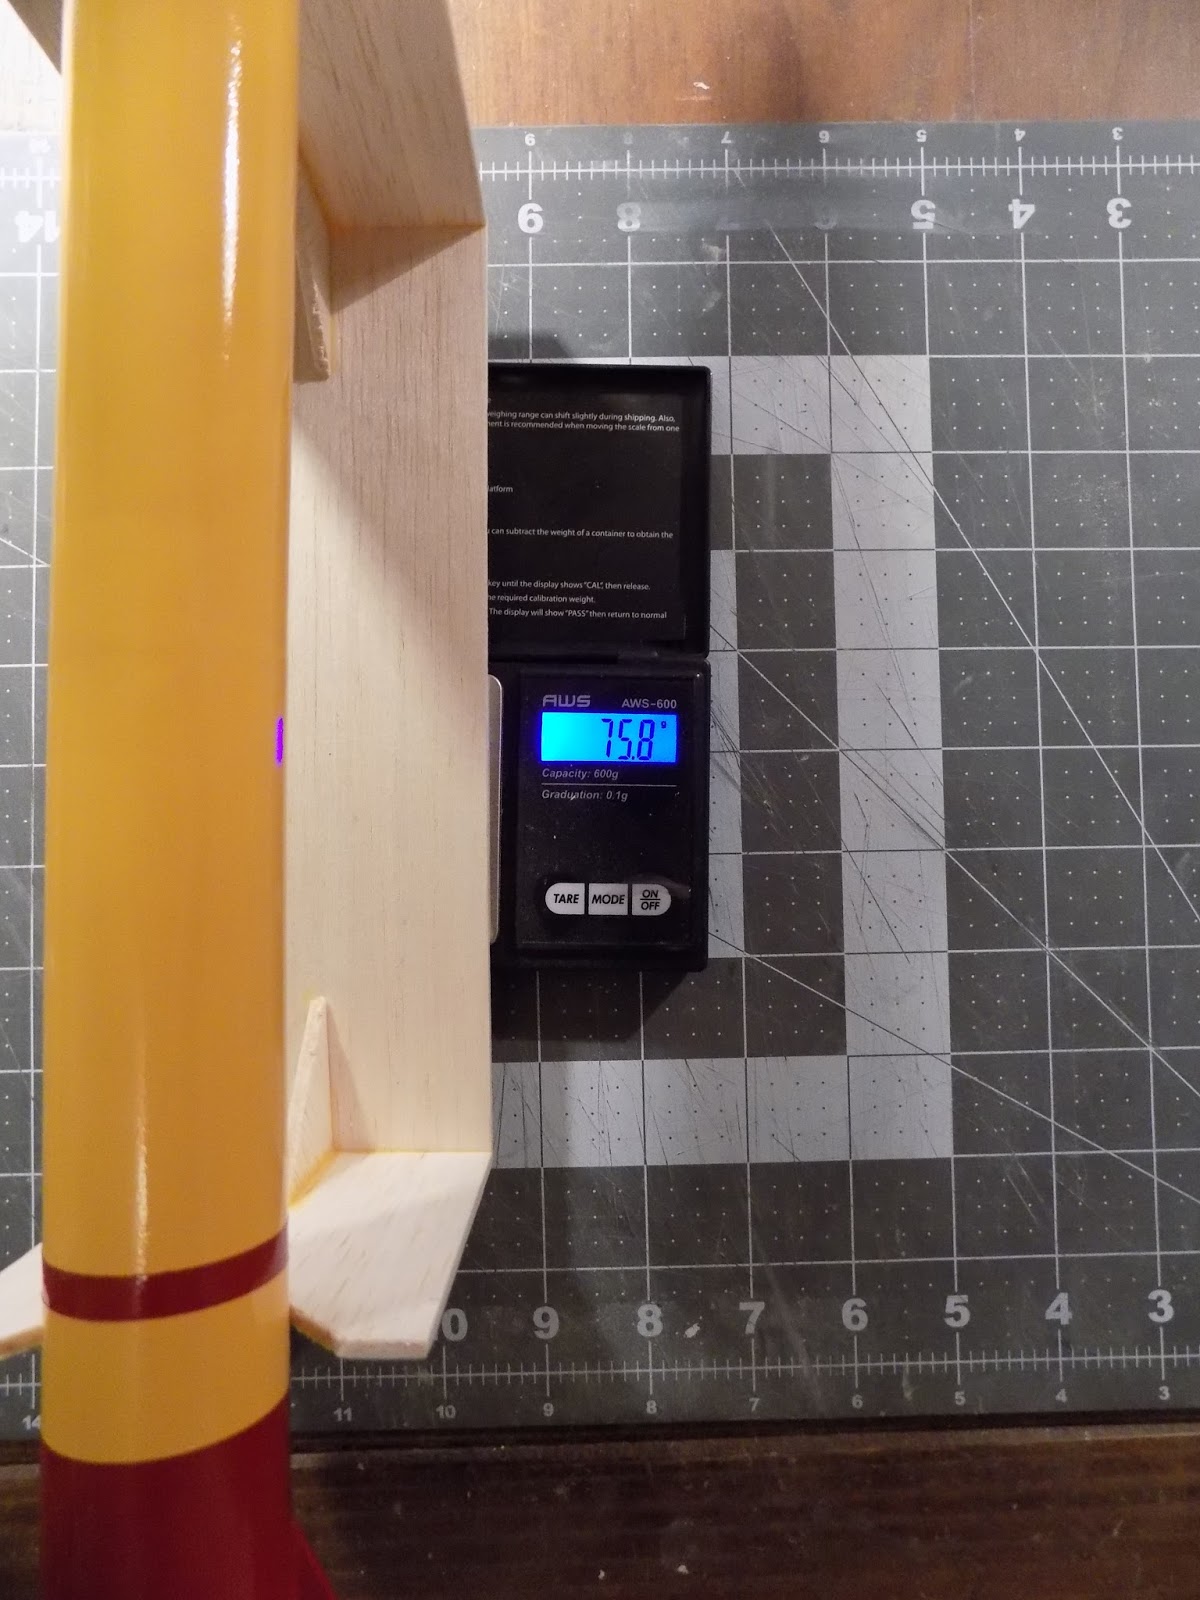
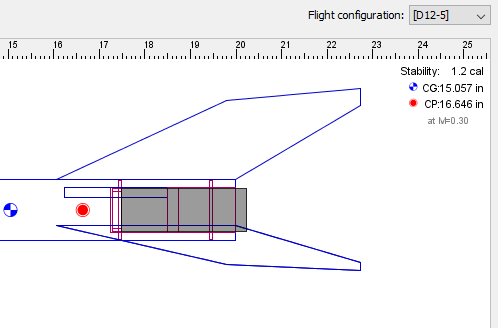

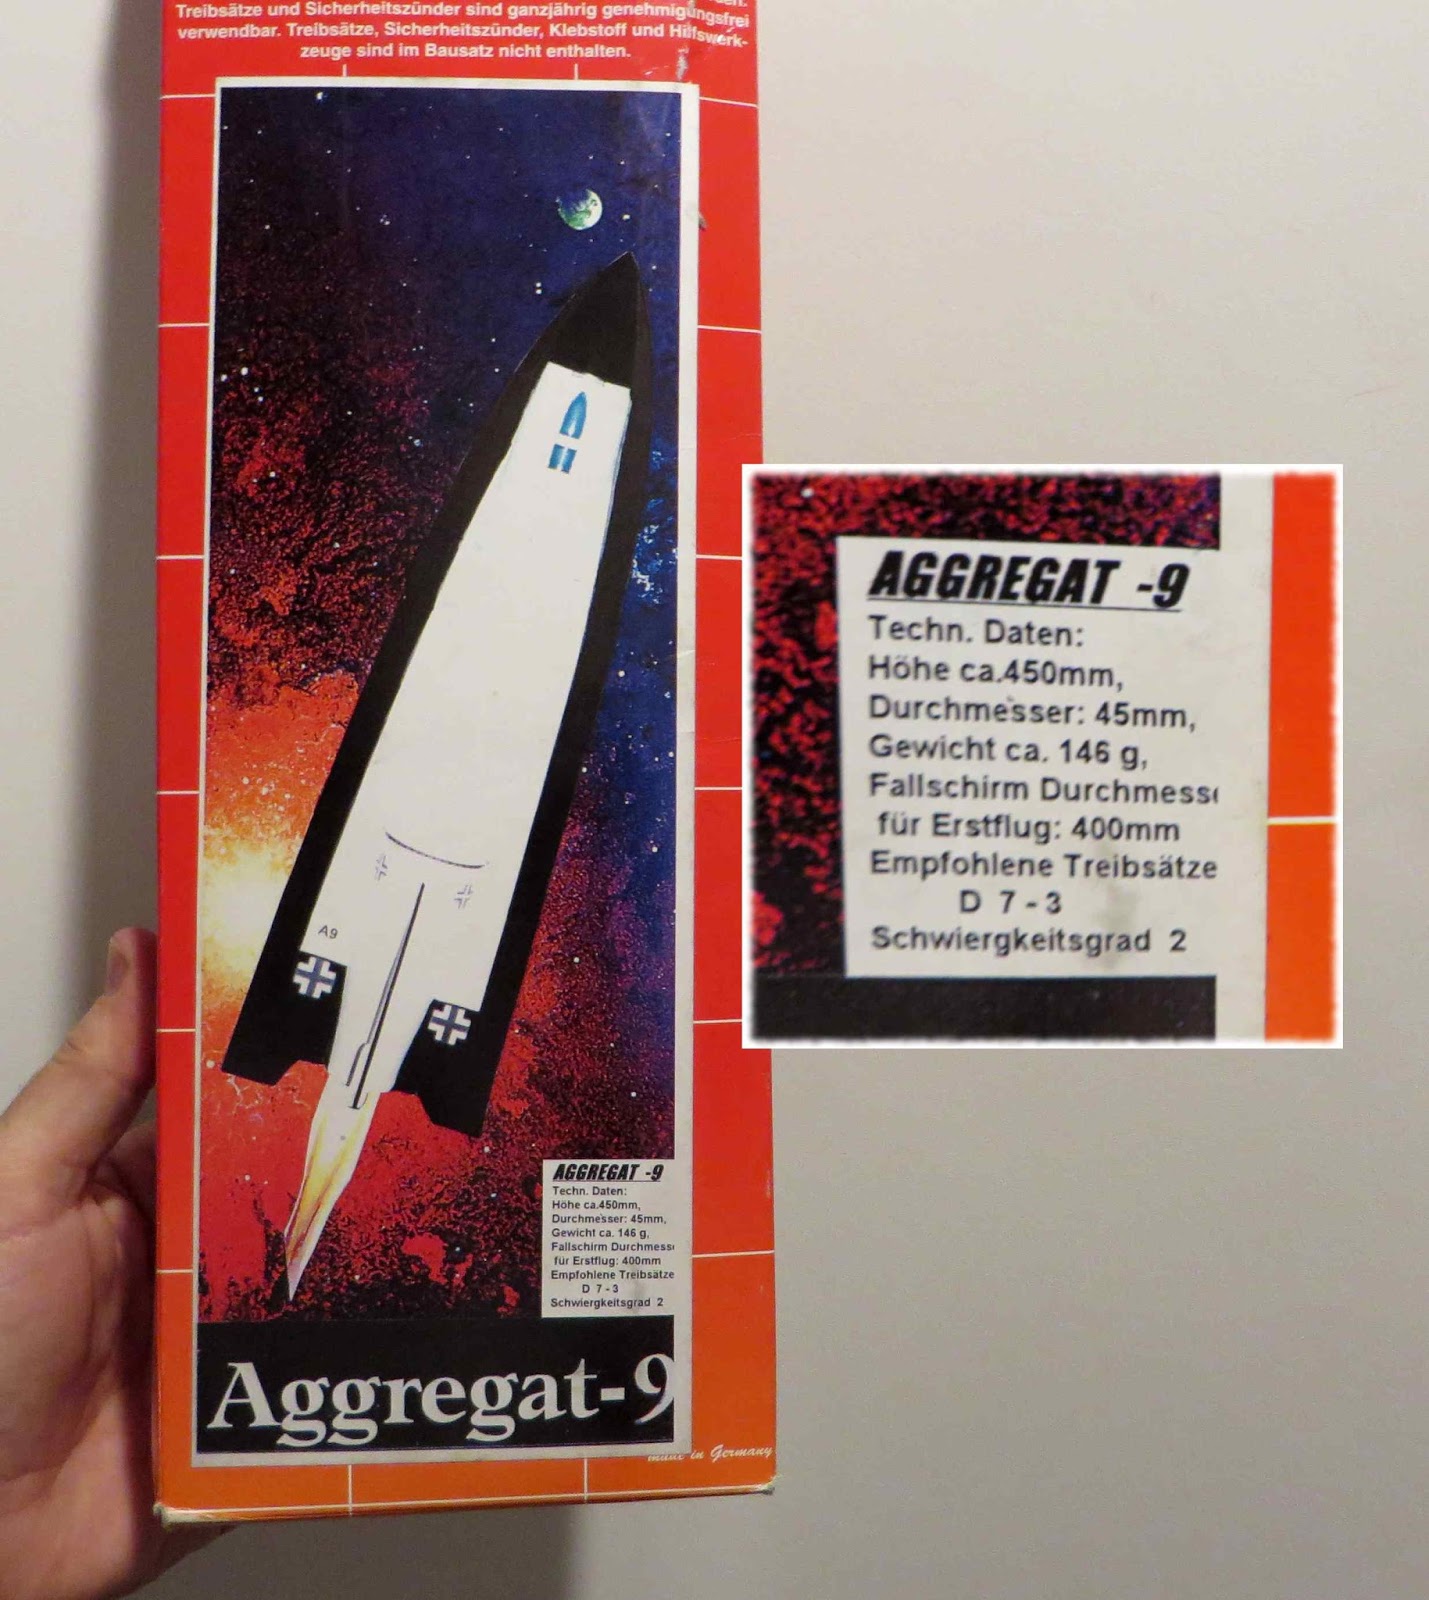
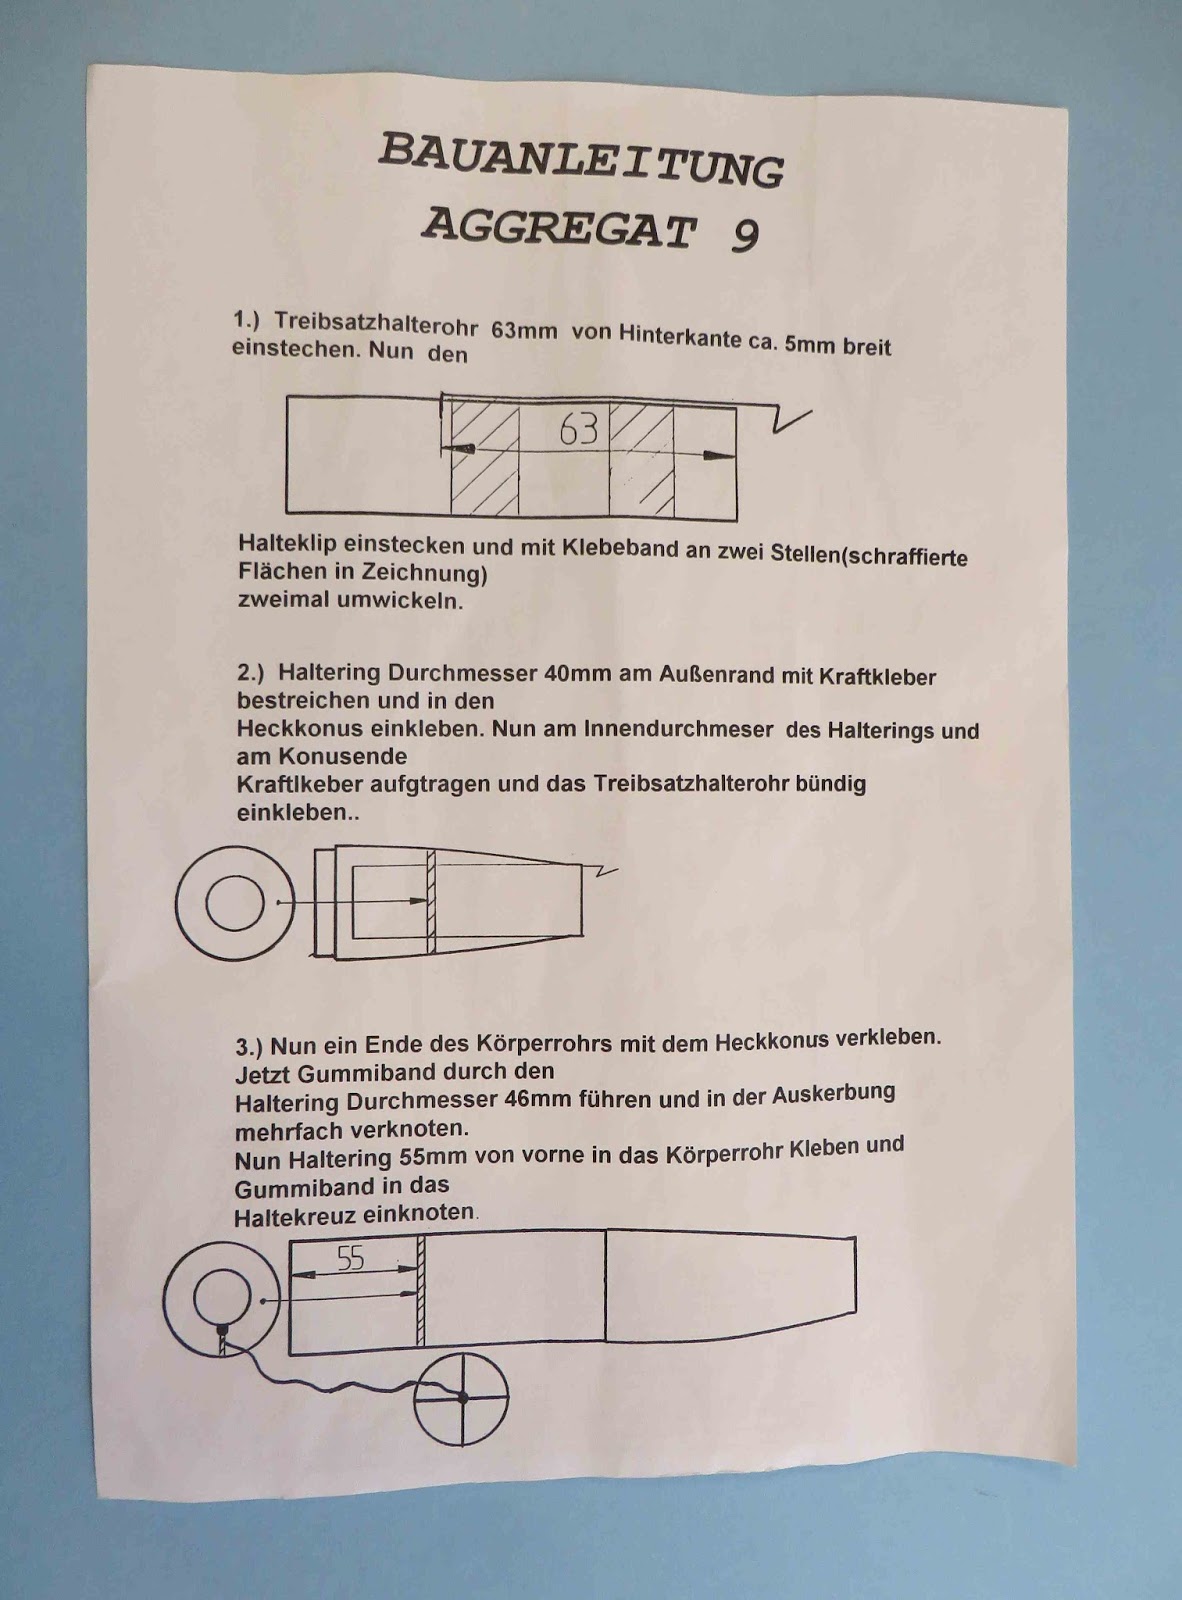
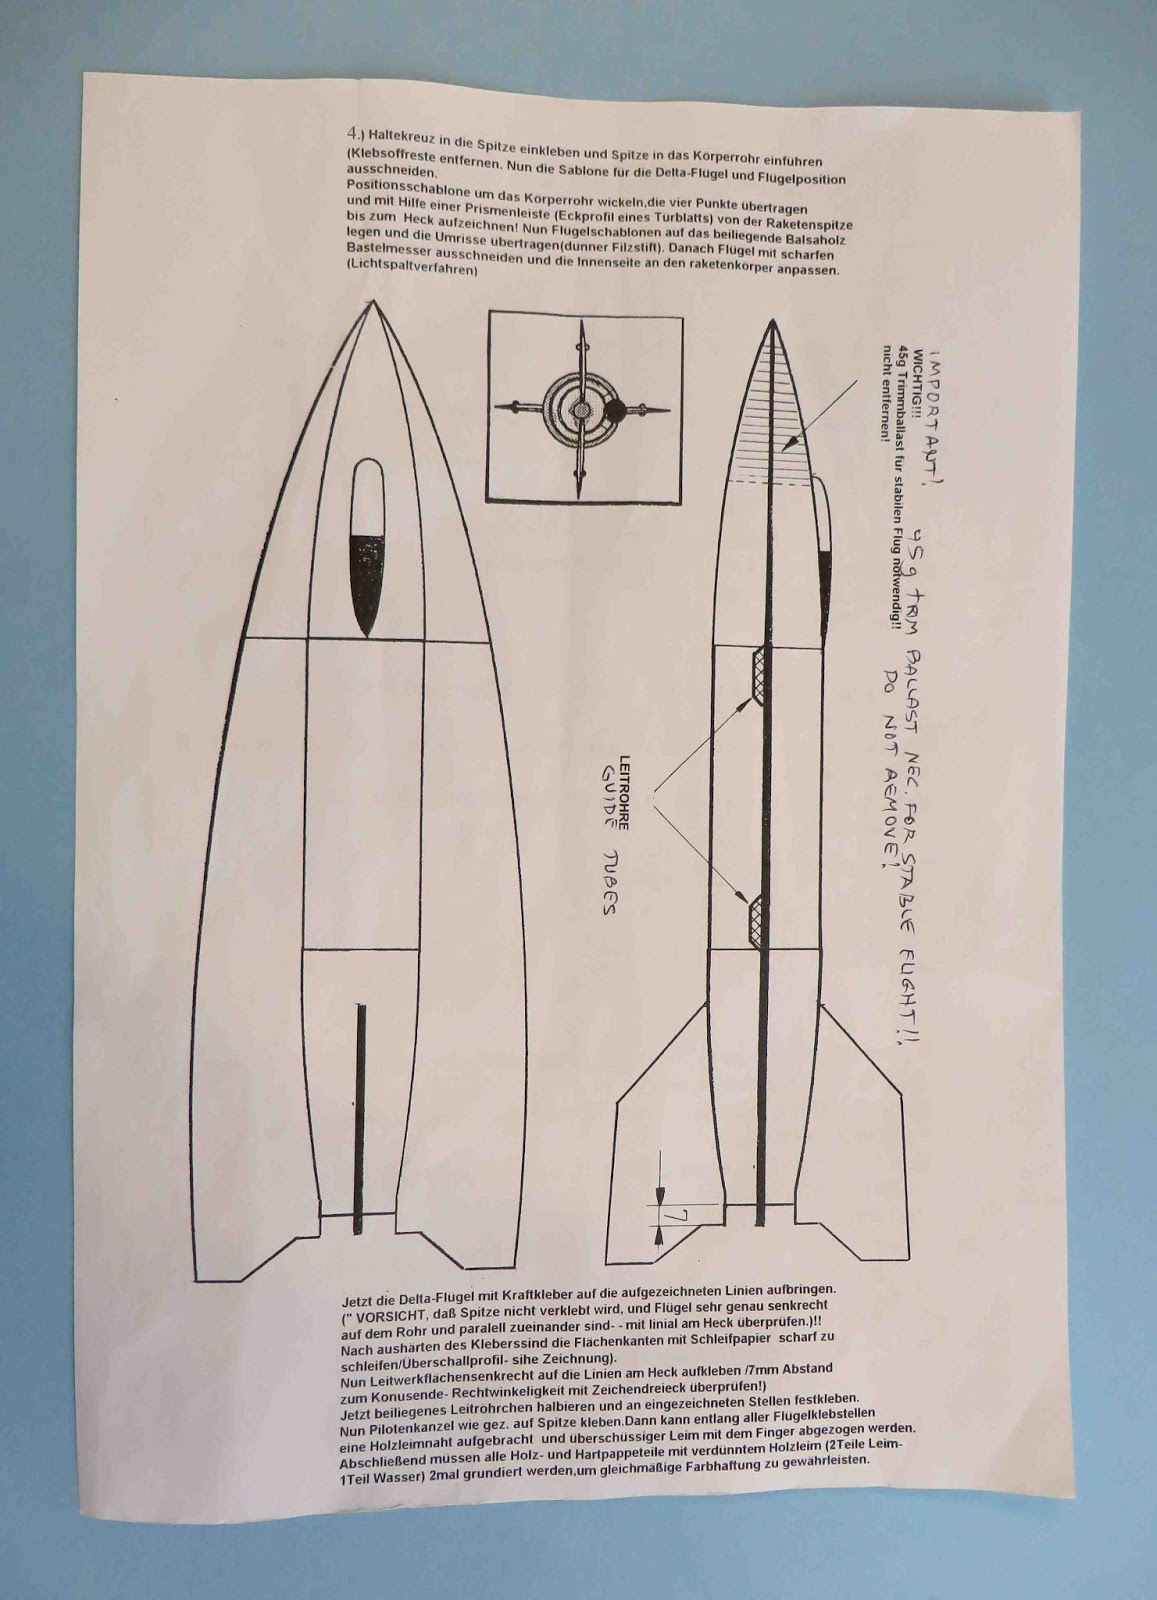

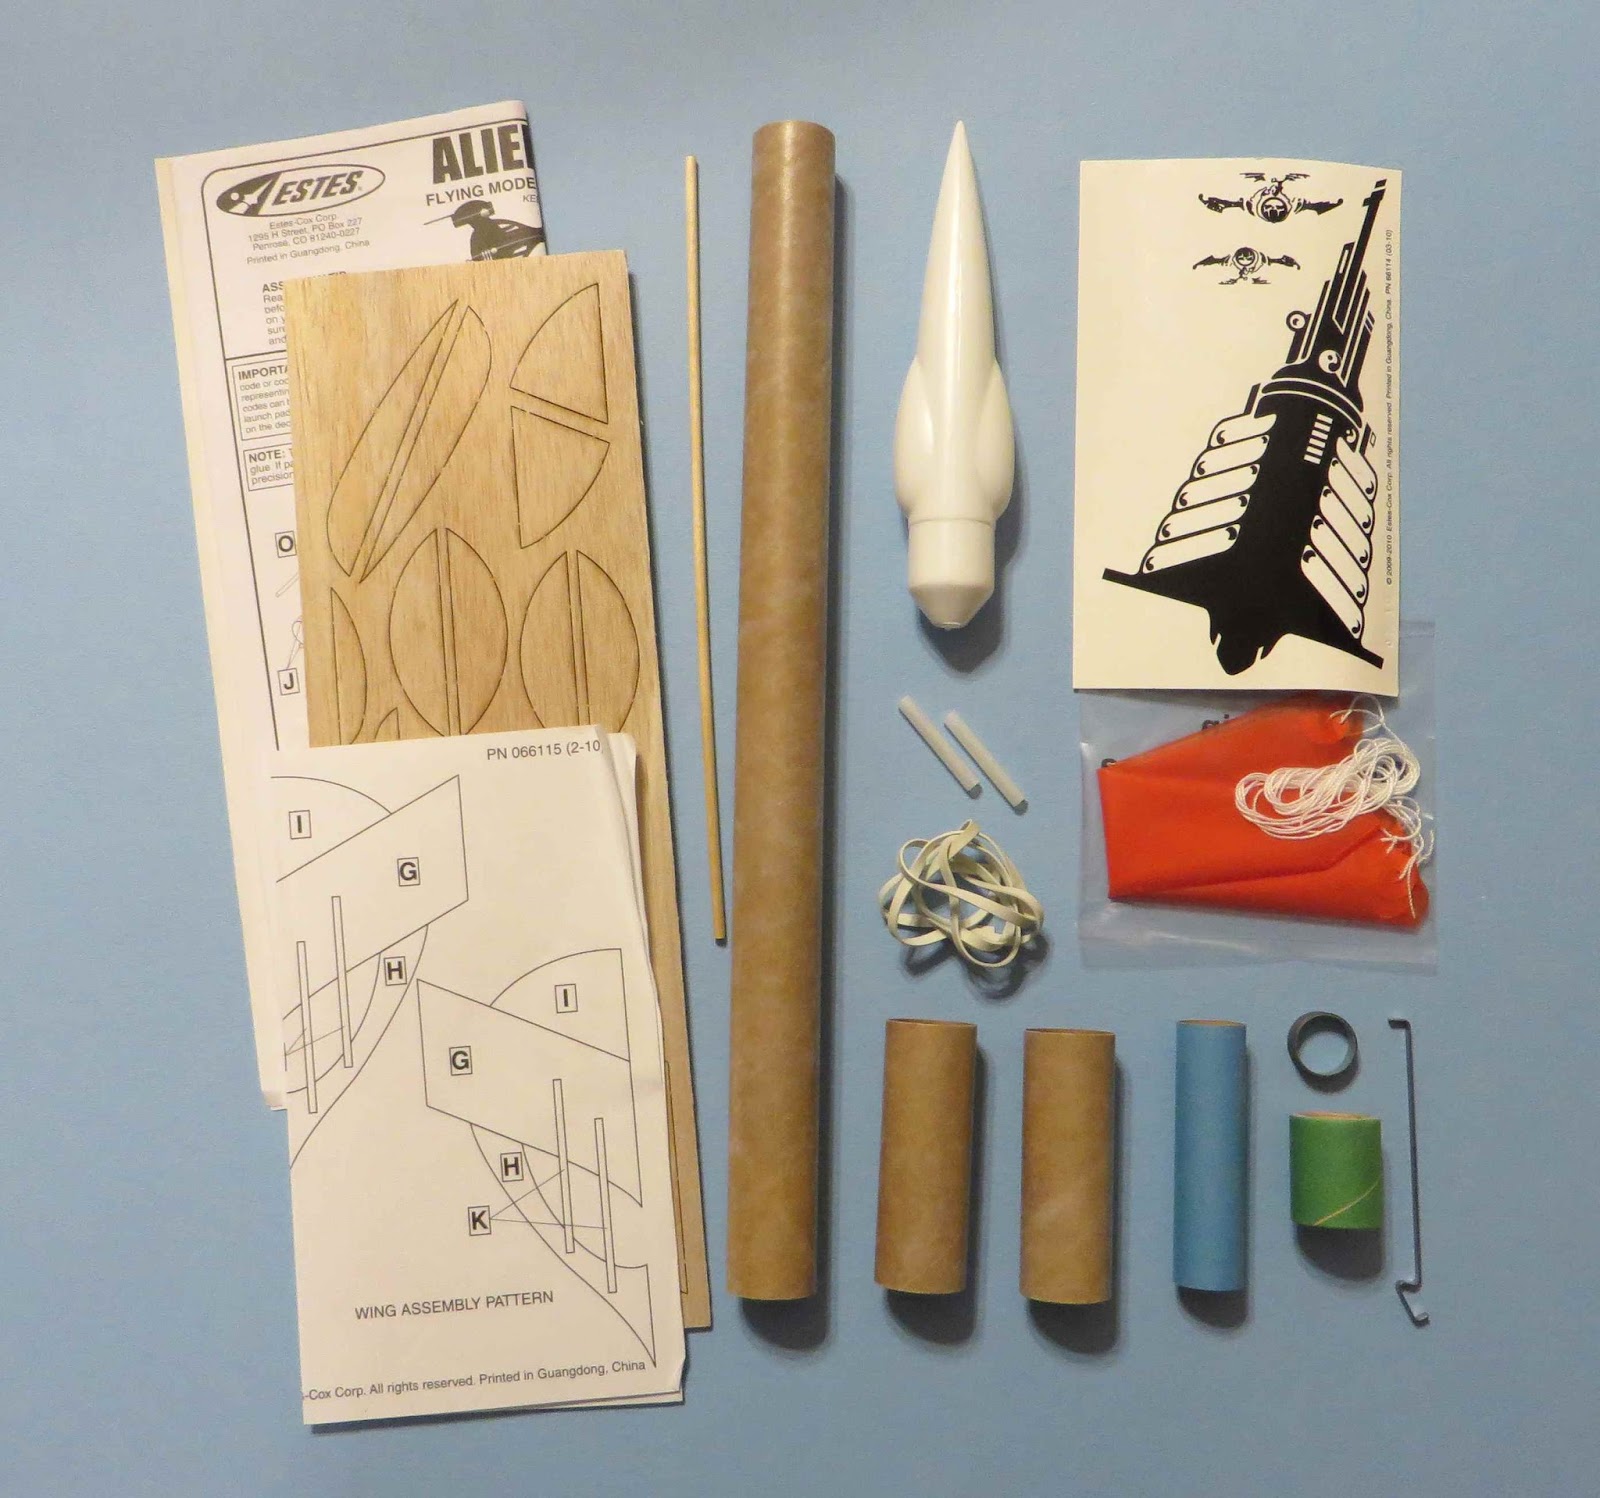
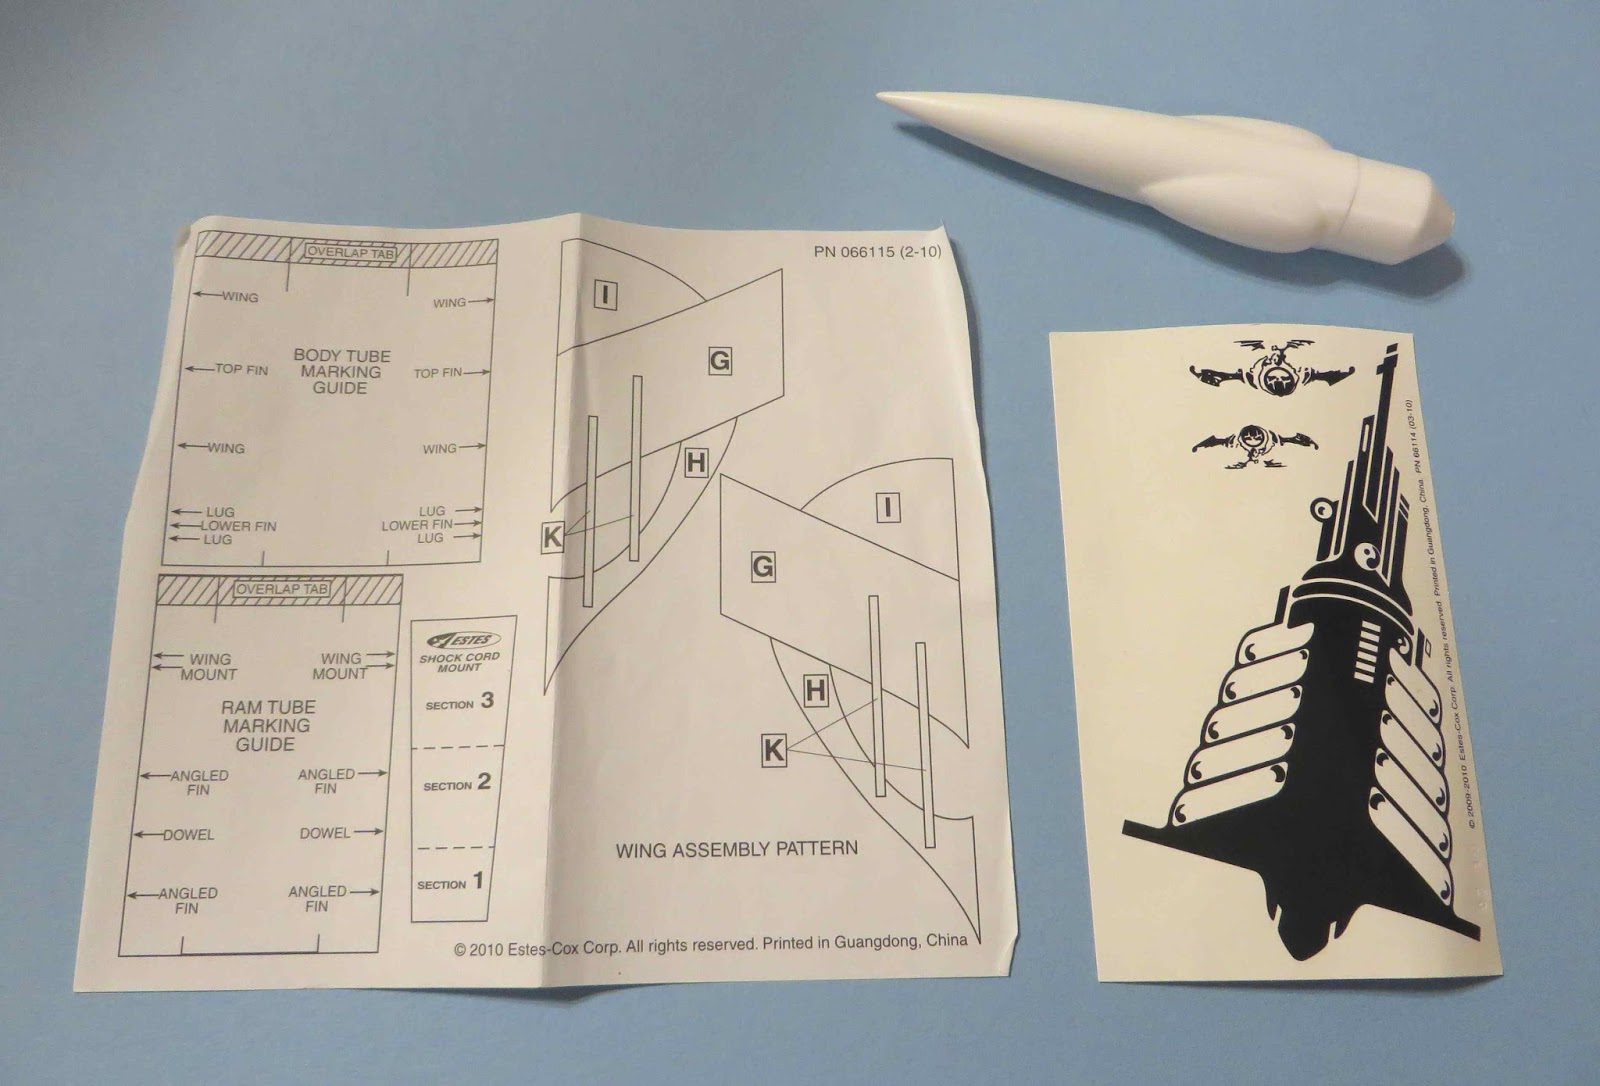
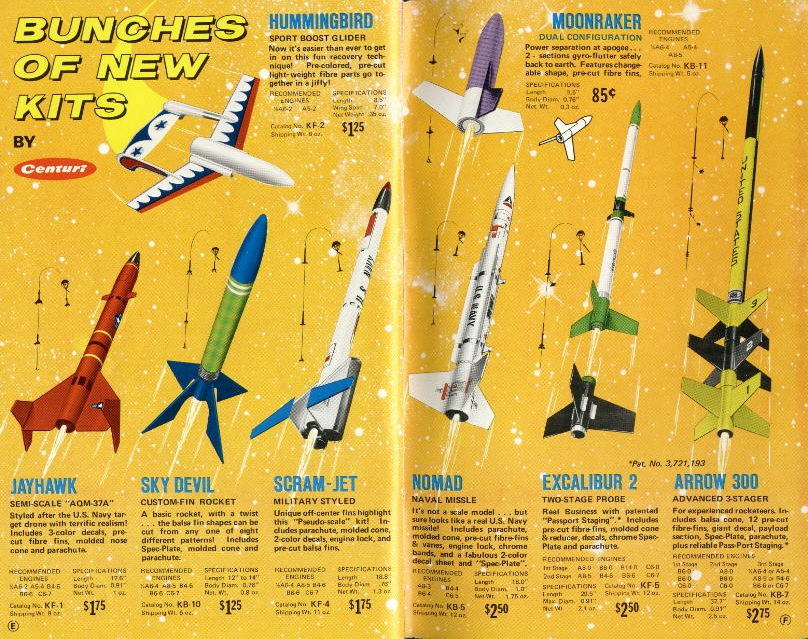
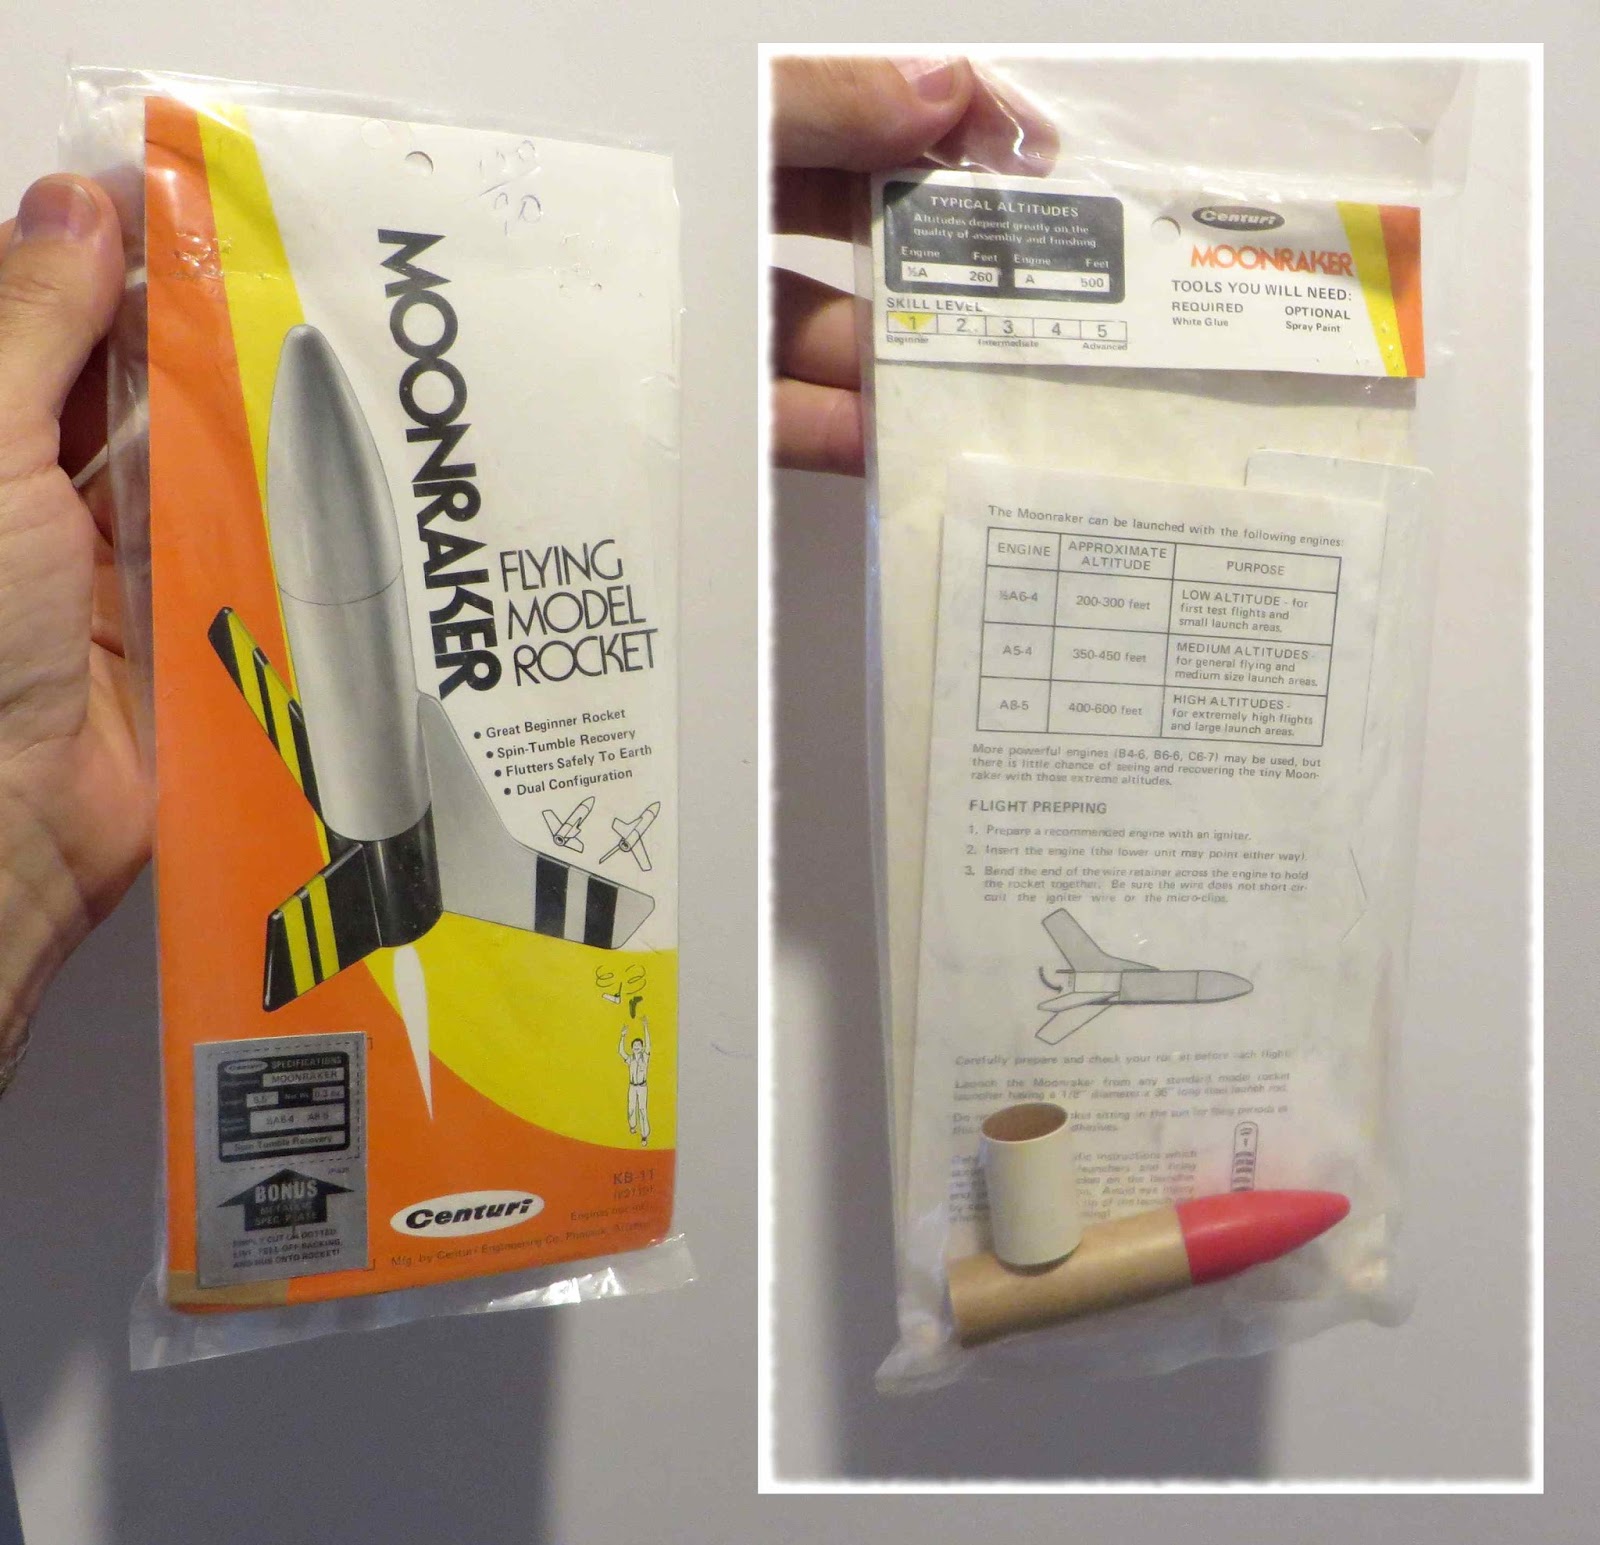
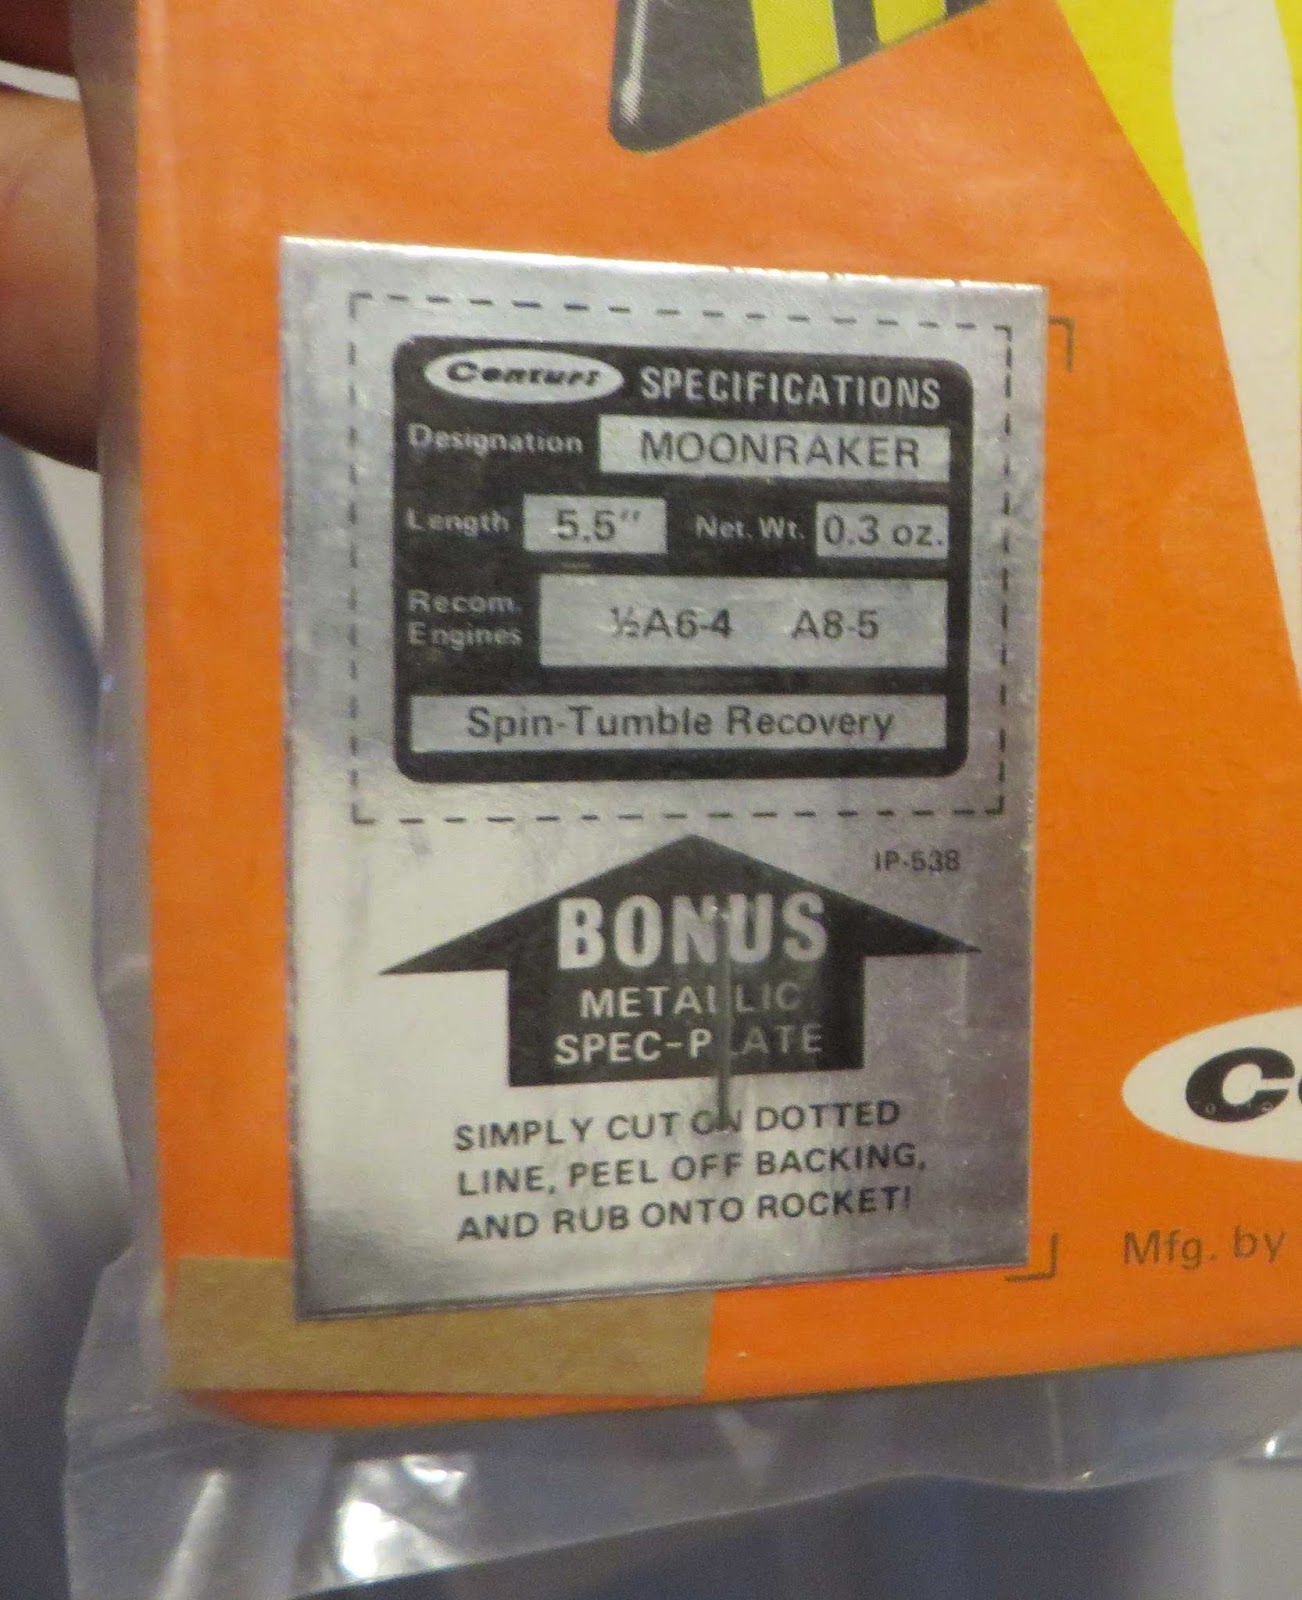
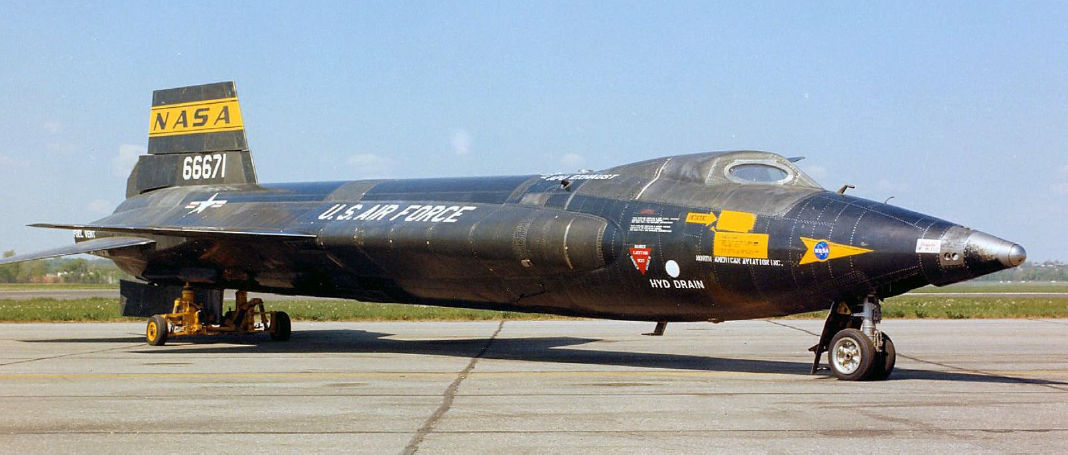


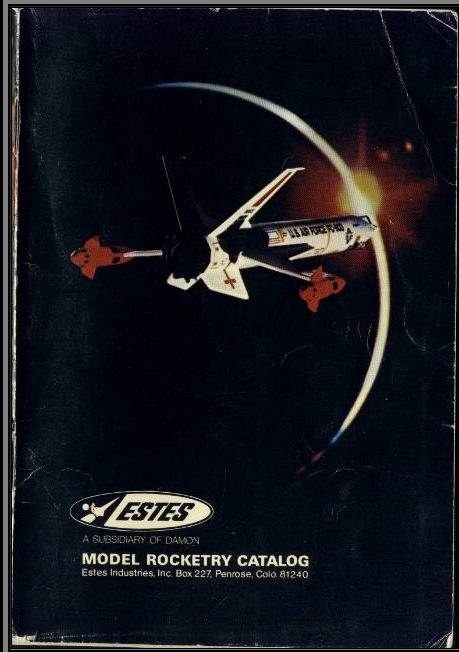


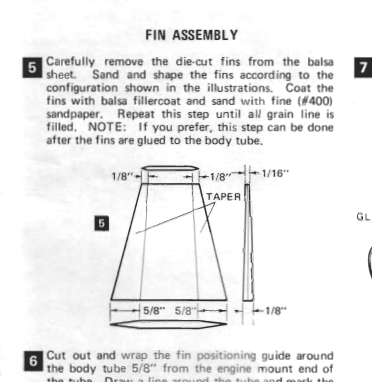
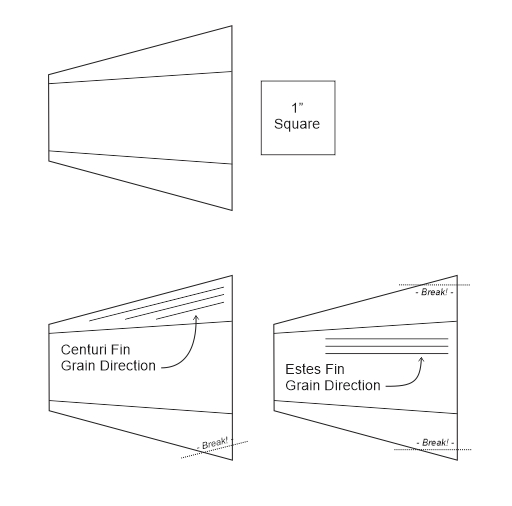
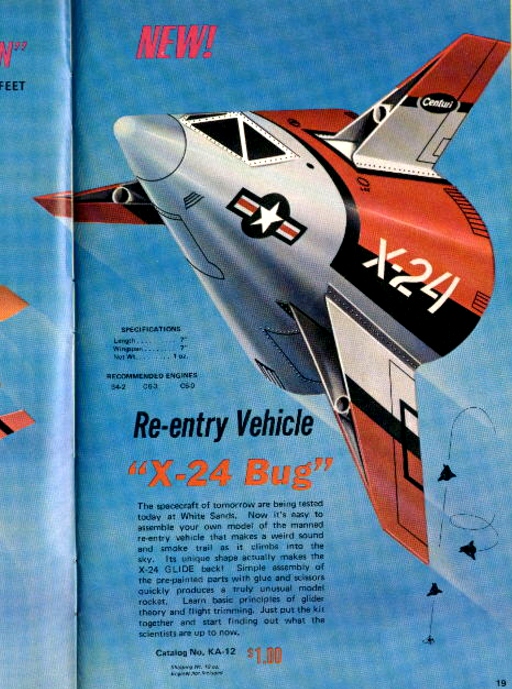
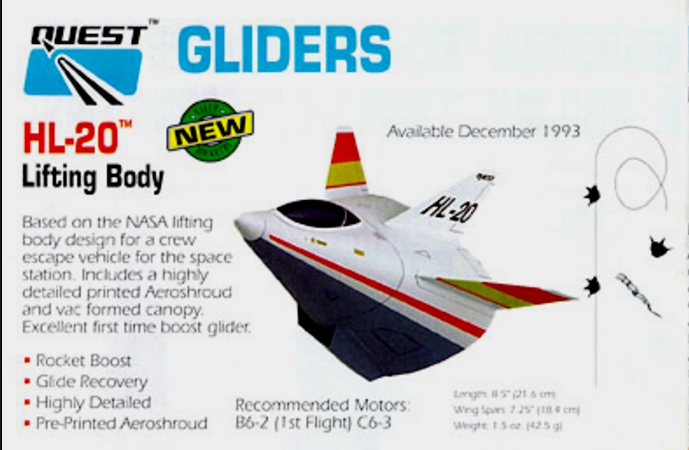


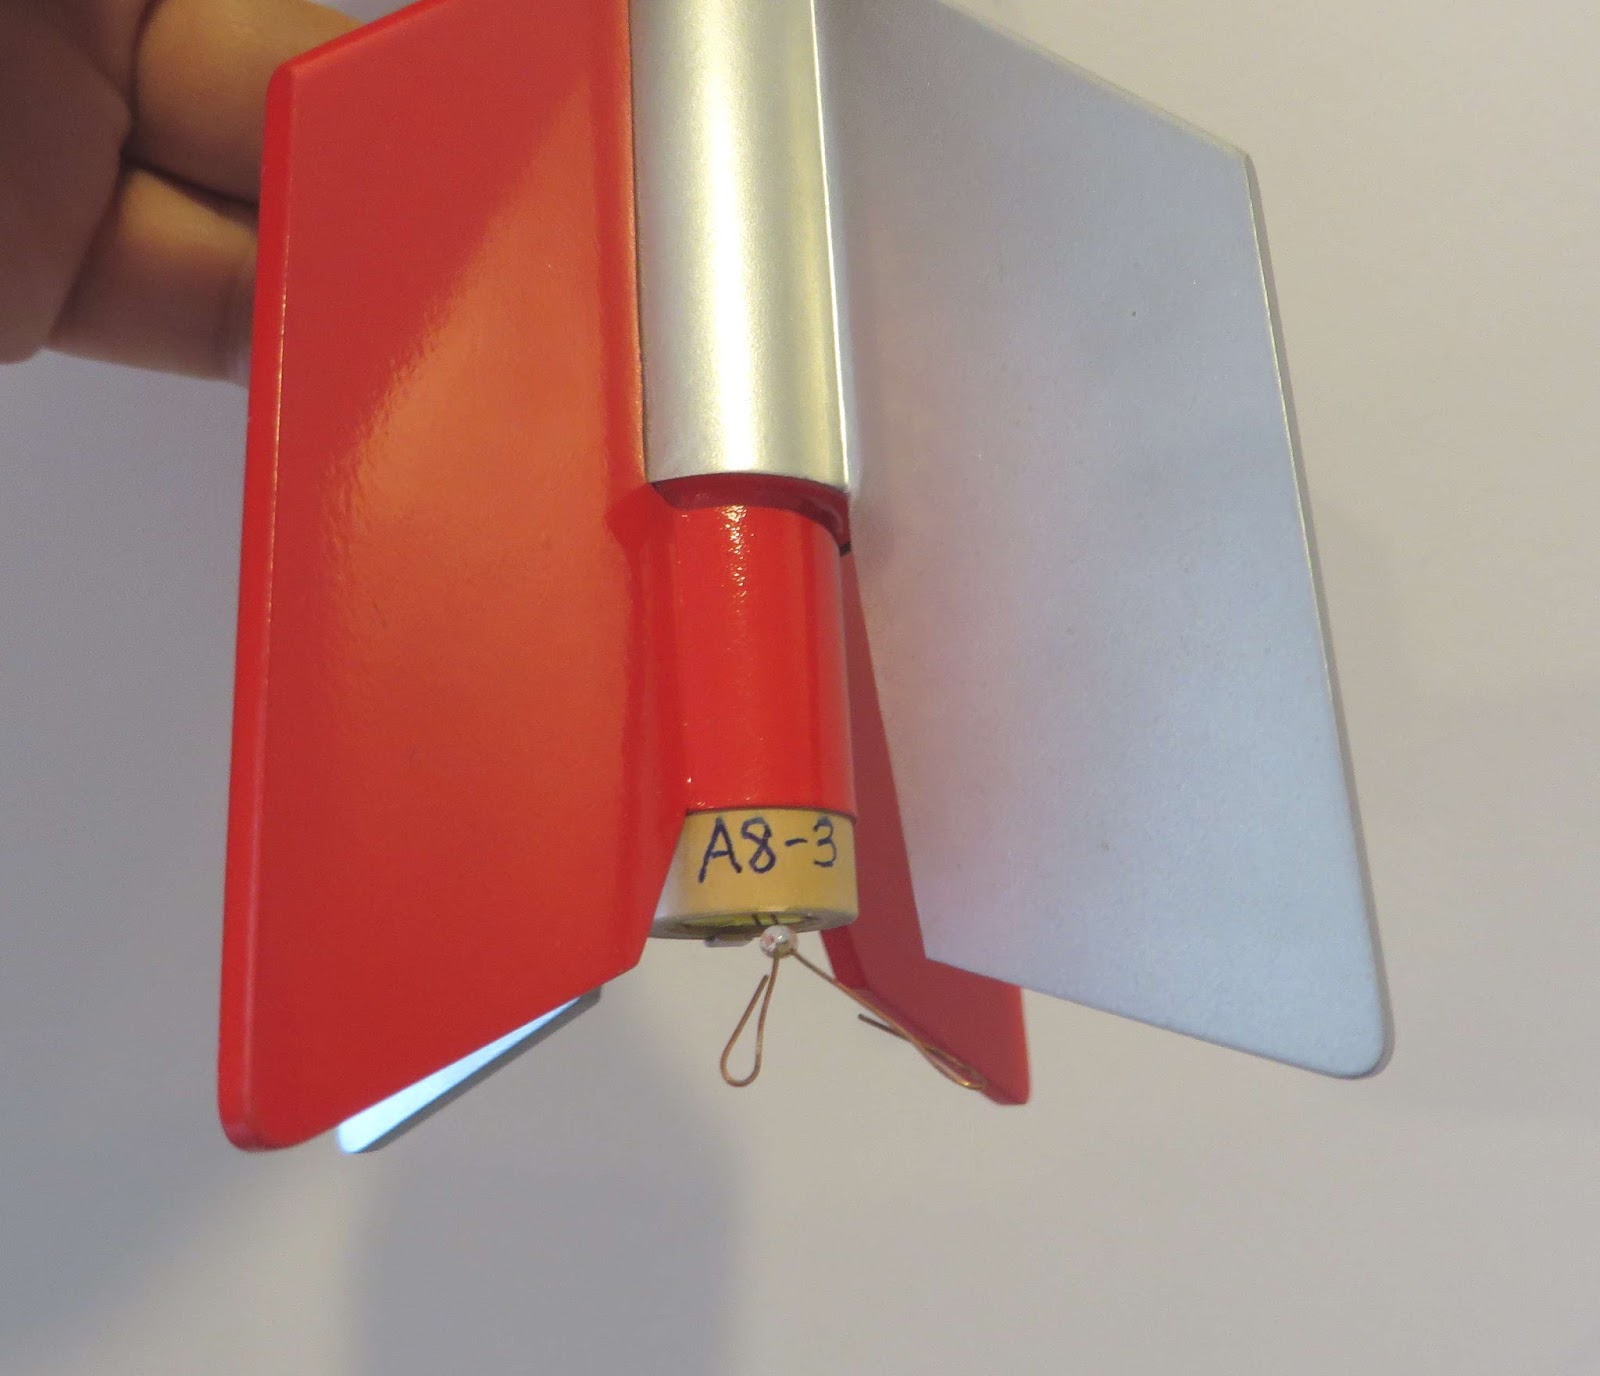
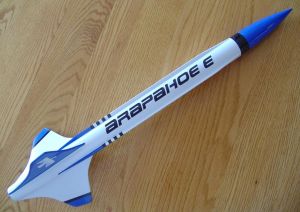
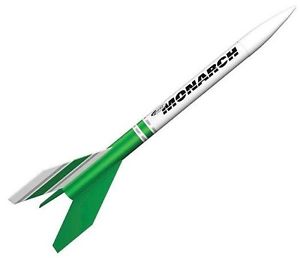


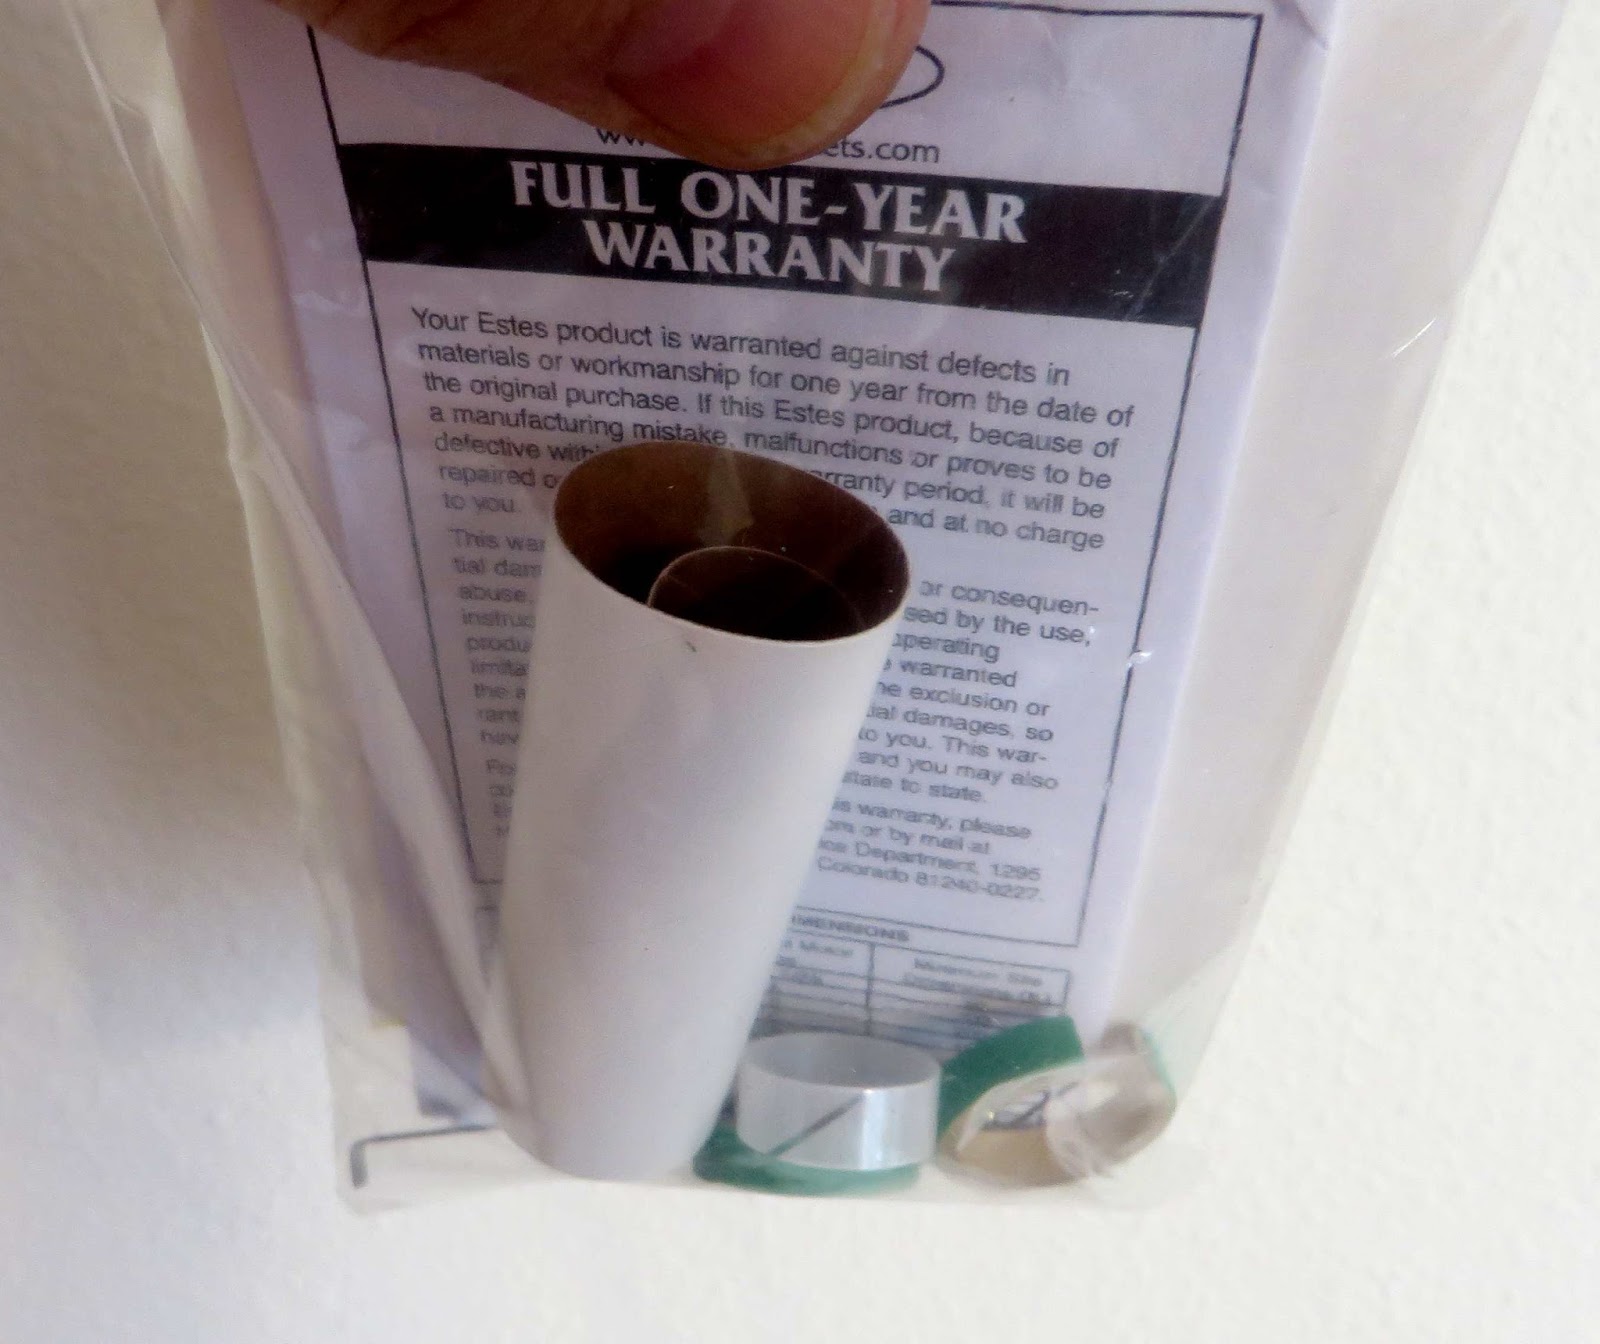
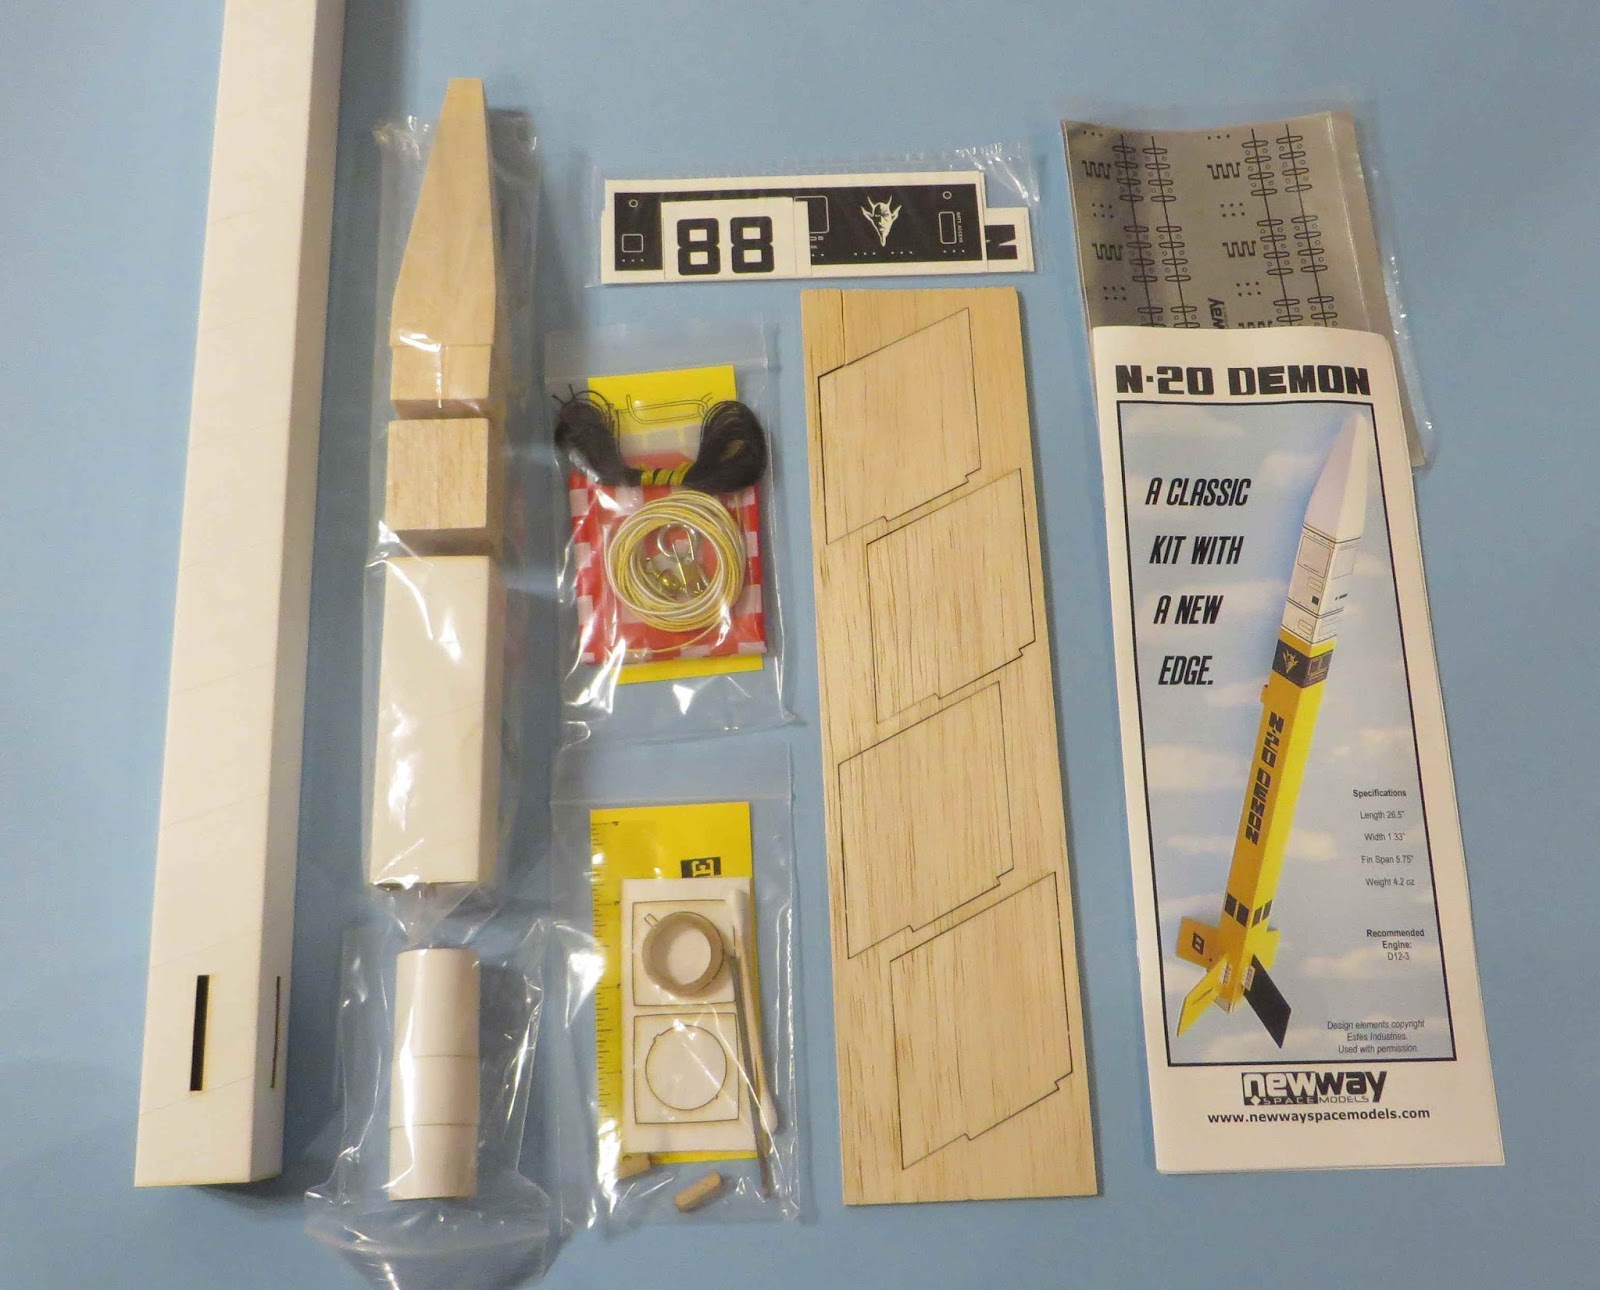
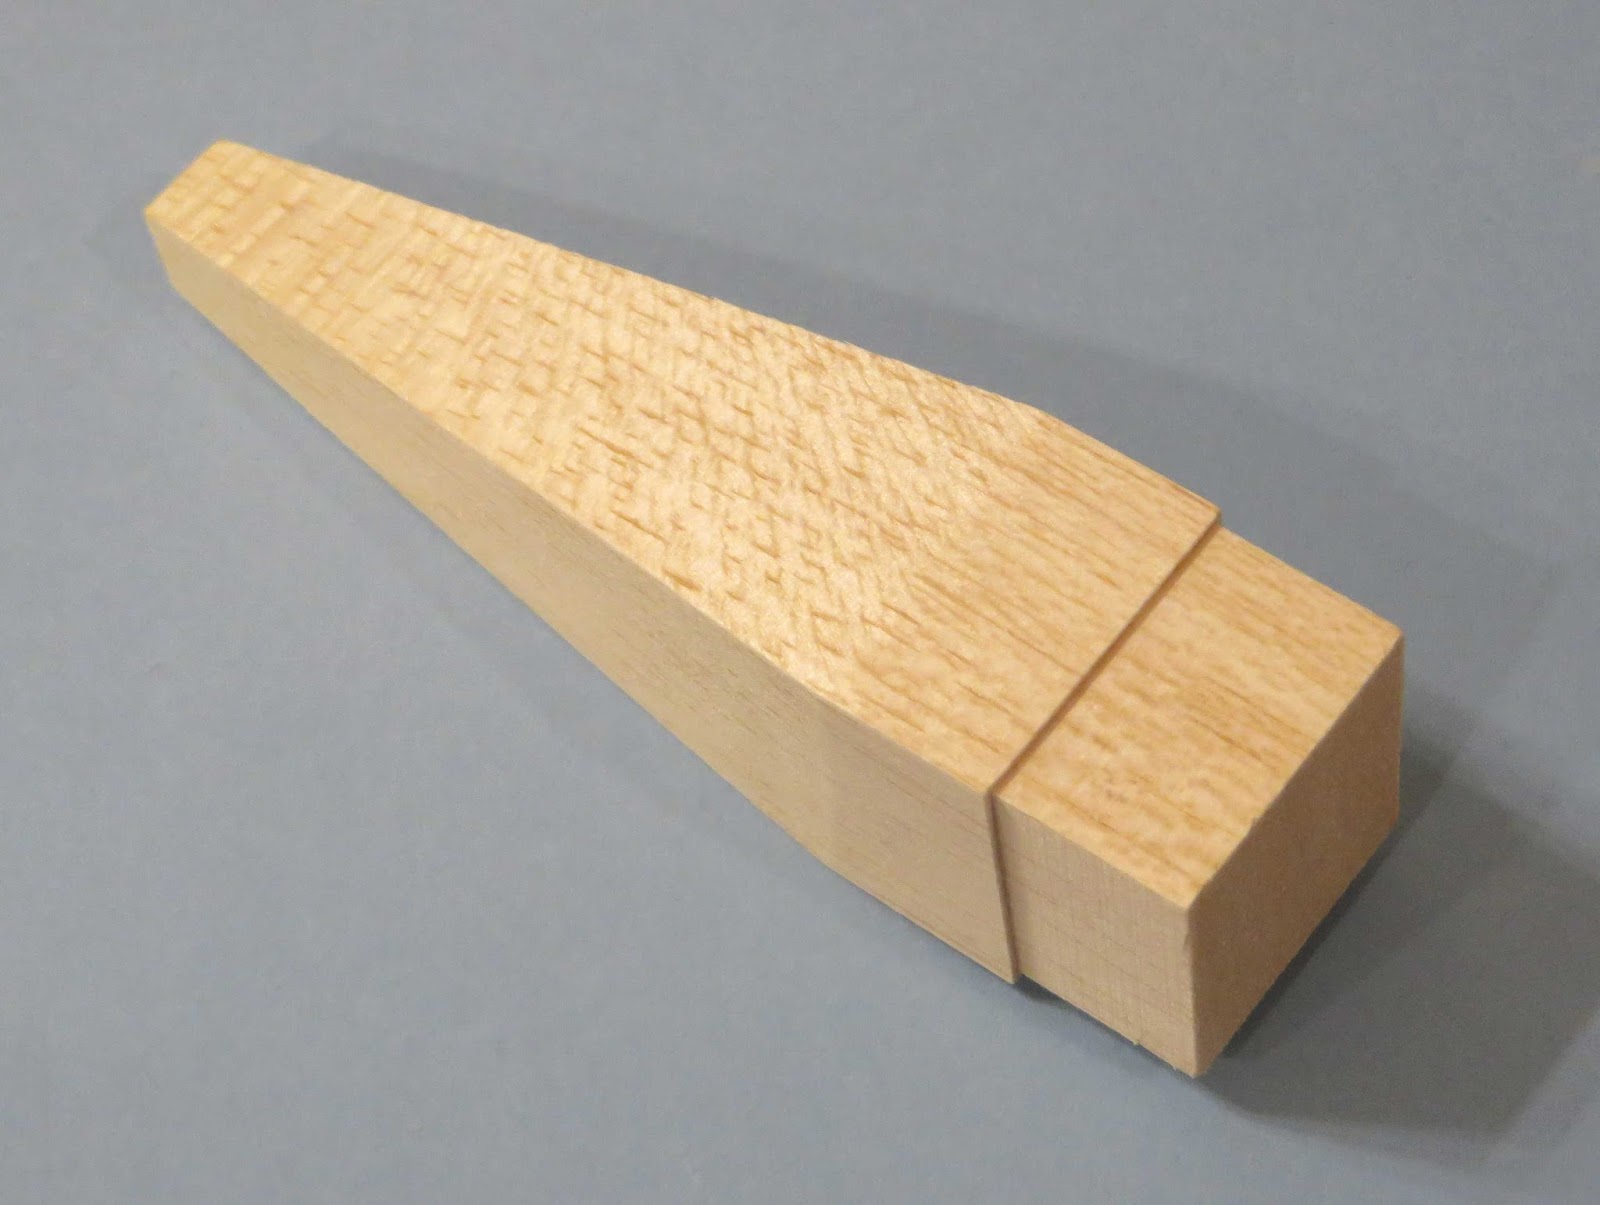
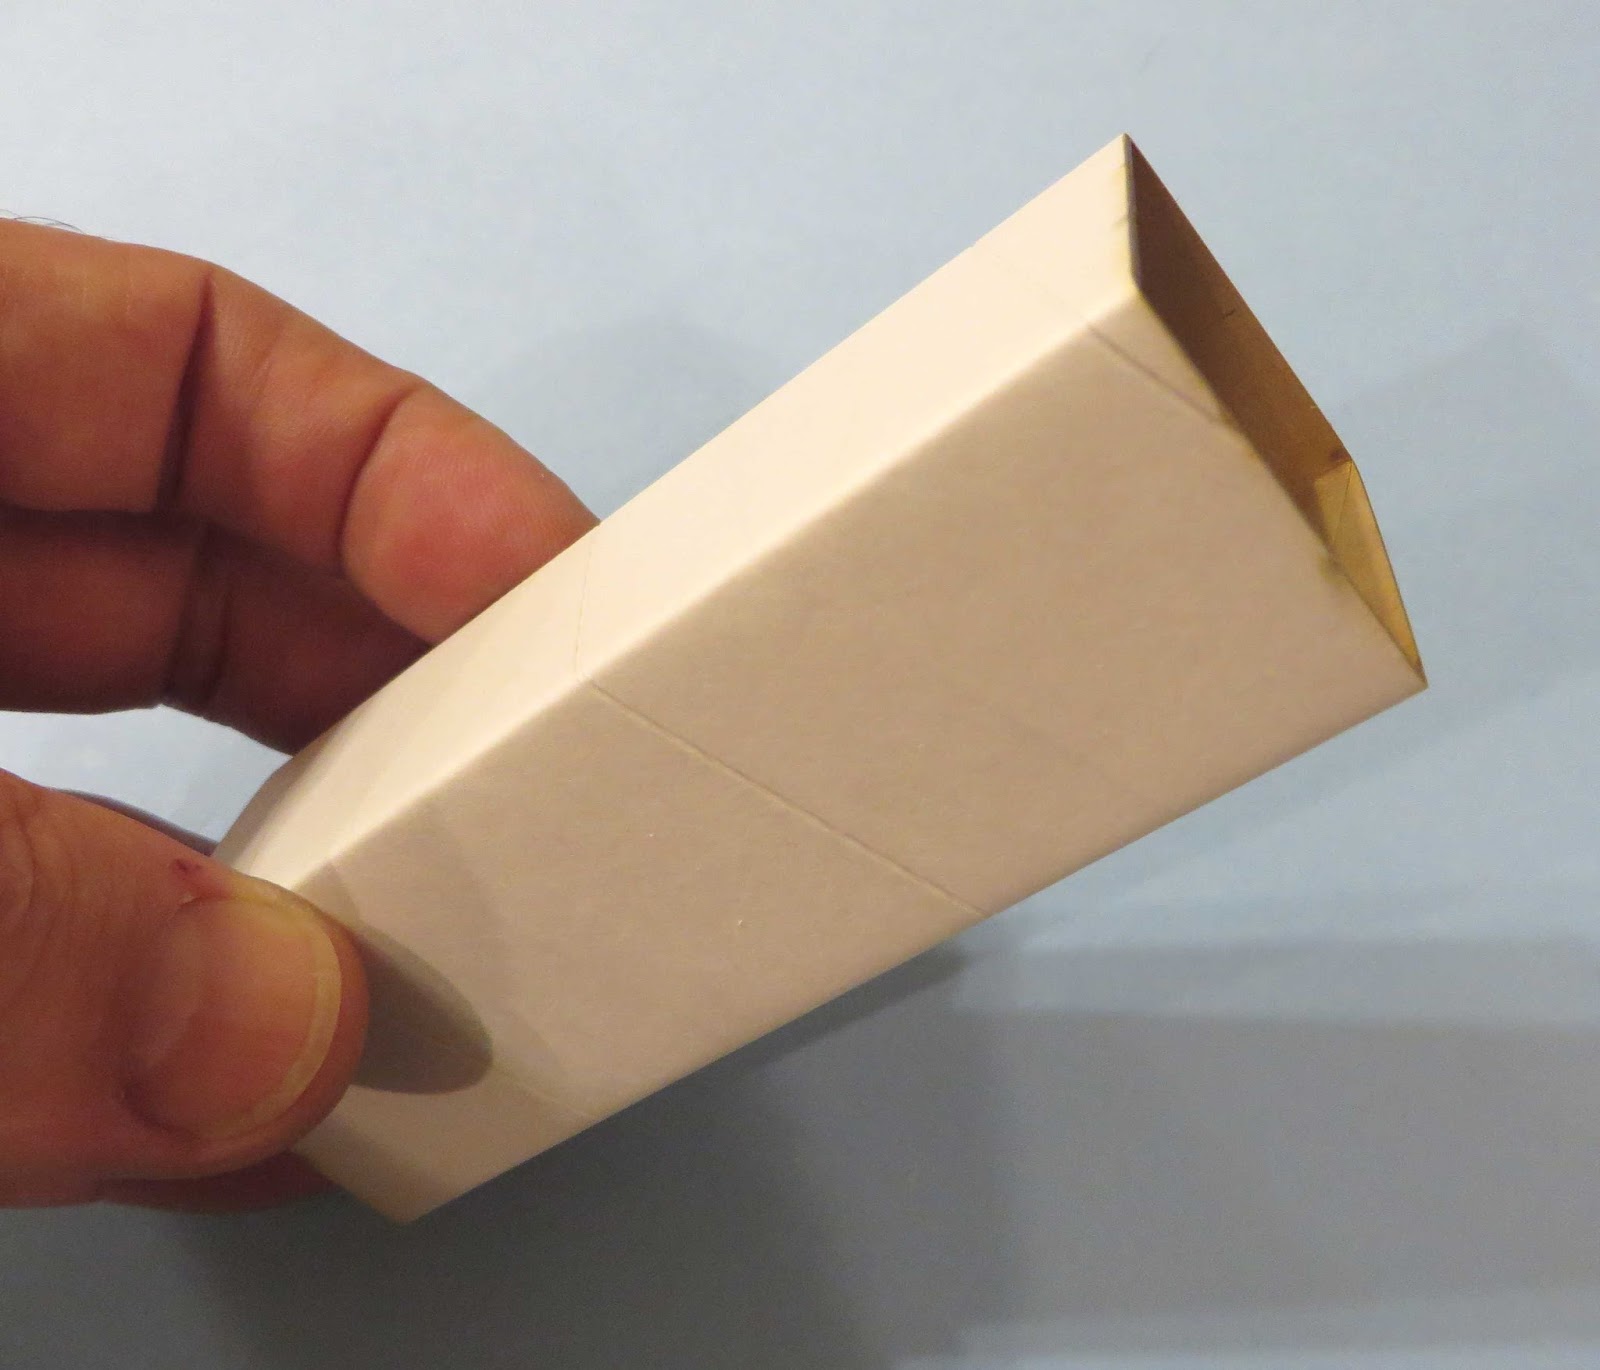
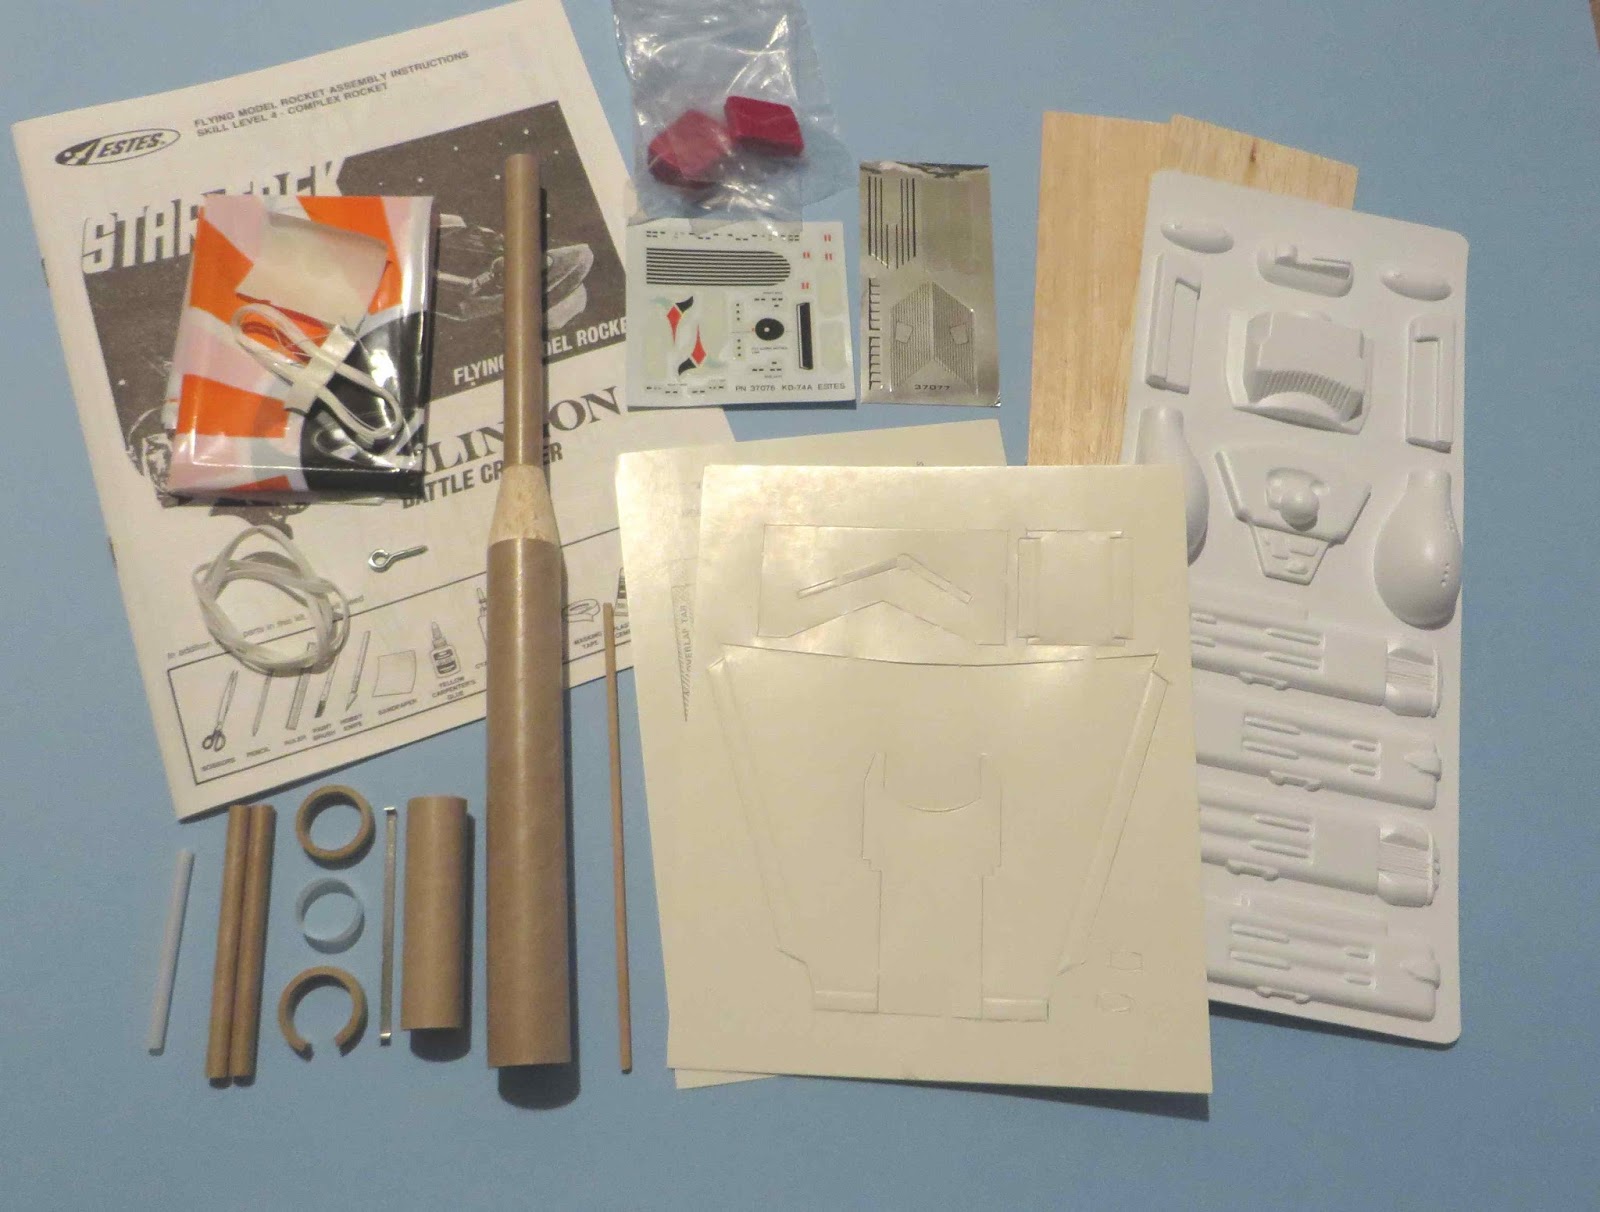

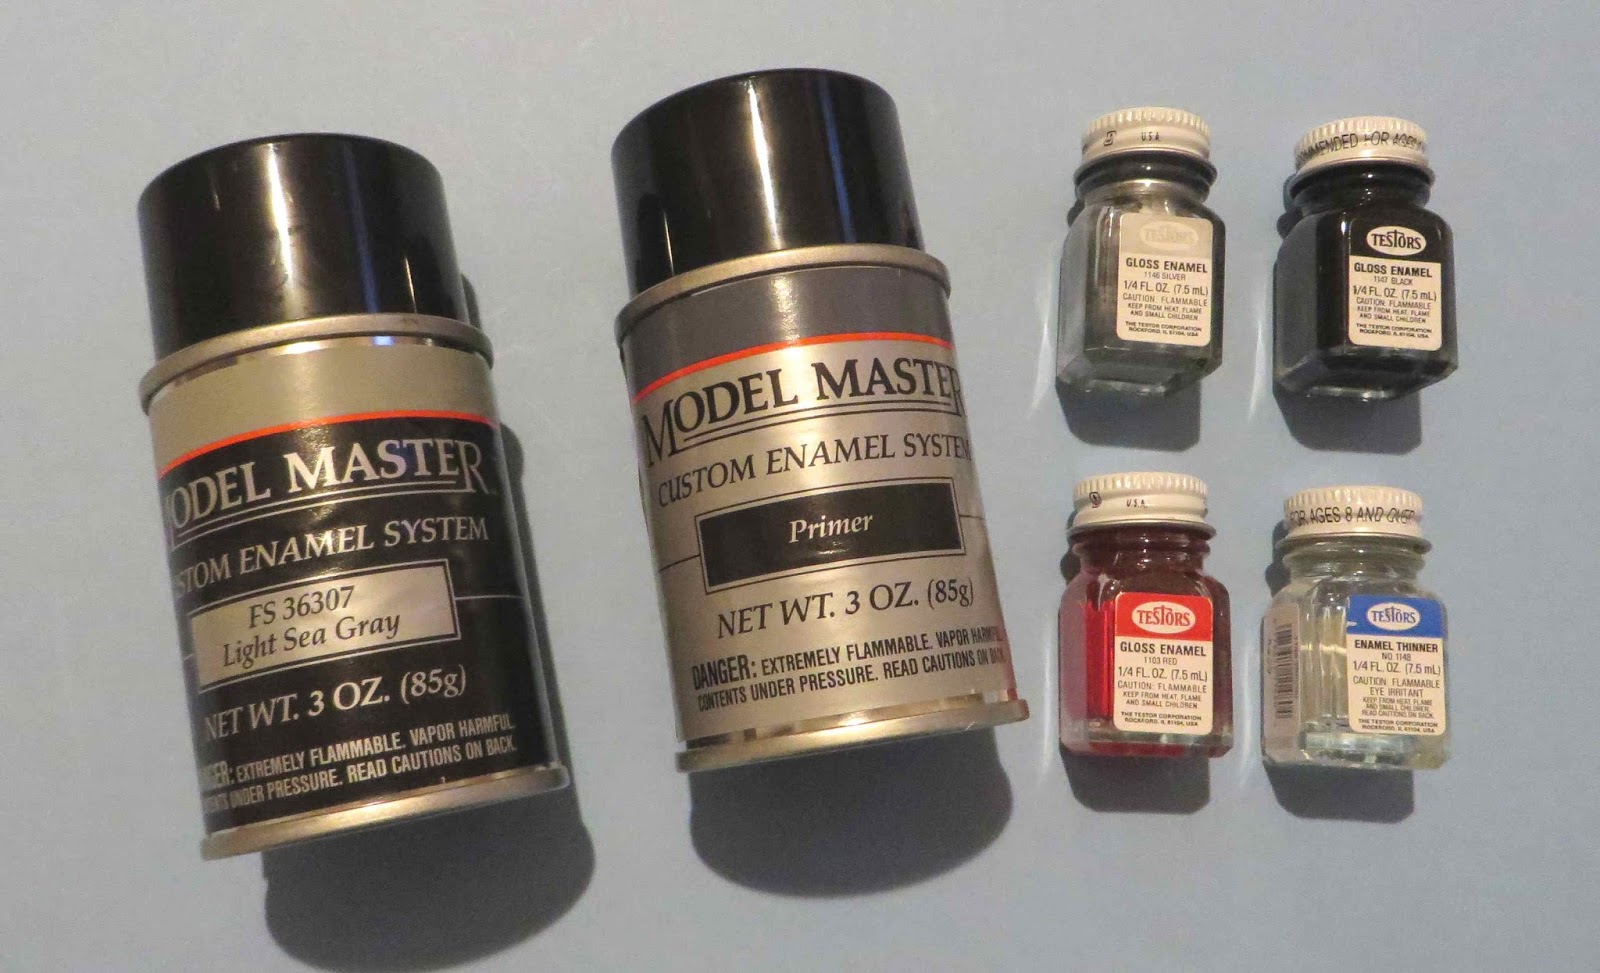

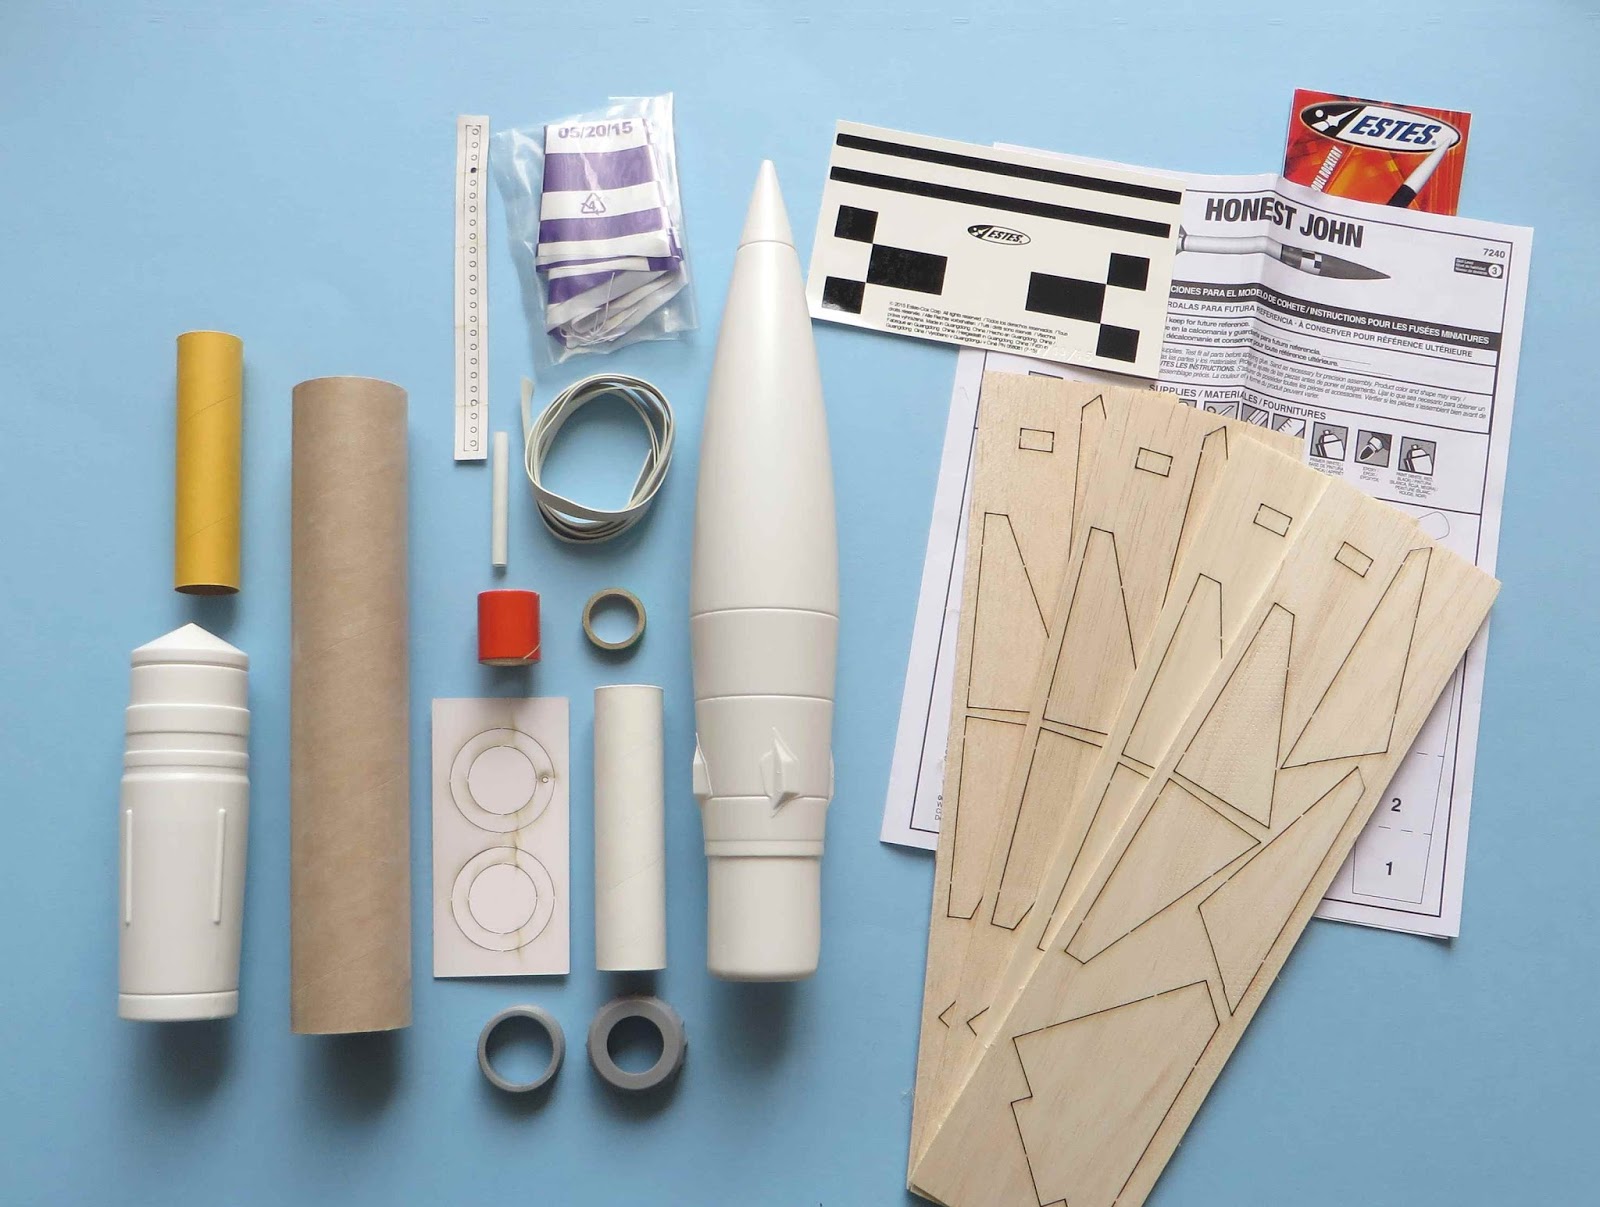
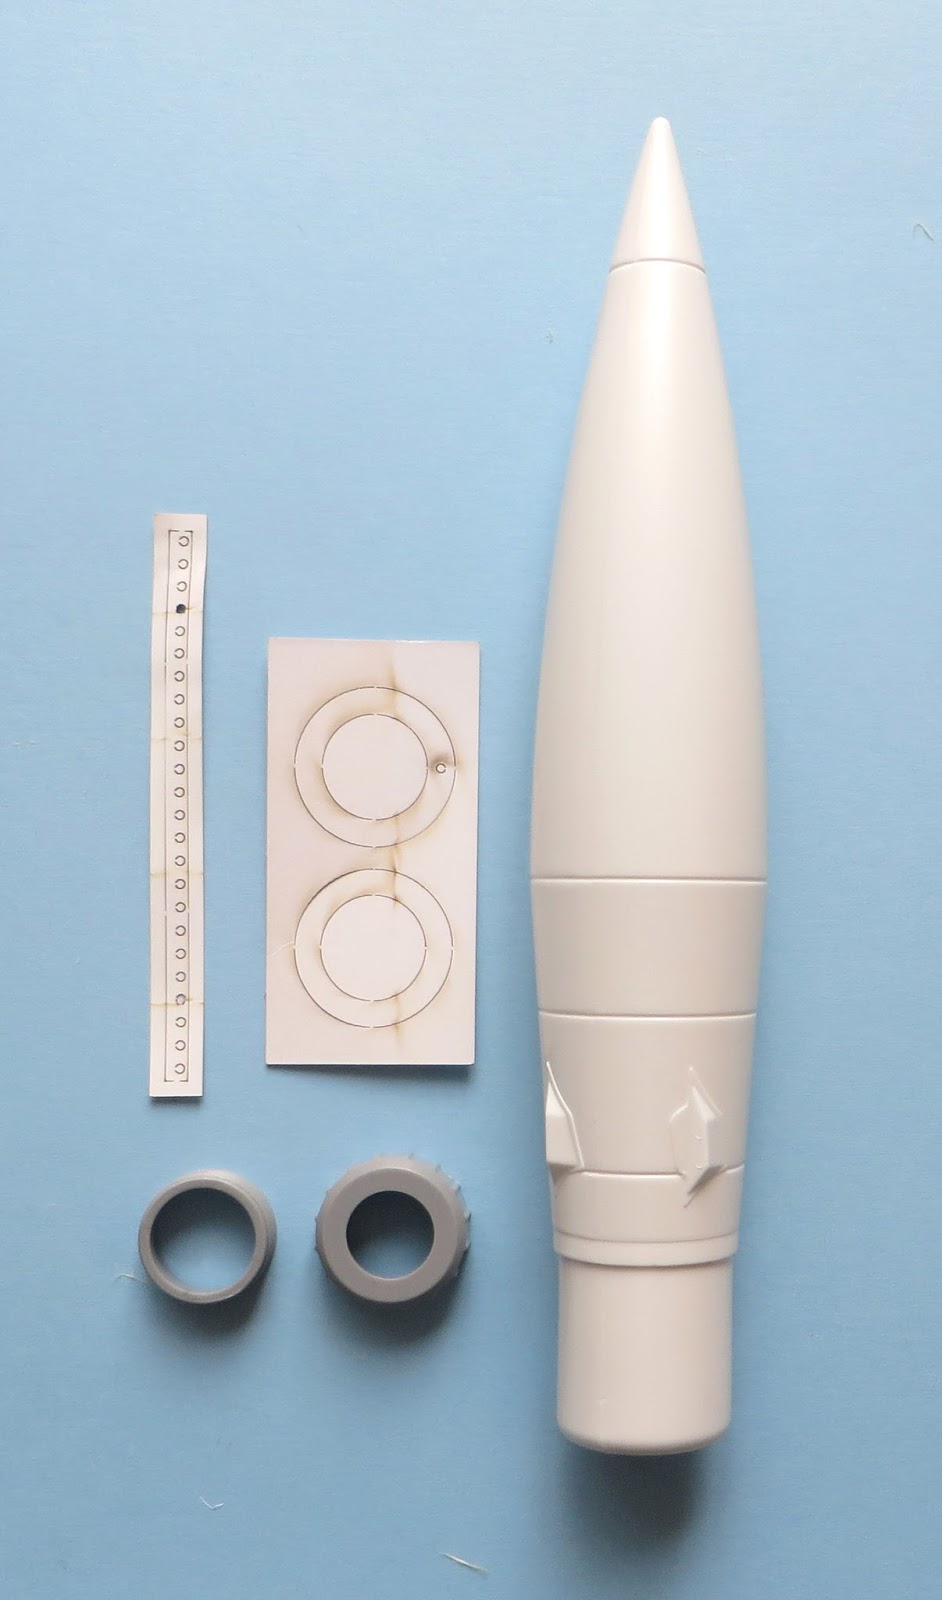
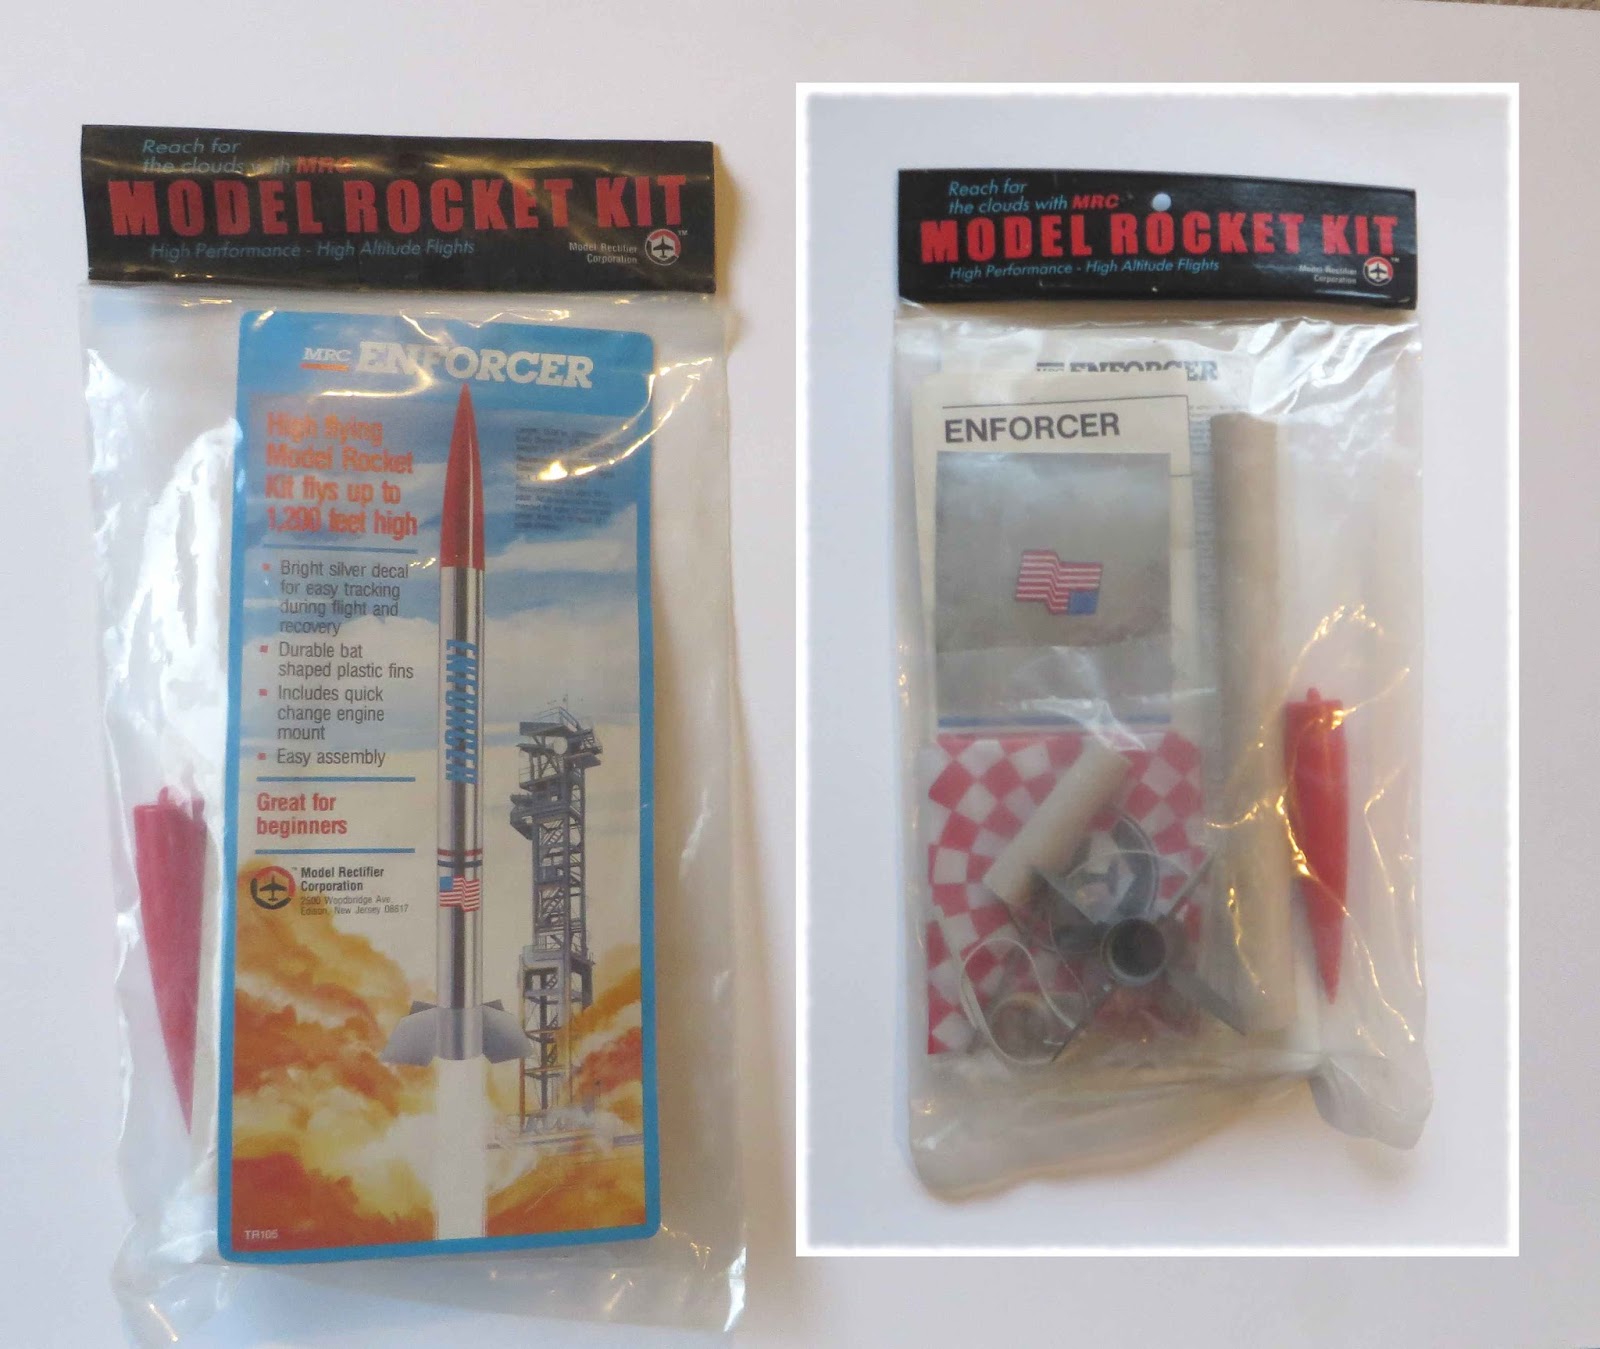


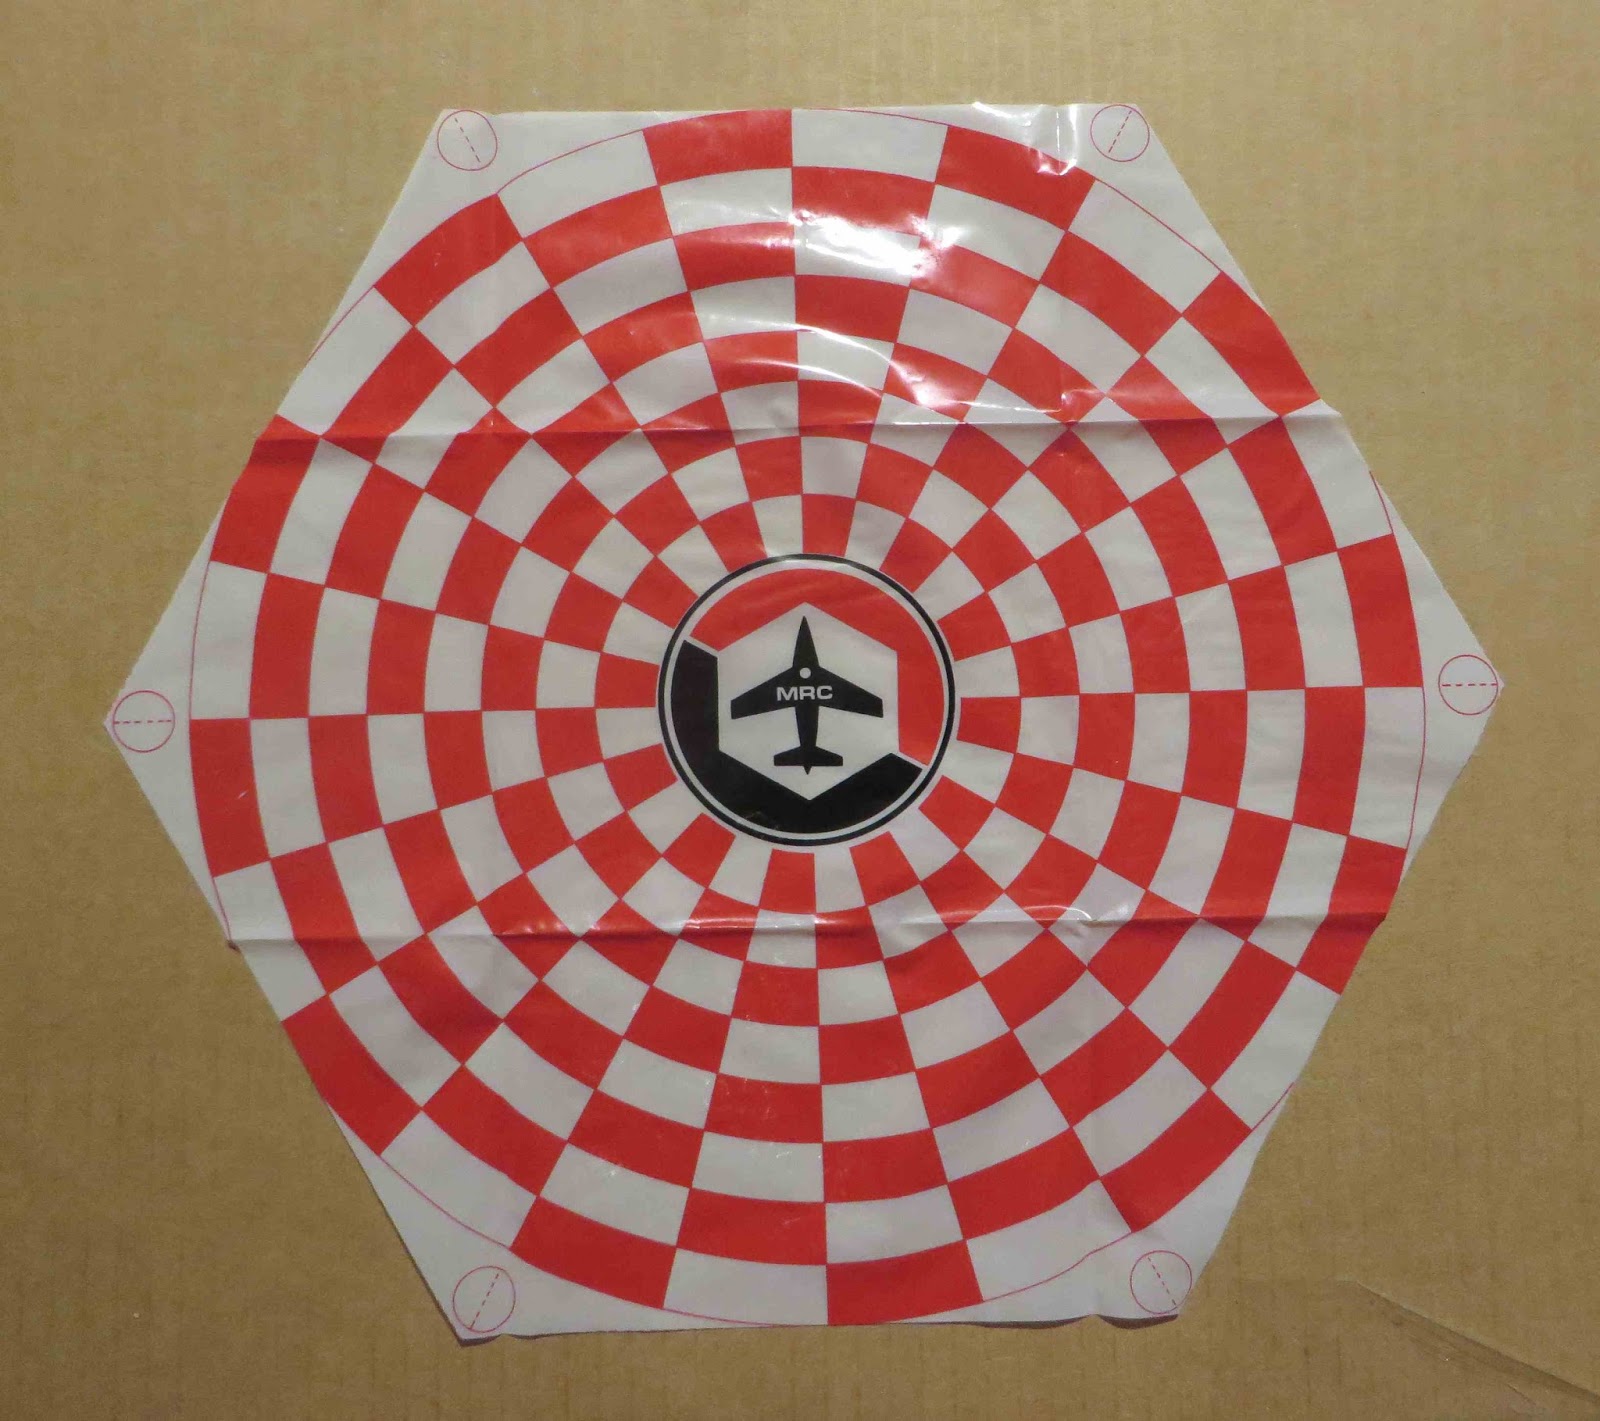


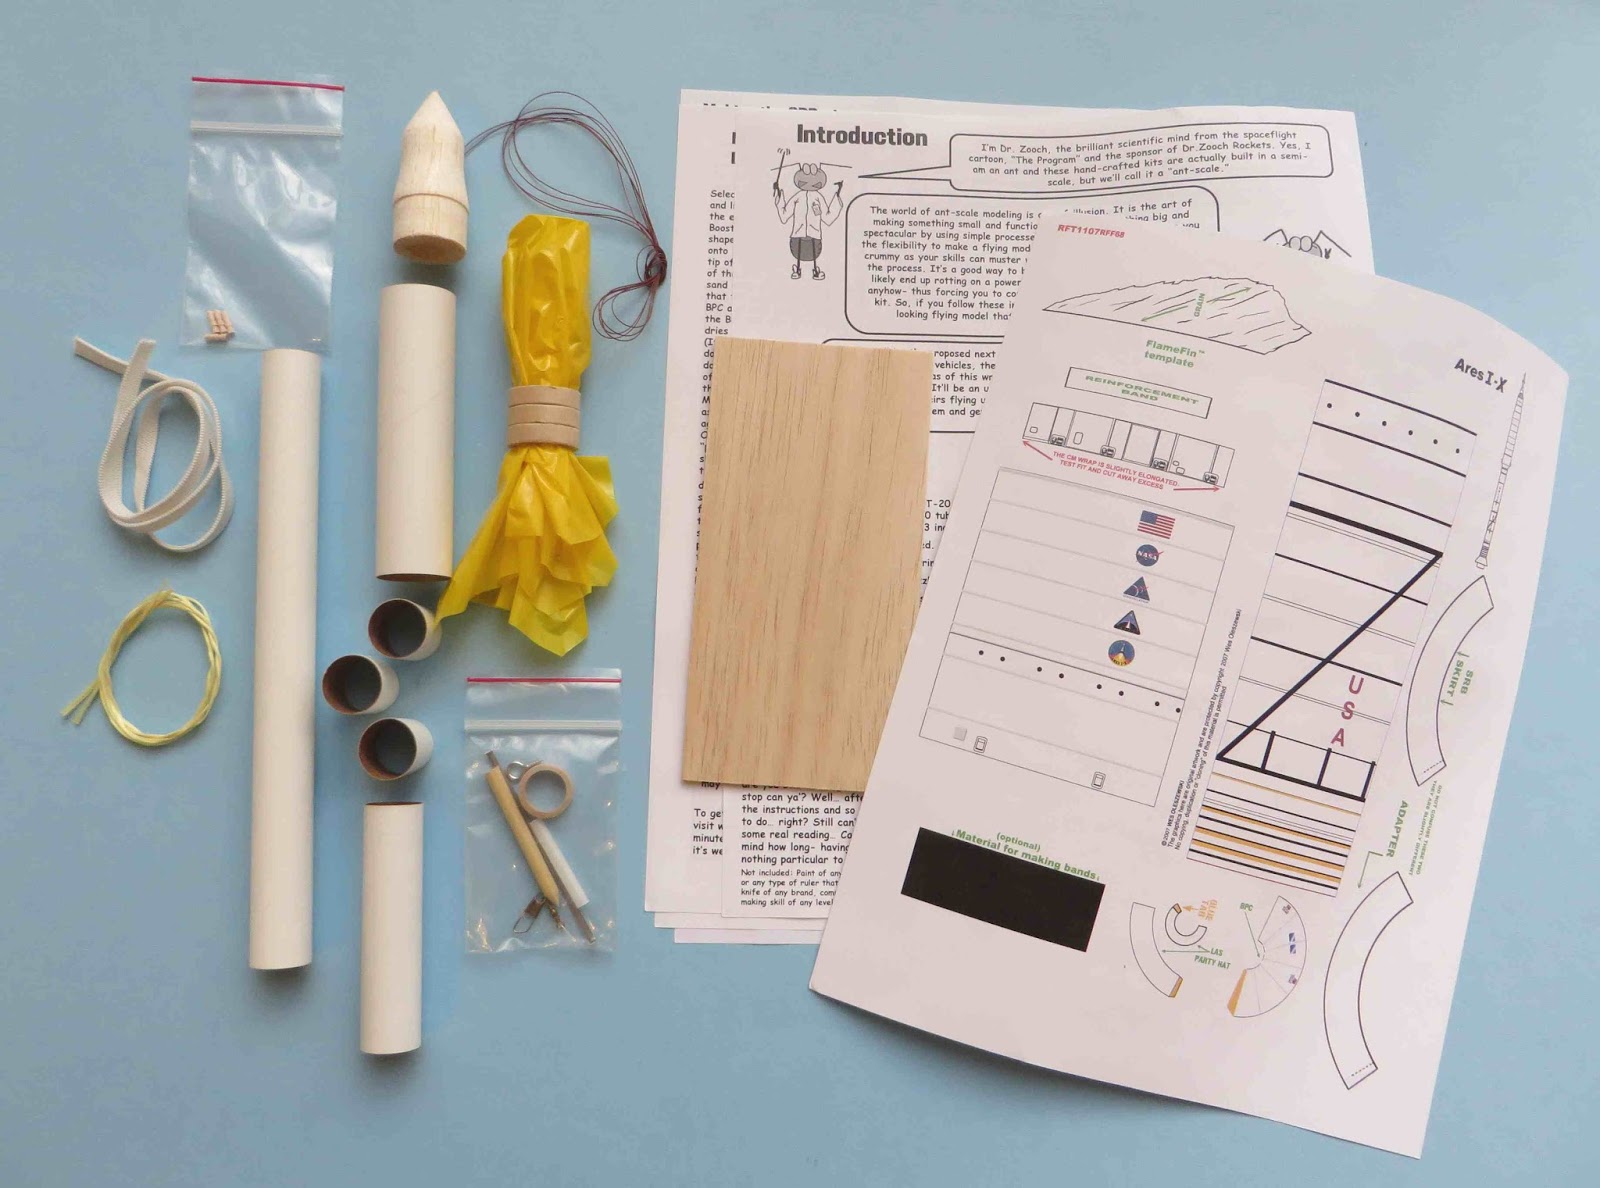
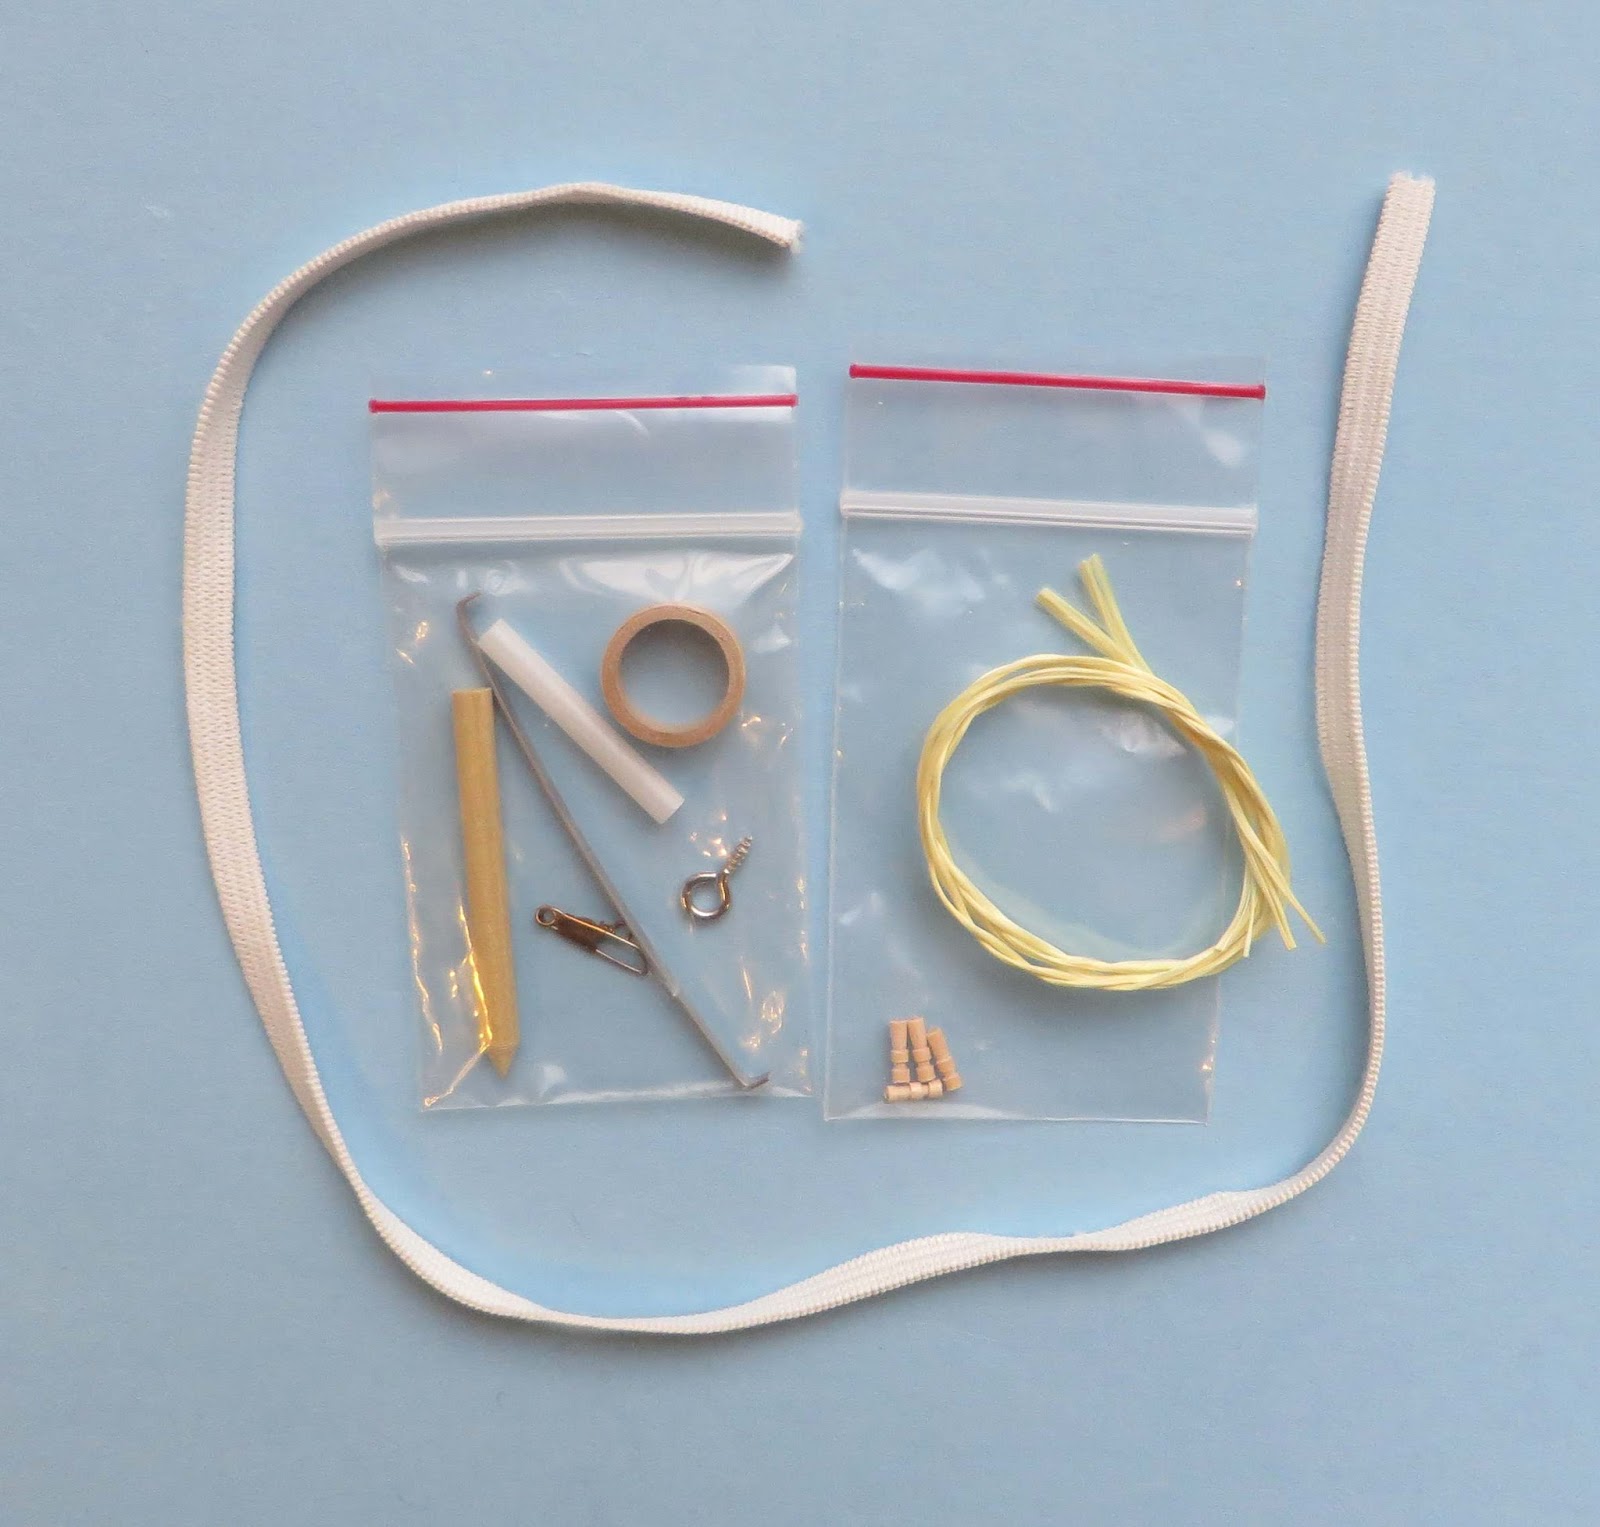
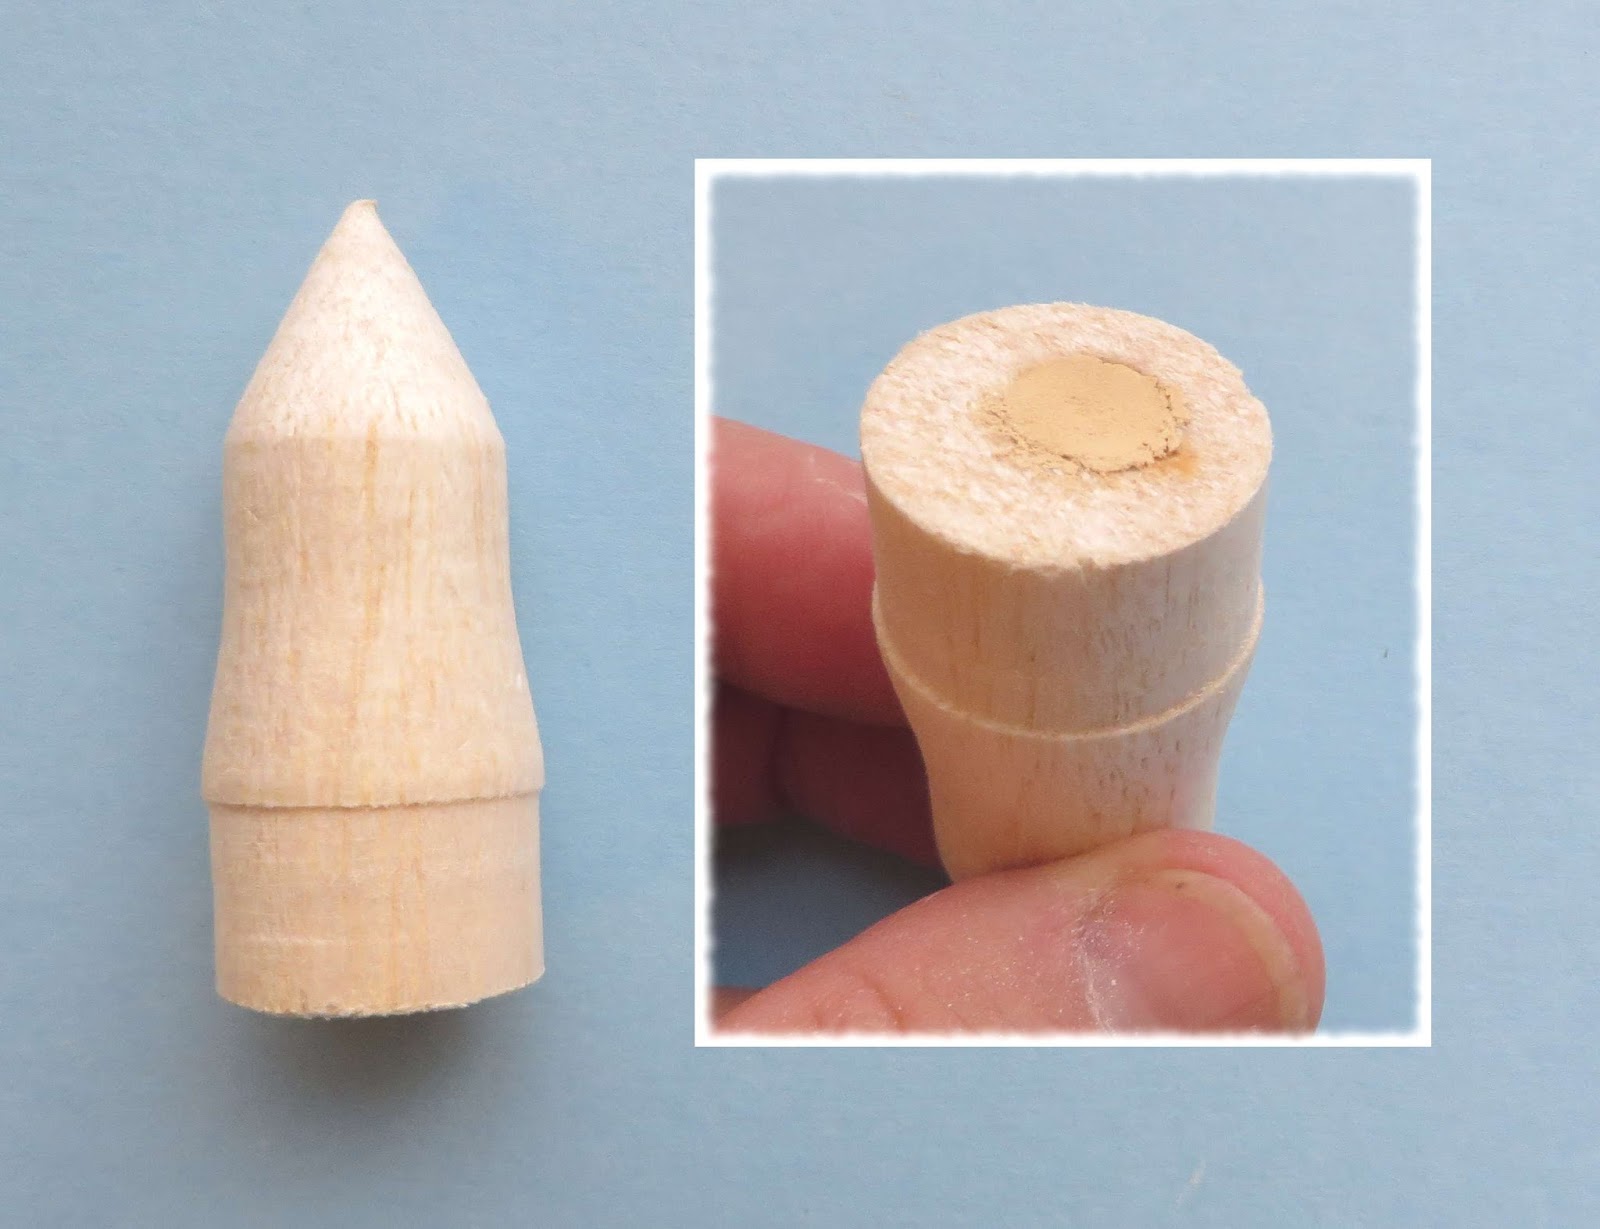

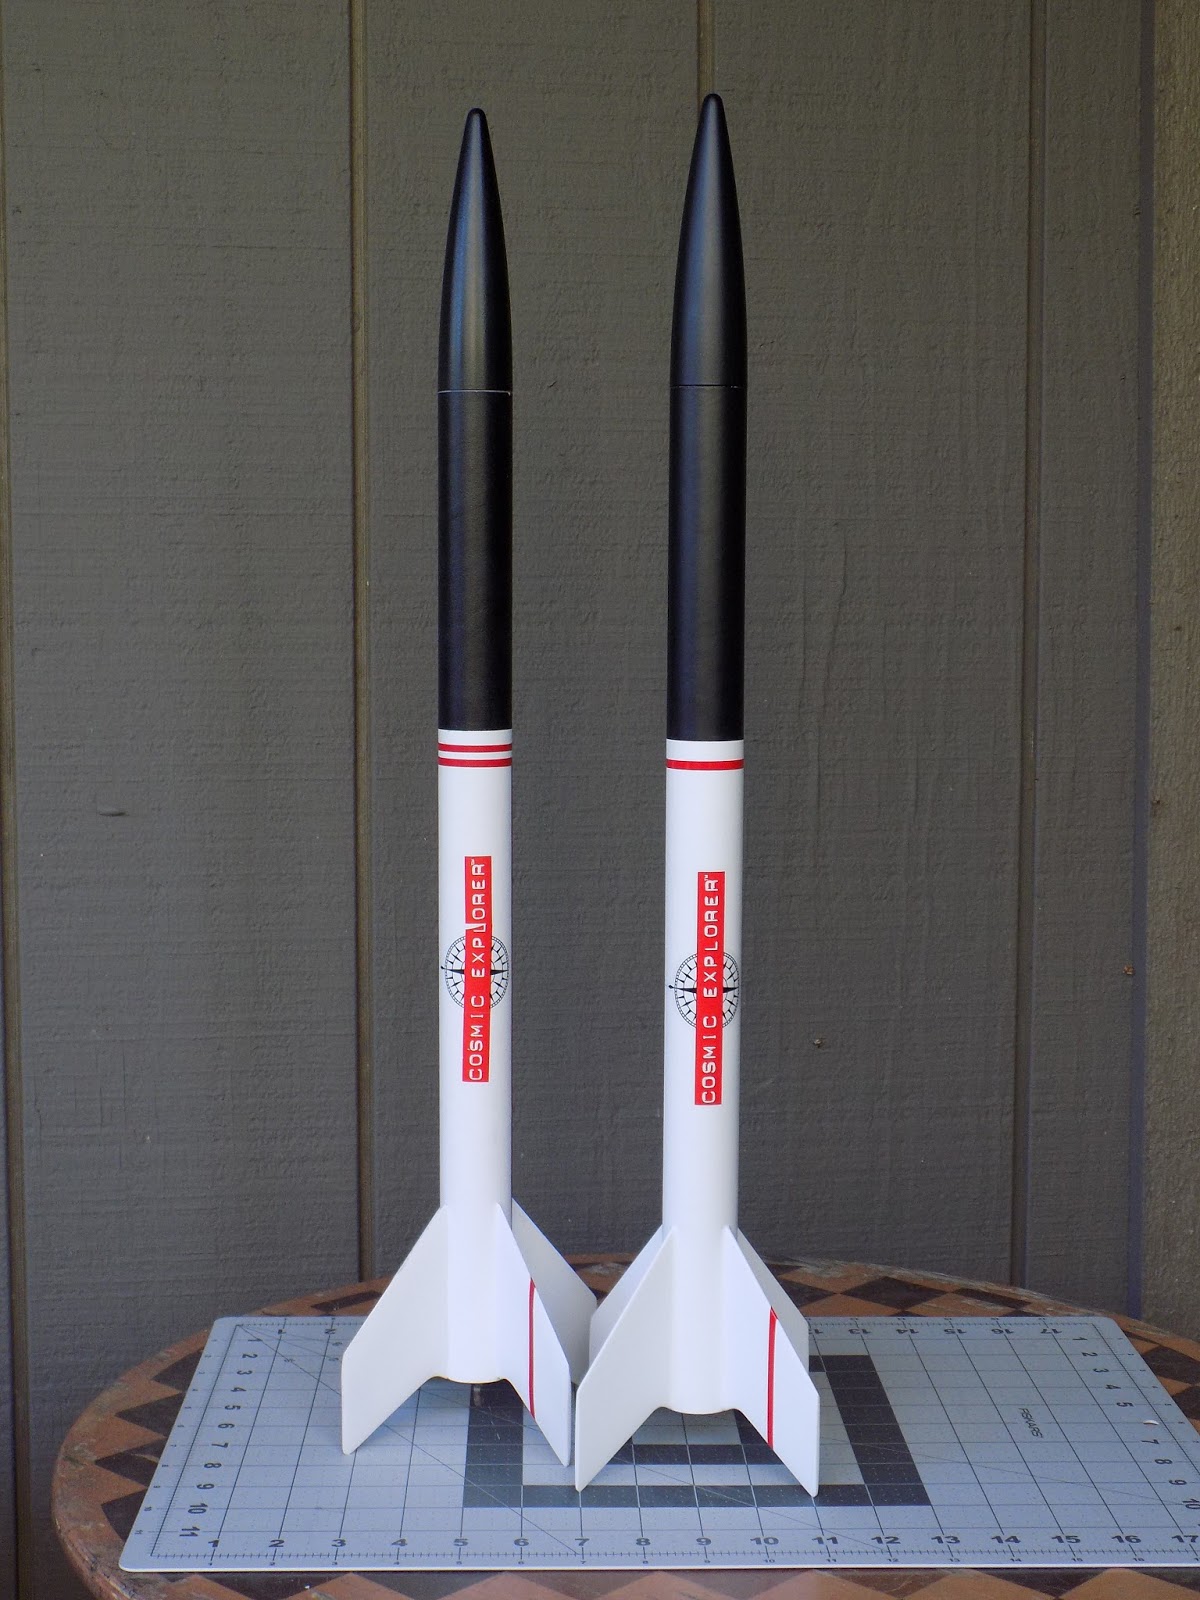

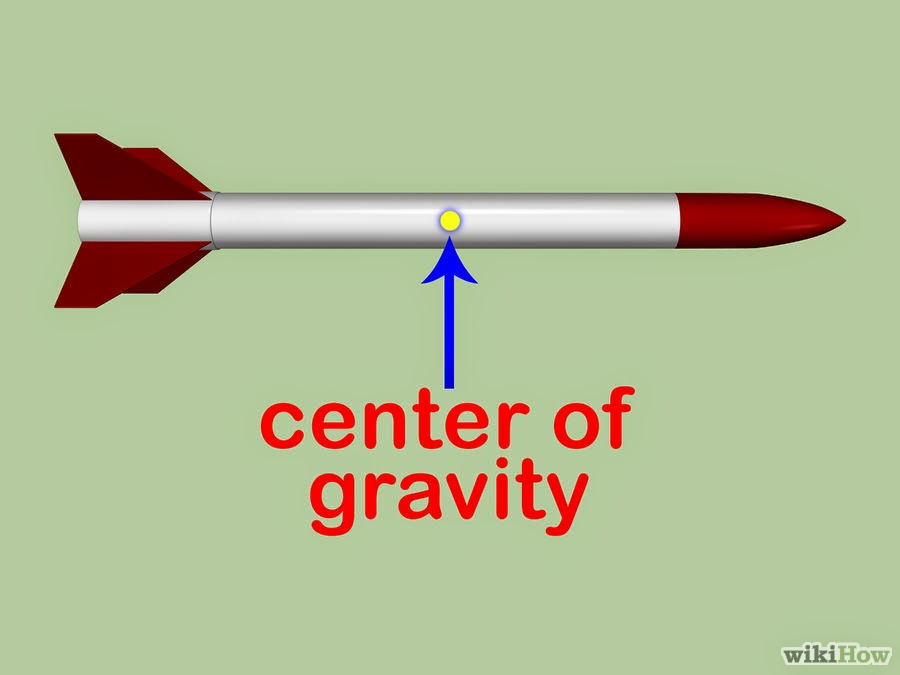


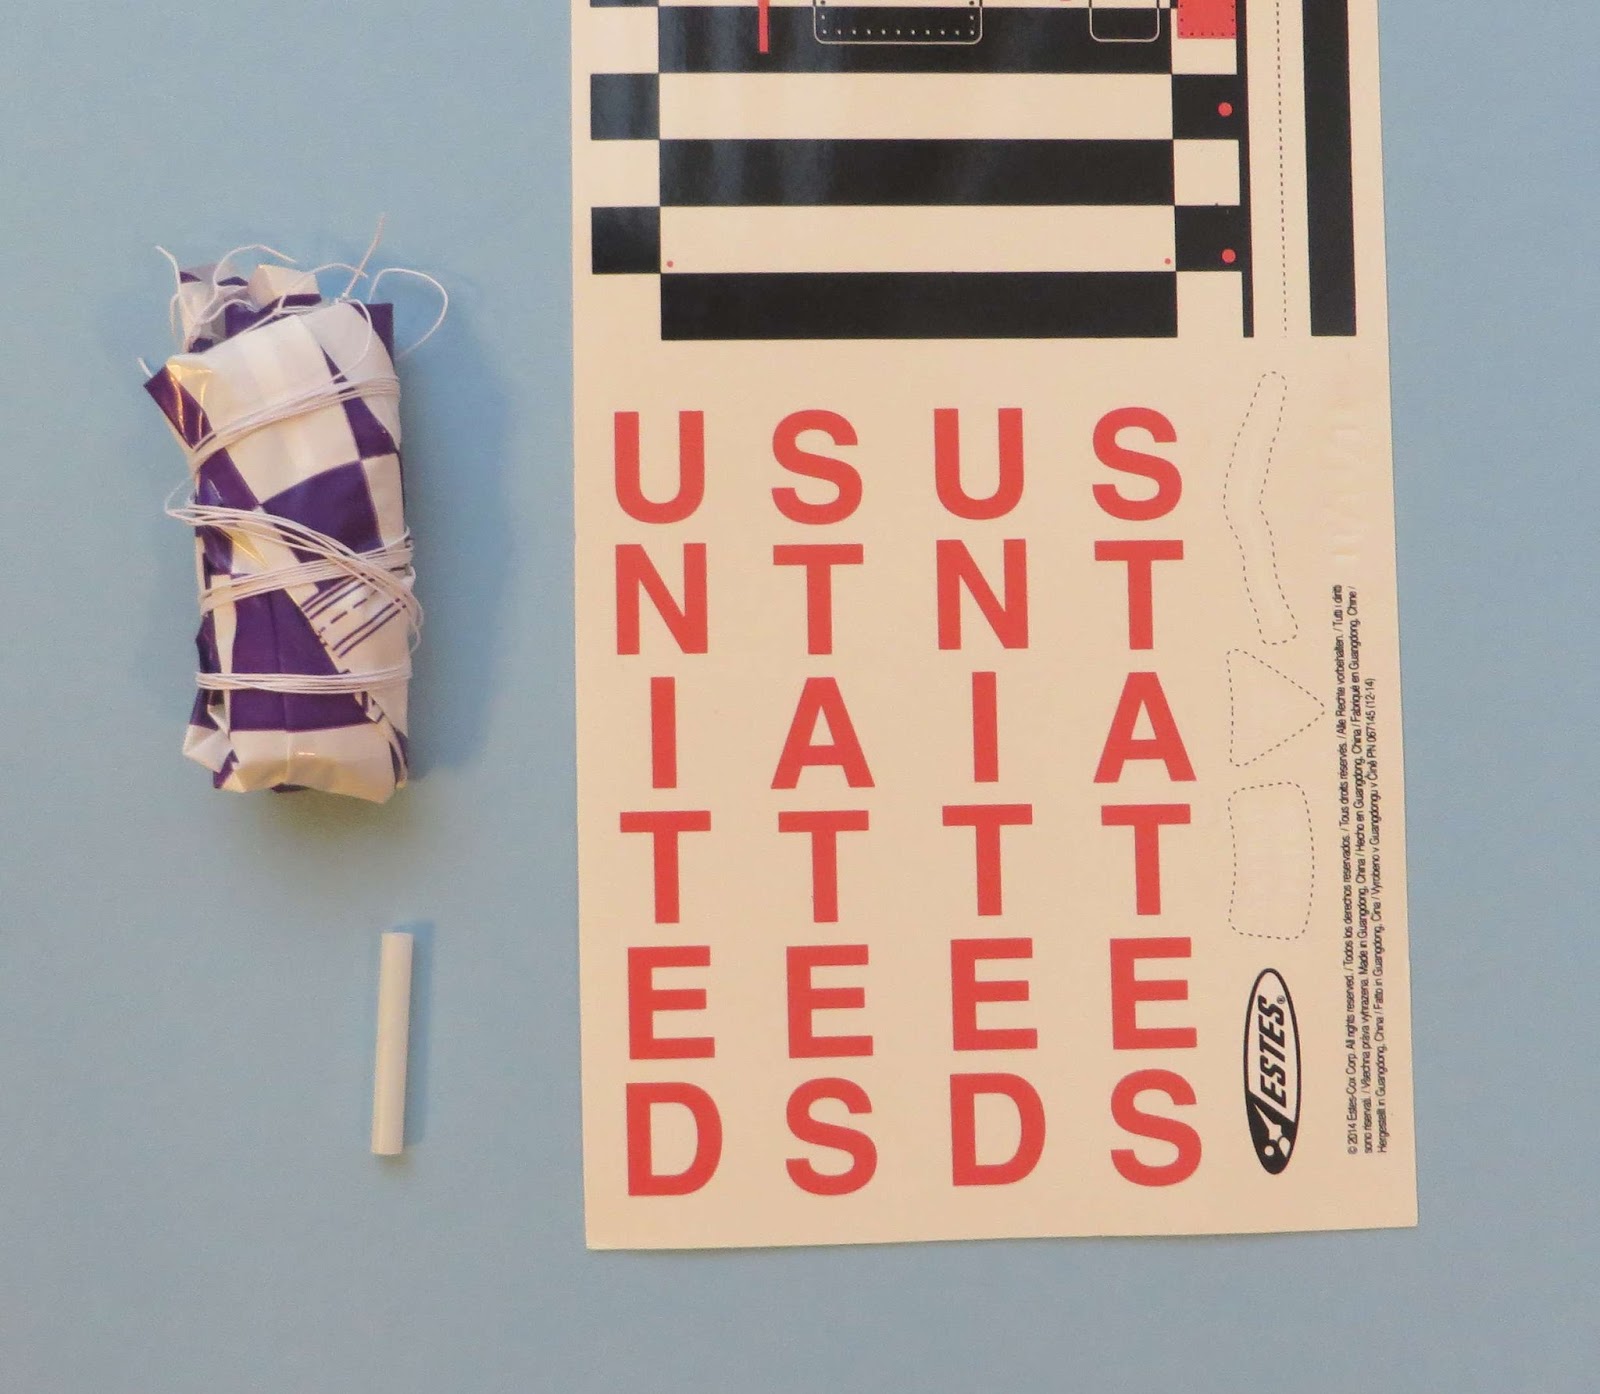
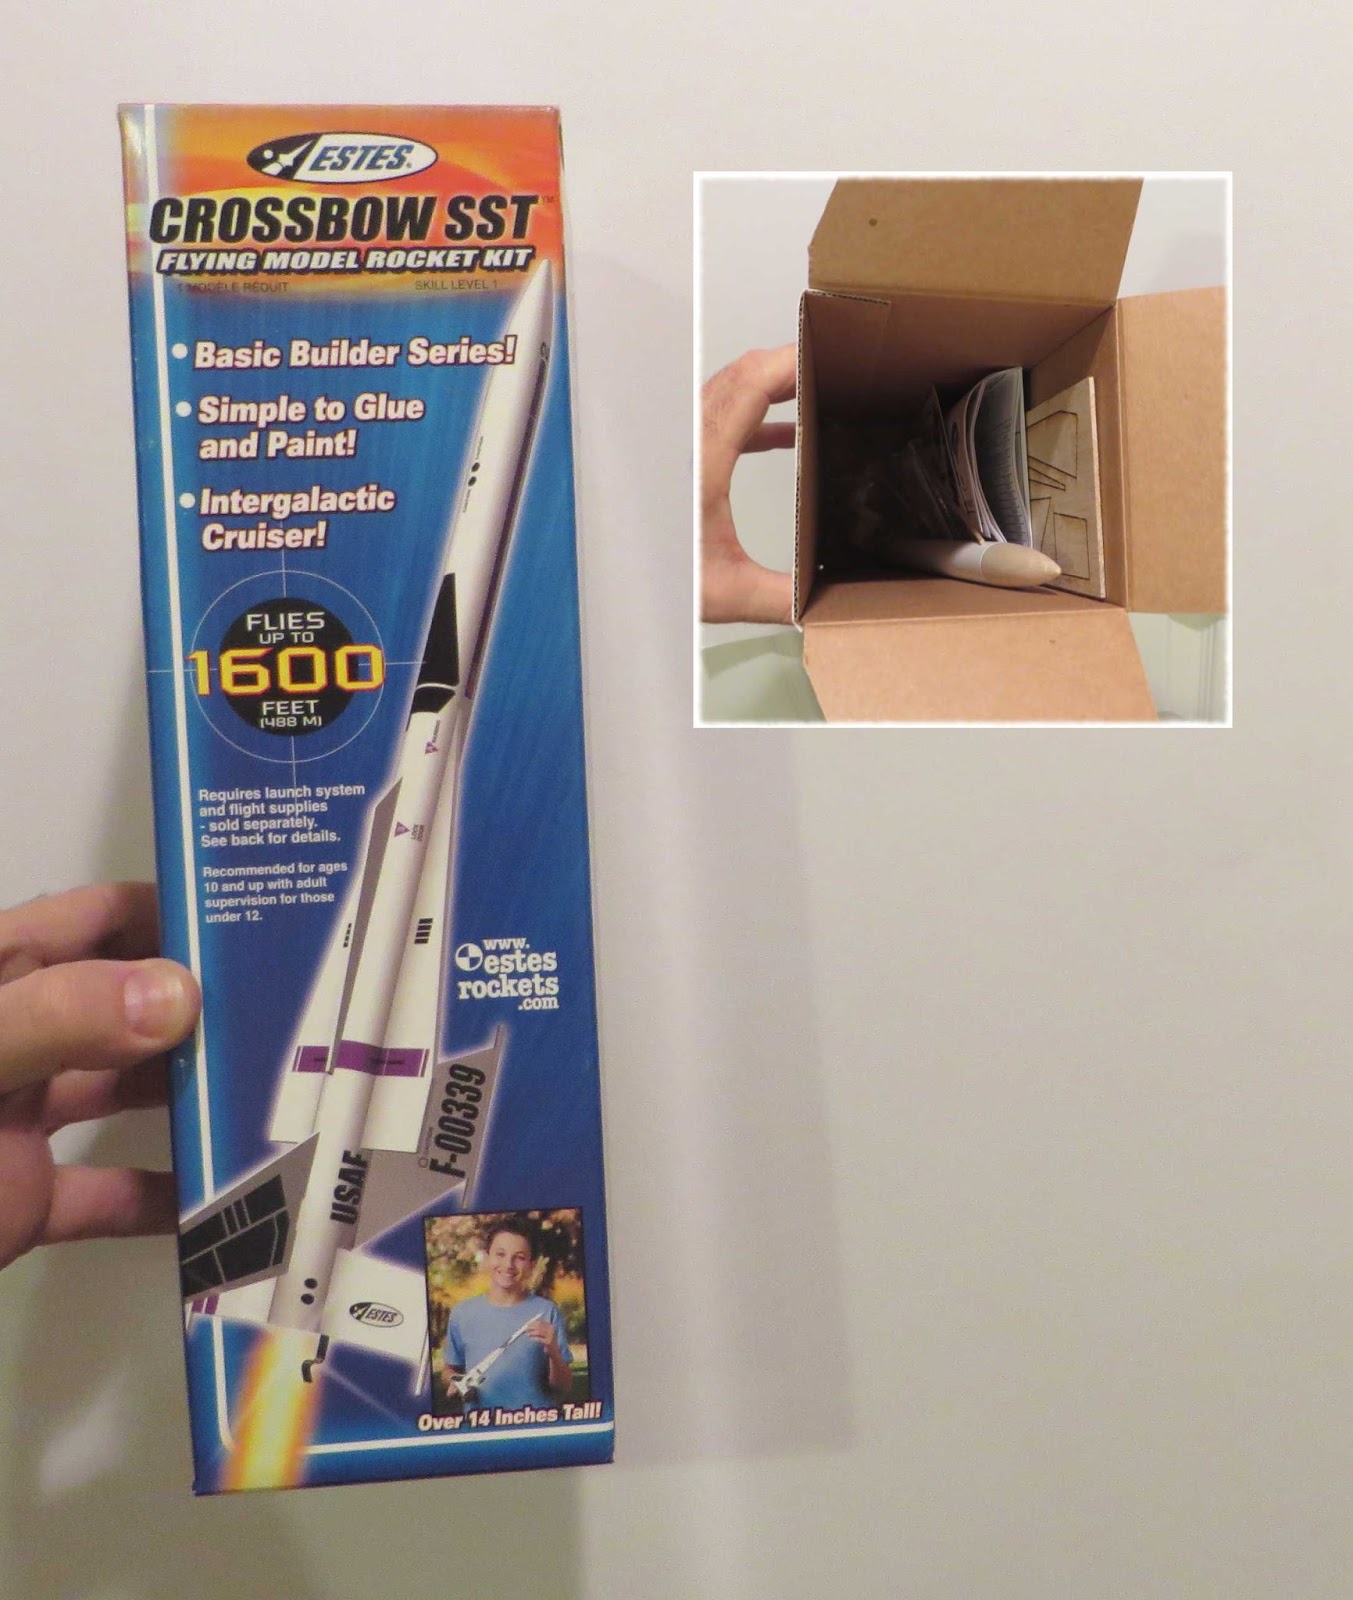
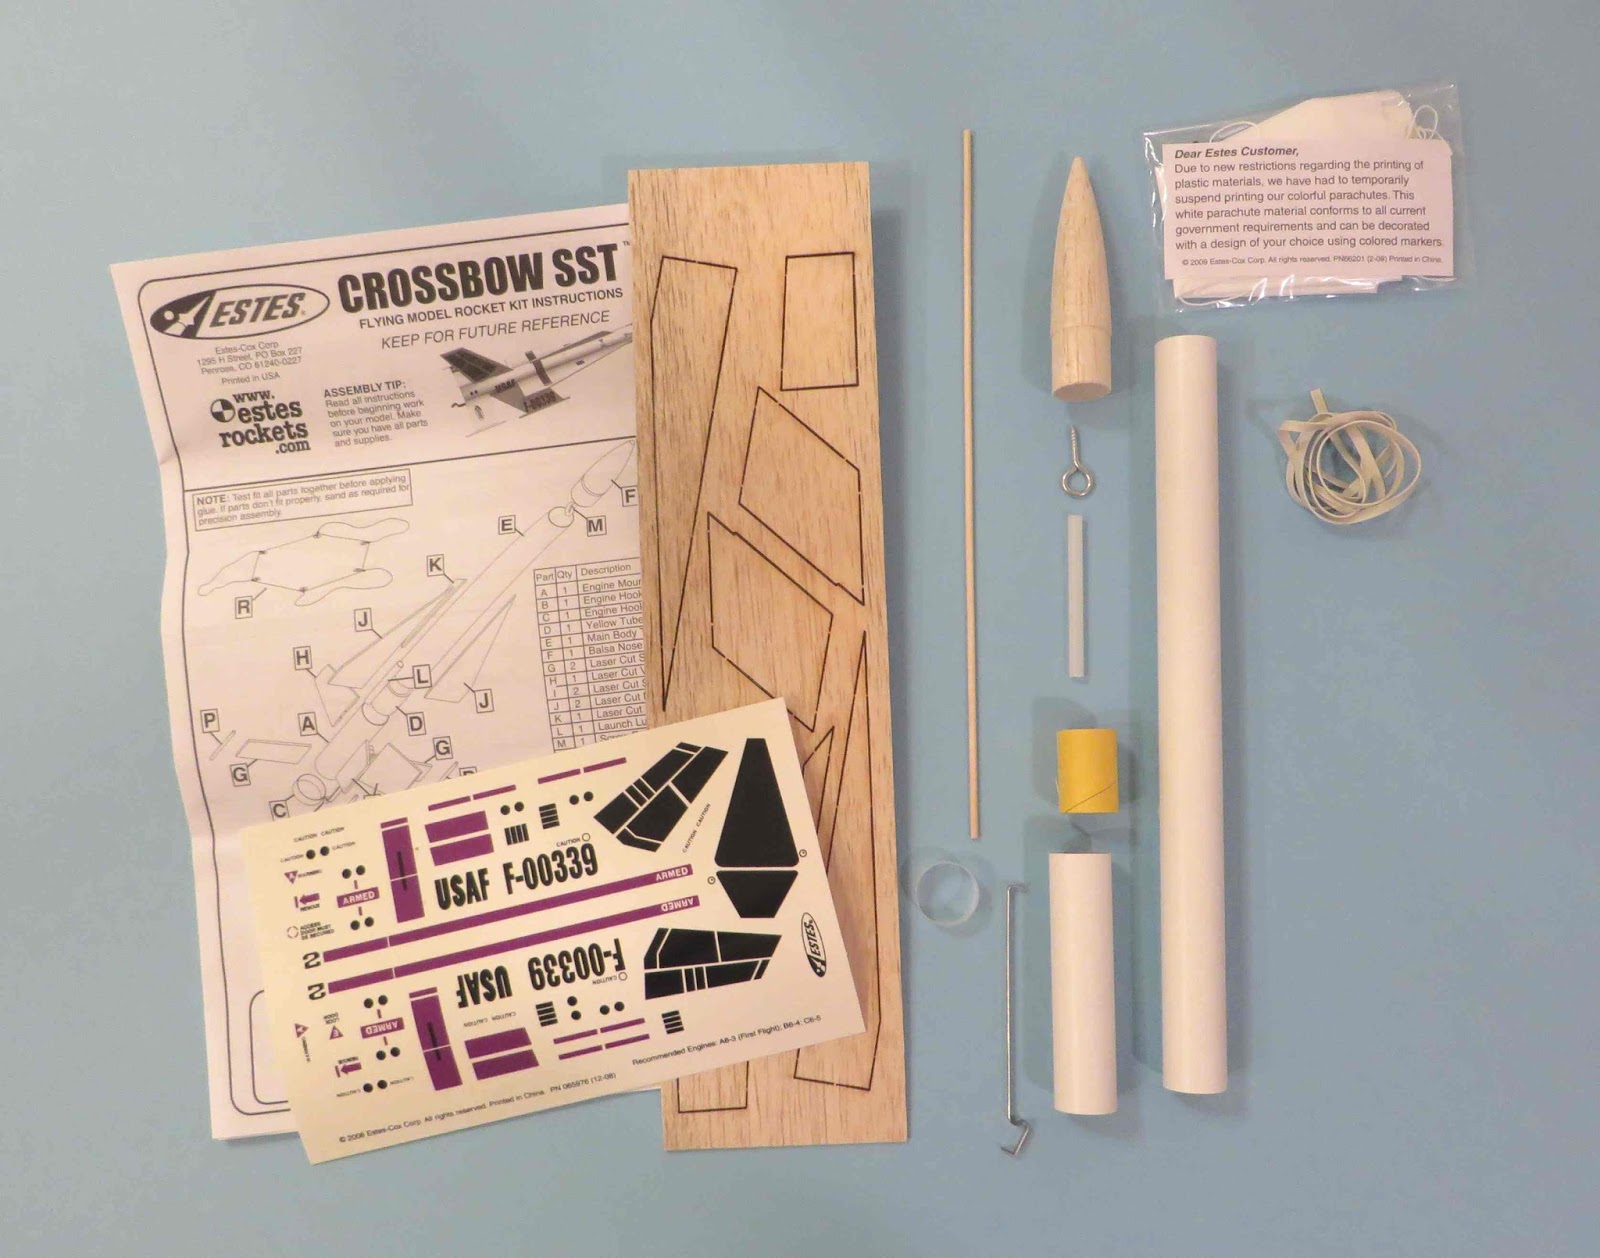
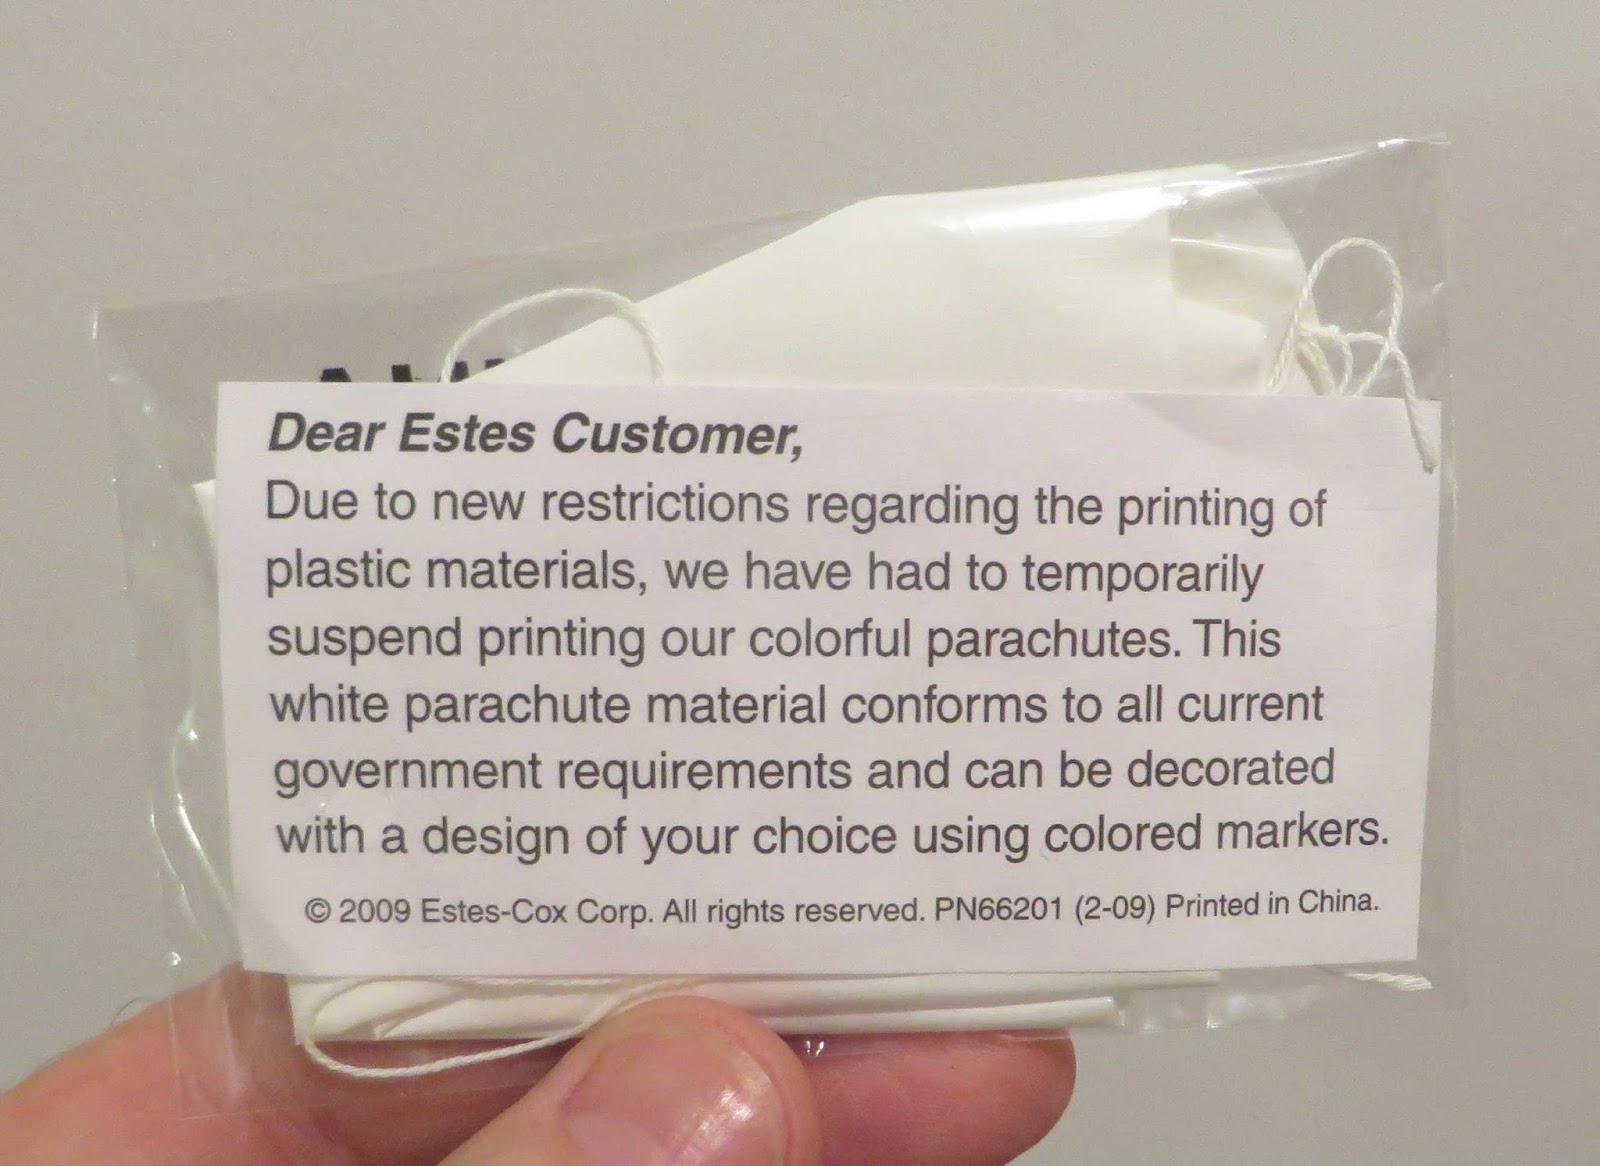
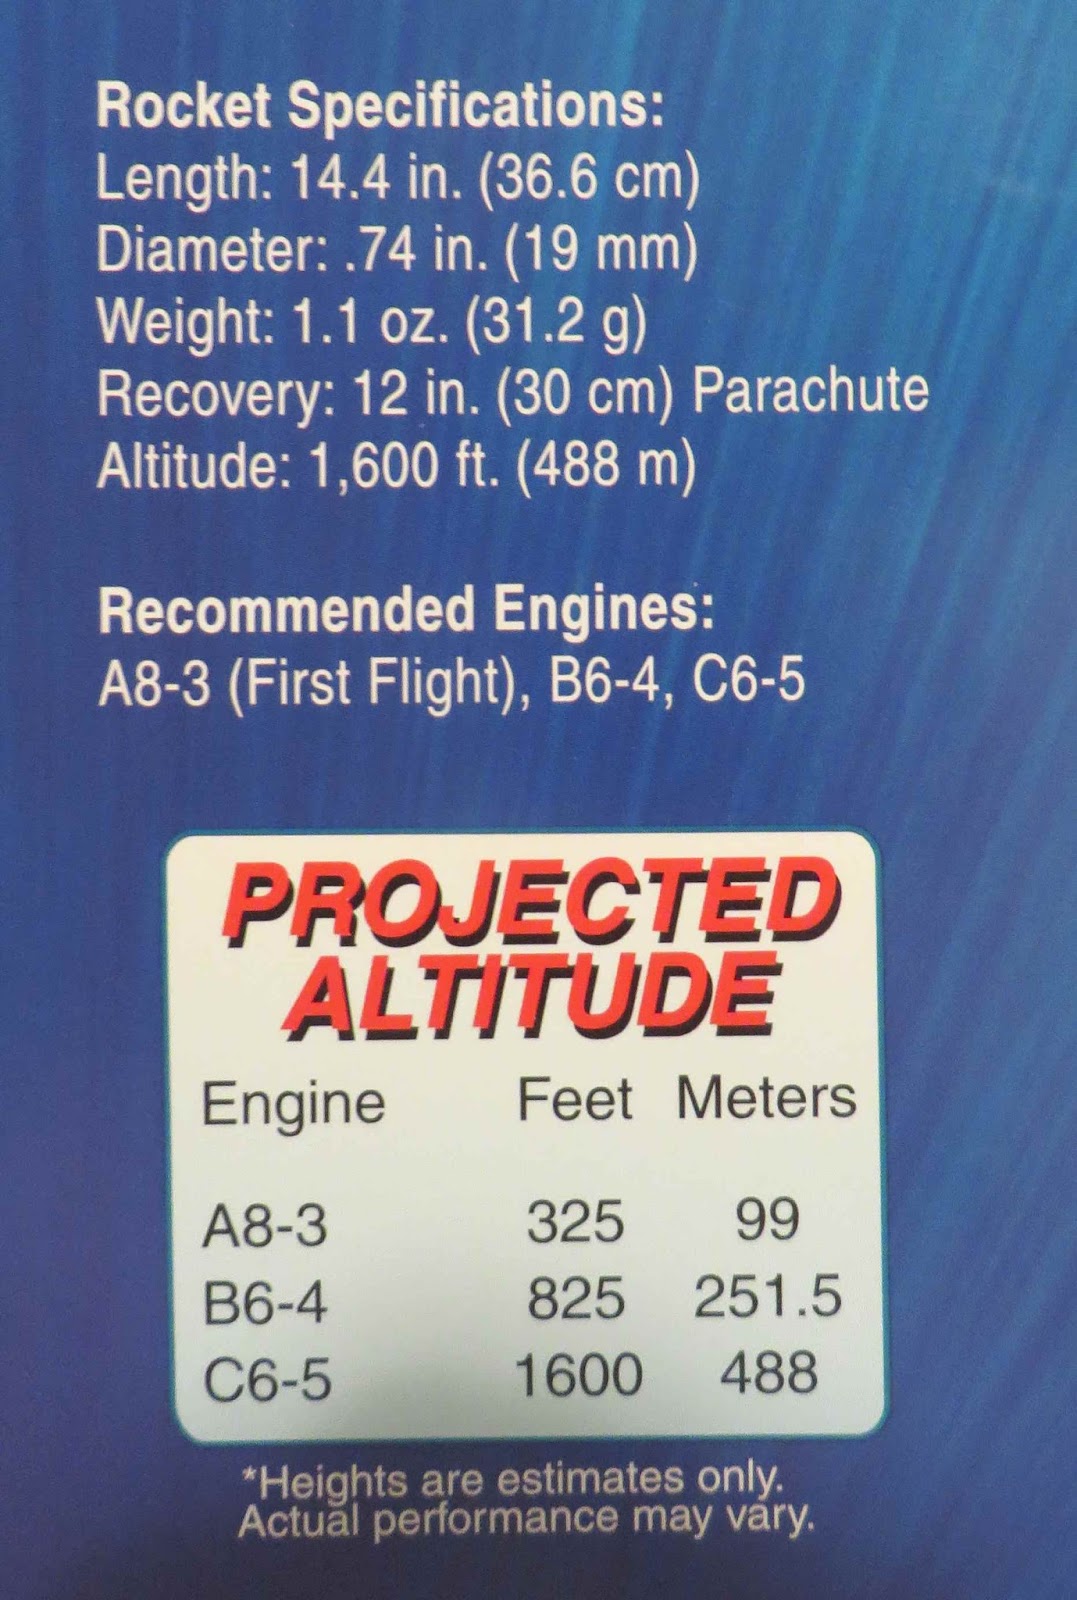
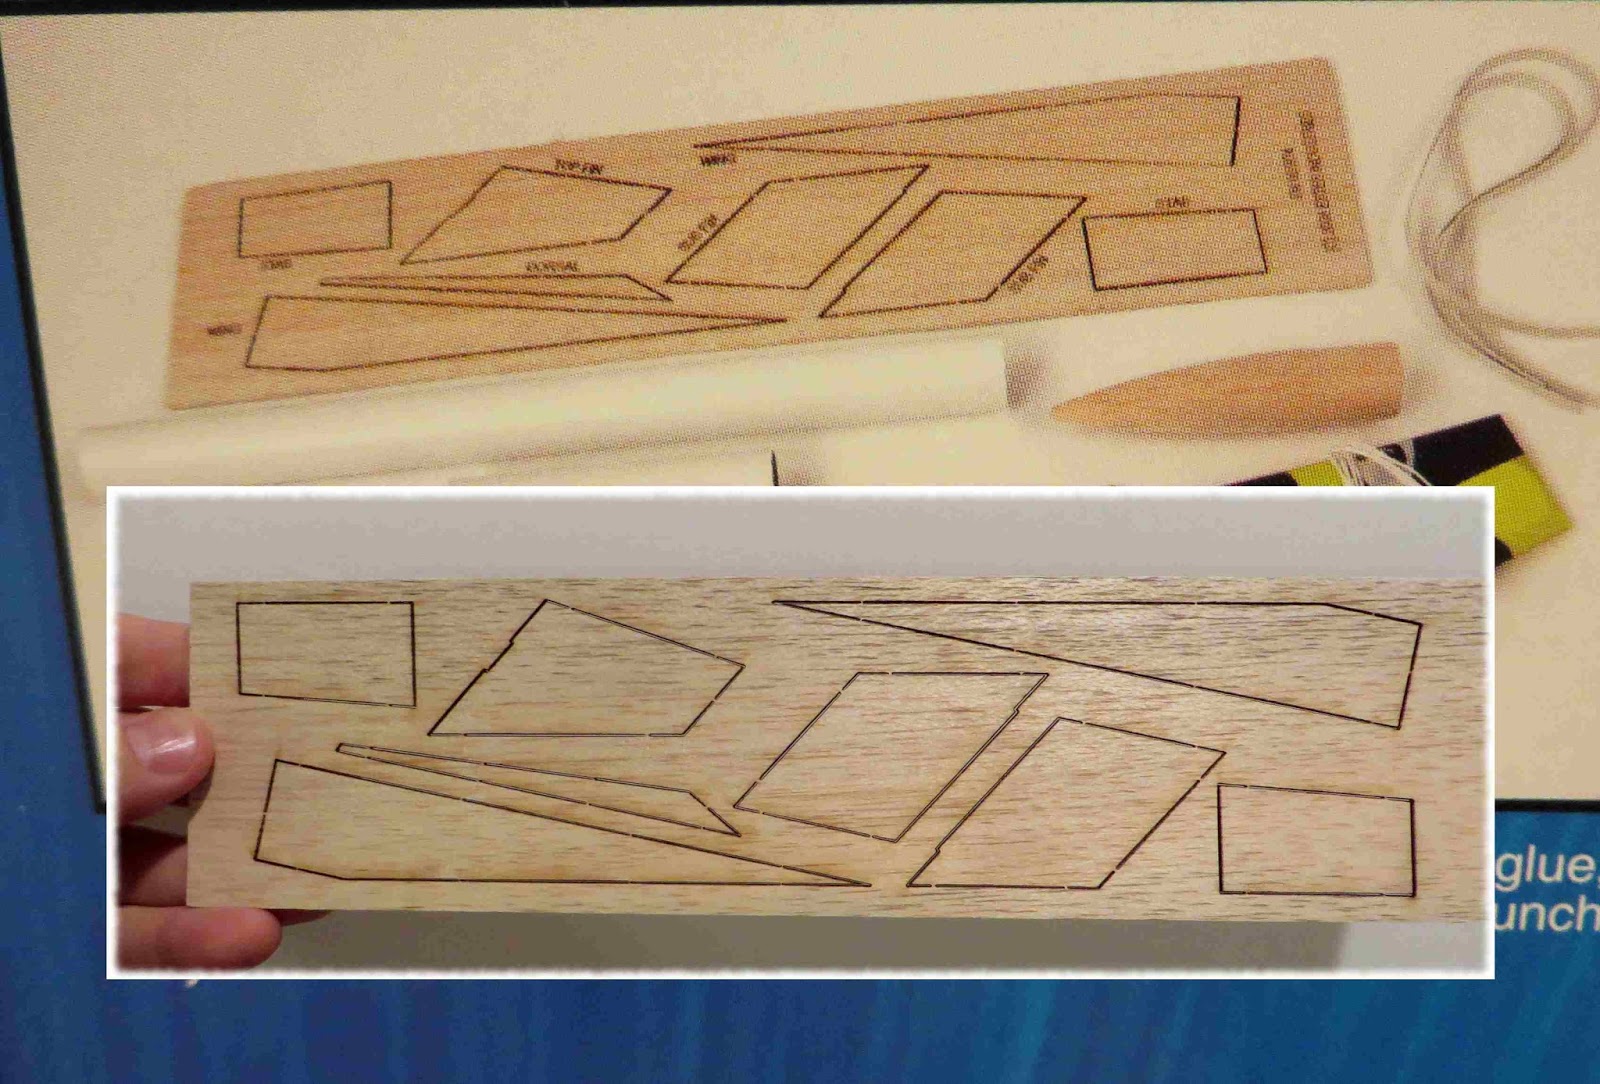
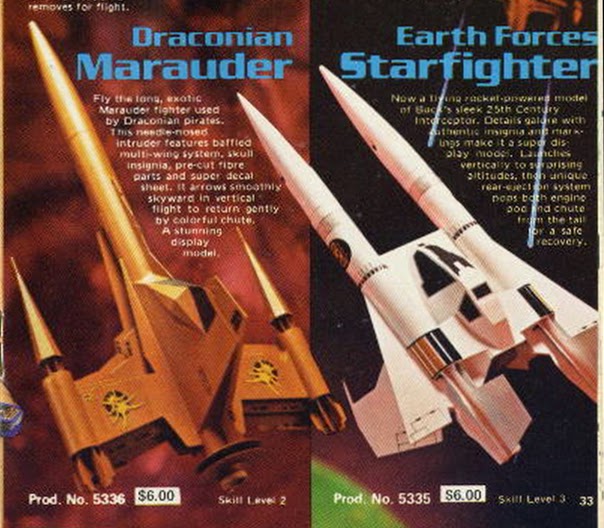
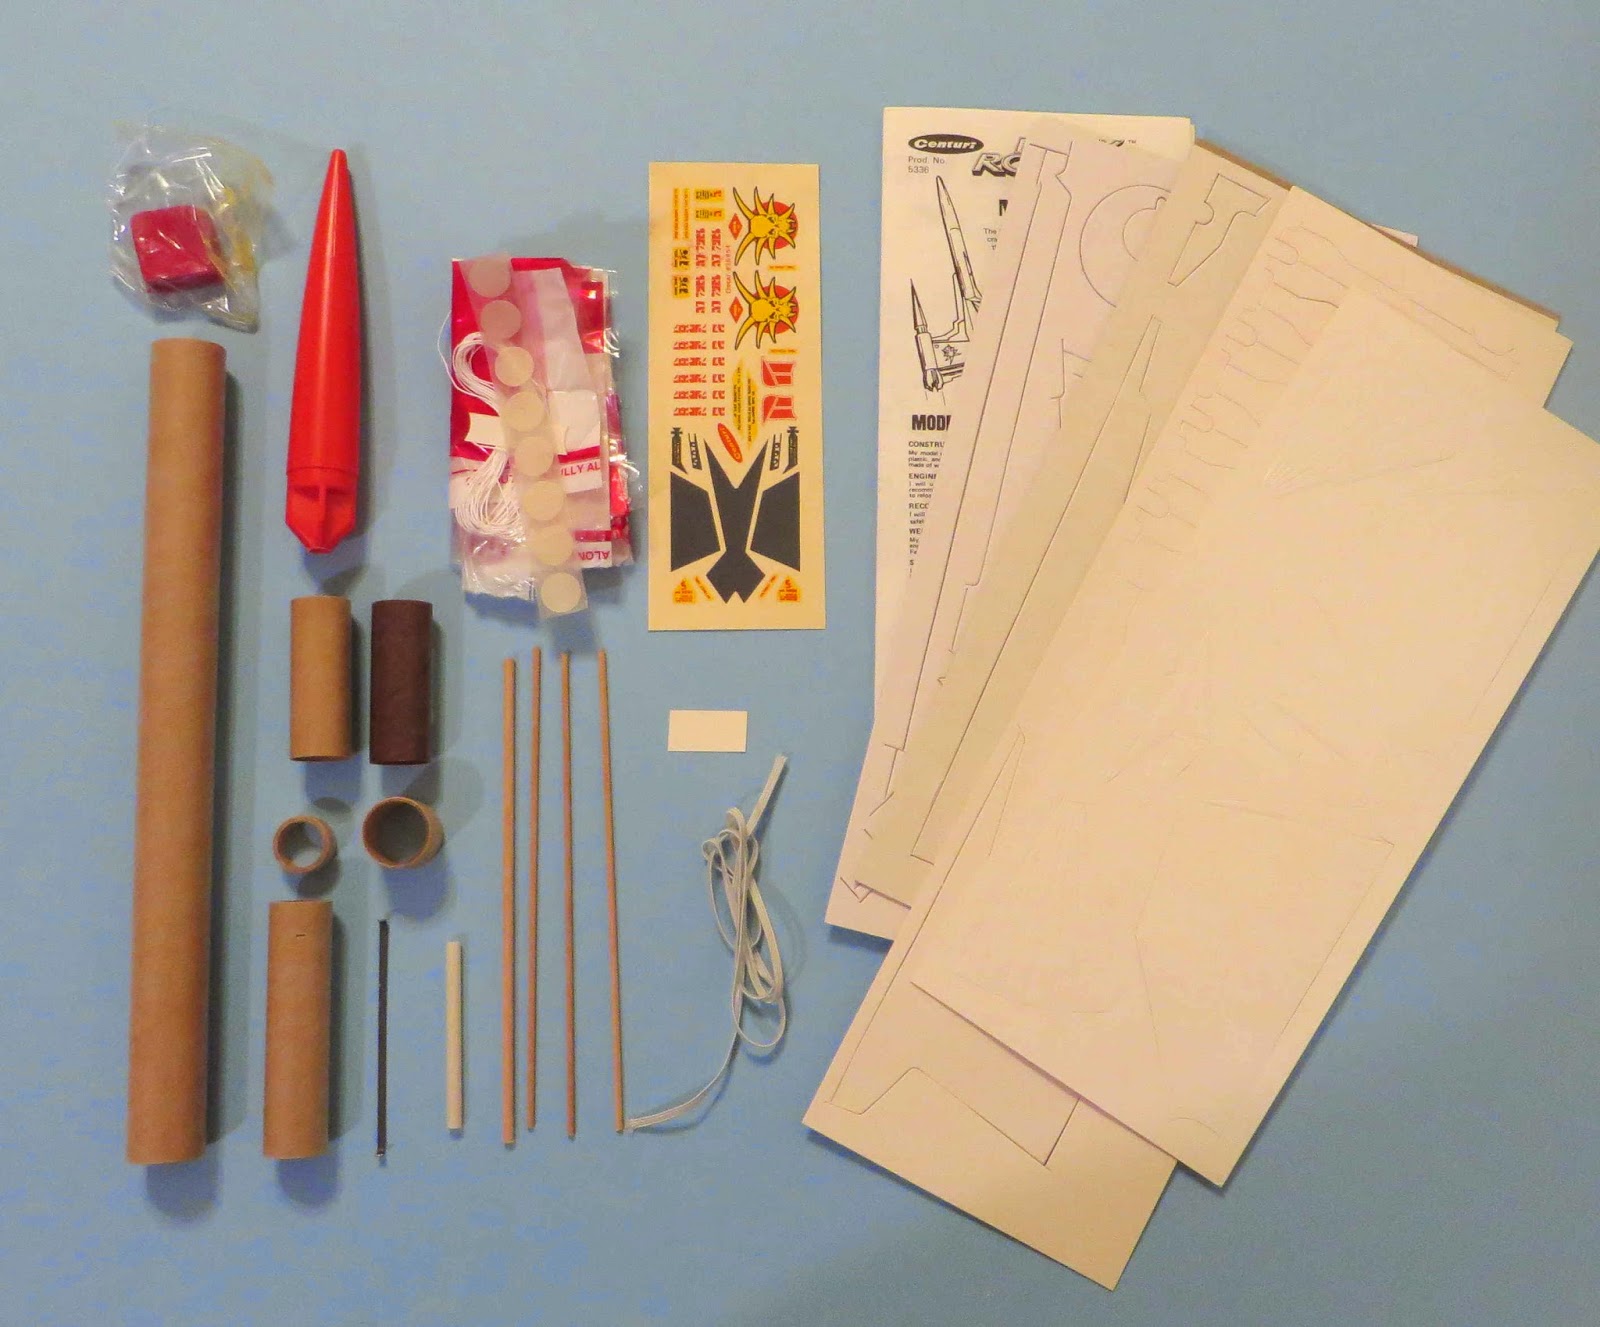

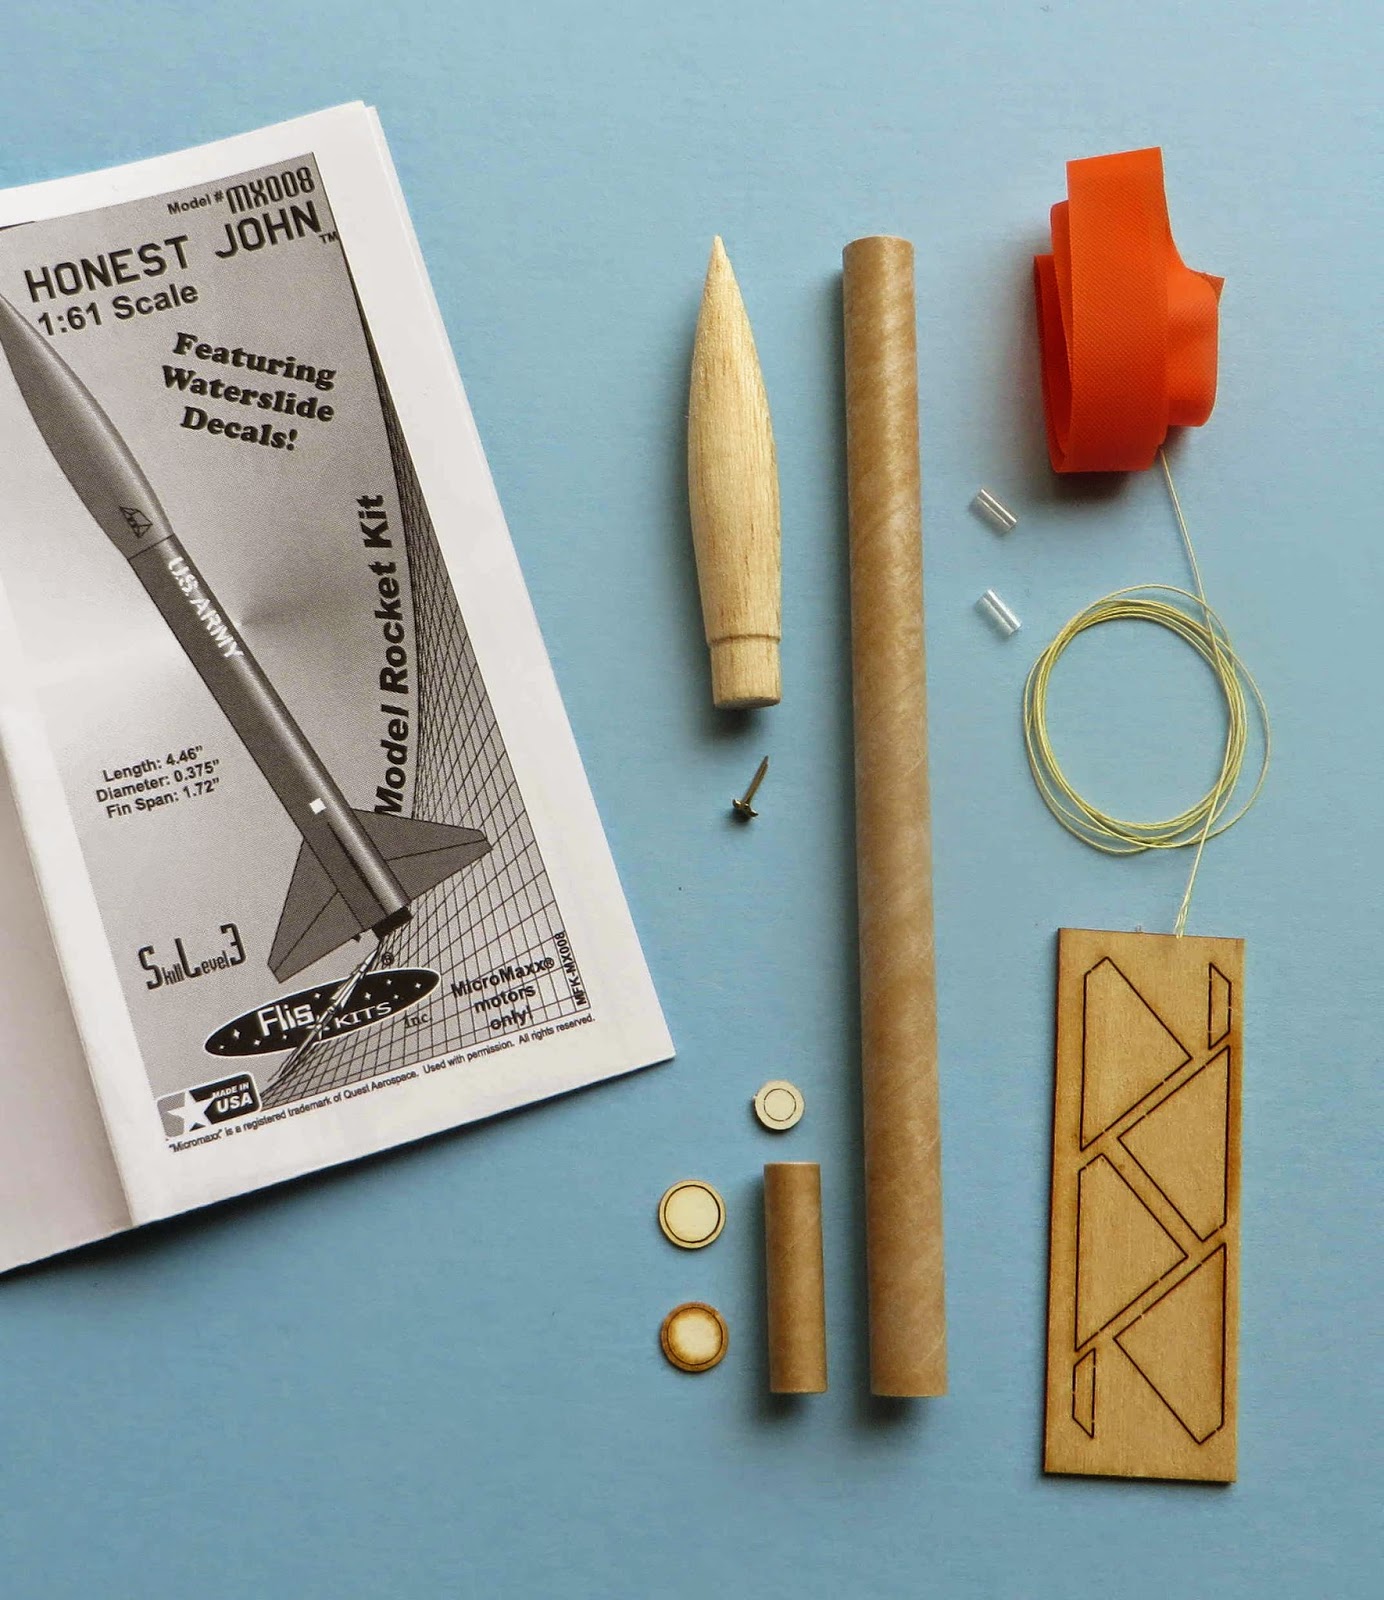
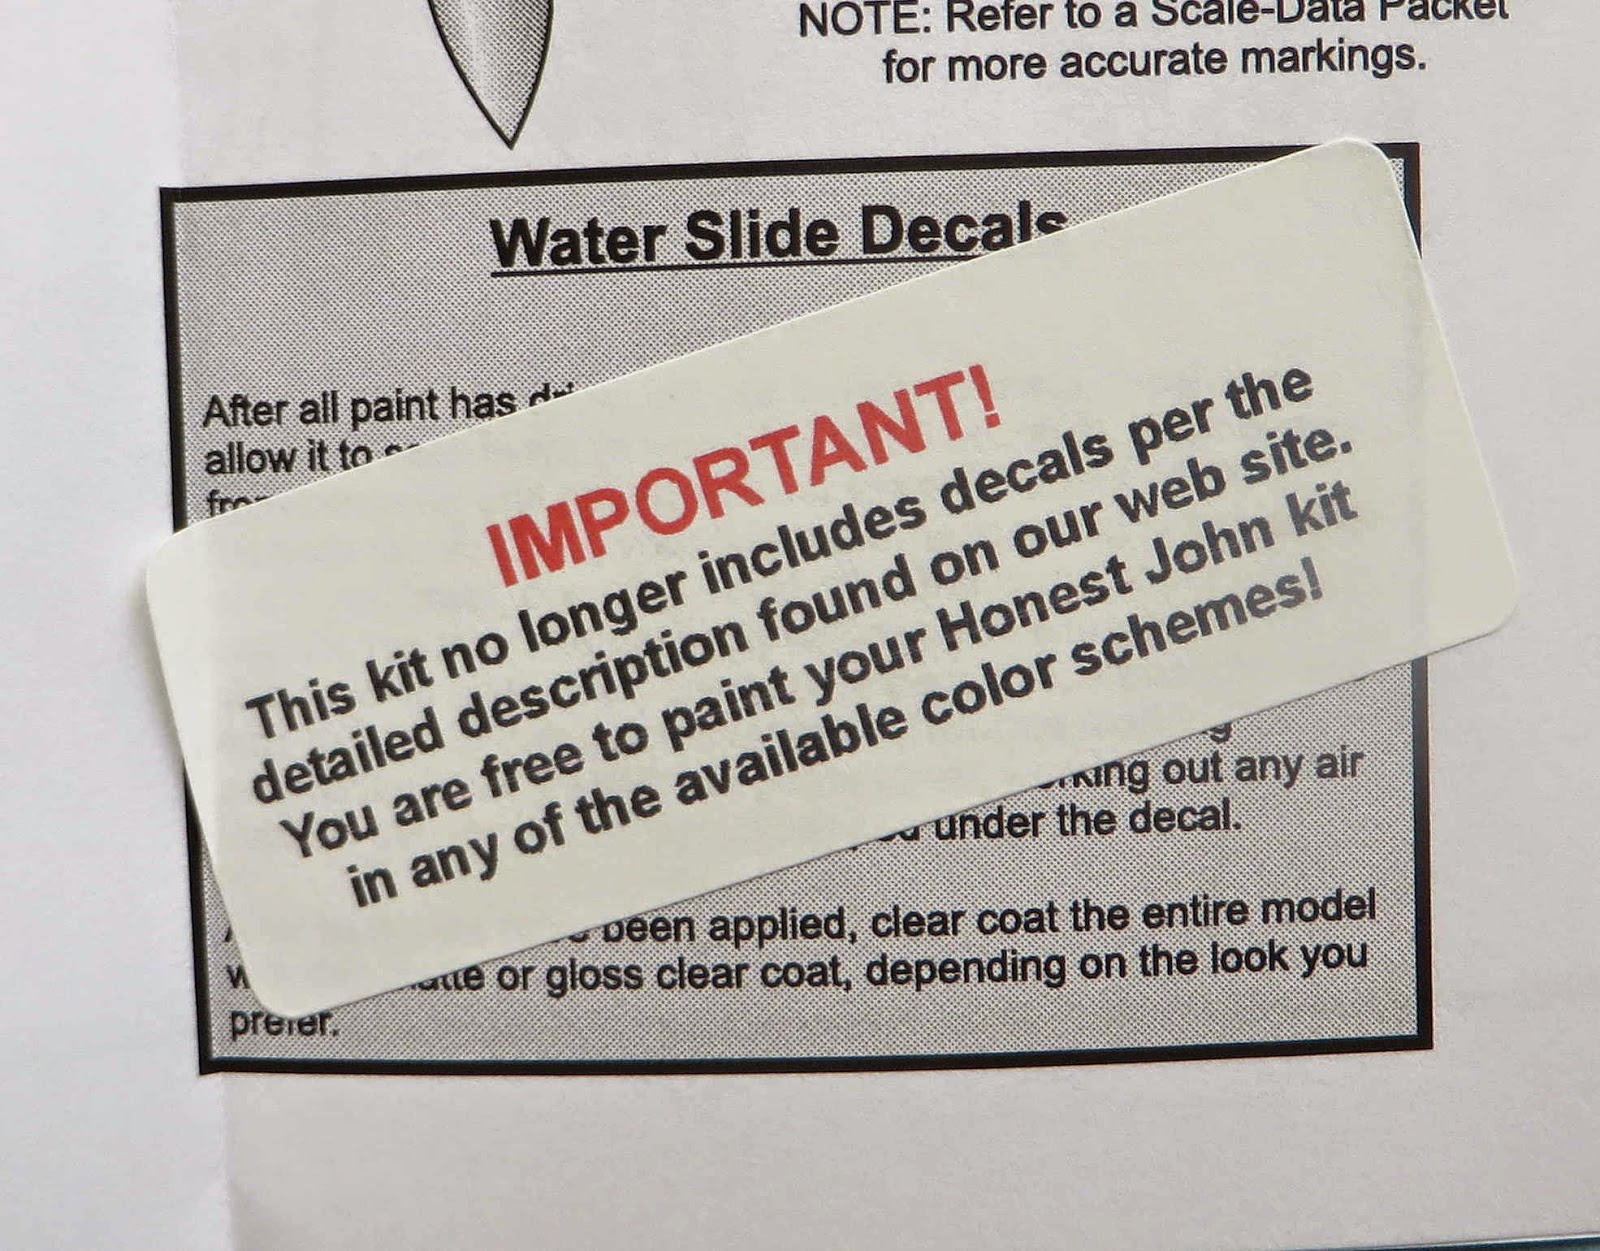
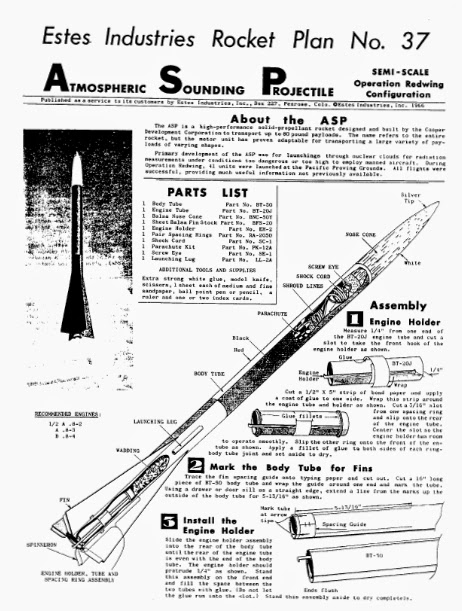
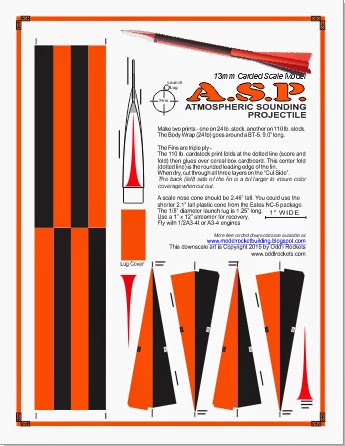


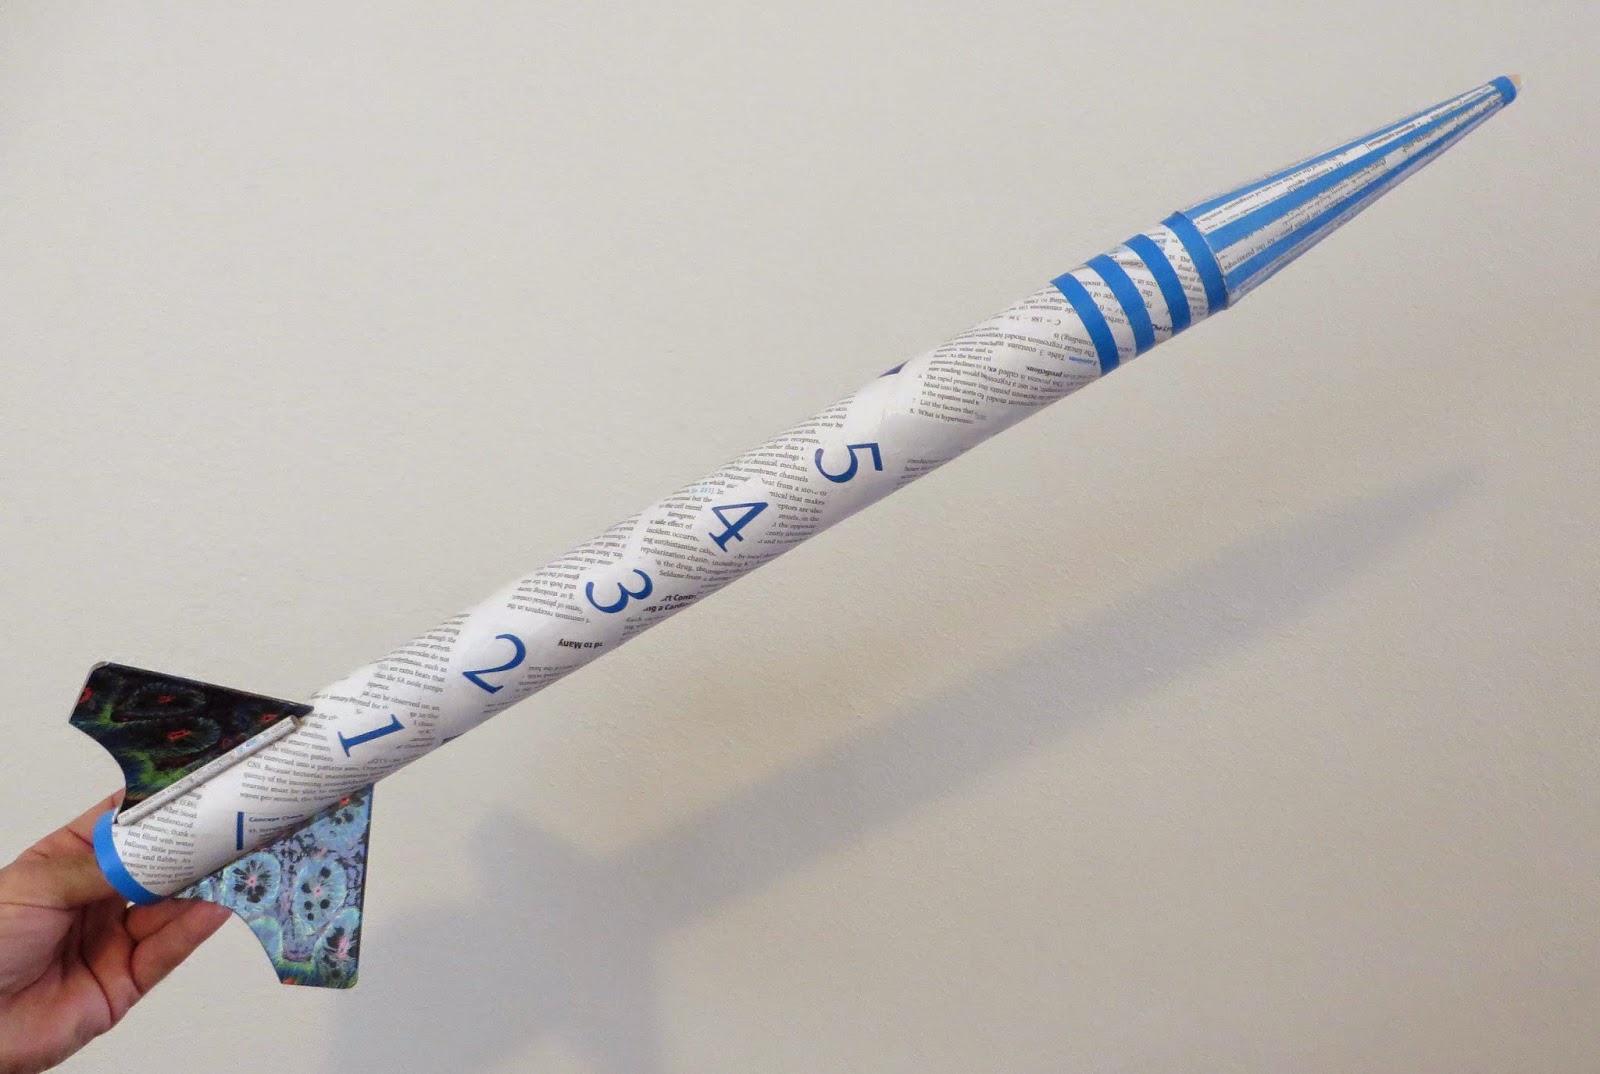


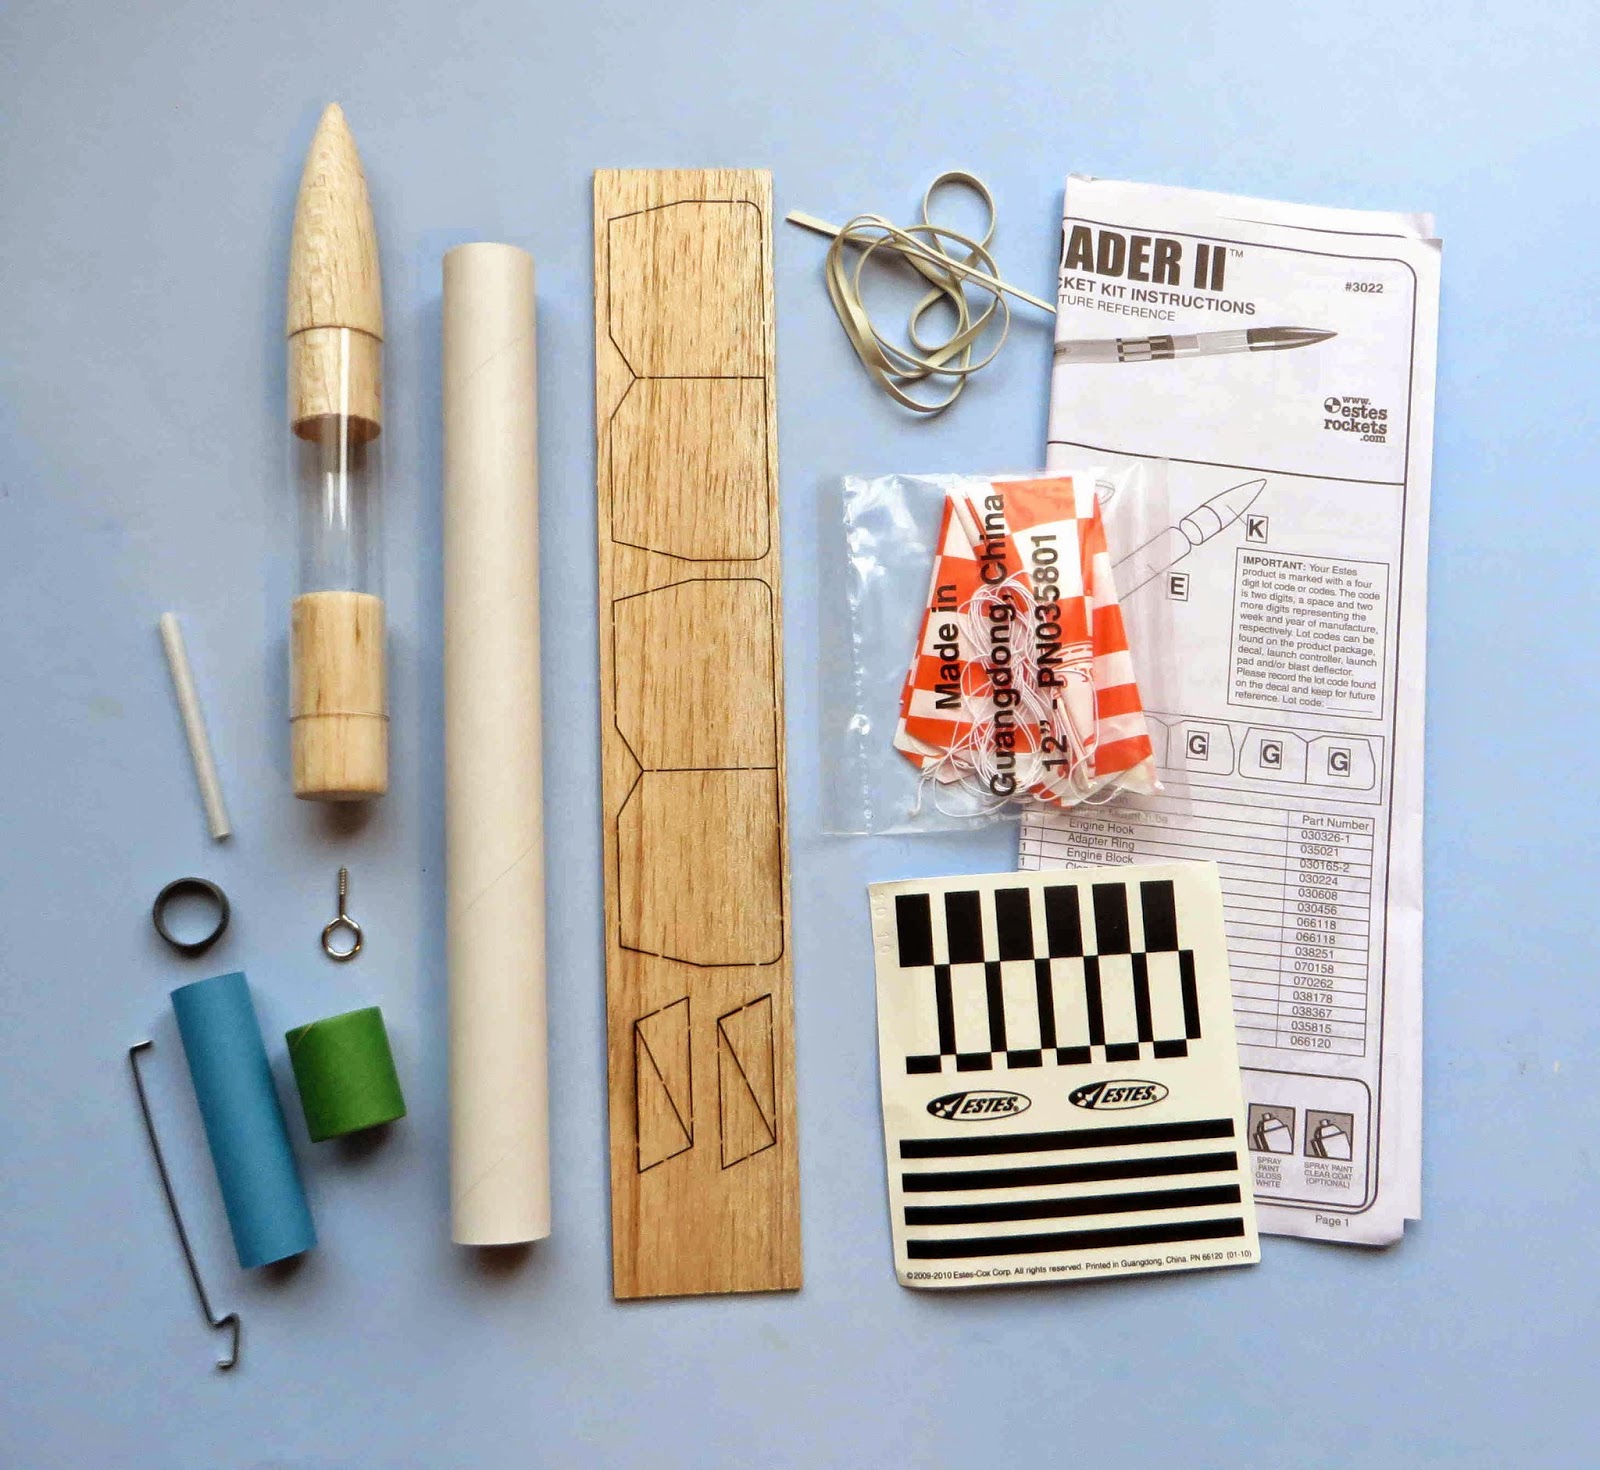


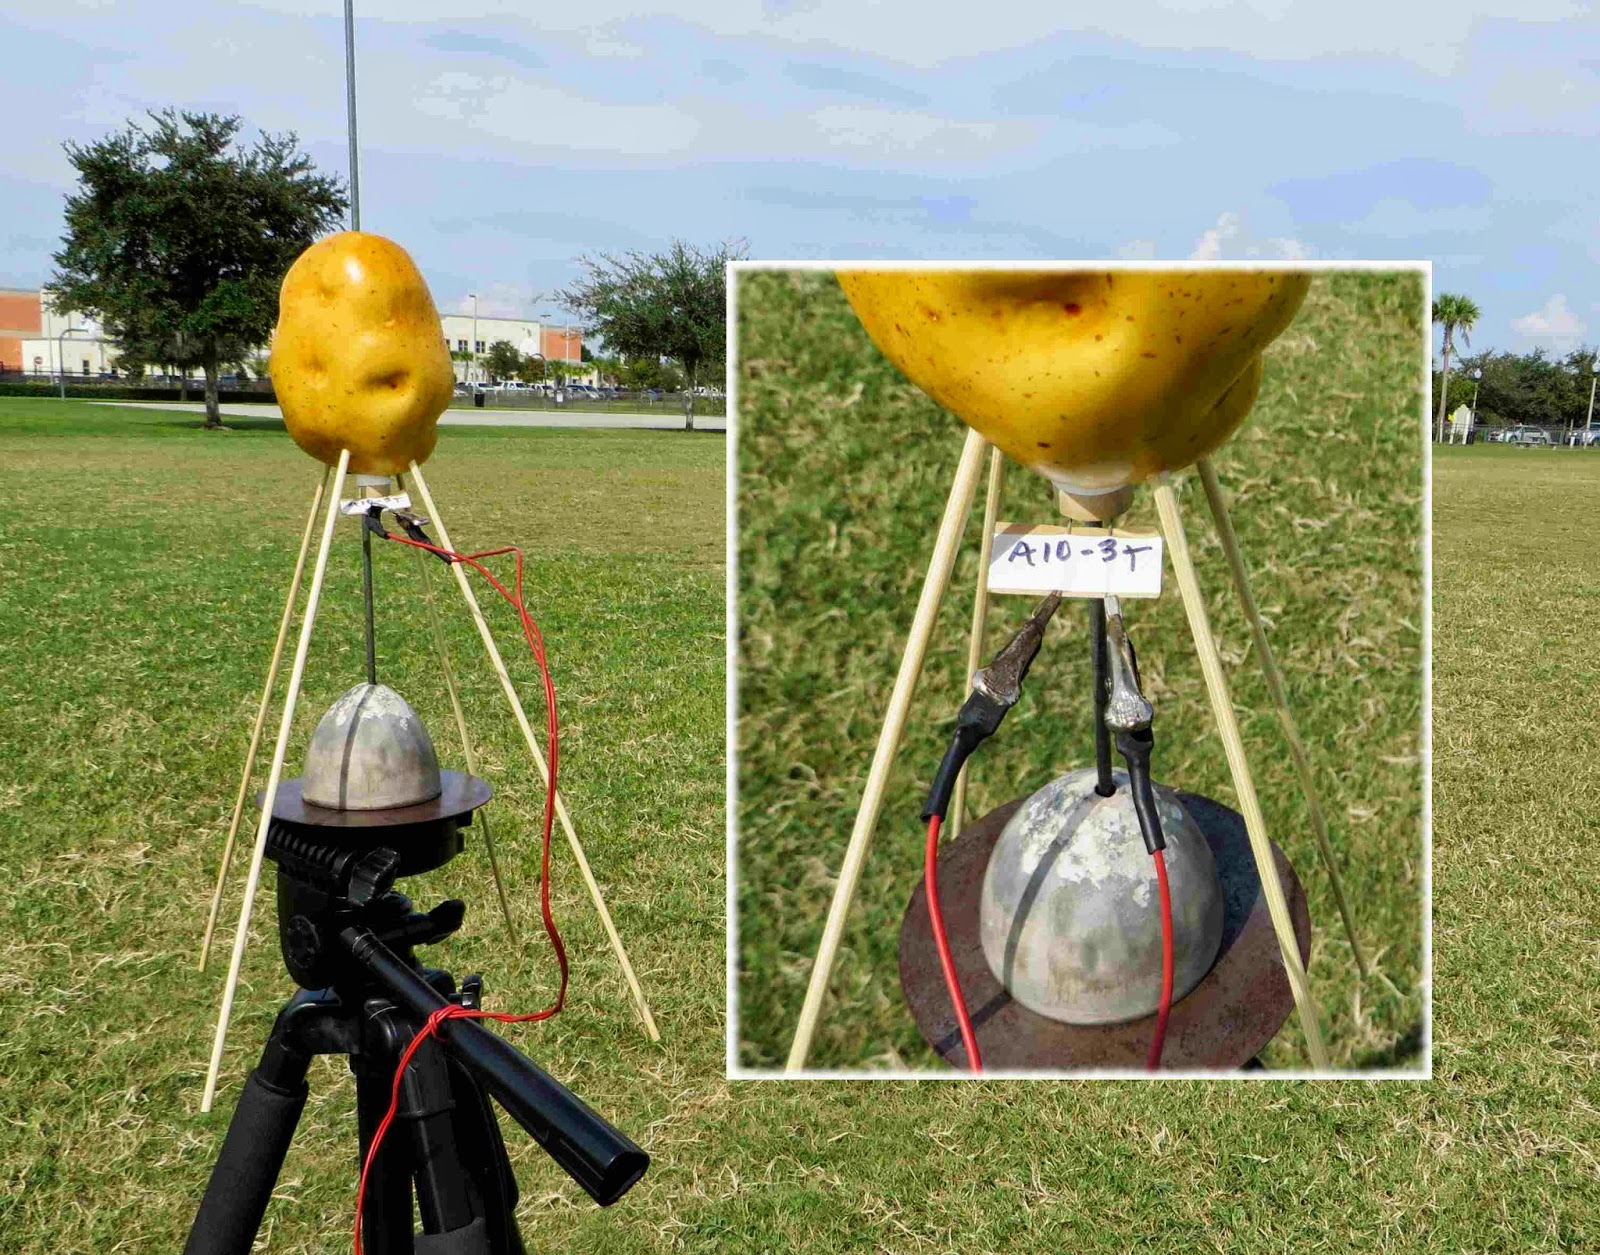

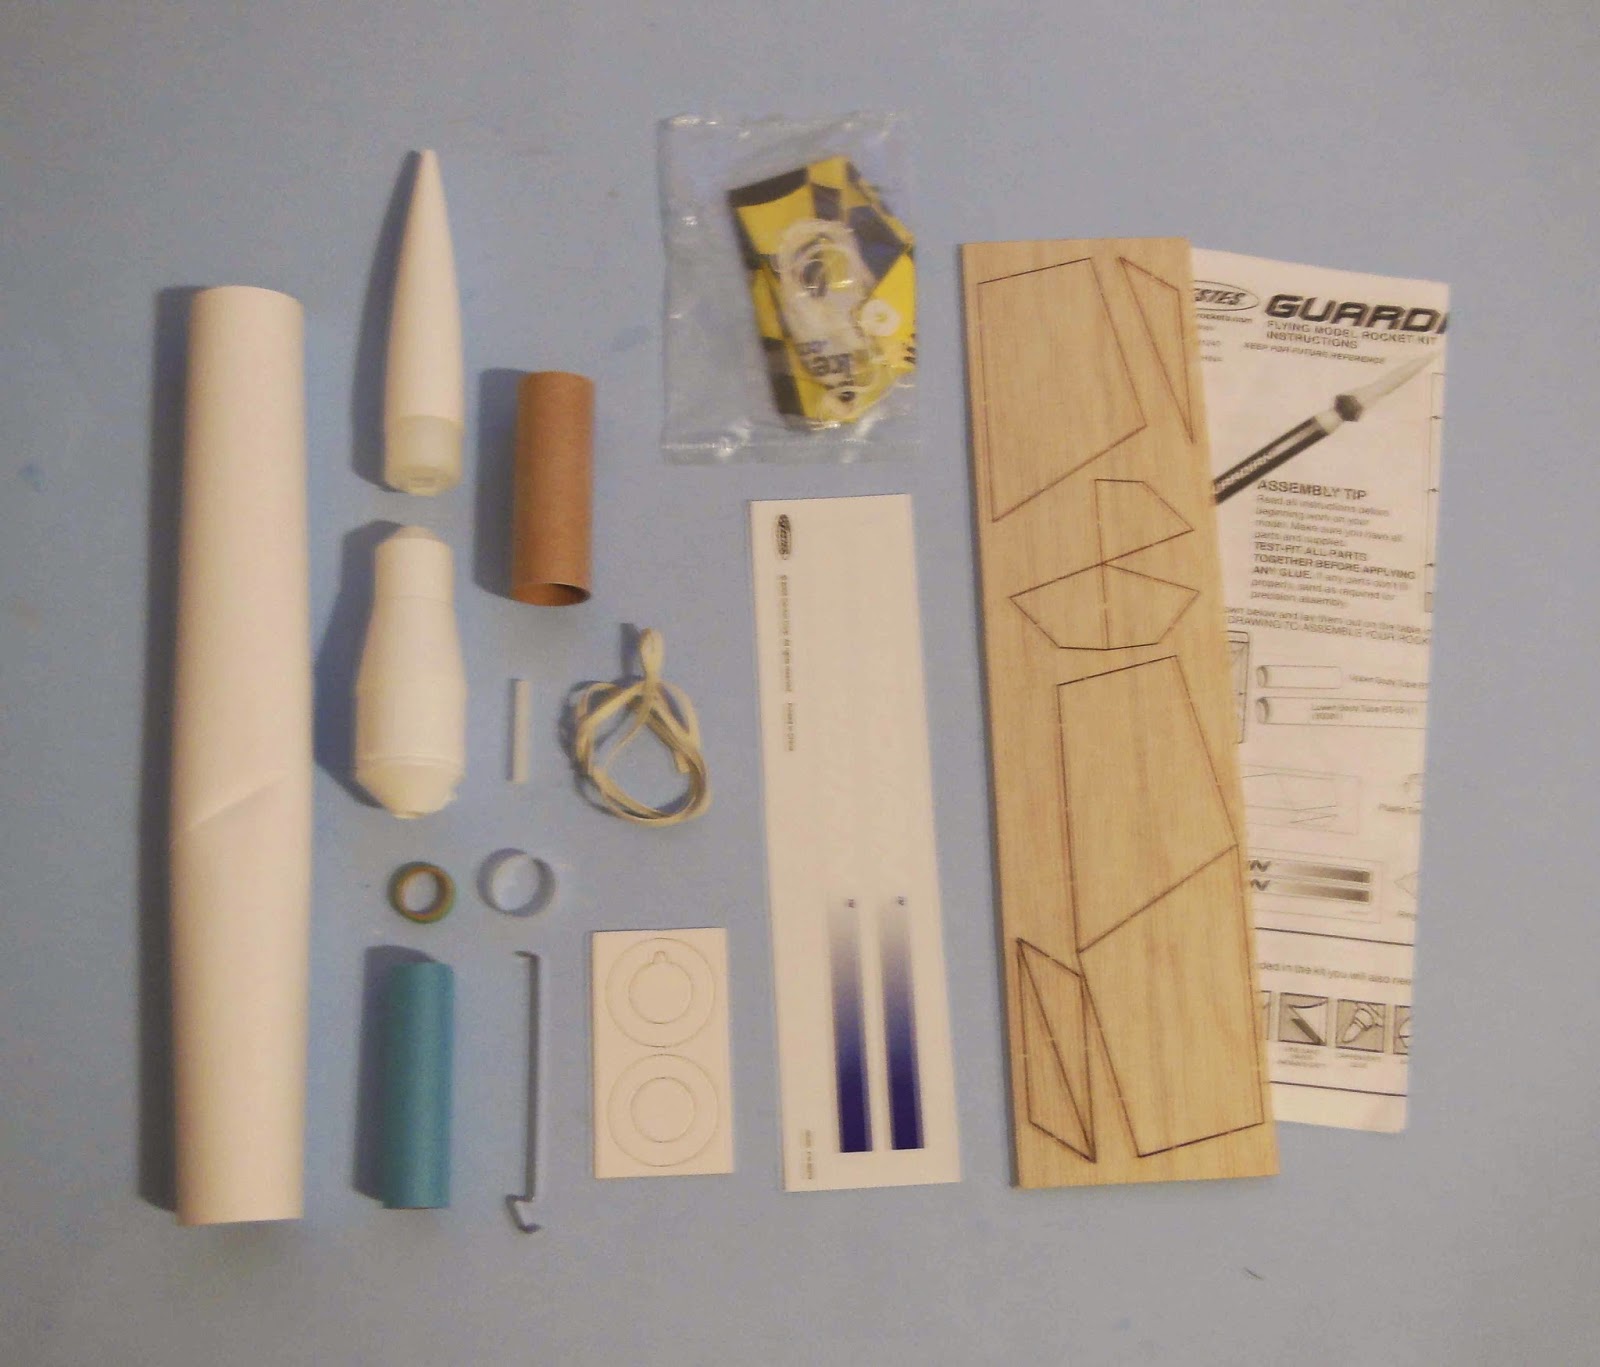

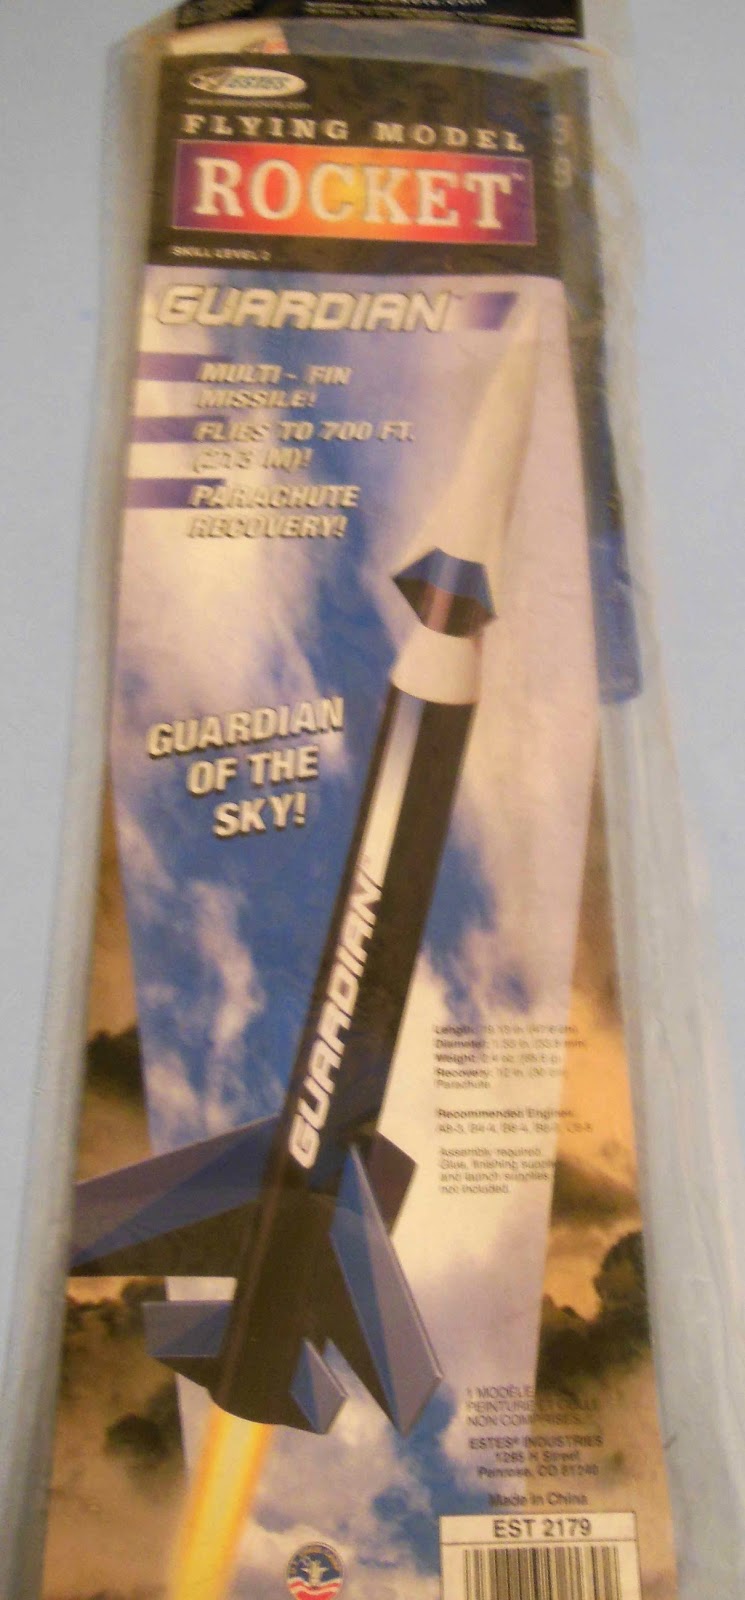
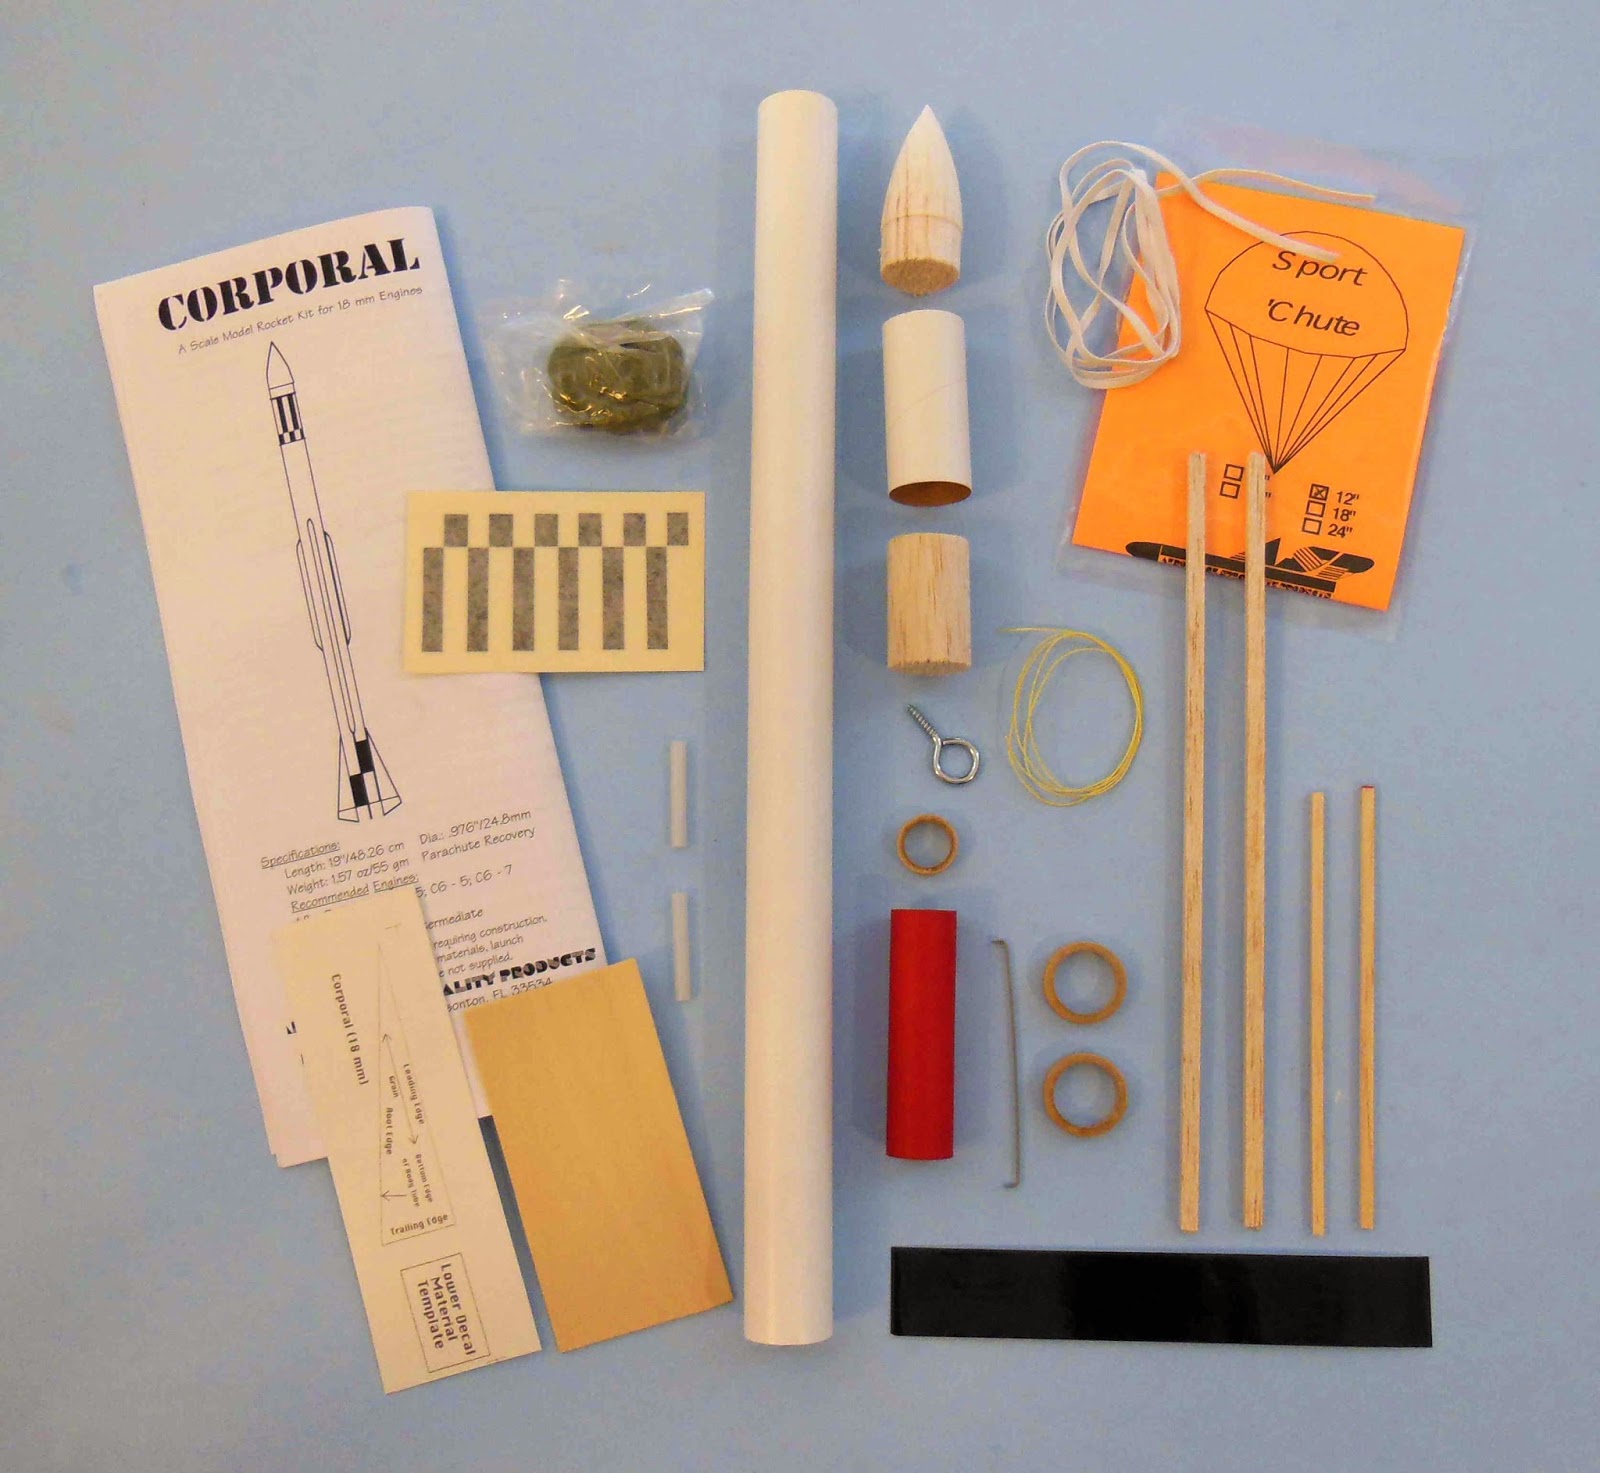
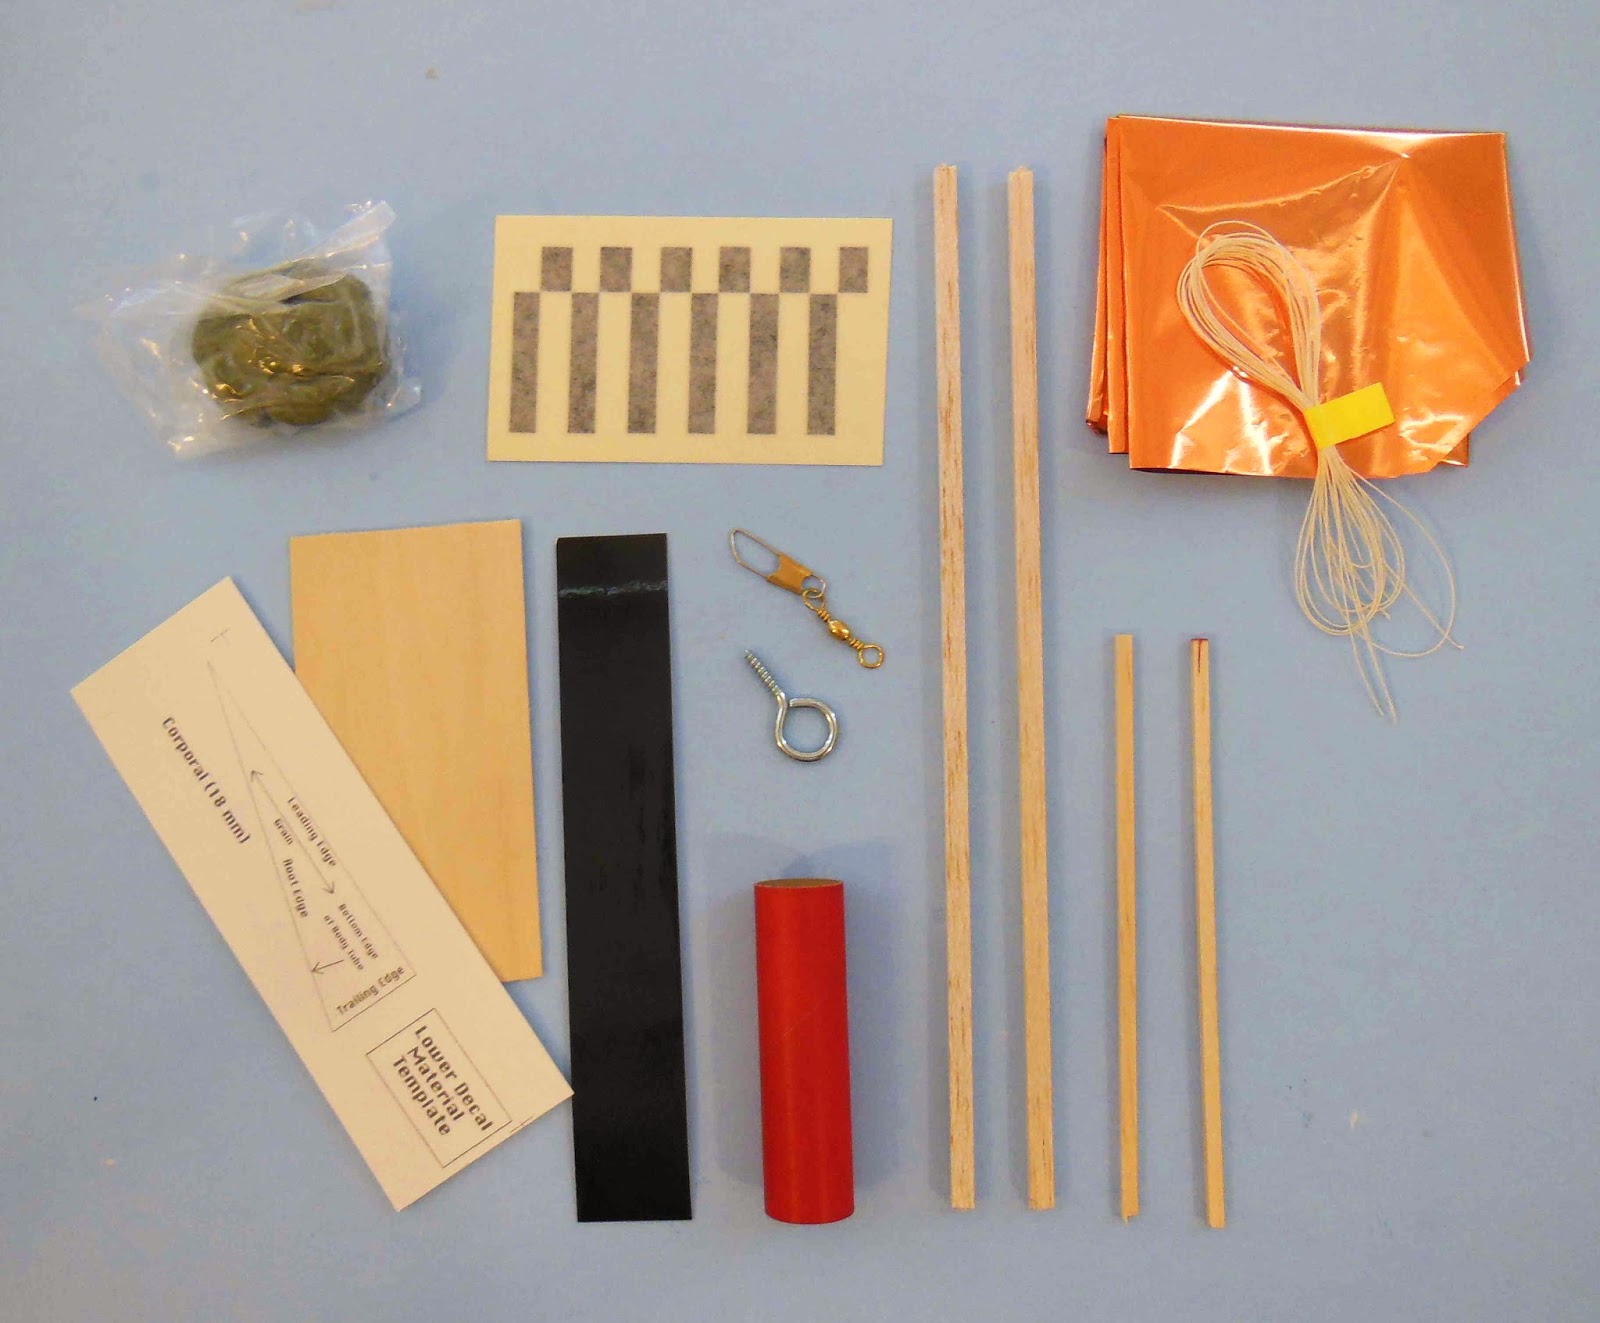
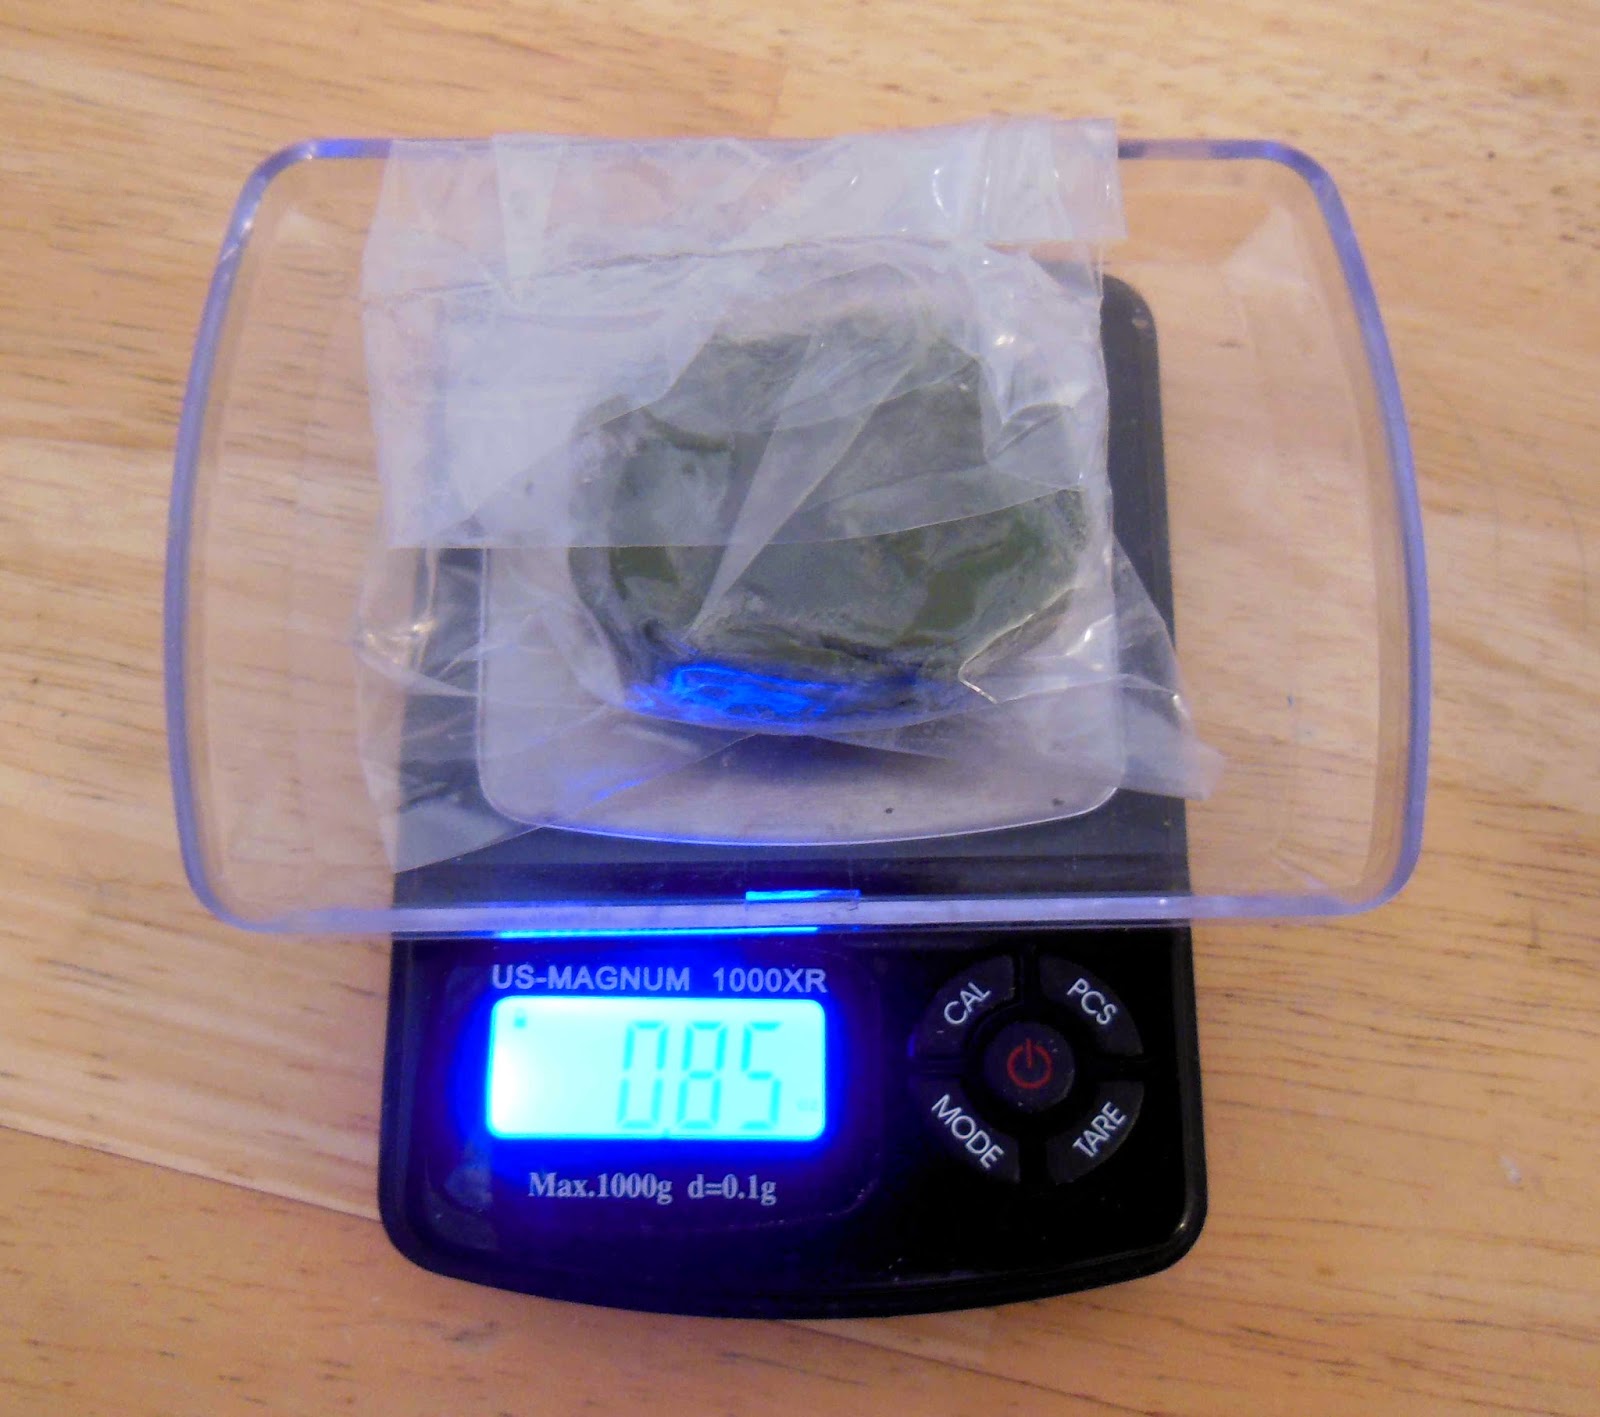
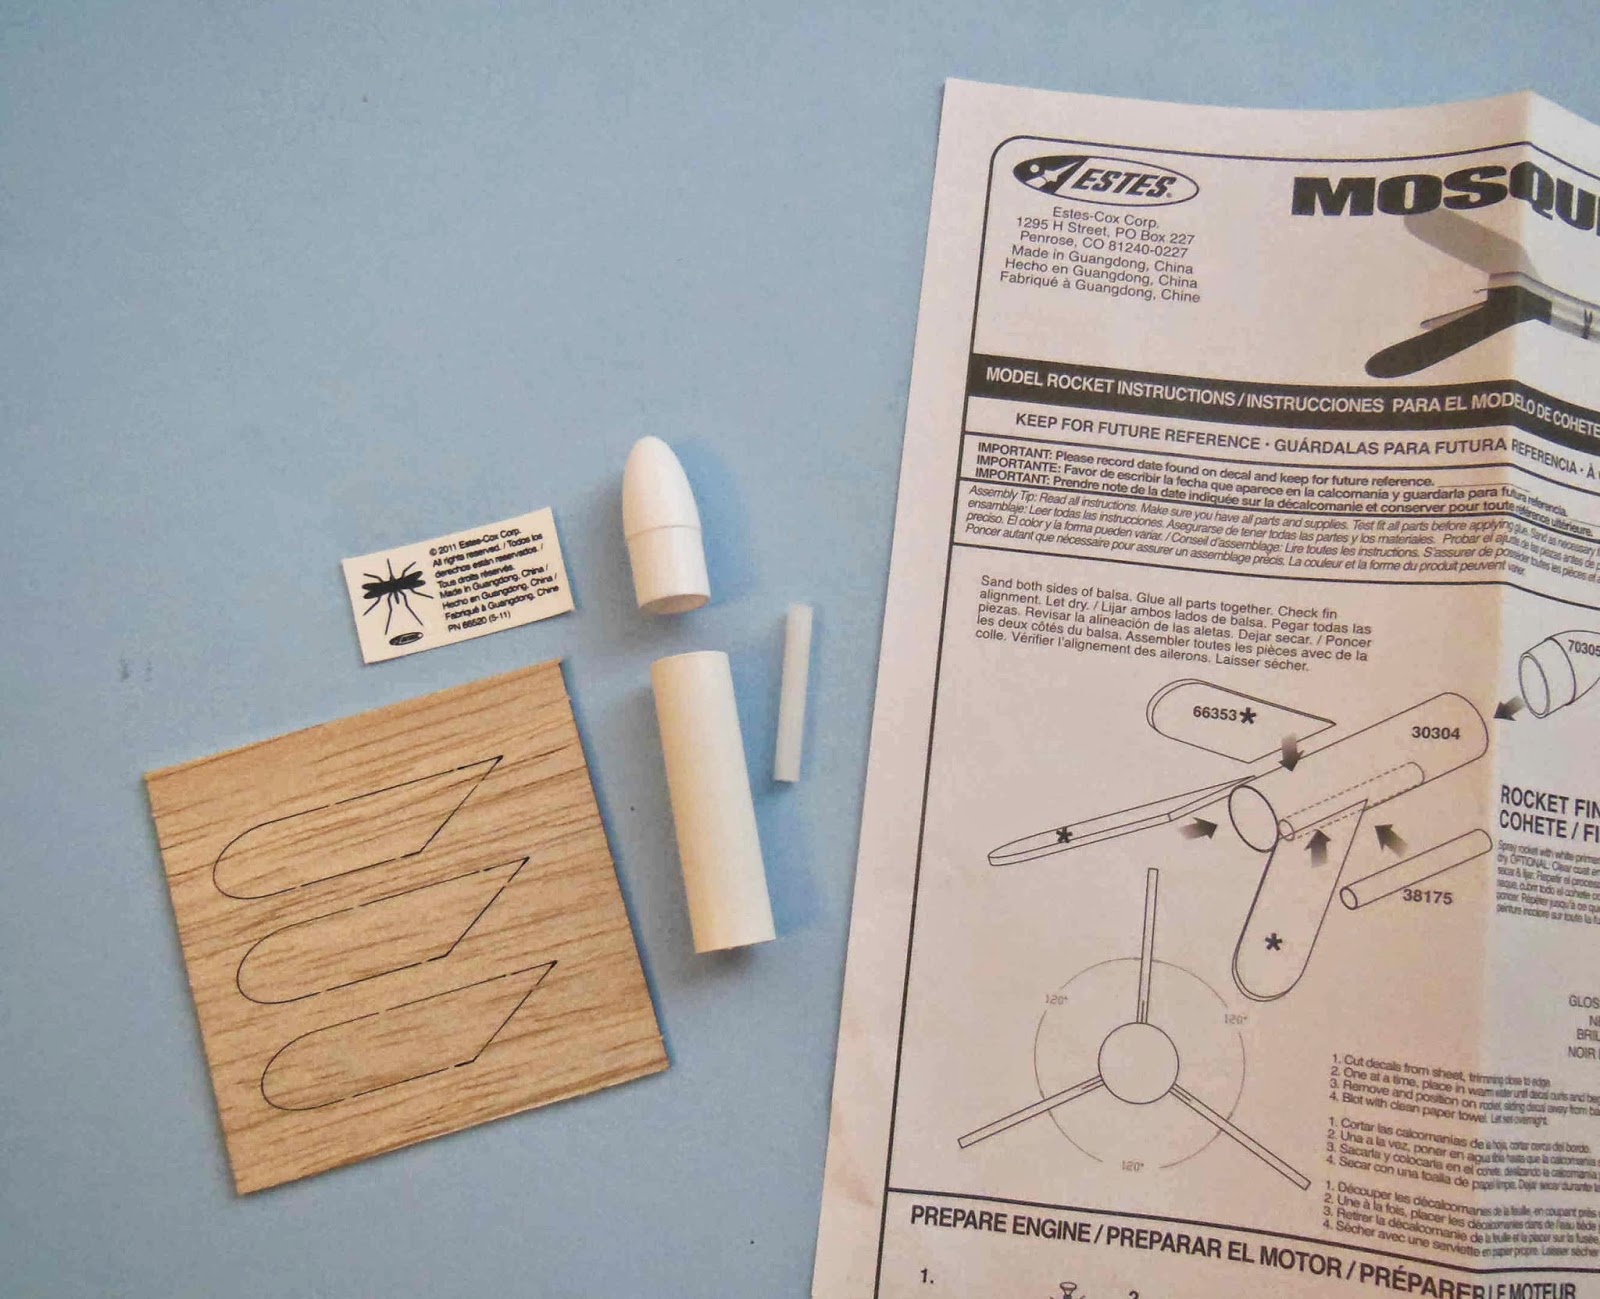

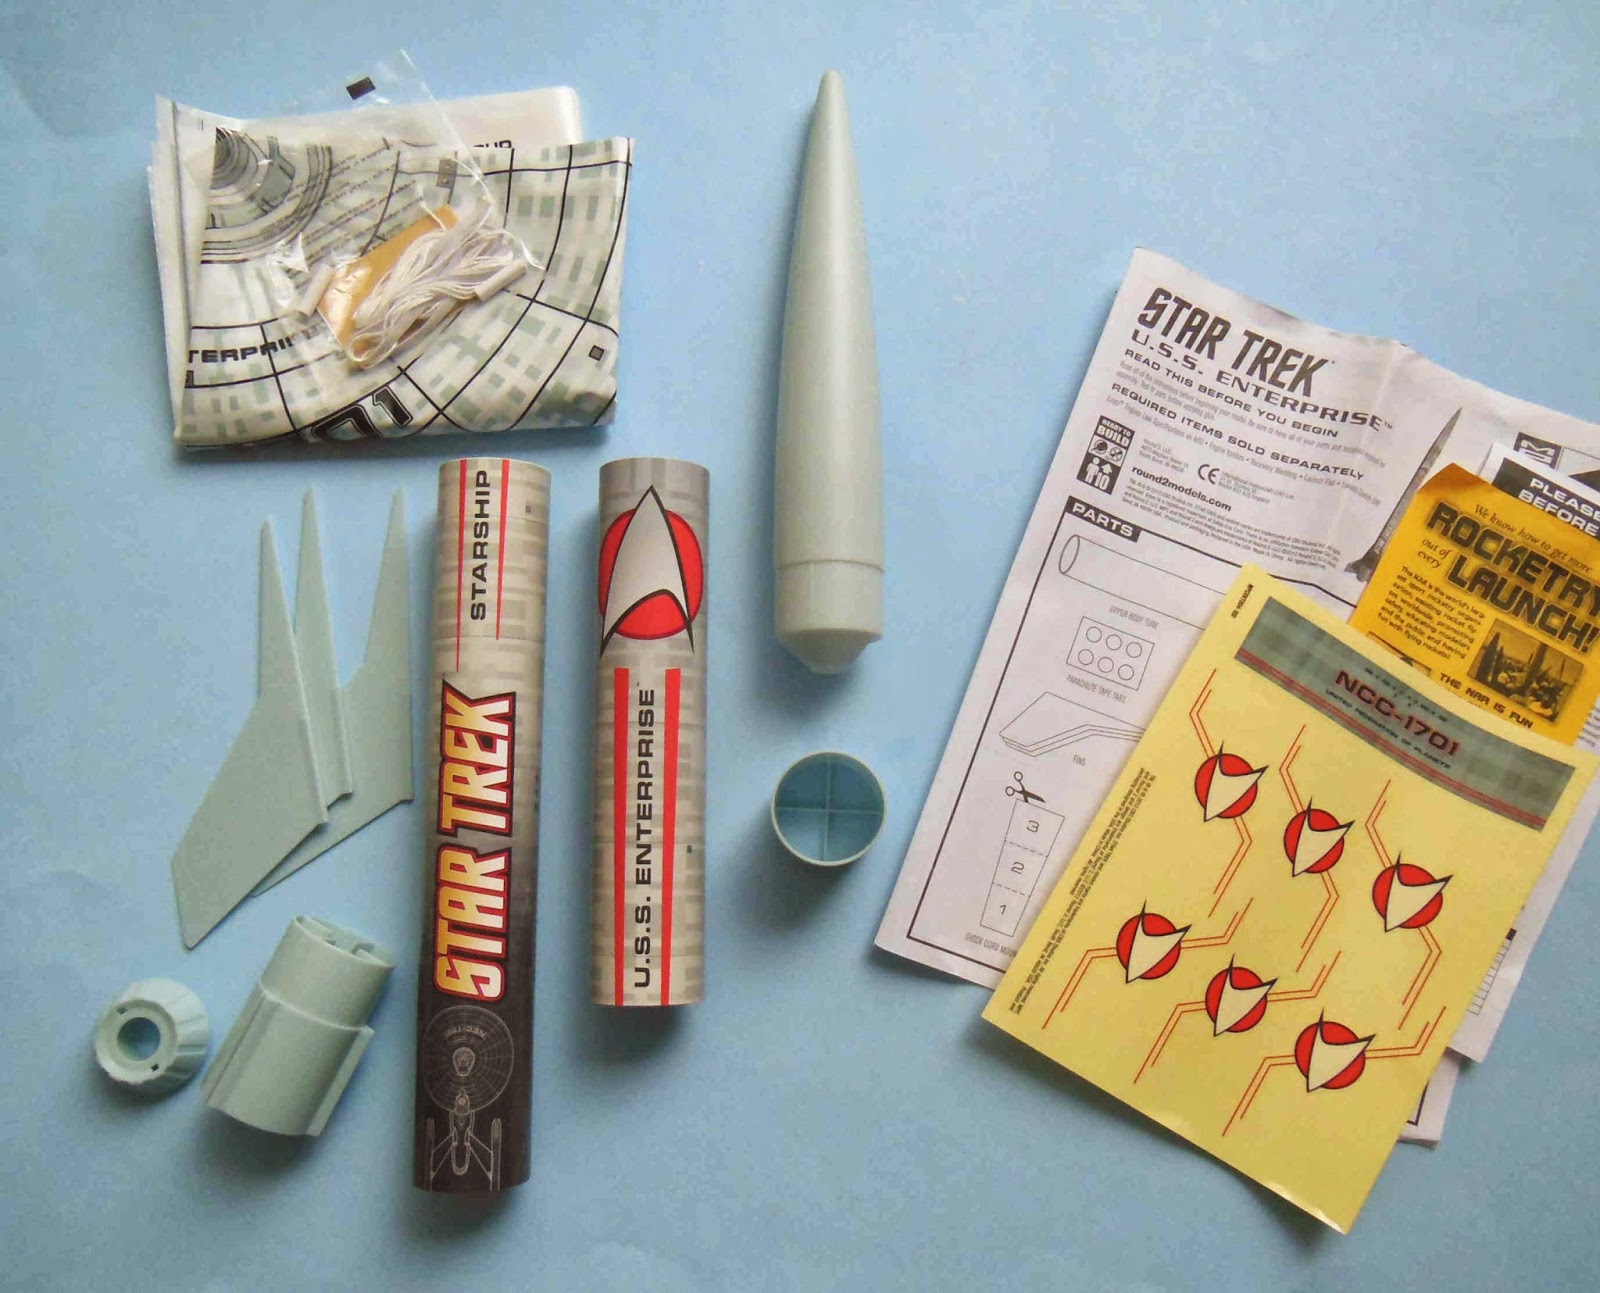
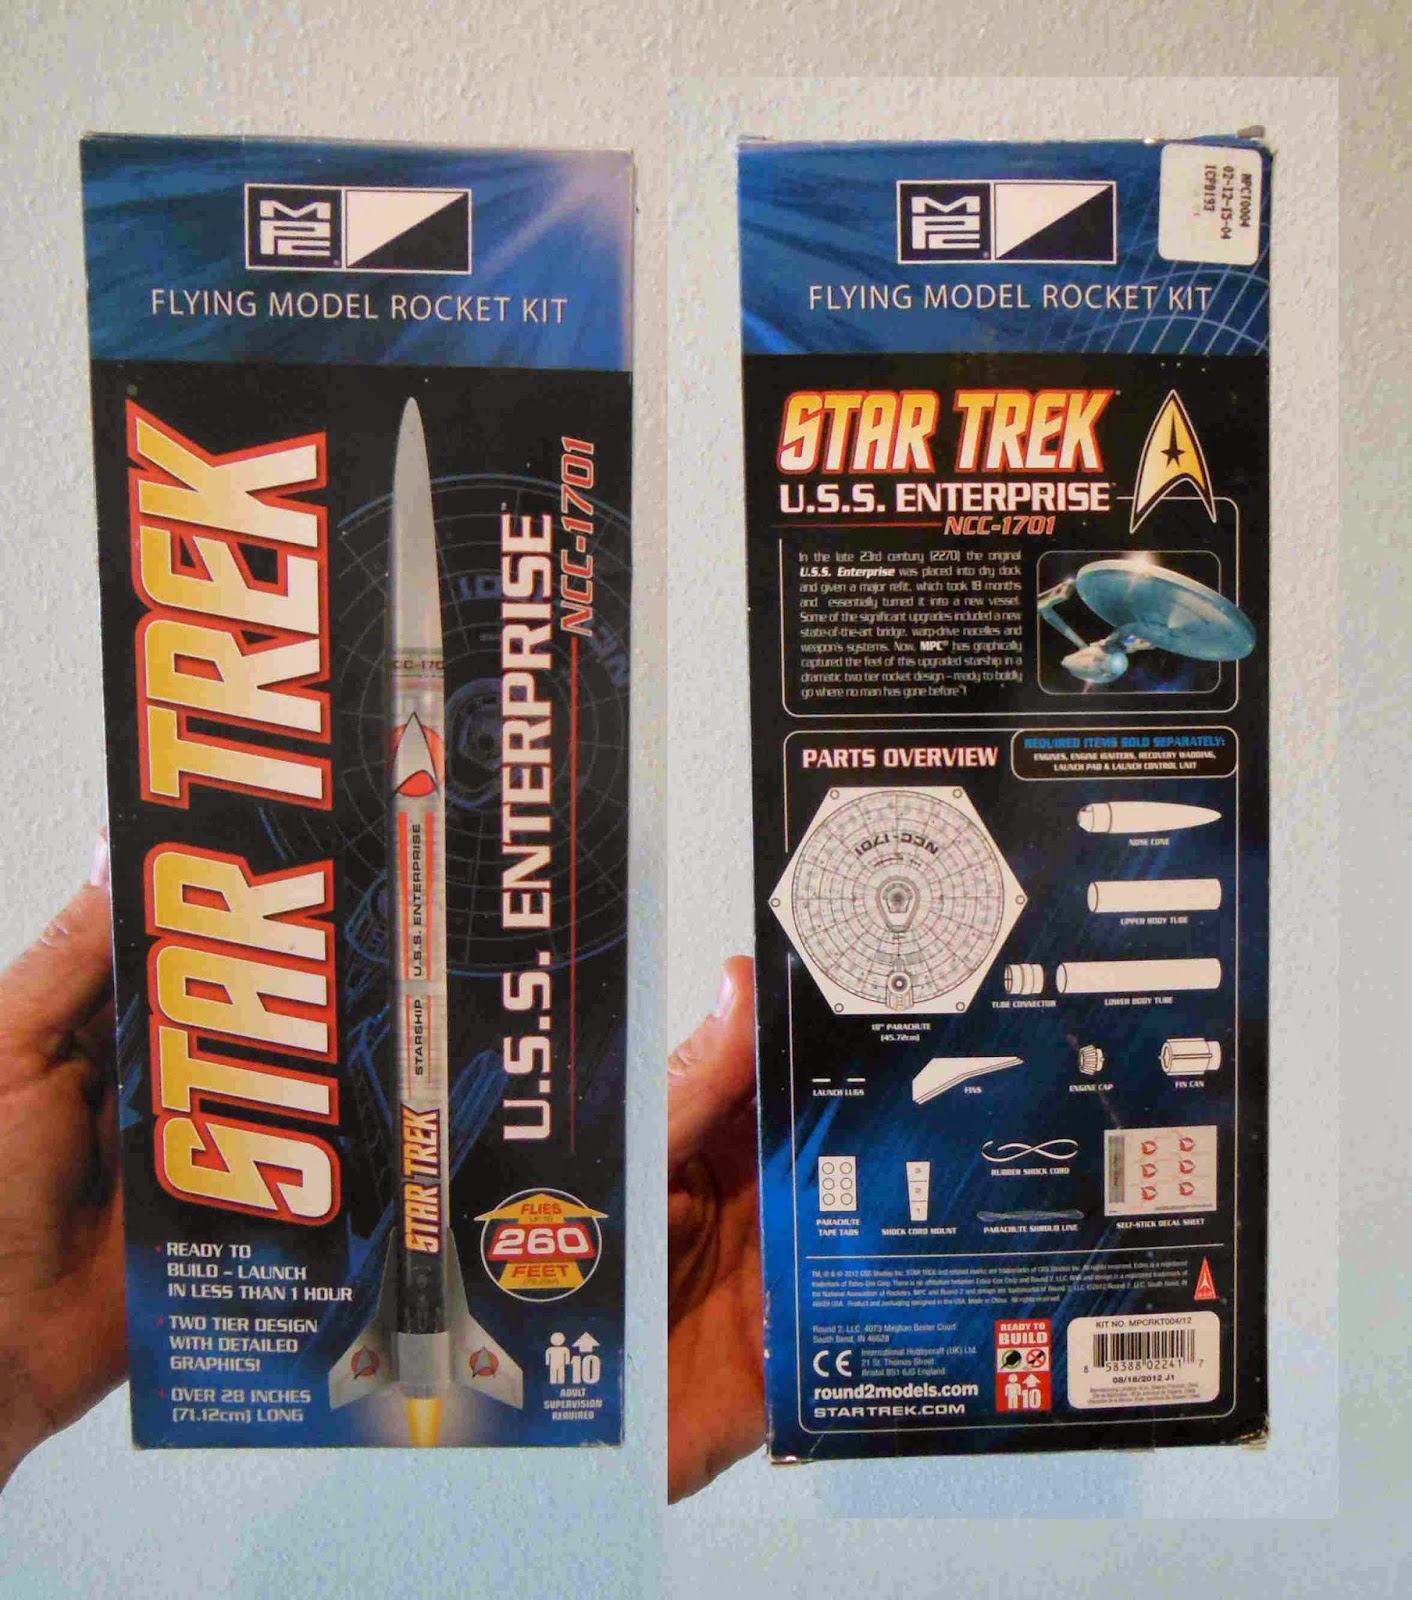
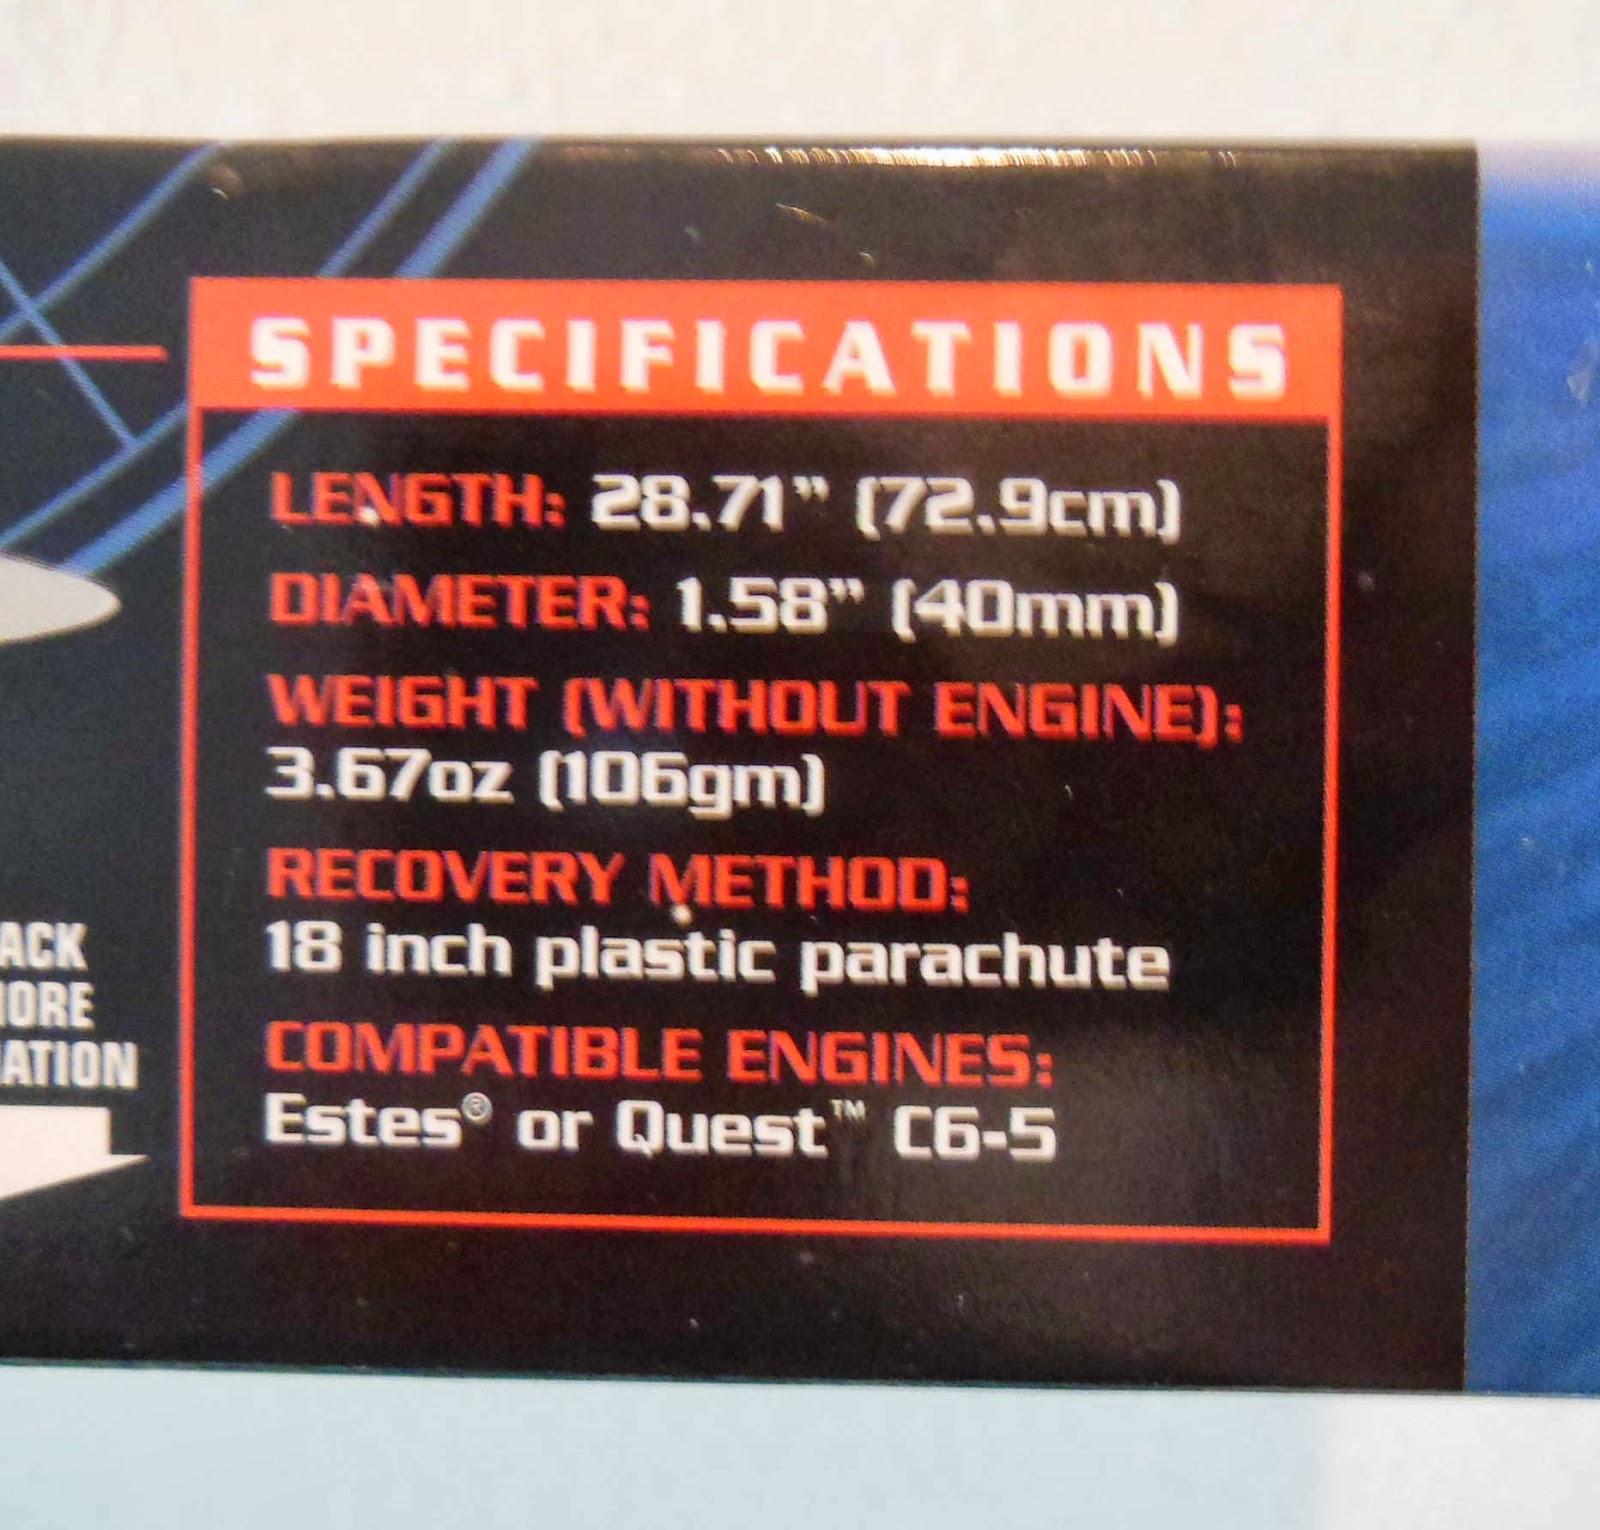


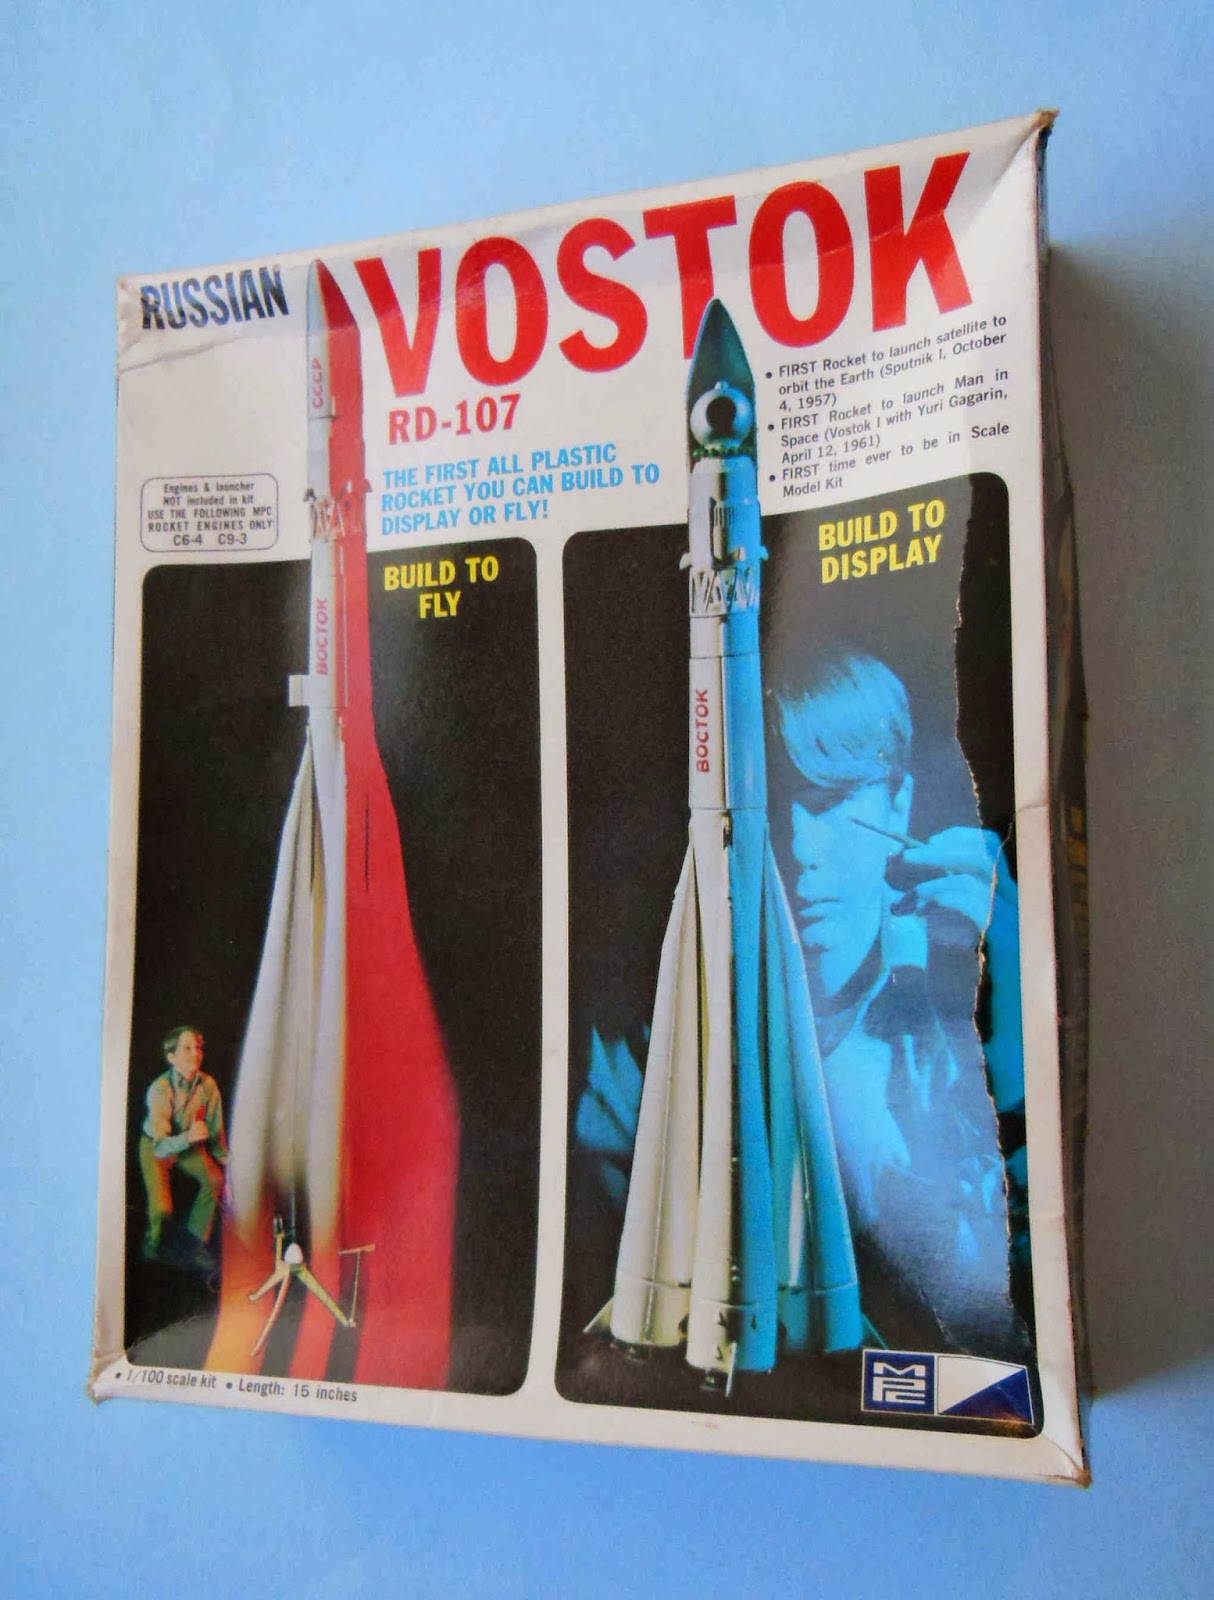


.jpg)


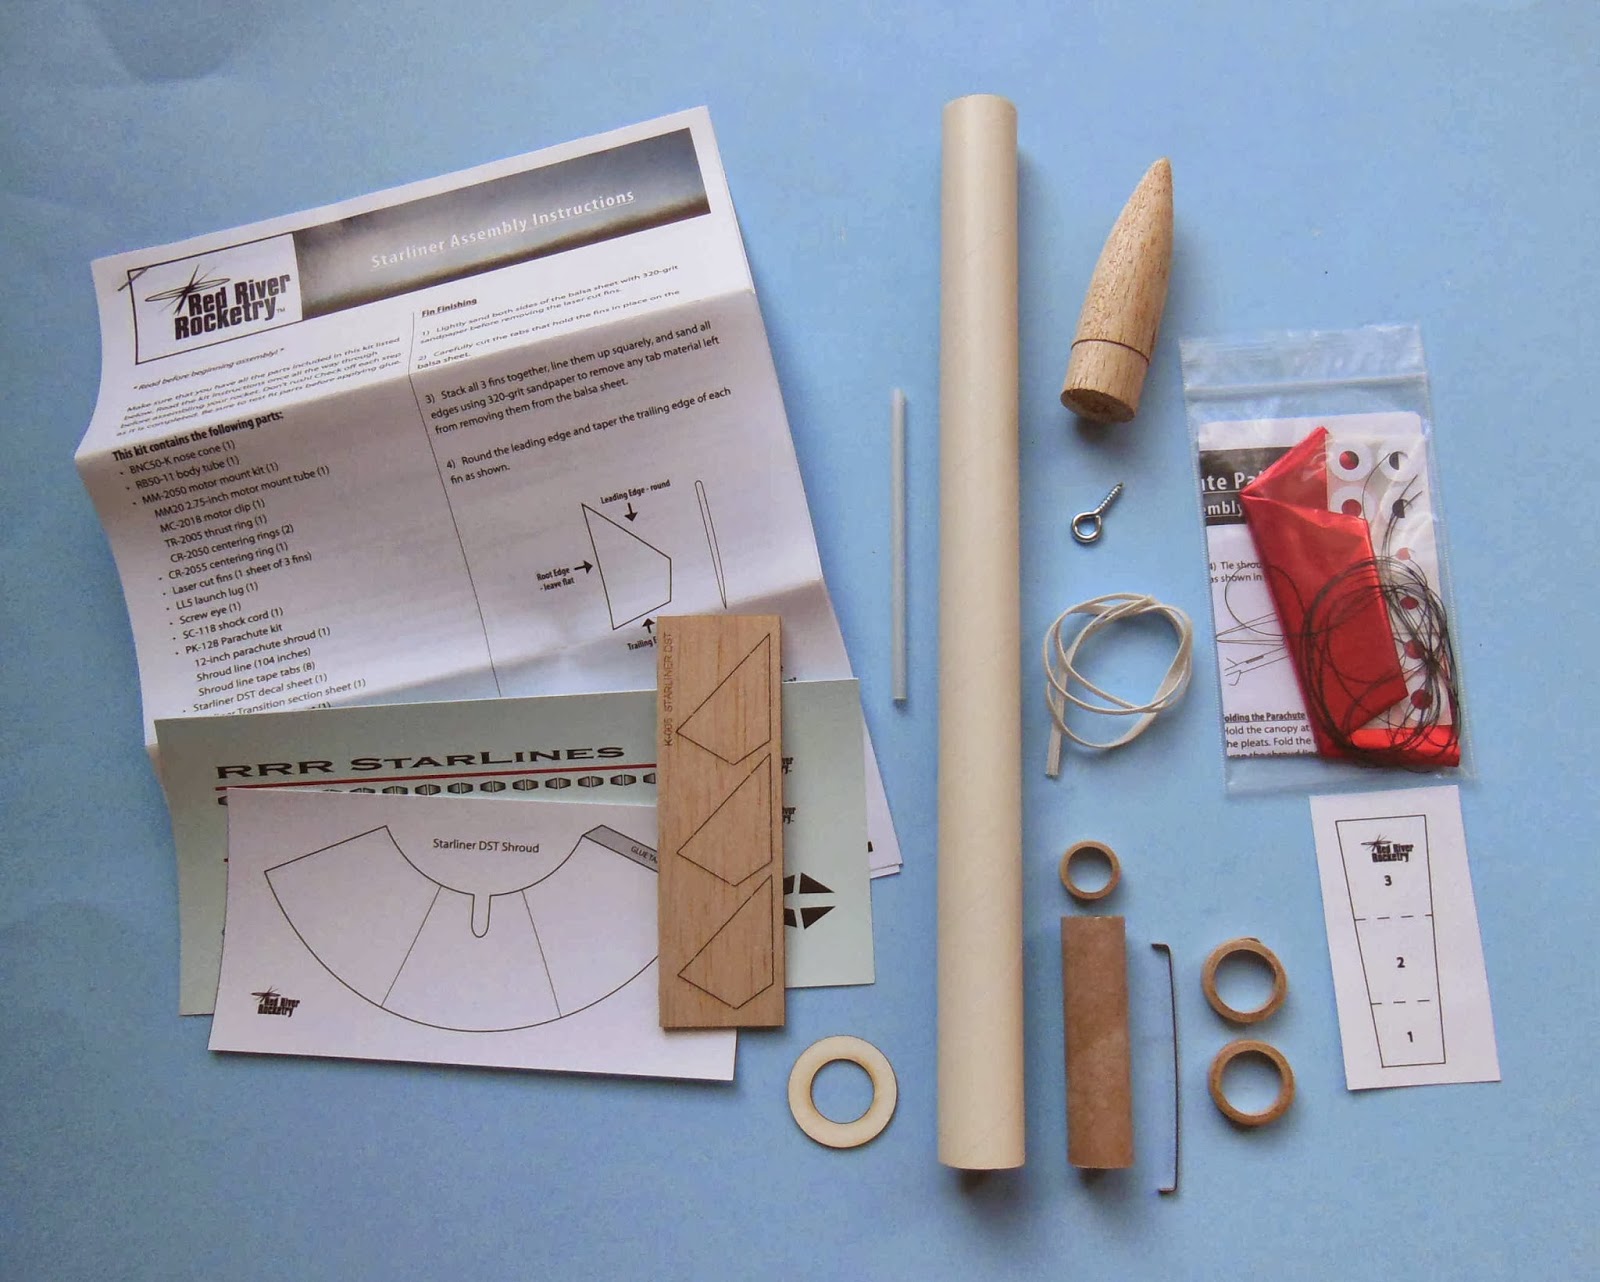

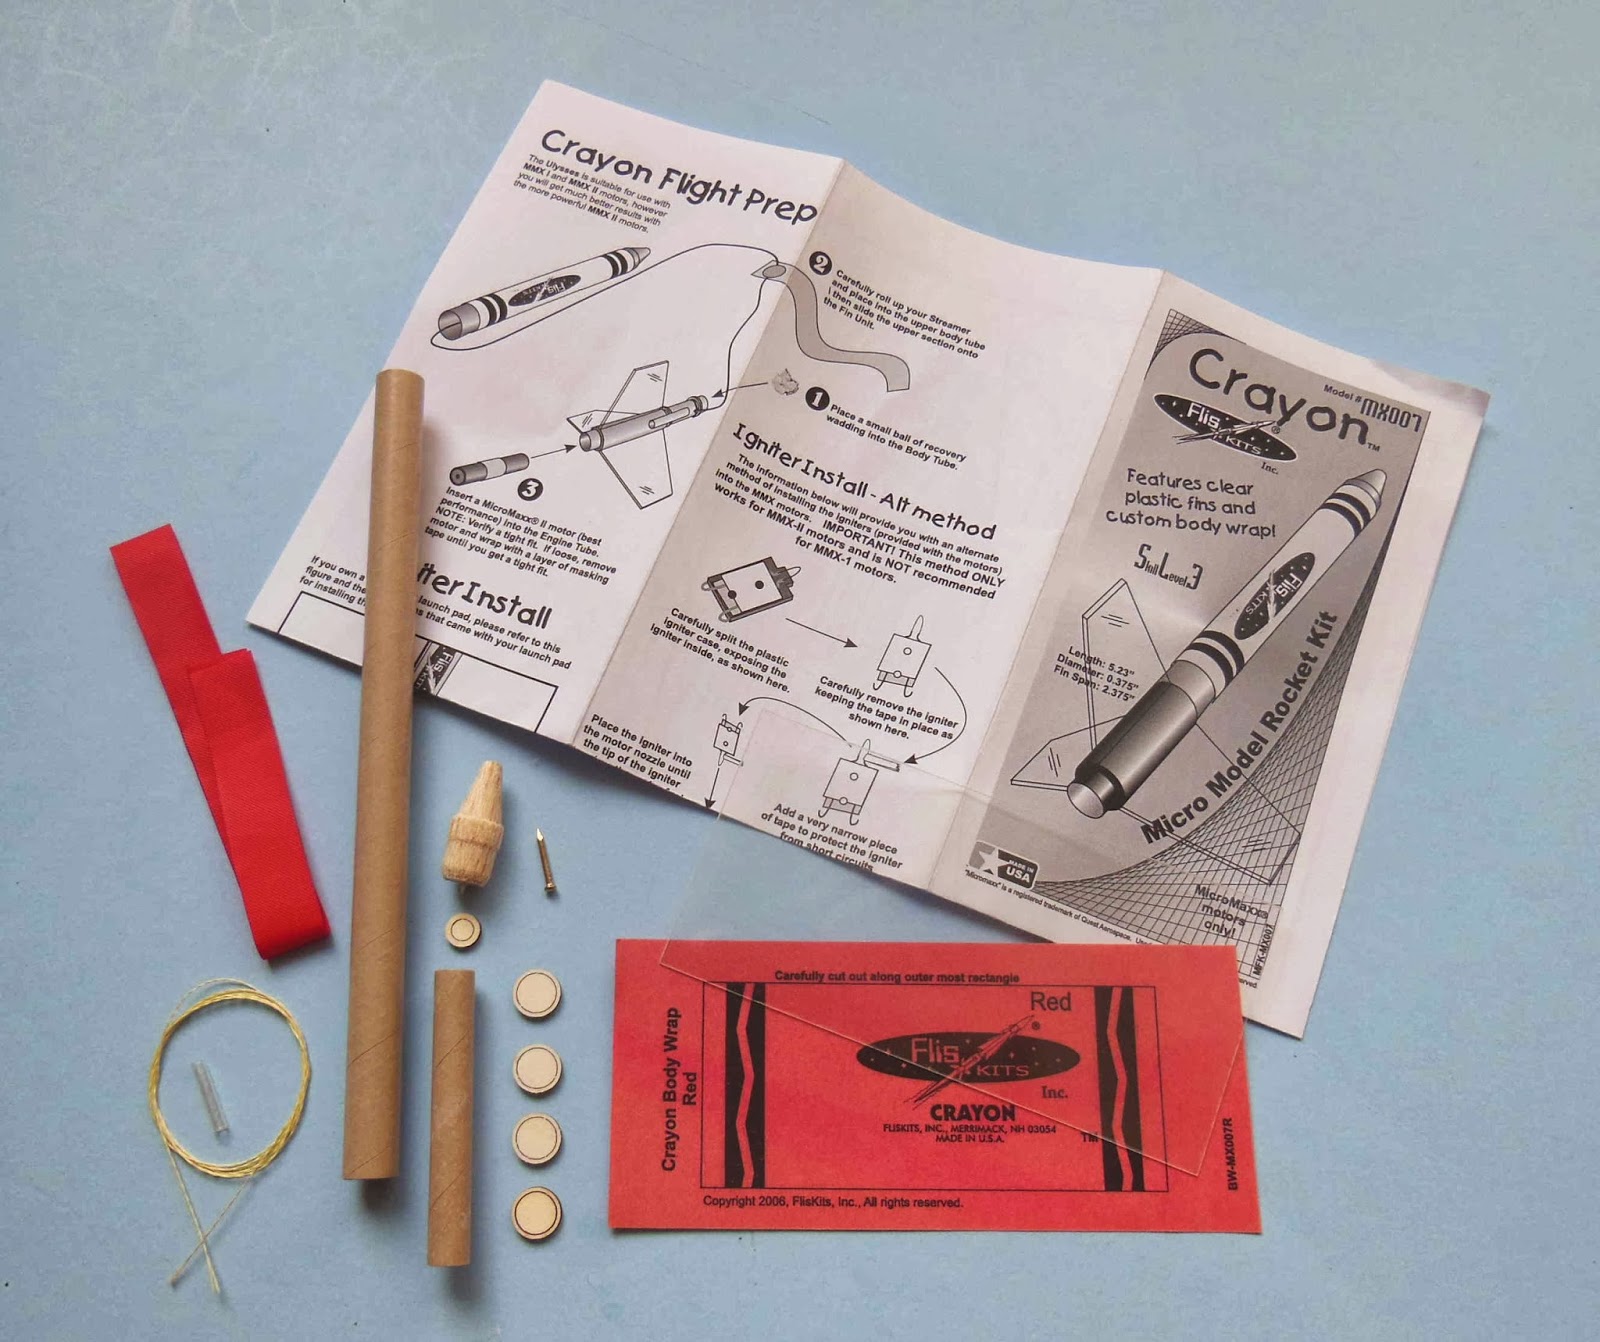


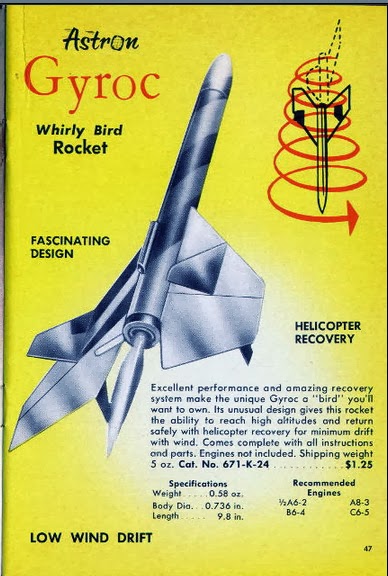


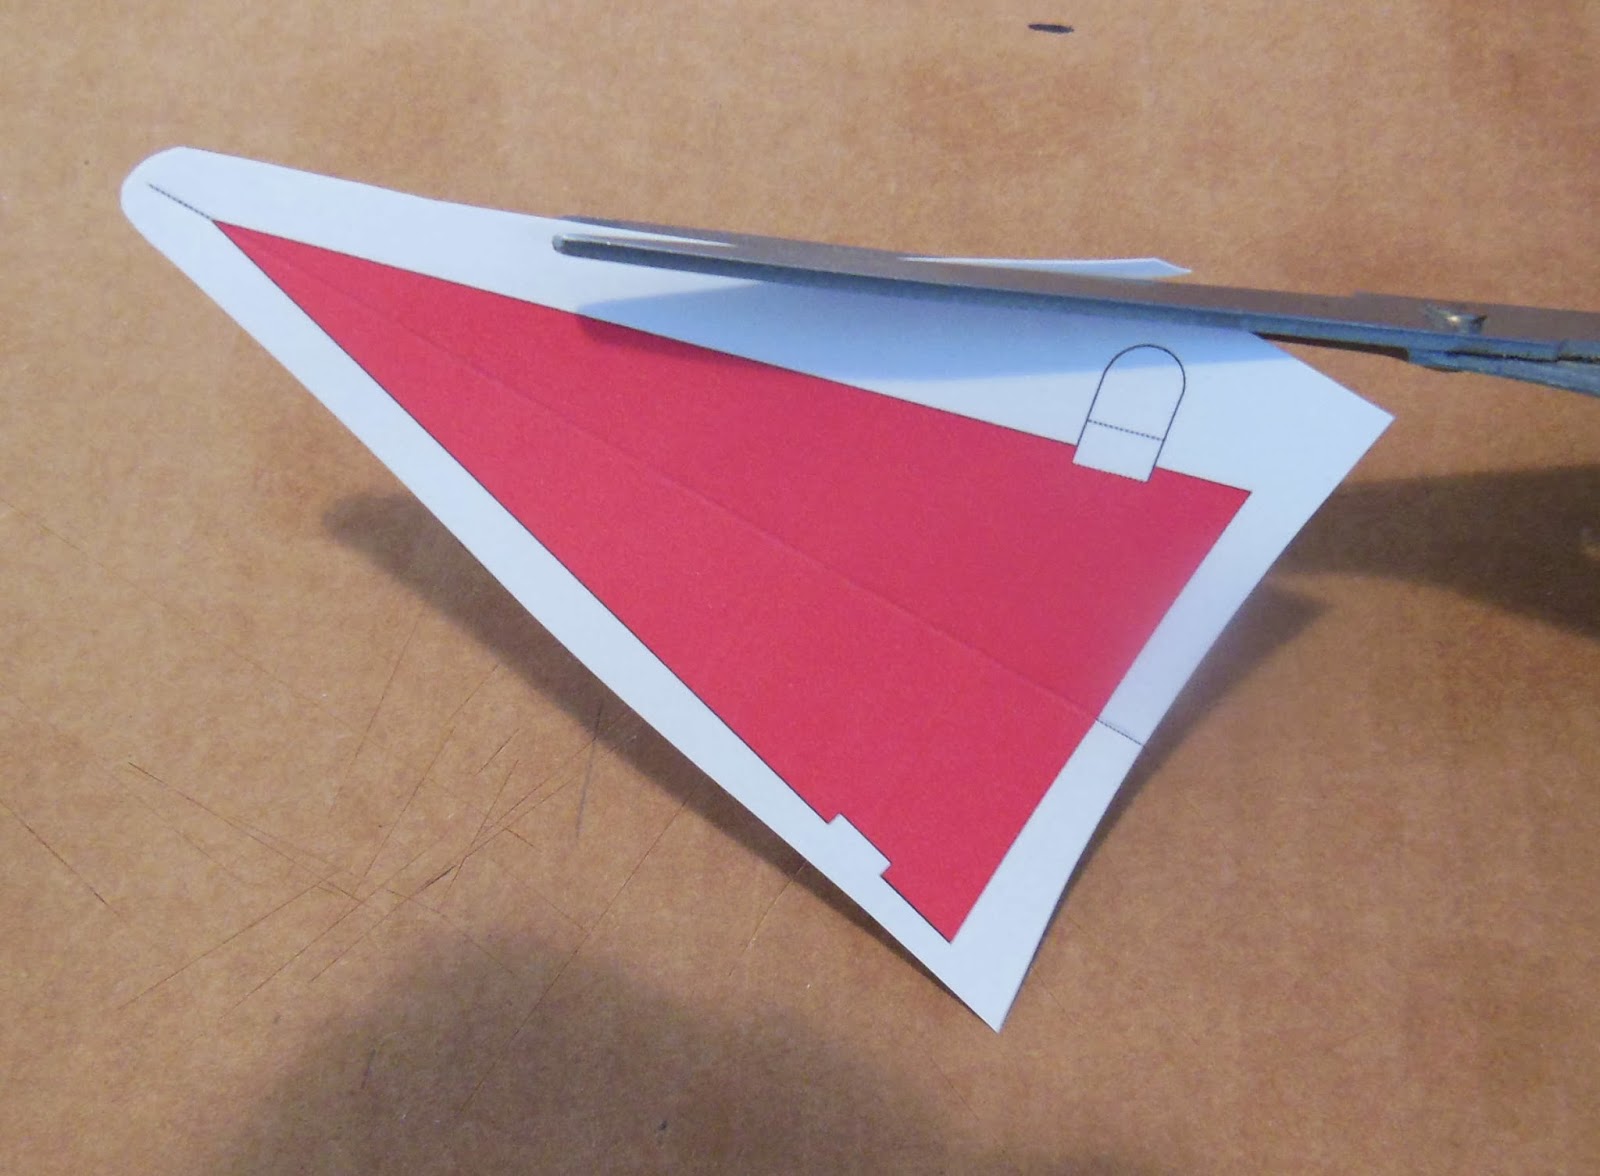

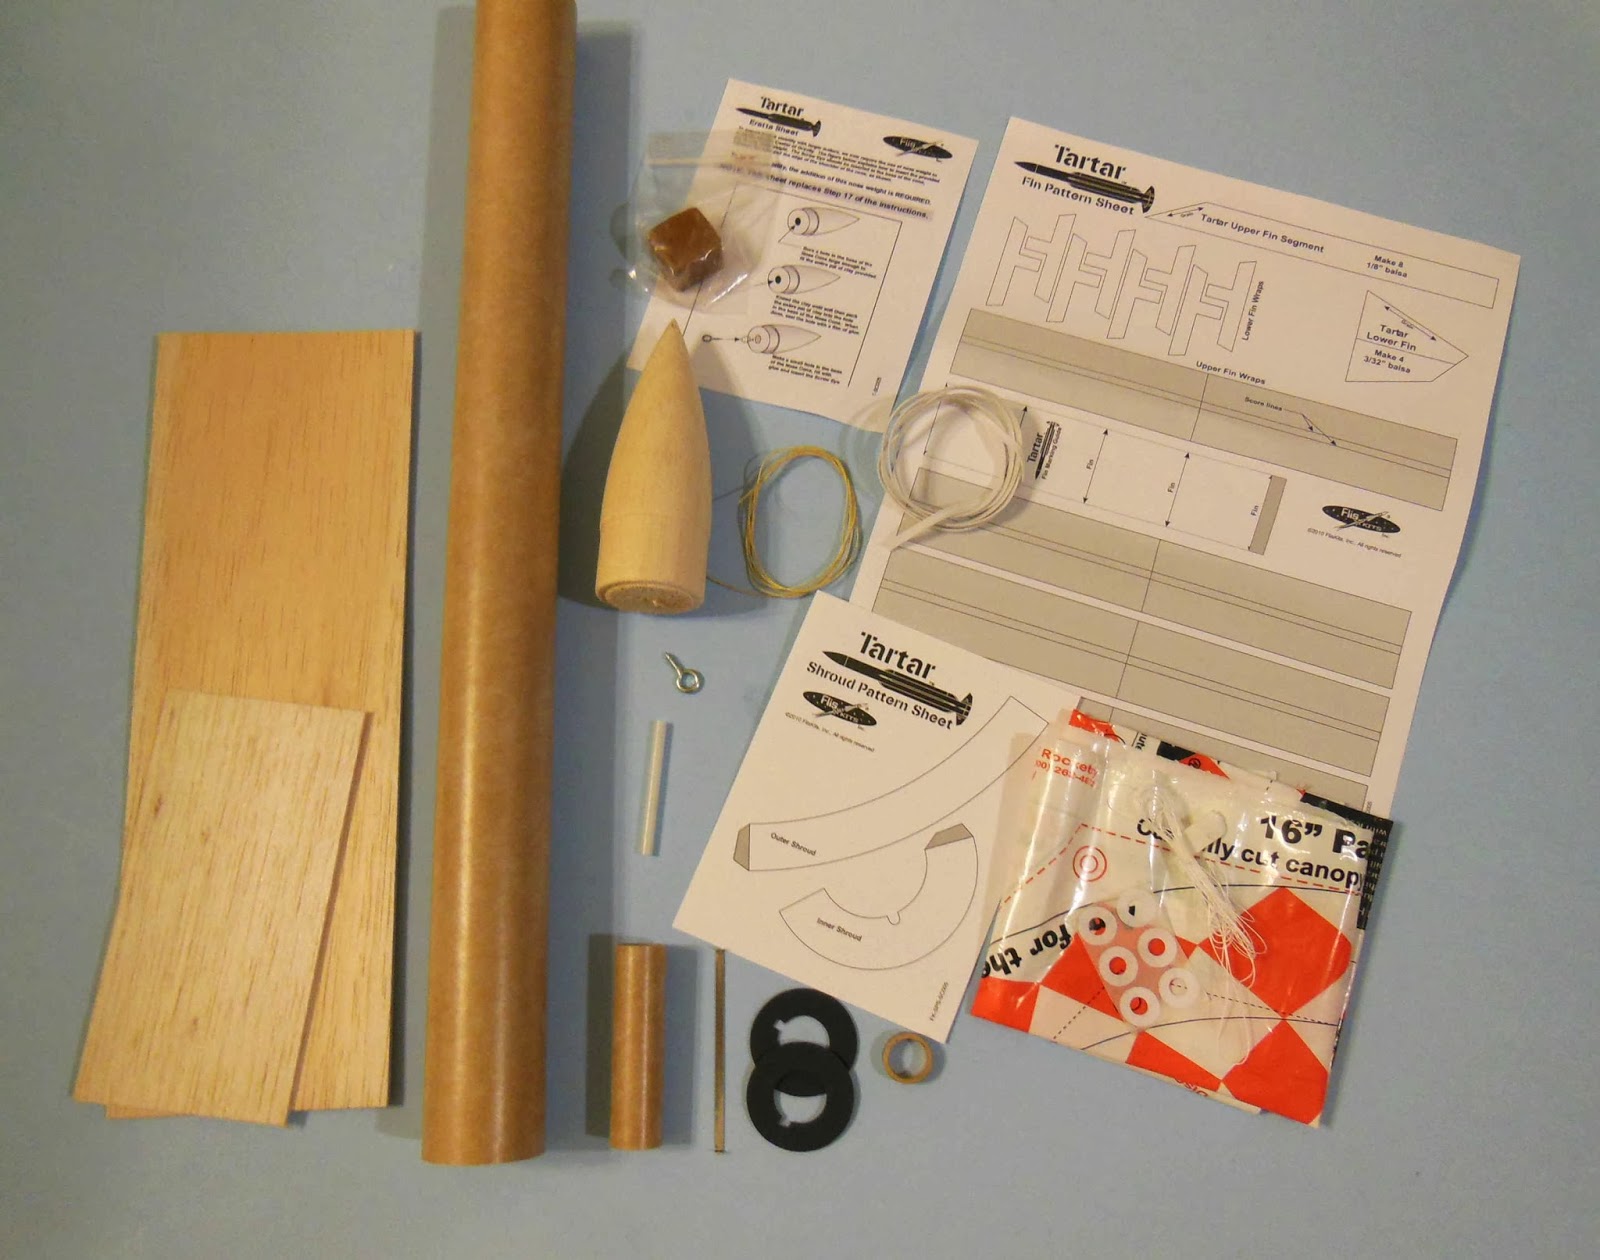

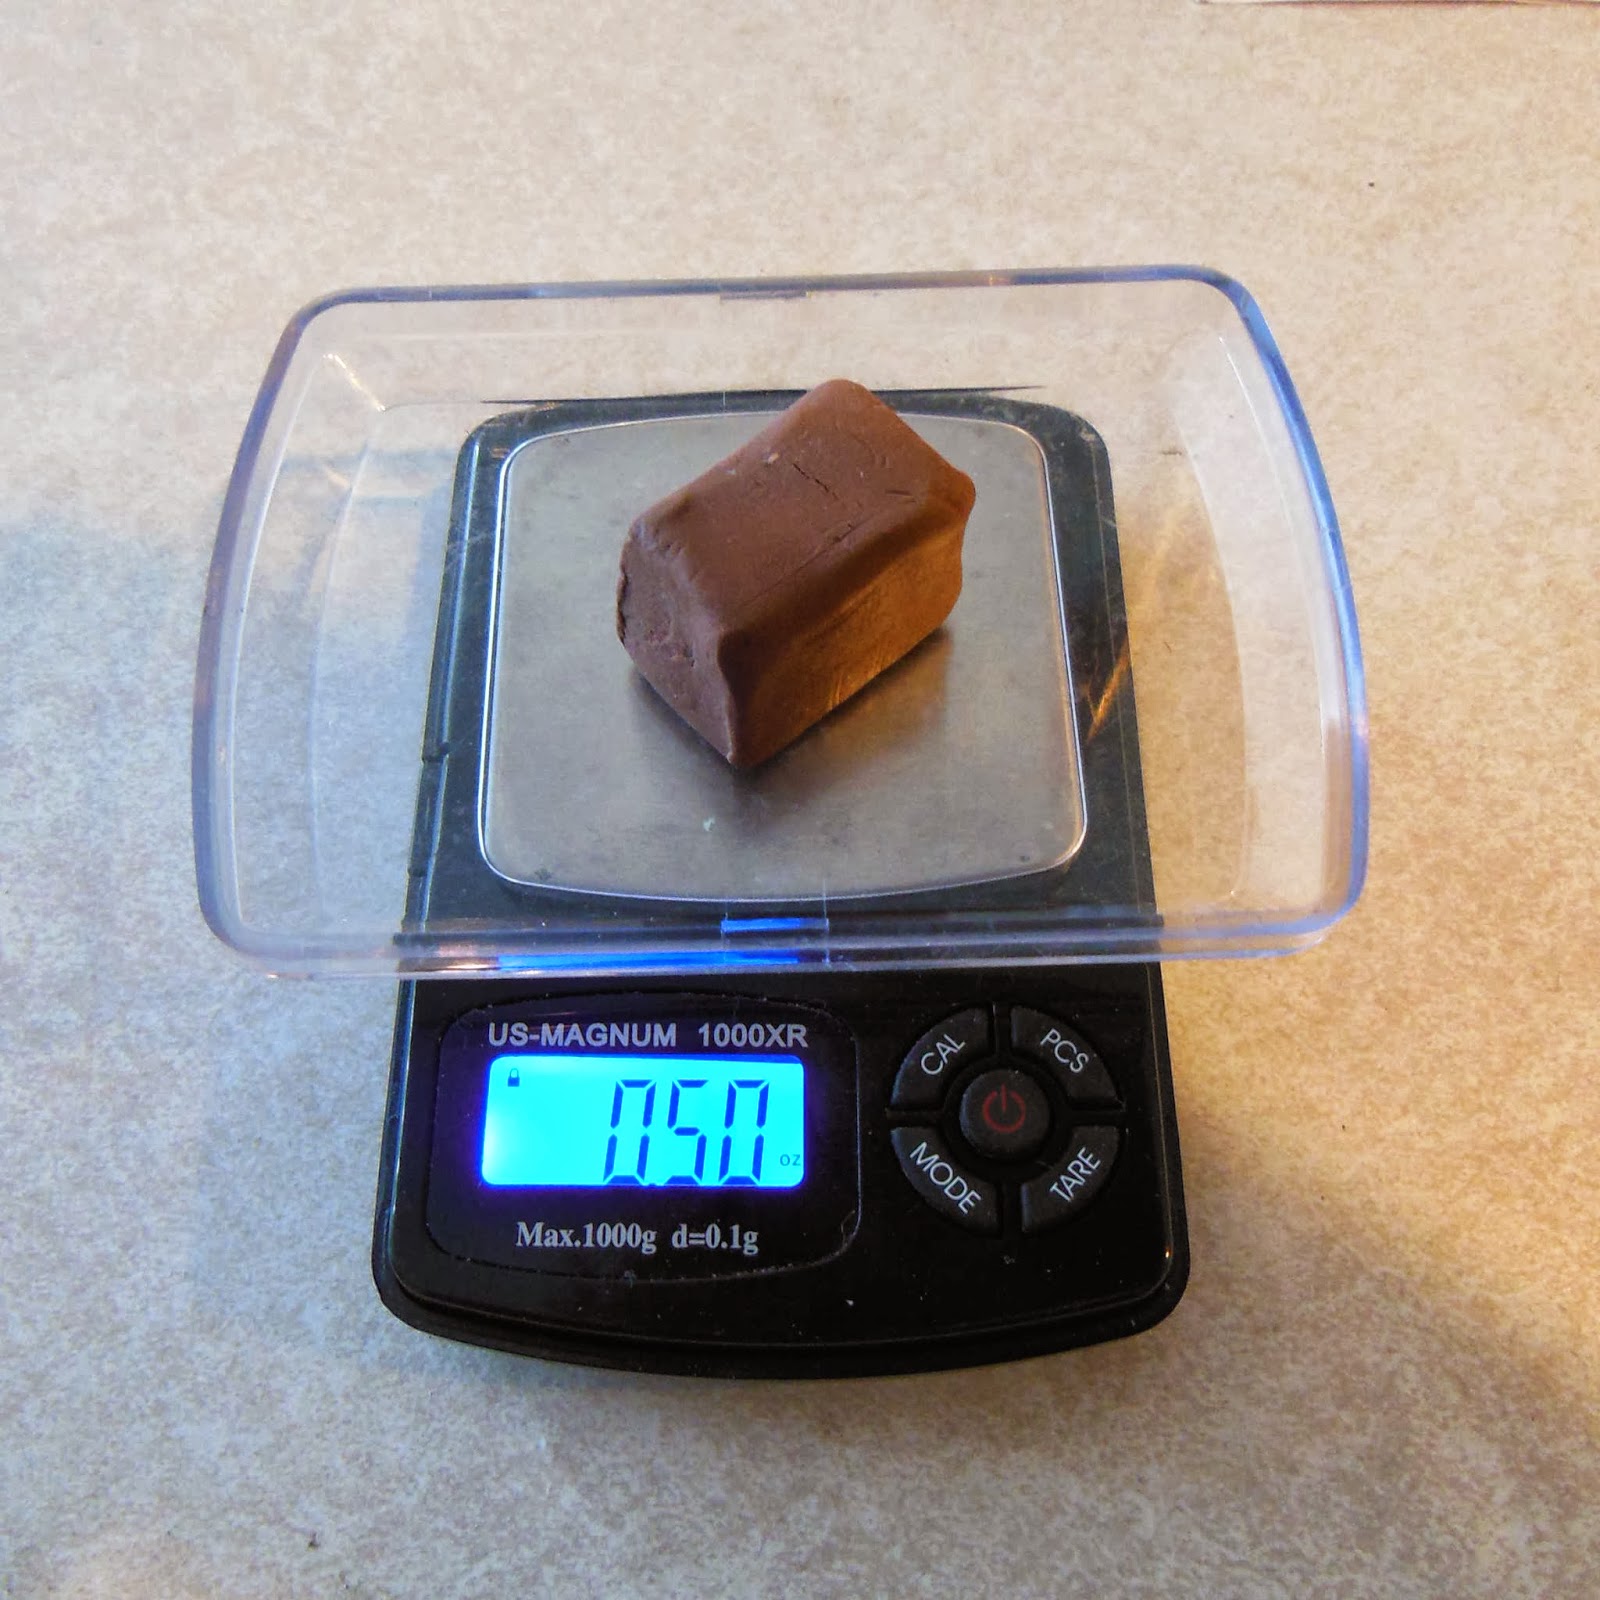

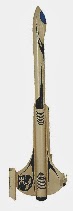


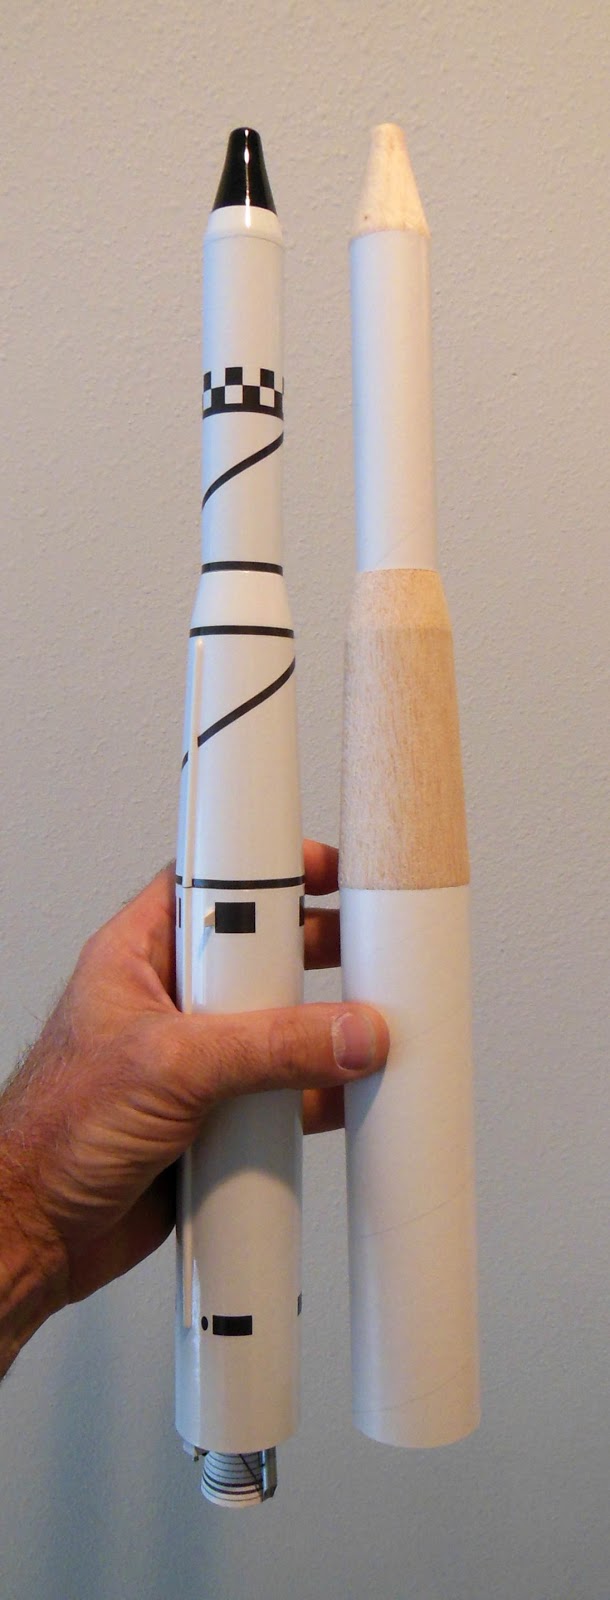
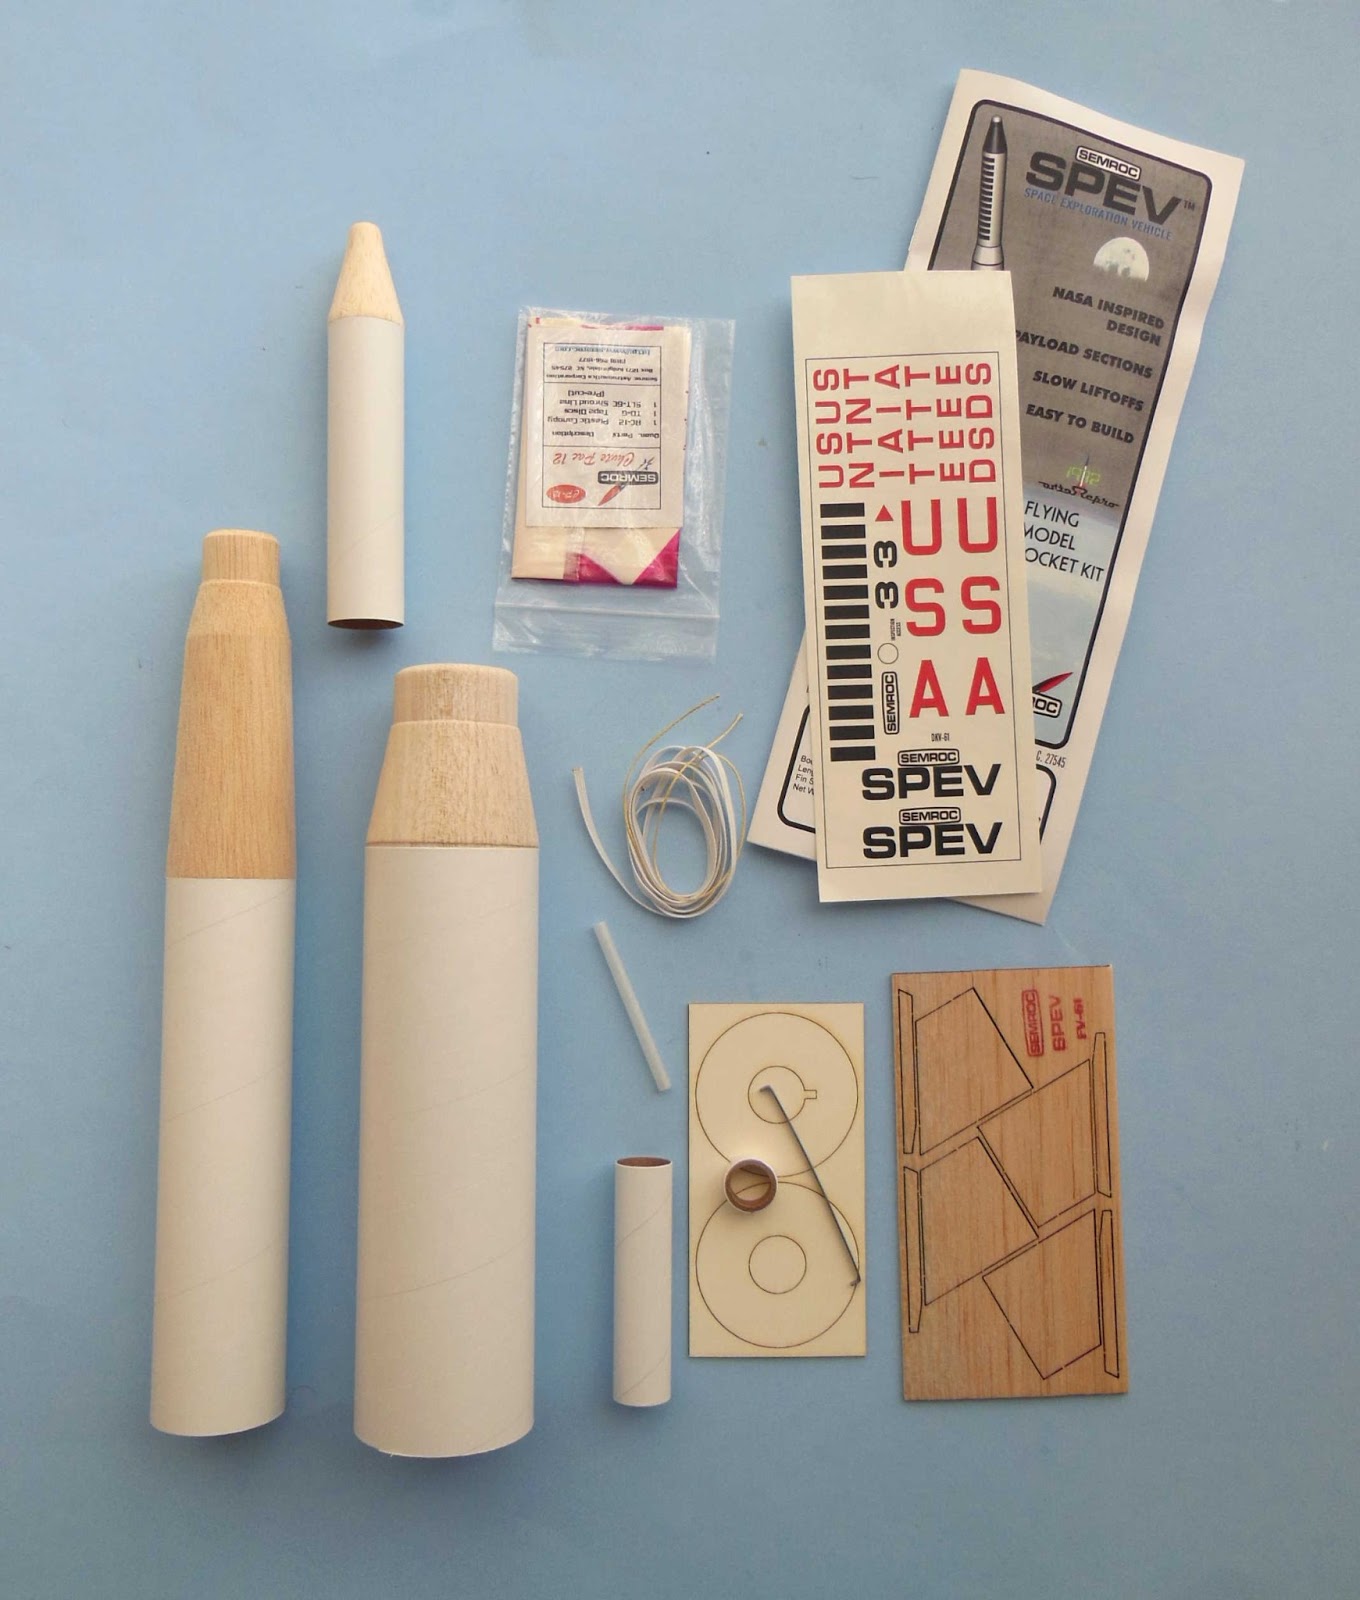
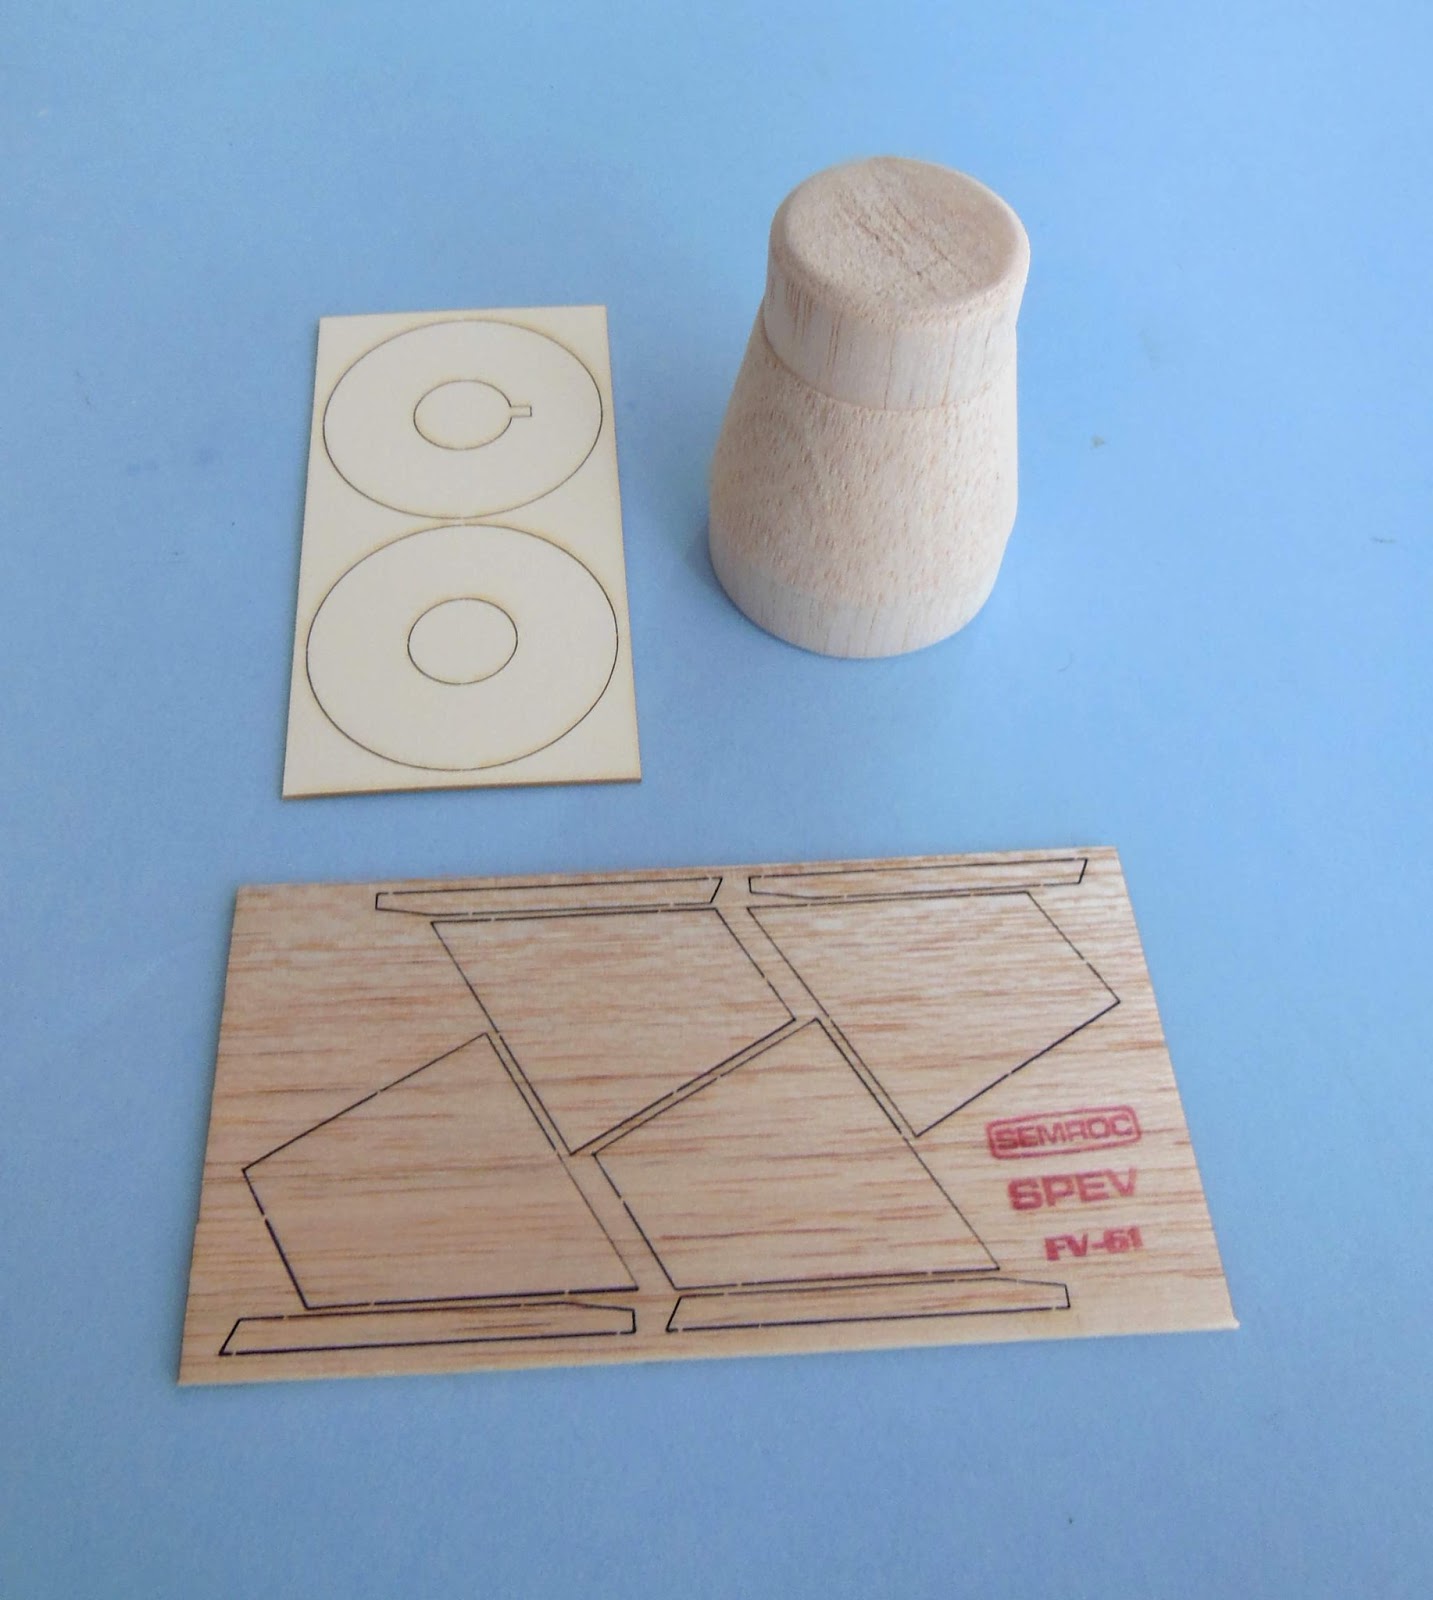

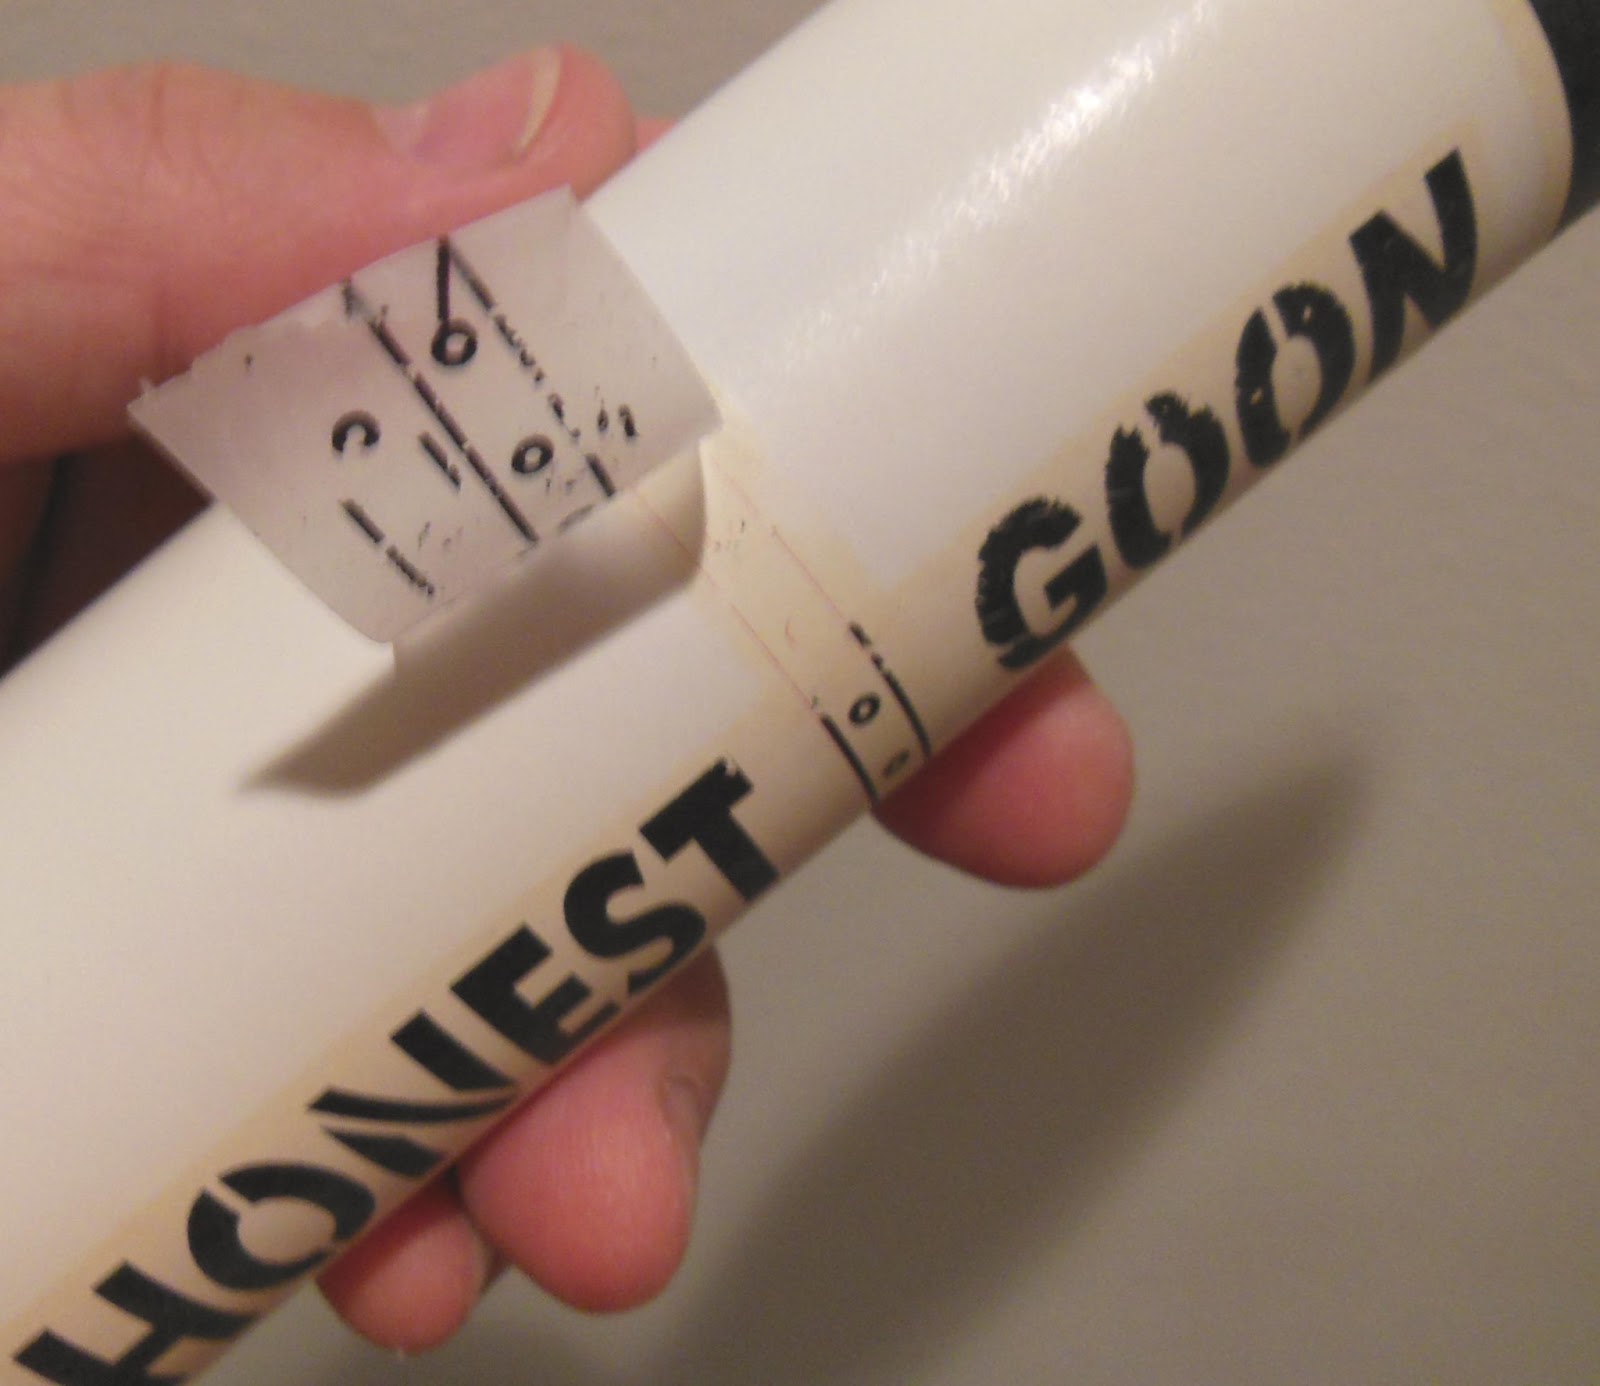

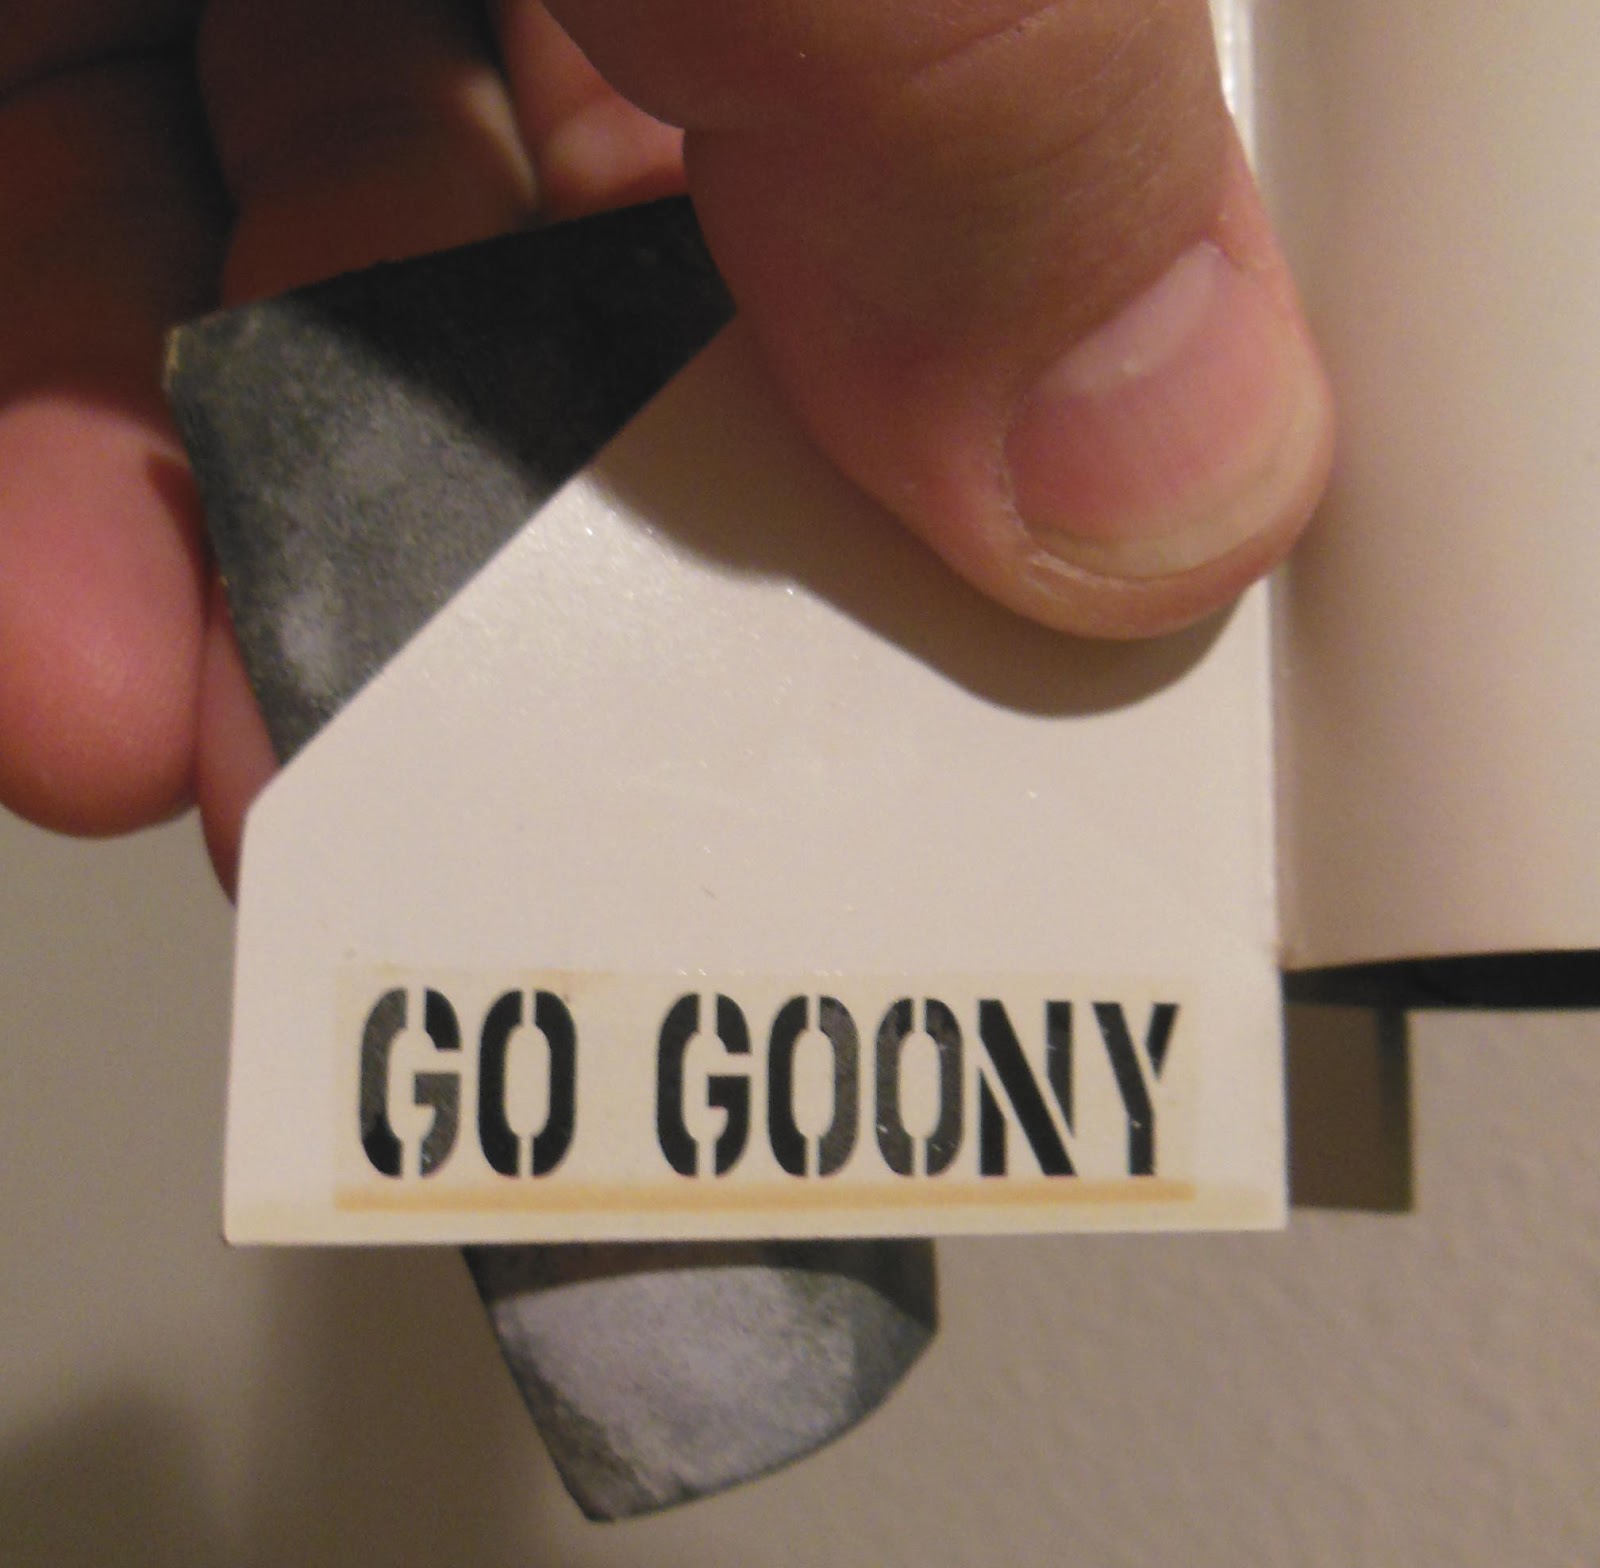


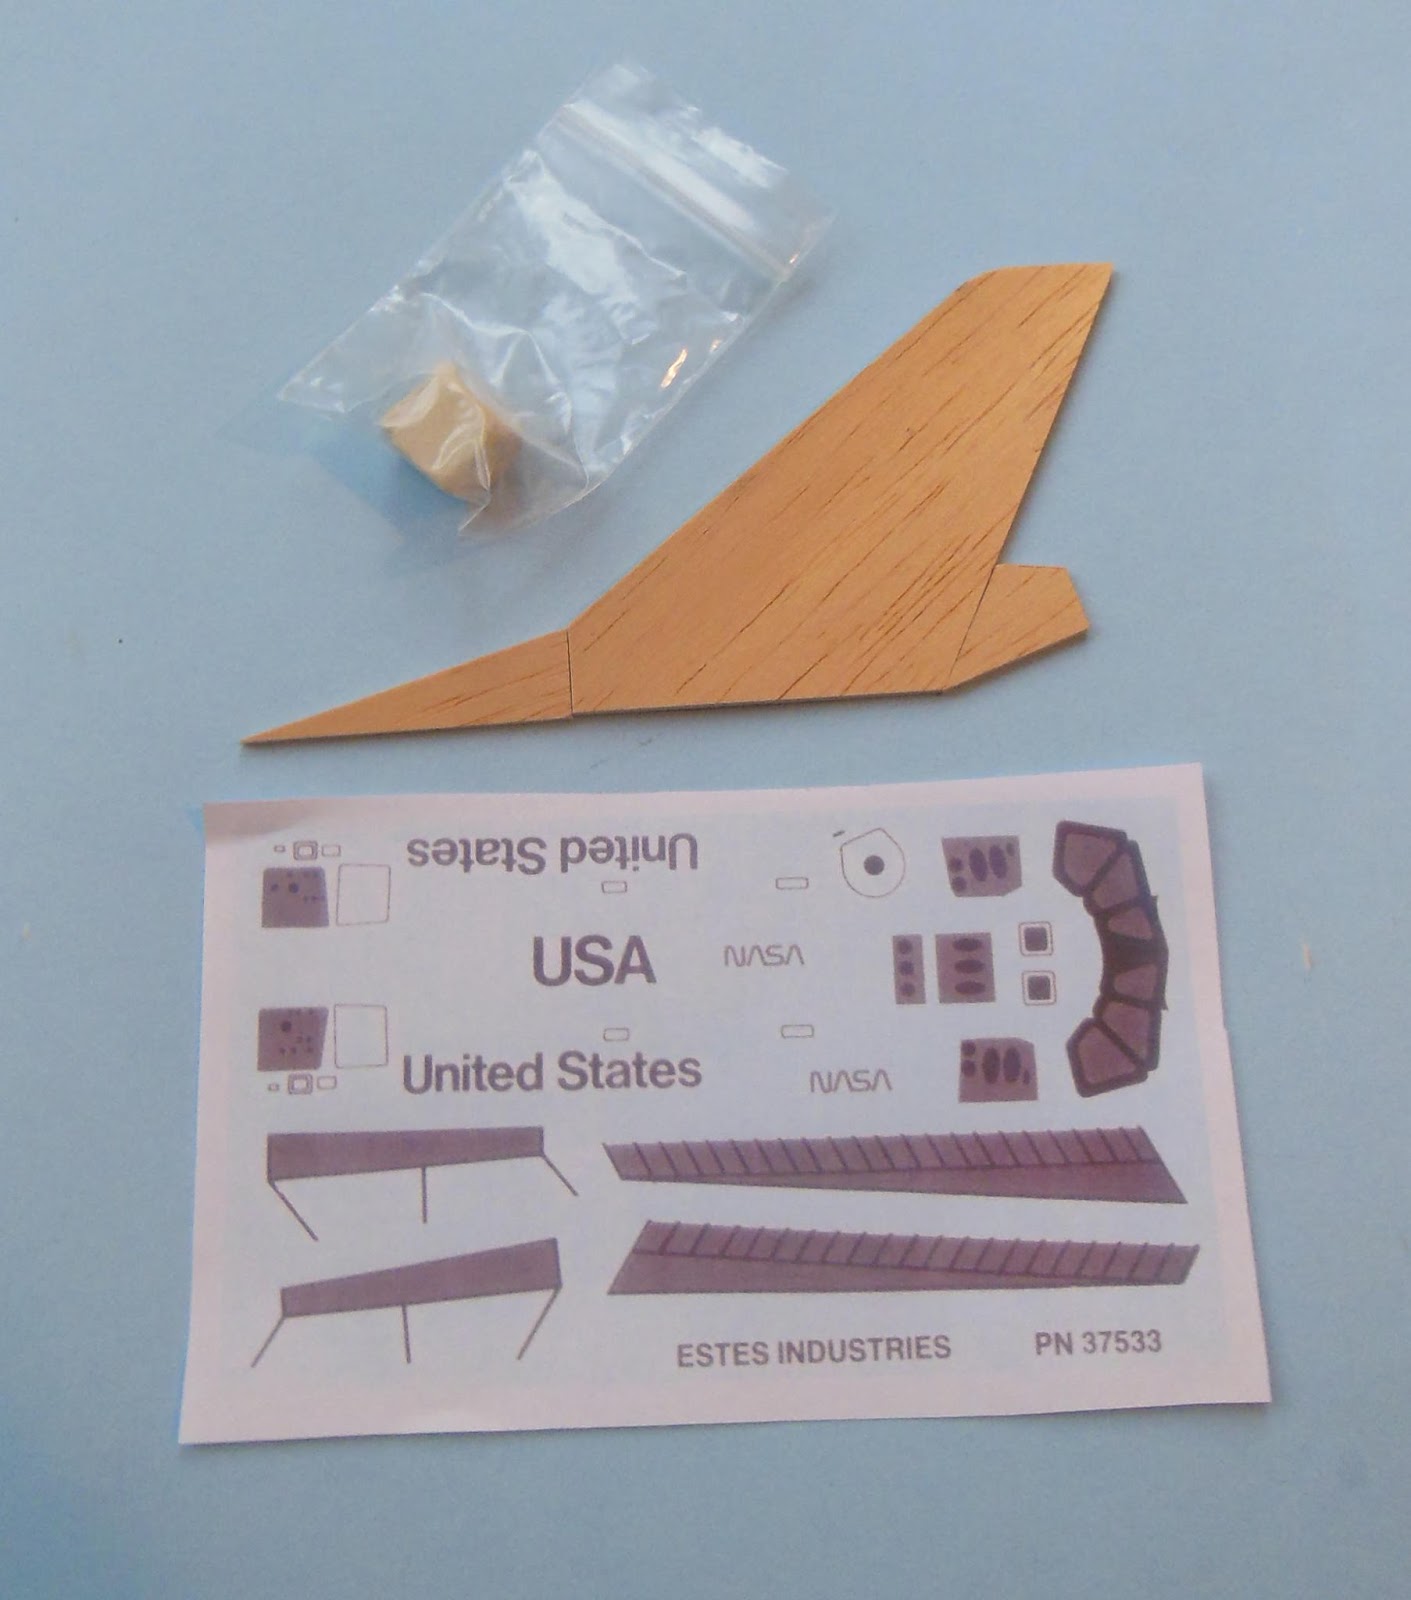
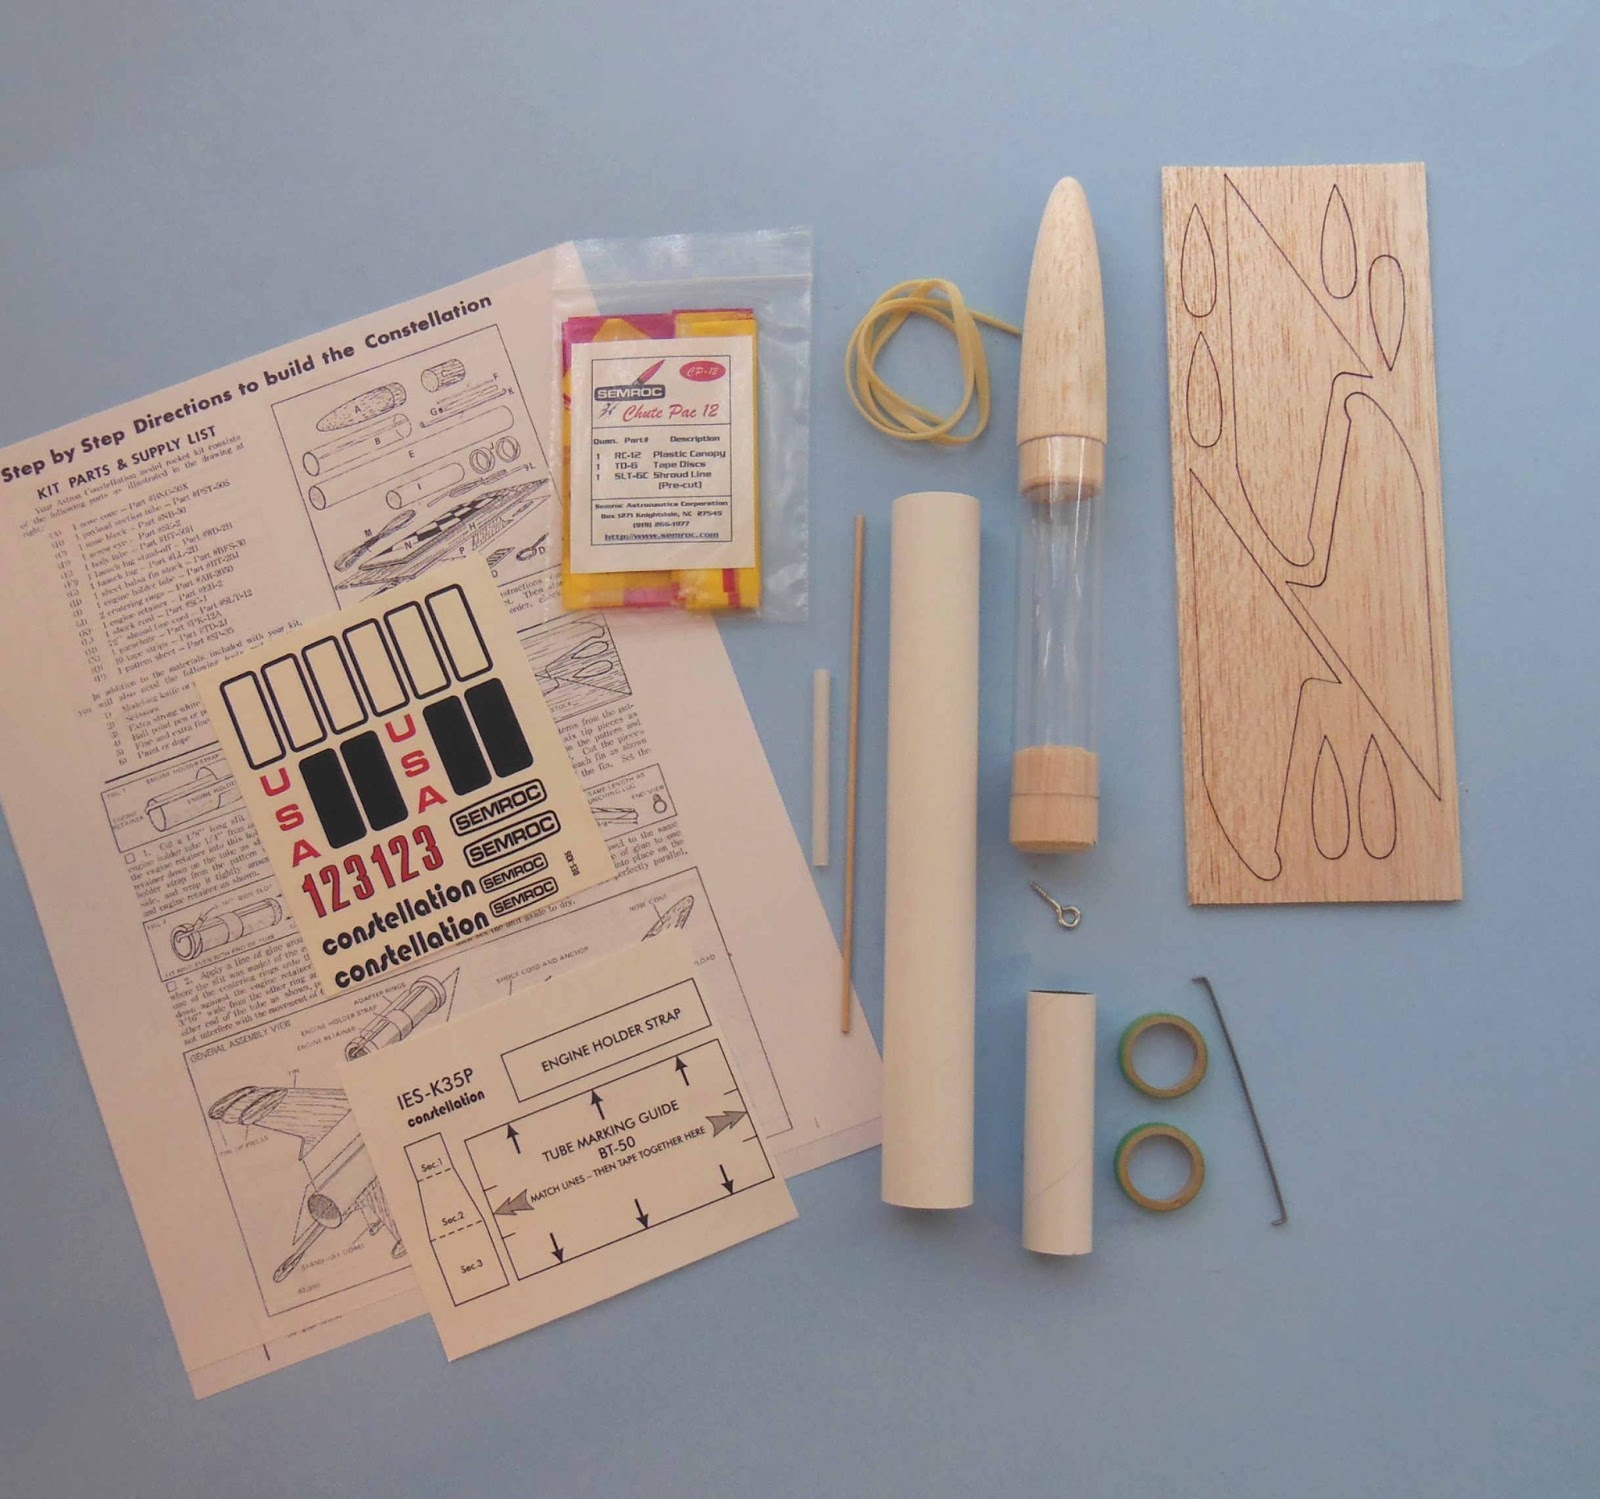


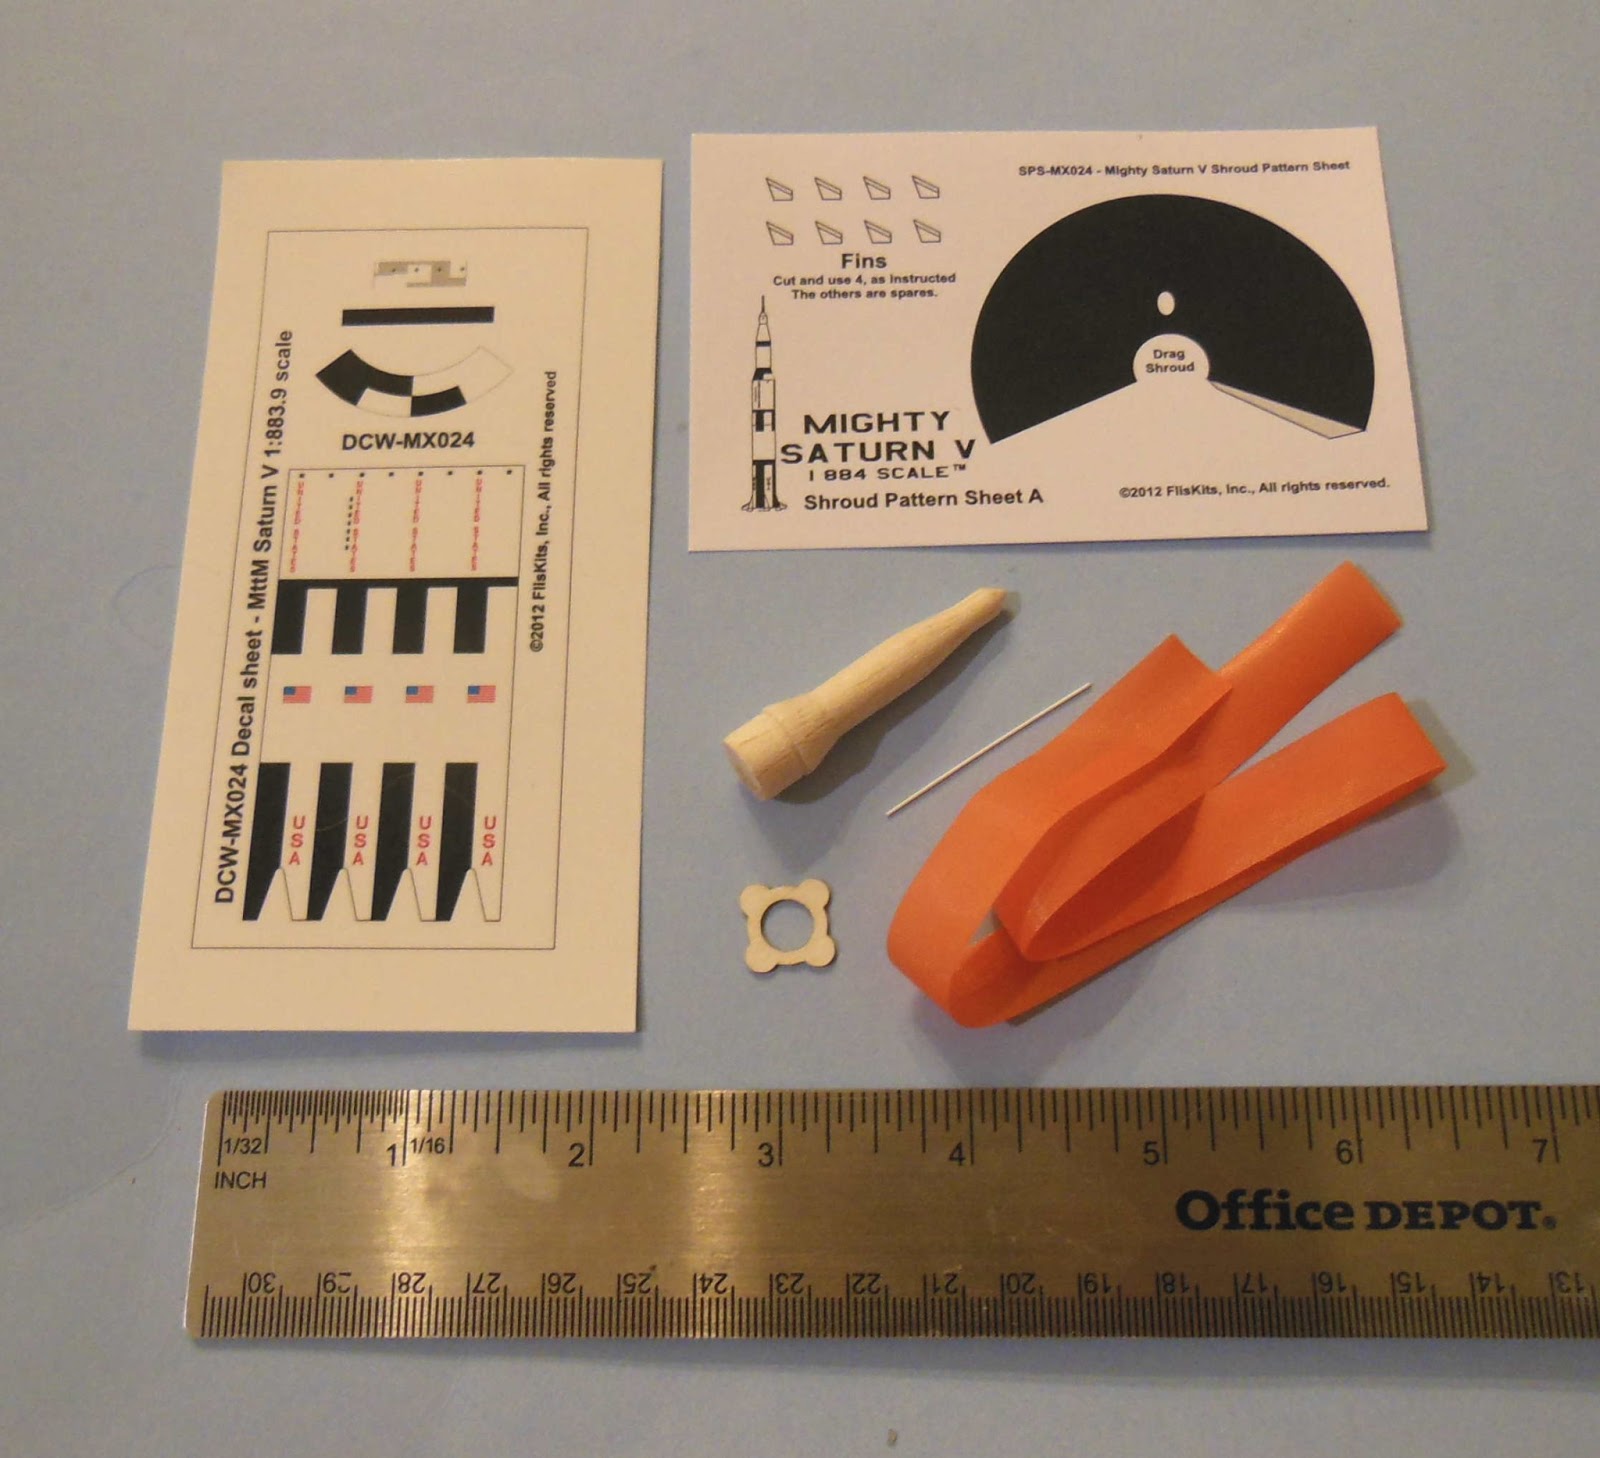


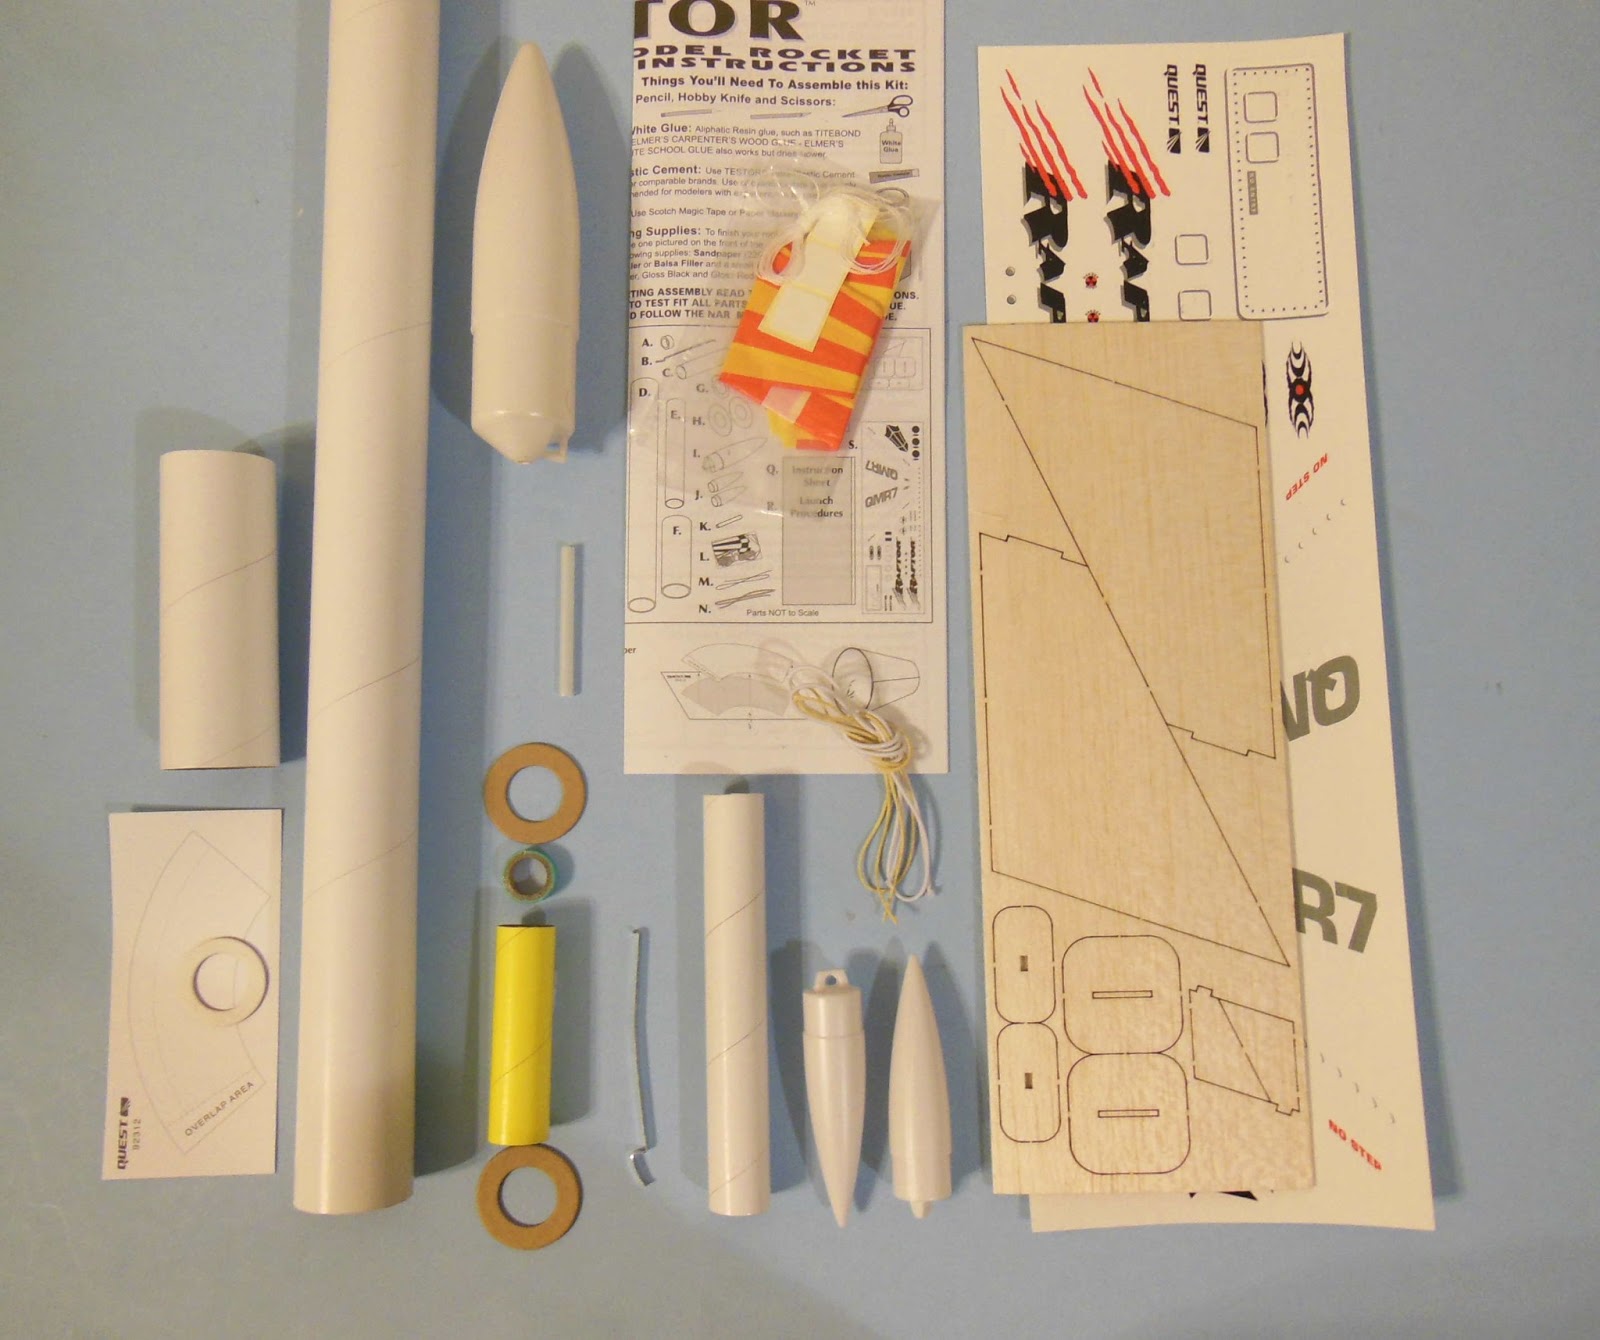
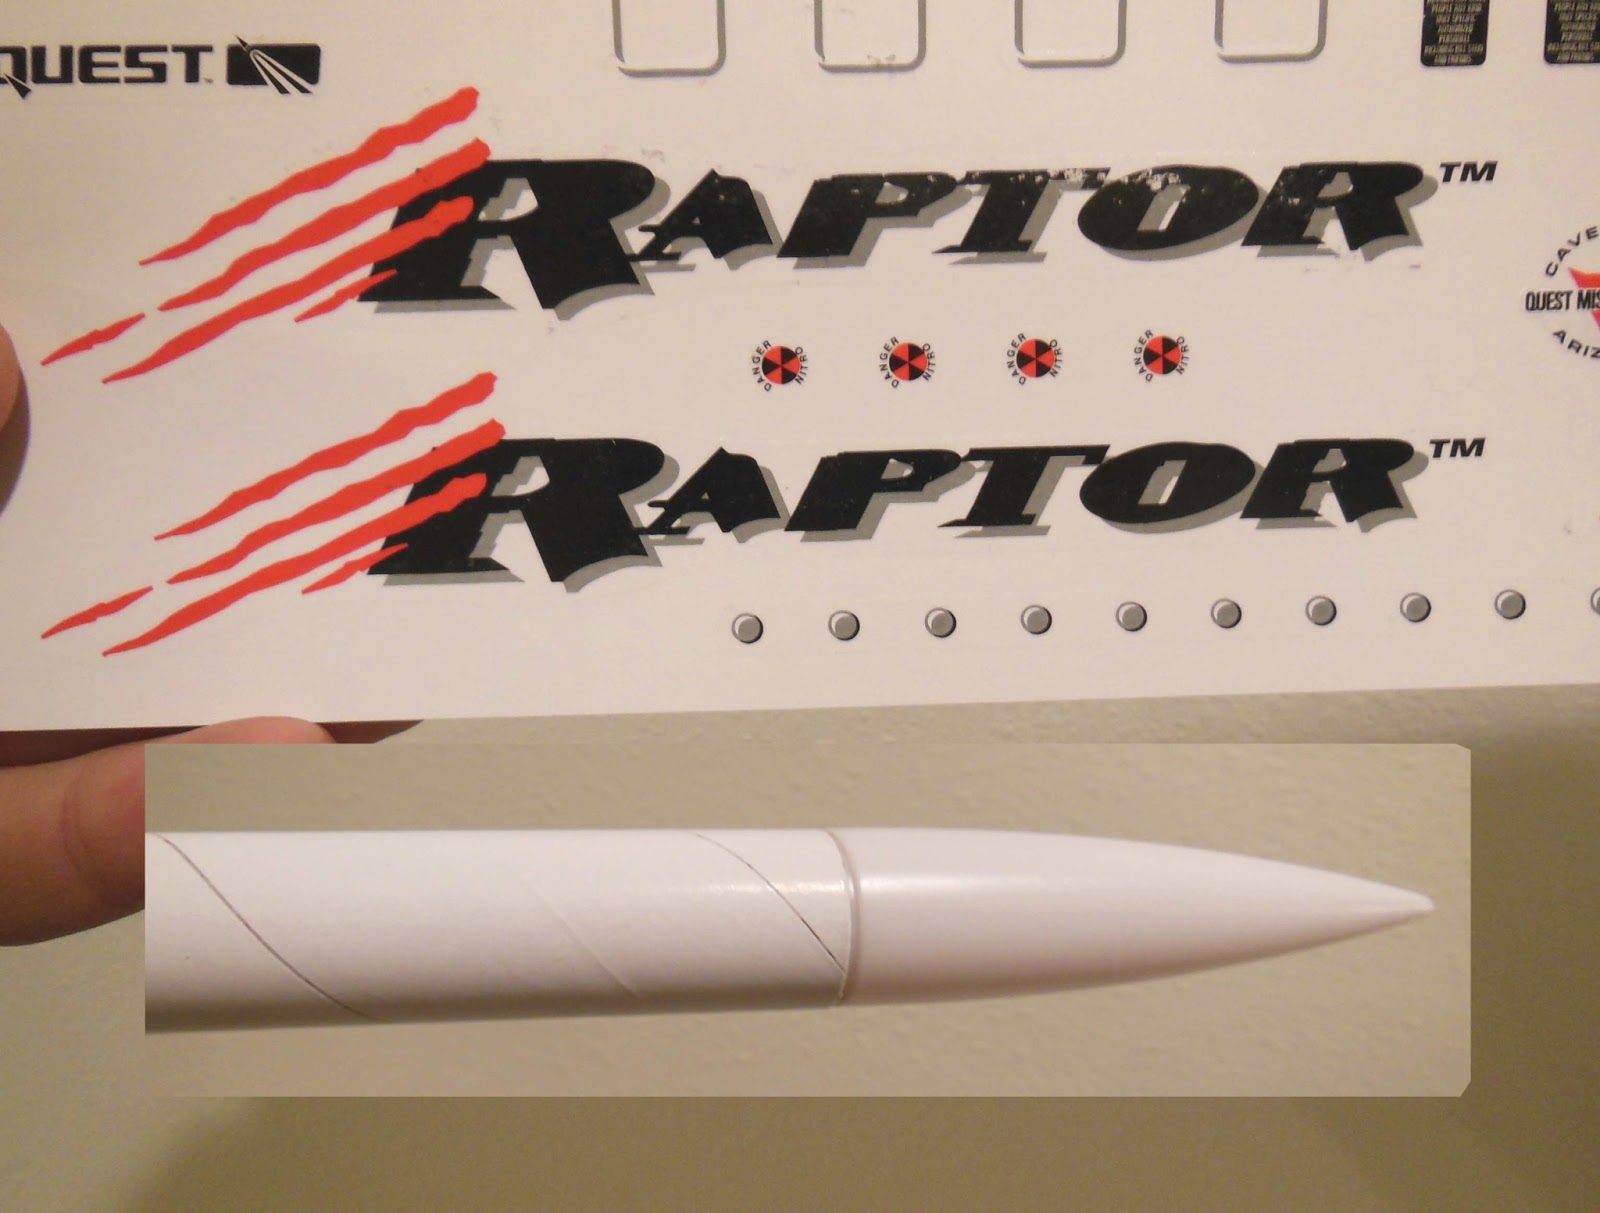


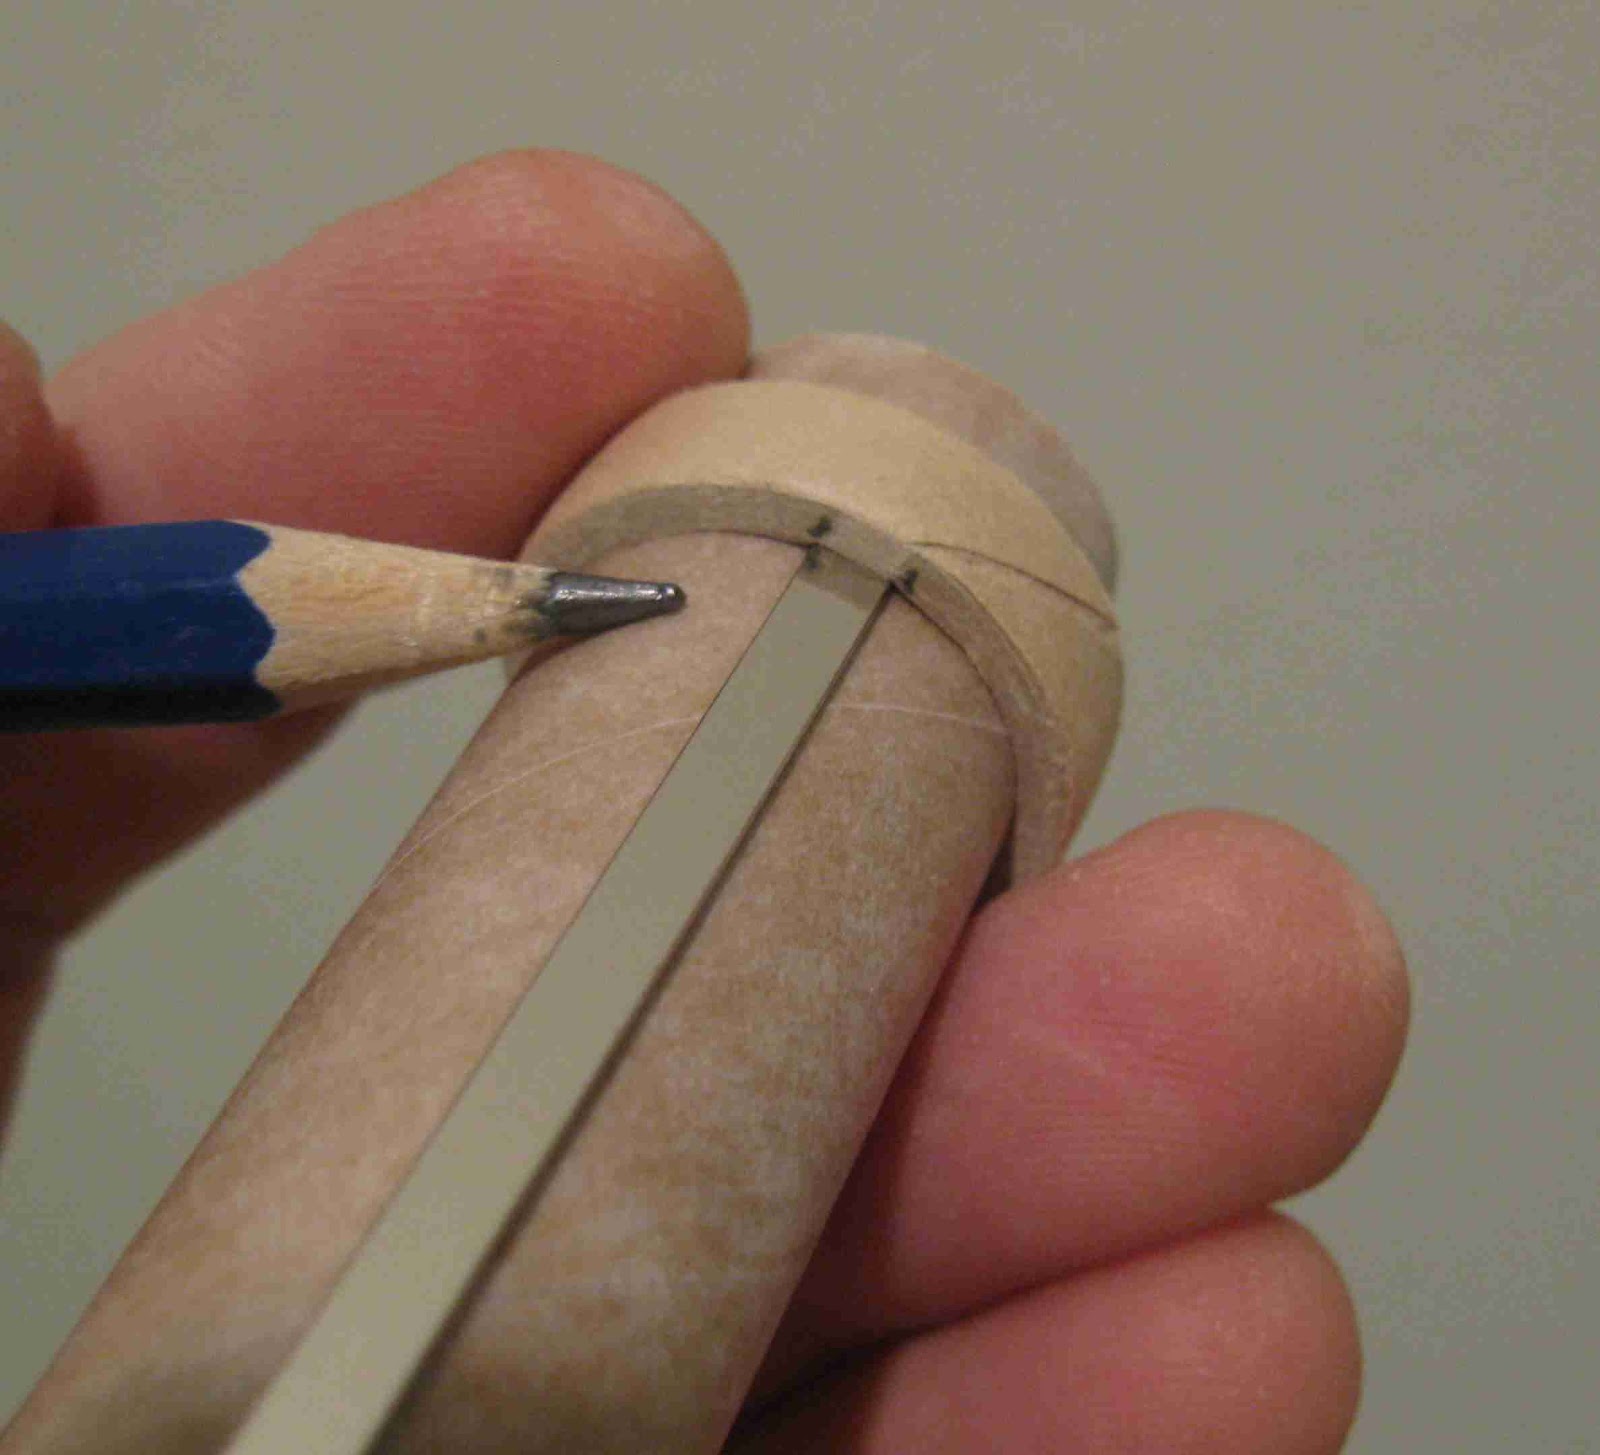

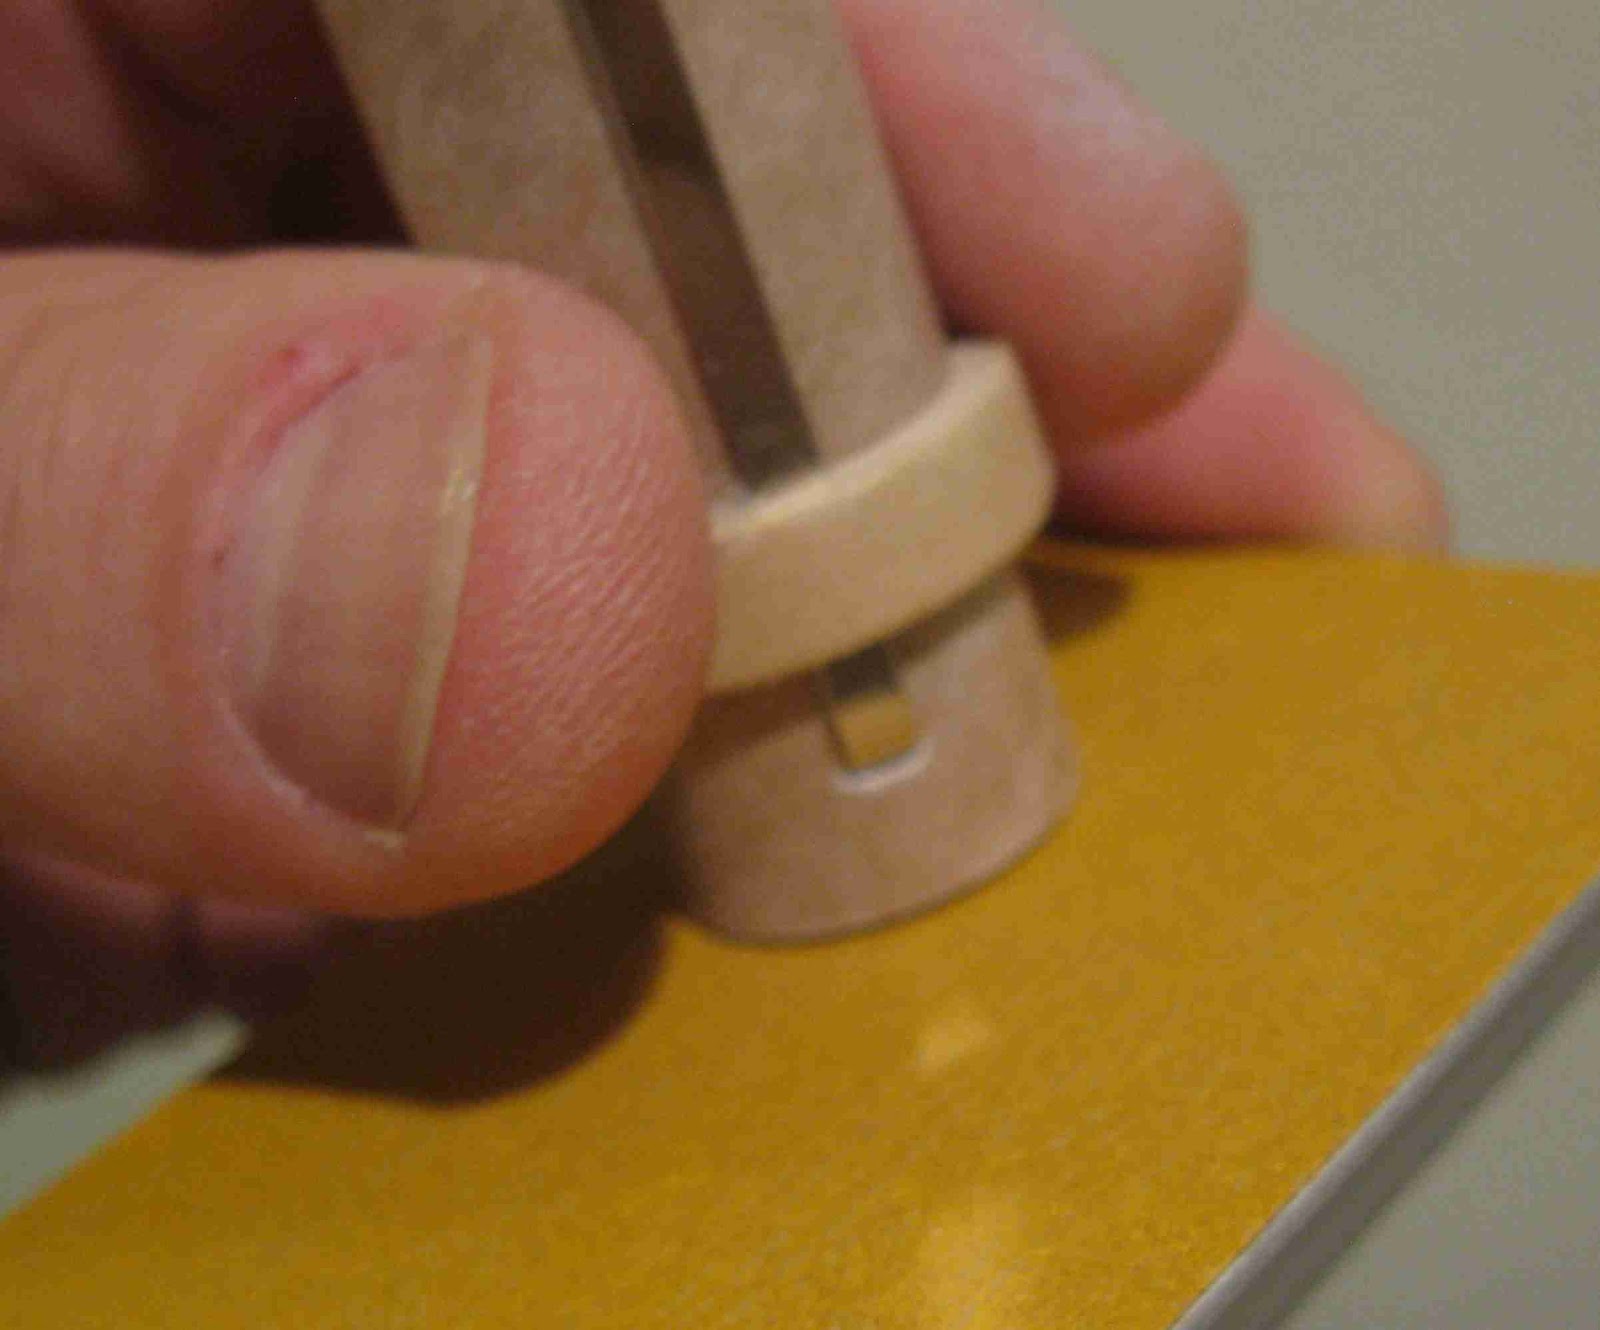


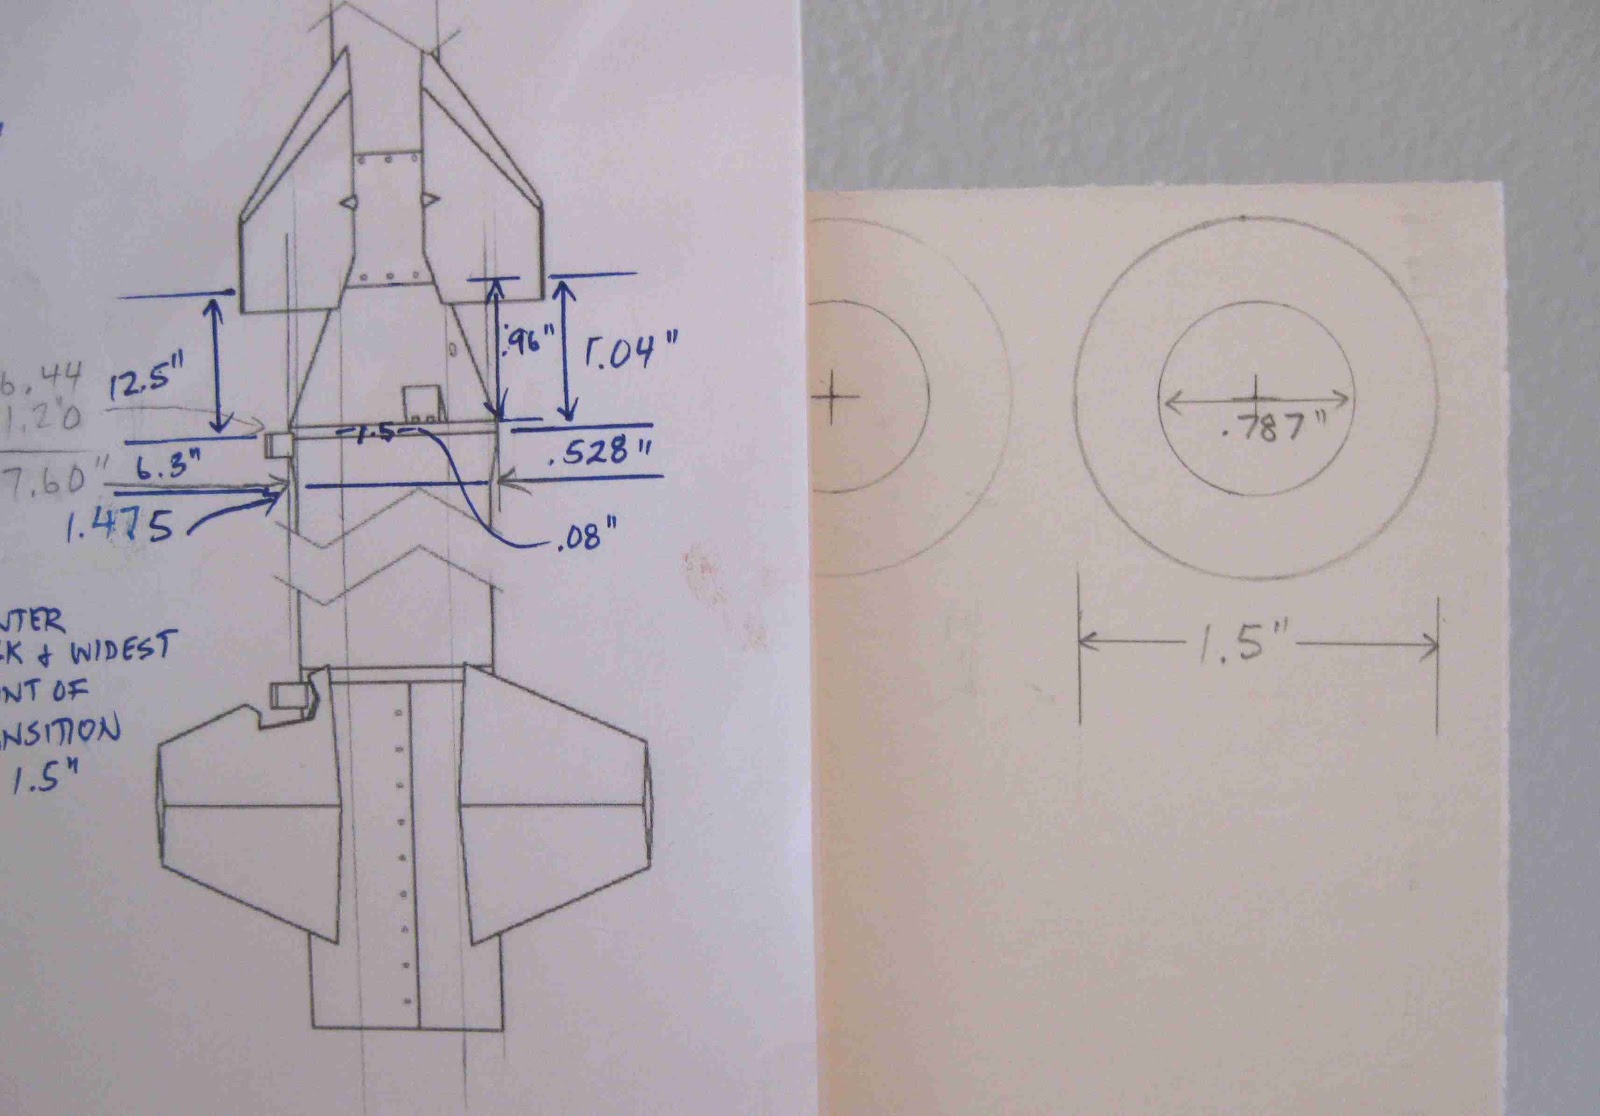


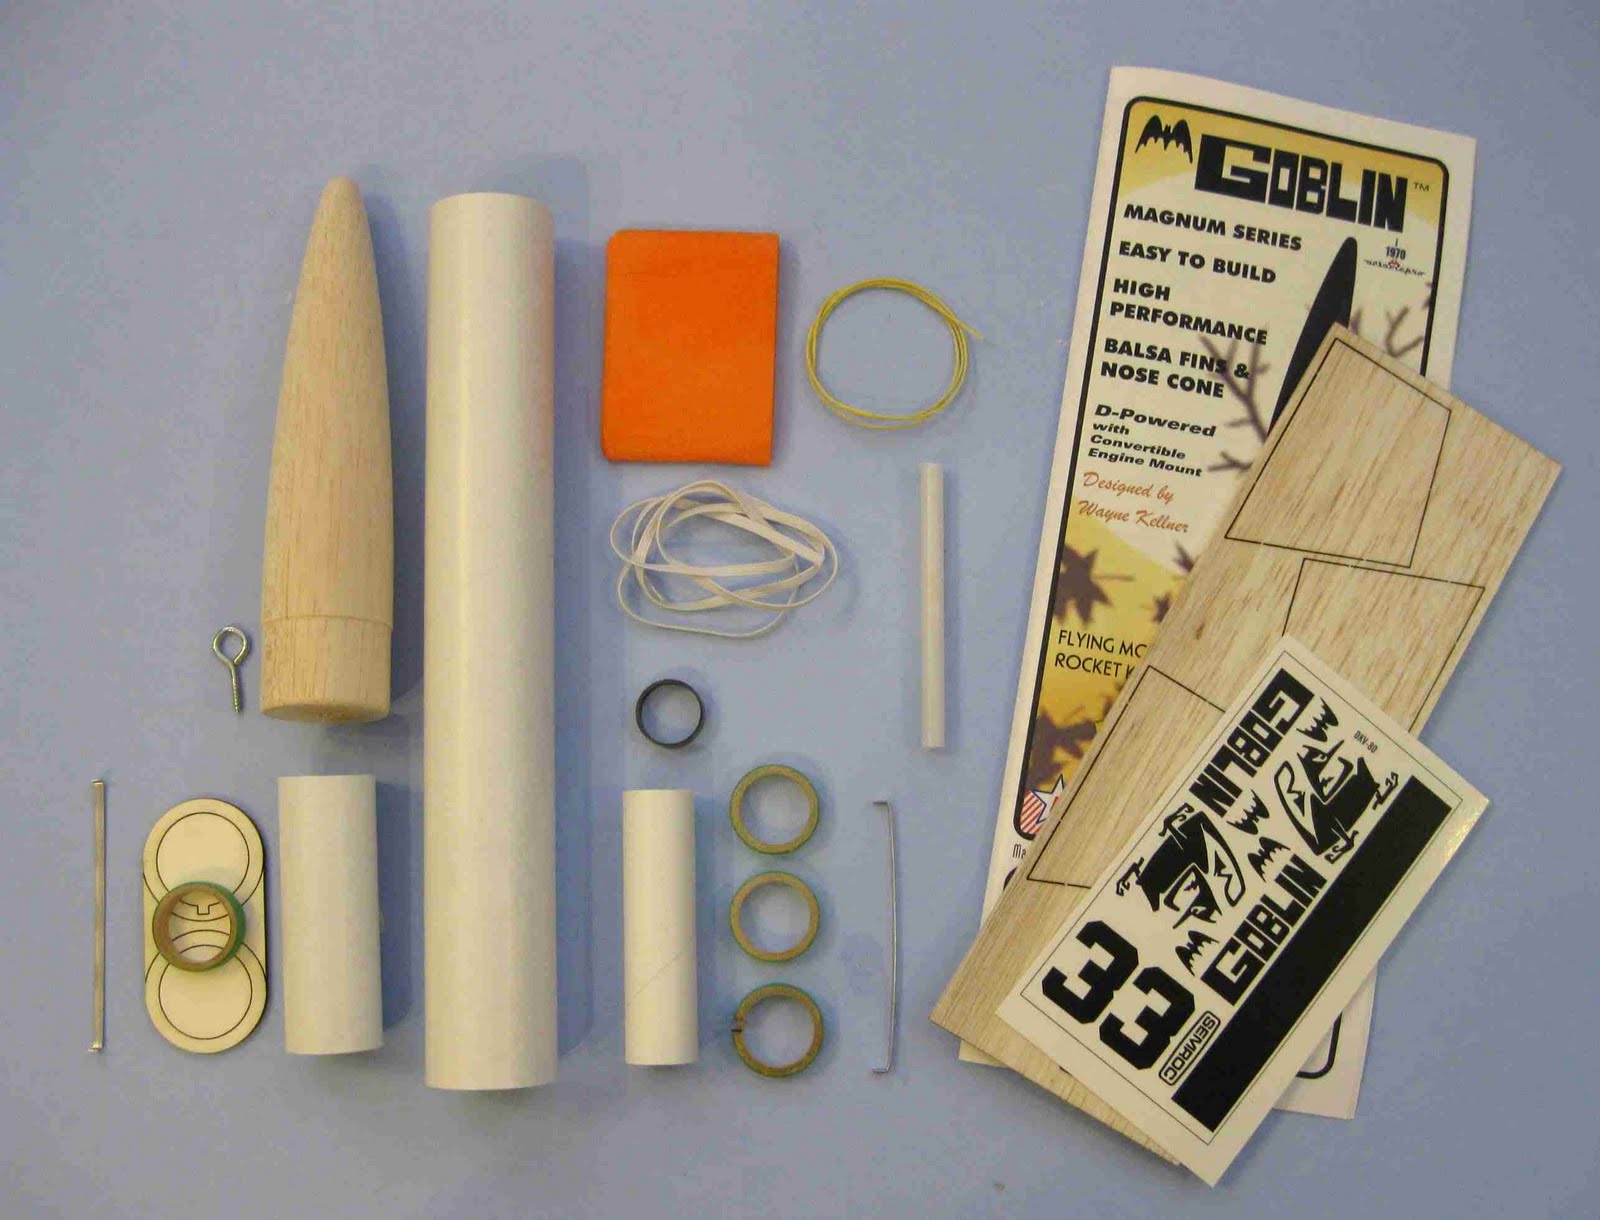
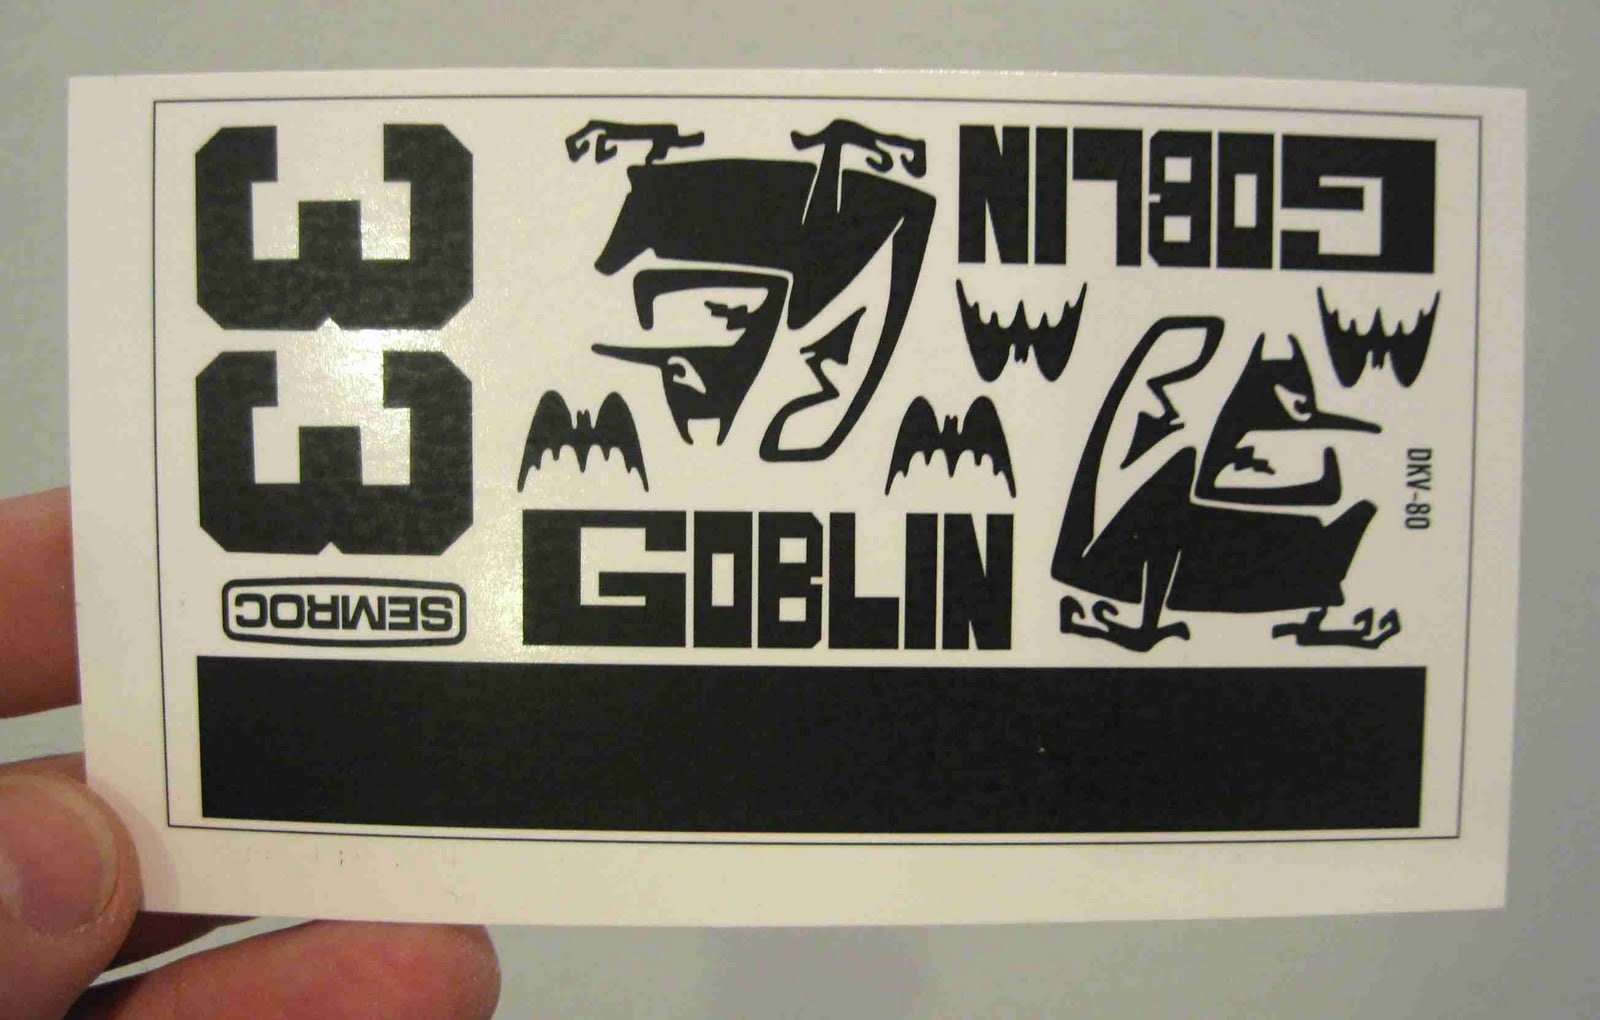
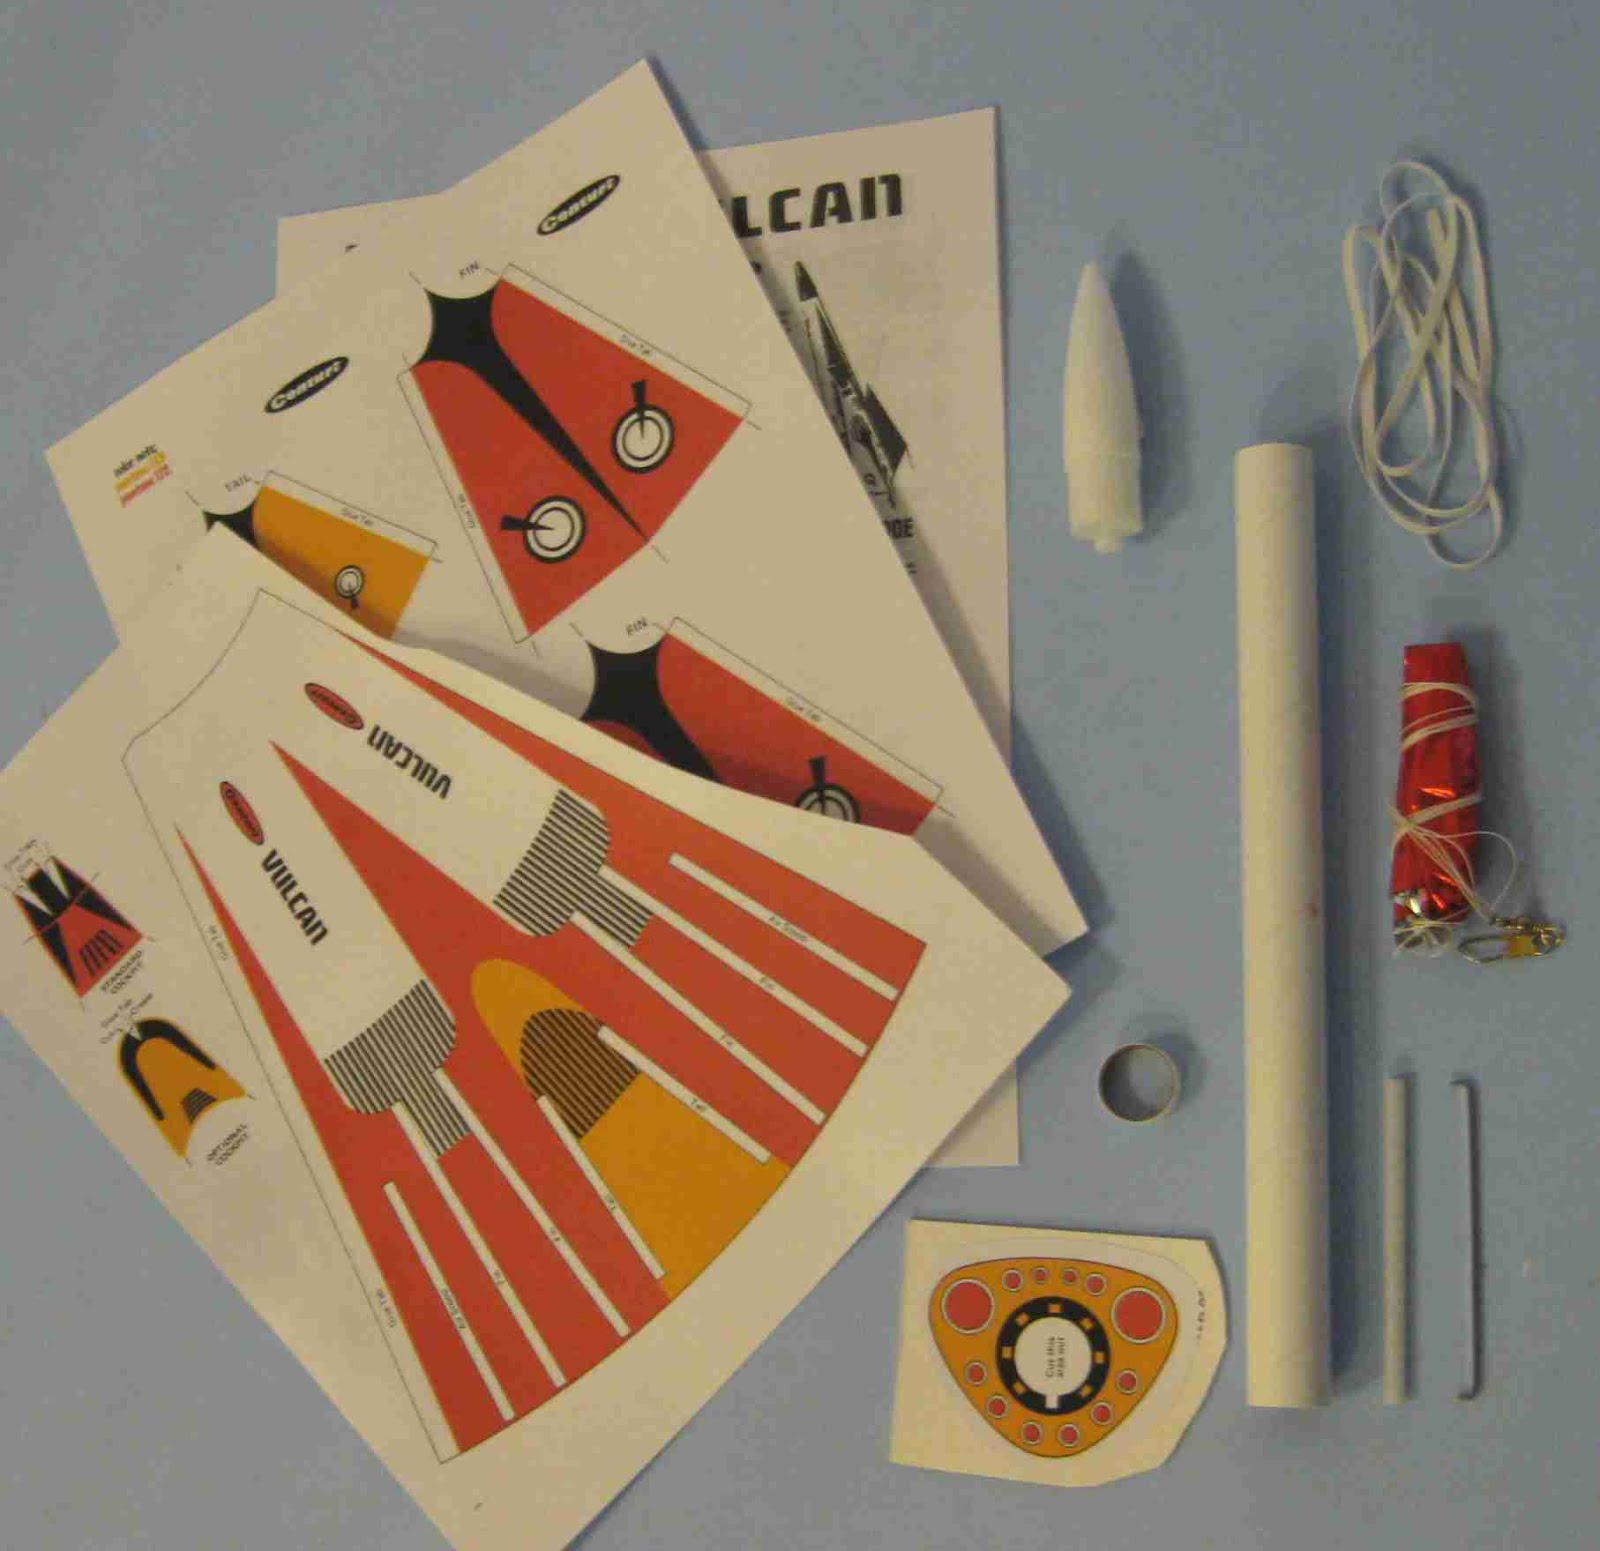

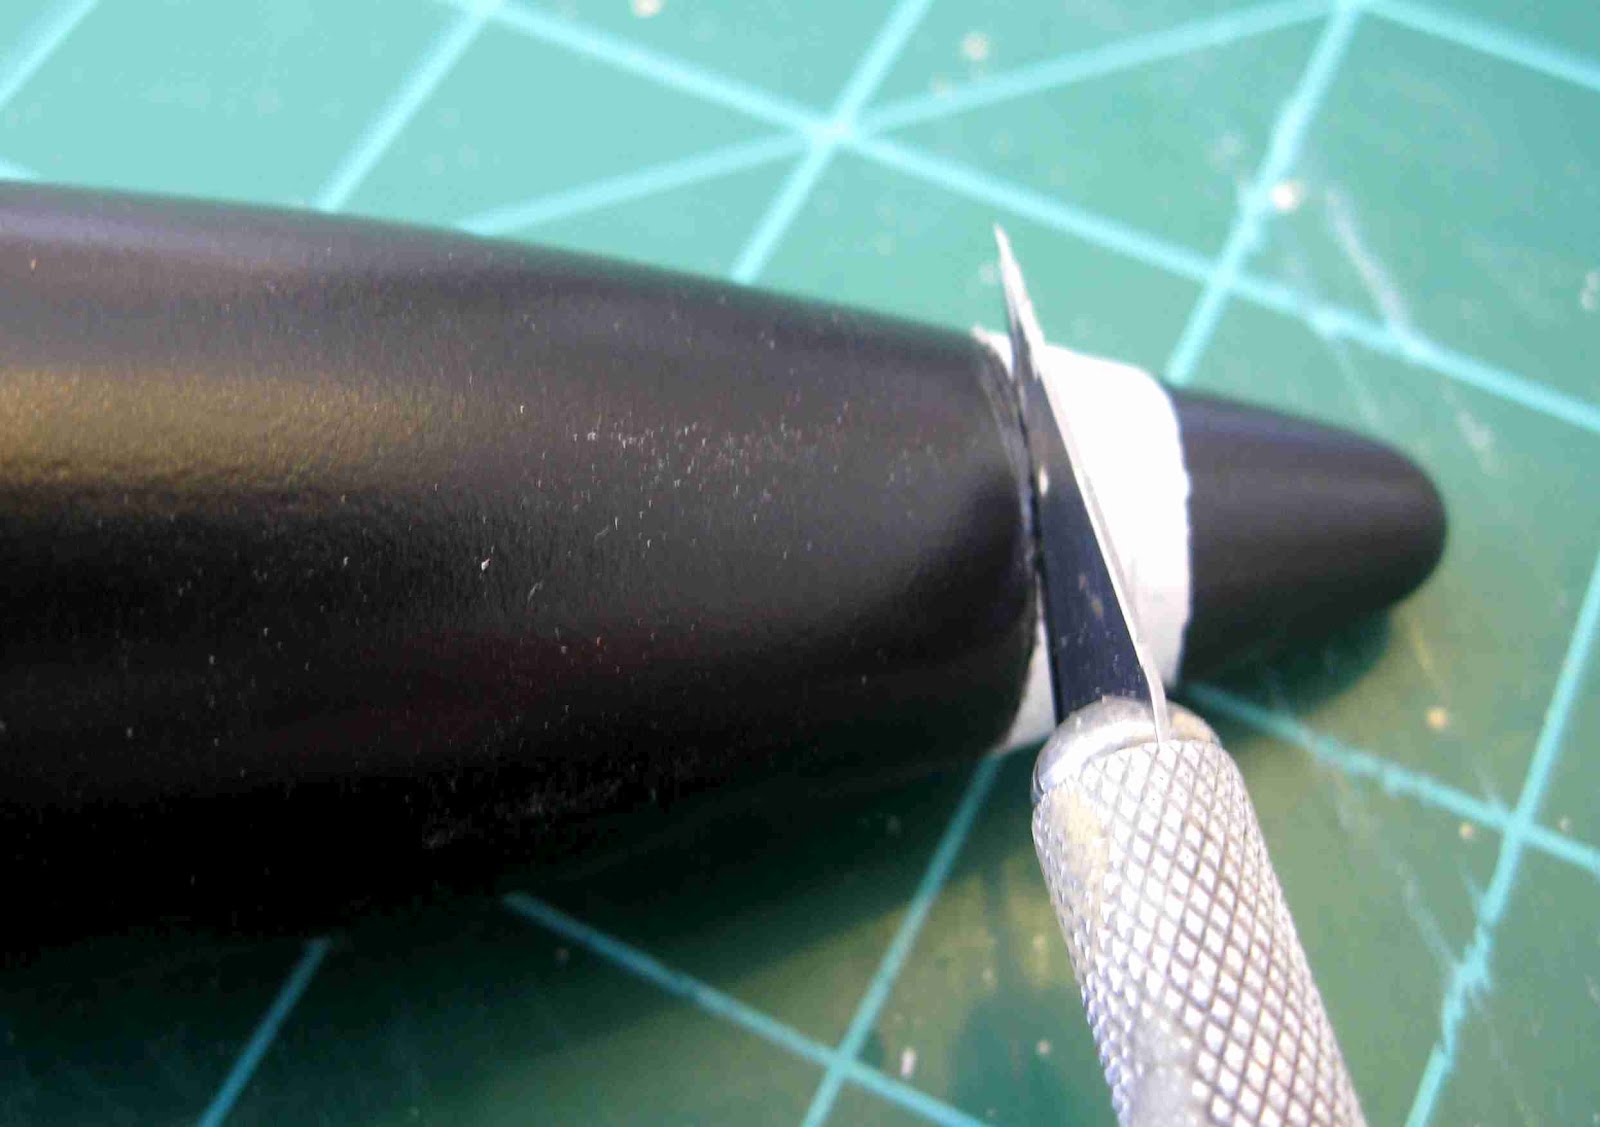


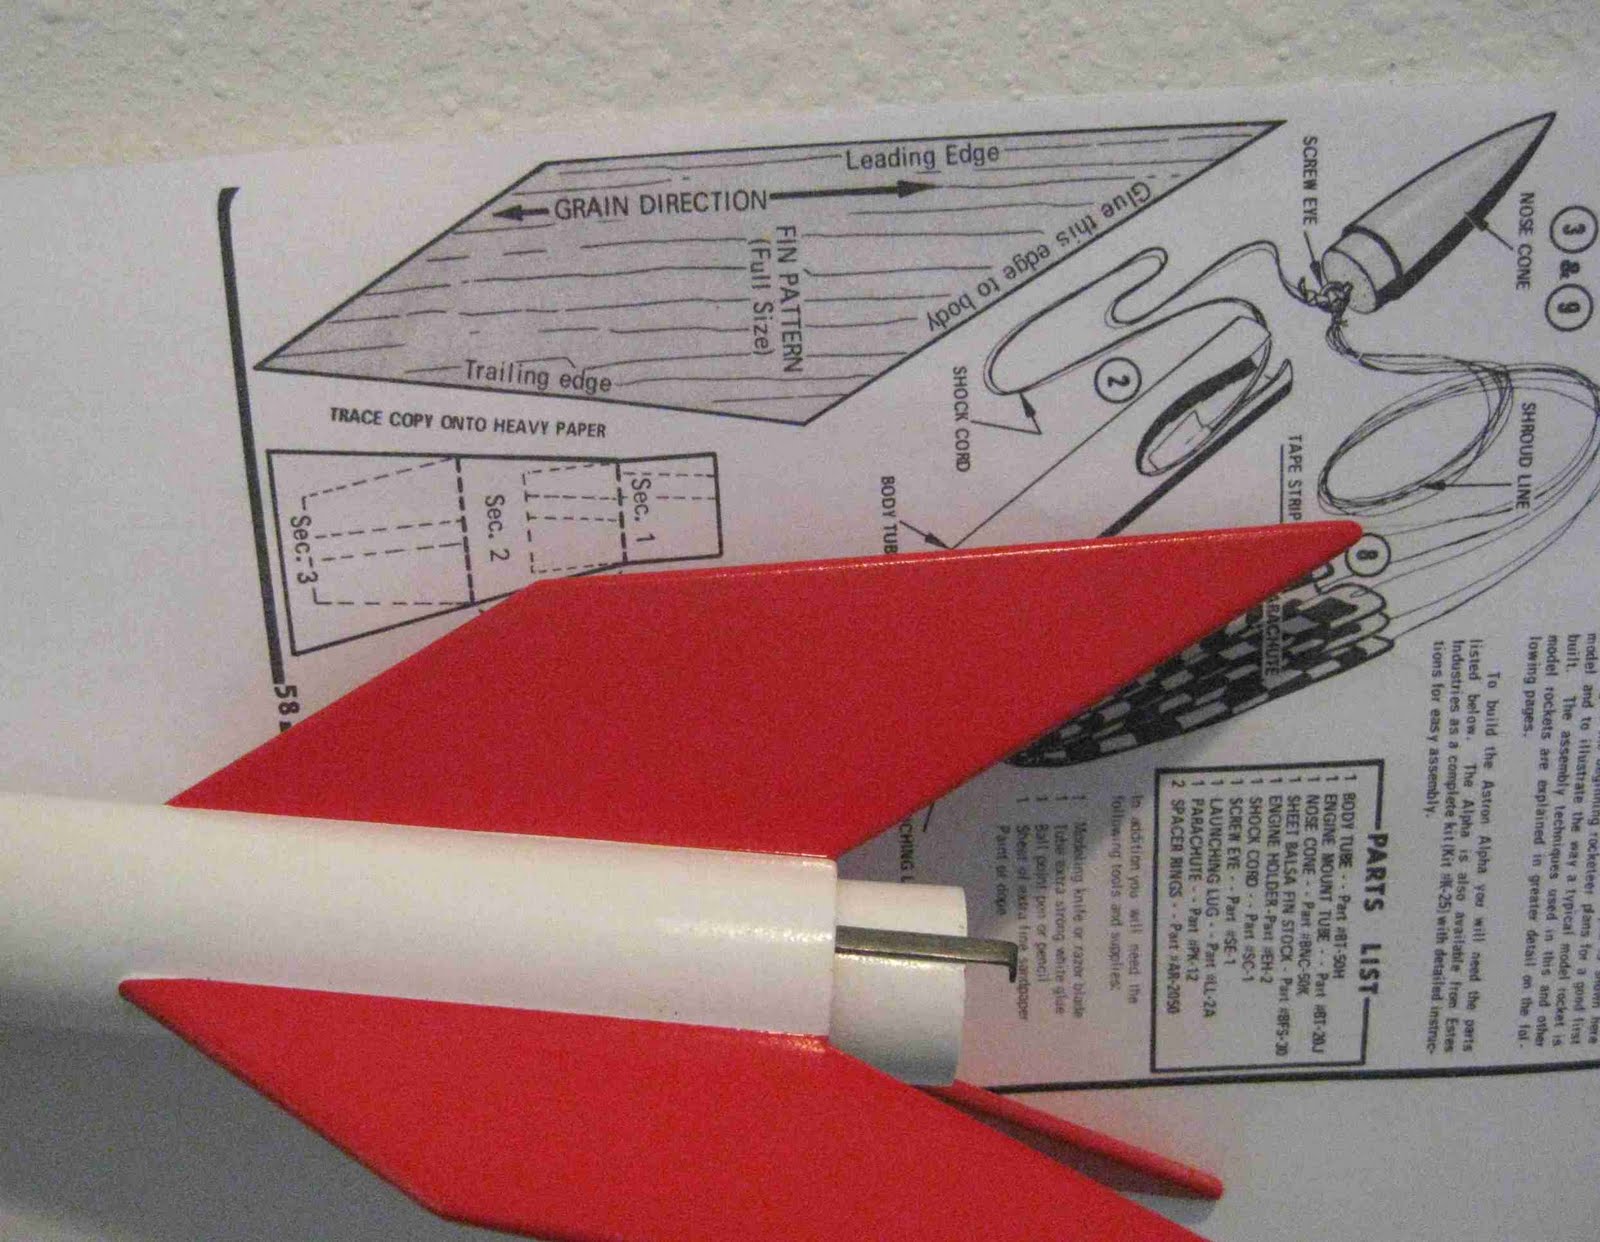


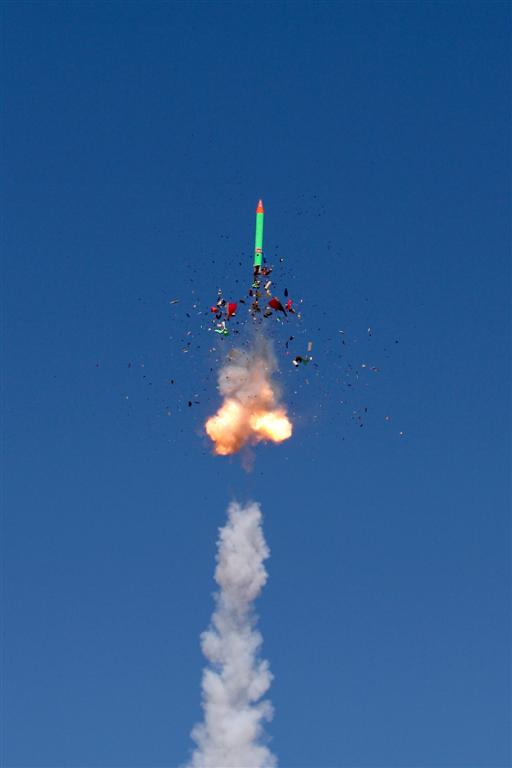


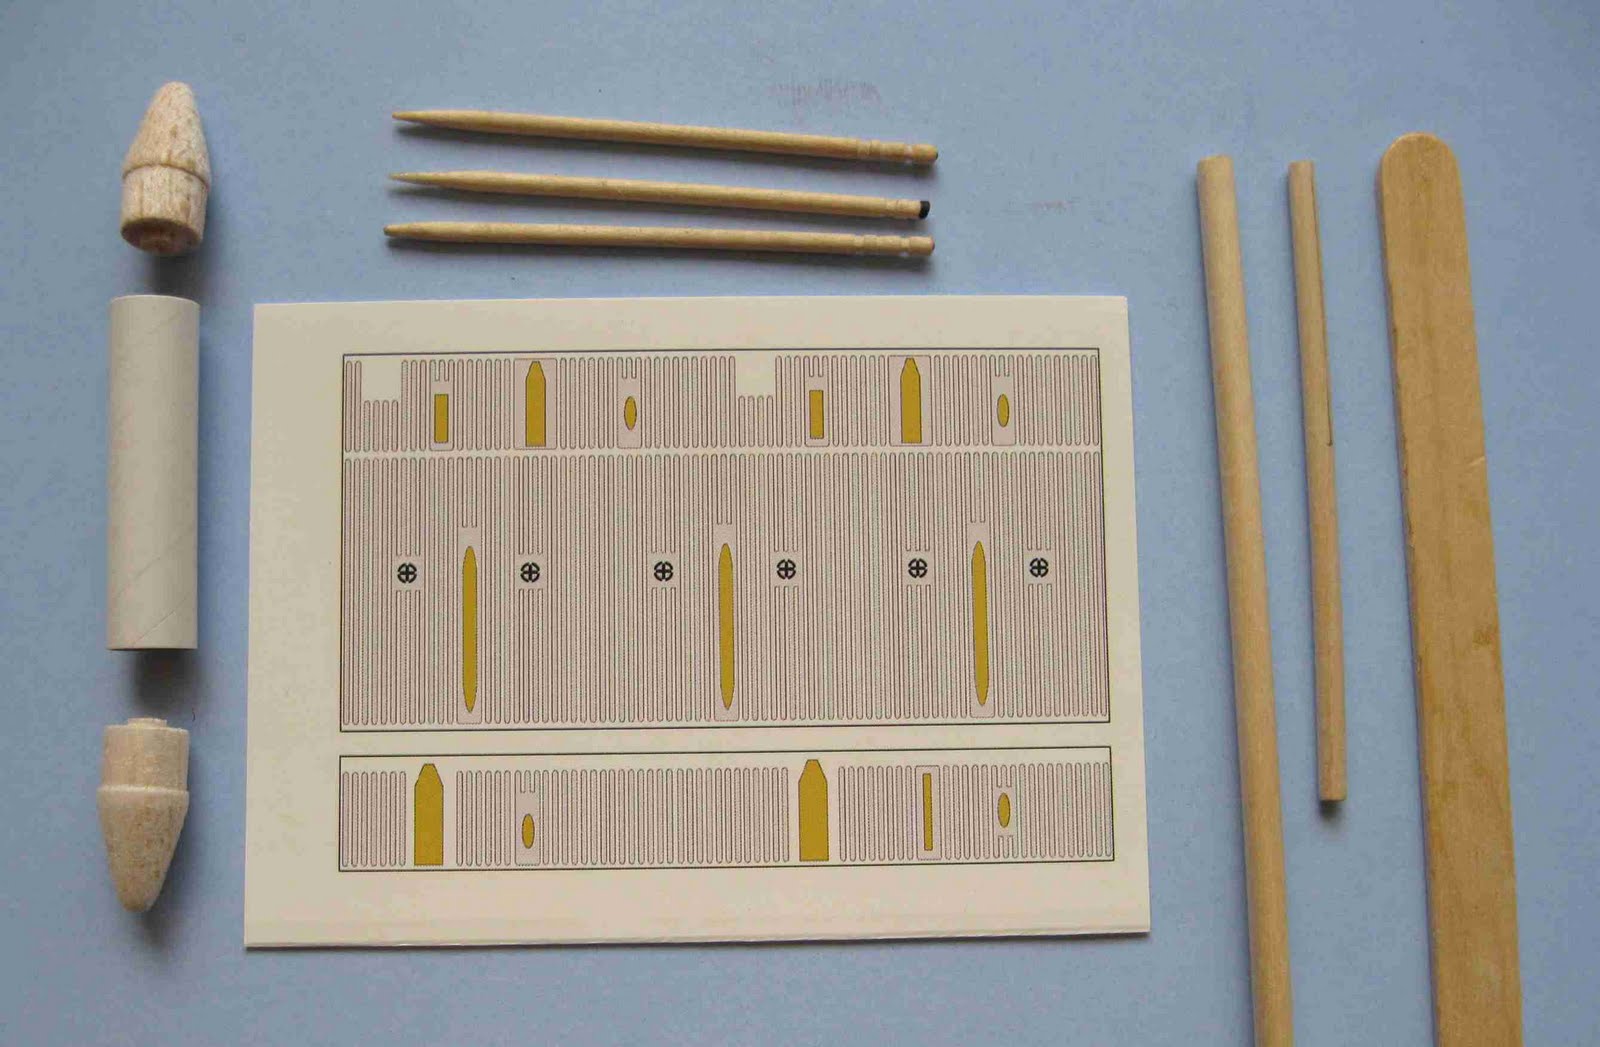
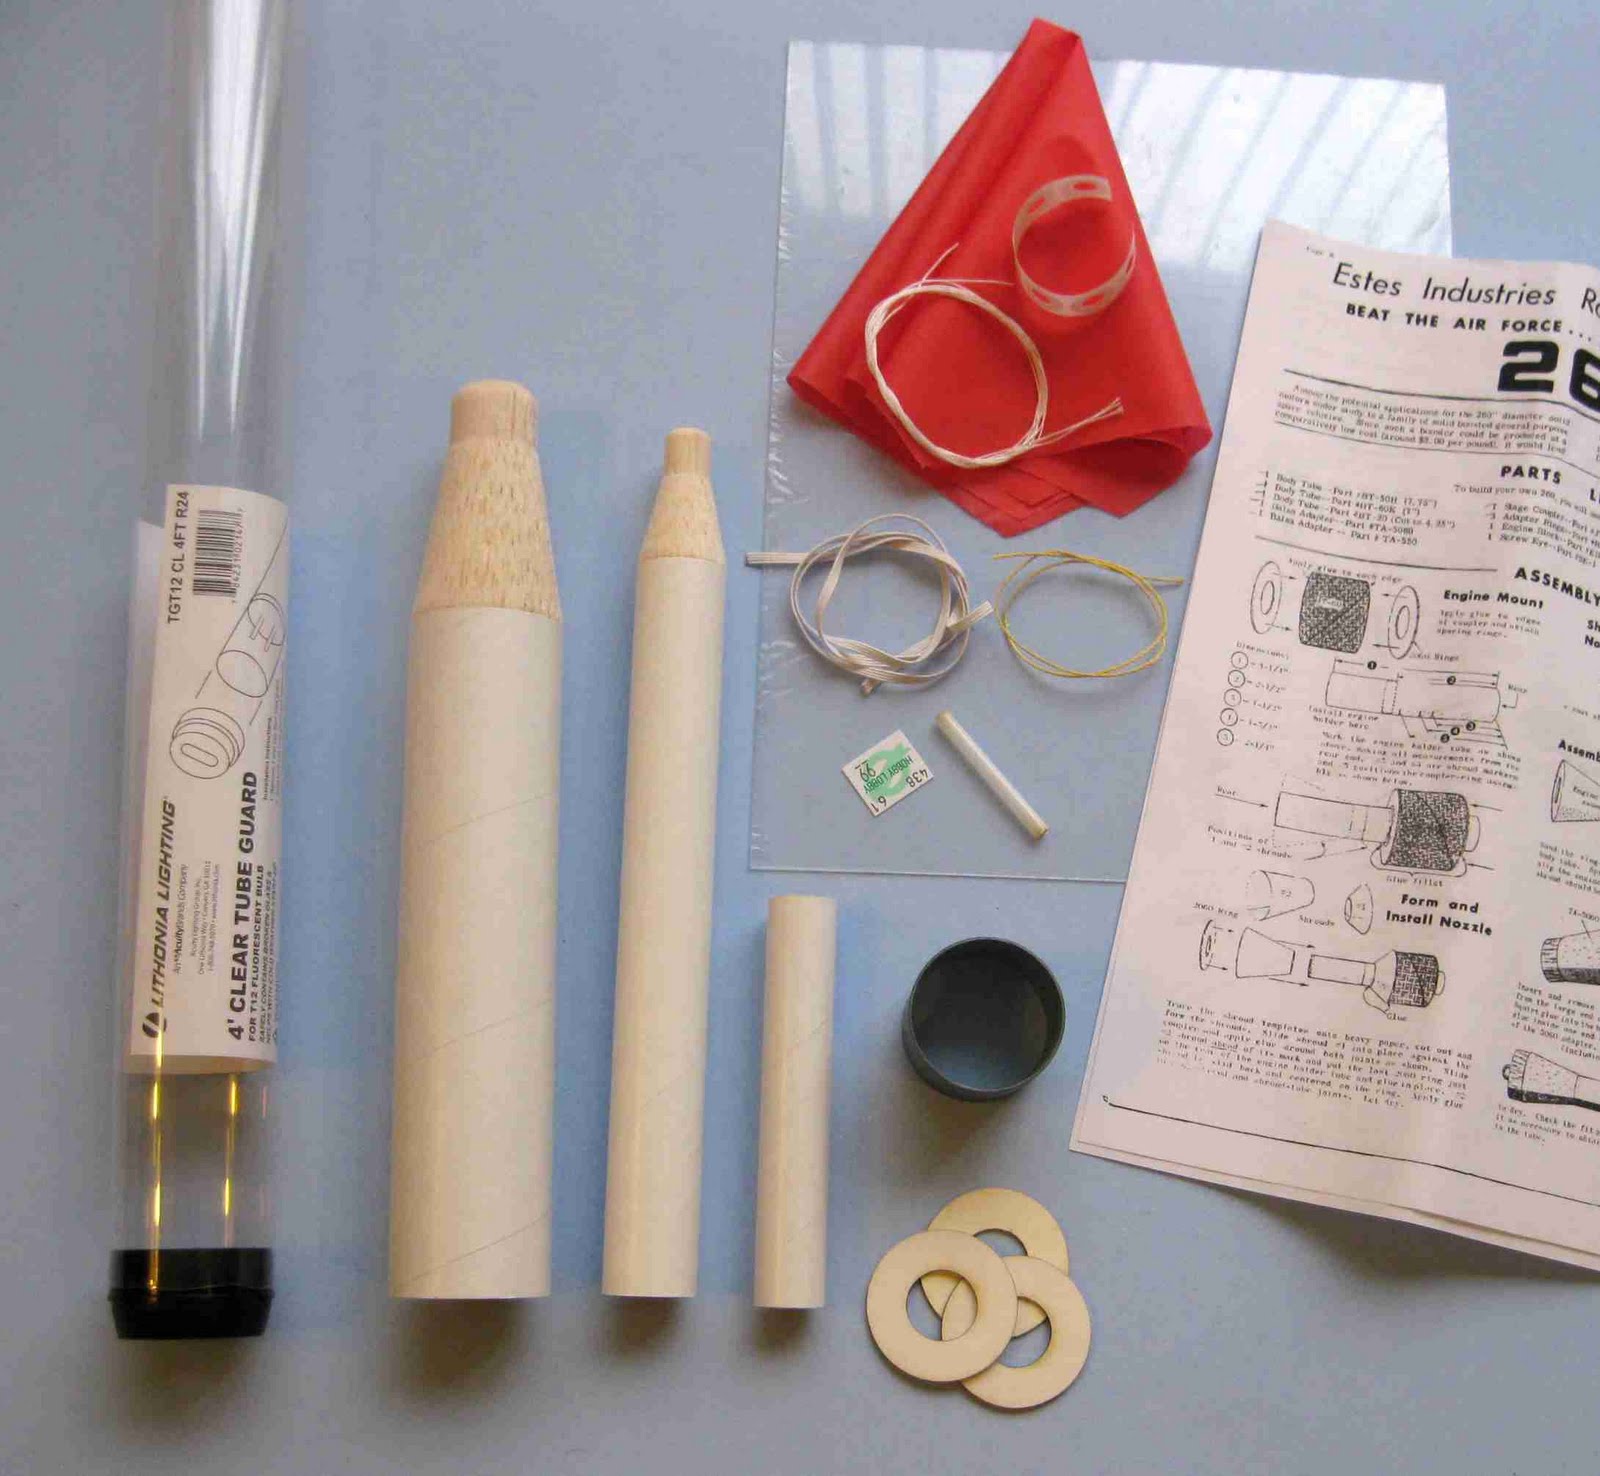

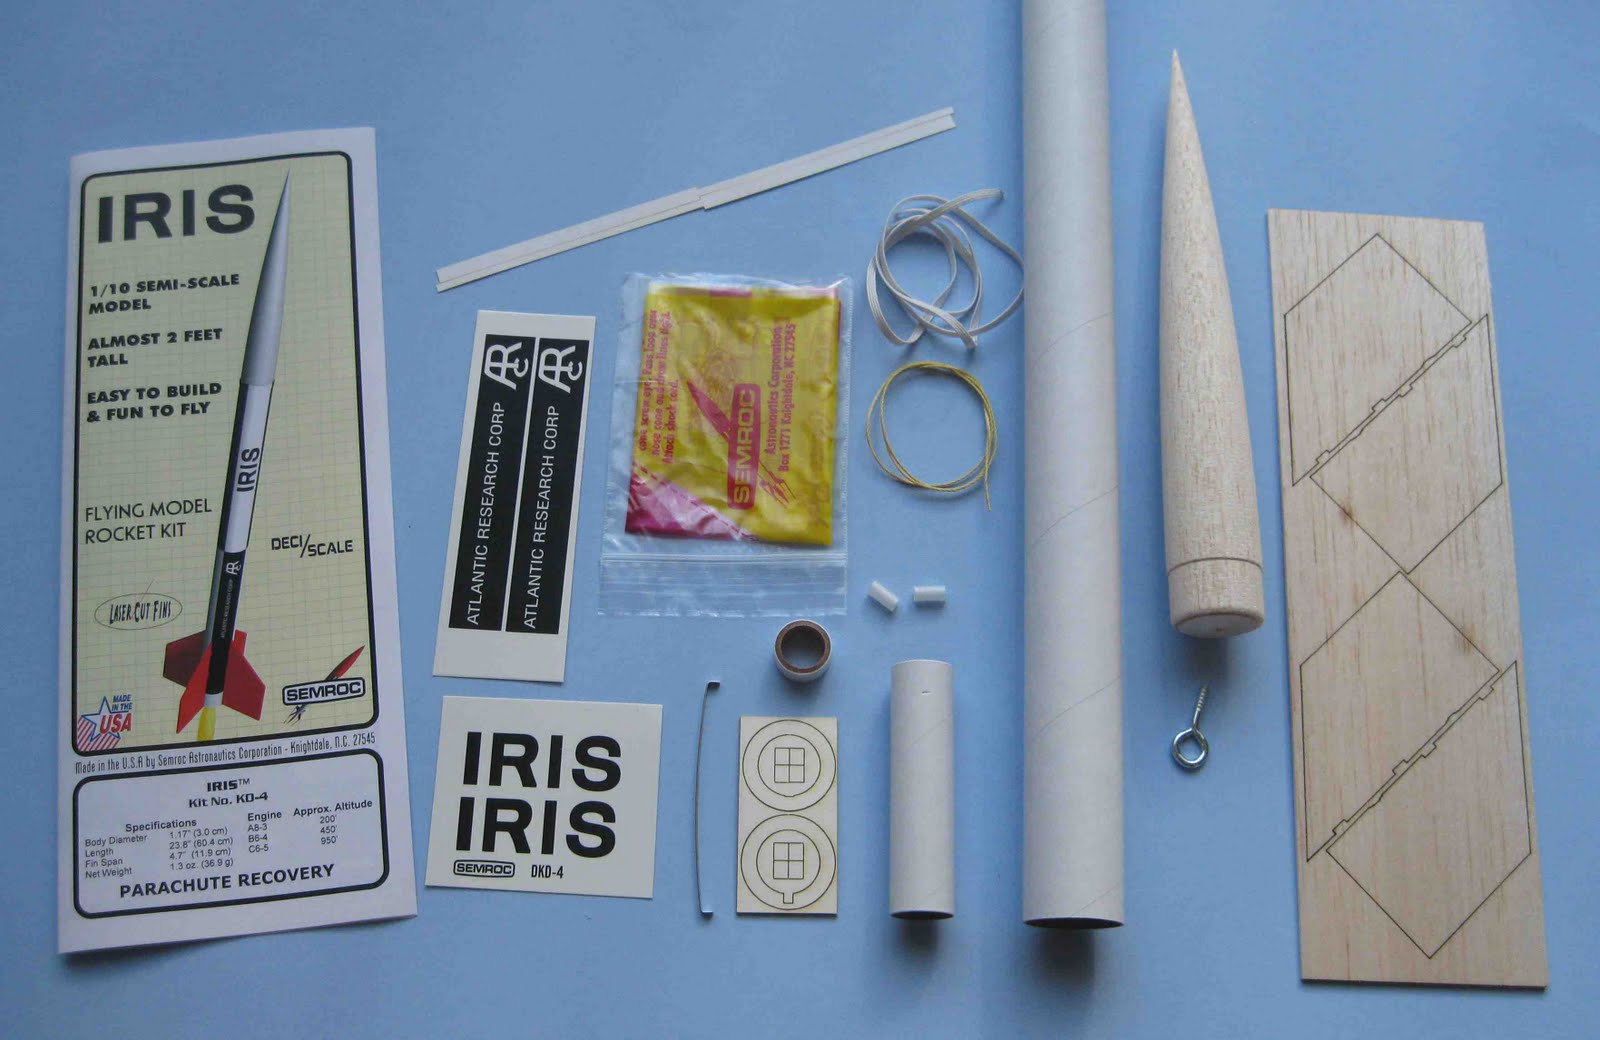

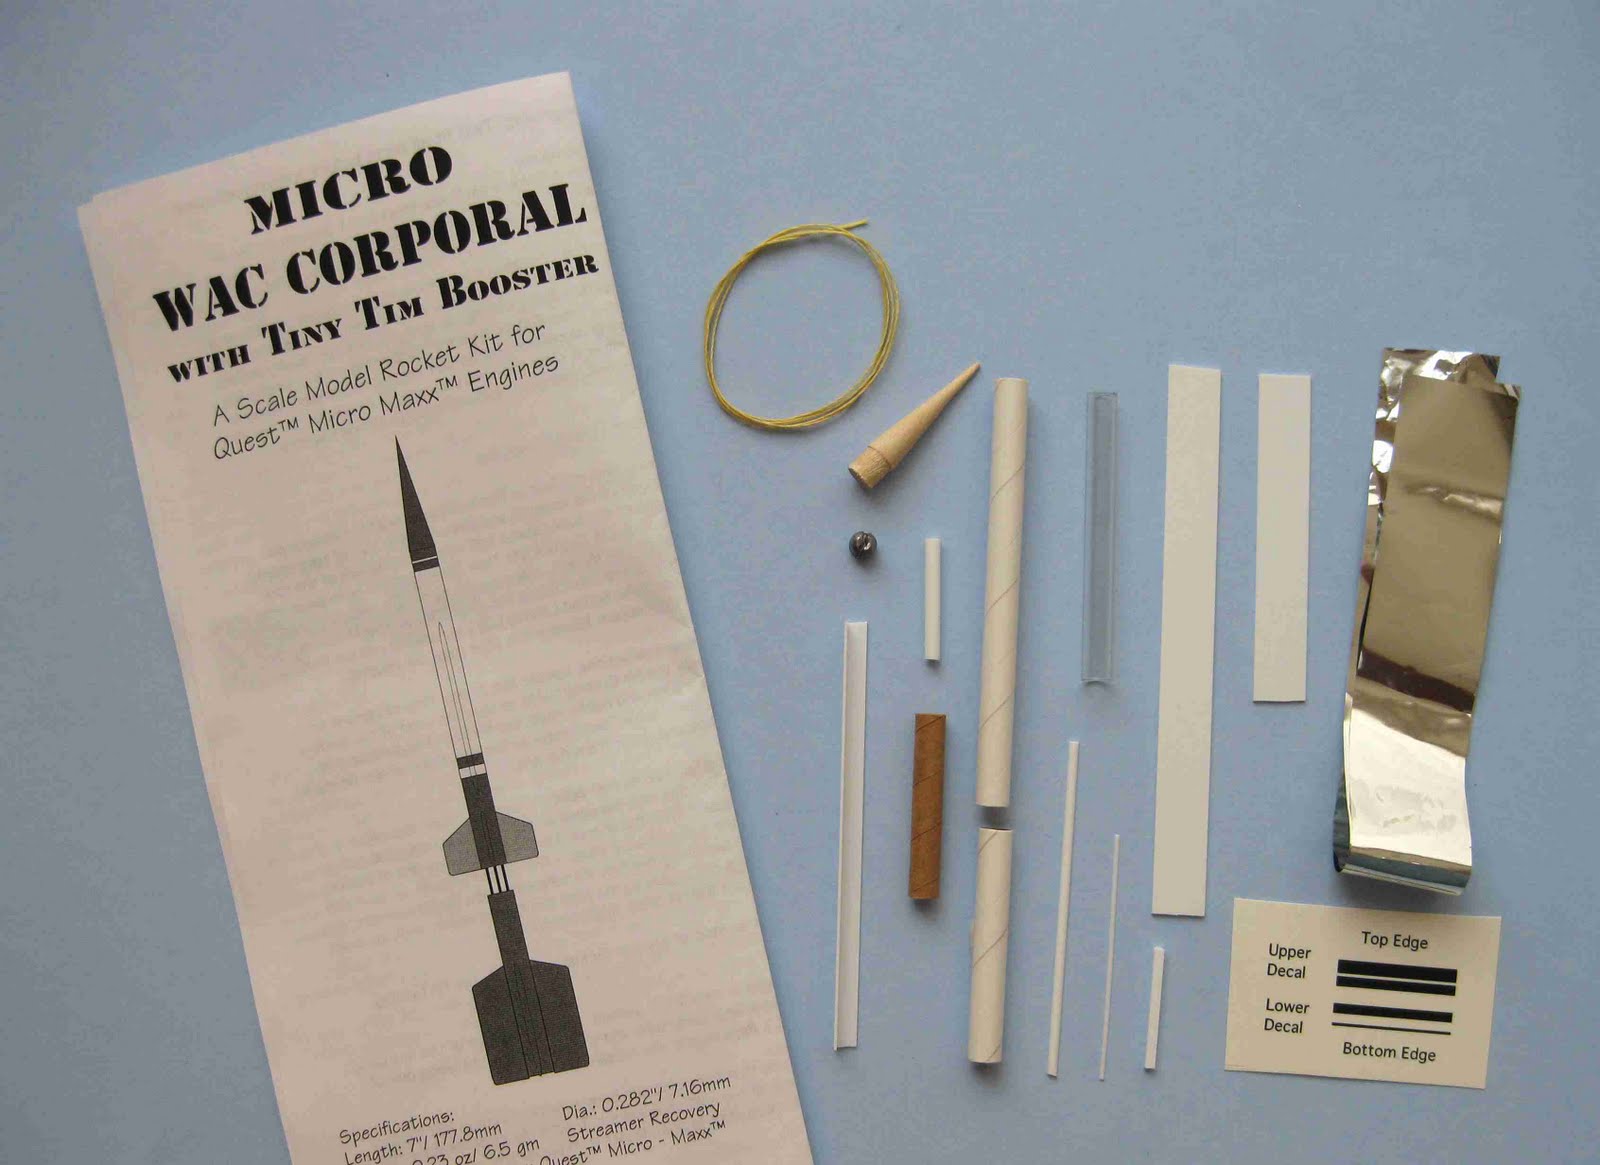

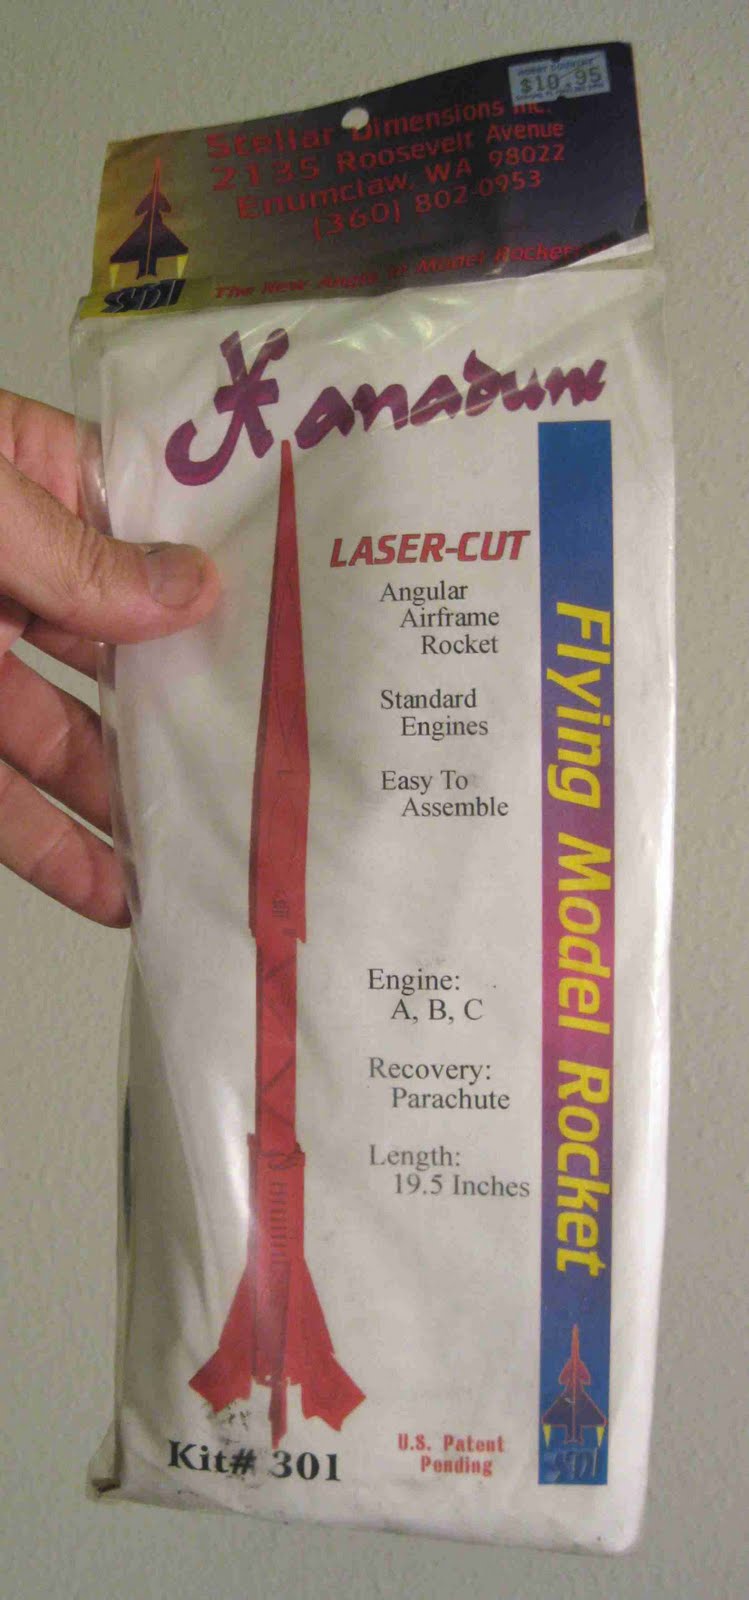
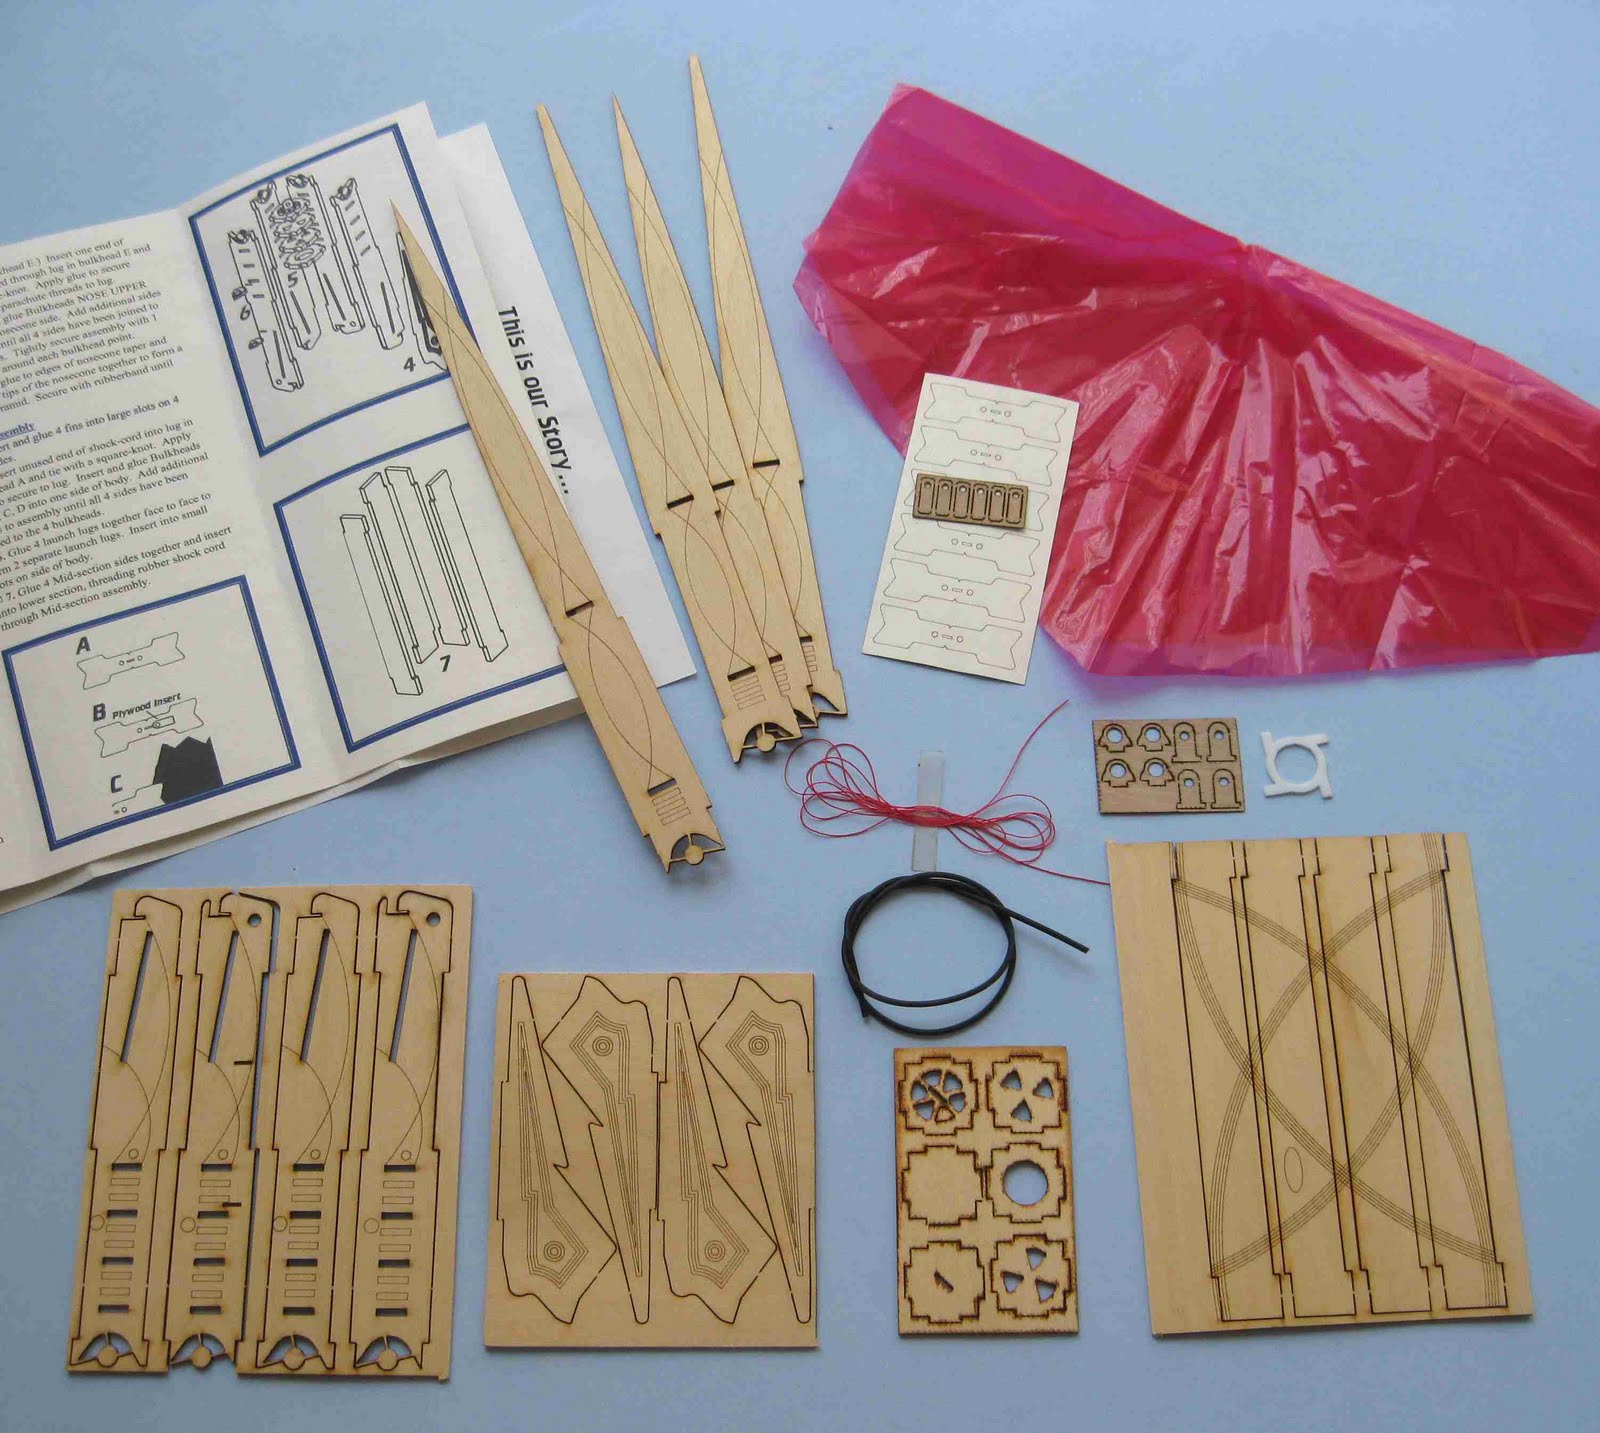


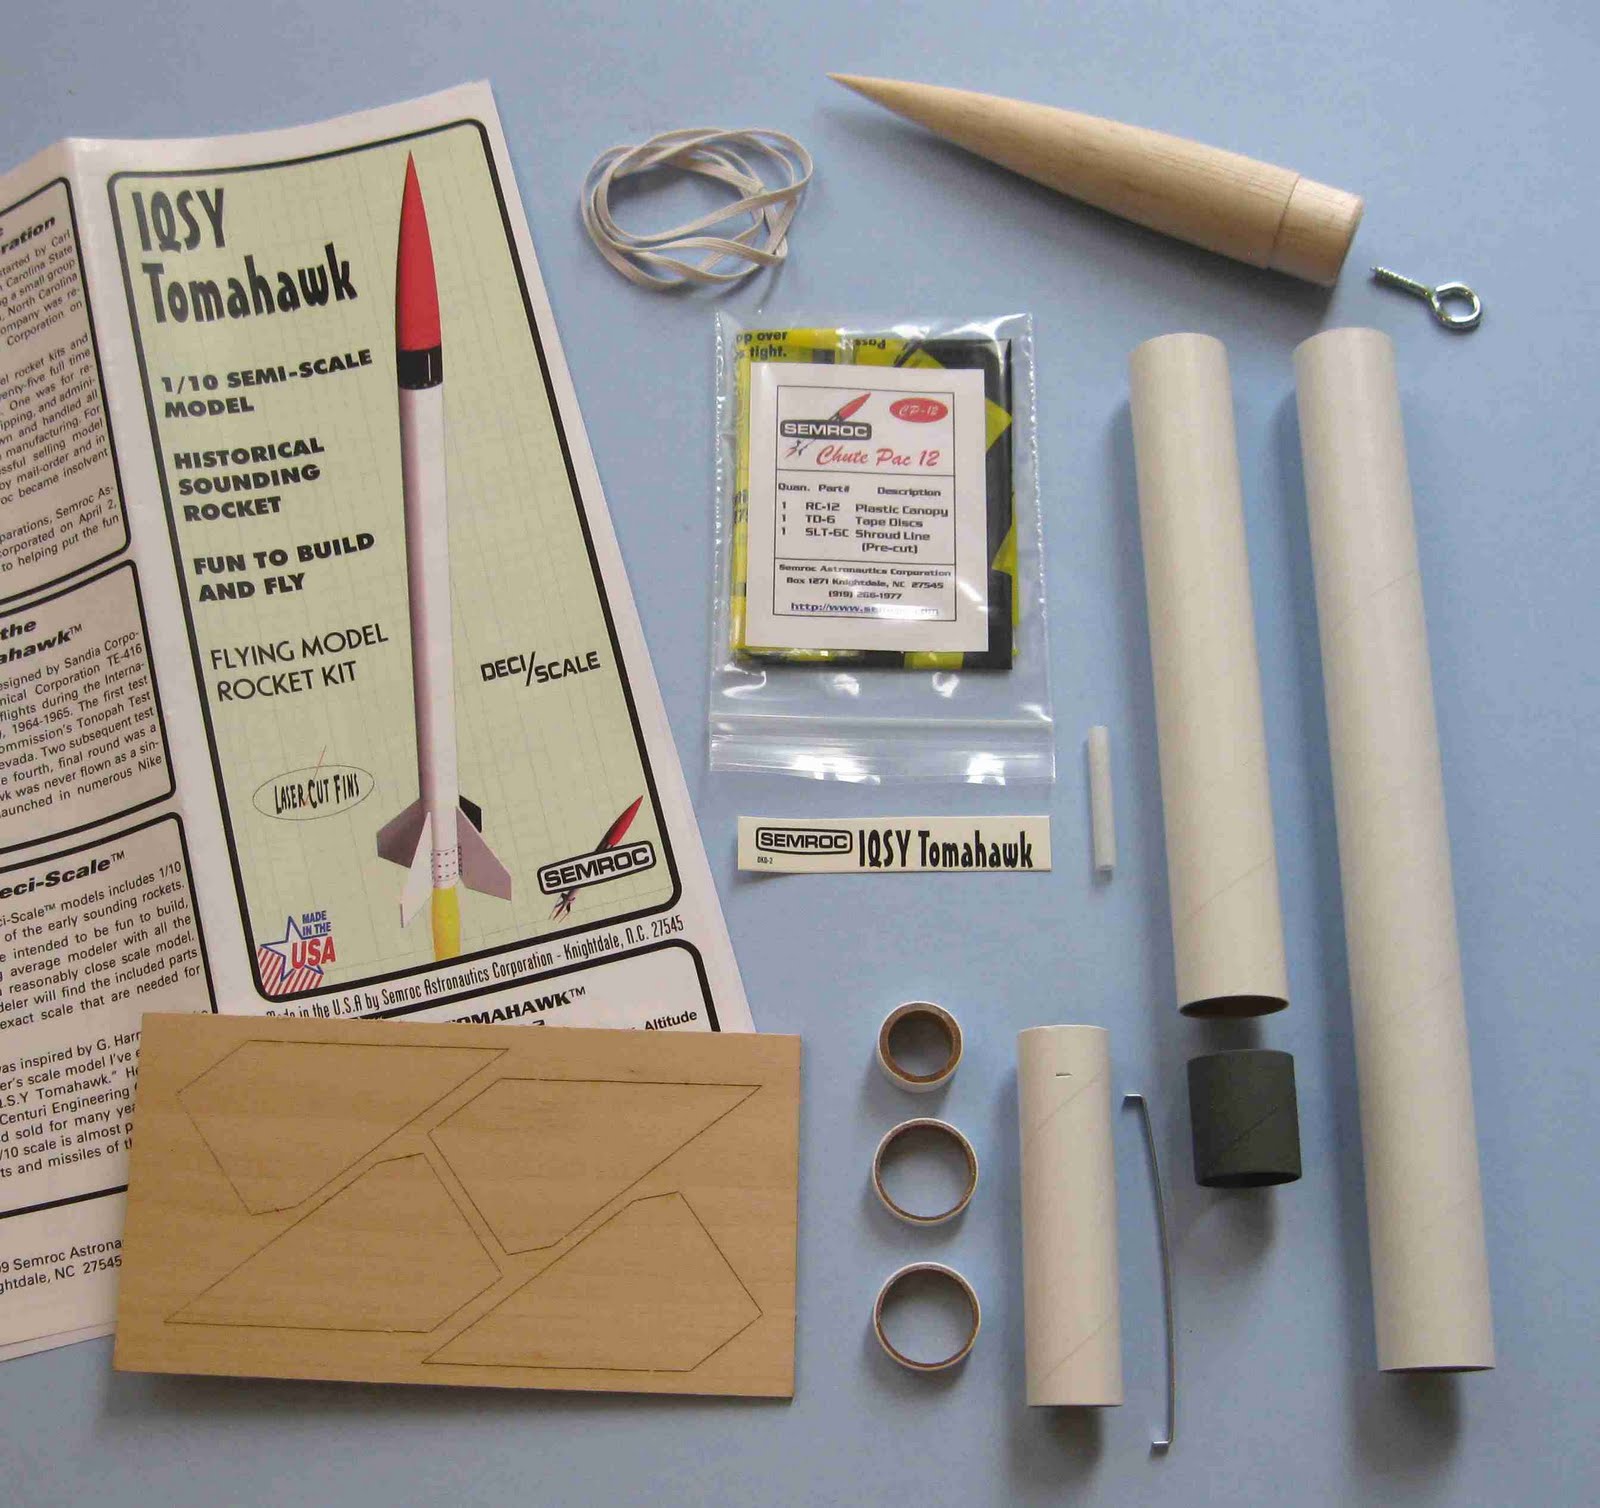

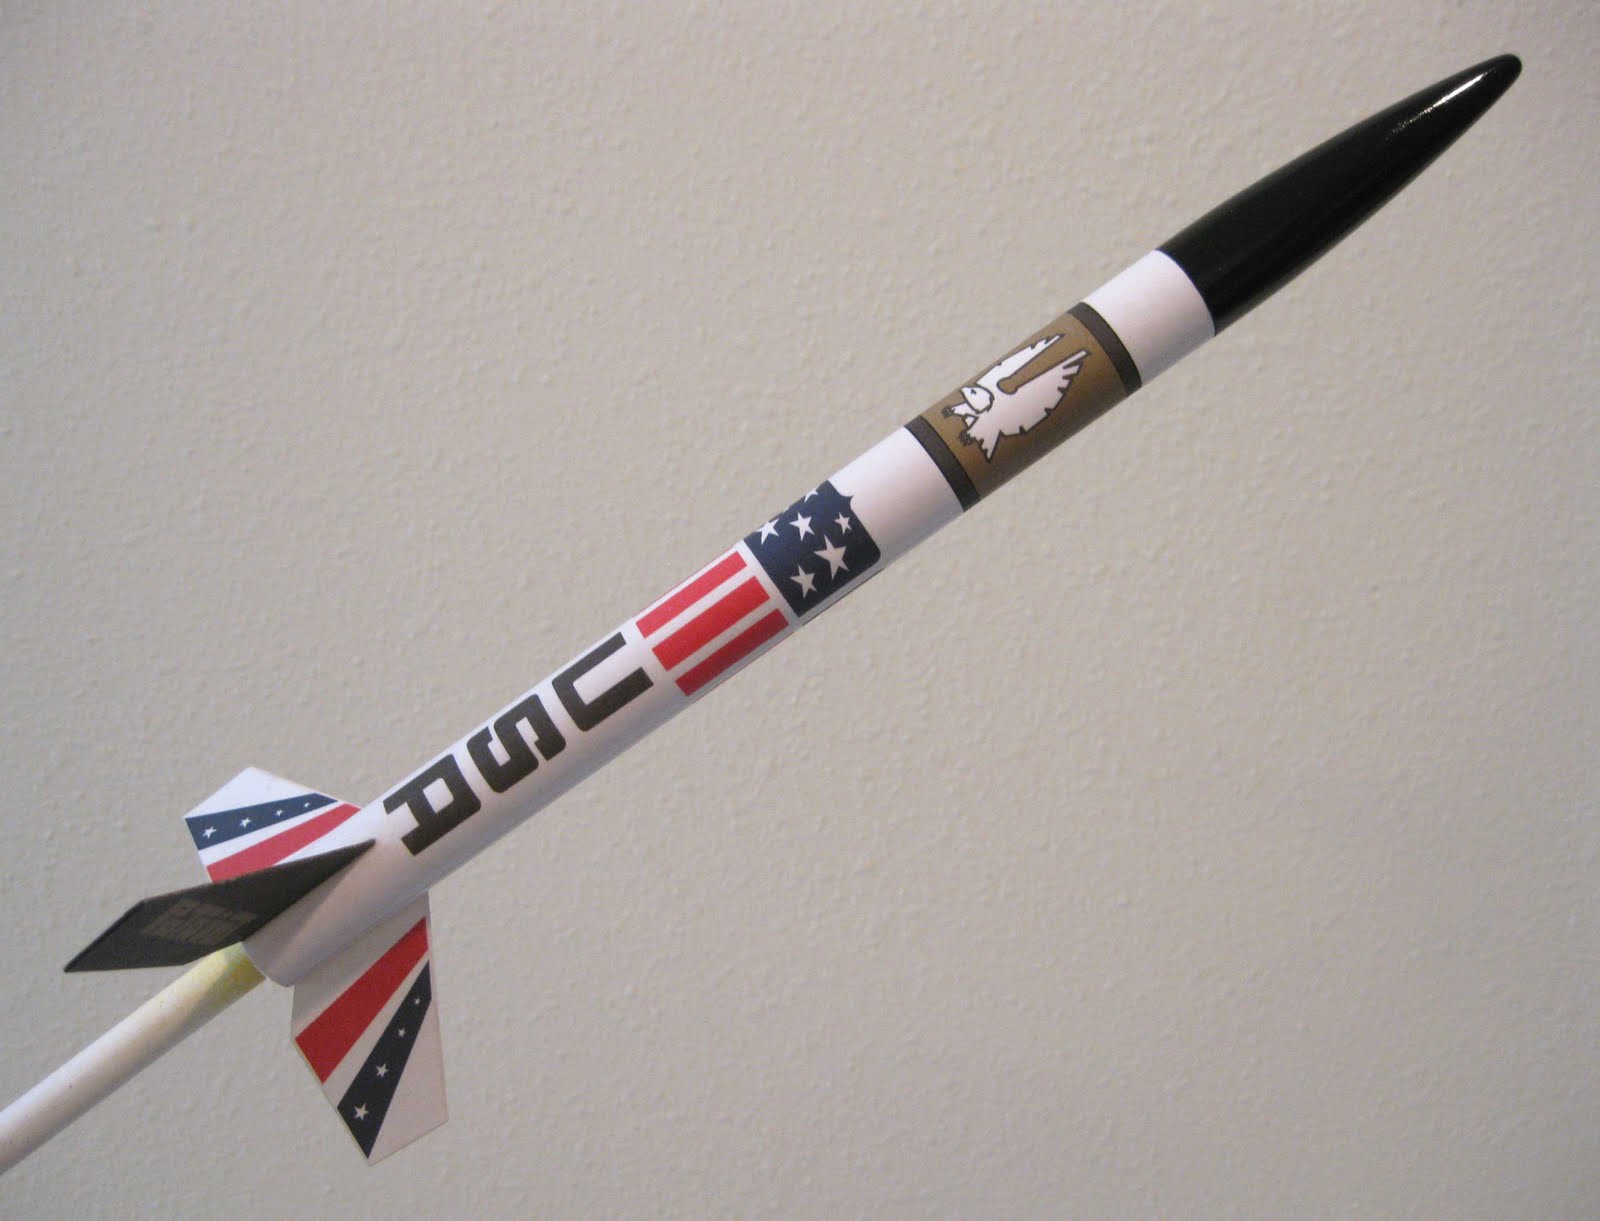
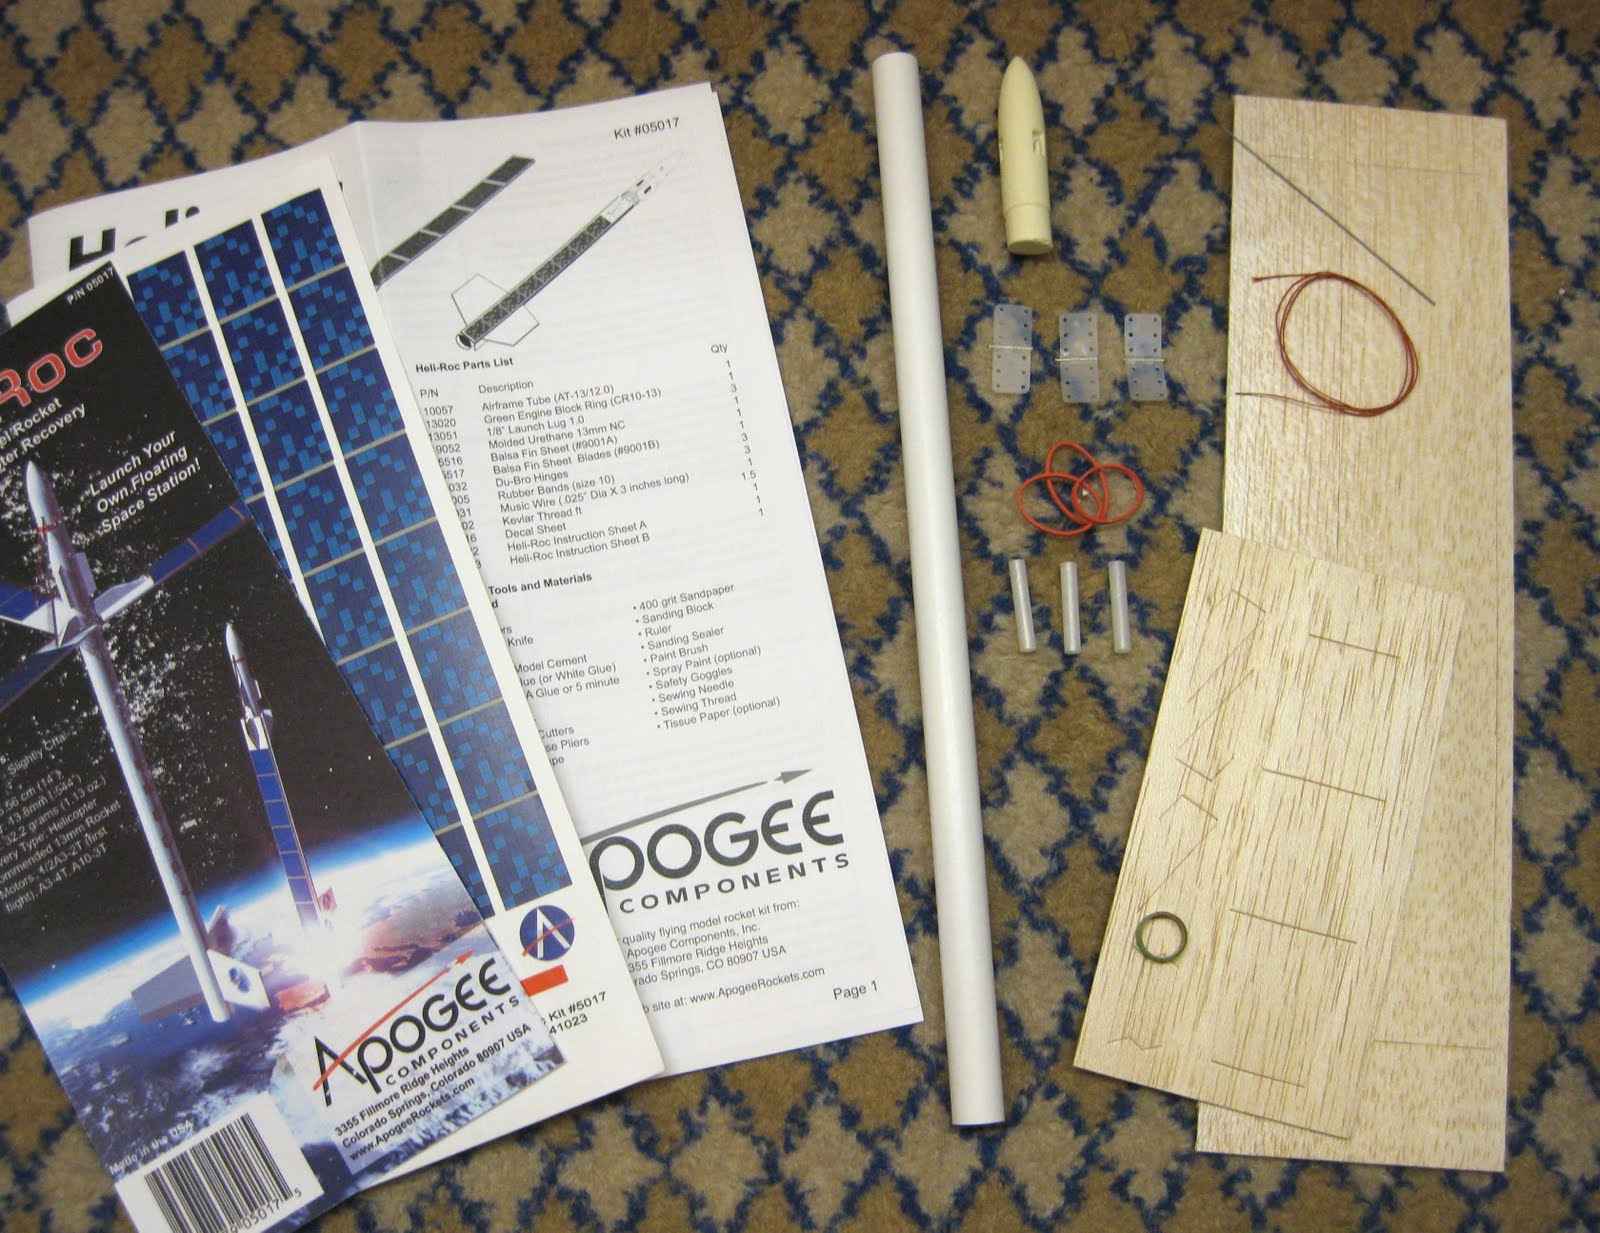


