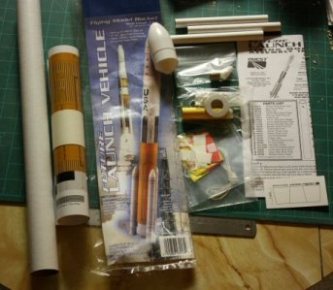
Quest Future Launch Vehicle Cluster
Modification - Future Launch Vehicle Cluster {Modification}
Contributed by Dale Marshall
| Published: | 2010-07-21 |
| Manufacturer: | Modification |
| Style: | Cluster, Futuristic/Exotic |

Brief:
This is Quest's highly detailed sport scale model of NASA's next big-payload launch vehicle. The
kit features beautifully detailed and pre-printed body wraps.
Modifications:
When building the first kit, I was thinking of ways to modify it, and immediately wanted
to put engines in the boosters and make them fall away and recover separately. However, that was too hard since I
didn't know anything about fall-away boosters so I decided to put two engines in the main body tube as well as engines
in the static boosters. Unfortunately, I didn't have a two-engine cluster mount available, so I had to build my own. It
wasn't too difficult and soon I had a nice engine mount.
Following my own advice (see my FLV review), I built the rest of the rocket before installing the mount.
First I cut everything out, and then dry-fit the wraps, trimming as necessary to ensure a good fit. Some spray adhesive and small amounts of white glue later and it was done.
To put engines in the boosters I rounded up some BT-5 thrust rings and dry-fit them using a 13mm engine to determine depth. Turns out the booster tubes are a bit larger than the trust rings, so I had to put tape around them to get a better fit before gluing them in. I left off the booster nozzles completely.
The dual engine mount when in nicely once everything else was in place.
I decided to paint the nosecone black on this version of the FLV so it is easily distinguishable from the regular one.
Also I roughly doubled the noseweight but it turns out that was likely not enough as you'll see later.
Construction:
When building the first kit, I was thinking of ways to modify it, and immediately wanted
to put engines in the boosters. However, that was too easy so I decided to put two engines in the main body tube.
Unfortunately, I didn't have a two-engine cluster
Finishing was the same as my first FLV except I decided to paint the main nosecone black. Also, there is a gap between the main body wrap and the one around the nosecone, so I colored that black with a Sharpie.
Flight:
For my first launch I used two B6-4s to see how stable it was. It launched quick and straight
and landed with no problems other than a slightly bent fin. I repaired it with some Gorilla Glue and it was ready to go
again.
For the second launch I installed two A8-3s in the main tube and three 1/2As in the boosters. I had to double-wrap tape around the booster engines because the tubes are a little larger than the engines.
This launch wasn't so good. It went up about 100' and arced right over the pad. At first I though one of the booster engines might not have lit, but after reviewing the video there are at least four distinct "pops" as the ejection charges go off. I think it needs more noseweight.
For the third launch of my modified FLV, I loaded up a C6-3 and a C6-0 (didn't feel the need for two ejection charges). No engines in the boosters because I want to get a bigger clip whip before trying 5 engines again. The launch was spectacular to say the least. The rocket whipped off the rod and immediately went end-over-end, crashing to the ground about 40 feet from the pad where it sat until the ejection charge went off. Upon inspection, there was a large hole in the side of the rocket, and the parachute was completely melted. The insides of the FLV were still on fire five minutes later. RIP.
Unfortunately, one of the shroud lines ripped out and a couple of fins broke so I couldn't get my third launch in. I'll repair it and try again later.
Summary:
This was a fun project and I'm looking forward to launching it again with more noseweight. I'd
really like the cluster to work correctly.
Sponsored Ads
 |
 |


