| Construction Rating: | starstarstarstarstar_border |
| Flight Rating: | starstarstarstarstar_border |
| Overall Rating: | starstarstarstarstar_border |
| Manufacturer: | Clone |
Brief:
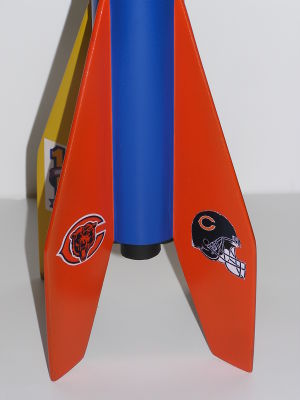
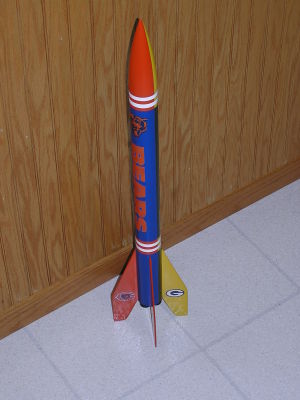
I received these plans from NAR and built this as part of my NARTEK Silver achievement. In addition, this was my first cluster rocket. During the construction I made one modification, replacing the payload section with plain BT-60 body tube. The paint scheme represents the classic struggle of good vs evil--I will let you decide which team represents good and which evil. Our family is divided.
Construction:
The kit includes:
- 1 BT 60 - Body Tube (18" Long)
- 1 Nose Cone (Plastic)
- 3 Engine Holder Tubes
- 2 Centering Rings
- 2 1/8" Launch lug (7/8" and 1-1/4")
- 24" of 150# Kevlar
- 24" Elastic Shock Cord
- 18-24" Plastic Parachute
- 0.125" Balsa Fin Stock
- Nose Cone Weight (~40g)
This was a pretty simple build. Body tube, nose cone, 4 fins, and engine mount. The paint scheme actually took longer to paint then it took to assemble the rocket.
Engine Mount: I used the 3 18mm engine tubes glued them in a triangular shape, gluing each to the other. I traced this triangular tube shape on to centering ring material and then traced the outer tube diameter. I cut out 2 engine mounts. I mounted the 3 tube sub-assembly and bulkheads. I choose not install engine hooks and use tape to hold the engine in place.
Fins Construction: I used the templates included in the plans and cut the fins from 0.125" fin stock. I rounded the leading edge and filled the flat surfaces with thinned Elmer's Wood Filler. I sanded the fins with 220 grit sandpaper, filled, and sanded again with 400 grit sandpaper until smooth.
Main Body Tube Assembly: I mounted the engine subassembly into the main body tube leaving the engine tubes sticking out about 0.375". Next, I mounted the fins 90 degrees apart and added fillets to the fin tube joint.
Finally, I used the traditional Estes shock cord mount to attach the shock cord to the main body tube. If I had to do this over, I would attach this to the engine bulkhead.
Nose Cone: I added ~40g of nose weight to ensure the rocket would be stable.
Finishing:
After the rocket was complete, I then applied a few coats of gray primer. I then painted the entire rocket white, once this was dry. I masked the rocket and painted the yellow, let it dry and masked it for the orange. Once the orange was dry I masked it for green and then blue.
I found the images on the internet and printed these on to Expert's Choice Decal Material. After the decals, I applied 3 to 4 coats of clear coat.


Construction Rating: 4 out of 5
Flight and Recovery:
The flight prep was your basic rocket prep. Engines installed (taped in place), dog barf added, and put in the folded parachute. I installed the igniters. After reviewing the wiring diagrams, I chose to make a 2 jumper sets (basically 3 wires with alligator clips, twisted together).
I used 3 C6-5s for the first flight. Launch was nice and straight. It went a lot higher than I anticipated. Ejection was a little early, but overall it was a very nice flight for my first cluster rocket. The next flight was on C6-7s. This flight seemed to fly much higher and it took about double the time to land.
Flight Rating: 4 out of 5
Summary:
This is a great rocket especially if you have not attempted a cluster. I would highly recommend making jumper wires to attach the igniters rather then twisting them together as shown in the wiring diagram.
I would make two changes if I rebuilt this rocket: replace the nose weight with an engine baffle and change the shock cord mounting attachment method.
Overall Rating: 4 out of 5
#Related Reviews
Related Products
 |
 |
Roger Smith (June 21, 2023)
Thanks, Bill, for the correction. I've updated the review.
Sponsored Ads
 |
 |


Bill Eichelberger (November 20, 2020)
This review is actually for the BT-60 Estes Ranger. The 1955 kit is actually a BT-55 based rocket that only uses the Ranger name.