| Construction Rating: | starstarstarstarstar |
| Flight Rating: | starstarstarstarstar |
| Overall Rating: | starstarstarstarstar |
Brief:
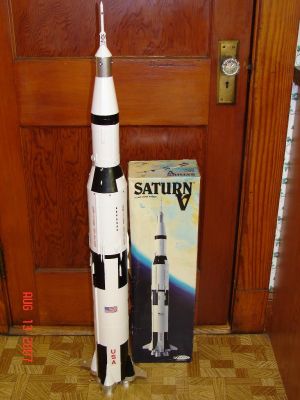
This is the classic Estes Saturn V kit, No. 2001. I purchased this kit off of eBay for a very good price. The kit was started. The single 24mm motor mount had been installed (using crazy glue), the fins and fin fairings had been partially assembled, the engine nozzles had been completed and secured to the cardboard nozzle disk holder, and the capsule and tower had been assembled. Other than that the kit was untouched.
Unfortunately the quality of work done by the previous builder was poor. The first thing that I did was to deconstruct everything in order to start again.
Construction:
The parts list for this rocket is extensive and included:
- main body tube
- 3rd stage body tube
- LEM/SM body tube
- core tube
- spacer ring
- main body coupler
- reinforcing ring
- 3rd stage coupler
- retainer tube
- engine hook
- thrust ring
- engine spacer tube
- brass wire (missing)
- snap swivel
- half-round wood tunnels
- wood tunnel strip
- die-cut cards
- balsa fin sheet
- parachutes
- bag of plastic parts
- shock cords
- tape disks
- shroud lines
- embossed body wraps
- printed cards
- decals
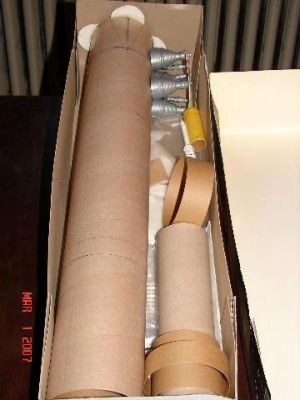
My first challenge was to remove the existing motor mount and stuffer tube because I had decided to go with a triple 24mm configuration. It was slow work, but after carefully removing the existing mount I was able to create the triple mount from components I purchased from JonRocket.com
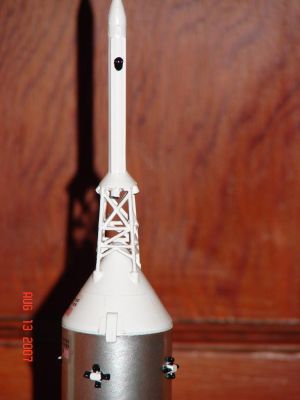
At the same time I realized that the fins and fin fairings were A) probably not strong enough to stand up under the new engine configuration and B) had been pretty much destroyed by the previous builder. That meant a trip to Moldin Oldies to purchase a resin command module and escape tower assembly and resign fins/fairings.
While I waited for those to come in, I also deconstructed the engine nozzle assembly because it was poorly done and the cardstock had warped giving it a U-shape which would prevent it from fitting flush in the rocket for display. Once I got that apart, I reconstructed it onto a stronger balsa base platform.
I then took the escape tower off of the command module and reattached it so that it was fairly straight.
From there it was on to regular construction of the model. I found all steps to be clear and straightforward. This truly is a classic builders kit and I enjoyed each and every step of the build process.
Once the resin parts came in I attached the fins and fairings after some sanding and the model was ready for paint, final detail part attachment and decals.
Finishing:
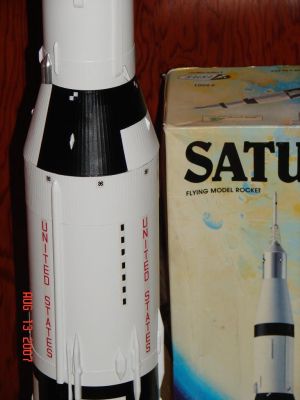
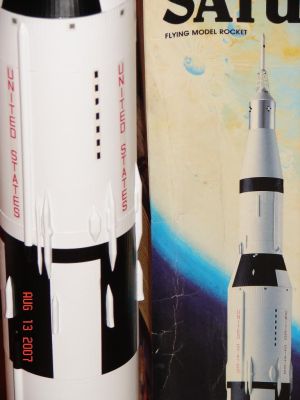
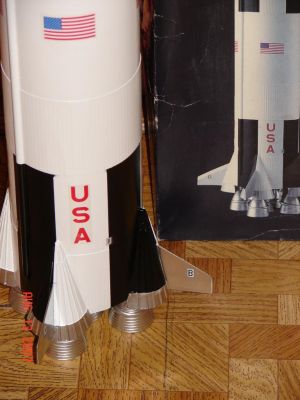
The model is in four main components so that finishing is manageable. I primed and sanded balsa parts, priming again where appropriate. I then masked and painted the fins and lower fairings silver. After they dried well I masked that off. I then painted most of the model semi-gloss white with the exception of the small body which got painted silver and then masked. After that I began masking for the black detail. I think the instructions did an excellent job showing the builder how to mask. After that was done I applied the black paint and removed the masks after it had dried.
I then painted the detail pieces semi-gloss white. After they had dried they were attached. The RC nozzles were painted black and attached as well.
Next came the decals and that's when the model took on the majestic look of the Saturn V. Once the decals are on I stood back and looked at the finished product. Wow, what a rocket! I was more than pleased with the finished product to say the least.
Construction Rating: 5 out of 5
Flight:
For flight I used 3 D12-3 motors and plenty of recovery wadding. I actually pushed a piece of recovery wadding down into each of the three stuffer tubes and also laid a thick blanket of recovery wadding in the chute chamber.
I used a friends 6 foot long 3/16" launch rod for launch because I wanted to make sure the rocket stayed on a straight course for as long as possible.
At ignition the three engines lit and the Sat V ripped off the pad very quickly, leaving a trail of thick smoke behind.
I estimate altitude at around 300 feet, maybe more. To be honest I'd rather a bit slower flight, but it was very impressive none the less.
Separation was near perfect. Drift was much further than I would have liked even on a relatively wind free day. Both upper and lower components were recovered with no real damage. A little paint scuffing was all.
Recovery:
This rocket is amazing to see on the pad and in flight, but it's also stressful because of the amount of time and energy that you put into a rocket like this.
I think that I will let the Saturn V sit proudly in my office for a while. I'm not going to retire it, just keep the active launches down to a minimum for this one.
Four very important things for flight:
- Since this is a cluster bird make sure you have the clip whip connections on correctly and make sure your battery has enough juice to kick all igniters at the same time.
- Make sure that you use plenty of recovery wadding. Burning a chute or burning through a shock cord or chute line on this and you are going to be a very unhappy individual.
- Use as long of a launch rod as possible. I am going to go out and purchase longer 1/8", 3/16", and 1/4" rods myself after using the 6 foot 3/16" rod on this flight. Longer rods equal rockets that don't arch over as much and for this rocket the straighter it goes the better.
- Fly only on a grassy field and on a wind free day.
Flight Rating: 5 out of 5
Summary:
It's unfortunate that this kit or it's newer cousin isn't still on the market. It's a builders kit and one that I completely enjoyed building.
Overall Rating: 5 out of 5
Sponsored Ads
 |
 |


