Art Applewhite Rockets Dragonfly Monocopter (18mm)
Art Applewhite Rockets - Dragonfly Monocopter (18mm) {Kit}
Contributed by Dick Stafford
| Construction Rating: | starstarstarstarstar |
| Flight Rating: | starstarstarstarstar_border |
| Overall Rating: | starstarstarstarstar |
| Manufacturer: | Art Applewhite Rockets  |
Brief:
This was the first monocopter kit released by Art
Applewhite. He previously published a free plan for a monocopter built from Popsicle sticks and now has a 13mm, two
18mm and a 24mm version. The Dragonfly flies on a variety of 18mm black powder motors and features an 8" wing.
 Construction:
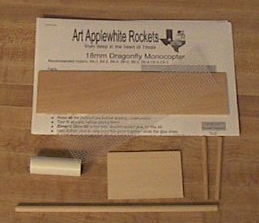
This monocopter consists of the following parts:
- Wing - one basswood strip, 8" x 2"
- Balance beam - 1/4" dowel
- Support beams - two 3/16" dowels
- Center hub - one basswood strip, cut into 3 pieces
- Motor mount - LOC BT-20 tubing
- Motor mount reinforcement - Fiberglass drywall tape
Heres a summary of the steps:
- Assemble the center
- Add supports and a balance beam
- Glue wing to center
- Assemble motor mount
- Wrap fiberglass tape
- Glue motor mount to center
- Drill launch rod hole
I built the motor mount in parallel with other components. This consists of a basswood motor mount, the tube and the drywall tape. The tape is self adhesive to some extent but wanted to lift when soaked in glue. So, I used some small plastic clamps to hold it where the tube met the motor mount. After about 20 minutes, I removed the clamps and let the glue set the rest of the way.
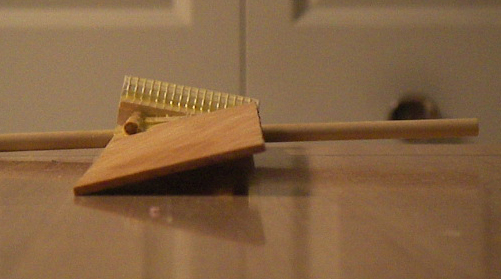
 The support dowels are mounted parallel with the wing.
The wing and motor mount are attached with one end over one dowel and under the opposing one. In the absence of a good
airfoil and a long burn motor, monocopters need to have the motor mount and wing canted to provide lift. Mounting these
items between the dowels provides this angle.
The instructions say to sand the dowels so they mate with the tube. On mine, only the bottom edge touched so a slight nick with a knife did the trick. I filled the remaining gap with glue.
I drilled the 1/4" launch lug hole on my drill press.
Finishing:
Art recommends at least a light clearcoat. I used Helmsman Spar Urethane®
(the only clearcoat that I had).
Construction Rating: 5 out of 5
 Flight:
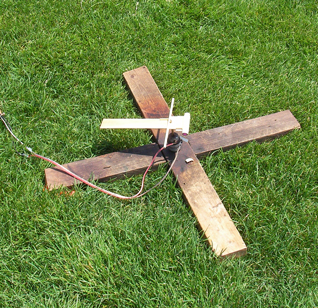
Prep consists of centering the motor in the mount, adding a tape thrust ring and friction fitting. You can use
booster motors or those with up to 3 second delays. I flew mine on a C6-3. It flew off of my standard pad, which
happens to be similar to that described by Art and I already had a 1/4" stubby monocopter rod.
It flew nicely, even in the 10+ mph winds. It was still at a good altitude when the ejection charge went off.
Recovery:
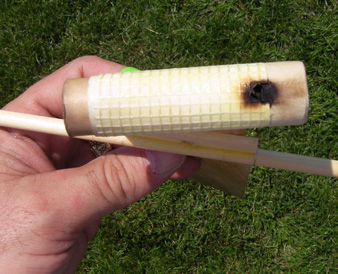
At burn-out, the Dragonfly merely flutters to the ground lightly. I found that the side of the motor had burned
through just above the nozzle. The burn through also made a small hole in the motor tube, but it's flyable as is.
 Overall this is an awesome flier but I'll ding it for the
hole. I had seen this before on spinning rockets and I suspect this is just the physics of the beast.
My video isn't very good, so I'll refer you to this one.
Flight Rating: 4 out of 5
Summary:
This is a fun kit, easy to build and sure to get noticed on the field. It flies great on a C6-3. Since I don't think
the burn through is avoidable, I won't let it detract from my overall rating.
Overall Rating: 5 out of 5
Other Reviews
- Art Applewhite Rockets Dragonfly Monocopter (18mm) By Glenn Little (July 29, 2008)
Brief: I won this rocket as part of an EMRR giveaway, which was really exciting for a variety of reasons. Aside from this being my 15 seconds of international fame, I've wanted some rockets I could launch in a small area (such as my 30' x 20' front lawn or the street out front) since all the local fields are now full of various summer crops that make flying impossible. (Can you say ...
- Art Applewhite Rockets Dragonfly Monocopter (18mm) By Dick Stafford
You have to love a rocket that assembles quickly and that can be flown in your front yard (and not that big of a front yard either)! That's what you have with the 18mm Art Applewhite's Dragonfly. I brought this kit, a hobby knife, a ruler, a pencil and some Elmer's Glue with me on a short business trip. I was successful in building the kit while in the hotel one night and finished ...
 |
 |
Flights
Sponsored Ads
 |
 |


