Aardvark Rockets Sandia Sandhawk (2.6")
Aardvark Rockets - Sandia Sandhawk (2.6") {Kit}
Contributed by Frank Ross
| Manufacturer: | Aardvark Rockets |

(Contributed - by Frank Ross)
This formerly Blackhawk R&D rocket is now fully owned and produced by Aardvark Rockets
Brief:
2.6" 29mm Sport-scale Sandia Sandhawk
Construction:
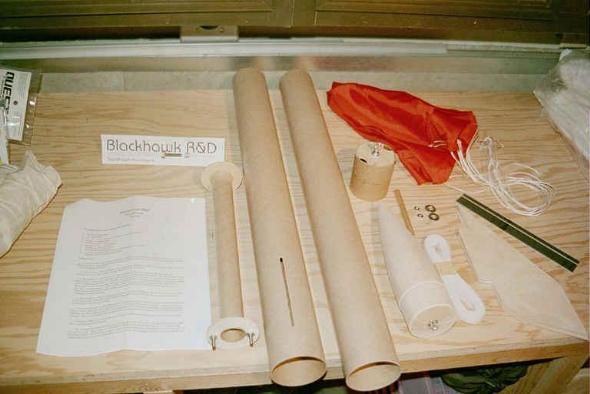
Kit came complete with 4 1/8" birch plywood fins, two 2.6" heavy-duty
Kraft body tubes, one tube-coupler/ ejection baffle assembly, 29mm motor mount
tube, two birch centering rings, balsa nose cone & screw eye, 36"
nylon chute, elastic shock cord, and two machine screws w/nuts & washers
for motor retention, decal, and instructions.

Construction of this kit is pretty straight-forward as the rocket is a pretty standard design - nothing fancy, just a simple sport-scale sounding rocket. Things were also simplified a bit as the tube coupler/ejection gas baffle assembly came pre-constructed (disappointing to me really, but I guess it simplified packaging for the manufacturer).
The instructions that come with the kit are brief and to the point, not a lot of detail, but again, this is a pretty straight-forward kit. For a beginner these would probably not be adequate, but for someone experienced with basic rocket kits they are appropriate.
Assembly went quickly and smoothly and the rocket was constructed as quickly as the glue dried and epoxy cured. There were only a couple of pauses where I considered some modification to the kit but in the end I stuck with the instructions verbatim (more on these later).
 Another flawless rocket? Unfortunately the
answer is no. There were a couple of mistakes made that I will mention so that
others may learn. During the joining of the two body tubes with the
couple/baffle assembly I was not careful to align the tubes perfectly. The
result is a slight curvature to the rocket, which, although mostly unnoticable
to most observers, still bothers me a little. Be careful to align your tubes,
especially on a long rocket where only a slight mis- angling of the tubes can
produce a significant bow.
Secondly, don't be hasty finishing a rocket as I can sometimes be. Allow each coat to dry and cure thoroughly before masking and applying another coat or color.
Finishing:
Finishing the kit took some time as I wanted a really good looking rocket so I
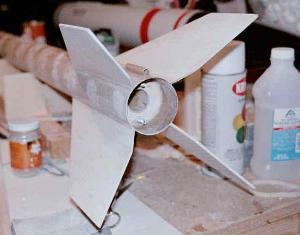
spent some hours here with the fin fillets, fin finishing, and body tube seams.
Finally a couple coats of primer, some sanding, and painting and I ended up
with a beautiful Sandhawk.
This kit came with only two decals - both black stripes of different thicknesses which wrap around the body of the rocket in two locations. The decals are self- adhesive, which I usually despise for multiple reasons: one being that they often don't adhere well or at all to the rocket (especially when wrapping tubes), and another being that they are often thick and unsightly on an otherwise smooth and clean rocket. The decals that came with this kit however were excellent. They applied very easily and they wrapped and aligned perfectly on the first attempt! They are also thin and are almost indistinguishable from paint even close up.
Construction Rating: 4 out of 5
 Flight:
So far I have flown this rocket only three times - the only reason that I
haven't logged more flights is due to windy range conditions - I plan to fly
the rocket many times in the future as it is really an excellent flier.
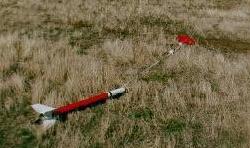
I have only flown the rocket using G64 RMS motors. I doubt that I will experiment with others much in the future because this is really an ideal motor for this kit. All of the flights of this rocket have been on windy days (15-20mph) and the rocket has flown flawlessly each time.
The ejection gas baffle assembly on this rocket is really a nice feature. I only have to replace the motor, re-stuff the chute, and it's ready to fly again.
There is however, one thing about the rocket that I do not care for, and would highly recommend modifying during construction, which is the motor retention. The kit uses two machine screws secured through the rear centering ring onto which two washers and a nut are threaded which hold the motor in the rocket. This is a simple and solid way to secure a motor in any kit, however with the Sandhawk kit, the rear centering ring is not flush with the rear of the body tube, but is inset several inches in order to help secure the fins. Trying to thread and tighten the nuts on the screws recessed in a 2.6" tube is difficult and frustrating. I would recommend using tee nuts in the rear centering ring with hex-head screws and washers to make the job of securing the motor MUCH simpler.
 Recovery:
The 36" chute that came with the kit is adequate for safe recovery of the
rocket. One needs to be careful with rockets that have fins extending behind
the body tube as much as the Sandhawk as they can be easily damaged by ground
impact after too-fast a descent. I have not experienced any problems so far
with this kit. The elastic shock cord that is supplied with this kit seems
fine, however with a 2.6" tube it will be very difficult to replace a
severed or worn cord later on, consider upgrading the cord with strap nylon or
some other more durable cord.
Flight Rating: 4 out of 5
Summary:
PRO's: Excellent component quality. Simple kit, excellent sport-scale design.
Perfect flights. Ejection baffle. CON's: Motor retention needs modification.
Wimpy shock cord.
Overall Rating: 4 out of 5
 |
 |