| Construction Rating: | starstarstarstar_borderstar_border |
| Flight Rating: | starstarstarstarstar |
| Overall Rating: | starstarstarstar_borderstar_border |
| Manufacturer: | Binder Design  |
 Brief:
The Bat is a very stable flying model and is designed for 29mm motors. A great small field performer! The Bat was designed for the beginner or sport flyer in High Power Rocketry.
Construction:
The following was included in the kit, which came packed in a plastic bag with all the parts in their own plastic bags.
- 1 — 4" Ogive Nosecone 16 1/4" long
- 1 — 4"x24" Body Tube
- 1 — 29mm Motor Tube
- 3 — 3/16" Plywood Fins
- 2 — 4" Centering Rings
- 1 — Nylon Shock Cord Strap
- 1 — 1"x12' Tubular Nylon Shock Cord
- 1 — Quick Link
- 1 — Eye Bolt/Nut/Washer Assembly
- 1 — 1/2" Launch Lug
- 1 — Set of Decals
- 1 — Fin Alignment Guide
The instruction were easy to follow and included pictures. They also included tips on how to make things go a bit easier during construction. The instructions included 20 steps, they went from checking to make sure everything was in the kit to step 20 telling you how to pack the parachute.
You do have to drill a 1/4" hole in one centering ring to attach the eye bolt through. You start by assembling the motor tube and centering rings. Now here I didn’t follow the instructions. Instead of gluing both centering rings on I just glued the top centering ring into place.
The next step was cutting the fin slots in the body tube, here the instructions where wrong; they have you cut only a 6" slot to match the fin root when the fin root measured 8 1/4" long. Other than that it was easy to cut the slots with a sharp hobby knife and the fact that the lines were marked on the body tube helps.
After I had the slots cut, then it was time to insert the motor mount into the rocket but before I did this I scrapped the Nylon shock cord strap and instead used a 1/8" steel cable like the NCR kits used. After attaching the cable I inserted the motor tube so the top centering ring was flush with the top of the fin slots. I then slid on the back centering ring, turned the rocket over, and glued the top centering ring in. After the glue was set I removed the rear centering ring so I would be able to add internal fillets to the fins.
Now it was time to put the fins on. I didn’t use the included fin jig which is just a piece of paper with the fin layout printed on it, but instead I used a homemade fin jig from a pattern I found on the Rocket Team Vatsaas site (http://www.vatsaas.org/rtv/construction/finjig.aspx).
Now with the jig in place I glued the fins into place. After they set up I then glued the rear centering ring into place.
The final step was to glue on the launch lug.
Finishing:
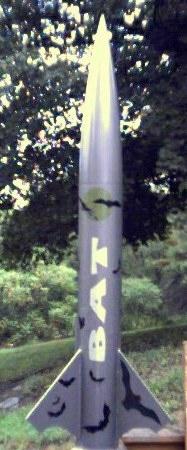
I gave the rocket 3 coats of Krylon Primer then painted it with Krylon bronze Hamm-R paint.
Now the kit came with a Silver Bat decal and also 6 silver decals to put on the fins, but the only decal I used was the BAT name. I made some of my own decals with pictures of bats and applied those to the rocket.
Construction Rating: 3 out of 5
Flight:
Now prepping for flight was made easier because I installed a Kevlar® ’chute protector so there was no need for wadding.
The first flight was with a G80-7T in light winds, it was a nice straight flight with good recovery.
The second flight was using a G75-6, it took off the pad but then I had a problem; the delay burnt up through the top and the rocket was in flames. Inside of rocket was toast and the shock cord burnt. I’ll have to replace the shock cord, do a bit of clean up, and it will be ready to fly again.
Recovery:
I used a 1/8" steel cable from the top centering ring to the top of the body tube. Then attached the 12' tubular nylon shock cord to that. I also installed a Kevlar® ’chute protector so no wadding would be needed.
The one good flight it had everything worked great!
Flight Rating: 5 out of 5
Summary:
Over all I think it is a good kit with decent instructions however they should change the instructions to get the correct measurements on everything.
Overall Rating: 3 out of 5
 |
 |
Flights
|
|