Centuri Mercury Redstone
Centuri - Mercury Redstone {Kit} (5131, KS-1) [1971-1983]
Contributed by David Montgomery
| Construction Rating: | starstarstarstarstar |
| Flight Rating: | starstarstarstarstar |
| Overall Rating: | starstarstarstarstar |

Brief:
The Centuri Mercury Redstone is a highly detailed 1/35 scale model of the launch vehicle that launched America's
first men into space. It was classified as a "super-scale model" in the famous Centuri Engineering Company's
line of fine scale models. It had dual parachute recovery, a baffle ejection system that eliminates the need for
recovery wadding, and a very detailed all plastic Mercury capsule with Launch Escape Tower.
I managed to find this kit at some hobby shop in the early 1980's and bought it before I left the hobby in 1982 due to a career change. It stayed in the packaging with hang tag for some 20+ years before I became a BAR in late 2003. Several years after that, I decided it was time to pull this kit out of its' long hibernation and build it for display and sport flying.
In addition to the instruction sheet, the model also includes another instruction sheet specifically for the Mercury Capsule as well as a very nifty Mercury Redstone Historical Brochure that is sure to be a collector's item.
Construction:
The KS-1 Mercury Redstone kit came with the following parts:
- 1 Engine Lock
- 1 Engine Tube
- 1 Thrust Ring
- 1 Notched Centering Ring
- 1 Sleeve Tube
- 1 Centering Ring
- 2 Main Body Tubes
- 2 Sets of Fins, Die-Cut into Balsa
- 4 End Plates
- 1 1/8" x 2" x 1" Balsa Strip from which the Air Rudders are cut
- 2 Launch Lugs
- 2 Launch Lug Standoffs
- 2 Pull-Away Lugs
- 2 Baffle Disks
- 1 Sleeve Tube for Baffle Disks
- 1 Elastic Shock Cord
- 1 Shock Cord Fastener
- 1 18" Plastic Parachute for Main Body Section
Mercury Capsule Kit (All Plastic Parts):
- 3 Ladders
- 1 Base
- 1 Antenna Housing
- 1 Escape Motor Bottom
- 3 Escape Motor Nozzles
- 1 Separation Motor
- 2 Escape Motor Halves
- 1 Antenna Housing Top
- 3 Capsule Segments
- 1 Aerodynamic Spike
- 1 12" Plastic Parachute for Mercury Capsule
Also there was a decal sheet included with the kit, but since the quality of these decals had gone bad from over the years they had been stored in the kit's bag, I ordered a fresh set of Mercury Redstone decals from Tango Papa.
Tools needed for construction are:
- X-Acto Knife
- Ruler
- Spray Paint
- Centuri Superbond or White Glue (just love it when the kit's manufacturer recommends their brand of glue!)
- Balsa Fillercoat or Sanding Sealer
- Fine Sandpaper
- Pencil
- Paint Brush
- Scissors and
- Plastic Glue (for capsule only)
Construction was pretty easy and straightforward as the degree of difficulty was no where near the level of, say, Estes' first Mercury Redstone kit (you know, the one with the intricate fin & tower assembly with balsa). The only deviation I made from the kit and instructions is I used the standard Estes tri-fold shockcord attachment as I've had a few bad experiences with the Centuri adhesive stick-on shock cord mount in some of my previous models (Centuri SkyLab is one).
The all plastic Mercury Capsule went together very well. Only deviation I made from the instructions was I went ahead and glued the aerodynamic spike on top of the escape motor (the instructions specified that it be removed for flight, in order to "avoid the danger of its sharp tip."). Since I was going to rig the recovery system so the Mercury capsule with LES is near horizontal with the LES at a slight upward angle, I felt there would be no such danger with the aerodynamic spike in place.
Finishing:
The paint pattern is clearly given in the instructions along with the decal placement. Before I attempted to use the
Tango Papa decals, I tried a piece of the original decals that came with the kit and the decal surface quickly
dissolved a few seconds after soaking in the water. The Tango Papa decals gave the model a very nice finish overall.
For the 1/8" line that goes around the body tube just above the fins, I used a very thin scribe pen.
Construction Rating: 5 out of 5
Flight:
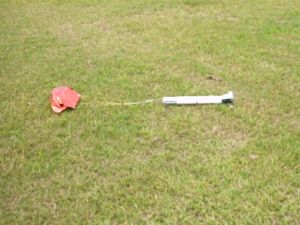
Since this model was built in early 2006, I've been able to fly it three times. The first flight took place at our
Challenger 498 club launch at Rushing Park near Katy, TX on 5/7/06. I used a C6-3. The flight was good, although a bit
wobbly during boost, probably because the model was marginally stable. At ejection, only the 12" chute for the
Mercury capsule deployed while the 18" main chute never left the inside of the body tube. Probably due to very
weak ejection charge of the C6-3 used.
On reaching where the main body section, I discovered the hard landing caused one of the fin's air rudder to break off damaged.
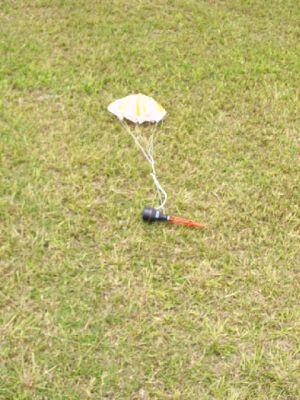
It was more than a year before I attempted another flight for this model. This time, I'd use CA to attach a nickle to the strut support at the base of the Mercury capsule to move the CG forward a little more. This second launch took place at Rushing Park again, with the Challenger 498 NAR Section hosting the Scout Troop 941 from Fulshear, TX. Again using a C6-3, the Mercury Redstone had a very solid flight with much improved stability thanks to the added nose weight, and both parachutes deployed for a nice, safe landing.
 The most recent flight was down at Challenger's new launch site in Needville, TX
on 6/14/08. Again using a C6-3, this was the best flight of the three on record. The C6-3 this time seem to have a lot
more power than I've seen a C6-3 perform previously, as the Mercury Redstone soared solidly to a higher altitude than
before. Although the 18" mylar parachute I used for the main body section got stuck together in some places, both
sections returned undamaged and ready for another flight.
The most recent flight was down at Challenger's new launch site in Needville, TX
on 6/14/08. Again using a C6-3, this was the best flight of the three on record. The C6-3 this time seem to have a lot
more power than I've seen a C6-3 perform previously, as the Mercury Redstone soared solidly to a higher altitude than
before. Although the 18" mylar parachute I used for the main body section got stuck together in some places, both
sections returned undamaged and ready for another flight.
Recovery:
I'm giving the Centuri 1/35 scale Mercury Redstone a 5 rating for flight even though the first flight as partially
successful (failed chute deployment). I attribute this to a weak ejection charge of the C6-3, which isn't the fault of
Centuri.
Flight Rating: 5 out of 5
Summary:
All PROs and no CONs. I would like to see a model of this quality back on the market if at all possible. Glad I
bought it before it went OOP.
Overall Rating: 5 out of 5
 |
 |