| Construction Rating: | starstarstarstar_borderstar_border |
| Flight Rating: | starstarstarstarstar |
| Overall Rating: | starstarstarstarstar_border |
| Manufacturer: | Cognis Aerospace |
 Brief:
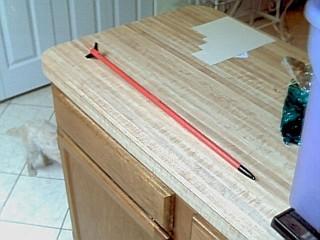
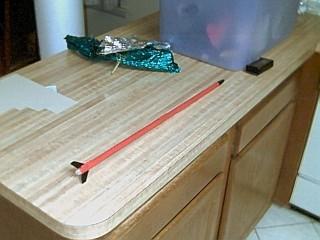
This is a downscale of the popular long kit by another, un-named vendor. It
flies on 13mm mini-motors and uses a streamer for recovery.
Construction:
The kit included:
- Two BT13 tubes, with a white glassine coating and almost no spirals
- One tube coupler
- One 2-part nose cone (instructions referenced a different type)
- One engine block
- Two launch lugs
- 1/16" balsa fin stock
- One Mylar streamer, 2" x 12"
- 54" of thin Kevlar® twine
- 3" thin Kevlar® twine
 This OOP kit was
manufactured in the U.S.A. by LawnDart Rocketry. The instructions are seven
pages long and with many color photos--it is almost more than you really need
for this simple rocket. However, there were changes to the US version of the
kit that were not consistently reflected in the instructions. The changes are
that the US version uses a streamer in place of a chute and that it uses
Kevlar®
cord exclusively, whereas the foreign kit uses a Kevlar®/elastic
combination. In addition, the last page looks to be an add-on by LawnDart,
which includes a nice break-out drawing, a fin template, and an alignment
guide. It also presents several notes, including an alternate placement of the
top launch lug and a note stating a concern about 'possible references' to that
un-named kit and vendor. Of course, 99.9% of you immediately knew what kit it
was--and the rest of you have homework: search EMRR and find the mystery kit
:-)
This OOP kit was
manufactured in the U.S.A. by LawnDart Rocketry. The instructions are seven
pages long and with many color photos--it is almost more than you really need
for this simple rocket. However, there were changes to the US version of the
kit that were not consistently reflected in the instructions. The changes are
that the US version uses a streamer in place of a chute and that it uses
Kevlar®
cord exclusively, whereas the foreign kit uses a Kevlar®/elastic
combination. In addition, the last page looks to be an add-on by LawnDart,
which includes a nice break-out drawing, a fin template, and an alignment
guide. It also presents several notes, including an alternate placement of the
top launch lug and a note stating a concern about 'possible references' to that
un-named kit and vendor. Of course, 99.9% of you immediately knew what kit it
was--and the rest of you have homework: search EMRR and find the mystery kit
:-)
I decided to build the kit using the new Perfect Glue-1, by Liquid Nails. The Perfect Glue series has three glues. The #1 glue is for wood/paper, so I thought I'd give it a try. This is a clear, rubbery glue that reminds me of a thinner version of the standard Liquid Nails. You can read all about these glues [here].
The balsa was very light and cut easily. The fins and lugs went on easily, but I could tell that this glue is not good for fillets. The Perfect Glue says to spread the glue on the surface to be bonded, separate the parts to ~five minutes, and then re-attach them. I do this same thing with white and carpenter's glue anyway. Oh, I'm glad LawnDart added an alignment guide on the last sheet, as the one in the main body of the instructions didn't fit the 13mm tube.
The motor block and coupler were a bit snug and the joint between the two tubes was damaged, but filling and sanding too care of this.
Assembly of the nose cone was not discussed in the instructions. I first bored two small holes in the base of the shoulder and inserted the small piece of Kevlar®. I tied it so that the knot was inside, added a large drop of the glue, and pulled the loop down from the outside. Finally, I spread some of the glue on the inside of the cone and slid in the base.
The shock cord is attached to the tube using the tri-fold paper method. I generally don't use this method but decided to give it a try to further test the glue. A cutout wasn't provided. That's a minor item but sloppy. The other end is tied to the Kevlar® loop on the nose cone.
Despite the numerous issues with the instructions, this was an easy rocket to build. I would be more critical on a more challenging kit and only deducted one point. I also have to deduct a point for the fit of the coupler and the two part nose cone. The latter may be personal preference, but I don't like this type cone so the construction rating is 3.5.
Finishing:
Finishing was easy because the spirals were almost non-existent. In fact, I
couldn't detect any gaps although the spirals appeared to be slightly raised
from the tube. I filled the gap between the tubes, sealed the fins, and made
fillets with fill-n-finish. I then gave it one coat of white primer. Since it
was launched in October, I painted it Halloween orange and black. For
finishing, I have to give it a 5, bringing the total construction rating to a
3.
Construction Rating: 3.5 out of 5
Flight:
I flew it on an A10-3, which was held in with masking tape. I used cellulose
wadding and found the streamer, which was corrugated.
It had a nice respectable flight, similar to my Skinny Mini.
Recovery:
I had packed the streamer a month earlier and didn't repack it. As a result,
the streamer didn't open. Still, it fell on grass and there was no damage. I
can't fault the kit on the streamer problem, so I'll give it a '5' for flight.
Flight Rating: 5 out of 5
Summary:
I liked my Mean Machine (thought I wouldn't say it, eh?) and I like this
downscale. The instructions need work but it a very simple kit. I give it a '4'
overall.
Overall Rating: 4 out of 5
 |
 |