| Construction Rating: | starstarstarstarstar_border |
| Flight Rating: | starstarstarstarstar_border |
| Overall Rating: | starstarstarstarstar_border |
| Manufacturer: | Cycline3 |
Brief:
Cycline3 describes the XROC as "the pinnacle of performance". This is something of an understatement. This near minimum diameter, single stage mach-buster may not be the prettiest rocket in your fleet, but it will likely be the fastest for it's size! The XROC Prototype is a ultra-high performance kit that uses unusual construction techniques to go way beyond your usual 3FNC kit!
Construction:
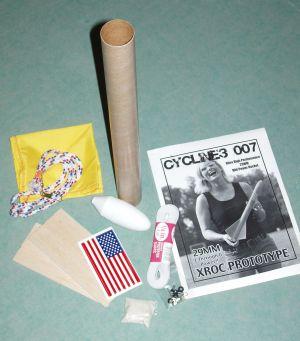
The kit came packaged in a poly bag with a header card. All of the components were in good condition and had been shipped securely in a sturdy box. The main airframe is solid, similar in quality to LOC and Aerotech tubing. The motor mount and centering rings are designed around a 29mm motor, but the builder could easily adapt the kit to fly on 24mm and 38mm motors. The fins are cut from balsa stock that would appear at first to be way too thin for mach plus flight. This kit includes Cycline3's sturdy Frankenchute and more shock cord than many high power kits.
Although this kit uses many unusual building techniques, the five 8.5" x 11 pages of instructions make the processes clear and fairly gotcha-free. The only thing that was missing from the instructions were illustrations, but with a minimum of experience, they really would have been extraneous. In addition to the instructions, there were two sheets of cardstock with the templates for the motor mount tube, centering rings, and fin alignment pattern.
 The motor mount is hand rolled around a 29mm single-use motor. This process, while seemingly a little dicey, produces a tube that is a custom fit. This process would allow the builder to chicken out and roll the tube to fit a 24mm motor as well.
The centering rings for the kit are cut from cardstock which is reinforced with a substantial fillet of polyurethane glue. Polyurethane glue is required for this section of the build because of its expanding properties when it is exposed to moisture. This produces a very sturdy and lightweight "honeycomb" around the mount.
The balsa that came with the kit was a little bit soft and crumbled slightly when cutting. The fins were extremely easy to cut though, requiring only two cuts diagonally across the fin stock to produce the fins. This results in 4 fins although only 3 are used. The fins are edged with fiberglass reinforced shipping tape to help them hold together at the mach plus speeds that can be produced with the recommended G80 motors.
The kit comes with a small package of sand to be used to ballast the nosecone. I mixed the sand with a roughly equal amount of polyurethane glue and poured it into the hole in the base of the cone. As the glue cured, it expanded and filled the cone full and locked the ballast in.
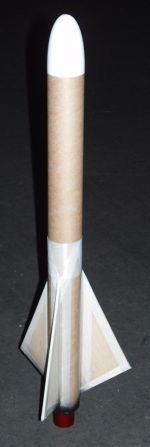 The XROC comes with 24 feet (no, that's not a typo) of shock cord. This is mounted into the airframe with a standard 3-fold Estes-style mount. The kit comes with rail buttons but not being a big fan of buttons, I substituted them with ACME conformal lugs.
Finishing:
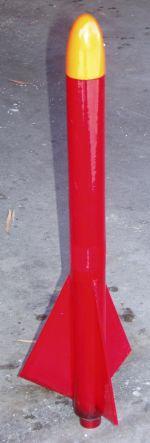
I was concerned about the way paint would look over the tape edging on the fins, so I decided to try something that I have wanted to for a while. I used Monokote to cover the rocket. Having some experience covering RC planes, this was fairly easy and I ended up with only a few slight wrinkles in the covering. This also saved me the time and effort of sealing the fins and priming the XROC. The finishing of this kit only took around an hour! I opted to pain the nose cone with a quick coat of fluorescent orange paint. The kit comes with an American flag sticker, but I decided not to use it with this rocket.
Construction Rating: 4 out of 5
Flight:
Wanting to make sure that I got more than a single flight out of this high performance kit, I decided to start at the low end of the recommended motors with a Estes E9-6. The kit has no mechanical motor retention device, but a quick wrap of masking tape held the motor snugly in place. A small handful of dog barf was used to protect the chute. The rocket leapt skyward to an impressive height on this motor with ejection just a little early as the rocket was still coasting when the ejection charge deployed the chute.
The second flight of the XROC Prototype nearly resulted in the loss of the rocket. (Don't listen to your rocket buddies when they goad you into flying a motor that seems too big at the time...) I loaded up an AeroTech SU F25-7W. I switched out the "Frankenchute" for a smaller homemade chute due to the breeze. I wanted to minimize the drift on the larger motor as here in San Diego, we launch on an island. (You can probably see where this is going...) The rocket vanished from the pad the instant the button was pushed. After an amazing boost, all of the half dozen trackers I had watching the flight lost track of it. The rocket was found afloat by boaters and returned to the launch area with the homemade chute stripped from the Kevlar shroud lines. I won't make the mistake of not using the Frankenchute again! The rocket came back a little soggy, but it should be flyable again after it dries out.
I might be persuaded to use the suggested G80 motor but not at an island launch! Based on the F powered flight, a mach breaking G powered flight is going to take a reasonably large recovery field.
Recovery:
It's a little tricky to fold the Frankenchute and 8 yards of shock cord into the airframe but with the supplied tips, it's possible. The chute itself is a little bulky for an airframe of the kit's size, but with the speeds at which it could be deployed, sturdiness is probably a good thing.
Flight Rating: 4 out of 5
Summary:
If you are looking for a build that can teach you some new, different building techniques and/or for a reasonably inexpensive mach buster, this is the kit for you.
Overall Rating: 4 out of 5
 |
 |