Beldar the Conehead
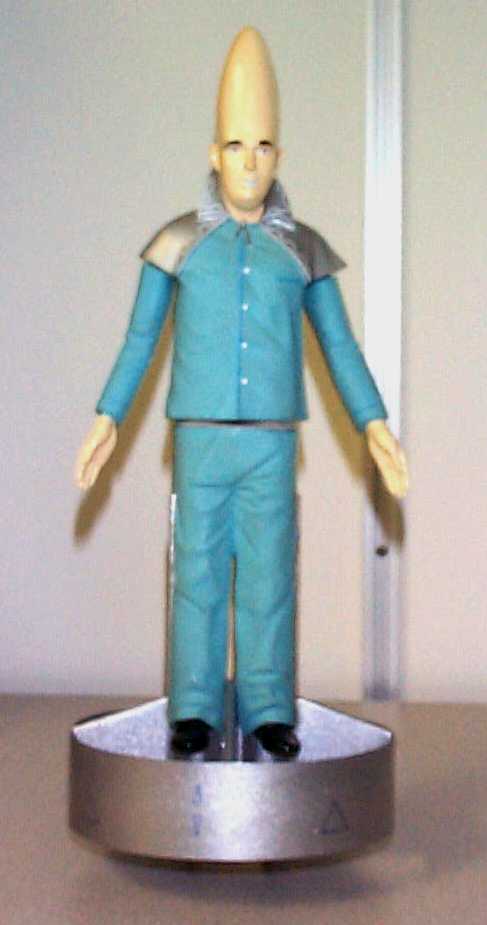 I will be the first to admit that I spent far too much time watching TV as a kid. Especially far too much SNL. When I found a collectable(?) figurine of Beldar, the Conehead parental unit from the planet Remulak, in a clearance bin at a local store I realized it was going to be my mission to return him to his home planet regardless of how many mass quantities of Newtons it would take!
The model flies well on an 18mm two motor cluster. At apogee twin parachutes are deployed.
While the plan presented here applies specifically to the Beldar figurine, the design can be adapted to fit most figurines of similar size and construction. Captain Picard, for example, should work well with his smooth boundary layer control head. A Klingon might suffer performance troubles due to the decidedly non-laminar flow over the forehead.
The figurine used should ideally be around 11" tall, have a parting line at the waist, and have legs that can accommodate a BT-20 sized tube. It should be made of a vinyl compound that is easily cut with an X-acto knife.
The "Beldar" I used is made by the Hamilton Gift company.
Construction begins with separating the Conehead at the waist. Just follow the glue line with a very sharp knife. Once separated, measure the length and spacing of the legs and determine if the plan dimensions need to be adjusted to fit your figure.
Next cut BT-20 sized holes in the feet of the lower section and, if required to fit the body tube in the legs, cut a slit in both the inseam and outseam of Beldar's pants. Once you are satisfied with the fit you can start to construct the booster.
 The business end of Beldar's booster. |
The booster section (or Remulakian Trans-Spatial Insertion Device if you prefer) is built in its entirety before attaching the legs. The ring fin is made of 1/32" plywood, bent on the inside of a 4" PVC pipe coupling. I cut the strip of ply 1 3/8" wide and a full length 24" long. Don't cut the strip to the final length until after it has been bent.
Glue a PVC endcap on one end of a section of scrap PVC pipe that has an inside diameter big enough for the strip to fit into. This will be used to steam the plywood in prior to bending it. Place the strip inside the pipe and then fill the pipe with boiling water. Remember to be careful, have adult supervision, and all appropriate safety gear. Let the wood soak for 5 minutes or so and then carefully pull the wood out of the tube. Form the strip into a ring by curling it and by placing it inside the 4" coupling inside diameter. Let the strip overlap itself. With any luck at all the springiness of the wood will make it conform to the coupling without additional clamping. Allow the strip to completely dry before removing it. If it isn't completely dry it will unroll.
The ends of the strip never get perfectly curved so trim them off. Adjust the diameter of the ring to match the plan (5" inside diameter on my model), mark, and cut the strip to size. Leave 1" of overlap for the glue joint. The ply will not absorb "white" glue well. I roughened up the surface and used epoxy. Once the glue has dried, sand, fill, and sand the joint on the outside of the ring. The inside edge can be left square.
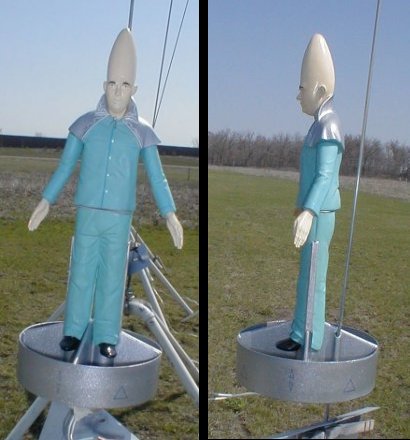 Photo by Alan Estenson, President of MASA |
The fins were cut from 1/8" hard balsa. Adjust the size as necessary to match your figurine. The larger fin goes between Beldar's legs. Glue a spacer block on each side of the fin at the centerline. Next glue the two BT-20 tubes to the spacers. Insure the tubes are correctly lined up! The ends of the tubes should be flush with the trailing edge of the fin. The shorter fins are then glued to the tubes. Finally glue the ring to the fin tips. I used epoxy for this. Align one fin up against the inside edge of the ring joint overlap. Install motor blocks or hooks into each of the tubes. If you use hooks then glue on a doubler cut from scrap body tube over the top half of the hook. This helps to keep the hook in place.I used a motor overhang of 3/8". Glue the launch lug to the large fin on what will become the "butt" side of the model. Position the lug as close to center as practical without the launch rod hitting Beldar's back when the torso is in place. Fillet everything.
It's a lot easier to paint the booster section now. Mask off the tubes were the legs will glue to them and then spray away using your favorite paint. I chose Rustoleum metallic silver since it matched the color of Beldar's cape well, and because I am attracted to shiny things.
Slide the leg half of Beldar over the two body tubes and glue them into position. The soles of his boots should be even with the top of the ring fin.
Super glue bonds the vinyl to the tube quite well. For a better appearance enlarge the slit on the outside of the legs to fit a 1/8" wide strip of balsa. When painted this makes the ugly slot look like a feature of the pants. Install a card stock bulkhead at the waistline. This stops ejection gas and debris from shooting down the pants and giving our Conehead a hot foot. Install a ¾" long piece of balsa between the tubes where they project out of the pants. Place it about ½" up from the waistline bulkhead. Adjust the thickness to hold the tubes parallel to each other. Use lots of glue here, as this will also be where the torso shock cord will attach.
Cut any vinyl on the underside of the torso waist joint away, leaving a 1/8" or so wide flange. Test fit the torso over the body tubes and on to the waist. He should slide on smoothly without much drag. Cut a bulkhead out of 3/16" heavy balsa or 1/8" ply. Leave extra material on the edge so you can custom fit it to your figure. Make two balsa couplers (plugs) that fit nicely into the BT-20 tubes. These plugs perform the same function as the shoulder on a normal nosecone. To correctly space the plugs, first insert them halfway into each tube. Then smear glue on the ends and set the bulkhead on top of them. You will find it easier to fit the bulkhead to the torso if you first make a pattern out of cardboard first and then transfer this shape to the wood.
Drill a small hole in the area indicated. Tie a knot on one end of the shock cord and pull the cord through the bulkhead from the far side, apply a dab of glue.
Set the bulkhead assembly into the body tubes, put glue on the outside edge and push the torso over the bulkhead and down to the waist. Be careful not to glue the waist and torso back together. Tie the free end of the shock cord around the body tube spacer block and glue in place.
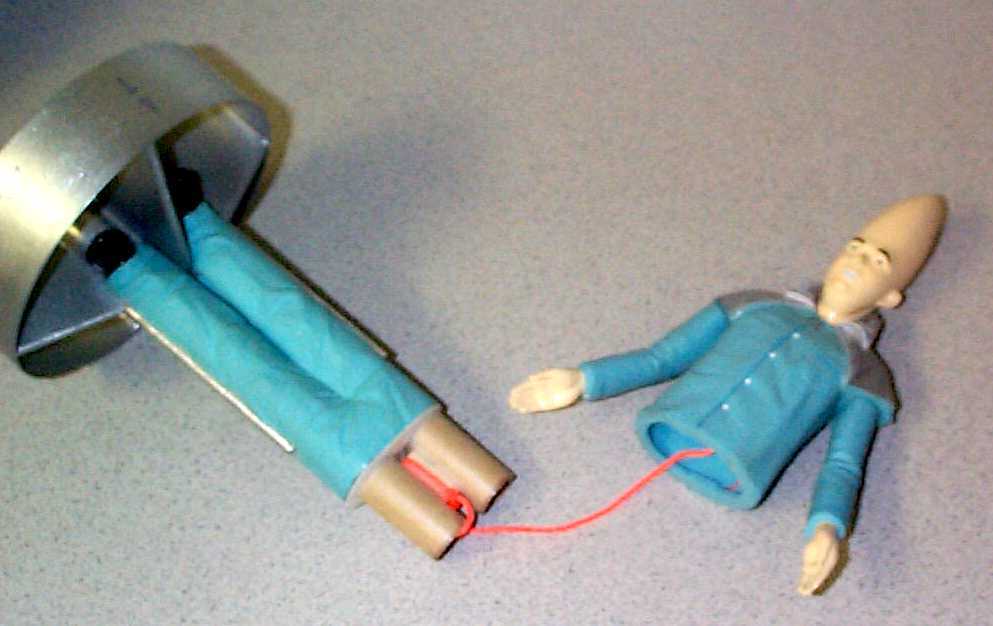 Detail shot with the torso separated. |
For the recovery system make up two Estes style 12" parachutes. Use a folded paper mount to attach the elastic shock cord to the inside of each tube. Remember the mount must not interfere with the bulkhead plugs. Tie a parachute to each of the free ends of the elastic cords.
Prepare Beldar for his homeward trip by placing adequate wadding into the body tubes. Fold and insert the parachutes and elastic cords. Fold the torso shock cord and place it between the two tubes and then slide the torso into pace until the plugs (couplers) are in the tubes. The torso should have enough of a friction fit that the model doesn't separate when lifted by the head (cone), but will pull apart with a slight tug.
Insert the motors into the legs. Prior to the first flight you will want to perform a swing test to ensure Beldar is stable. Add cone weight as necessary. Install and wire the igniters in the normal cluster fashion.
My model had a finished empty weight of 5.75 ounces. Beldar has flown well on two C6-5's. B motors could be used, but I would use a 4' launch rod just to be safe.
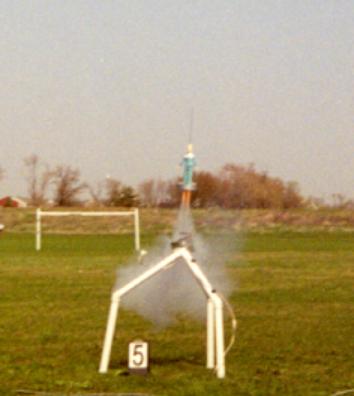 Twin flames accelerate our intrepid Conehead skyward at a recent MASA launch. Photo courtesy of Dave Fergus. |
Upon ignition of the dual tree derived cellulose pressure cased chemical decomposition thermal Newtonian thruster pods Beldar will leap off of the pad and streak skyward. If he reaches trans-space insertion velocity he will pop through a wormhole and be home in time for lunch. Otherwise he activates his ground return safety devices and floats back to earth. Remulak technology is notoriously unreliable.
Should only one of the two motors ignite, poor parental unit Beldar will take a sharp left and head to France, no doubt to drown his sorrows by consuming mass quantities of cylindrically packaged carbonated beverages.
In conclusion, Mr. Lithgow you are no Dan Aykroyd, Sir. Jane Curtin, how could you.


Photo by Meg Gerdes WHEEHAAAAAAA!
Sponsored Ads


 |
 |