Descon Dizzy Lizzy

Scratch - Dizzy Lizzy {Scratch}

Contributed by Chip Jenkins

Manufacturer: Scratch
(Contributed - by Chip Jenkins)
Pic
Dizzy Lizzy
- By Chip Jenkins 
Specifications:     Height: 20"    Weight: 4 to 5 oz. ?
Parts List
  • 1 body tube BT-55 x 13 1/2" long
  • 1 body tube BT-55 x 1 1/8" long
  • 1 engine pod BT-20 x 5 5/8" long
  • 2 thick centering rings BT-55 to BT-20
  • 1 cardboard centering ring BT-55 to BT-20 (with cutout for engine hook)
  • 1 Engine Block (18 mm)
  • 1 Engine Hook
  • 1 Launch Lug
  • 1 1/8"tk basswood fin stock
  • 1 NC-55 plastic nosecone
  • 1 Hardwood stock (a Popsicle stick will work)
  • 1 Decal Material
  • 1 Pattern Sheet
  • 1 Hinge Material (contact paper or a strip of paper with thin double sided tape)
  • 1 Elastic String
  • 1 "CAUTION" plastic streamer material x 6' long
  • 1 shock cord x 16" long

  • Download Fin Pattern Sheet and BT Marking Guide
  • Download Text Instructions
  • Download Decal .gif 
Assembly

1. Mark BT-20 engine pod 2 1/2" from one end. Make all measurements in this step from the same end. Slot 1/8" wide and insert engine hook. Glue the engine block in place behind the engine hook. Tape engine hook to engine pod with 1" masking tape approx. 1" from mark. This is now the rear of the engine pod. Slot 1 thick centering ring to allow to pass over engine hook. Glue slotted centering ring 1" from end of body tube (over engine hook). Glue other centering ring about 1/8" down from the top of the engine pod. Slide small (1 1/8" long) BT55 tube over lower centering ring to about 1/3 of its width. Glue the cardboard centering ring into the end of the BT-55 and BT-20 tubes just past the rear of the two tubes. The rear of the two tubes should be flush. Tie the shock cord to the front of the engine pod just behind the front centering ring and attach the plastic caution tape to the other end of the sock cord. The engine pod is now complete.

click for larger image
2. Cut the rudder, fin, and flap patterns from the pattern sheet. Lay out fin a flap patterns first and then the rudder patterns. Trace around each and cut 3 fins, 3 flaps, and 6 rudders from the 1/8" basswood sheet and sand as shown at left. 

Pattern Sheet will open in new window.

3. Cut out the tube marking guide for the fins and mark the 13 1/2" long BT-55 body tube. Extend the lines at least 4" long from one end of the body tube. This is now the rear of the body tube.  Tube marking guide will open in new window.

4. Tape the fins and flaps together as shown at right. Cut out a hinge from contact paper that is 1/2" x 3 1/2" long. Apply the hinge piece as shown. Cut away the excess. Repeat for the other 2 fin-flap assemblies. Remove the masking tape and bend the flap back against the fin to crease the hinge. The flap will stay bent slightly. To facilitate handling, replace the piece of masking tape to hold the assembly flat.

click for larger image

click for larger image
5. Glue fin assemblies in place. See picture to left for proper location on the main body tube. The flaps must be positioned correctly with respect to the engine pod. Repeat for the two other fin assemblies.
6. Glue rudders (one each side) to fins. Measure 1.5 inches from root edge of fin and align the back edge of the rudder to the back edge of the fin. When finished, the bottom view of the rocket should look like the picture to right.

click for larger image

 7. Glue the hardwood tabs to the flaps to hold the flaps straight with the engine pod inserted.
8. Thread the elastic thread through the eye of the needle, and double knot the other end of the thread. Hold one flap against its rudder and push the needle through the flap from the back. The needle point should come out through the hinge al least 1/16" from its rear edge. Draw the elastic thread through until the knot is seated against the flap. Apply a touch of glue to the knot side forcing just enough glue through the hole to appear on the hinge side. Allow this glue to set. Locate a point 1/2" up from the root edge and 1/8" back from the leading edge of the rudder. Push the needle through and draw the thread tight enough to pull the flap from a straight position to a full flap position. Apply glue as you did on the flap and hold the elastic thread in this position until the glue appears firmly set. Repeat this for the other two fins.
click for larger image

9. Glue the plastic nosecone to the front of the body tube.

10. The image at the beginning of this sheet (Dizzy Lizzy) is the main decal for the rocket. If you donít have a printer that will enable you to print white decals, you can paint a small section of the rocket white, measure the decal and tape off the area before painting black. Four of the six fins are to be painted silver. 
The remaining two fins (face to face) and the nose cone is to be painted gold.

11. Wrap the streamer around the engine pod, hold the three flaps straight and slide the engine pod in. You're ready to fly!


Pod Deployed - Aft View

Pod Installed

Flight Report

Here is the flight report section from the Dizzy Lizzy the first time it was launched.  I have launched it several more times with the same results.  Spins fast, pod and rocket land very near to each other.

10-15 mph wind has very little effect on the flight and recovery at all.  I sent it up again today (right before the Saturn V)

3/5/2000
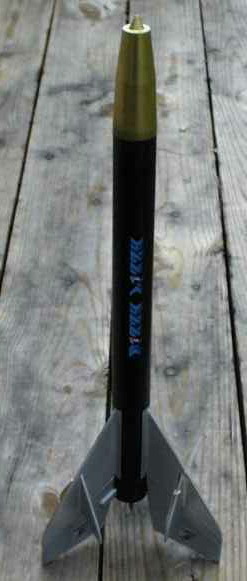
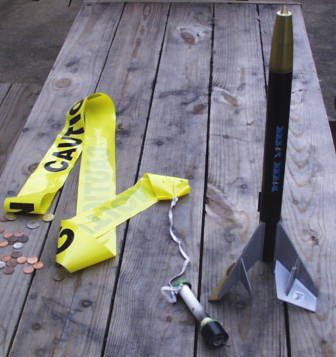
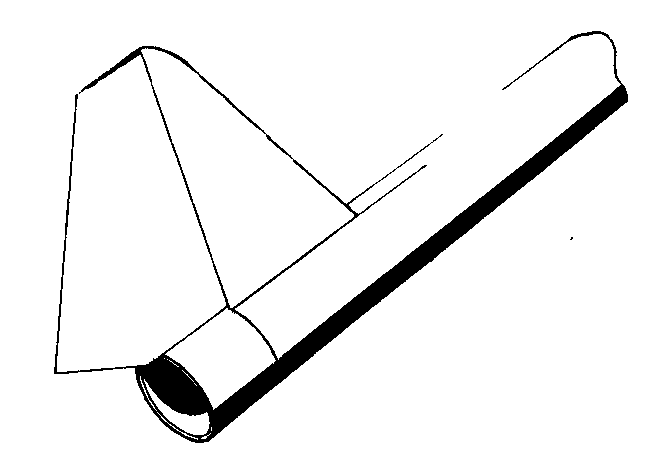
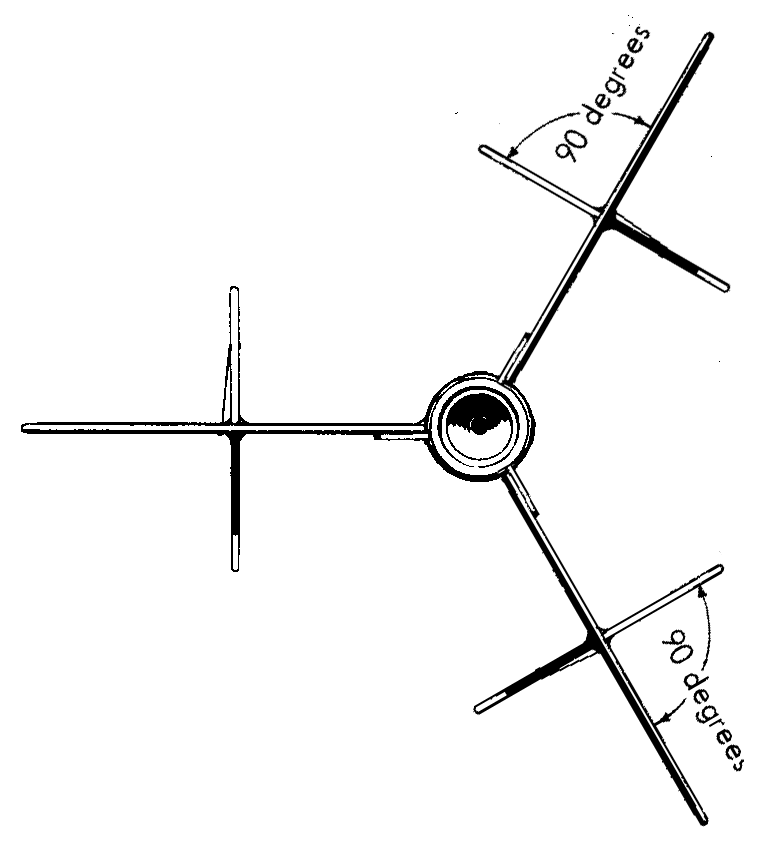
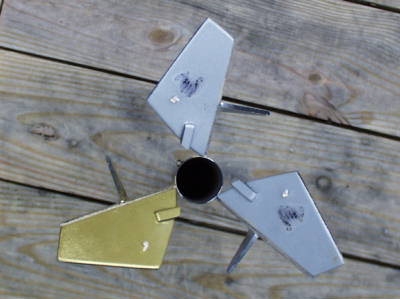
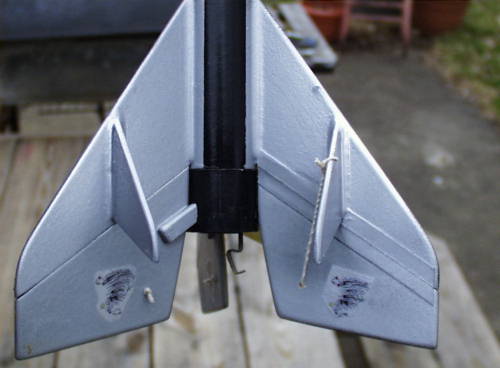
Dizzy Lizzy (Scratch)  C6-3
Good boost 325+/- feet,
Ejection just past apogee. Worked as designed (spins like a top!)
Hit grass moderately hard, no damage.  Engine pod returns with 6' streamer nearby.

It's a keeper.

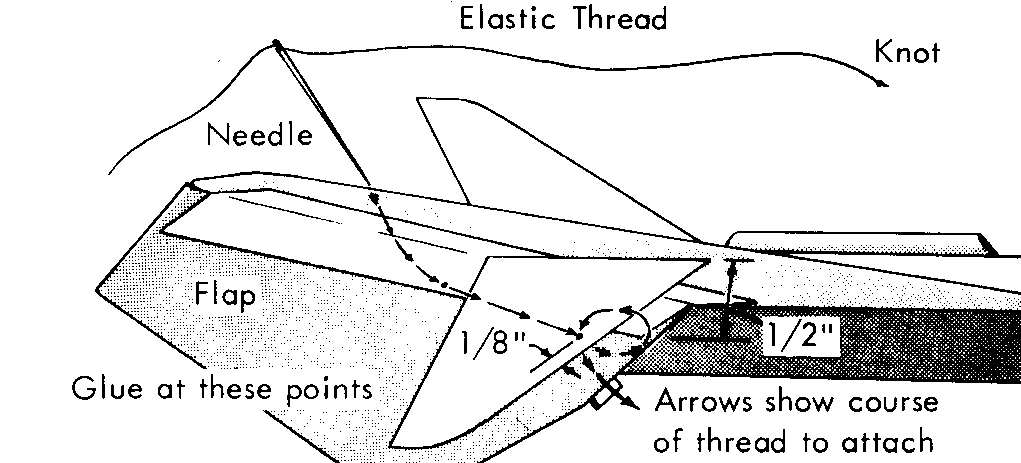
On a side note, I got some model aircraft hinges from a friend of mine. I am thinking about making a larger version of the Dizzy Lizzy with some sort of spring loaded nose/airframe connection to minimize the impact.  I thought I saw something like that on one of your designs.

Either that or I'll add a streamer that is secured to the end of the airframe that deploys when the pod kicks out.  It will still spin like a son of a gun and I would think that the streamer would slow the descent considerably.


comment Post a Comment