| Manufacturer: | Scratch |
 Film WORKS!

Background:
About six years ago, my daughters and I joined the local YMCA Indian Princess
program (Dad/daughter version of Indian Guides). Three years ago I decided to
become more involved in the program and volunteered to be the Longhouse Legend
Maker. The Legend Maker's duties are to keep a photographic record of the
various Longhouse activities throughout the year. I began ordering
prints/slides and digital images from Seattle FilmWorks (SFW) to aid in my
duties. Each time I sent in a roll for processing, SFW sent me at least one new
roll of film and sometimes two for every one roll. Well, over the course of two
years, I had collected quite a few unused rolls stacked up on my desk at
work. I was just about to FINALLY throw them all out last week
but...Hmmm....DESCON 8 project!
 Materials:
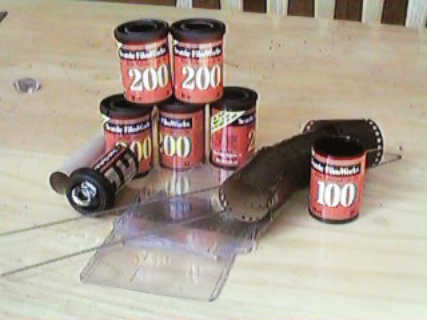
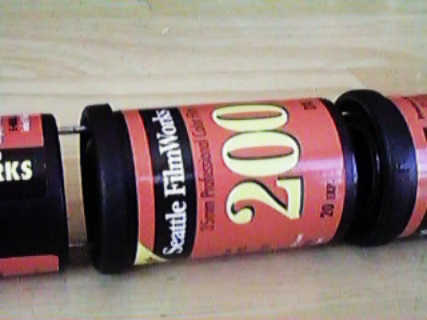
(6) Empty Seattle FilmWorks film cans
(1) Roll of Seattle FilmWorks film
(3) Baseball card protectors
(1) 3-1/4" BT-20
(2) BT-20/50 Heavy Duty centering rings
(1) BT-20 Engine Block
(1) Screw eye
(1) Small washer
(1) Approx. 21" piece piano wire
(1) 36" piece of 1/4" elastic
Exacto Knife, Sandpaper, Scotch tape, Super Glue, 90 minute Epoxy and Wood glue
Construction:
 Cut out or drill 3/4" hole in each film can lid and can
bottom. I had originally planned on using a BT-20 through the entire body for
support but I decided, in keeping with the theme of the contest, to use piano
wire instead so that the only real rocket parts would be the motor mount
assembly.
Cut out or drill 3/4" hole in each film can lid and can
bottom. I had originally planned on using a BT-20 through the entire body for
support but I decided, in keeping with the theme of the contest, to use piano
wire instead so that the only real rocket parts would be the motor mount
assembly.
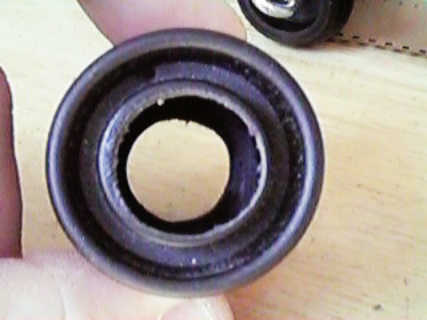
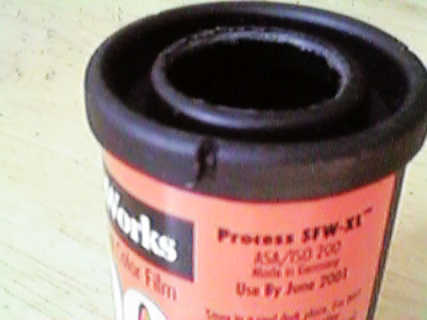
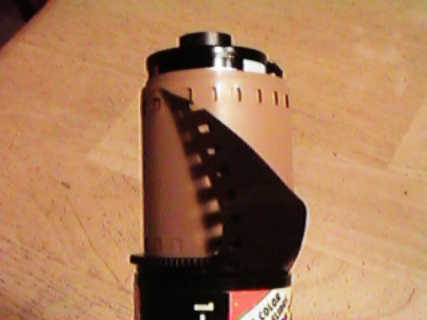
 The roll of film serves as the nose cone with a film can lid attached to it
using a screw eye and a small washer. The plastic was soft so no drilling was
required. These parts were found in the "MISC" bin on my workbench. I
sanded some of the 'shoulder' (raised surface) of this lid to make sure that
the nose cone would come off at ejection.
The roll of film serves as the nose cone with a film can lid attached to it
using a screw eye and a small washer. The plastic was soft so no drilling was
required. These parts were found in the "MISC" bin on my workbench. I
sanded some of the 'shoulder' (raised surface) of this lid to make sure that
the nose cone would come off at ejection.
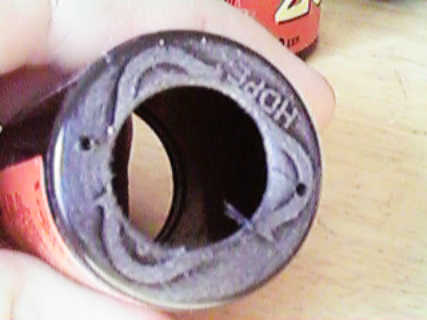 The bottom of each film can is roughed up with sandpaper to
improve epoxy adhesion. I drilled two holes in the film can lids and bottoms to
allow for insertion of the piano wire.
The bottom of each film can is roughed up with sandpaper to
improve epoxy adhesion. I drilled two holes in the film can lids and bottoms to
allow for insertion of the piano wire.
 Slots are cut in the bottom two film can lids to serve as a
guide for the fins.
Slots are cut in the bottom two film can lids to serve as a
guide for the fins.
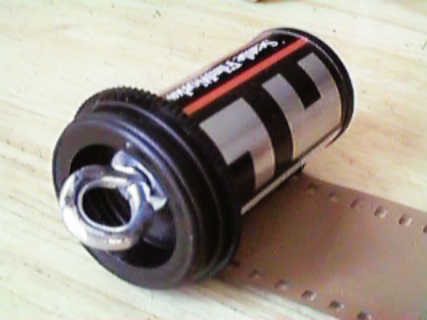
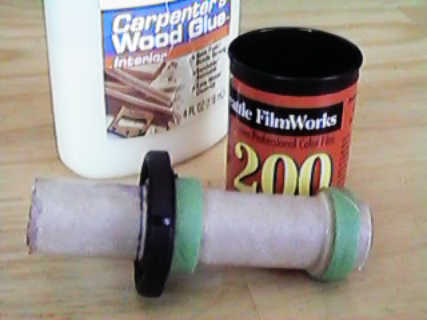 The motor mount is made so that the two heavy duty centering rings would hold
the MMT in place within the bottom film can. This is the only place that I used
the wood glue. I think that something could have been rigged to avoid
using a standard MTT but I chose the safe route.
The motor mount is made so that the two heavy duty centering rings would hold
the MMT in place within the bottom film can. This is the only place that I used
the wood glue. I think that something could have been rigged to avoid
using a standard MTT but I chose the safe route.
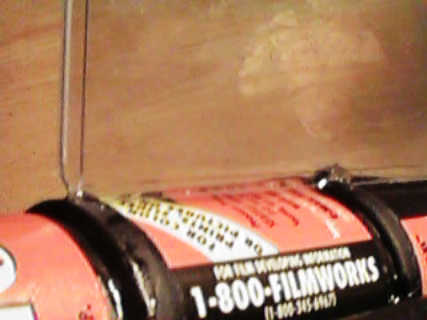
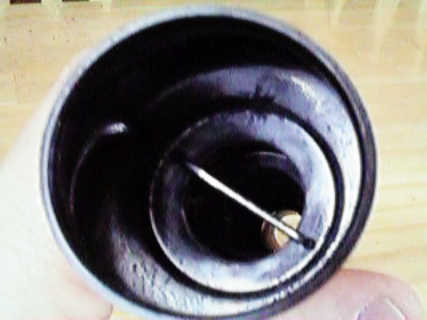 The piano wire is inserted through the top of the first film can
and acts as the shock cord mount. The other end of the shock cord is attached
to the screw eye on the nose cone.
The piano wire is inserted through the top of the first film can
and acts as the shock cord mount. The other end of the shock cord is attached
to the screw eye on the nose cone.
 The piano wire is the guide for aligning the film cans. It also adds stability
and strength to the entire airframe.
The piano wire is the guide for aligning the film cans. It also adds stability
and strength to the entire airframe.
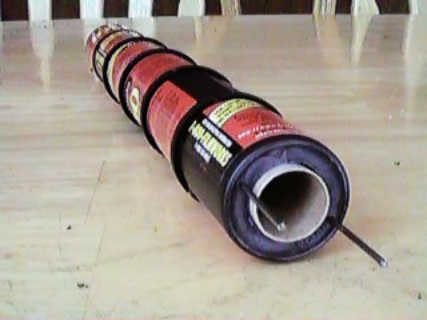 All airframe parts (film cans) glued together with 90 minute
epoxy. To make sure that there would be no pressure loss at ejection, I went
back and applied epoxy to each joint to make sure that the airframe was
completely sealed. The ends of the piano wire are cut flush with the motor
mount.
All airframe parts (film cans) glued together with 90 minute
epoxy. To make sure that there would be no pressure loss at ejection, I went
back and applied epoxy to each joint to make sure that the airframe was
completely sealed. The ends of the piano wire are cut flush with the motor
mount.
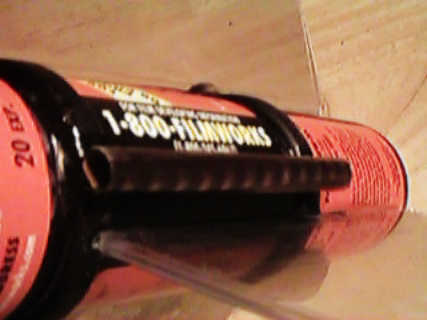 The launch lug is constructed from a 2-3/8" strip of film that is rolled
and scotch taped to fit a 1/8" launch rod. The lug is super glued in place
and reinforced with 90 minute epoxy.
The launch lug is constructed from a 2-3/8" strip of film that is rolled
and scotch taped to fit a 1/8" launch rod. The lug is super glued in place
and reinforced with 90 minute epoxy.
 For fins I originally thought I would use some old AOL CD's that
were sitting right next to the film on my desk but decided that it would be
great if I could stick with the 'film' theme. How do I include something light
weight that could hold pictures? Ah-ha! A couple of my son's baseball
card protectors would do the trick! These are super glued in place,
using the slots I had cut in the bottom two film can lids, and then reinforced
with the 90 minute epoxy.
For fins I originally thought I would use some old AOL CD's that
were sitting right next to the film on my desk but decided that it would be
great if I could stick with the 'film' theme. How do I include something light
weight that could hold pictures? Ah-ha! A couple of my son's baseball
card protectors would do the trick! These are super glued in place,
using the slots I had cut in the bottom two film can lids, and then reinforced
with the 90 minute epoxy.
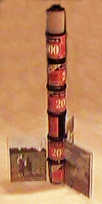
 I chose six pictures from some memorable rocketry moments,
printed them out, trimmed them to size and inserted them into the fins.
(I'm still looking for some of those old Indian Princess pictures to
use...) Voila! Sure, for a rocket...Film WORKS! Now my desk is clear of
unused film cans AND I have a conversation piece that doubles as a photo frame.
I chose six pictures from some memorable rocketry moments,
printed them out, trimmed them to size and inserted them into the fins.
(I'm still looking for some of those old Indian Princess pictures to
use...) Voila! Sure, for a rocket...Film WORKS! Now my desk is clear of
unused film cans AND I have a conversation piece that doubles as a photo frame.
Computer Drawings/Simulations:
 Scale drawing made in
CorelDraw.
Scale drawing made in
CorelDraw.
 I used VCP software for locating the approximate
Center of Pressure. The weight and Center of Gravity are actual measurements
taken from the completed 'vehicle' with an Estes C6-5 loaded.
I used VCP software for locating the approximate
Center of Pressure. The weight and Center of Gravity are actual measurements
taken from the completed 'vehicle' with an Estes C6-5 loaded.
 wRASP simulation using
an Estes B6 motor. A little low and slow to give this motor a try, at least for
the first launch. Probably need to use a
wRASP simulation using
an Estes B6 motor. A little low and slow to give this motor a try, at least for
the first launch. Probably need to use a faster ASA higher
impulse.
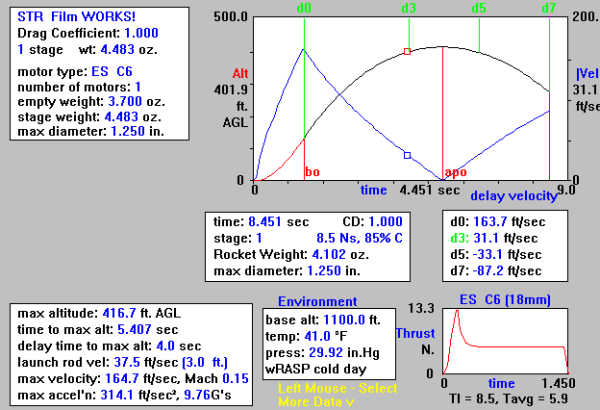 wRASP simulation using an
Estes C6 motor. The motor of choice for the Film WORKS! is probably the C6-3.
Chances are that it will not reach 400 feet, with the high amount of drag this
shape will generate, and I'd rather see ejection earlier than later.
wRASP simulation using an
Estes C6 motor. The motor of choice for the Film WORKS! is probably the C6-3.
Chances are that it will not reach 400 feet, with the high amount of drag this
shape will generate, and I'd rather see ejection earlier than later.
 Recovery System:
My plan is to use the film as a streamer for the recovery system. The film will
be wound in the opposite direction that it was loaded in the cartridge on the
outside of the film cartridge. The tip of the film will be held
in place by the film can lid. I think that between the film streamer and the
oversized fins, the odd-roc will slow down enough for recovery without
breakage. No typical rocket parts here!
| Flight Log: | |
|---|---|
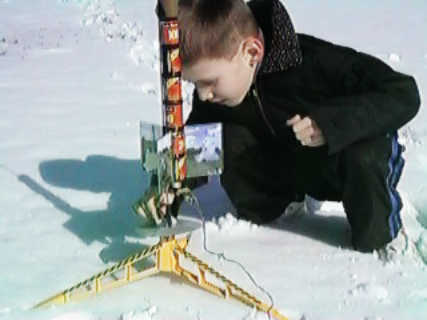
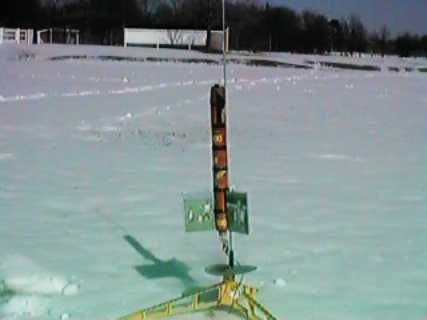
| Date: March 10, 2001 Time: 2:00pm Location: Middle School, Hudson, OH Conditions: Mostly sunny Temperature: 35° F Winds: 10-15mph S-SW Pretty chilly for a launch but Adam and I were determined to put this bird in the air. Flight #1: Motor: Estes C6-3 Adam manned the flight controls as I prepared to photograph the event. 3-2-1-LAUNCH! Amazingly straight and stable flight to between 300-400 feet. Ejection near apogee and the film did unravel for recovery slow down. Landed about 30-35 yards from the pad. A little snow in the tube but no damage!! Flight #2 Motor: Estes C6-3 Adam wondered if we could "burn the snow" this time so he positioned his side project. 3-2-1-LAUNCH! Another straight flight to nearly the same altitude with ejection right on the money. The wind picked up and carried the rocket away from the softer snow. Landed hard about 25 yards away and broke off a fin. Minor damage that is easily repaired. I was unable to get any more flights in before the end of DESCON 8 but hope to at the next MTMA club launch. |
  |
 |
 |