| Manufacturer: | Scratch |
 Generations is the
scratch rocket that I built recently. It was my first scratch rocket and also
my first rocket motor mounts bigger than 24mm. I really wanted some punch so I
also made it a cluster with 2 - 29mm motor mounts.
Generations is the
scratch rocket that I built recently. It was my first scratch rocket and also
my first rocket motor mounts bigger than 24mm. I really wanted some punch so I
also made it a cluster with 2 - 29mm motor mounts.
I happened to be in Oklahoma City when I found the tube that I wanted to start with. My dad has a lot of shop equipment so I figured that I'd start the hard part there. I grabbed some scrap 1/4 plywood and cut it into three equal squares about 5 inches on each side. I screwed them together and then used a circle cutter to cut the 3" centering rings at the same time. I sanded the edges of the centering rings to where they were a perfect fit into the body tube. I then measured across the widest part of the centering rings and made an X on the rings. I then made two marks on one of the lines at .75" from the center of the centering ring. I used this as the starting point for the hole saw. Using a 1.25" hole saw I cut the two holes for the motor tubes. I like the Great Plane's motor tubes that I got because they have an OD of 1.25". This made it real easy for me. I also used my dad's equipment to cut my motor tube in half. I used the entire 36" tube to make my motor tubes so I have 2 18" motor tubes.
Next I packed it all in the car and took it home.
 Fins
Fins
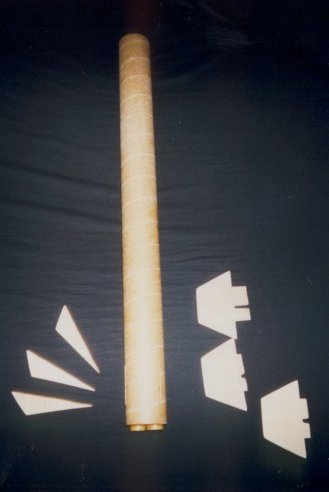
Next I used the remaining wood to cut out the fins. I screwed together three
sheets of plywood and drew this fin pattern on the top sheet. I used my jig saw
to cut out the fins and the little sanding wheel on it to sand the fins.
I was going to put on the fins just like they are on the pattern. I was just going to move the small fins forward about 1 inch but my son suggested and talked me into flipping the small fin over and then moving it up. I think it worked out real well.
That's the reason I named it Generations.... My dad helped me with the centering rings, and my son helped me decide on the fins.
Assembly
The next thing I did was cut fin slots in the body. Once that was done I
epoxied all of the motor mount parts. Unfortunately I was so excited when it
was going together that I forgot to get a picture of the motor mount before I
glued it into the body tube.
 Since the motor tubes where
18" I used three centering rings. One at the top, one at three inches from
aft, and the last one a half inch from the end. Since I had two holes in each
of the centering rings I used the holes in the aft one and added T-Nuts. In the
top one I looped steel cable from a picture hanging kit. I crimped a connector
onto it and then expoxied the holes shut. On the top of the cable I put in a
bigger loop that had a 2-inch piece of balsa wood in it. I was hoping that this
would help from zippering the rocket by keeping the cable and elastic from
hitting the side of the tube.
Since the motor tubes where
18" I used three centering rings. One at the top, one at three inches from
aft, and the last one a half inch from the end. Since I had two holes in each
of the centering rings I used the holes in the aft one and added T-Nuts. In the
top one I looped steel cable from a picture hanging kit. I crimped a connector
onto it and then expoxied the holes shut. On the top of the cable I put in a
bigger loop that had a 2-inch piece of balsa wood in it. I was hoping that this
would help from zippering the rocket by keeping the cable and elastic from
hitting the side of the tube.
I epoxied the motor mount into the tube and then used Elmer's wood filler to fill the seams of the tube. Once the motor mount set up I numbered the slots and then fins from one to three. I notched the fin tabs at the same level as the middle centering ring. Since the motor tube was not exactly in center I had to trim each fin tab so it would reach all the way to the motor tube.
The next step was the easy part. I glued on the fins using 30 Min epoxy. I wanted to make sure that it was super strong. I used the same type epoxy for my fin fillets. I did not make the upper fins TTW because they would not ever hit the ground with any kind of speed. Once the fins were set it was just tying the elastic to the wire cable and to the nose cone, and adding the two chutes from my Bomarc kit. I also pulled out my jig saw and cut what I call the peanut. I use this for my motor retention. Since there are two motors in the rocket I did not want to use tape to keep the motors in. There is a better picture at the end of the page that shows the peanut.
 Finishing
The finishing was the most tedious part. I covered the fins with sanding sealer
to get them ready for paint. I sanded it smooth and primed the rocket with
light gray primer. While I was light sanding, with 400 grit, I saw that the
fins had too many little cracks in them. I filled all of the little flaws with
Elmer's Filler and let it set. I sanded that smooth and then shot another coat
of primer on it. When I finished sanding that coat I was happy with the fins
and let it all dry for 24 hours. I then shot more primer and sanded it again. I
let that sit for a couple of days and shot it again. I ran out of primer about
half way through the rocket and grabbed another can. It was a DARK gray primer
and caused problems. I ended up sanding most of it off to get the body smooth
again and then shot it with a final coat of primer. After sanding it with 400
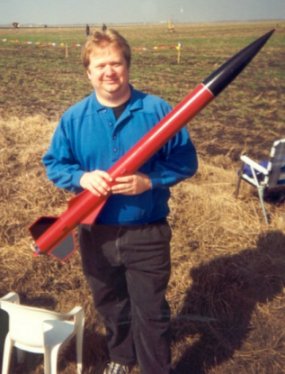
grit I finally for you shoot on some real paint. I gave the body about 3 coats
of red and then made the nose cone black. The black parts that you see on the
fins were actually painted on with a paint brush. It was hard keeping the lines
but I got it done.
I finished it off with a clear coat. I buffed this up and it made for a hard solid surface.
Launch day
I finally got to launch it on 2/12/00 at NTHP XVI. I installed the two F25-9s
in the rocket and sent it up. It flew great..... There was no corkscrewing or
any other type of unstable actions. It deployed the chutes right at apogee and
floated to a great landing. I figure that it hit about 1,800'. Once we saw it
hit the ground my wife said "OK, time for bigger engines!". We walked
out and picked it up and there was NO damage to it at all. I could not even
find a scratch in the paint.
I pulled out the motors and popped in a pair of G40-10s. I installed the Fire-In-the-Hole© igniters and got it ready for the next launch. The LSO made me put more tape on the nose cone because of the bigger motors but we set it up on the pad after that. Thatís where I learned a great lesson about the three position arming switch that DARS uses. After they had to pass my rocket over because of a launch failure I when out and put the arming switch in the correct place. I then got to wait for the hobby pads to clear, the yellow HP pads to clear, then they got back to my rocket. Again the launch went great. Both motors lit up and it screamed off the pad. I think this time it hit about 3000'. At apogee it deployed the cutes and landed a little further from where it had hit before.
I sim'd this rocket with RockSim and added the nose weight so I can put bigger motors into it. If you want a copy of the .rkt file please click here. If all goes well I may get a chance to launch it in September during the NTHP XVII. We will pop in a couple of H's into it and really see it go. I think that I'll add my Radio Shack alarm to it when it goes high power. I really want to get it back so I can send it up a few more times. If you want more info about NTHP XXVII (North Texas High Power 17) please drop by the DARS web site at HTTP://WWW.DARS.Org. It's going to be a very big launch with a ceiling around 25,000'. There is also a 1,600 acre recovery area with very, very few trees.

Here is the business end of the rocket. You can see the 'peanut' with this view.
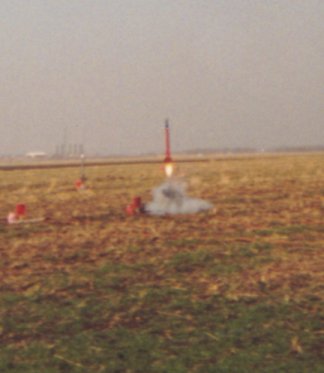
This is the only launch shot thatís not 'real' blurry. I don't have a
camera with a zoom on it either
so it looks like we are real far from it. Next time I'll get someone else to
take the pictures for me.

This is how I found it after the second launch. Again there was no damage to the rocket.
 |
 |