| Manufacturer: | Scratch |
KidflaSh Spring
Pad
by Chris Kiekens
After destroying several Estes pads, and having several others fall over with bigger rockets, I came to the conclusion that I needed something bigger, stronger, heavier... The original concept for this pad was created in 3D Max. I have yet to match the pretty colors that were on the original design... oh well.
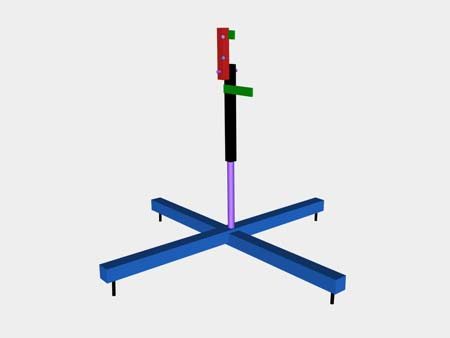
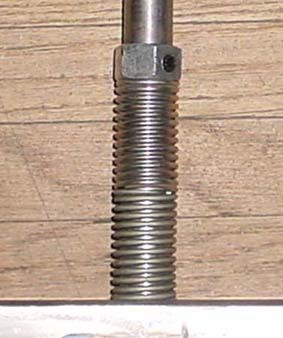
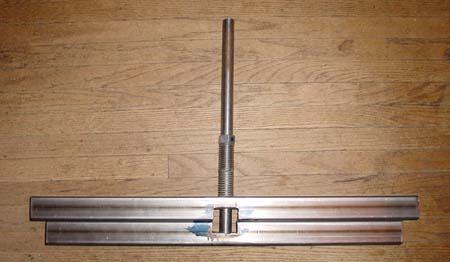
I definitely wanted a pad that had the basic functionality of the Estes pad, as in it needed to be able to angle, and swivel easily. This was accomplished as you see, the swivel sits atop the base, and is secured by a 1/4" bolt. It was formed from 1" square steel tube, approx. 16 gauge. Loosening the bolt allows it to turn freely 360 degrees, and with a quick turn, attaches it firmly to the solid steel rod(3/4") on the base. Holes were drilled on the corners of the square tube, and nuts welded on the holes to allow the rod to be captured on the opposite angle to hold it securely. Both steel, and hard rubber washers were set between the 1" square tubes, so as to allow them to have movement, but also allow them to be tightened, and movement stopped easily.
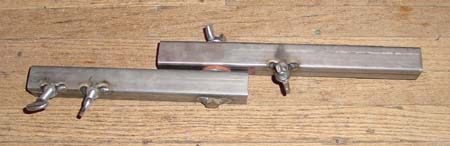
I also wanted the legs to lock into place at 90 degree angles to ensure it would not become unstable at an inopportune moment. This turned out to be easier than I suspected, with the use of a couple of heavy duty springs, and a lock collar around the Steel rod on the base. The two steel legs (1.5" square steel tube) were notched at the center to cause them to lock into place as the spring applied pressure.
The legs were formed from square steel tube, approx. 10 gauge, the base is 24" wide. A 3/4" steel rod was welded to the bottom leg, and passed through a hole in the upper leg. The upper leg is attached via the springs and lock collar. I don't expect it to fall apart in the near future.
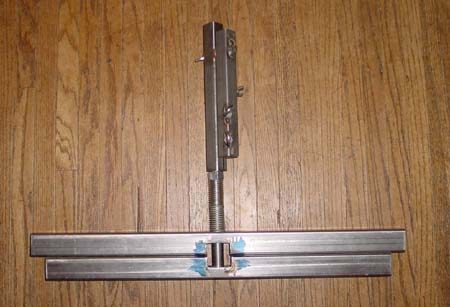
The lock collar serves two purposes, to lock the legs together, as well as provide a stop for the swivel rod holder.

When the base is folded open, and the spring engages the legs, the base is very solid, and stable. It is 14" high without the swivel attached.
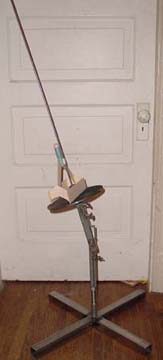
This pad may look to be overkill for a model rocket, but after several CATOs with Estes D engines, I feel better safe than sorry. If I can get away with it, most of my rockets are now built with at a 1/4" Launch lugs. This pad will accommodate rod sizes from 1/8" to 1/2", and I have launched small rockets like this Flying Jenny(on an A), to what is currently my largest, a LOC IV (on a G75), without any issues at all.
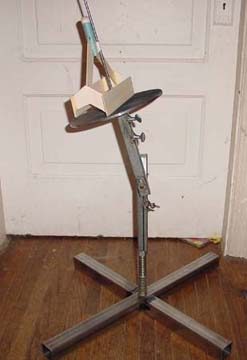
Launch angles are very easy to change, as well as very easy to secure, as a result of using both metal, and hard rubber washers between the 1" steel tubes used to create the swivel.
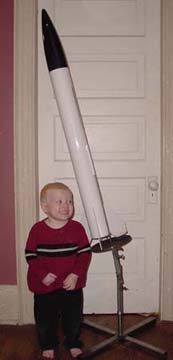
I may lose more rockets to Jake than the "Rocket gods", but I have no fear of him wrecking this pad. Due to the height of the pad, I also have no fear of Jake or myself losing an eye to the rod either. The pad stands 21 1/2" without a rod, and the shortest rod I currently have is 48" long, with 3 inches of rod lost to the pad to secure it, the top of a 4' rod is still well over 5 feet off the ground, well above imminent eye damage.
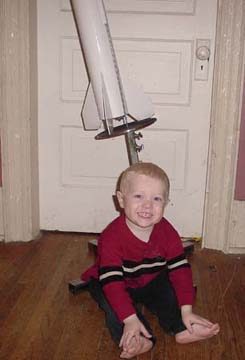
The angelic smile on this beautiful boy's face pretty much sums up my feelings for how this project turned out. I am pretty happy with this pad.
Parts:
- 2-24" 1.5" square steel tubes $4.00
- 1-3/4" 14" long round steel bar$1.50
- 1-8" 1" square steel tube$.85
- 1-10" 1" square steel tube$1.00
- 2- heavy springs (3/4" ID)$3.00
- 1-3/4" ID Lock collar$.35
- 3-1/4"x2" long thumb screws$.75
- 1-2 1/2 1/4" carriage bolt$.40
- 1-steel washer$.05
- 1-rubber washer$.05
- 1-9" round steel blast plate Free(scrap)
- Total investment $11.85
- Time time invested-4 hours
- Making your own Bullet Proof pad-PRICELESS
 |
 |