| Manufacturer: | Scratch |
Space Spud
Background
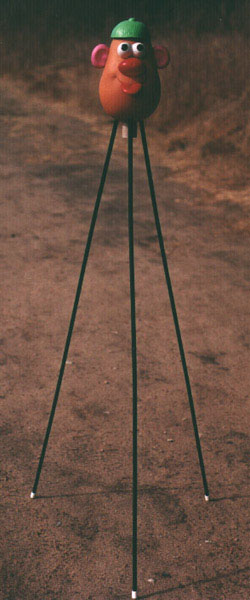
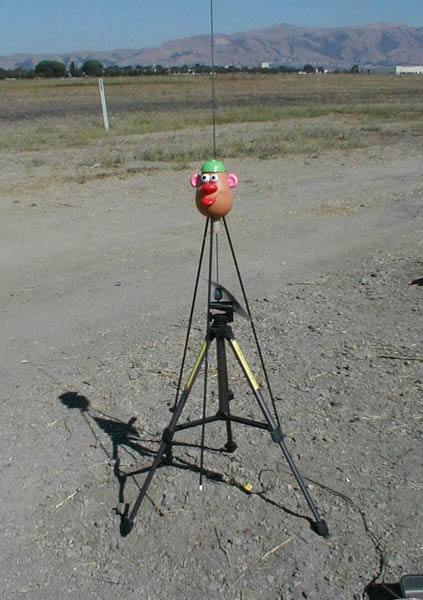
Space Spud is a rocket-propelled version of the Mr. Potato Head kid's toy. I spotted it at a garage sale for 50 cents. The package says that it is suitable for children aged 2 and up, so I guess I'm covered. The rocket consists of the Mr. Potato Head body, which contains the engine assembly and recovery system, standing on long fiberglass legs. At apogee, engine ejection deploys the 18" nylon parachute by blowing off Mr. Potato Head's hat.
Flight Characteristics
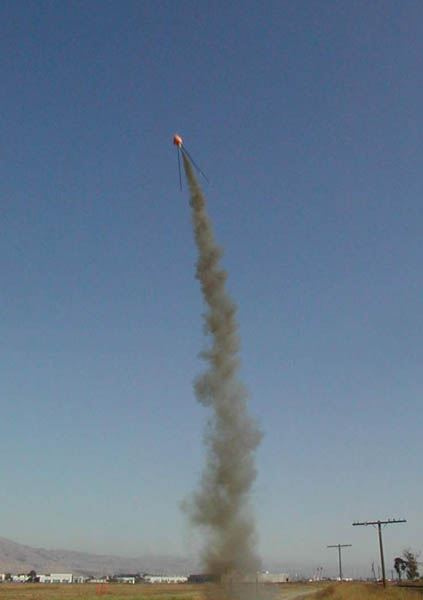
Space Spud is somewhat heavy, drag-limited, and over-stable, giving it a very low-and-slow behavior. On an E15 engine, it flies to about 300 feet, or about half that on a D12. It has been flown several dozen times at BAYNAR, a NAR section in Cupertino California that is very well attended by kids. Space Spud is always a crowd-pleaser with the younguns, both because of it's appearance, and due to the slow, loud and smoky flight profile.
Construction
The following sketch (sorry, it's not particularly to scale) shows the general layout of the Space Spud construction. Only two of the three legs are shown, for clarity.
Parts List
- one Mr. Potato Head child's toy, by Fisher Price
- one section of Estes BT-60 tube, 4" long
- one section of Estes BT-50 tube, 4.5" long
- three Estes BT50-BT60 centering rings
- one engine block, 24mm
- one launch lug, 1/8" x 2"
- one Estes BT-60 tube coupler
- three fiberglass tubes, 1/4" in diameter, 32" long (I used Glaspar A20 spars from my kite supplies)
- three vinyl caps for 1/4" rods (used for "feet")
- one 24" length of 3/16" sewing elastic for shock cord
- one 18" thin mil nylon parachute
- 5 minute epoxy glue, yellow glue, hot-melt glue, CA glue
Preparing Mr. Potato Head
First, cut holes in the top and bottom of the main body of Mr. Potato Head to accommodate the BT-50 protruding from the bottom and the BT-60 exiting the top. These holes should be placed along the centerline of the toy. I used a hot knife to cut rough openings slightly smaller that the final size, then enlarged them to the exact dimensions with a Dremel tool fitted with sanding drum attachment.
Drill three 1/4" holes in the base of Mr. Potato head to accommodate the legs. These should be equally spaced around the base, and centered at one inch from the center of the hole that you carved for the BT-50 tube.
The facial features, eyes, ears, etc., need to be permanently attached to keep them from falling off during flight. All of these accessories are molded from a rubbery plastic. I tried silicon adhesive, but ultimately found that hot-melt glue was the only thing that would stick. Put the facial features in place and then glue them with hot-melt from the inside. You'll omit the feet that came with the toy. I chose to leave off the arms, as well, to give my Space Spud a more aerodynamic appearance (well, sort of).
Mr. Potato Head's hat will serve as the nose cone, and will need to slide off under pressure from the ejection charge. Attach the BT-60 tube coupler to the inside of the hat for this purpose, using hot-melt glue.
To allow the launch rod to pass through, you will need to cut a notch in the top of the Mr. Potato Head body next to the hole that you cut for the BT-60 tube. The bottom of the Mr. Potato Head already has a slot, intended for the feet on the original toy, which will serve this purpose. Cut a corresponding hole in the hat.
Building the Motor Subassembly
All of the motor assembly is done with yellow carpenters' glue, except as noted.
Mount the three centering rings on the end on the BT-50 tube at 1/8", 3/8" and 5/8" from one end. Filet well for strength. Install the BT-50 assembly into the BT-60 so the the aft centering ring is recessed 1/16 from the aft end of the BT-60. Filet the exterior surface of the aft centering ring with epoxy. Mount the engine block in the BT-50 to allow the engine to protrude 1/4". Add the launch lug to the outside of the BT-60 close to the aft end of the tube.
Final Assembly
Install the motor subassembly in the prepared Mr. Potato Head so the the BT-60 just barely protrudes out the top of the head, and the launch lug is aligned with the holes that cut earlier. Attach the motor assembly with epoxy, and filet thoroughly, inside and out. Install the legs, passing them through the holes in the base of the head to rest against the aft centering ring. Filet all joints thoroughly with epoxy.
Attach the shock cord to both the interior of the BT-60 and the BT-60 tube coupler that you glued into the hat, using the traditional Estes three-fold style attachment. Tie a loop a few inches from the hat, and attach the parachute using a snap swivel. Add the protective vinyl feet to the tips of the legs, securing with CA adhesive.
Place the back on the Mr. Potato Head, attaching with a spot or two CA glue.
Preparation for Flight
The space for the recovery system is rather cramped. The rocket is heavy enough that it really needs an 18" chute, but I thought the Estes style "garbage bag and thread" style chute, although smaller when packed, might shred under the load, so I used a Top Flight thin mil nylon chute. Both chute and recovery wadding need to be installed carefully to fit them in the available space.
Slide the hat/coupler onto the forward tube, and align the hole in the hat with the notch in the Mr. Potato Head body to allow the launch rod to pass through.
This rocket likes a short ejection delay, and has flown many times on a steady diet of D12-3 and E15-4 motors. It ultimately met its demise when I flew it on a reloadable Aerotech E11-"3" motor, which really turned out to have a delay of about six seconds or so. The asphalt parking lot on which it landed was most unforgiving, and alas, Space Spud is no more.
The Future of Space Spud Technology
One of these days I intend to build a high-power upscale version of Space Spud (I'm thinking fiberglass and expanding foam construction here, big enough to accommodate an K motor or so), but I just haven't gotten around to it.
 |
 |