DG&A High Power Rocketry Mini-Armageddon
DG&A High Power Rocketry - Mini-Armageddon {Kit}
Contributed by Randy Ashley
| Construction Rating: | starstarstarstarstar |
| Flight Rating: | starstarstarstarstar |
| Overall Rating: | starstarstarstarstar |
| Manufacturer: | DG&A High Power Rocketry |
 Brief:
The Mini-Armageddon as built is a single stage, single deployment (parachute), mid power rocket that can take you through HPR level 1.
Construction:
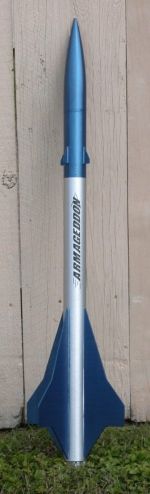
The Mini-Armageddon has a single body tube 2.1 inches in diameter, a short 6 inch payload bay, 4 VERY cool fins and 4 canard fins on the payload bay. The motor mount is 29mm and has 2 centering rings. The kit includes a Kevlar® shock cord leading out of the body tube to a nylon shock cord, and a 30" parachute. The kit also includes a plastic nose cone.
Having built many low, mid and high power rockets the assembly was a snap. But more importantly, my wife also built a Mini-Armageddon and she has only built one kit before but had no problems with the kit. Assembly is very straightforward. I started with the motor mount. I usually change the kits that I build slightly. On this one I built the motor mount as per the instructions. I used 15 minute epoxy for all glue joints on this kit. Danny's (owner of DG&A Rocketry) instructions followed my usual procedure of putting in a couple of blind nuts in the rear centering ring for positive motor retention. The one change I did make to the motor mount is that I used my own Kevlar® shock cord which is a little larger in diameter than the cord supplied in the kit. I ran it through a hole in the upper centering ring as instructed but instead of just knotting it below the ring, I tied it around the motor mount, and knotted it below the centering ring. I should also note that I used about 15 feet of shock cord rather than the supplied 6 feet. I like to give the nose cone/payload assembly plenty of time to slow down before reaching the end of the shock cord. After completing the motor mount, I dry fitted it into the body tube and cut my fin slots. I then tacked the fins to the motor mount. After this, I cut the back of the body tube below each fin so that I could remove the motor mount/fin can assembly. This allowed me to finish gluing the fins to the motor mount and apply fillets to both sided of each fin where they meet the motor mount. I followed by gluing the fin can assembly into the body tube and filleting the fin to body tube joints. I used a plastic tie wrap to hold the rear of the body tube tight to the rear centering ring until the epoxy dried.
 This was the only major change I made to Danny's assembly procedure. The rest was straight forward. Glue a coupler into the payload, glue in the bulkhead fitting to the coupler, insert an eyebolt to tie the shock cord to and I put a single screw through the payload bay into the nose cone to retain it. Danny recommends friction fitting the nose but I like the screw for a more secure retention. Once complete, I tied the shock cord to the payload and installed the parachute.
Finishing:
The body tube that Danny uses for these kits has very small spirals and filling them was not necessary in this case. I applied 3 coats of primer sanding between each coat and the spirals were no longer visible. I then painted the body tube with a metallic silver paint. After drying I taped off the body and painted the fins metallic cobalt blue. These metallic paints dry very fast and I was able to apply the second and third coats right away. I painted the entire payload bay, nose, and canard fin assembly metallic cobalt blue. After all the paint cured completely I applied the included decals. The finished rocket is one of the nicer rockets that I have owned. Very unique. Overall I changed a few assembly steps but for the average builder this rocket can be built as per the instructions and be just fine. I just tend to overbuild every rocket that I build.
Construction Rating: 5 out of 5
 Flight:
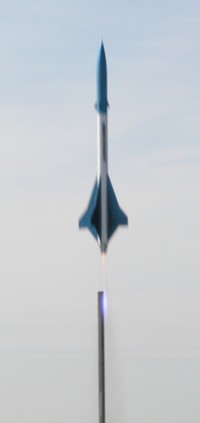
Danny recommends a variety of G motors for this kit. The motor I used is not on his list but turned out to be a wonderful match for this kit. I used an Aerotech G-104. It is a Blue Thunder formulation, with very little smoke and a blue flame. I used a Kevlar® chute pad so there was no wadding required. The motor was retained with a homemade ring that fits below the bottom of the motor and uses two screws into the supplied blind nuts in the back centering ring. The Mini-Armageddon came off the rail straight as an arrow and flew to apogee very straight. The medium delay on the G-104 was right on and the chute popped out just as the rocket reached the top of its arc.
Recovery:
The long shock cord that I installed allowed the nose cone to slow before the chute opened. The decent rate could possibly have been a little slower (by using a larger chute), but this is Texas and in our part of Texas the wind is usually high so I will stick with the chute supplied in the kit. Even though the decent rate "looked" a little fast, there was no damage on landing. As a matter of fact, my wife and I examined the rocket REAL close, and could not even find a scratch.
Flight Rating: 5 out of 5
Summary:
Pros for the Mini-Armageddon: Ease of assembly, Unique appearance, wonderful flight characteristics, will really rip on G motors, outta sight performance on an H motor.
Cons: None that I can think of.
Overall Rating: 5 out of 5
Other Reviews
- DG&A High Power Rocketry Mini-Armageddon By Jeff Short
Brief: This is a scaled down version of DG&A's Armageddon line. It is a single stage rocket with parachute recovery. Construction: This rocket comes with all tubes made of very heavy craft paper. It comes with 27.75" and 6.6" long body tubes, 1 coupler, plastic nose cone, 17" motor tube. The wood parts are all 1/8" birch plywood: 8 nozzle fins, 4 carnard ...
Related External Links
 |
 |