| Construction Rating: | starstarstarstarstar |
| Flight Rating: | starstarstarstarstar |
| Overall Rating: | starstarstarstarstar |


Brief:
Classic clustered egg-lofter. Very neat rocket.
Construction:
This is a clone kit I purchased on eBay for $21.00. It came in a box, but the
parts were in a plastic bag. All parts were present. The Astron Scrambler was
Estes' first egg-lofter and was distributed from 1969-1977.
The kit includes:
- 1 Balsa Nose Cone
- 1 Payload Tube
- 1 Balsa Transition
- 2 Balsa Fin Stock Sheets
- 1 Wooden Dowel
- 1 Body Tube (BT-60)
- 3 Engine Tubes (BT-20)
- 1 Centering Ring
- 2 18" Parachutes
- 2 Snap Swivels
- 1 Launch Lug
- 3 Engine Hooks
- 1 Decal Sheet
- 1 Screw Eye
- 1 Shock Cord
- 1 Pattern Sheet
- 1 Tape Strips Sheet
- 1 Technical Report on Clustering (TR-6)
This rocket is rated Skill Level 3 but is very easy to build if you've had a few other rockets you've built. Tools needed are glue, sanding paper, hobby knife, and maybe tape. There are 16 steps in the instructions.
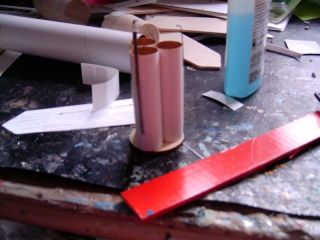 You start
by gluing the 3 engine tubes together to form pyramid. While that dries, you
then stick 4 tape strips into the bottom of the payload tube. Then you add glue
to those strips and slide the balsa transition into place. Next, you glue the 3
engine tubes to the centering ring, where they must be aligned correctly or
they will not fit in your body tube. You cut a small slit in each of the engine
tubes for your engine hooks and tape them to the engine tubes. To ensure a
proper fit, slide the motor mount assembly into the butt of the rocket without
any glue! Once satisfied with the fit, glue it in the body tube. Make sure the
ends of the engine tubes are even with the end of the body tube.
You start
by gluing the 3 engine tubes together to form pyramid. While that dries, you
then stick 4 tape strips into the bottom of the payload tube. Then you add glue
to those strips and slide the balsa transition into place. Next, you glue the 3
engine tubes to the centering ring, where they must be aligned correctly or
they will not fit in your body tube. You cut a small slit in each of the engine
tubes for your engine hooks and tape them to the engine tubes. To ensure a
proper fit, slide the motor mount assembly into the butt of the rocket without
any glue! Once satisfied with the fit, glue it in the body tube. Make sure the
ends of the engine tubes are even with the end of the body tube.
Now you cut 3 fins out with the 2 balsa sheets supplied with the kit. Cut 2 fins on one sheet, and the third on the second sheet of balsa wood, sand them to an airfoil if you want good performance. The fins are glued on before the last external item, the launch lug, is glued to the standoff.
Screw the screw eye into the narrow end of the balsa transition, remove, add glue, then screw it back in. This will be your shock cord/parachute mount for the payload tube. Attach the paper shock cord mount inside the body tube and tie the shock cord end to a snap swivel. To finish construction, attach the parachutes to the loop on the snap swivels. The payload tube can come down in 2 pieces if you're using a payload or for non-payload flights, remove the payload chute and you attach the body tube's snap swivel to the screw eye.
You finish the build by adding fillets to all balsa joints.
Finishing:
This rocket can be painted any way you want. I've even seen a purple Scrambler.
I tried to paint it to mirror the face card: red nose cone and one fin, black
stripes on top and bottom of payload tube along with one fin, and white body
tube, transition and fin. Unfortunately, I was cursed while trying to paint
this rocket. First, a bee lands on wet paint and then it dripped. Then when I
clear coated the black bands on the payload tube, they warp!! How? I don't know
but because of that, I may not be able to do egg lofts with it now...
The decal sheet comes with very funny and weird decals such as: Omlet Express, Eggsaust, Good Eggs Fly Estes, and Sunnyside Up. They are waterslide decals that went on easy. Clear coat them after they dry and you're done!
Construction Rating: 5 out of 5
Flight:
The Scrambler uses a 3 engine 18mm cluster of A, B and C engines. It does
require about 8 sheets of wadding. You also need to place 1/4 square of wadding
in each of the engine tubes before loading the engine. You also need a battery
source of at least 12v to ignite all 3 motors. I flew mine on 3 A8-3s with an
egg on 4/17/05. It didn't go as high as I expected, but sitll a great flight.
Recovery:
Recovery is by 2 18" parachutes. 1 for the body and 1 for the egg-crate.
They both worked perfectly. No scrambled egg!
Summary:
This is a great sport and competition rocket. It truly proves that egg lofting
is fun, especially with 3 motors to put it way up there!
Overall Rating: 5 out of 5
 |
 |
Flights
|
|