| Construction Rating: | starstarstar_borderstar_borderstar_border |
| Flight Rating: | starstarstar_borderstar_borderstar_border |
| Overall Rating: | starstarstarstar_borderstar_border |
| Manufacturer: | Estes  |
 Brief:
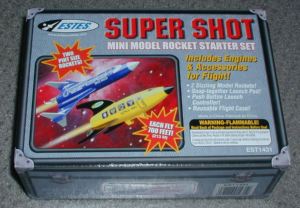
Mini Engine Starter Set. Comes with a "Space Bus" bullet style rocket, and a "Space Hauler" Jayhawk style rocket. Also included is a mini launch pad, Electron Beam launch controller, two A10-3T motors with igniters, plugs, and wadding.
Construction:
The rocket kits each feature two body halves, a nose cone, nose cone base, plastic launch lug, motor tube, motor hook, overlap tube, shock cord, half width streamer, and clay. The launch pad has three plastic legs that snaps into the base. The launch rod is a shorter version of their two piece rod. It twist-locks onto the base, which is unique. The pad also features an adjustable stand off to adjust the height of the rockets on the pad. The launch controller is the standard launch controller that Estes includes in all of their starter sets.
Since both rockets are similar, I wrote this like I was writing about one rocket. Construction starts with the motor mount, which goes together like any other motor mount in other Estes kits. The only difference is the motor tube is shorter than normal. Clay is added to the nose cones before the base is glued on. The shock cord is attached by tying a double knot in one end, and feeding the other through a tab on one of the body halves. Then the motor tubes are glued to one of the halves, and the halves are glued together. The Space Bus was the easiest to build. The Space Hauler parts did not fit perfectly, and masking tape had to be used to align the parts together. Final assembly is accomplished by attaching the molded launch lug piece to the rocket and attaching the streamer. There is one gotcha though... Plastic cement does not stick very well to the plastic. Try to find a glue that does stick. I used regular plastic cement, and that proved to be a problem later. This is why I gave it a rating of two.
Finishing:
The parts of the rockets are pre-colored, so no painting is required. The details on the Space Hauler is screened on, but the Space Bus use stock on decals. Alignment of the decals is not a problem because you can use the mold lines as guides. When all is done, these rockets look like McDonald Toys (Cool Idea ... Rockets in every Big Kids Happy Meal! :-)). They are so cute!
Construction Rating: 2 out of 5
Flight:
Loading the Space Bus and Space Hauler is the same as any other Estes rockets. The Space Hauler uses one piece of wadding, but the Space Bus works best with two pieces. Both rockets fly with 1/4A through A motors. The motor hook gets in the way of the exhaust path. This caused both rockets not to have a straight flight.
Recovery:
This is where all the cons add up. With the Space Hauler, the glue's inability to bond the plastic caused the rocket to blast into its basic pieces during the ejection of the 1/4A3-3T motor used. The Space Bus held together, but I figured that the better fitting parts and the decals held it together. My Space Bus was lost after a flight with a A10-3T because of the motor hook. The rocket veered into the woods next to my house.
Flight Rating: 2 out of 5
Summary:
These rockets are cute, and worth the effort and price if you do two things ... Use a glue that sticks to the plastic used, and trim the motor hook so it does not get in the way of the motor exhaust.
Overall Rating: 3 out of 5
Other Reviews
- Estes Super Shot Mini By Eric Truax
A kit containing 2 plastic bodied rockets (Space Bus and Space Hauler) with cardboard engine tube and metal engine hook. Well, I tried model cement but saw that it wasn't sticking to the plastic. Rather than second guess it, I went straight for the CA! I thought that since these little buggers were so small it would be OK--and it was! Construction was a snap, with about 10 minutes or less ...
 |
 |
Flights
|
|