| Construction Rating: | starstarstarstarstar |
| Flight Rating: | starstarstarstarstar |
| Overall Rating: | starstarstarstarstar |
| Published: | 2015-07-28 |
| Diameter: | 2.60 inches |
| Manufacturer: | The Launch Pad  |
| Style: | Scale |
 Brief
Brief
This is a dual motor scale version of the French-built surface to surface anti-ship missile designed in 1967 and still in service today. This is a true modeler's kit that should only be attempted if you have previous building experience. There are lots of diagrams to reference but not the Estes type of "hold your hand through each step" instructions. Still, if you follow closely, you shouldn't have any problems.
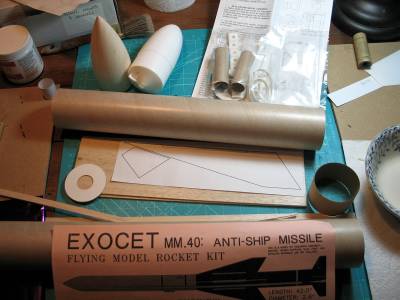
Components
The components are all of high-quality. I was hesitant to use the card stock nose cone extension configuration and substituted a Semroc BNC-80HVE nose cone in place. After seeing that a number of Launch Pad kits use this card stock nose cone extension I purchased all that Semroc had in stock after they announced shutting down in early 2014. It is an excellent substitute if you don't want to deal with the card stock extension configuration. The fins must be traced from patterns on to balsa sheets and cut by hand. No die-cut material here! I upgraded the rubber shock cord to an elastic one purchased from a local fabric store. I also substituted or will use a 24" nylon parachute in place oh the kits Mylar parachute.
Construction
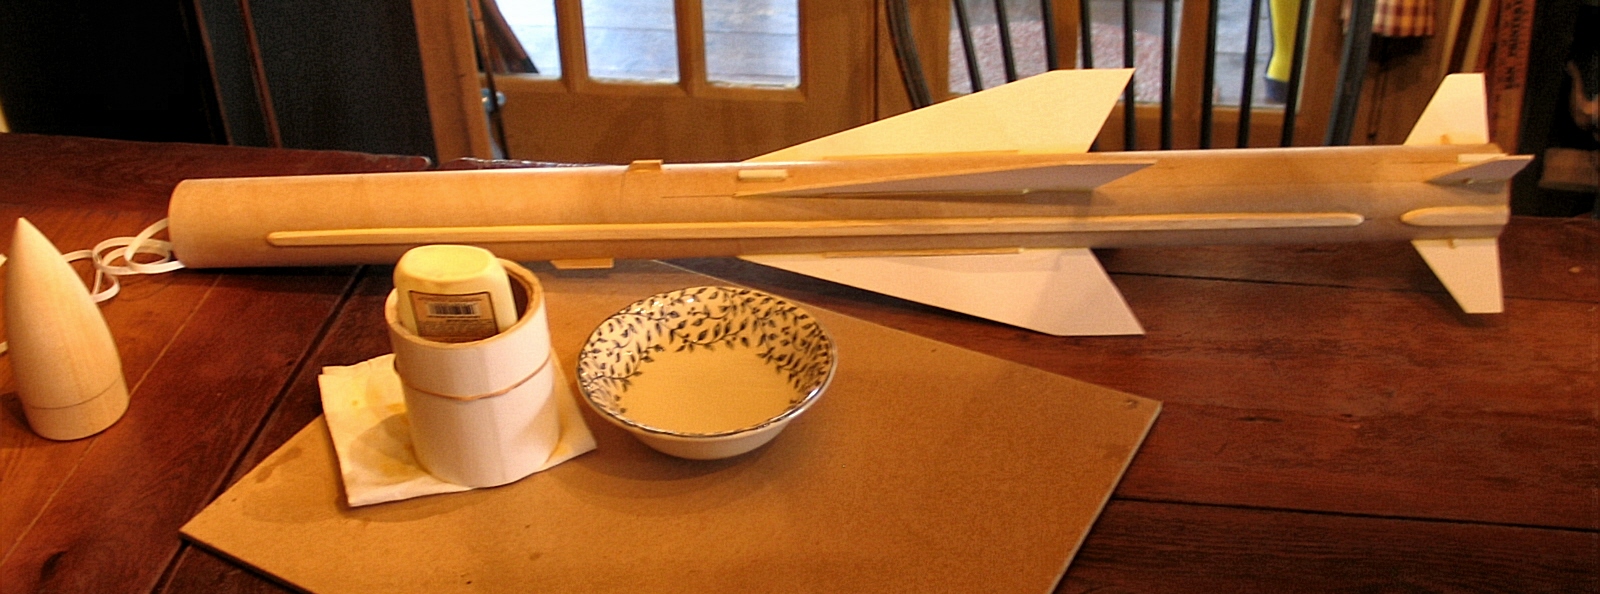
PROs: High quality parts for the most part. I really enjoyed tracing the fins out on to the balsa sheets and cutting them out by hand. I also "skinned" each fin with adhesive label material. I couldn't fit the entire larger forward fin on to one label sheet, but I had no problem hiding the seam between the labels with finish coats of primer. Skinning the fins made finishing way easier and strengthened the fins immensely. The rest of the balsa parts are easily cut from the sheets and with a little time and patience add a beautiful look to the rocket when attached. I also passed on using the shock cord mount and attached the shock cord to the inside wall of the body tube. I used Titebond II carpenters glue throughout the whole assembly. I really like the dual snap swivels that are used for rigging the parachute to the shock cord and nose cone.

CONs: I didn't want to attempt the paper nose cone transition so as I said earlier substituted a beautiful Semroc BNC-80HVE in its place. The Semroc cone fit, looked perfect and was only about .1 ounces less in weight than the PNC and card stock that came in the kit. After finishing the BNC with balsa wood filler and adding a screw eye to attach the shroud line to it weighed the same as the original PNC/card stock. No additional nose weight was added. The only other minor issue I ran into was the engine clips are a little sloppy. I don't know if this is because I used masking tape (the instructions called for a card stock "patch") to keep them in place instead of the standard Estes Mylar rings or the clips themselves are flimsy. Regardless they seemed to hold a 24 MM motor in place okay.
As for the instructions, they are well detailed and excellent if you have some prior building experience under the belt. Plenty of detailed instruction but some "fill in the blank" details are left out - like no fin marking guide (I used a guide out of an Estes Der V-3) and no instructions on where to mount the launch lug which is left up to the builder.
Finishing
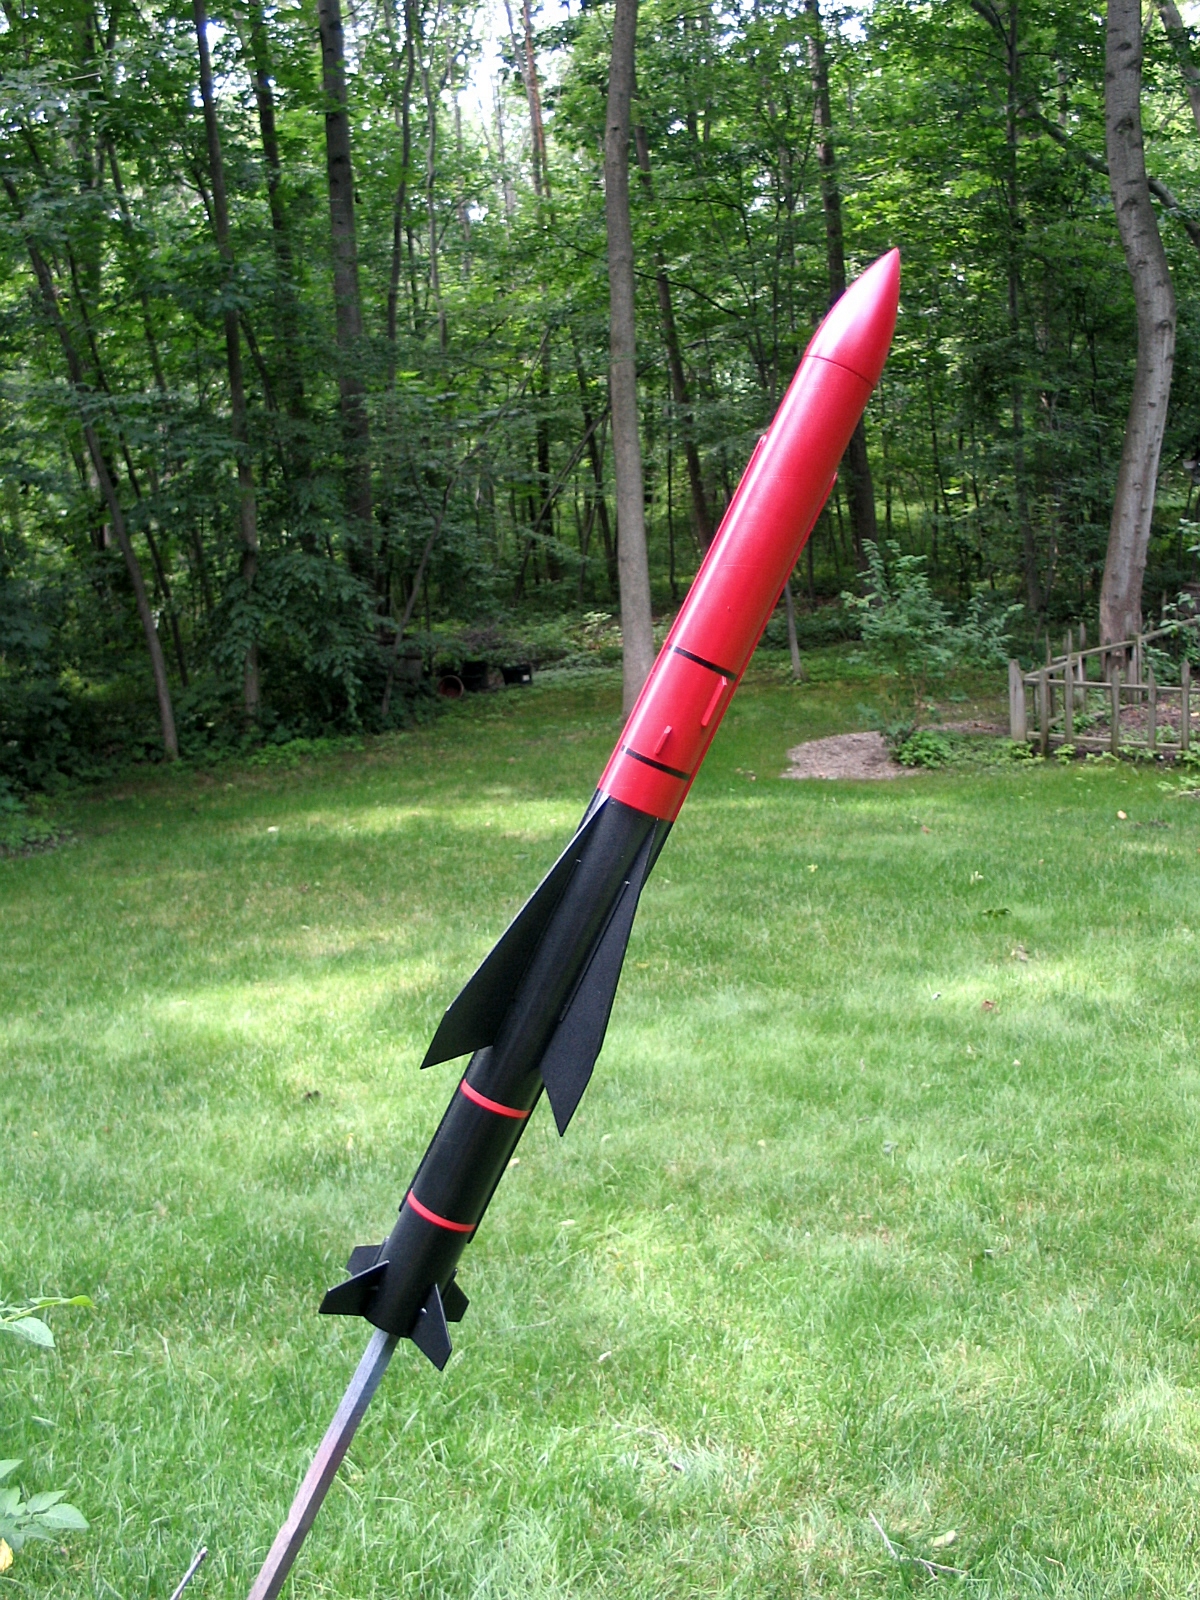
Finishing was fairly easy with the fins "skinned". On the larger balsa pieces like the conduit strips that run most of the length of the rocket I pre-filled with Hobbylite Balsa filler. The nose cone as I said earlier was finished with regular brushed on balsa filler. I then applied three coats of Rustoleum primer/filler of three different colors (sanding in between coats) before applying the finish paint coats. I used Valspar Cut Ruby Red on the top half and Valspar Gloss Black on the bottom. There are no decals but the finishing diagram in the instructions (very well laid out) call for four detailing stripes two black and two red. I used auto body detailing tape for this. The only problem I had finishing the paint scheme was not waiting long enough before I painted the bottom section gloss black. I taped the red painted top section off using craft paper to cover most of it which stuck to some of the red upper body. Some of the areas were still a little tacky and not dry enough. No problem to fix, I just wet-sanded the blemished areas with 1000 grit and re-painted the areas. Lastly, I clear-coated the entire rocket with Valspar gloss clear coat. Overall a fun, straight forward (but time consuming), easy finish.
Flight
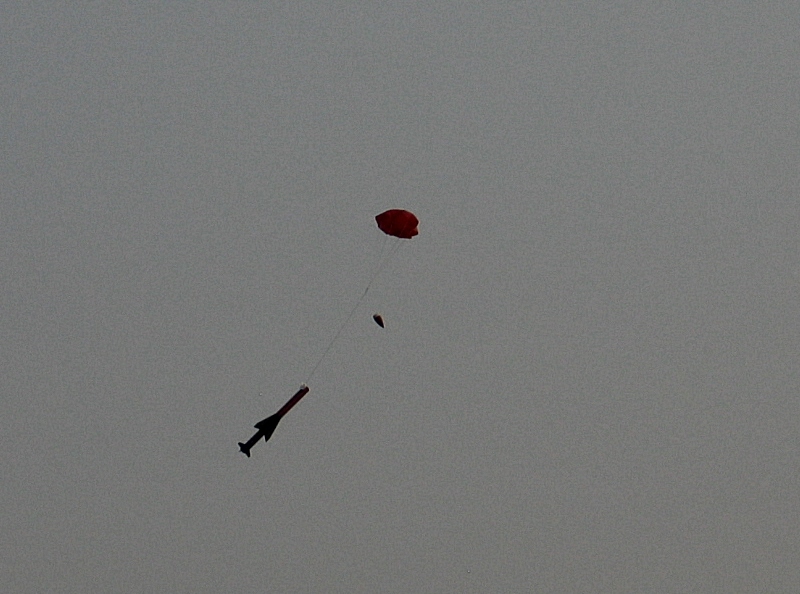
Now the fun begins! After reading previous reviews on this site, I chose to fly on dual Estes D12-5 motors. I installed a 3" square fiberglass heat shield adding a couple of sheets of wadding to play it safe. I almost didn't fly this bird because it had been windy all day (July 4, 2015) 5-15 MPH winds. But at 8 PM the winds had ceased and there was nothing but blue skies so I decided "okay!" The Exocet lifted slowly and picked up speed with excellent velocity!
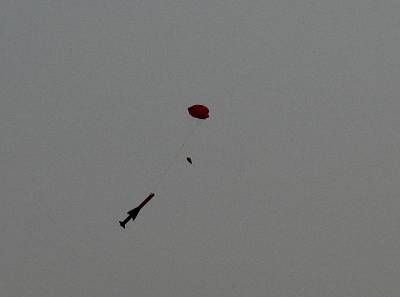
Recovery
Once in the air the D12-5 motors were a perfect choice with parachute ejection right at apogee. I used a 24" red nylon parachute to match the body. The dual swivel configuration for the parachute is a very nice design preventing no shock cord tangles. The Exocet descended slowly down to earth with a perfect recovery!! Thank goodness it missed the adjacent neighbors pond by 75 feet!
Summary
PROs: An enjoyable kit to build from start to finish that you can't wait to get to the launch pad. Again, have a little prior building experience before you attempt one of these Launch Pad kits and the end results will be very rewarding! This is one of my top three favorites in my collection!
CONs: The card stock nose cone extension that can easily be remedied with the SemrocBNC-80HVE nose cone.
Overall Rating: 5
Other Reviews
- The Launch Pad Exocet MM.40 By Andrew Bronfein (May 1, 2011)
I purchased the Launch Pad Exocet because of it's odd fin shape that I think look really neat. As all Launch Pad Kits I have purchased, not a part was missing and the instructions were definitely top rate. However, I hate leaving things the way they are and decided to follow Chuck's word for once and I'll be damned if he wasn't correct. Painting the fins with finishing epoxy instead of CA ...
- The Launch Pad Exocet MM.40 By Gary Drebit
The Launch Pad Exocet MM.40 (Early Version) is a Skill level 3 project and they mean it. There is no pre-cut balsa wood parts and the instructions I received did not have an inventory list of parts, so I wasn't even sure when I started that I had everything. Instructions were on 5 pages and half of every page included diagrams to help with the assembly. If you have built a few rockets in ...
 |
 |
Flights

|
|
|
|
Bill Eichelberger (July 29, 2015)
Excellent tip on the BNC-80HVE. I love the Launch Pad kits, but the paper cones leave a lot to be desired.