| Manufacturer: | FlisKits  |
The following article was a submission to the FlisKits, Inc
Deuce-Bash Contest and is archived with permission
from FlisKits. Some of these designs are not actually kitbashes, however, all come from the basic motor design feature
of the FlisKits Deuce's Wild.
(Contributed - by Susan DeBerg - 02/07/07)
Parts List:
- 1 FlisKits Deuce's Wild! kit
- 1 FlisKits BT-60-18 body tube
- 1 FlisKits CPL-60-015 Coupler or optional FlisKits BAF-60 baffle kit
- 1 Estes NC-60 nose cone
- 1 screw eye
- 1 stainless steel Chore Boy pot scrubber
- 2 pieces of brass tubing to fit your launch rod, ~3" long
Construction and Finishing:
Please follow the instructions included with the rocket kit with the following changes:
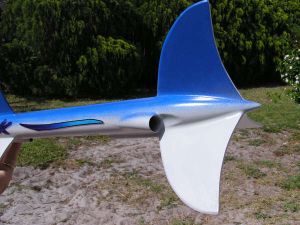
- Set the completed motor mount 1/2" deeper in the bottom of the body tube, this will give you extra depth to attach inverted Estes nose cone as the tail cone.
- Cut the extra FlisKits BT-60-18 body tube at 14" and use it to lengthen the DW body to 32". Use either a FlisKits coupler or baffle kit to join the tubes together. I used the baffle kit since it also provides a nice, sturdy Kevlar® cord mount for the shock cord. While building baffles, I also cut off about 1/3 of a Chore Boy stainless steel pot scrubber pab and stuffed it inside the baffle tube for a little extra protection.
 Measure the lip in the bottom of the motor mount and cut off the shoulder of the Estes nose
cone to fit snugly inside. If necessary, carve out two notches on the nose cone shoulder to clear the motor tubes.
Measure the lip in the bottom of the motor mount and cut off the shoulder of the Estes nose
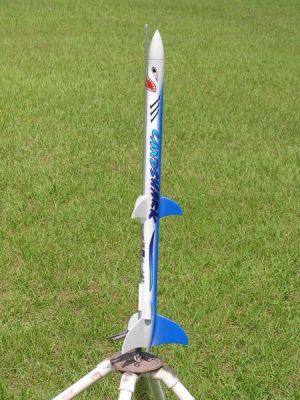
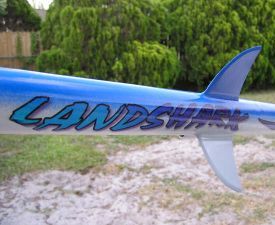
cone to fit snugly inside. If necessary, carve out two notches on the nose cone shoulder to clear the motor tubes.- Use the Landshark fin template and cut them out of the sheet of balsa included with the DW kit. Mark 19.25" from the front of the body tube and install the three smaller fins evenly spaced around the body tube. Mark 3/4" from the body tube/tail cone seam and install the three larger fins with the trailing edge on the mark. [Note: You might have to do a little bit of sanding to get the fit right between the fins and the tail cone.
- Use the big screw eye instead of the one included for adding proper nose weight to compensate for the additional drag of six large fins.
- Install two lengths of brass tubing for launch lugs--one underneath the motor mount and the other between the forward fins.
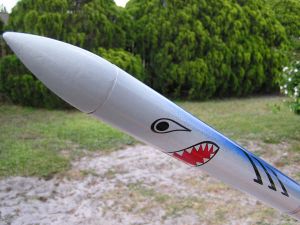
- Prime and paint to look like your favorite shark.
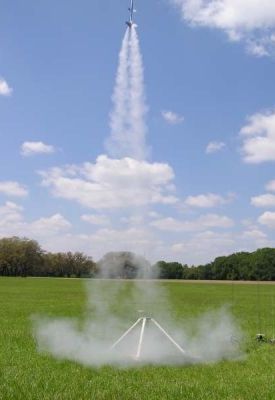
- Now go flying! I recommend two C6-3 motors to start with...

Happy launching!
 |
 |