| Construction Rating: | starstarstarstarstar |
| Flight Rating: | starstarstarstarstar |
| Overall Rating: | starstarstarstarstar |
| Published: | 2012-01-16 |
| Manufacturer: | Clone |
| Style: | Ring/Tube/Cone Fin |
 Brief
Brief
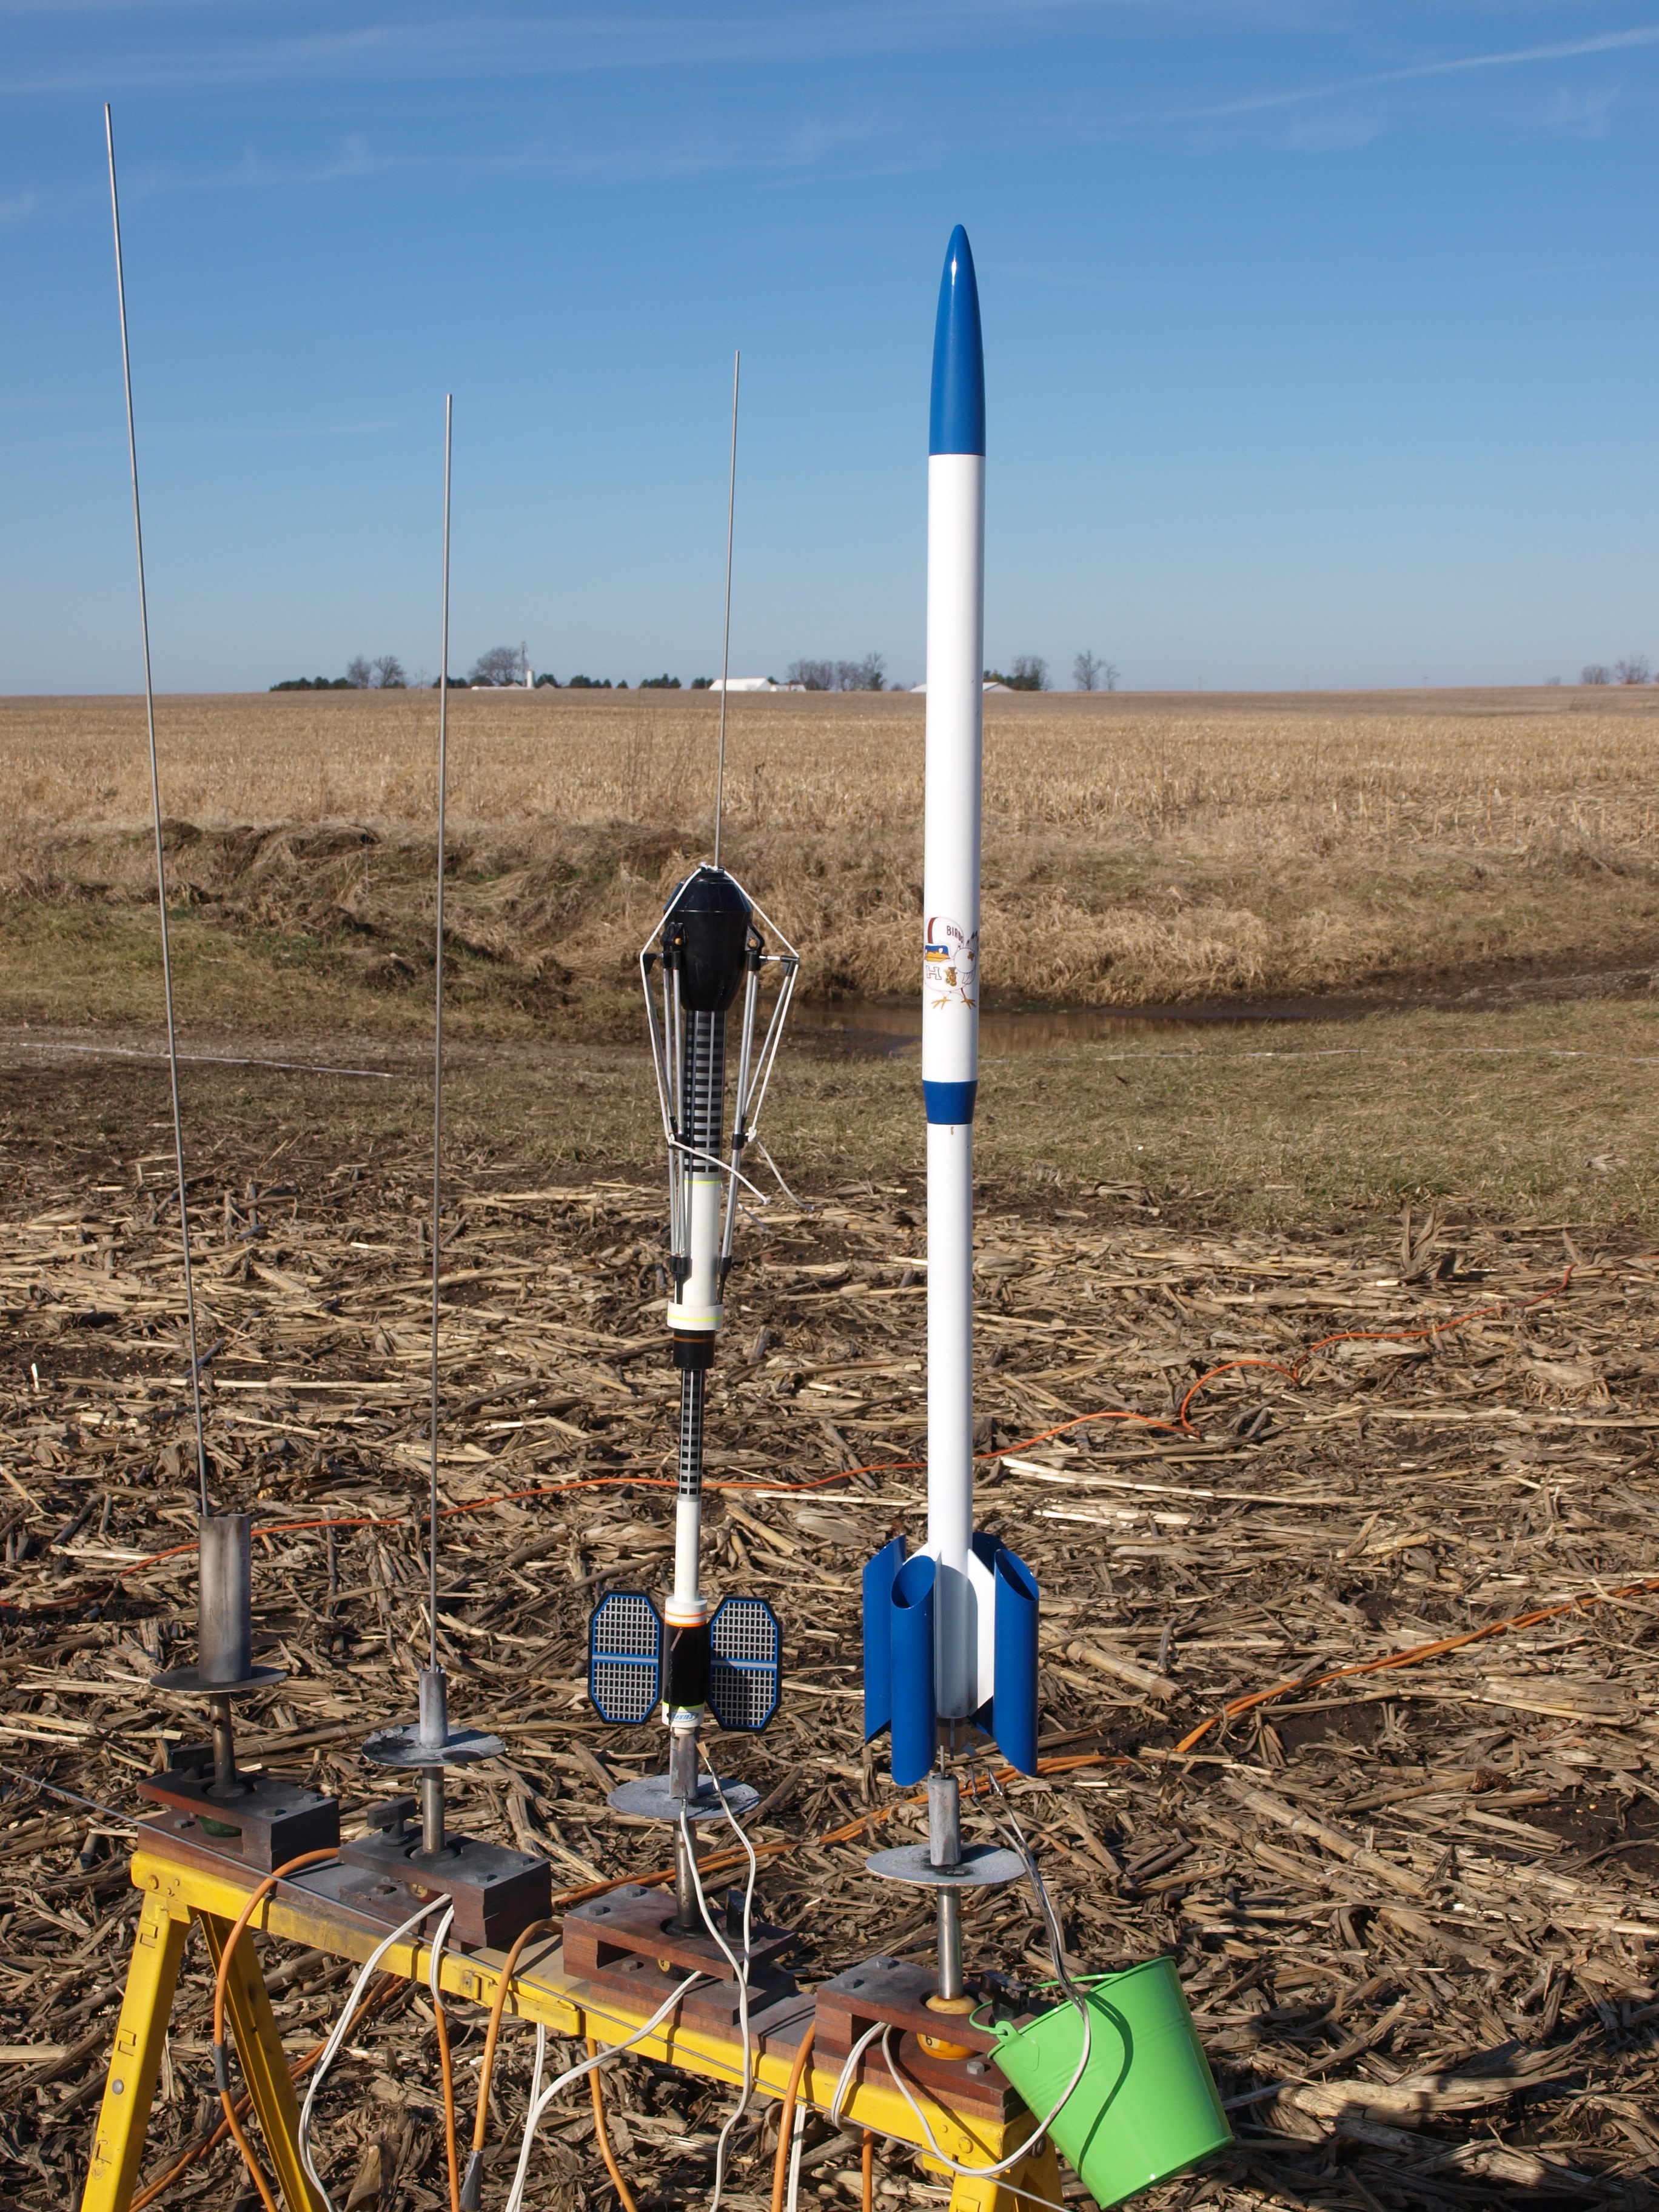
The Viking 5 was the last in the Viking series, a tube-finned family of performance birds from Flight Systems, Inc. I was looking at http://www.ninfinger.org/rockets/rockets.html for something different and seldom seen to build before NARAM 53. I'd previously built a BMS Viking 1 Clone of the Month and was familiar with the Viking 2, 3 and 4 models, but I'd never noticed the Viking 5. The picture in the 1990 FSI catalog doesn't really give an idea of the size of this bird, and had I not looked at the specs, I might have passed it over. When I noticed that the finished model stood almost 4 feet tall, I took another look at the plans at YORP and started figuring out what I had on had versus what I needed to order from Semroc.
Components
- 18" BT-55
- 18" BT-60
- BNC-60AH balsa nose cone (Semroc)
- TA-5560A balsa transition (Semroc)
- 36" length Kevlar shock cord
- 36" length 1/4" sewing elastic shock cord
- 6" BT-50 engine tube
- Estes "E" engine hook
- 2 - 5055 centering rings
- 2050 engine block
- 2 medium snap swivels
- medium screw eye
Construction
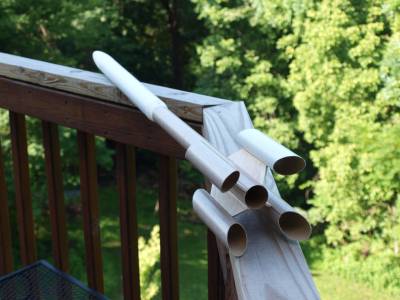
If you've built or cloned an FSI kit in the past, you know that the instructions are somewhat minimal, but easily understood if you have a few builds under your belt. That said, I didn't even bother to print the instructions http://www.oldrocketplans.com/fsi/fsi1024a/fsi1024a.htm from YORP because the whole project is pretty easily understood with one look at the exploded view. I did use the patterns for the tube fin fairings and launch lug standoff.
Finishing
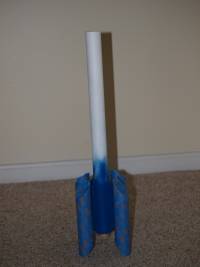
Because the catalog pictures were black and white, and because I've never seen a Viking 5 in the flesh, I felt free to pick my own color scheme. Being a simple-minded sort when it came to anything artistic, I decided to go with a simple-minded blue and white paint scheme. My Viking has Valspar Gloss Royal Blue tube fins, transition, and nose cone, with Valspar gloss white body tubes. All tube and balsa surfaces were primed with Valspar primer, coated with thinned Elmer's Fill & Finish, two coats, sanding between each coat. After another coat of Valspar primer, the rocket was assembled, and the tube fins sprayed. When the tube paint was dry, I covered them completely in and out with blue masking tape, then sprayed the upper and lower body tubes gloss white. The nose cone and transition were sprayed together using short sections of scrap tubing. Much of the painting took place the night before the first planned flight at NARAM 53, and when I peeled the masking tape from the tube fins, they had marks on them from the tape. It was only noticeable from up close and from ten feet it could hardly be seen, so I decided against respraying it and went to bed. By morning the marks were gone, leaving me to guess that the paint hadn't completely dried when I'd taped the tube fins up. (They still smelled fairly strongly of paint fumes.) If I were to do this build over, the one thing I'd likely change would be to paint the tube fins before gluing them to the fairings, but in the end the process was easy enough due to the size of the components.
Flight
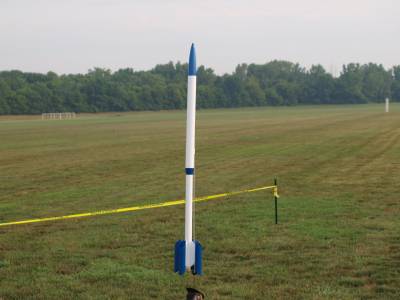
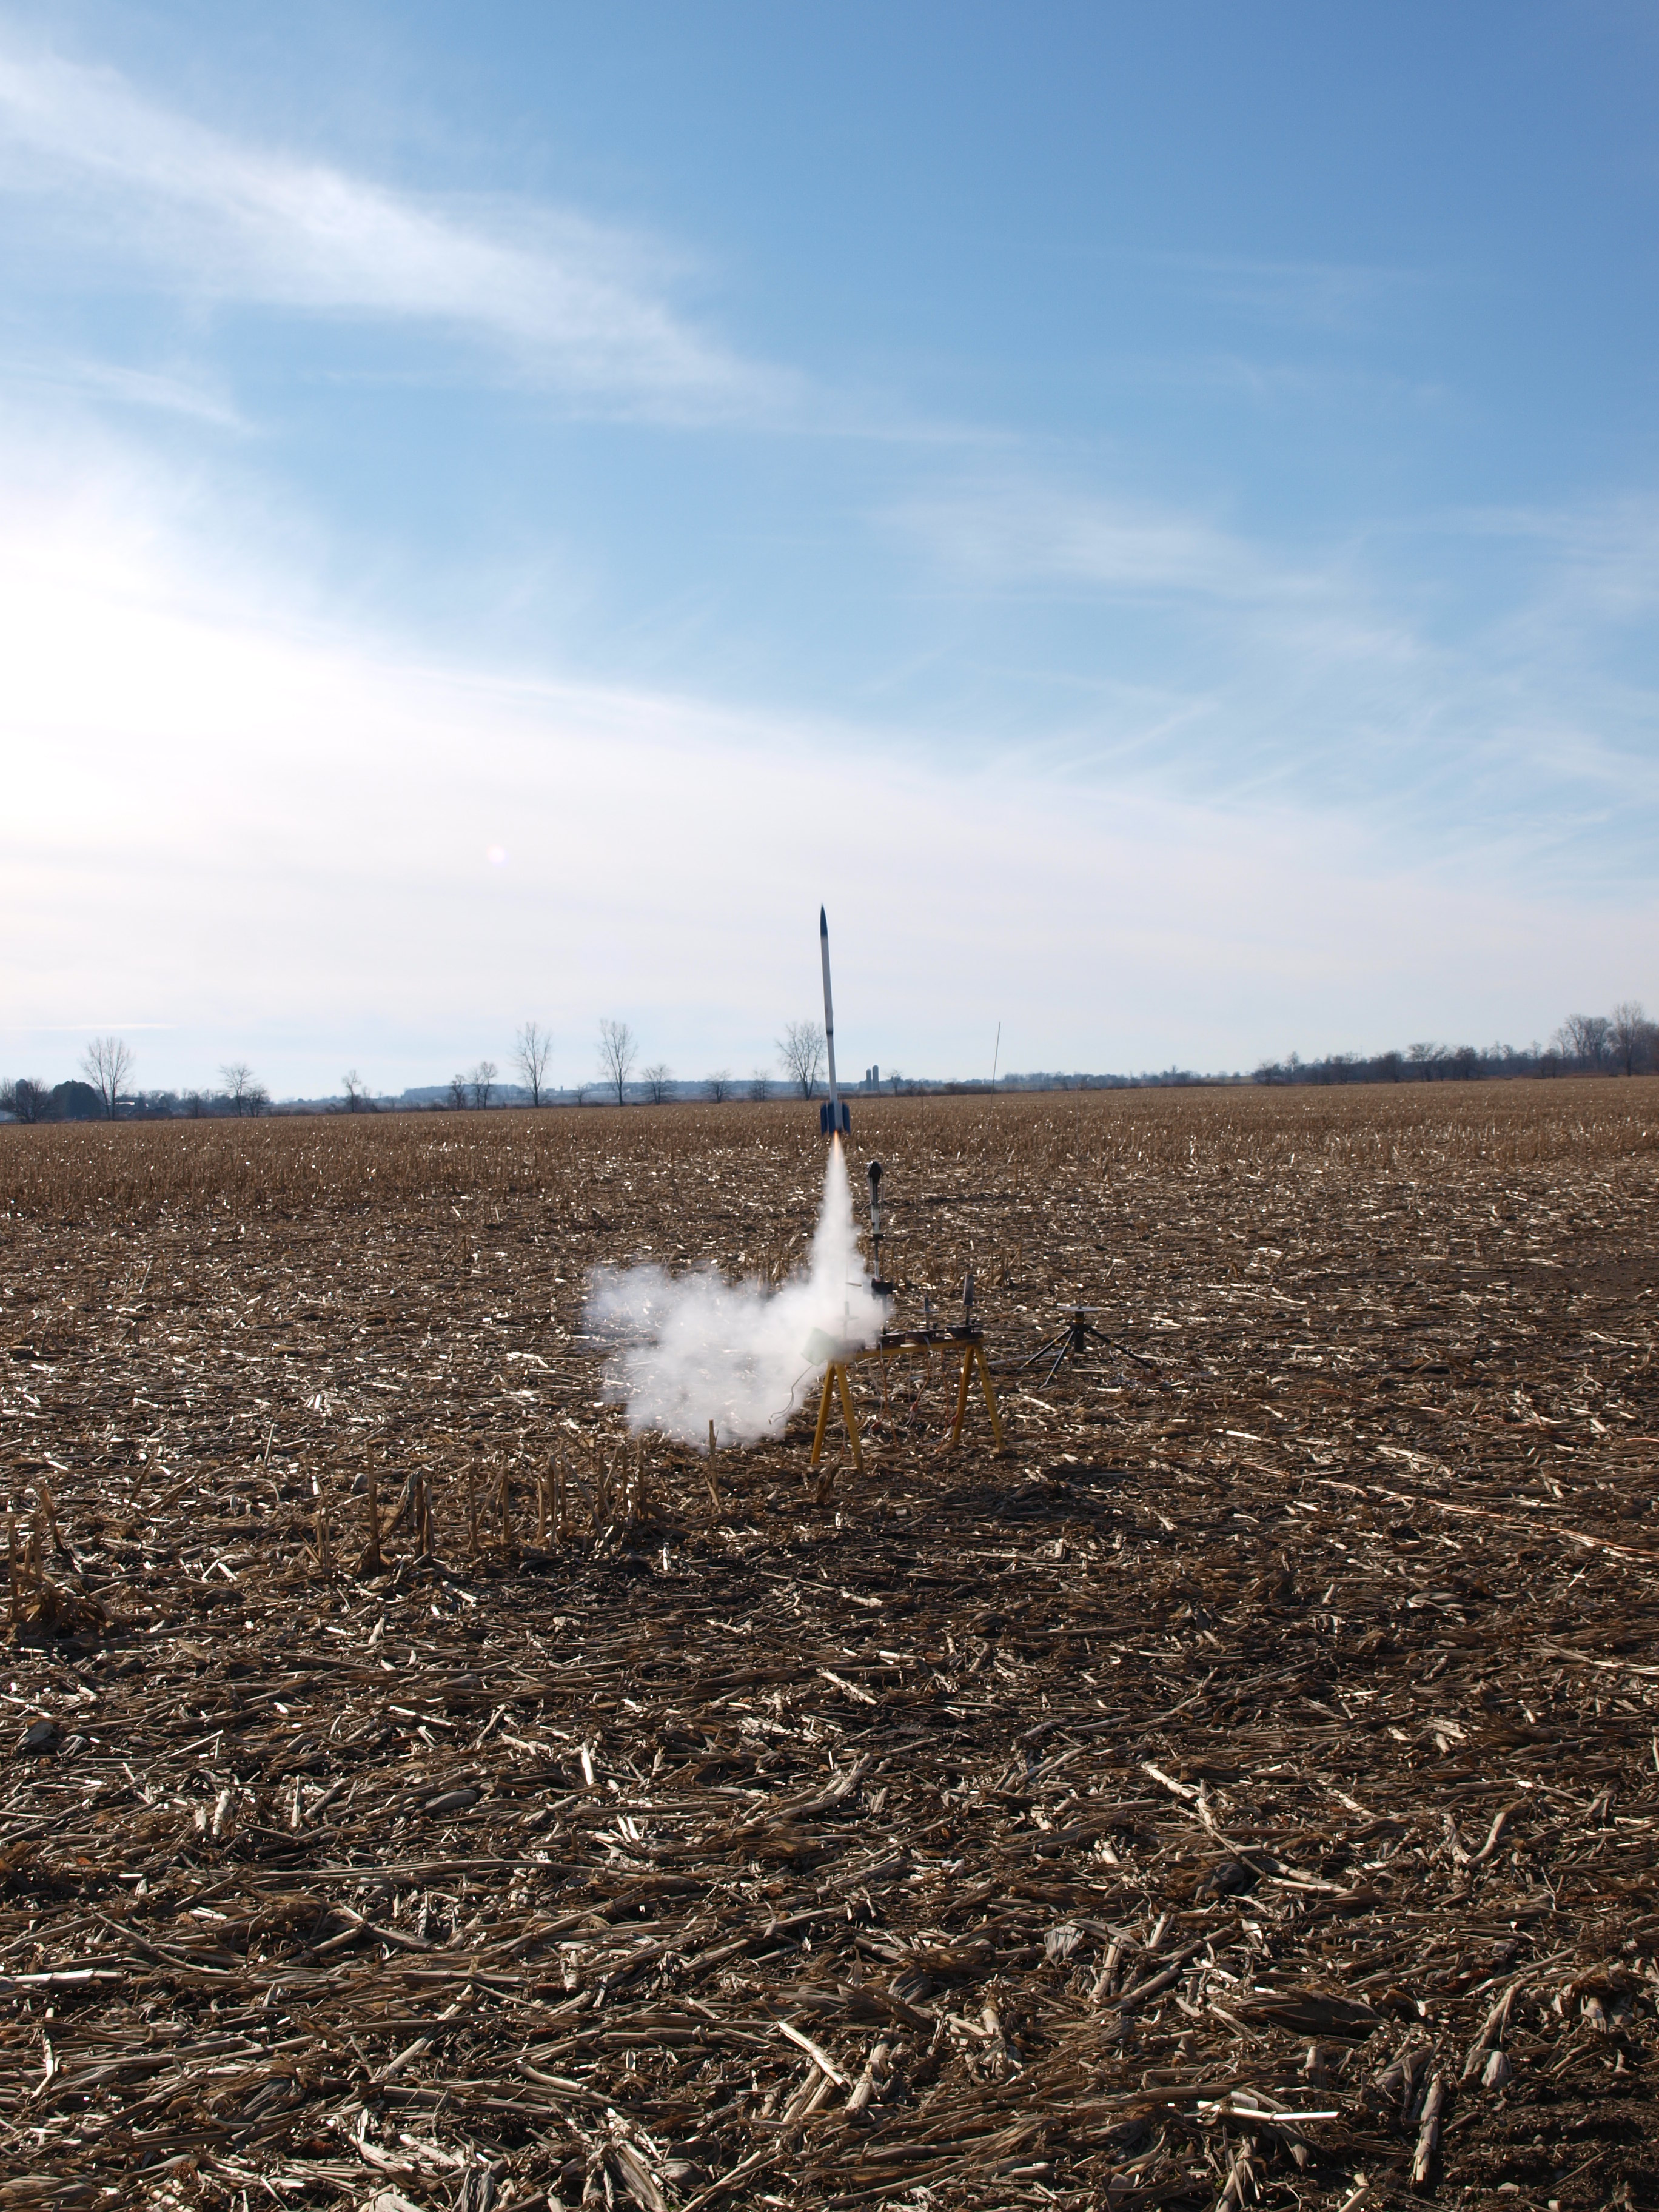
As I'd hoped, the first "flight" of the Viking 5 would be at the Thursday opening of the sport range at NARAM 53. Loaded with an E9-6, the rocket looked great on the pad, even without the decals that I'd yet to think up. I hooked it up, took some on pad glamour shots for the review, and headed back to the shelter to switch lenses. I selected burst mode on the camera, got everything set with the auto-focus, and gave the signal to start the countdown.
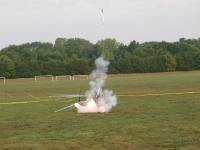
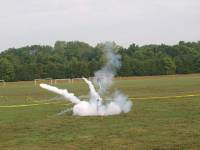
Everything looked normal at first with the ignition, but then I was sighting the whole thing through the eyepiece since the screen occasionally becomes balky on my NEW Olympus. The explosion when the engine CATOed took me by surprise, but I managed to keep my finger on the shutter release for two bursts before the shock took over. I looked up to see the lower section cartwheeling across the sport range while the upper section came down under chute. My initial horror was almost instantly replaced with excitement because I knew I'd caught at least some of the action on the camera. We walked out to survey the damage and check for fires, finding only ghostly smoke emitting from the grass all around the scene. Both launch lugs had been ripped off, one was found on the rod, the other in the grass. The lower section was still smoking with the Kevlar and 1/3 of the elastic still attached. The upper section came to earth twenty feet away by parachute. The almost completely cleaned out casing was found in the opposite direction of the rocket carcass, having completely bypassed the engine hook. Other than the ripped off launch lugs and some scorched paint near the top and bottom of the lower body tube, damage seemed minimal. That night I reapplied the launch lugs and planned to fly it first thing on Friday. When Friday arrived, I again planned to make it my first flight, but when I went to install the motor, the engine tube slid back up into the body. Needless to say, I needed a pinch hitter for the opening flight.
The damage appeared to be mostly to the centering rings, both of which had delaminated due to the force of the CATO. The repair involved pulling as much of the old tube and centering ring as possible, which I accomplished by using a needle-nose plier, grabbing the end of the motor tube, and twisting. The motor tube pulled out easily when the rings continued to delaminate. Since I had tied the Kevlar behind the forward centering ring, I wound up with a loop of Kevlar that was pre-sized to the motor tube, a nice convenience. I peeled out what was left of the rear ring, then sanded everything as smooth as possible. Since the forward ring had partially peeled away, I was able to glue the new rings around the mid-point of the new motor tube. The front of the motor tube would easily slide through what was left of the forward ring, and the new centering rings could be glued in place forward of the old rear ring. The Kevlar was mounted between the two new rings, with the forward ring notched to allow the cord to pass through. Everything was mounted with a thick coat of white glue, and the repair seemed solid.

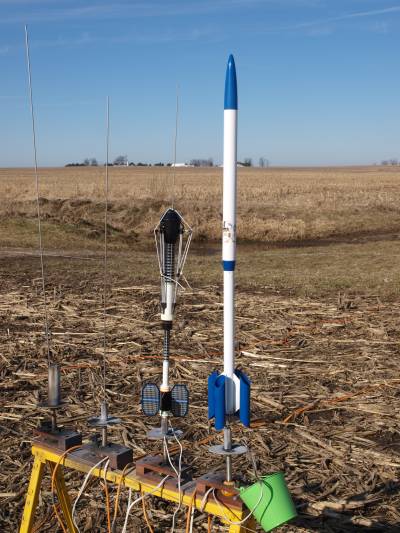
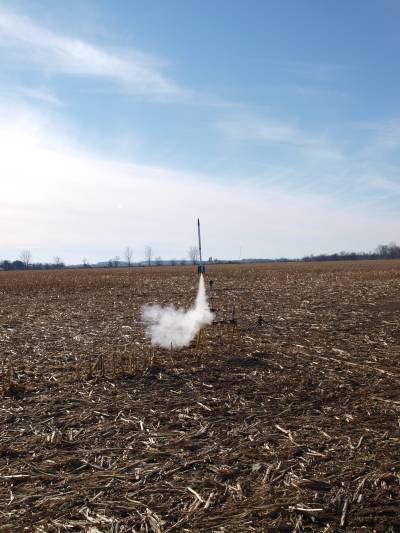
Almost six months later, I finally managed to fly the Viking 5 at a windy TORC launch in South Charleston, Ohio. As with everything else I flew that day, the Viking 5 windcocked severely, burned on the E9-4 for what seemed like an eternity, then recovered deep in the cornfield, even with the heavily reefed chute. Even though I knew where the landing spot was, it still helped to have the chute out there blowing around. (I actually passed it, then spotted it on the return trip.) Glad that's over with. ;-)
Recovery
Summary
Pro: Big, bulky tube-finned bird with plenty of internal room for the chute and shock cord. FSI birds are cool, but seldom seen at the pads. Looks great leaving the pad.
Con: Decals were minimal.
Related Products
 |
 |
Flights


.JPG)


|
|