| Manufacturer: | Giant Leap Rocketry  |
Picture courtesy of Giant
Leap 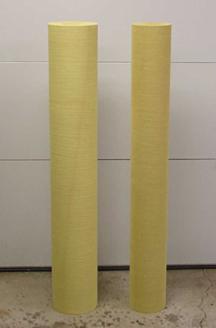
The Giant Leap Kevlar® Sock is a great new product for rocketry. Kevlar® has been used in the past in bulletproof vests and the aerospace industry as well as rocketry. However, the Kevlar® of the past was sold by the foot and cost quite a lot because there was often unused excess and because the product was so unique in itself. This new idea from Giant Leap reduces that cost dramatically.
The sock is actual Kevlar® that can expand and contract to fit tube sizes from 3 inches up to 6 inches. It has a yellow color and cotton like feel to it. When ordering the sock you need to order between 1.5 and 2 times the length of the tube you are planning on laminating because as the sock expands it loses some of its length.
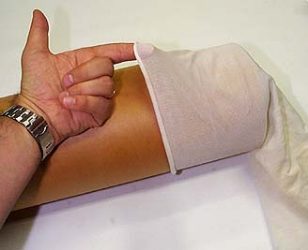
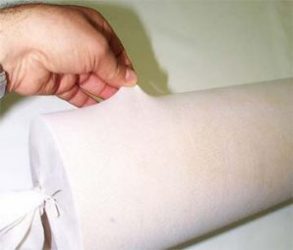
Once you have the sock, slip it over the tube you plan to use it on by either stretching it over the tube with your hands or by using a nose cone to stretch it to the proper diameter. Leave some overhang (1-2") on each end of the tube and cut the sock to size.
To prepare the tubes either remove a layer of glassine from the tubes or sand with 60 or 80 grit sandpaper. I used PML phenolic tubes and just sanded them for about 7 minutes a piece with the electric palm sander and 80-grit paper. After the tubes were roughed up I set up a stand to laminate the tubes on. The idea is the same as if you were ‘glassing, only easier. Next, because I was unsure about good saturation, I coated the first tube (3" diameter) in a light coat of my finishing epoxy. Next, I rolled up the sock and put it on one end of the tube. I rolled down the sock over the wetted tube and stretched it a bit to get it to lie out nice and smooth. I got the weave straight with the tube but this may not be necessary. Then I placed the tube on the stand so that it gave me a nice horizontal surface to apply epoxy.
Pictures courtesy of Giant Leap
Picture courtesy of Giant
Leap 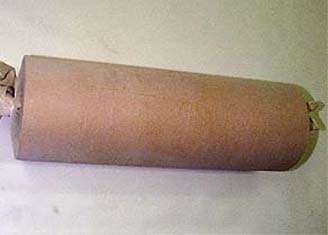
I mixed up a batch of epoxy that I thought would be enough or close to it. This first batch was the equivalent of what I would use to ‘glass the tubes with 3-oz. fiberglass. The epoxy I was using was 20 minute finish cure Bob Smith epoxy. I began to pour on the epoxy and spread it with a squeegee. Squeegees are a must for this. I then found that I had no where near enough epoxy to do the tube and had to mix one or two more batches. In the end I ended up using about 3 times more epoxy than what I thought I was going to use. I believe I used somewhere around 20-26 oz. of epoxy to cover three 3" diameter tubes with a combined length of just under six feet. Basically, make sure you have enough epoxy in the house to do the job. I ended up running out the store and buying 6 packs of the small containers of 20-minute epoxy (all the hobby shop had). Make sure that you wet the Kevlar® down enough though or it won't take much stress. In my observations, the tube went through two color changes. First, when you just put a little epoxy on the Kevlar® it turns glossy and a slightly darker color. Then, when more is added, it turns much darker as the tube color underneath starts to come through just a little. Now you have enough epoxy on the tube. The best way to tell if there is enough epoxy or too much is to run the squeegee over the tube lengthwise with some pressure and see if any epoxy is picked up by the squeegee. If it is, then there is too much and just keep squeegeeing until no more excess comes up. I also found it helpful to even out the tubes by going over them with a small sponge roller and then blotting with paper towels or toilet paper.
After the Kevlar® is cured the fun begins. I chose to let it cure completely before trimming the ends because I did not want to accidentally move the sock. Once cured the next morning I got out a brand new exacto knife blade (you will need a sharp one). I slowly worked my way around the ends of the tubes and then in the fin slots, using a considerate amount of force on the blade. It took awhile but it looked great. Next, I lightly sanded the tubes to remove the "fuzz" that was left on the tubes.
Finally, I ‘glassed the tubes with a layer of 4 oz. glass because Kevlar® cannot be sanded smooth once you get past the "fuzz." Then I filled the weave of the ‘glass and primed, sanded and painted.
There are several advantages and disadvantages to this product:
Advantages:
- Greatly increases strength
- Cheap
- Easy to work with (when used correctly)
- Does not require vacuum bagging
Disadvantages:
- Greatly increases weight
- Requires a lot of epoxy
- Tough to trim edges
- Impossible to sand smooth w/o ‘glassing
I also learned some lessons when working with this product. First and foremost is having enough epoxy. You don't want to run out half way through laminating a tube. Also, use a longer setting epoxy. A 4-8 hour epoxy is preferable as it gives you plenty of time to make it perfect, especially if you are not vacuum bagging it. Be aware that it will add considerable thickness to your tubes (mine are double). Cutting it, especially in areas that are over-soaked with epoxy is a real pain. Also, squeegees and rollers are your friends on this project. You may not need them when ‘glassing but you will need them here. Lastly, do your best to get the Kevlar® laid flat and even because unlike fiberglass you cannot just sand it out.
 |
 |
Sponsored Ads

 (UK IMPORT)")
|
|
D.S. (August 2, 2003)