| Construction Rating: | starstarstarstarstar_border |
| Flight Rating: | starstarstarstarstar_border |
| Overall Rating: | starstarstarstarstar_border |
| Published: | 2011-05-11 |
| Manufacturer: | HotRod Rockets  |
 Brief
Brief
There are two versions of the Buffalo offered by HotRod Rockets, the standard or 'Full Buffalo' which comes with an ejection baffle and 24" nylon parachute, and the 'Buffalo Speed' with comes with a longer 29mm motor mount tube, no baffle or parachute. There is also an electronics bay kit that can be used with the Buffalo Speed. HotRod Rockets bills the Buffalo and it's electronics bay as a perfect way to learn Dual Deploy - i.e. on a simple, strong, inexpensive midpower rocket that can be flown on a relatively small field. I was just starting to graduate into HPR and would need to utilize Dual Deploy on our smaller fields in the Northeast. So this seemed perfect for me. This review is of the Buffalo Speed and its electronics bay.
Components
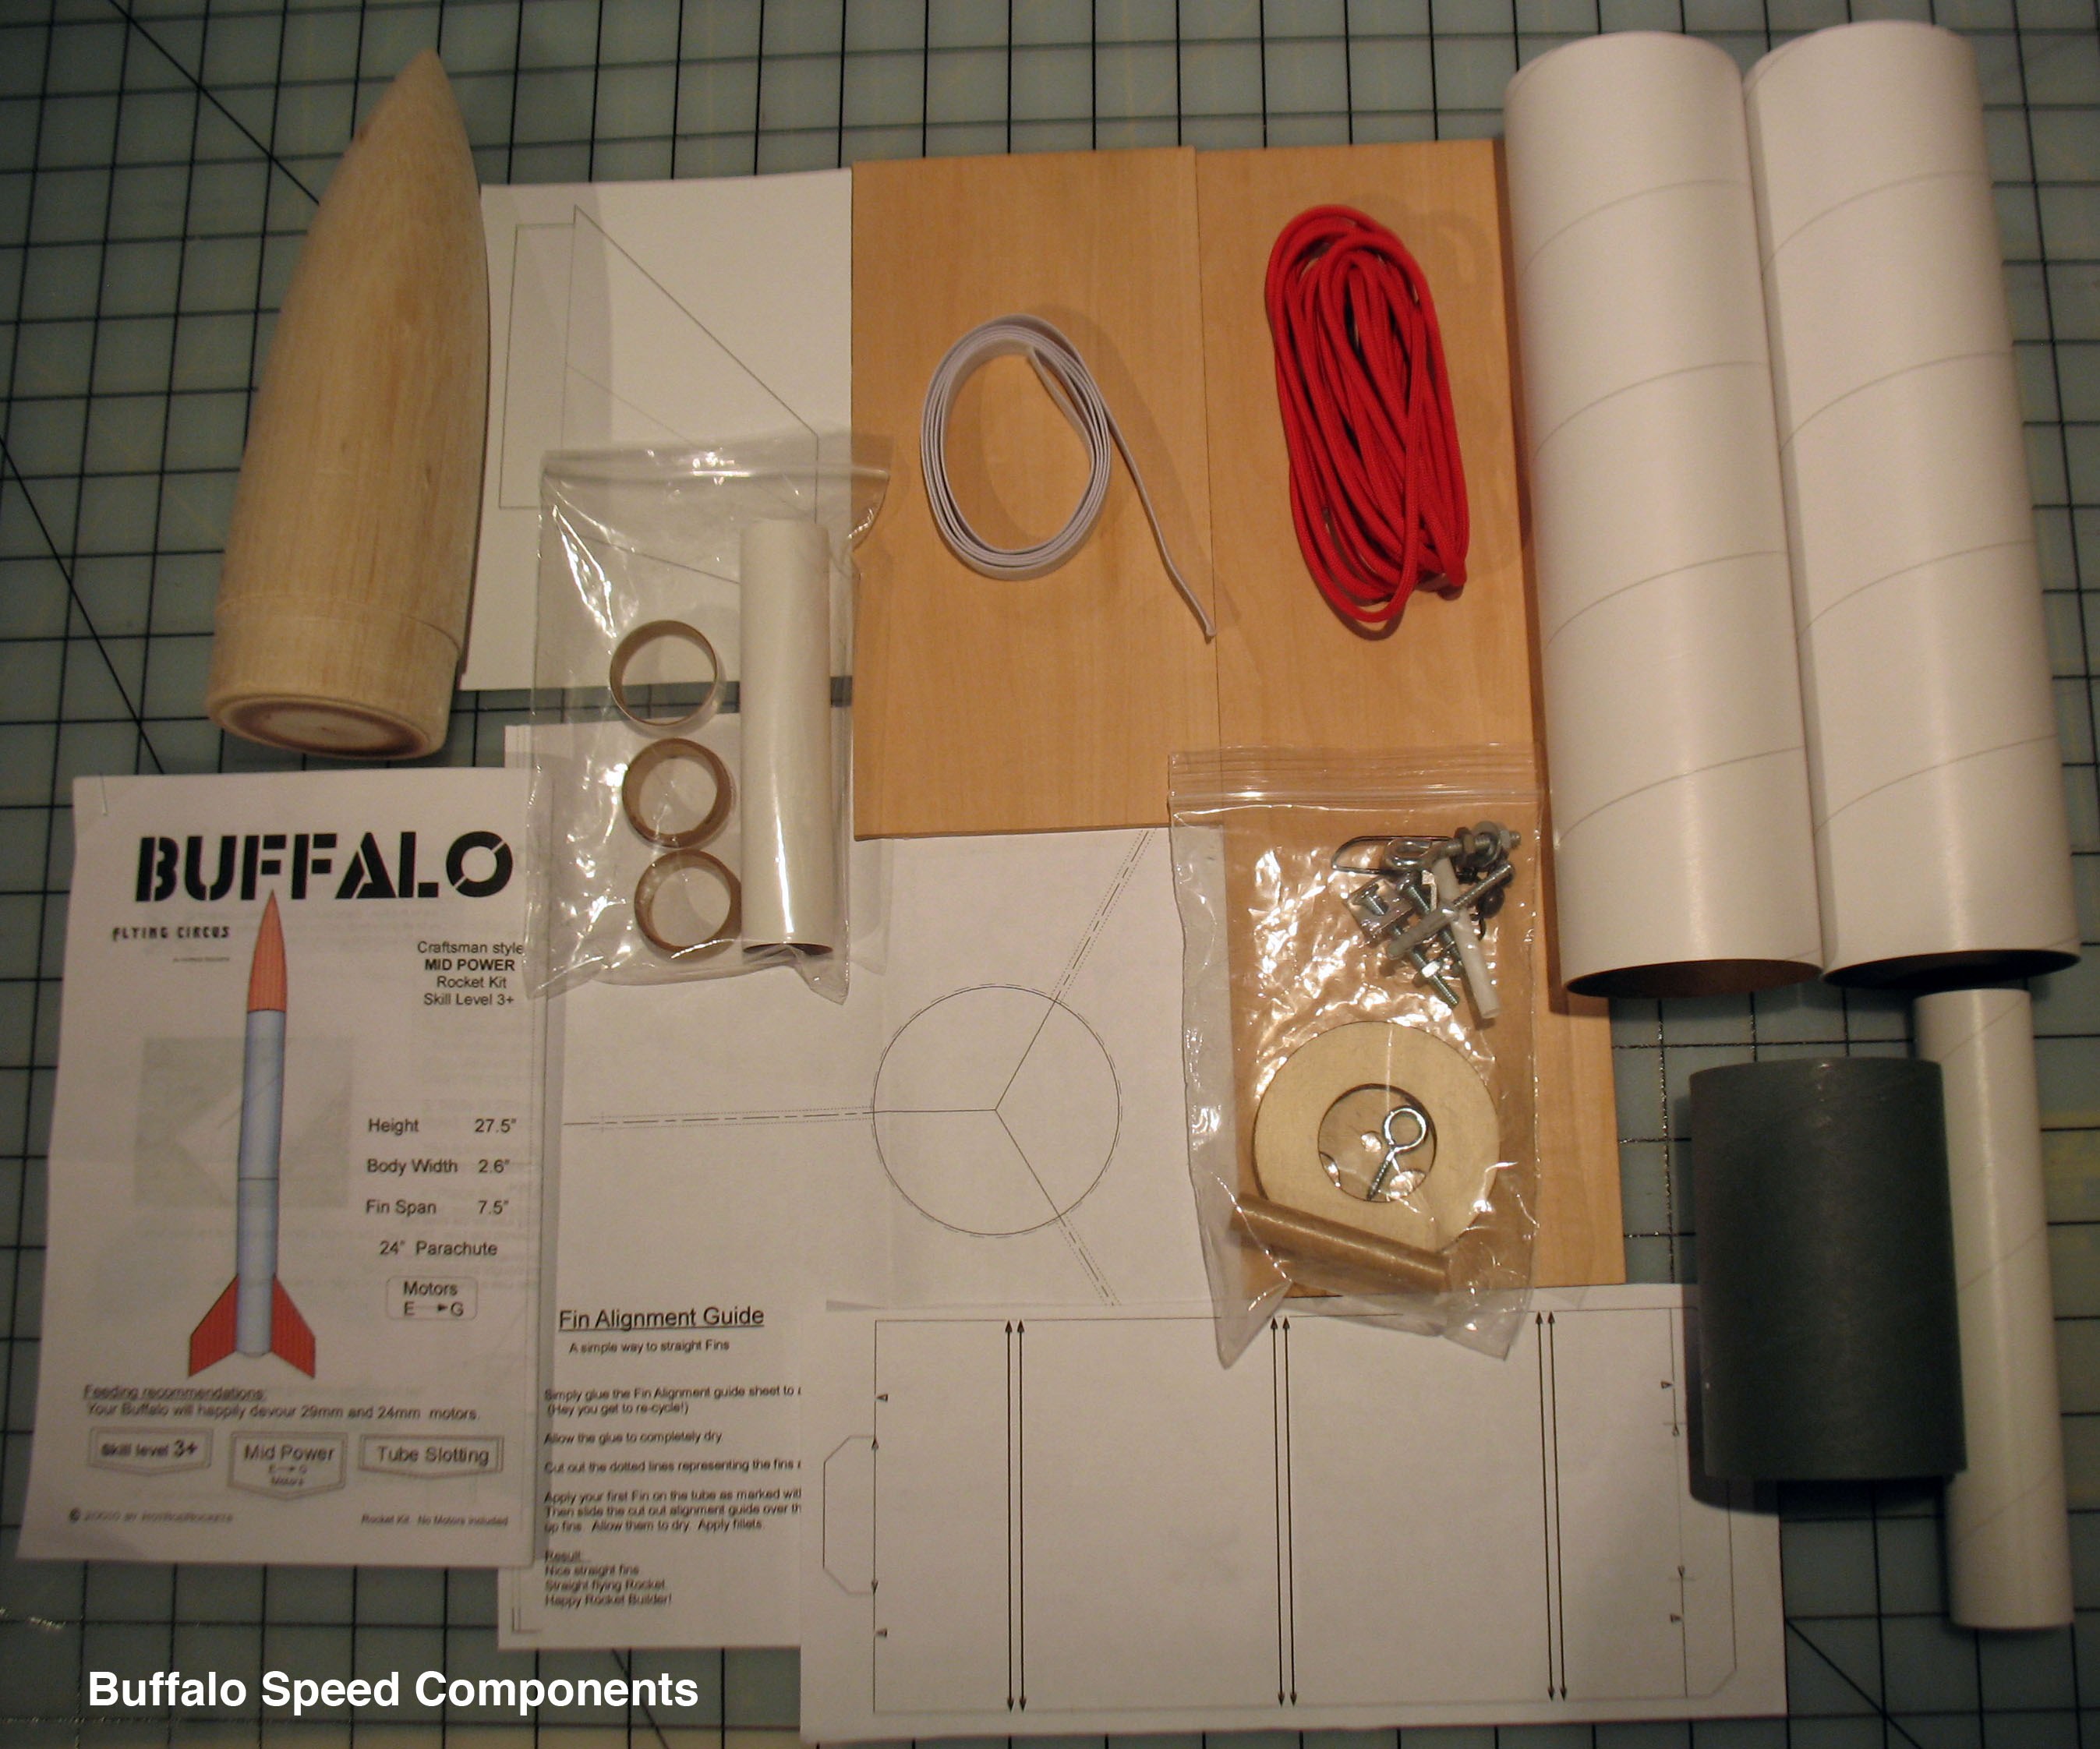
- Buffalo Speed:
- 10" BT80 Body Tube - 2
- 1/8" Basswood Fin Stock
- 4" BT80 Tube Coupler - 1
- Ogive Balsa Nose Cone - 1
- 29 mm, 6.4" motor mount - 1
- Plywood Centering Rings - 2
- 40" Elastic Shock Cord - 1
- 9' Nylon Shock Cord. - 1
- Engine Retainer - 1
- Eyehook - 1
- Large Snap Swivel - 1
- 24mm/29mm motor mount adapter - 1
- Fin Pattern wrap
- Fin Pattern guide
- Fin Pattern template
- Instruction book
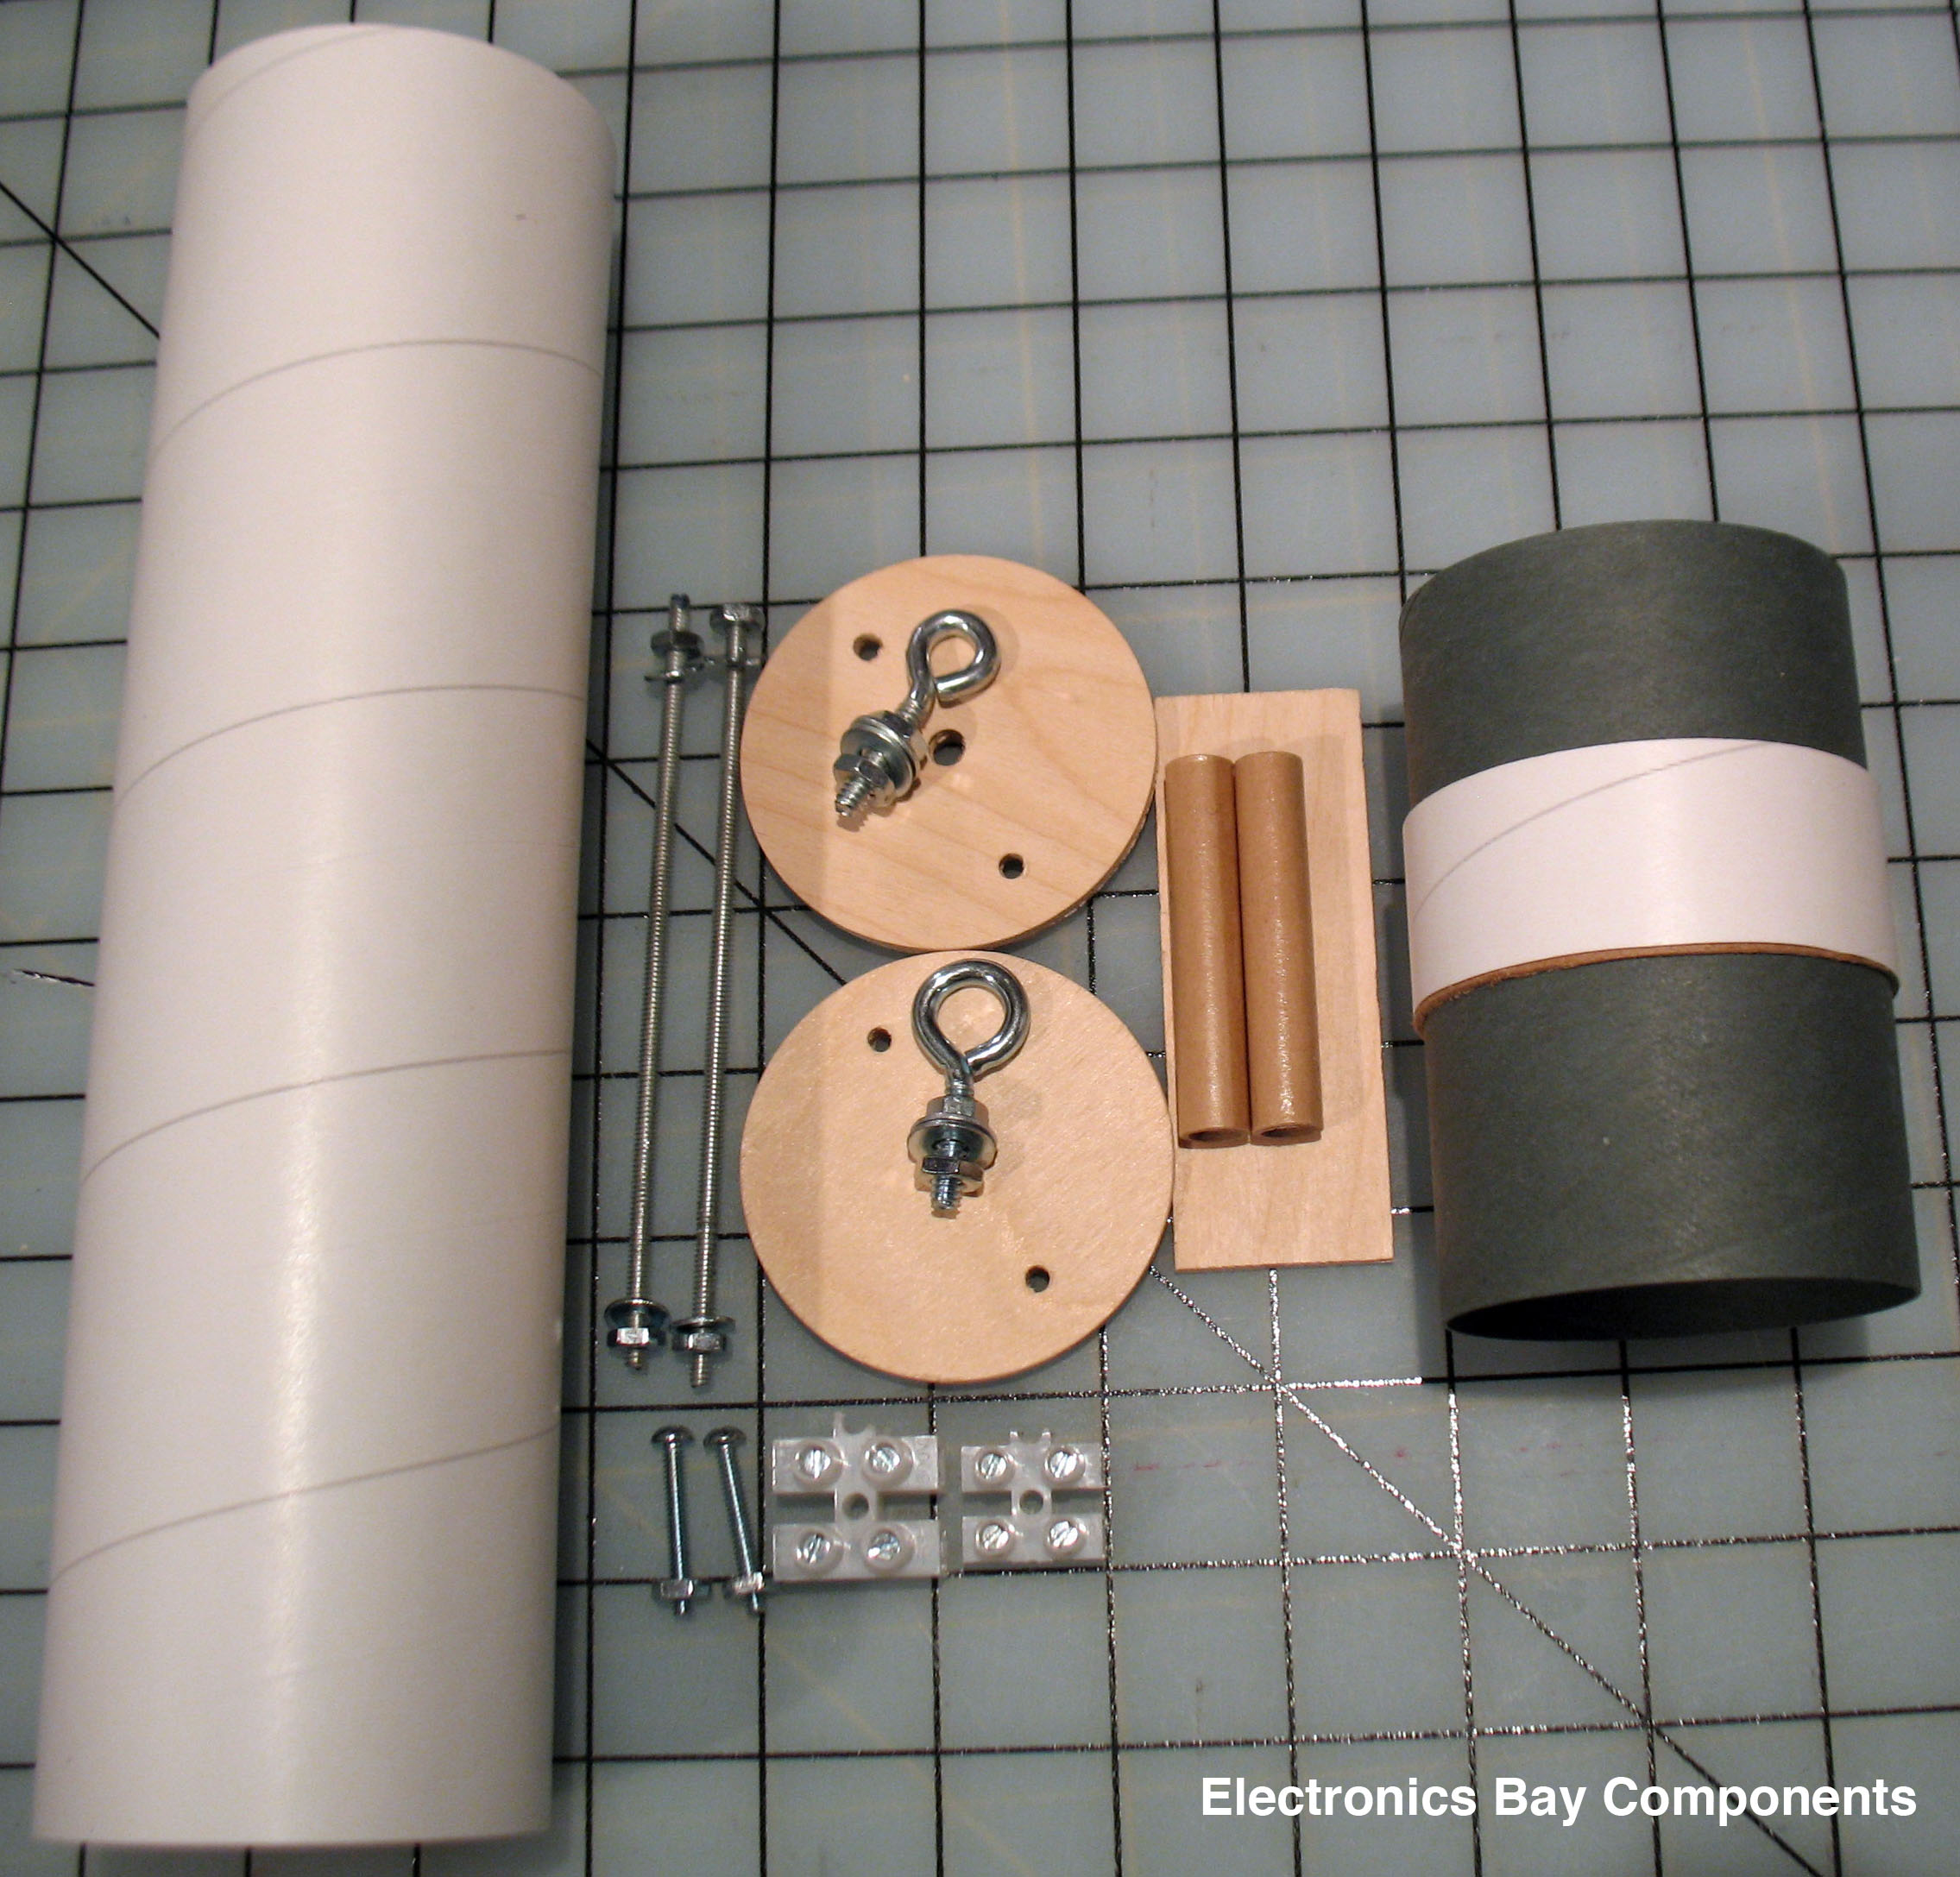
- Electronics Bay:
- 1" BT80 Body Tube - 1
- 4" BT80 Tube Coupler - 1
- Pre-drilled Bulkheads - 2
- Basswood sled - 1
- 1/4" launch lugs - 2
- Connectors - 2
- Necessary hardware
Construction
The Buffalo Speed kit is packaged in four separate clear plastic bags and the electronics bay in two. All components were present with a couple extra pieces for the baffle that comes with the Full Buffalo, but not the Speed.
The instructions are for the Full Buffalo and are contained on four sheets of double-sided 8.5" x 11" paper with color figures. No instructions came with the electronics bay. Upfront the instructions say that the Buffalo is for an experienced rocketeer and so the instructions given should be used as guidelines and are not the only way to assemble the rocket. The Buffalo is essentially a 3FNC rocket with TTW fin construction and the build is pretty straightforward. But it is not for a novice; you should have a couple of MPR builds under your belt before you start. All that being said, the instructions are not minimal, give some good hints along the way - including where to use yellow glue and where to use epoxy - and emphasizes dry fitting parts before gluing throughout the instructions.
I first marked the bottom BT80 body tube with the guide provided and cut out the three slots for the fins. I then marked and cut out each of the three fins from the basswood sheets provided. The instructions suggest using a hobby knife to cut the fins, making several light passes until the wood is cut through. I used a utility knife for most of the cuts and a hobby saw for the smaller, delicate cuts. While that was going on, I started on the motor mount. The instructions call for gluing the forward centering ring to the inside of the body tube just forward of the fin slots before gluing it to the 29mm motor mount tube. I chose to glue the forward centering ring to the motor mount tube first. I glued it 4 3/8" from the bottom of the tube which, once inserted would put the centering ring just forward of the fin slots. While that was drying, I epoxied the two screws for the motor retainer to the aft centering ring. Once both were dry, I glued the motor mount inside of the bottom BT80 body tube such that the forward centering ring was just forward of the slots. I inserted the bottom centering ring on the motor mount tube but did not glue it. It was there to ensure that the motor mount tube was straight as the glue dried. I made sure there was a good fillet of glue on the topside of the forward centering ring and stood the body tube upright to dry overnight.
The fins were next. I dry fitted each fin, sanding as necessary and marking each and its corresponding slot. I ran into a problem here. The forward tip of the root edge of the fin extends only 1/4 inch past the tab. It is very delicate and I snapped it off on two of the fins while sanding. In one case, I found the piece and re-attached it with CA. I could not find the other and had to fashion a new one from the left over basswood, and attached that with CA. This could have been just my bad luck. However, if the tabs were shorter in length, leaving 1/2 inch, instead of 1/4 inch on each end, this would have helped. I removed the aft centering ring and then placed a line of glue on the motor mount tube directly under a fin slot using a wood applicator. I then inserted the corresponding fin, making sure it made a good connection with the motor mount tube. I used a piece of masking tape over the top (outer edge) of the fin and around the body tube to keep the fin straight while the glue was drying. After the glue had set, I repeated this for the other two fins. I then filleted both sides of each fin at the junction of fin and motor mount tube with wood glue, one fin at a time. Once all of the fins were glued and filleted to the motor mount tube, I fillet the fins to the top centering ring and the ring to the body tube and let this dry with the body tube standing on its top side. I glued the bottom centering ring onto the motor tube and when dry, I coated the bottom of the aft centering ring with epoxy. This glued the centering ring to both the motor tube and body tube and gave the ring some extra strength. I then filleted each fin to the body tube with epoxy. Finally, the motor mount tube was in and the fins were done. Those fins aren't goin' anywhere!
The Buffalo is supplied with both a 3/8" and 1/4" launch lug. The instructions say that either can be used, or glue both on side-by-side. I chose to use just the 1/4" launch lug. I first glued the launch lug to a scrap piece strip of balsa wood the same length and width of the launch lug and 1/16" in depth. I then glued that assembly to the body tube on the line marked earlier and just below the junction between the two body tubes. After the glue had dried, I put a fillet of epoxy on each side of the launch lug making sure the epoxy contacted the launch lug, balsa and body tube on each side.
The instructions for shock cord attachment are for the Full Buffalo, which has a baffle, and the shock cord attaches to the baffle. There are no instructions of where to anchor the shock cord for the Buffalo Speed without a baffle. I mounted mine using 6' of 150 lb Kevlar in a trifold assembly. I epoxied the trifold to the second body tube and tied the elastic shock cord to the Kevlar.
 Finally there was the electronics bay. There were no instructions with the electronics bay kit, which was disappointing. I know that there are many different ways of putting one together and a lot depends on what electronics are being used. But since this is billed as an introduction to Dual Deploy, some instructions would have been useful. As it turns out, I had already read Modern High Power Rocketry 2 by Mark Canepa and the chapters that covered electronics bays and Dual Deploy are very useful. So I used that as my instruction guide. The parts to the electronics bay are well made and fit together nicely. I did swap out the two hex nuts for the threaded rods for two wing nuts. Along the way, I did have a few questions about static porthole diameter, wire gauge and external switches for David Mackiernan. He was very good about it and got back to me right away each time. There was no cup/canister for the ejection charge or an on/off switch. Again, I know that there are many different ways of doing this including not using either. But again, since this is billed as an introduction electronics bay kit, it would have been nice to have both a canister(s) and switch that you know would fit and would work. The only other minor complaint is that once the altimeter, battery, on/off switch and all of the wiring are packed in the bay, it is a tight fit. I have a PerfectFlight HiAlt45K that uses a 9-volt battery and I purchased the smallest switch I could find at Radio Shack. I'm not sure how much of the tightness was due to the size of the altimeter and switch. And things may have fit better if I had gone with a different altimeter and no switch. But again, since this is billed as a beginner's electronics bay, it would have been safer to supply a longer (6" to 8") tube.
The Buffalo comes with a 29mm/24mm motor mount adapter. However, there were no instructions or diagram of what it should look like in the kit I received. The adapter is fairly straightforward to construct but a diagram would have been helpful. As it turned out, my adapter kit was also missing a part. I contacted David and he mailed me a whole new adapter kit that included an instruction sheet. I gather that an instruction sheet is now being included in the kit.
The Buffalo Speed with an on/off switch, empty electronics bay (i.e. no altimeter, battery, or ejection canisters) and finished (see below) weighs in at 16.8 oz, with a measured CG of 21.75 inches and calculated CP (RocSim) of 30.4 inches from the nose cone tip.
Finishing
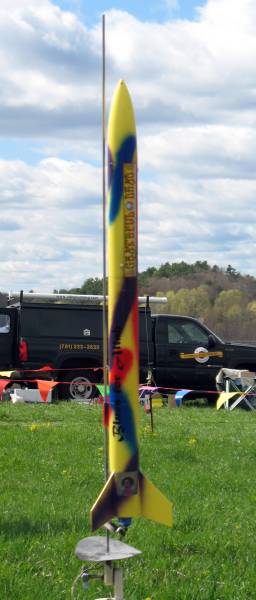
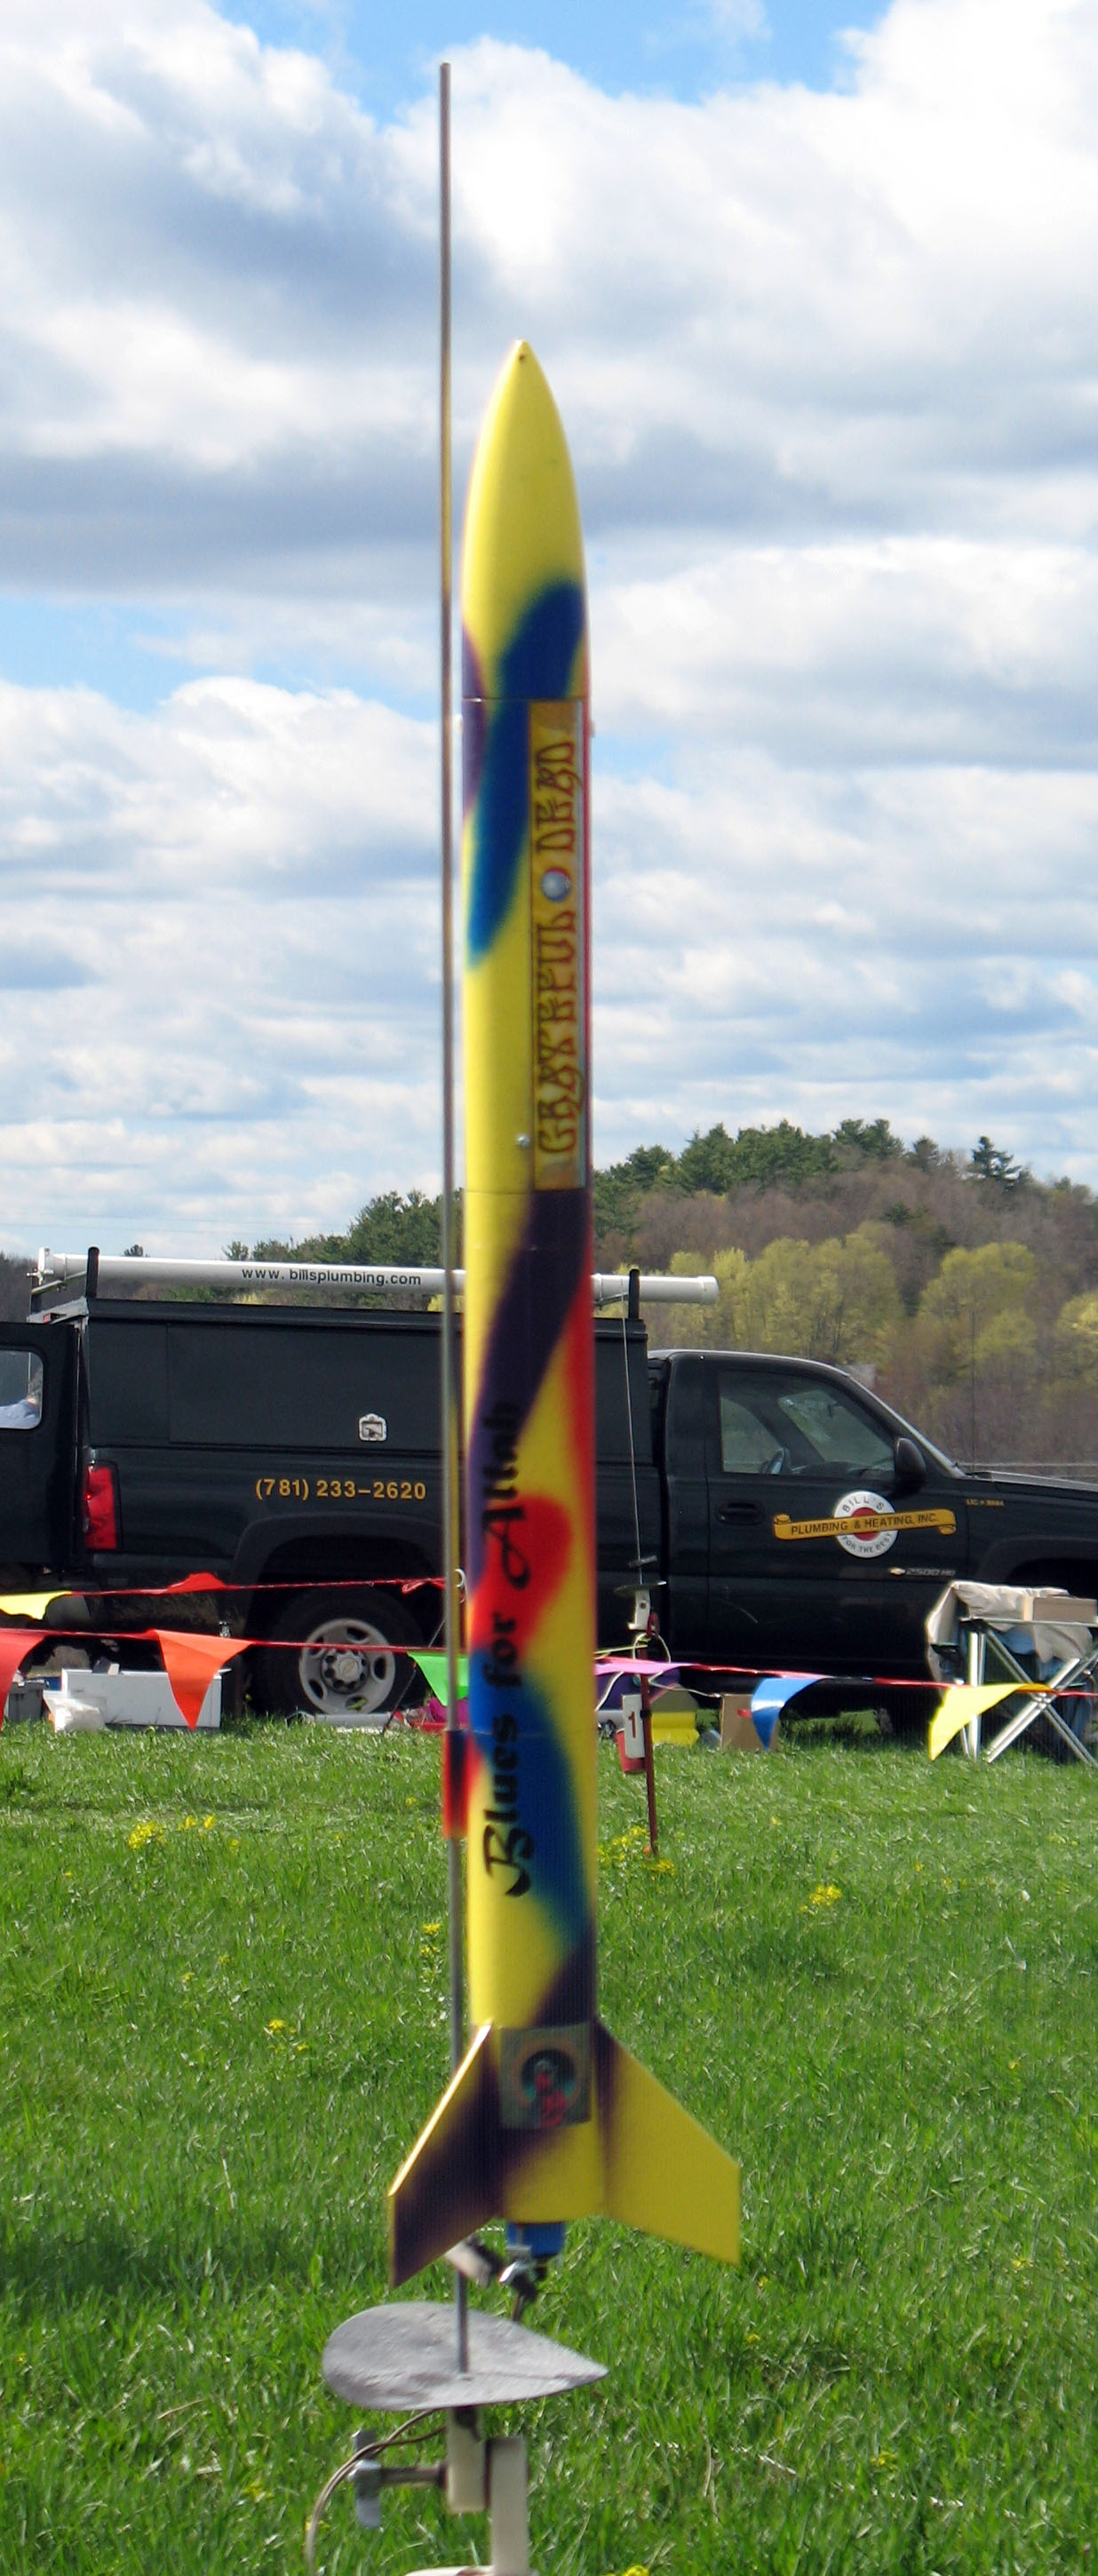
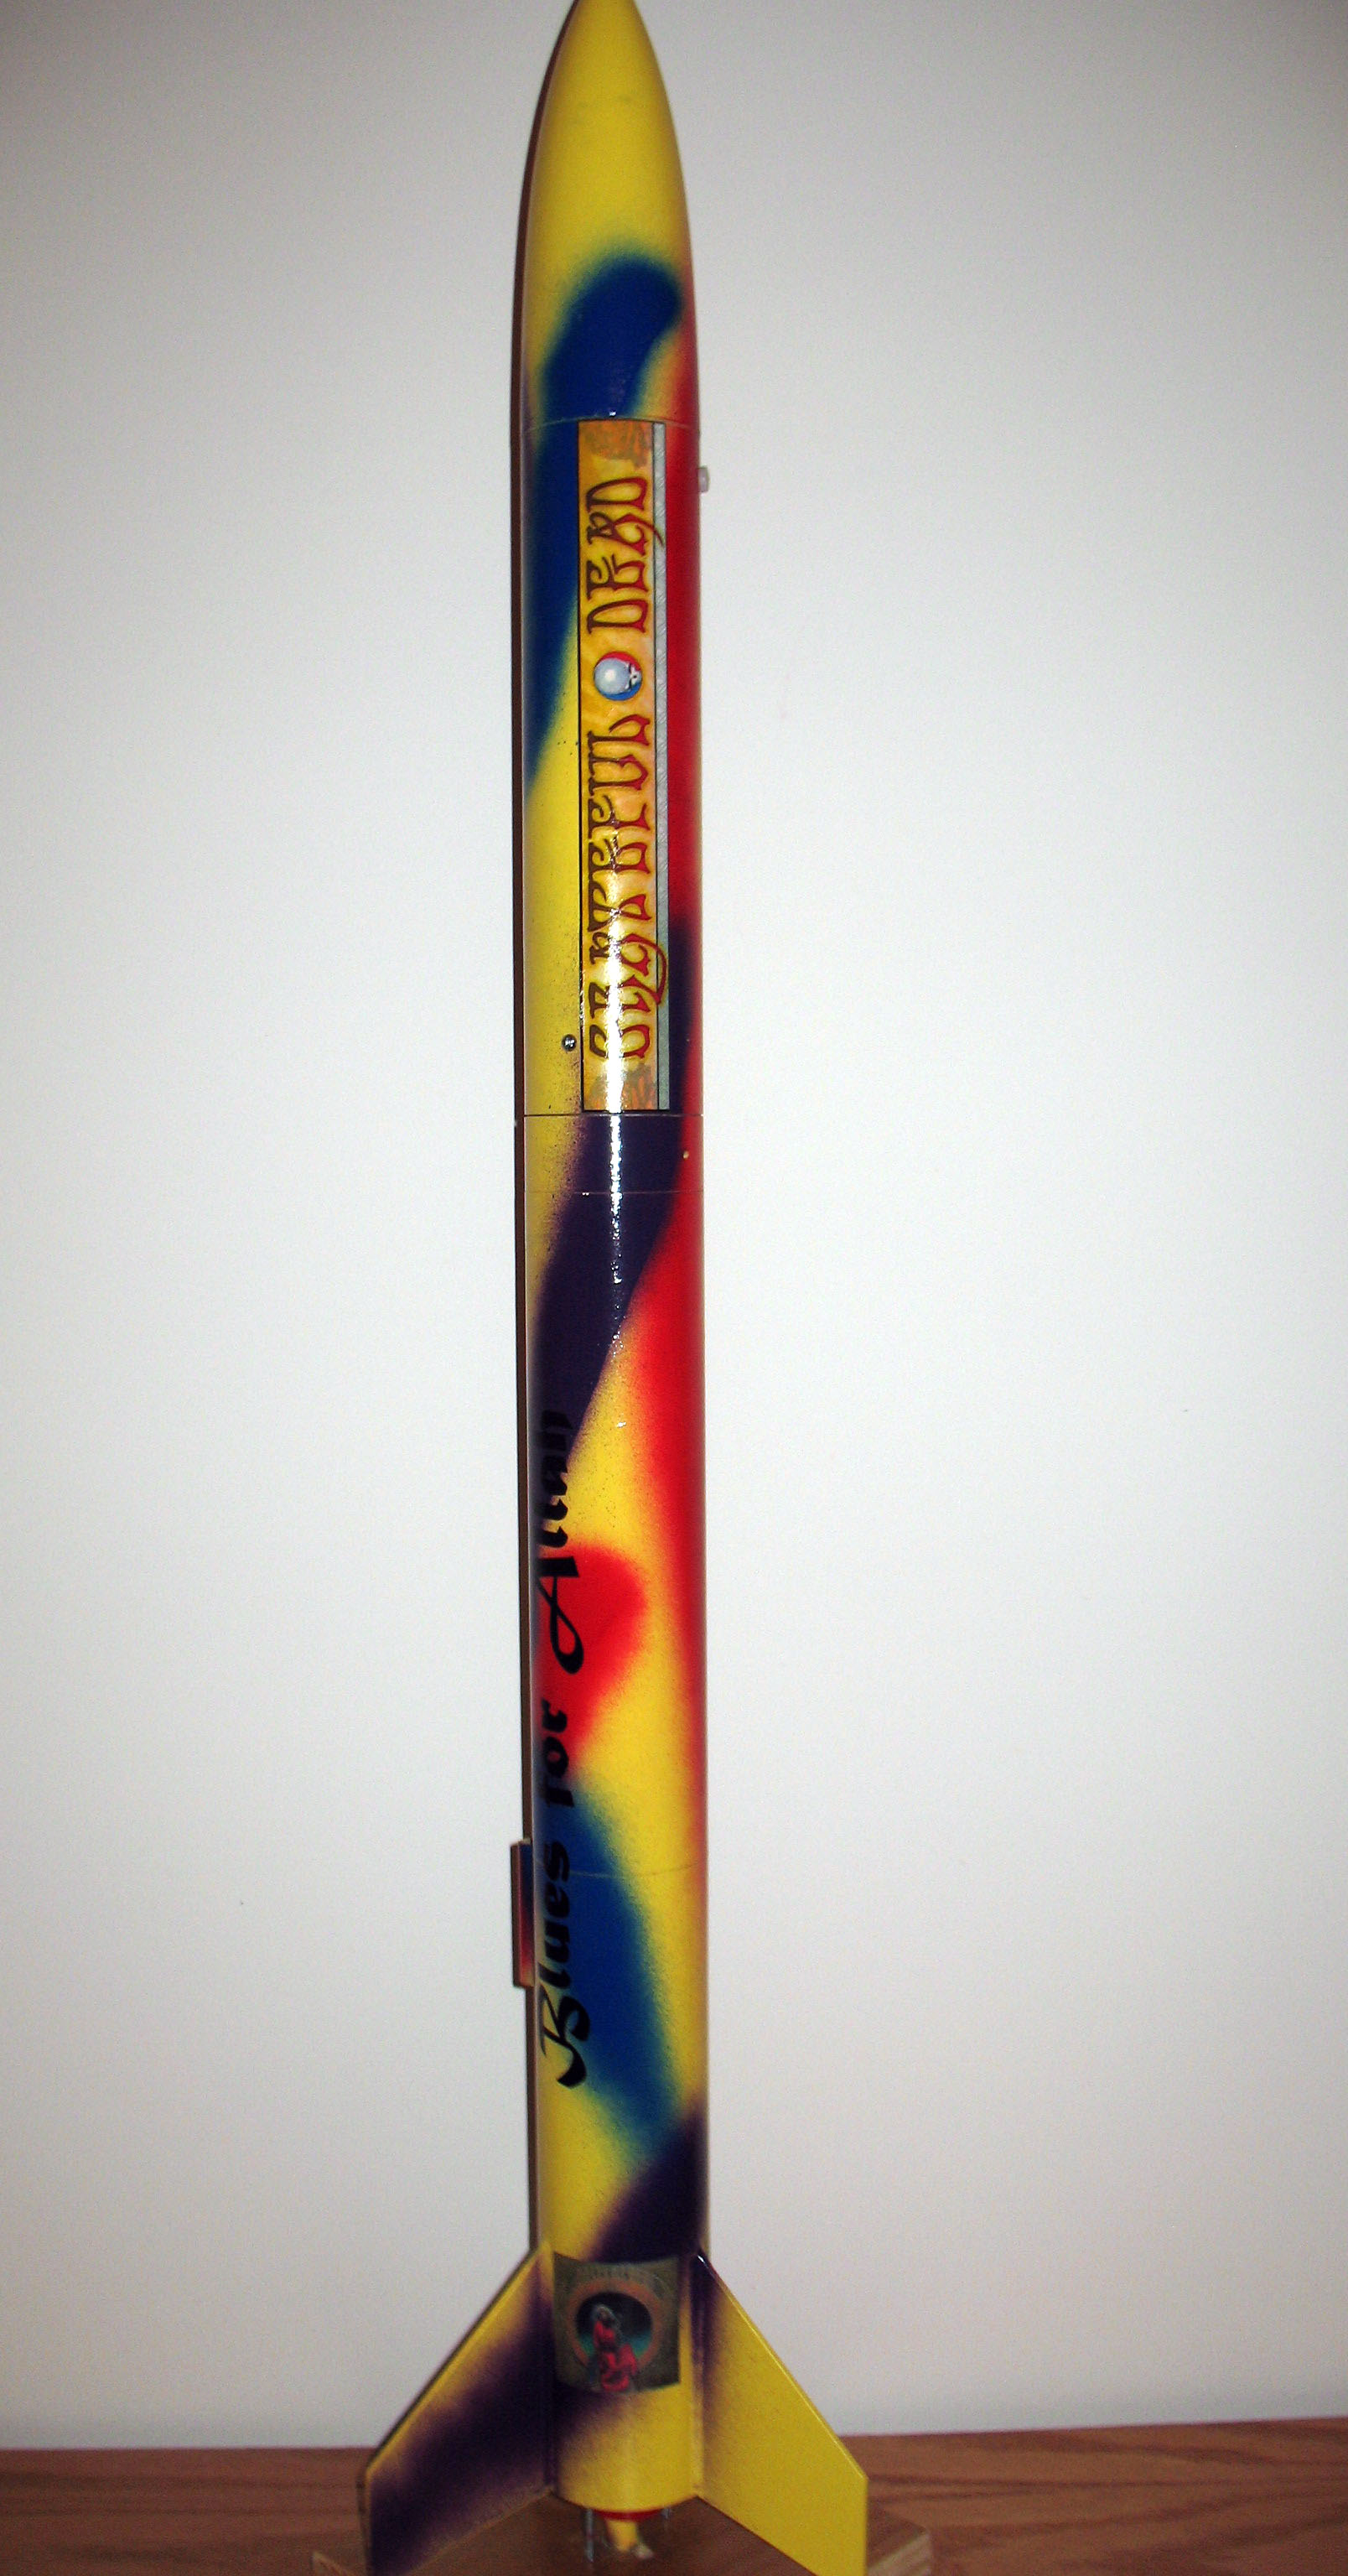
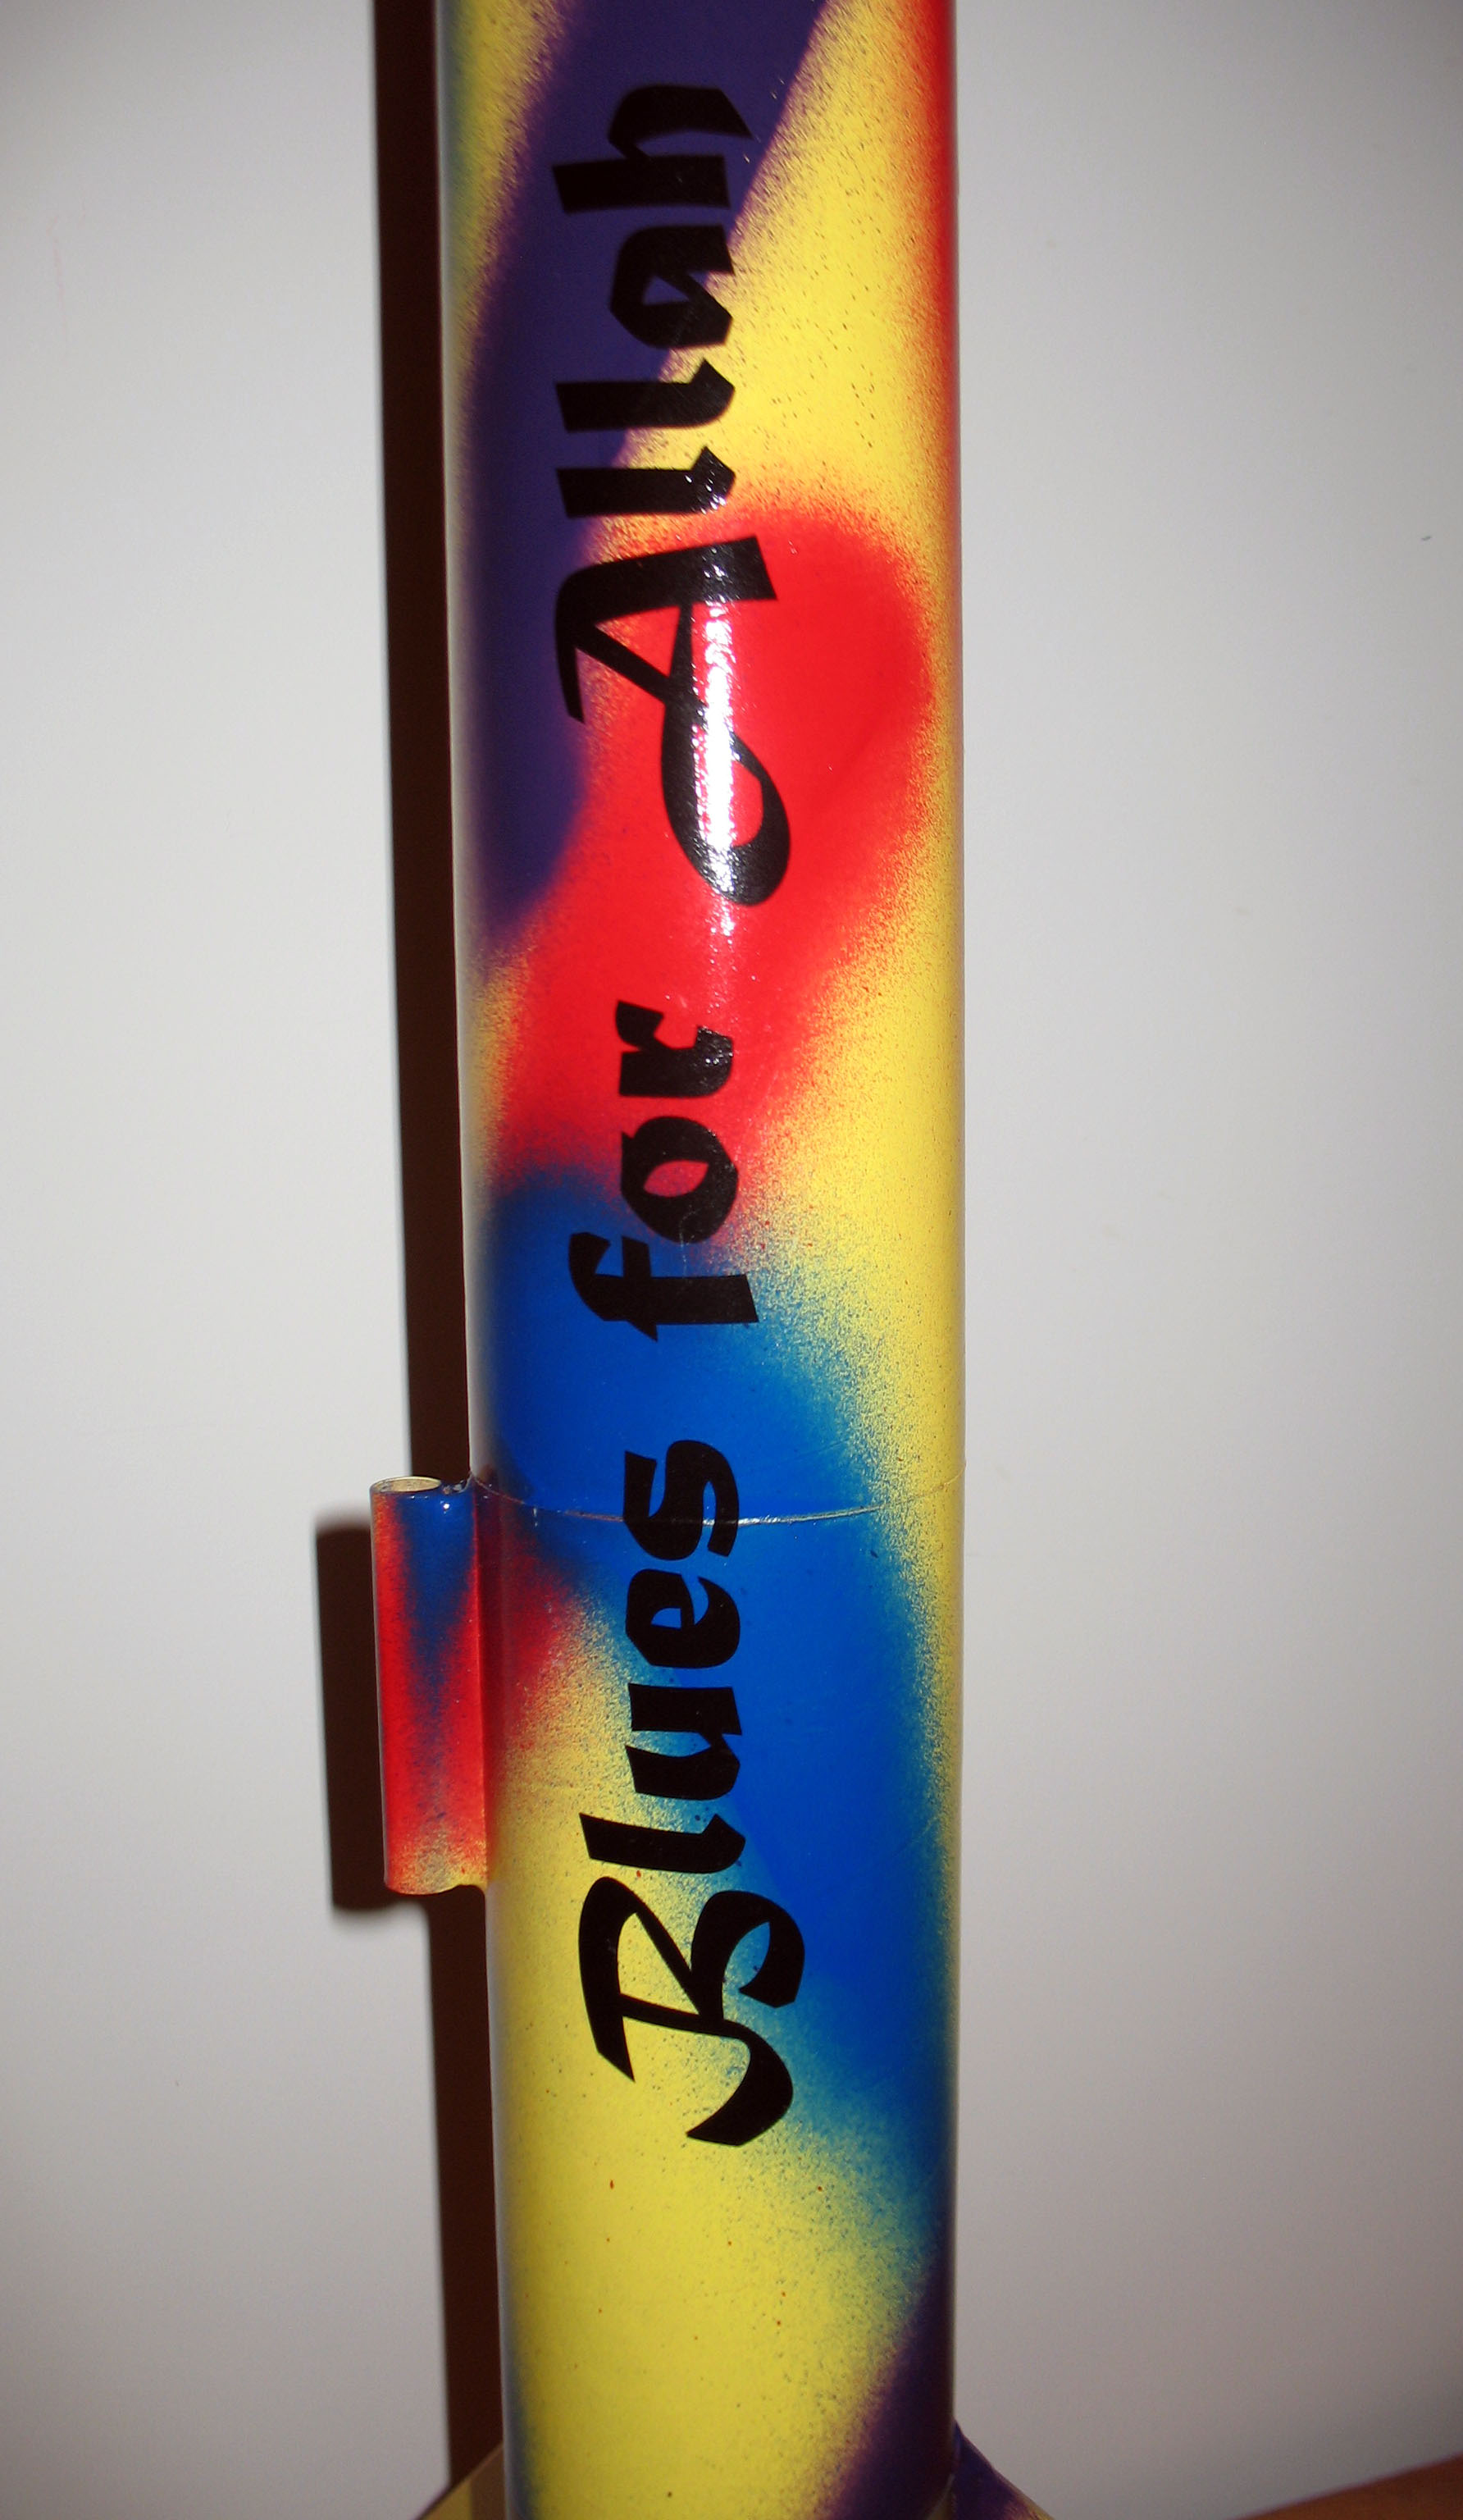
I gave the balsa nose cone 8 coats of sanding sealer and the basswood fins 4 coats, sanding in between each coat with 320-grit paper. I then primed with Rust-Oleum White Primer - 4 coats, sanding with 400 grit paper in between each coat. I let the primer dry for a couple of days and then painted with Rust-Oleum Painter's Touch Bright Yellow - 4 coats, and let dry for 2 days. I followed this with Rust-Oleum Painter's Touch Apple Red, Dark Blue, and Purple, allowing each color to dry for 2 days before applying the next. I let the rocket dry for 3 days before applying decals. 'Blues for Allah' was printed on Laser Decal Paper (DecalPaper.com). The 'Dead logo and album cover were printed on standard label paper. And finally, I gave the rocket 4 coats of Rust-Oleum Painter's Touch Clear Gloss. It is a long stream-of-consciousness to get from Buffalo to Blues for Allah - too long to go into here (and that only indirectly passes by Truckin'). I know that the 'Dead are pretty protective of their brand. I only hope that don't come after me!
Flight
The maiden flight was at the April, 2011 CMASS launch with an Aerotech 24 mm F32-6T single use motor. I used a PerfectFlight 45K altimeter in the electronics bay just for altitude determination. It was a great flight - straight, fast and a lot higher than I expected. I used a 24" parachute, which was just right. The rocket did not drift far and gave a soft landing in the tall grass. Ejection appeared to be at apogee and the altimeter reported an altitude of 1092 ft.
Recovery
Summary
Pros:
This is a rugged and simple MPR/L1 HPR kit that is perfect to learn Dual Deploy and is also great as a standard (single deploy) MPR rocket.
Cons:
A longer electronics bay with ejection canisters, switch and instructions would have been helpful.


 |
 |