The Launch Pad AMRAAM AIM-120
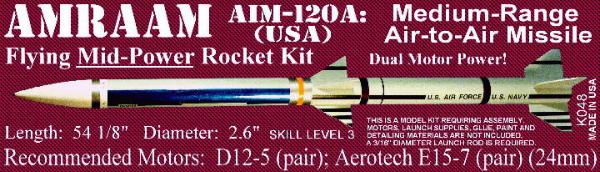
The Launch Pad - AMRAAM AIM-120A {Kit} (K048)
Contributed by Michael Nipper
| Diameter: | 2.60 inches |
| Manufacturer: | The Launch Pad  |
| Skill Level: | 3 |
| Style: | Scale |
Brief:
Only kit parts used were body tubes and coupler. Basswood used for wings/fins, tunnel cable cover, and missile
hangers. Ogive BT-80 nose cone from Apogee Components 4-cluster motor mount from BRS Hobbies All markings created on
home computer with Harvard Graphics
Modifications:
After basic construction of body tube, motor mount was installed, but aft centering ring was placed 1/2-inch into
tube. This greatly reduces scorching common to a lot of Launch Pad kits. Body was painted with Krylon gray primer, and
sanded several times to fill spirals. Final coat was again gray primer, it's a perfect match for the gray used on the
actual AIM-120.
Wings and fins were cut from basswood sheets with a dremel tool, and sanded to bevel the leading and trailing edges. After a few coats of primer and sanding, final coat was Dupli-color Ford medium charcoal metallic, buffed with 4-0 steel wool for a smooth finish.
Forward fin guides were made from card stock, these were not used on the 1st lot of AIM-120's, but were added due to fin flutter in flight. The knurled finger knobs at the base of the aft wings were made from wooden buttons I found in a craft store, with some detailing with the dremel. I took the marking from photos I took of actual AIM-120's I worked on while in the Air Force. They were created on my home computer using an old DOS program-Harvard Graphics. Then printed on Avery clear shipping labels.
After they dried for 2 days, the rocket was given 2 coats of clear to protect the markings.
Construction:
U sed the 2 BT-80 size body tubes and coupler from the kit. Referred to actual scale drawings of AIM-120A to
determine proper wing and fin size, formed them from basswood. Used basswood strip to form the ventral tunnel cable
cover, and the center and aft missile hangers. Nose cone supplied with the kit was wrong profile, obtained proper ogive
nose from Apogee Components. Used a 4-cluster 24mm motor mount from BRS Hobbies instead of kit 2-motor mount. Used
Kevlar®
shock cords, attached to the motor mount. Used a 24-inch nylon parachute from LOC instead of kit mylar chute.
As with all Launch Pad kits, packing was great. All parts were there, just not used. Instructions didn't really matter, I was making this up as I went. Had to add a bit more nose weight, due to doubling the number of motors from 2 to 4. Instead of more clay, I used the clay from a Launch Pad AIM-9 kit, and added a dozen small fishing weights, topped off with some white glue. Worked like a charm. Launch Pad does not supply decals, and only gives a vague idea of what they might be. It's up to the modeler to figure out what and where. Finished rocket is impressive, I get quite few odd looks on the way to and from launches with mounted on a rack in my truck bed.
Flight:
Recommended kit motors were 2 24mm D-12's, or E-9's. I opted to go instead for a 4-cluster mount of D12-5's or
D12-7's. Both have been flown, and both work out fine. With a 6-ft rod (don't even think of using a 4-ft rod on this
thing), lift-off is always something to watch. D-12's don't rip off the pad fast, buy 4 of them at once do make a good
show.
The rocket usually does a slow spin after about 50 to 60 feet, and tops off about 500 to 600 on D12's.
It does have some weight to it.
So far it has flown 4 times, and no damage yet.
Summary:
Pro's- standard launch pad quality kit, no complaints there, except the nose cone has the wrong profile. But unless
you spent time around the real thing, you probably wouldn't notice. As I didn't build according to the instructions,
not much else applies.
Con's- a lot of work to detail this thing out! And if I prang it, I'll cry!
Other:
Besides rockets, I build a lot of plastic models, 4-0 steel wool is great for smoothing out sanding marks after using
xtra-fine sand paper. And don't just use stock dept. or hobby store paints. I use a lot of automotive touch-up spray
paints, you can get a lot more colors and shades.
Other Reviews
- The Launch Pad AMRAAM AIM-120 By Joe Cacciatore (March 1, 2011)
Single-stage, scale model of Air Force AMRAAM AIM 120 medium range air to air missile. Uses 18" chute and dual "D" or "E" engine power. Kit consists of two (2) body tubes (similar to Estes') of different lengths. Plastic nose cone and mylar chute which is bright blue. The eight (8) fins are made from balsa wood. The engine mounts are standard "D" engine size mounts with metal hooks. The ...
 |
 |
Flights
|
|
M.N. (December 11, 2006)
|
|
F.C. (December 2, 2006)