| Construction Rating: | starstarstarstarstar_border |
| Flight Rating: | starstarstarstarstar_border |
| Overall Rating: | starstarstarstarstar_border |
| Published: | 2011-02-01 |
| Manufacturer: | The Launch Pad  |
| Style: | Scale |
 Brief:
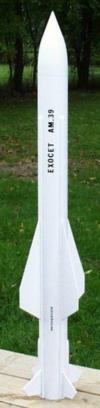
This is a Scale model version of the French anti-ship missile. It is a single stage, mid-power rocket
Construction:
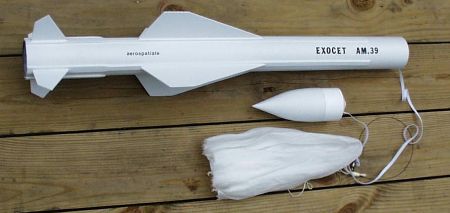
Parts: The parts were typical Estes type parts. All parts were in good condition when I received them. The parts consisted of two paper body tubes and several sheets of balsa as well as 1/4" wide strips of balsa. I don't particularly like the mylar parachute so I substituted a nylon chute instead. It's a personal preference and not indicative of the quality of the materials.
Instructions: The instructions were clear but assumed a good working knowledge of "Best Practices" in rocket construction techniques. The only issue I encountered with the instructions were the order of assembly of the motor mount and body tube construction. The instructions had you attach the two body tube halves together prior to inserting the motor mount. I prefer the other way around so that I can more easily apply glue to the top centering ring of the engine mount. Fin alignment is a bit tricky because the fins mount to the balsa strips which are mounted directly to the body tube. Also a bit tricky is applying the paper nose section to the top of the plastic nose cone.
Finishing:
The instructions show a typical Exocet finish to provide guidelines in finishing the rocket. I purchased vinyl lettering from an office supply store (suggested in the instructions) to add the lettering to the rocket, as the kit does not contain any decals.
Construction Rating: 4 out of 5
 Flight:
I have only flown the rocket once. It was a fairly windy day. The rocket was easy to prepare, and I used a Estes D12-5, with 4-5 sheets of chute wadding. The rocket weather cocked severely about 100 feet up and did not achieve a very high altitude. I am looking forward to trying again on a calm day.
Recovery:
The recovery is accomplished via an 18 inch nylon parachute in place of the mylar 'chute included in the kit, however I did keep the standard Estes style folded paper shock-cord mounting. The parachute deployed flawlessly during the initial flight.
Flight Rating: 4 out of 5
Summary:
I am very happy with this rocket kit. It has allowed me to practice some advanced construction skills and provided me a excellent looking - and I believe and excellent performing rocket.
Overall Rating: 4 out of 5
 |
 |
Flights
|
|
|
|
S.G. (April 1, 2001)