| Construction Rating: | starstarstarstarstar_border |
| Flight Rating: | starstarstarstarstar_border |
| Overall Rating: | starstarstarstarstar_border |
| Manufacturer: | The Launch Pad  |

Brief:
Here's the verbiage from TLP website: "This is the first supersonic anti-ship missile to arm tactical aircraft. Comparable to the ANS missile developed jointly by France and Germany, "Krypton" employs a solid fuel booster for initial thrust. Once at speed, the ramjets take over. One version has four individual ramjets spaced evenly around the outside of the airframe. This version, the Kh-31A, ducts the ramjet intakes into an internal combustion chamber. "Krypton" is an air-to-surface missile, carried by both Su-17M4s and Su-24Ms. However, an air-to-air, anti-radar version, designed for use against AWACS and similar aircraft, is also being developed. Here's a challenge for the most experienced model builder. Our "Krypton" model features three-piece fairings for the four ramjet inlet tubes, with realistic inlet nozzles. Recovery is by our unique 18" by 30" oblong Mylar parachute. Designed for 24mm "E" and "F" motors, this is a distinguished and classy up-to-the-minute addition to any rocket fleet."
Construction:
This kit comes with two main 2.6" body tube sections, four 24MM tubes that simulate the turbine intakes and a 24MM motor tube. It also comes with all the paper fairings, balsa wing stock, and a wood dowel for the turbine shafts
The instructions where easy to follow, but I found the following discrepancies: The four 24MM turbine tubes were 1" longer than described in the instructions. I didn't notice this until I put them on, but this doesn't seem to impact flight performance. The paper fairings at the bottom of the of the intake tubes should be a little wider to allow surface area to glue to the main body tube. After putting on the first one with much difficulty, I found it much easier to add about 1/8" flair to the portion of the shroud that mates to the main body tube. In general, I found that the fairings around the bottom of the rocket required the most playing around to achieve the right look.
Finishing:
This is definitely a kit for advanced modelers who can tolerate a lot of CA glue exposure. All the cool shrouding to achieve the unique look of this rocket requires heavy doses of CA to harden surface areas. This rocket takes lots of surface preparation, sanding, filling and priming before it is ready for final paint. I spent a lot of time preparing the shroud surfaces and intersections with CA, filler and sanding. All this adds weight, and I estimate that its weighing in around 12-14 oz. Having said all that, this is a COOL looking rocket, and flies surprisingly well. I finished the rocket with haze grey enamel and sealed with clear gloss Krylon sealer. The Launch Pad never provides any decals, so I settled for some Russian looking vinyl lettering and some red Soviet stars. I put a black/white checkered band of laminate paper just below the bottom fins, and put a red/white checkered band near the nose cone. I also used some black bands out of laminate at the base of the nose cone.
Construction Rating: 4 out of 5
 Flight:
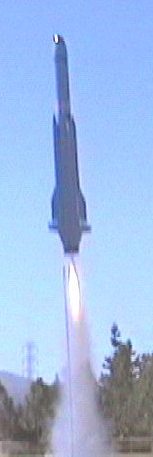
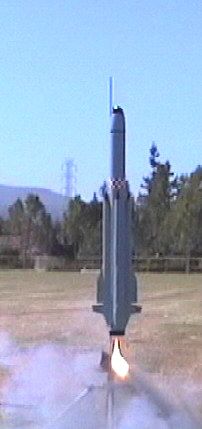
I have flown this rocket about 7 times by now on AT RMS E18-4W and once on an F24-4W. Flights are awesome, with slow take-off and lots of noise. I flew it at dusk one night, and got a great kick out of the white lighting exhaust flash. On the E18's, it probably gets to about 400' which is plenty. The F-24 probably took a few hundred feet higher. For my money, the E18 is a real crowd pleaser for this rocket. Since the 'chute is positioned well clear of the ejection charge, I usually just put a piece of aluminum foil on the tube ring used to support the 'chute, and that has provided adequate protection to my nylon 31" 'chute.
Recovery:
I have built several Launch Pad kits, and prefer a more rugged construction than is recommended in the plans: Used Kevlar®/epoxy shock cord mount in main body tube. Attached extra long nylon shock cord. Used plastic thru-tube wall mounted fins. Added additional weight to the nose cone to compensate for plastic fin and liberal epoxy usage. Used NC20 nose cones instead of wooden dowel for the protruding engine turbine shafts. This looks much better than the sticks provided in the kit. Use 31" nylon parachute
Flight Rating: 4 out of 5
Summary:
This is a very interesting design, and it is the most striking rocket in my collection. The kit gives you a bare bone starting point for building a solid kit. Highly recommend that you take the time and $ to ruggedize, and you will get a lot of great flights out of this kit.
Overall Rating: 4 out of 5
 |
 |
Flights
|
|