| Construction Rating: | starstarstarstarstar_border |
| Flight Rating: | starstarstarstarstar |
| Overall Rating: | starstarstarstarstar_border |
| Manufacturer: | LOC/Precision  |
Brief:
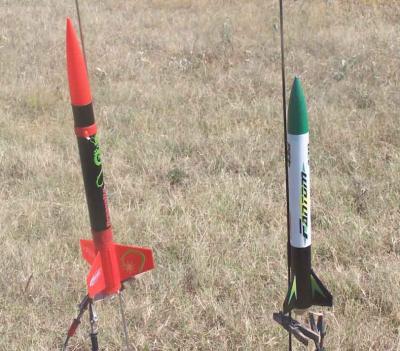
The Mini Fantom is a downscale of LOC's MPR/HPR Fantom. It is a simple 3 fin and nosecone design. I decided to start
on it because my other projects had me sitting around and waiting for glue to dry.
Construction:
The first surprise I got with this kit was with the instructions. I kept looking for them in the little plastic case
the kit came in and finally realized that they are printed on the back of the face card. Since the package itself it
small, this meant some small instructions. For me, they were difficult to read but this is a simple kit and it is
doable.
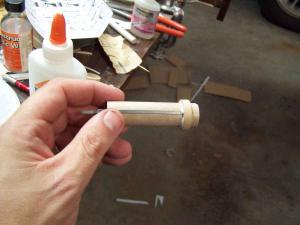
Actual construction began with the motor mount. A line was marked 1/4" from one end and a slit was made on the line to receive the engine hook. The centering rings were then slid into place on either end and glued. Both rings needed plenty of sanding on their inner surfaces to fit the motor tube. The thrust ring was then glued into place right over the top of the engine hook.
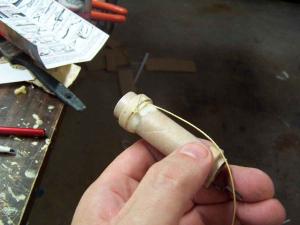
The kit came with a wraparound fin marking guide, but it was a bit different from what I am used to. With most wraparounds, I just tape into place and make the marks. On this one, wrapping the guide all the way would obscure some of the marks. It was just taped at one end and then wrapped to make a single circumference. I did not like the idea but it was no trouble at all. The end of the fin marking guide is taken up by a fin alignment template. The lines for the three fins and the launch lug were transferred and then an angle was used to extend them.
The fins came on a single small sheet of balsa and were in good shape. I cut them out, stacked them to sand them even, and then sanded bevels in all but the root edge.
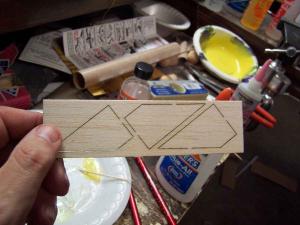
For this project, I decided to give another try to the idea of using label paper to "seal" the fins. Each fin was placed on the sticky part of the label paper with the root edge flush with the edge of the paper. The fin was then rolled over the leading edge and the paper pressed into place on the opposite side. A razor was used to trim away the excess. The result was a bit better than the last time I tried this, but I still need some practice.
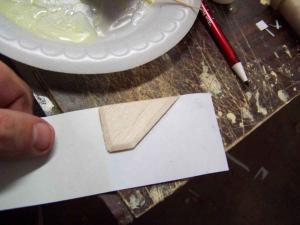
 As
mentioned earlier, the end of the wraparound fin marking guide is taken up by a template used for the placement of the
fins. A section representing the BT is cut out along with the correct angle for the fins. The instructions say to cut
along the red line but the guide is in black print only. Even so, the correct line was easy to identify as it is
dotted.
As
mentioned earlier, the end of the wraparound fin marking guide is taken up by a template used for the placement of the
fins. A section representing the BT is cut out along with the correct angle for the fins. The instructions say to cut
along the red line but the guide is in black print only. Even so, the correct line was easy to identify as it is
dotted.
I had real doubts about the efficacy of this fin guide but must admit that it worked out fine. Each fin was placed using a double joint of yellow glue. When the glue was tacky enough to stick, the guide was used to maintain alignment. The launch lug was also glued into place along its line at this time.
For a shock cord mount, this kit intends for a piece of elastic to be threaded through a perforated piece of sticker and stuck into the body tube similar to the old Centuri mount system. I declined to do this. I tied a Kevlar® thread around the forward end of the motor mount and the filleted it into place with some yellow glue. A small notch was cut into the forward centering ring to accommodate the passing of the Kevlar®.
The inside of the airframe tube was swabbed with yellow glue, the Kevlar® was fished through the tube, and the motor mount was slid into place with just a bit protruding from the aft end. The instruction call for the motor tube to be flush but I like to leave a bit hanging out. While waiting for the glue on the motor mount to dry, I took the opportunity to add more white glue fillets.
When the glue was dry, there was nothing left of construction except to tie the elastic to the Kevlar® and plastic nosecone. I should comment here that the plastic nosecone was one of the nicest I have seen with no mold lines.
PROs: simple, good materials
CONs: instructions difficult to read (small)
 Finishing:
The built rocket was quite unpretentious, little more than a generic 3FNC. I had hopes that the painting and
finishing would change that.
The first step was to take the cardboard colored rocket and make it white. This was done with the application of 3 coats of white spray paint.
The face card scheme called for a white body, black fins and a green nose cone. My intention was to go along with that scheme but I had been have really bad luck with paint lately. I decided to try painting just a single fin first. I taped it off using Frog tape and then brushed on the acrylic. The result was less than stellar. There had been some seepage and it looked like one of my earlier efforts.
Since my masking jinx still seemed to be active, I modified my plans a bit. I kept the color scheme but decided to apply the black to the entire base of the rocket from just below the launch lug. Even I have trouble messing up the masking of a simple ring. The rocket was duly masked and the paint brushed on. It was given a little while to dry.
Masking for the green was simple. I applied tape around the forward end of the BT and sild the nose cone out a bit. I then wrapped some foil around the body of the rocket to protect it from spray. The spraying itself was trivial. Two coats of green were applied and the masking was removed.
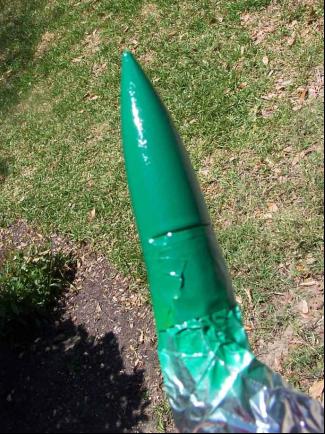 You
may recall my overconfident statement about not being able to mess up the masking of a simple ring. I was selling
myself short. I was able to mess it up and there was some leakage under the tape. On inspection, though, I decided that
I could live with it. The black was a bit mussed, the green was great, and I was happy that painting was over.
You
may recall my overconfident statement about not being able to mess up the masking of a simple ring. I was selling
myself short. I was able to mess it up and there was some leakage under the tape. On inspection, though, I decided that
I could live with it. The black was a bit mussed, the green was great, and I was happy that painting was over.
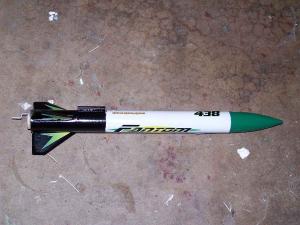
At this point I would very much like to wax rhapsodic about the wonderful waterslide decals but I cannot since there were none. Instead, the kit came with crack and peel stickers. The stickers do really dress the kit up, especially with the face card color scheme, but in the end, they are stickers. They are also quite stiff and a few of them refused to stay laying down along the body tube.
The artwork consists of a pair of chevrons for each fin, two name placards, two similarly sized "438"s and a couple of little bitty things that were completely forgettable.
There is one matter having to do with the stickers about which I am unsure. One of the logos is a very good looking "Fantom". At first glance, I thought there was a second just like it, but instead it is a mirror image. I don't mean that the letters are slanted in the opposite direction, I mean that the letters are reversed. I have no idea if they are supposed to be that way or not.
CONs: Thick plastic stickers instead of decals
Construction Rating: 4 out of 5
Flight and Recovery:
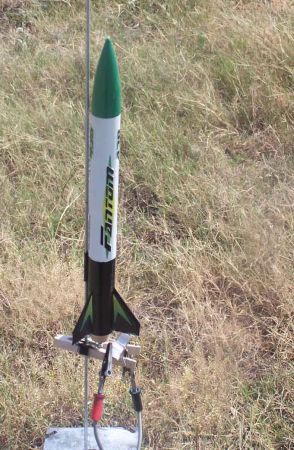
For its maiden flight, I decided to start off easy with an Estes A8-3. The rocket was prepped and put on the pad and
an announcement was made. Several of the people nearby were new and I heard a comment to the effect of "Big deal,
its just an A motor..."
The countdown came and went and the rocket went too. It really climbed well on the A. The person who made the comment about the A motor asked me to verify what motor I was using. He was impressed. A video of the maiden flight of the Fantom Mini can be seen here.
For the second flight, I loaded a B6-4. This time, people were paying more attention. The rocket again took off well and climbed great, just showing a bit of roll towards the end. The chute ejected and Lindsey had a nice little walk going to recover it. A vid of the second flight can be seen here.
Flight Rating: 5 out of 5
Summary:
This is a well designed little kit with quality parts. It goes together and flies well. It's not the most exciting
thing out there but is quite respectable.
I have only two real gripes. The directions printed on the back of the face card were sometimes hard for my older eyes to read and I would expect the maker of a quality product to use waterslide decals. At the very least, if stickers must be used, I would like them to be thinner and to stick better.
Persons interested in the ongoing fate of this rocket through photos and videos can find it here.
Overall Rating: 4 out of 5
 |
 |
Flights
|
|