| Construction Rating: | starstarstarstarstar_border |
| Flight Rating: | starstarstarstarstar_border |
| Overall Rating: | starstarstarstarstar_border |
| Published: | 2010-02-16 |
| Manufacturer: | Mercury Engineering  |
Brief:
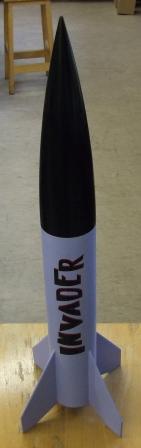
A low/mid power single staged rocket. Nice and beefy looking.
I won this rocket in the 2008 Design this spaceship contest.
Mercury Engineering were very generous: not only did they provide a really good kit for EMRR, but they also
included a second free parachute, which i think is fantastic service.
Construction:
The kit comes in a plastic bag, with an art card, instructions and the kit itself.
On opening and inspecting the kit i was pleased, the body tube is of a good quality, although there are some spirals that need filling. The balsa wood is of a good quality. The instructions are brief but very clear with diagrams.
The only thing i was a tad disappointed with, is that the fins are not TTW for attachment.
The motor mount assembly is straight forward.
The body tube is quite thick, as are the centering rings.
The engine hook is for an E motor - an adaptor is supplied.
The whole lot goes together in the normal fashion.
Whilst i was waiting for the glue to dry, I cut out the fins.
The balsa is of good quality and the parts were laser cut.
T sanded the balsa down before cutting out the parts.
Then I sanded the leading edges down to a rounded profile.
I marked the fin positions on the body tube with the template provided.
I then rough up the tube and remarked the tube again.
With the mount now dried, I added a length of Kevlar® cord to the mount. The kit calls for the shock cord mount to be attached to the body tube and uses the Estes three fold card method. I personally nearly always add a Kevlar® cord to all my rockets that don't already include it.
After the cord was added, i filleted the joints with white glue.
Whilst waiting for the new fillets on the mount to dry, I attached the fins and lug to the body tube. To do this I used CA gel, which dries and holds the fins in place within 5 seconds, but it is not the strongest of holds and is prone to cracking if the fins are hit.
After the fins were attached I filleted the fins and lug with white glue.
This was a slight skip from the instructions as they have the mount being installed before the fins.
The motor mount was a perfect fit.
The nose cone was probably one of the best nose cones I've seen in a kit, no flash marks or blemishes at all.
Before I started to paint the rocket, I've attached the elastic shock cord to the Kevlar® one that I added.
In addition to this, I've added two sheets of fireproof wadding very similar to Nomex®. I have had one or two problems in the past with Nomex® wadding moving to one side in a large body tube and the hot gases frying my chute. To lessen this, I now add an eyelet rivet to the corner of the wadding which seems to help.
The elastic provided with the kit is about 1 meter in length.
Finishing:
The body tube has some spirals in that took a lot of filling, I made the mistake of filling
with primer, which took several coats of primer and sanding between. I should have used modeler's clay which would have
been a lot quicker.
In the end, a really smooth finish was obtained.
Went for a lilac color - because I had a tin of lilac spray paint.
Also it kind of fits with the red on the decal. Black gloss nose cone.
The decal went on easily and looks good.
Construction Rating: 4 out of 5
Flight: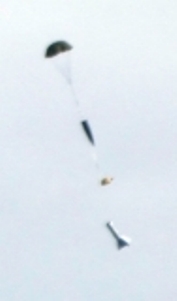
After a long wait between finishing the rocket and its first flight i finally flew her
The lift was good and slow, and on a D12-5 ejection was just after apogee
and then things went wrong.
The nose cone came out, but the parachute - one of my own, not the supplied one failed to show.
She came in hard
but there was no damage...........until i tried to remove the motor.
The heat of the motor must have softened the glue i used on the mount, as the motor mount itself moved through the centering rings, the motor was well and truly stuck in the mount.
This is the first time i have had a mount move and i have flown hundreds of rockets.
Long story short.. had to remove forward CR and mount. Was a quick rebuild - with epoxy.
I am really impressed that the rocket took a free fall and came out undamaged.
Next flight was on a D12-3, ejection was just before apogee.
home made 28 inch silk chute opened and recovered the rocket fine.
Flight Rating: 4 out of 5
Summary:
This is a great rocket, I've got to get her up on something larger that a D.
Overall Rating: 4 out of 5
 |
 |
Flights
|
|